

How to Make a Simple, Homemade Lotion and How to Customize it
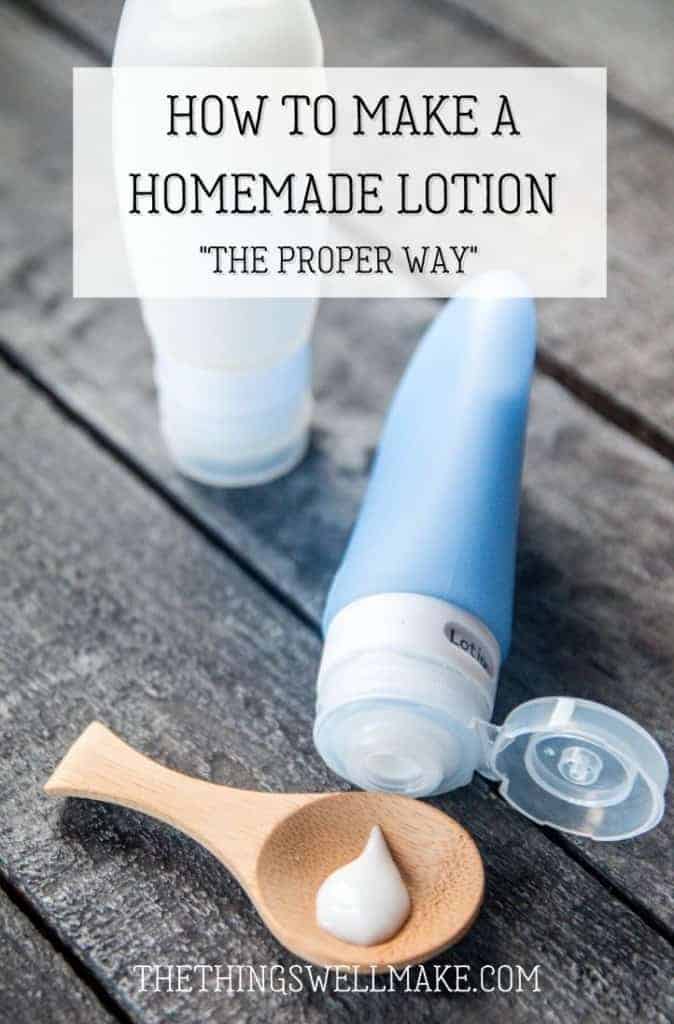
Learn how to make an easy, basic homemade lotion that is the foundation for many different types of cosmetics. It can be customized to suit different skin types or to make a wide variety of products!

Over the years, I have shown you how to make all sorts of things. I’ve shown you how to make soap, cosmetics, and lots of food recipes. This, however, might be one of the most important things I show you how to make!
Lotions are the foundation of many types of homemade cosmetics. It’s important to learn how to make a lotion correctly so that it is stable and safe for use on your skin.
Most recipes I’ve seen out there are either intimidating with lots of (unusual) ingredients, don’t work, or are lacking important information like how to preserve the homemade lotion so that it is safe to use.
Years ago, before I knew better, I tried one with beeswax. Beeswax isn’t a true emulsifier and that lotion separated into liquid and oil layers. It also got mold right away because it didn’t use a preservative.
So, today I’ll be showing you how to make a simple lotion safely!
Why make your own lotion?
There are several great reasons to make your own lotion from scratch.
Save money
While you can probably find inexpensive lotions for sale at the local dollar store, those may not be exactly what you are looking for. A cheap lotion will probably have cheap ingredients and cheap packaging.
On the other hand, high-quality lotions with high-quality ingredients tend to come with a hefty price tag.
When you consider that the main ingredient of pretty much any lotion is water, you’ll soon realize that there is a huge potential for saving money by making a lotion yourself!
Keep in control of the ingredients
For me, the main reason for making my own lotions and other cosmetics is gaining full control of what goes into them.
In some cases, I want to use an organic ingredient and I’m willing to spend a bit more on it. In other cases, it’s not that important to me.
It’s not just about the quality of the ingredients, though. It’s about choice.
- Are you allergic to a certain oil? You can use a different one!
- Are you looking for a certain oil blend that isn’t available in any store-bought lotions? Make your own!
- Are you looking for all vegan/all locally sourced/palm-free ingredients, etc.? You can choose!
Sustainability
Making your own products also helps keep waste to a minimum. When you make your own lotion, you can disinfect and reuse your packaging or at least choose something more sustainable.
Lotion Based Cosmetics
Even if you don’t normally use hand or body lotion, this is an important basic recipe to learn.
Learning to make a simple lotion serves as a foundation for making all sorts of other cosmetics. By tweaking the various components of a homemade lotion, you can make just about any creamy-type cosmetic product that you can imagine.
Facial moisturizers
Let’s “face” it ?: facial moisturizers are expensive!
They make all sorts of claims and often have a bunch of exotic-sounding ingredients that make you want to buy them. That said, moisturizers are really just lotions with oils, vitamins, and other active ingredients targeted at improving our appearance.
Most of the time, it’s simple enough to make your own. The base recipe is just like any lotion. You just use oils known to improve fine lines and wrinkles (or whatever you are targeting) and add in extra active ingredients, as desired.
Check out my homemade moisturizer for oil, acne-prone skin as an example.
Homemade Moisturizer for Oily, Acne Prone Skin
Homemade conditioners
What’s the difference between a lotion and a conditioner? Not much!
Basically, the main difference between a lotion and a conditioner is the emulsifier used. To make a conditioner, you want to use an emulsifier that will “condition” your hair. Learn more about it in my post for how to make a conditioner.
Easy DIY Hair Conditioner
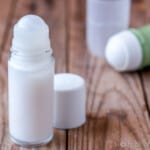
Roll-on deodorant
Even in a product like a roll-on deodorant, an emulsion is needed to get the right consistency. You could use all oils, I suppose, but it would be messier to apply and wouldn’t allow for water-soluble ingredients.
This roll-on deodorant is basically a light lotion with active ingredients to keep you odor-free. ?
Natural Roll On Deodorant
Other specialized lotions
Lotions aren’t just for your legs and hands. There may be special times that you may want a special lotion.
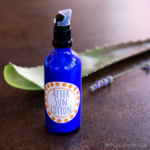
Why not try making a lotion with aloe and d-panthenol for some help in healing your skin from any possible ill effects of the sun. (It can also be used as a general, healing lotion.)
After Sun Lotion
Another of my favorites, this stress relief lotion uses menthol and essential oils to give a pleasant scent and cooling sensation when applied. I like to massage it into my often sore neck muscles. Some people like rubbing it into their temples to help relieve headaches.
Cooling DIY Stress and Headache Relief Lotion
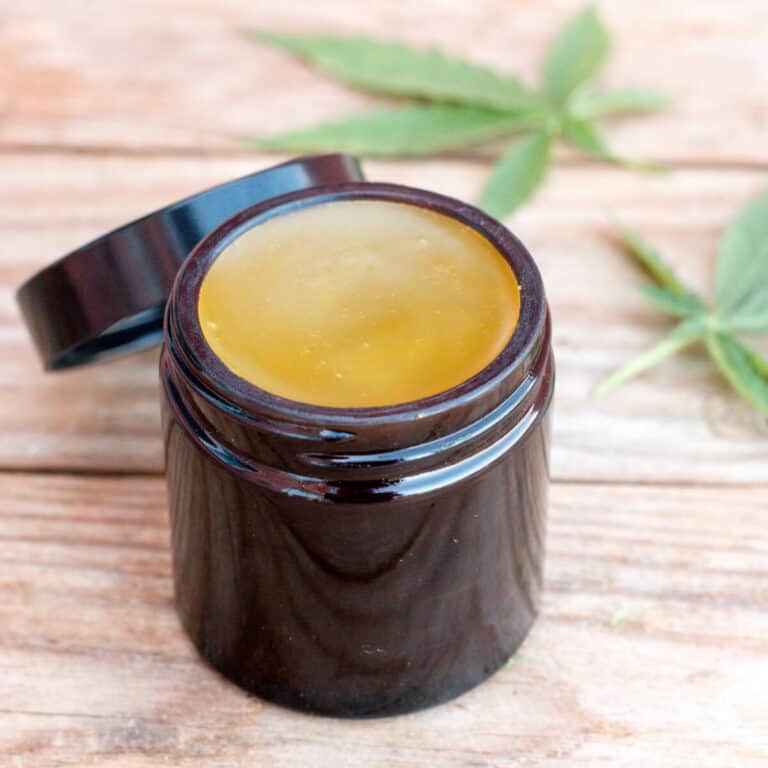
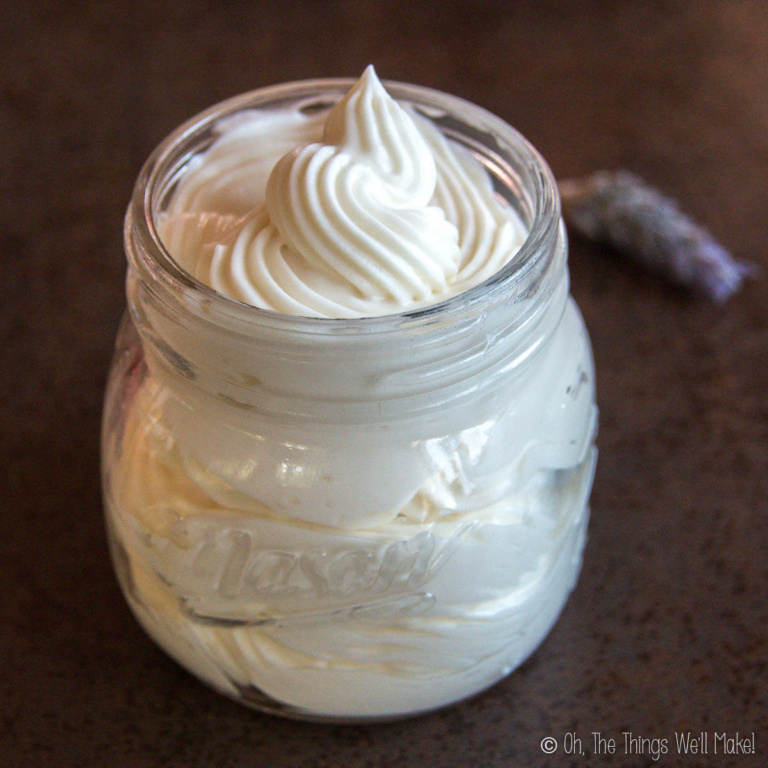
Lotions vs. body butter
To be honest, I personally don’t like body butters very much. I showed you how to make body butter because many of you asked for a simple recipe without emulsifiers and preservatives. That said, it’s not something I normally make for myself. When I do use a body butter, I layer it over a lotion.
There are several reasons I prefer lotions. Even when you whip butters and oils into a fluffy, smooth body butter, it still goes on feeling greasier than a lotion. Yes, I shared ways to reduce that sensation, but most body butters just don’t have that silky feeling that a lotion does when you put it on.
Body butters and lotion bars have other disadvantages. They don’t absorb into your skin in the same way or pull moisture into your skin either. (They have no water/moisture to draw in.) Plus, they are a lot more expensive to make because 100% of your ingredients are oils and other active ingredients.
When you stick to only body butters and lotion bars, you lose out on the opportunity to use a lot of beneficial ingredients that are water-soluble. I add things like rose water, witch hazel, aloe juice and gel, and hyaluronic acid to my creams and lotions as part of the aqueous phase.
Ingredients
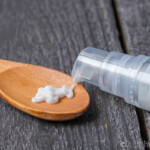
Making a basic lotion is very easy, and only uses 4 simple ingredients: water, oil, an emulsifier, and a preservative.
You can customize those ingredients somewhat, as needed. You can also add essential oils for fragrance and/or other ingredients like vitamins for their beneficial properties. For now, though, we’ll concentrate on the main essential ingredients.
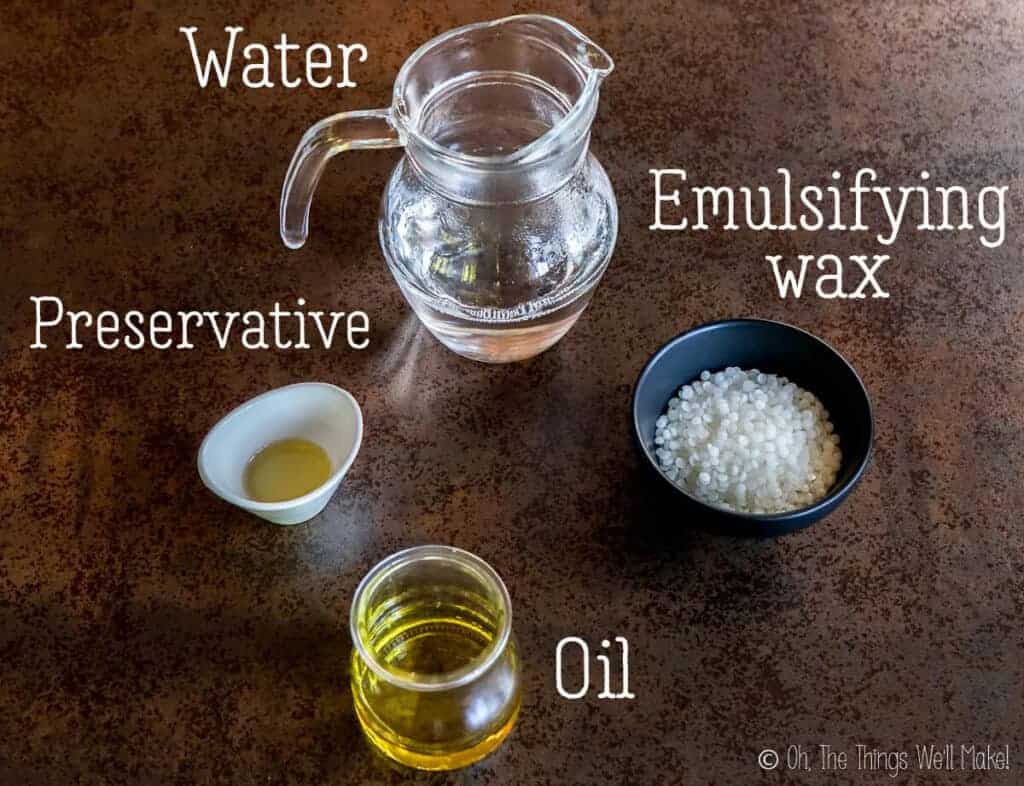
The aqueous phase:
The main component of lotion, and the one that makes it differ from a body butter, is water. In most cases, water makes up over 50% of the ingredients in a lotion!
This phase isn’t just made of water, though. It also includes hydrosols or floral waters as well as water-soluble ingredients.
What type of water?
To keep contaminants to a minimum, I use distilled water for my homemade cosmetics. You could use recently boiled filtered water too. By boiling the water before using it, you can kill off any pathogenic microbes that might be present in the water.
Once you introduce water into a product, you are making way for bacteria and mold formation, so you need to use a preservative of some sort. (Learn more about when and why to use preservatives in my beginner’s guide to natural preservatives.)
Other water soluble ingredients
While you can use just water in this recipe, you can also change out part of the water for other water-based ingredients.
Let’s say you want to add a mild fragrance to your lotion without using essential oils. Rather than use 65g of water, you could use 35g water and 30g rose water in the recipe below.
Other ideas include making teas/infusions to add the benefits of certain plants.
While using herbal teas is a valid option, keep in mind that any “organic” additions to the lotion can make your lotion more prone to bacterial/fungal growth. Strain out the plant material well, if making an infusion. Also, keep in mind that the final product may not keep as well as one made with water.
Always use freshly made infusions rather than ones that has been sitting around for a while!
For products that I want to preserve, I normally only use store-bought aloe gels/juices in the water phase. Aloe is notoriously difficult to preserve, so I only add small amounts and I don’t use fresh aloe. (Although I do make my own aloe oil.)
Cosmetic formulators test their products to ensure they stay microbe-free with time. As most DIY cosmetic makers don’t do that sort of testing, it’s always best to err on the side of safety. I like to make small batches, and use the product within 3 months or less. This is especially true of products made with herbal teas or aloe.
The oil phase:
Oils and “butters” add nutrients and antioxidants to your lotions and creams. Different oils have different properties that can be beneficial for different types of skin.
Despite what many believe, not all oils provoke acne or are bad for acne-prone skin. Some oils can actually help reduce acne and the inflammation caused by it by balancing the oils in your skin. Other oils are especially good for healing dry skin, clearing up eczema, and reducing the appearance of fine lines and wrinkles.
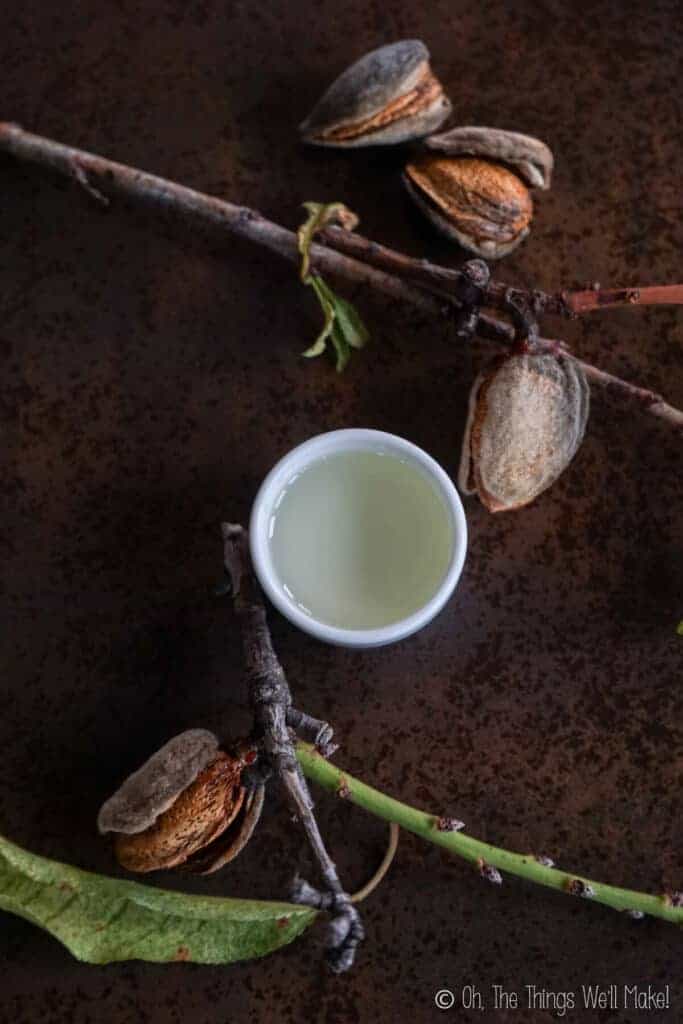
Sweet almond oil 
Olive oil 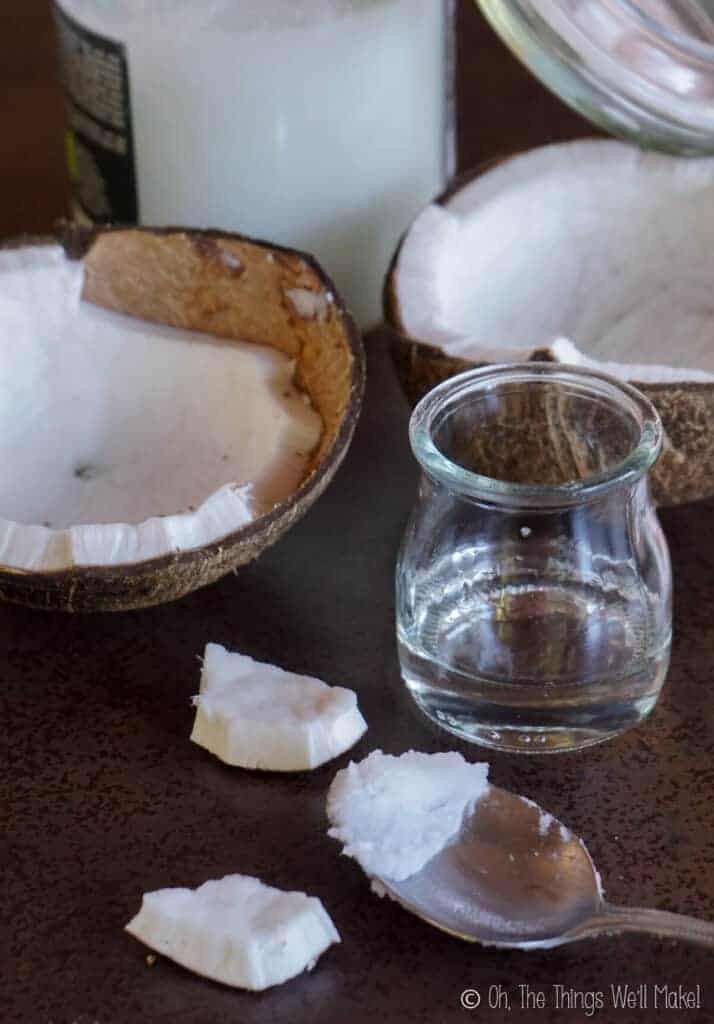
Coconut oil
What oils should you use?
I have made this recipe, as written, with only olive oil and with only coconut oil, and both worked well. I assumed that the coconut oil lotion would be a bit thicker, especially in colder environments, but both lotions were pretty similar in texture.
Making a simple lotion with only one oil is a great place for people with skin sensitivities. By minimizing the number of ingredients, it’s easier to pinpoint which ingredients are problematic for each person.
That said, you can also divide up the oil phase and use a combination of oils instead. The possibilities are really endless.
High-end cosmetics often add a variety of expensive oils in small amounts. This is not only for their beneficial properties but also for product appeal. (A product made with meadowform and rosehip oil, for example, sounds a lot more expensive than one made with only olive oil, even if there is very little of each of those oils in the product.)
Emulsifiers and waxes:
Oil and water don’t combine well on their own. In order to get them to come together into a stable product, you need some sort of emulsifier or emulsifying wax.
Emulsifiers have both a water-loving and oil-loving component to them, so they work as sort of a “glue” to keep both the oil and aqueous phases of your lotion together.
Because most of the emulsifiers are called emulsifying waxes, many people think that all waxes will work as emulsifiers for making lotions.
Unfortunately, waxes like beeswax, candelilla wax or carnauba wax, can’t be used as the emulsifier for making a lotion- at least not on their own.
(I found that out the hard way when I made a mess trying to make my first lotion with beeswax many years ago.)
There are lots of different emulsifiers and emulsifying waxes on the market, each with their own properties. Some will give a different texture or weight to your lotions, others are used more for hair conditioners and similar products.
Most emulsifiers are added to the oil phase of a lotion, but there are exceptions. Depending upon the emulsifier, you may need more or less for emulsification to take place or to get the right texture.
When substituting a different emulsifier in a recipe, it’s a good idea to check on its specifications and see how they differ from the emulsifier being used.
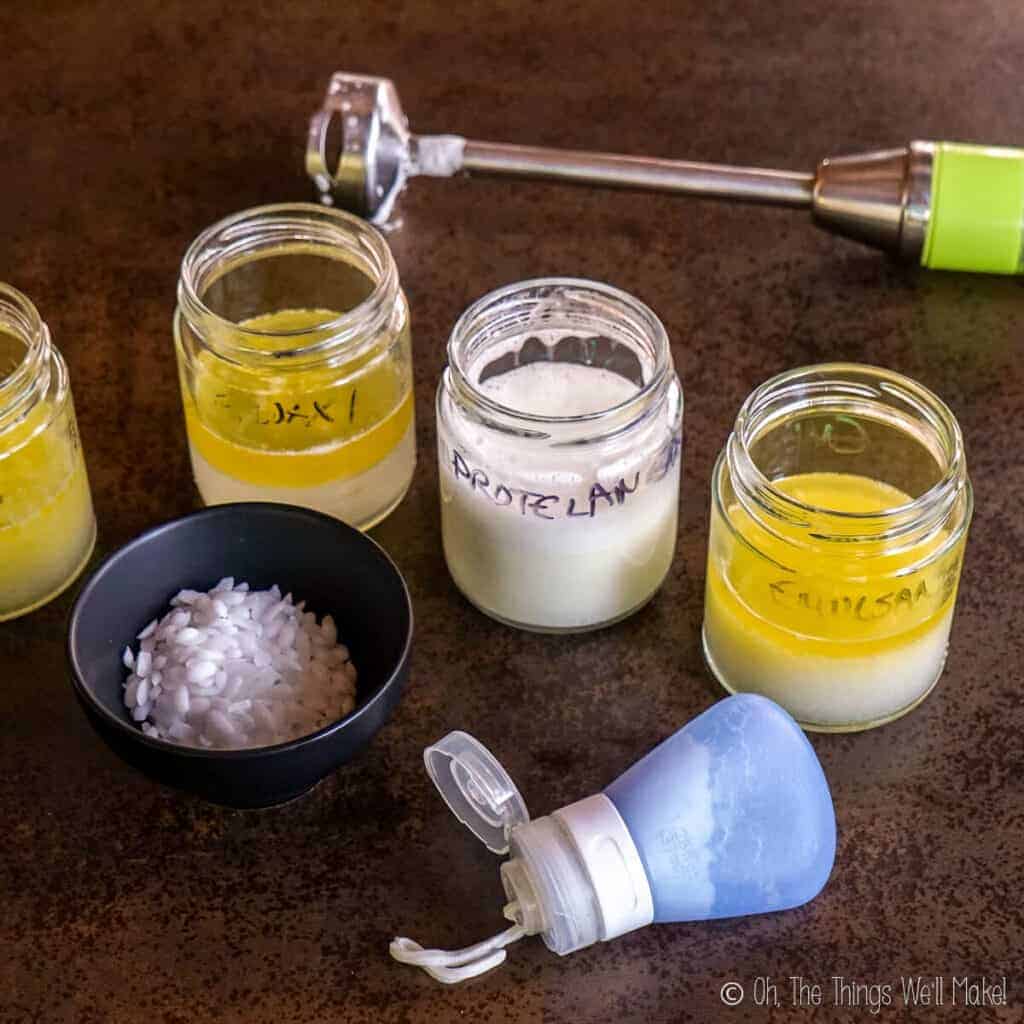
Examples of emulsifiers
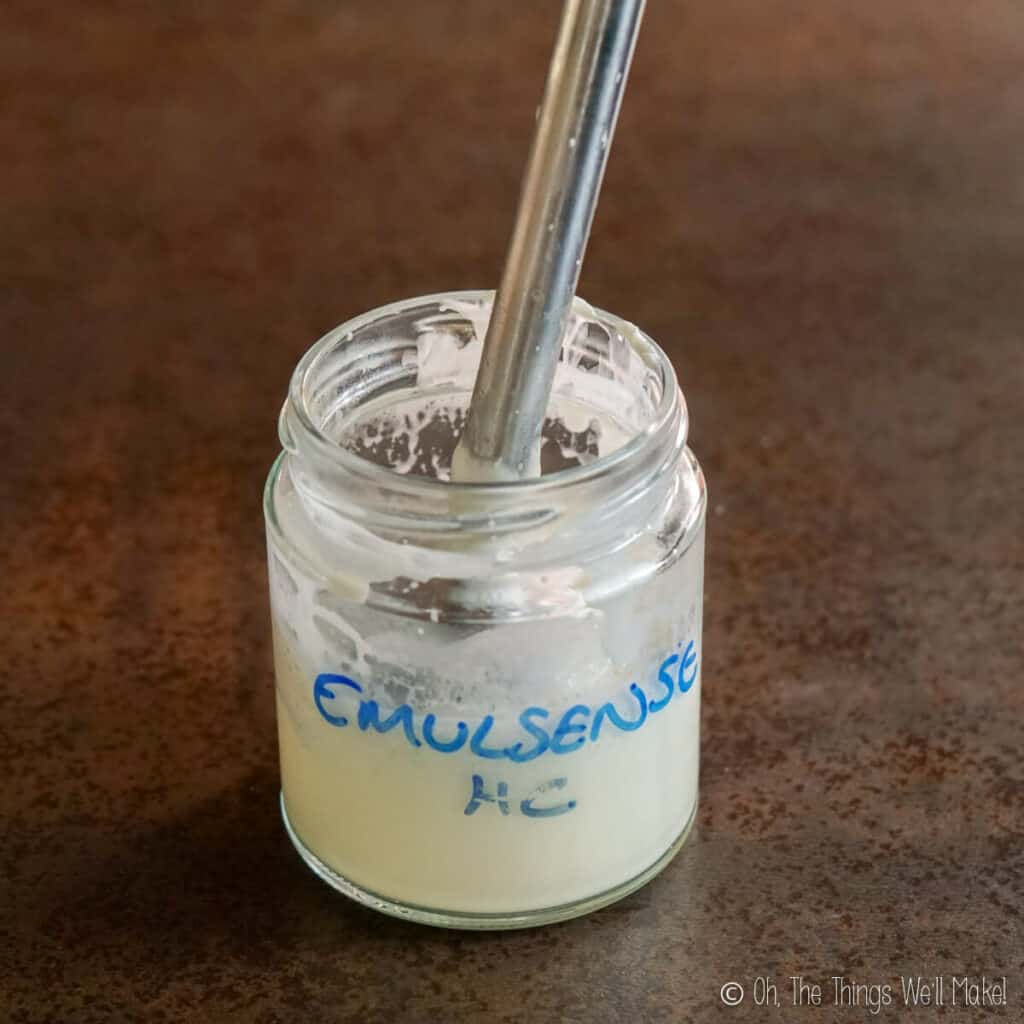
- Emulsifying wax: Emulsifying wax is a plant-based emulsifier made from wheat straw. In this simple recipe, I’m going to use emulsifying wax number 2 because it’s a common emulsifier to find on the market. It’s a good emulsifier for lotions with an oil phase of 25-40% of the recipe. (If using less than 25% oil, you’d need to add either some sort of gelling agent or a co-emulsifier like cetyl alcohol to help get a proper texture.) The recommended dosage for this emulsifier in lotions is 3-5% of the final product weight.
- Montanov 68: This emulsifier, made from coconut oil and the tapioca plant, is one of my favorites. (I guess the paleo diet lover in me loves those base ingredients.) 🙂 It’s a non-comedogenic emulsifier that is 100% biodegradable and accepted by BDIH and ECOCERT as a suitable natural cosmetic ingredient. The recommended dosage for a lotion is 4-5% of the final weight of the product.
- Olivem 1000: This interesting emulsifier comes from the olive tree plant, as the name implies. Unlike most emulsifiers, it can be melted into either the aqueous or oil phase of your recipe. The recommended dosage is 1.5-3% in serums or light lotions, or 3-8% for thicker lotions or creams. Olivem works in a wide variety of pH levels and for a wide variety of products like lotions, makeup, sunscreens, after-sun products, hair conditioners, and baby products.
- Emulsan II: Emulsan II is another plant-based emulsifier that can be used for making hydrating creams and lotions for any skin type. It should be used as 3.5-7% of the weight of ingredients, obtaining a normal texture at around 4%.
When updating this post, I decided to leave the information above with some options for emulsifiers that you can use. Since I wrote this, I’ve tested out many more emulsifying waxes. For more information about how to use emulsifying waxes, and which ones you can use, check out my beginner’s guide to emulsfiers.
Using beeswax and other waxes
Just because waxes like beeswax, carnauba wax, and candelilla wax don’t make good emulsifiers doesn’t mean that they aren’t suitable for homemade cosmetics.
Waxes can help thicken up a lotion or other emulsion, and they add staying power to certain cosmetics. They also help create a barrier that keeps moisture in your skin. I especially love waxes for making a simple homemade lip balm, a natural root concealer stick for your hair, or even a solid perfume.
The preservatives:
Preservatives are the “scary,” “non-natural” part of making lotions and other emulsions.
Once you add water to your product, it becomes lighter and absorbs more easily into your skin, but it also becomes a breeding ground for bacteria and molds.
There are people who make their own homemade lotions without preservatives thinking they will use them quickly enough to not have any problems. Even if you keep your preservative-free homemade lotion in the fridge, it will likely be filled with mold and bacteria within a couple of weeks. If you don’t use a preservative, you have to treat your lotion as if it were a general food recipe. Keep it in the fridge and toss it after 7-10 days max!
I much prefer to use a mild preservative that will allow me to have a safe product for several months.
There are natural preservatives on the market that will give your finished product a shelf life of around 2-3 months, on average, even when you store your lotion outside of the fridge. In reality, most cosmetics made with these preservatives will keep much longer than that. Without doing microbial testing on your products to see how long they really keep, I would suggest making small batches than can be used up within 3 months.
Natural preservatives
While you should use a preservative, you can choose to avoid the harsher chemical preservatives that most store-bought products use to give extended shelf lives that will allow their product to last for months and months on end.
When I first wrote this post, I gave you the following list of preservative examples. At the time, there weren’t a lot of natural preservatives on the market that were easy for me to find. I’ll keep the list up because they are still valid alternatives. That said, I now tend to use other preservatives instead. (Sharomix 705 is one of my favorites because it’s inexpensive and easy to find here in Spain.)
I suggest you read my beginner’s guide to natural preservatives to get more ideas about how to preserve your homemade cosmetics.
- Rokonsal: This preservative is a mild preservative that is accepted for natural cosmetics by the BDIH and ECO-CERT. It can be used to give a 2-3 month shelf life of products whose pH is less than 5. I use a few drops of lactic acid to lower the pH of my lotions before adding this preservative. It works against a wide spectrum of bacteria and molds and can be used at a dosage of .2% in shampoo recipes or .3-1% in lotions and creams. This is the preservative I used when I made the video of myself making a basic lotion.
- Leucidal: This ECO-CERT-approved preservative seems to be easier to find in the US, and it also seems to work on a wider pH range (3-8). It is made from fermenting radishes with the Leuconostoc Kimchii bacteria. (Kimchi? Yum! 🙂 ) One of the issues I have with Leucidal is that you need to add more of it to your products than you would with most of the other natural preservatives. (Its recommended dosage, when used alone, is somewhere between 3-4% of the recipe by weight.) It does have the added advantage of being able to augment the hydrating ability of homemade lotions. It gives your lotion a shelf life of 2-3 months.
- Geogard 221 (Cosgard): This mild preservative will help give a longer shelf life to products with a wider pH range. It’s effective in a pH range between 2 and 7, giving a shelf life of about 2 – 3 months. The recommended dosage is 0.2-1% of the final recipe by weight. Geogard is ECO-CERT approved for organic products certification.
What about essential oils and vitamin E?
Some people like to say that they are using essential oils, Vitamin E, grapefruit seed extract, potassium sorbate, or even coconut oil as natural preservatives.
While it is true that coconut oil and some essential oils can have antibacterial and antifungal properties, they alone aren’t enough to preserve any type of homemade lotion. Vitamin E and grapefruit seed extract are high in antioxidants, and can help slow rancidity in the oils in your lotions. They won’t prevent the formation of bacteria and mold, though.
Potassium sorbate can be used as a preservative against mold. The problem with potassium sorbate is that it doesn’t prevent against bacteria formation. If anything, adding only potassium sorbate may actually make for a more dangerous lotion because the mold formation won’t occur, which is what normally alerts you to something going wrong in your lotion! You could end up with a bacteria laden lotion that looks perfectly normal.
Potassium sorbate can be used to help preserve certain cosmetics, though, as long as it’s used with some sort of bacteria inhibitor like 10-12% alcohol in your recipe.
Again, most of this is covered in more detail in my post about natural preservatives.
Making a homemade lotion
Once you’ve chosen your oil(s), emulsifier(s), and preservative(s), making the lotion itself is quite simple.
Use proper hygiene
To ensure a safe lotion, you should work in a clean environment. It won’t be a sterile environment, nor does it need to be. That said, you should clean and disinfect both your work surface and utensils as best you can. I like to spray down my work surfaces and utensils with my homemade disinfectant spray. (Once I spray, I wipe the surface with a clean towel and allow it to dry.)
The packaging you will be using for your homemade lotion should also be clean. I like to run heat-stable packaging through the hot dishwasher before using them. Newly bought and wrapped packaging should be ready to use, as is. In any case, you can also use a disinfectant spray (or even something like vodka) to help further sanitize the packaging.
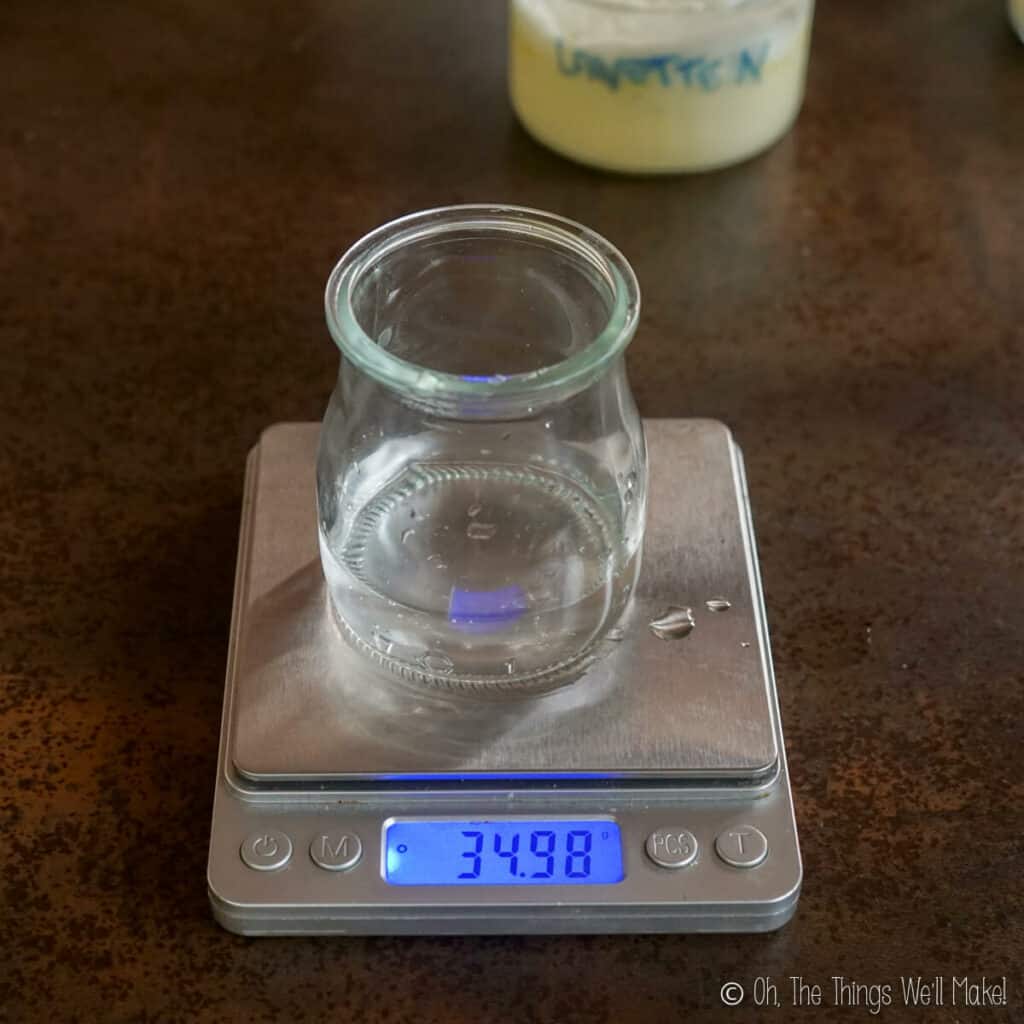
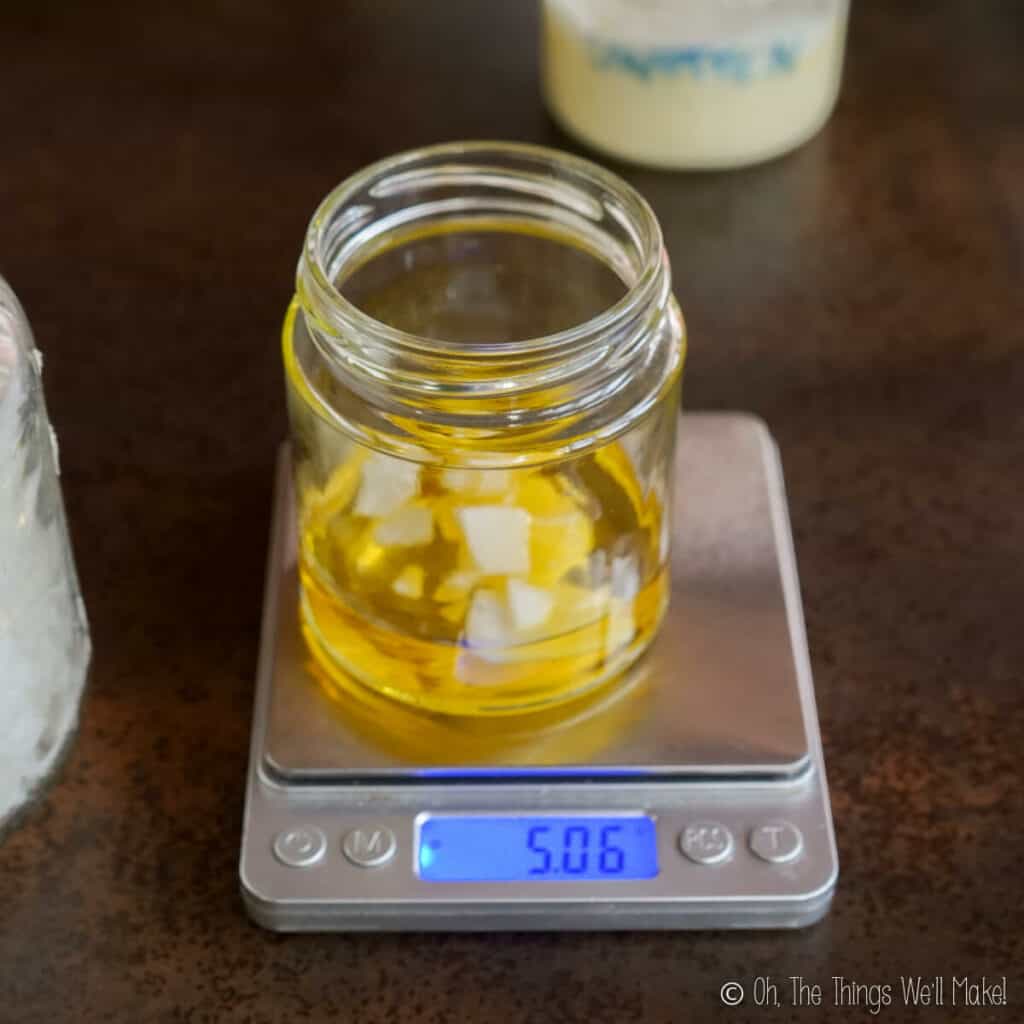
Weigh out the ingredients
Over the years, people have requested that I give recipes in cups and other volume measurements rather than in weight measurements like grams. While I also prefer using cup measurements for most basic food recipes (where precision isn’t important), in the case of cosmetics, it’s important to use precise measurements. That’s why I write my recipes in grams.
For those who will be making their own soaps and other cosmetics, having at least one scale is essential. You can buy an inexpensive kitchen scale for under $20. A kitchen scale is great for recipes where you don’t need to be super precise. It will give you a reading to the nearest gram.
More precise measurements may be needed for making smaller batches. (For example, when measuring out preservatives or when making a homemade serum.) I use an inexpensive jeweler’s scale for those times.
I like to weigh the ingredients directly in the recipient in which I will be heating them. When weighing out multiple ingredients in the same recipient, it’s easiest to tare the scale between each ingredient addition. So, tare the scale with the recipient on it and add the first ingredient until you reach the required weight for that ingredient. Tare the scale again, and once it has reached zero, add the next ingredient. Continue that method until you have weighed out all of your ingredients.
For the lotion, you should weigh out all of the aqueous phase ingredients (water and/or hydrosols) in one recipient and the oil phase (oils and/or butters and waxes) in another recipient. The emulsifier is generally added to the oil phase (but it may depend on your emulsifier).
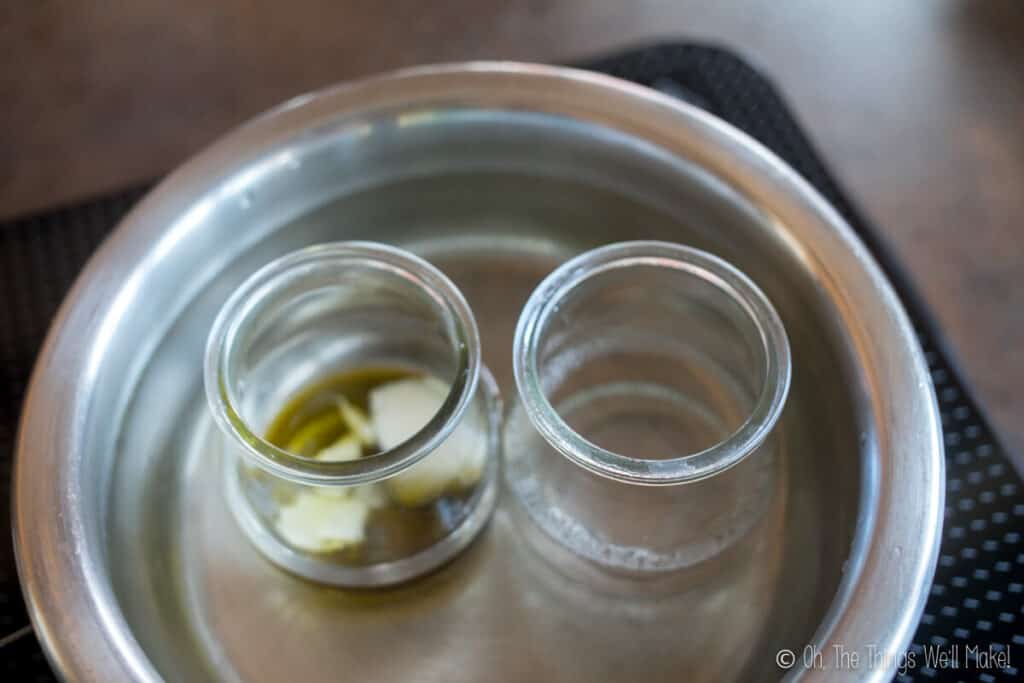
Heat the ingredients
In a water bath or in a pan of water over the stove, heat the ingredients of both phases. (You can also use a double boiler instead.) Heat until all of the waxes and butters have fully melted.
Both phases should be heated to around 70º-75ºC/160º-170ºF.
Heat and hold?
Some people advocate using a “heat and hold” method, where you heat both the oil phase and aqueous phase ingredients separately, and hold them at around 70º-75ºC/160º-170ºF each for around 20 minutes, before bringing them together. Some say it helps with the emulsification process. Others say it helps ensure killing off all possible pathogens.
I personally don’t use the “heat and hold” method myself, and until now haven’t had any problems with lotions separating or going bad more quickly. This is a topic that would warrant a full post, but I don’t want to go into it right now, so I’ll leave you with this post with some arguments against it. If you are having problems with lotions separating after several weeks, though, it is maybe something that you could try.
Combine the ingredients
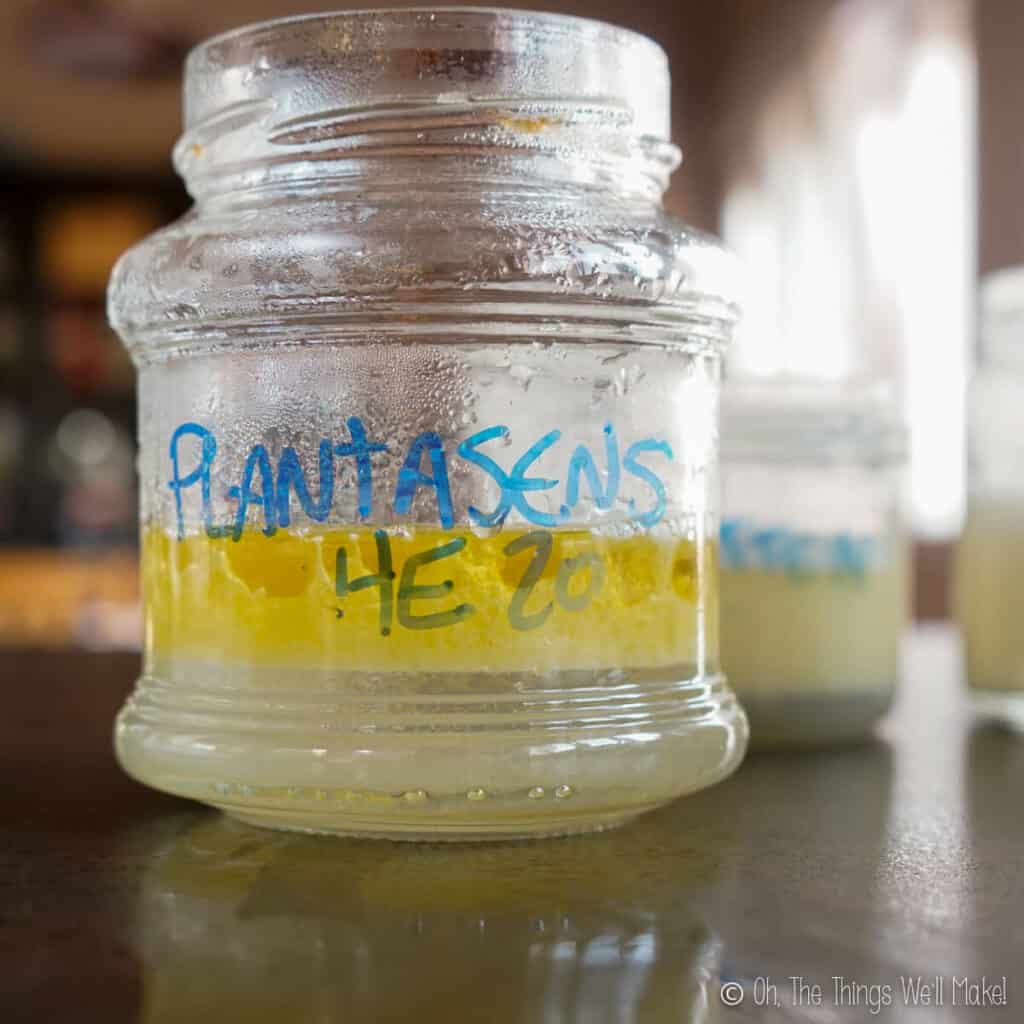
Once you’ve reached the goal temperature range, remove both phases from the heat source and combine them immediately by pouring one phase into the other and whisking them together. For a more stable emulsion, use an immersion blender to combine the ingredients.
When they are still warm, they will still be liquid. They may also start to separate. That is normal. To prevent them from separating, periodically mix together the ingredients as they cool.
Test the pH
While the lotion is cooling, you can also test the pH and make any adjustments as needed. You want the pH of your lotion to be in a range that is good for your skin. (A pH of 5-6 is a good range.) You also want the lotion to be in a pH in which your preservative is effective. (It’s better to use a different preservative that fits your ideal pH range than to adapt the pH of your product to fit the preservative you have.)
If needed, you can adjust the pH down with a couple of drops of lactic acid (or citric acid). You can raise the pH with a solution of sodium bicarbonate, sodium hydroxide, or another alkaline pH adjuster.
I have a post dedicated to the importance of pH in cosmetics with more detailed information on the subject.
Cool down phase
Once the lotion has cooled to around 30ºC/85ºF, you can add the preservative and any other heat sensitive ingredients that you may want to add. This includes adding essential oils for fragrance. You can also add vitamins and other active ingredients. Give the ingredients a final blending with the blender or a whisk before pouring it into your packaging.
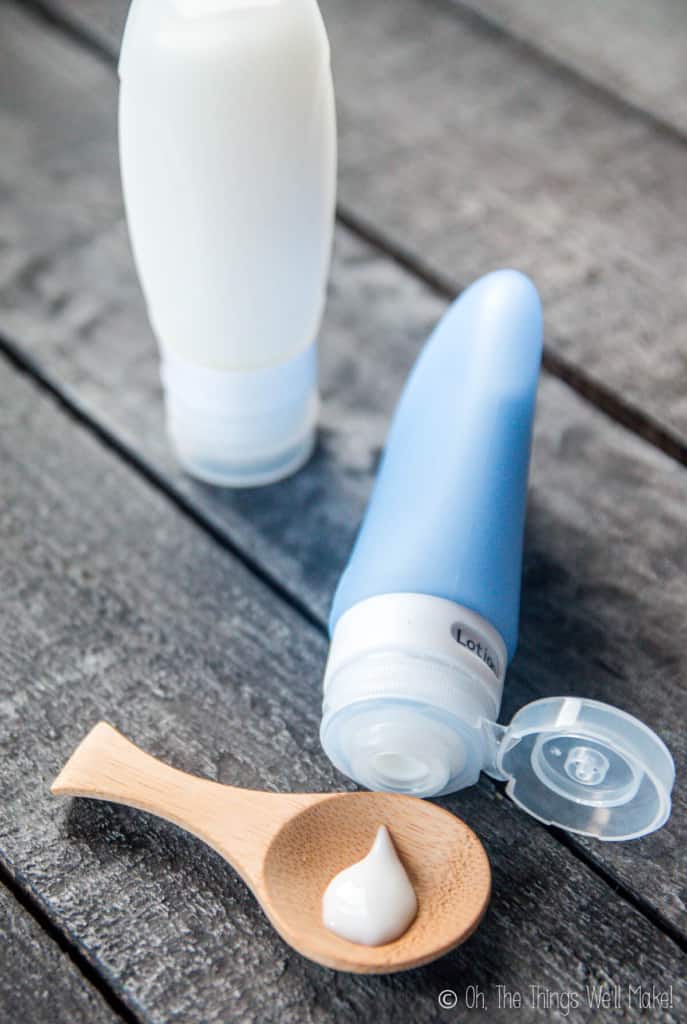
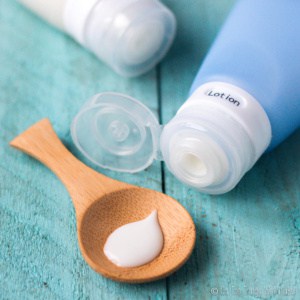
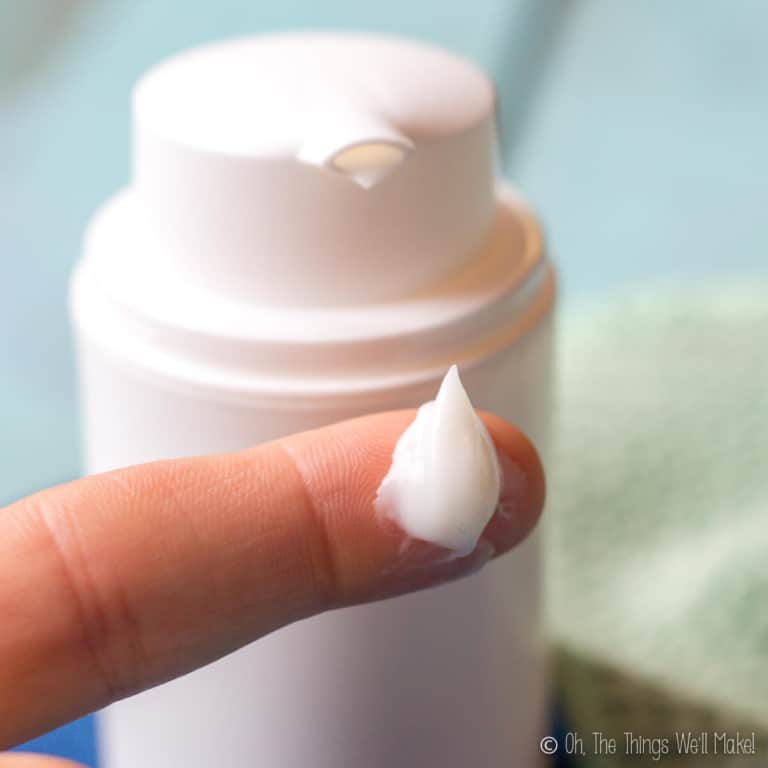
Packaging
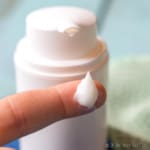
I like to use “airless” containers or silicone tubes for my lotions because they allow you to dispense the lotion without putting your fingers into the container. When scooping a lotion out with your fingers, you are potentially contaminating it with water, bacteria, and other microbes.
Wait until the lotion is fully cooled to room temperature before capping. This is just a precaution to keep condensation from forming inside the container and floating on top of the lotion to prevent mold from forming. In any case, it’s a good idea to shake the containers well, once capped, to ensure any humidity from possible condensation is incorporated into the rest of the lotion.
Troubleshooting
If you are having issues with the emulsification process, there are several things you can try to make a more stable emulsion.
- Use more emulsifying wax. (This will also thicken your lotion.) The amount of emulsifying wax needed for a stable emulsion will depend on the emulsifier used. You can also try using a different emulsifier.
- Use a co-emulsifier. (This will also thicken your lotion.) Try adding 1-2g of a co-emulsifier like cetyl alcohol or cetearyl alcohol to help stabilize and thicken it.
- Use an immersion blender to fully blend the phases together. Rather than whisking by hand, using an immersion blender to combine the phases can help disperse smaller droplets of oil within the water, ensuring a more stable emulsion.
- Try the “heat and hold” method.
- The mixture can also separate if the phases weren’t at a similar, hot-enough temperature. This can be remedied by re-heating the mixture over a double boiler and whisking until the mixture is well emulsified. (You’ll want to do this before adding any heat-sensitive ingredients like essential oils.)
Video
How to Make a Simple, Basic, Homemade Lotion and Customize it for Your Skin Type
Materials
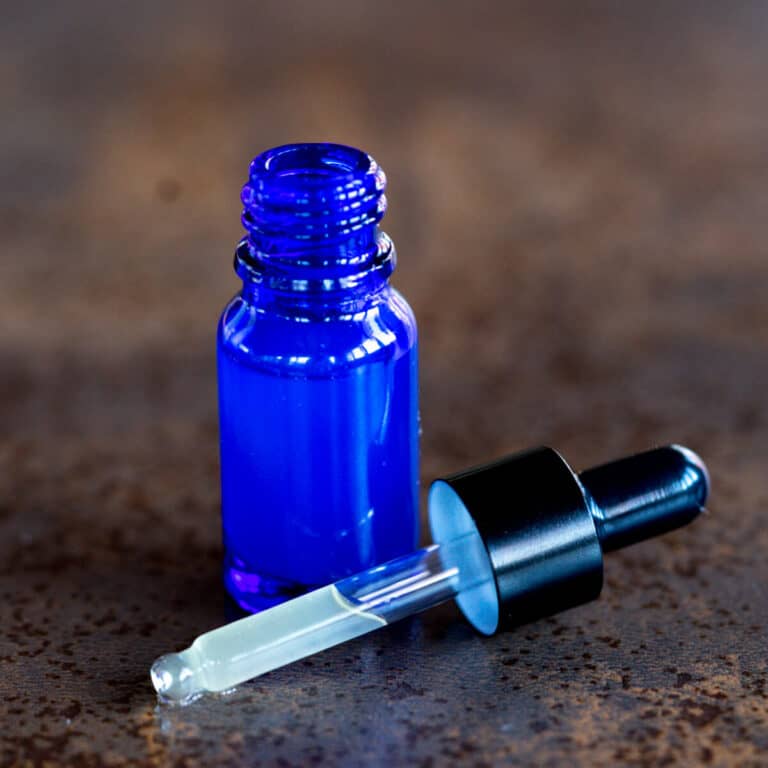
- 65 g distilled water (Can use hydrosols)
- 30 g oil (Can use a combination of oils)
- 4 g emulsifying wax Use 5g for a thicker lotion.
- 1 g preservative (Adjust to recommended dosage of your preservative- 3.5g for Leucidal)
Optional ingredients
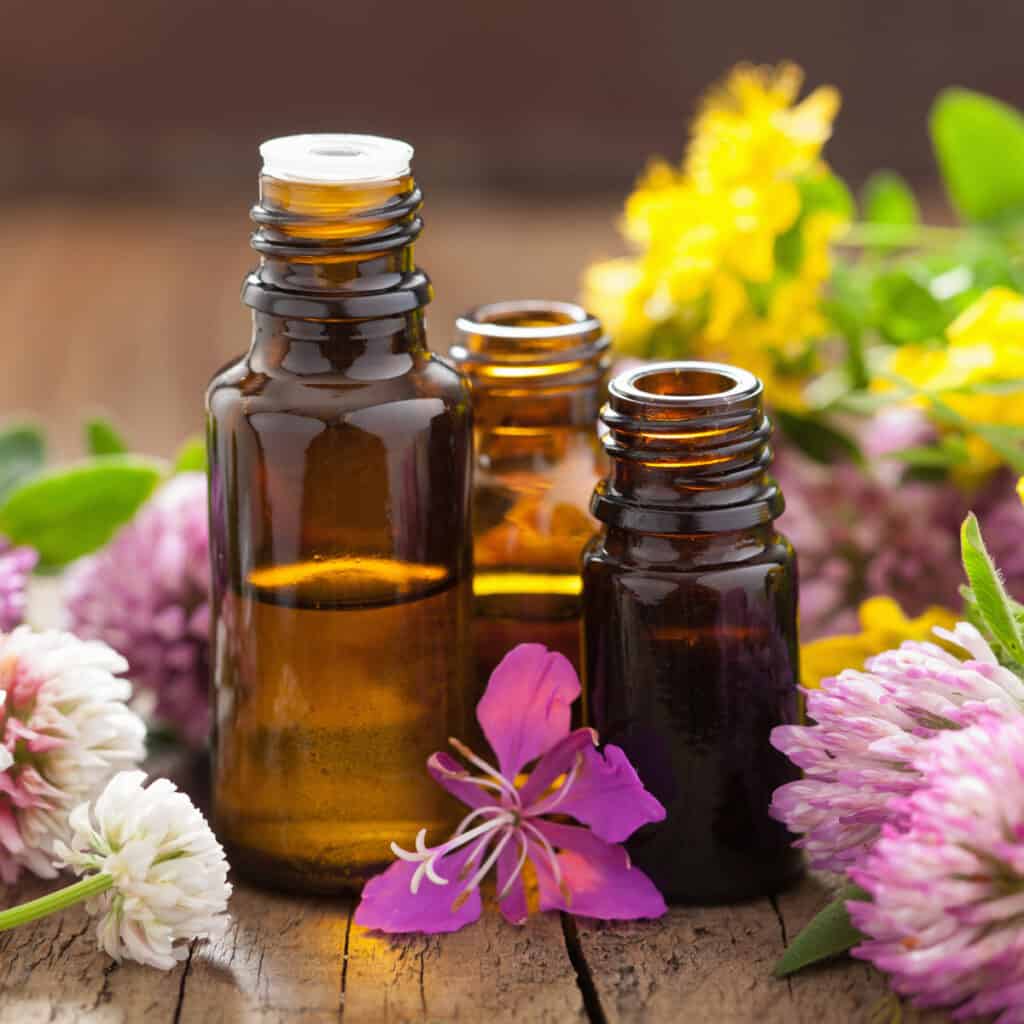
- 1 g lavender essential oil or another essential oil, for fragrance
- 3 drops lactic acid to adjust down the pH, if needed
Instructions
- Make sure all utensils, containers, and work surfaces are fully clean. I like to run heat-resistant utensils and packaging through the dishwasher. You can also clean utensils and work surfaces with a disinfectant spray and wipe them down with a clean cloth before allowing them to dry. This helps sanitize your work environment and ensure a safer lotion.
- Weigh out the aqueous phase ingredients in a small heat-resistant container. (You can also use a double boiler insert.) You should use either distilled water or freshly boiled filtered water to prevent adding any unwanted pathogens to your lotion. You can substitute floral waters or other distillates or hydrosols for the distilled water.
- Weigh out the oil phase ingredients. This includes the oil(s) and/or any butters or waxes you choose to use. It also generally includes the emulsifying wax. (Check your emulsifier to see if it should be added to the oil phase or the aqueous phase.)
- Heat both the water (or aqueous phase ingredients) and the oil phase ingredients to around 70º-75ºC/160º-170ºF. Both phases need to be around the same temperature so that the emulsification process can take place correctly. Make sure the emulsifying wax is completely melted before continuing.
- Add the hot water to the hot oil mixture and whisk the ingredients together. Using an immersion blender will help ensure a more stable emulsion.
- Allow the mixture to cool slightly. As the mixture cools, the liquid will get thicker and more opaque. Whisk the ingredients together again several times throughout the cooling process.
- As it cools, test the pH of your mixture. (You can use inexpensive pH test strips.) You want your lotion to be in a pH range that is skin-friendly. (A pH of 5-6 is a good goal range.) The pH should also be in a range in which your preservative is effective.
- If you need to lower the pH, add a few drops of lactic acid (or of a citric acid solution). Then, test the pH again. While less common, if you need to raise the pH of your lotion, you can use a solution of sodium bicarbonate or sodium hydroxide.
- Once the mixture has cooled (to around 30ºC/85ºF) and thickened slightly, you can add the preservative and any delicate, heat-sensitive ingredients you want to use. Consider adding around 1g of an essential oil for fragrance.
- Mix together all ingredients, and pour the mixture into the final containers.
- Wait until the lotion is fully cooled to room temperature before capping. This is just a precaution to keep condensation from forming inside the container and floating on top of the lotion to prevent mold from forming. In any case, it's a good idea to shake the containers, once capped, to ensure any humidity from possible condensation is incorporated into the rest of the lotion.
- Enjoy your lotion! Store it and use it for up to 3 months. Then, make a fresh batch!
Notes
Weighing ingredients
I find that the best way of weighing multiple ingredients in the same container is to tare the scale between adding ingredients. So, tare the scale with the empty container. Then, add the first ingredient to the container until you reach the required weight. Tare again before adding other ingredients.Emulsifiers
There are a wide variety of emulsifying waxes that you can use to make your homemade lotion! Some of my favorites are Montanov 68 and Olivem 1000. The emulsifier chosen will affect the consistency and texture of your lotion. For more information about emulsifying waxes, check out my guide to emulsifiers.Heat and hold?
Some people advocate using a “heat and hold” method, where you heat both the oil phase and aqueous phase ingredients separately, and hold them at around 70º-75ºC/160º-170ºF for around 20 minutes before bringing them together. Some say it helps with the emulsification process. Others say it helps ensure killing off all possible pathogens. I personally don’t use the “heat and hold” method myself, and until now haven’t had any problems with lotions separating or going bad more quickly. This is a topic that would warrant a full post, but I don’t want to go into it right now, so I’ll leave you with this post with some arguments against it. If you are having problems with lotions separating after several weeks, it is something that you could consider trying.pH
For more information about the proper pH and how to adjust it, read about the importance of pH in cosmetics.Troubleshooting
If you are having issues with the emulsification process, there are several things you can try to make a more stable emulsion.- Use more emulsifying wax. (This will also thicken your lotion.)
- Use a co-emulsifier. (This will also thicken your lotion. Try adding 1-2g of a co-emulsifier like cetyl alcohol or cetearyl alcohol.)
- Use an immersion blender to fully blend the phases together.
- Try the “heat and hold” method.
Packaging
I like to use ‘airless’ containers or silicone tubes because they allow you to dispense the lotion without putting your fingers into a container and contaminating the lotion.Preservatives
I like to use natural preservatives in my product. They don’t preserve the product for years at a time, but should give you a product that keeps for several months. Some of my favorites are Sharomix 705 and Euxyl K903. I have also used other preservatives like Cosgard, Rokonsol, and Leucidal in the past. Use the preservative at the recommended dosage for that preservative. (Most natural preservatives are used at around 0.8-1% of the product by weight. Leucidal needs to be used at a higher dosage, around 3-4%.) For more information about preservatives, check out my guide to natural preservatives.Storage
Natural preservatives give the final product a shelf life of around 3 months. (It should keep longer than that if made with proper hygiene, but without doing microbial testing, it’s best to err on the side of caution with homemade cosmetics!) I make lotion in small batches so that I use it up within 2-3 months. It’s a good idea to date your containers so that you know when you should toss the remaining lotion and make a new batch. (Once you get the hang of it, you can easily make a new batch in less than half an hour, so this isn’t really an issue!)This post was originally published February 24, 2017. It was rewritten, adding more information, new photos, and an updated video in April of 2021.


Hi Tracy
I have been following your page and how you are making your products and absolutely love it.
I haven’t had yet tried out your delicious recipes as yet cause things tend to be too expensive here in South Africa and sourcing them out gets tricky. But one of these days I’m trying out this recipe.
I wanted to to find out the difference between distilled water and deionised water. I wanted to make this recipe for a few people and was advised to use deionised water.
Thank you for your wonderful work. It’s inspiring.
Hi Nomfundo,
In most cases, it probably isn’t going to make much of a difference. I’ve read that when you buy distilled water, you are probably often buying deionized water. Deionized water, doesn’t have a charge because ions are removed. This can be important for mechanical uses and some medical uses.
On the other hand, it may also be more or less pure than distilled water because the process of making it can be different. It may be purer, or it may have more microbes left behind.
Distilled water should be free of microbes, which is what we want most for making a product like a lotion at home.
Because both of these types of waters are usually going to be relatively pure, though, I’d use whatever you have most readily available where you live. Make sure you stay away from water from the tap. 😉
What do you use to test the pH?
Hi Katharine,
I just use inexpensive test strips. (something like these test strips)
We don’t need a super precise measurement- we just want to make sure we are in a good range for whatever preservative we are using- so that is good enough!
Can I use olivem for lotion and hair conditioner? Or use BTMS for lotion and hair conditioner?
Thanks.
Hi Jayne,
Well, yes and no…
You can use the same emulsifiers for everything, but they aren’t always ideal for everything.
BTMS is cationic, which makes it really great for hair care. It’s really good as a hair conditioner and it detangles.
I have made a conditioner with Olivem, but I didn’t love it. It would have to do for someone who is avoiding BTMS as there are very few cationic emulsifiers that are available.
On the other hand, you could use BTMS for creams, but the feel is different from other emulsifiers. That isn’t necessarily bad, though. It’s all subjective.
Some people don’t like Olivem because they say it feels soapy- which is what makes it good for cream cleansers.
So, while you “can” use them interchangeably, they all have a different feel- which is what makes some better for some things and others better for others.
The nice thing about emulsifiers is that they have a very, very long shelf life- I buy them from the same places and have bought a few different ones to experiment.
Hi Tracy,
First, I love your site! It’s been super informative and helpful as I start making my own products at home. I haven’t tried the lotion yet (but I’m really looking forward to it now!) but was wondering if there were any other preservatives you could recommend using that would extend the shelf life? Thanks so much!
Hi Sarah,
Thank you so much.
Yes, there are many of them. I keep researching and really want to do a post on them to link to from these various posts. When I first wrote this, the supplier I normally buy from here in Spain only had a couple available. Plus, many of my readers want something really, really natural- so I went with Leucidal, etc.
That said, since then, I’ve tried a few more. There is one called preservative ECO that works pretty well. I’ve also been using one called Sharomix that I like.
At first, I was mostly using Leucidal, Rokonsal, and Cosgard, which were fine too.
Depending on the preservative you use, you want to make sure that your lotion fits into the pH where your lotion is effective.
You also want to use it at an effective dose.
The disadvantage of something like Leucidal is that you need to use a lot more (around 4% of your product) for it to be effective where most of the others are effective at right around 1% (or even less).
Hi, Tracy
Your website is very interesting. I read about your lotion recipe, but I’m not sure if I should try it, as my case is quite specific.
I am a student living in Europe, and I have a very bad case of uncontrolled atopic dermatitis which spread through my whole body and made my life, basically, miserable. As you can imagine, I have lots of problems with creams and lotions, even the ones that are specific to my skin disease. Sometimes, they aren’t supposed to be burning but they do, sometimes they are too uncomfortable, and sometimes they simply aren’t good enough for my skin. I have a lot of nighttime pruritus, my skin is dry and inflamed basically all the time.
I am trying to find an alternative, as the doctors themselves are always insisting for me to search for creams and lotions with the least ingredients possible. Another reason is economical, as the creams I need to use every day are quite expensive and because I need a lot of them.
So, I would like to ask you if you think it’s a good idea to try your lotion recipe, or (best case scenario) we could talk about making something specific for my case, as I really in need of help and guidance in this difficult problem.
Thank you very much and hope to hear from you soon.
Best wishes
Hi Darya!
I0’m really sorry to hear about your atopic dermatitis. I know how horrible it can be first hand as my son had quite a severe case of it (that has luckily improved by quite a bit with time). I also have localized bouts of it.
I can’t promise that making your own lotion will help clear the dermatitis. I spent months trying to find the best essential oils and other ingredients to add to lotions to help my son. We added CBD oil to lotions, which did help somewhat, but didn’t completely clear things. Blue tansy oil really helped, but it also gives a bit of a medicinal scent and a blueish color to the lotion.
What I will say, though, is that making your own lotion is a great way to experiment with what works best for your skin without spending a ton of money on lots of expensive products. The problem is finding what oils work for you specifically. Some people love coconut oil, for example, but it may make other people break out in a rash. It’s a very personal problem.
I’m very tempted to write a post about dealing with atopic dermatitis as we learned quite a bit along the way of dealing with it. (Did your dermatologist recommend dietary changes at all? That really helped us a lot.)
You should really try to make your own products, research a bit and you’ll be fine. I learned a lot on Aromazone and Formula Botanica sites.
Hello Tracy,
Thank you for this post and video- beyond helpful and inspiring. I have made the recipe a few times and it works lovely! I am trying to make it for our dispensary; I want to know if you have ever made a large batch? I’m thinking 5 to 10times the recipe to offset the testing fee. I’m wondering if doing a large batch will alter my results even if I do proper math and weighing? Have you any experience in that? Many thanks for your time and awesome website!!
Hello HoneyM,
No, I haven’t made large batches because I really only make for us at home and we don’t use enough lotion to warrant it.
I will say this…
The amounts should adjust perfectly- so as long as you increase everything by the same amount, you should be fine. (My recipe card should even help with that if you adjust the serving settings).
The only problem is that I’ve heard that some people have a harder time getting the mixture to emulsify well when working with large batches. To help with that problem, you may need to get some help from an electric beater or something like that to help whip your lotion into shape. this, of course, really depends on the emulsifier used too.
If you do find that you have issues getting a stable emulsion, you may be able to help stabilize it better by adding 1% cetyl alcohol (meaning at one percent of the recipe- so if you’re making 100g, replace one gram of water with the 1g of cetyl alcohol (but melt it in with the emulsifier).
I hope that makes sense!
Good luck with it! 🙂
Hello, I am new to the diy community. I would like to use your recipe as a starter for a face lotion. I wanted to know if it would be possible to incorporate fresh Aloe Vera gel into the lotion and if so how much should I use.
Hi Karina,
I wouldn’t recommend adding fresh aloe gel into any homemade product that you are trying to conserve. It’s a tricky ingredient for conserving and because most of us aren’t able to test our products for microbial growth, I think it’s best to err on the side of caution and not use it.
I’d save the fresh stuff for things that you’ll be storing in the fridge and using within a few days.
That said, you can buy aloe gels that already have the preservation taken care of. It’s still not a great idea to use it in super high concentrations in your mixes because even then it can make microbial contamination more likely.
Another idea to incorporate aloe in a safer and yet very natural way is to make your own aloe oil.
The oil soluble part of the aloe will be a bit different than the water soluble parts of the plant, but they can still be beneficial and add a lovely, natural scent to homemade products.
Hello Tracy!
It is possible to add to the lotion something to protect the Skin from the sun? The suncream is toooo greacy to me, I become acne with the combination from oil + sweat etc!
Do you have an Idea for me?
Thanks
Hi Gabriela,
Well, yes, and no.
Let me explain…
Both zinc oxide and titanium dioxide have sun blocking characteristics. You can add a bit to your lotions to help block the sun somewhat.
There are a few problems with doing that, though. First, they also have a bright white color that will make your skin look lighter when you wear it. You can fix that problem by adding other pigments to your lotion to help keep that from happening. You’ll end up with a tinted moisturizer, which isn’t really a bad thing if you can match your color.
The other problem, though, is that you don’t really know the SPF of whatever it is you’re making. For home use, if you’re just looking to somewhat protect yourself, that isn’t really a big deal. If you easily burn, though, and are expecting a full block, you may not be getting what you’re hoping for. As long as you keep that in mind, it’s fine to experiment with it.
Awesome awesome site. I’ve been needing all of your wonderful tutorials, suggestions and found the comment section very useful. I’m looking into getting into the business of selling smell good and do good products such as scrubs, mists and lotions. My goal is to become an independent maker and distributor of homemade body essential items, but I want to be as informed and safe as possible. Thank you so much for being a pillar of guidance during my season of embracing it all.
Toya,
Hi Toya,
Thanks so much for your kind comment!
I’m happy to help and working on getting more information out as soon as I can! 🙂
Hi, do you have any videos? Thank you
This post has a video within the written part of the post.
I have been making more and more videos lately. You can see my YouTube channel here: https://www.youtube.com/c/thethingswellmake
Thank you for sharing all this great knowledge! Any update on your effort to write up a post with the different benefits of different oils which will help give people a better idea of oils to use for their lotions and moisturizers?
Hello! You’re very welcome!
I actually did start writing it up, but got sidetracked and started on other posts and projects. (The same goes for a post on natural preservatives!)
It’s definitely something I plan on posting soon. Now that you’ve reminded me, it’s something I’ll try to push up on my to-do list! 😉
Hi, Thank you so much for your valuable information. I have learned a lot and actually have had great success making a body butter with e wax without the water and oils separating- thanks. The only weird thing is that the essential oils I add, at like 2%, they do separate… they “bead ” up on the top of my lotion inside my jars. I’ve been adding the eos after I fully blend my oil and water mixture, same time I add my leucidal preservative.
I am totally at a loss and cant figure out what to do to fix this- I was hoping you would have some ideas. Thank you in advance. My recipe is 1/2 cup water phase (magnesium oil), 1/4 cup coconut oil, 4 tbs. shea butter, 3 tbs. e wax, leucidal and essential oils at 2%.
Best, Beth
Hi Beth,
How are you calculating the 2% if you are measuring by volume and not by weight?
Leucidal needs to be at a higher level if it’s the only preservative, I think. At least with my distributor, it’s suggested it be used at 3.4-4%. That, again, though, is by weight percentage.
Seeing the recipe in volume, rather than by weight percentages, makes it difficult for me to pinpoint the issue. You may be adding too much of your essential oils. It’s really hard to know, though.
If I get a chance to try to somewhat figure out your real recipe by weight (I’m getting caught up on a lot of comments after being busy with my son’s birthday party this past weekend.), I’ll try to let you know if I see anything weird.
What essential oils are you using? Some could have different effects with different ingredients. Something may be reacting with the magnesium oil, dor example.
Hi Tracy, thank you. Yes, I know I should be making this by weight and not volume- probably not a great idea. I came up with these conversions for my recipe- 91.62 g Magnesium Oil, 54.4 g Coconut oil, 53.59 g Shea Butter and 42.63 e wax. I came up with the 2% essential oil by the finished volume I get from each batch which equals 6 oz…. so 2% would be 72 drops EO for each 6 oz batch… does that sound to high? I figured there is 1200 drops of EO in each 2 oz. bottle. I did the same for the Leucidal but I will double that since you recommend 4%. – Thank you. The essential oils I use are lavender, clary sage, ylang ylang, cypress, marjoram, peppermint, bergamot and geranium… I blend them in different scents I make, but don’t use all in the same recipe. I sooo appreciate your time and help with this- I am stumped. Thank you for responding so quickly 🙂 Do you think it would help to add a little candelilla wax to stiffen up the cream?
I think my conversions were wrong in my last comment- too much e wax. I just weighed everything and I came up with this : 126 g magnesium oil, 49 g coconut oil, 65 g shea butter, 17 g e wax. I’m sure you are busy. Thank you again for your time.
Let me give it a better look when I can sit down and study it better. I may also have to consult with some friends. 😉
The EO amount sounds like a lot to me.
Are you using any water, or are you only using magnesium “oil” as the water phase?
To thicken it, I’d suggest increasing the emulsifier amount or adding in a co-emulsifier like Cetearyl alcohol or cetyl alcohol. (But, yes, you can also try with beeswax or candelilla- the other alternatives would just make for a more stable cream and have a different feel.)