

Homemade Liquid Coconut Oil Soap
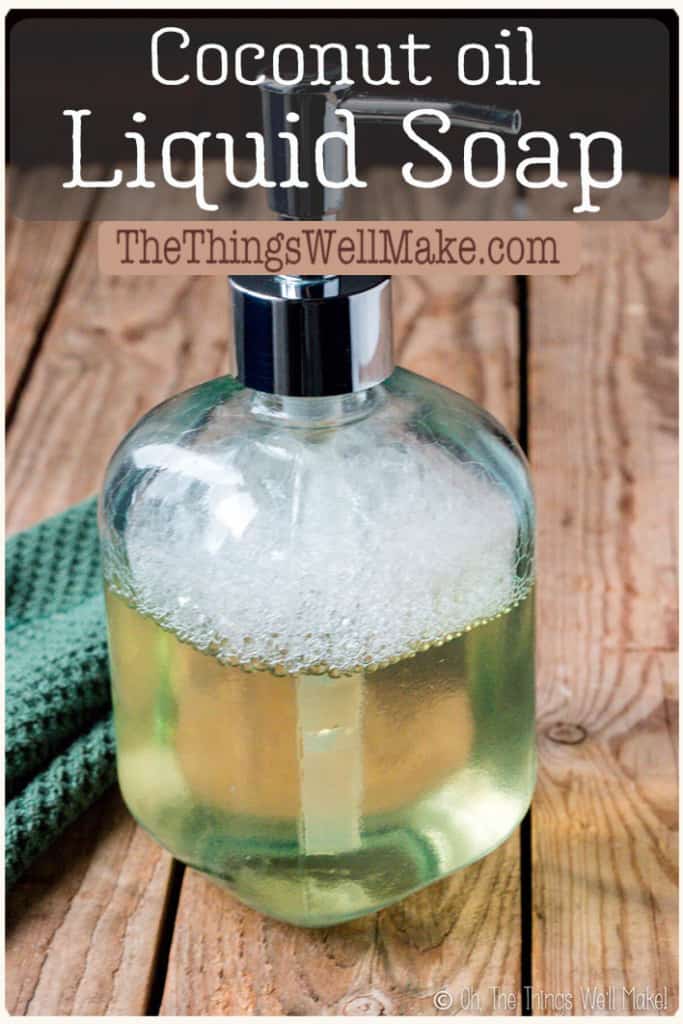

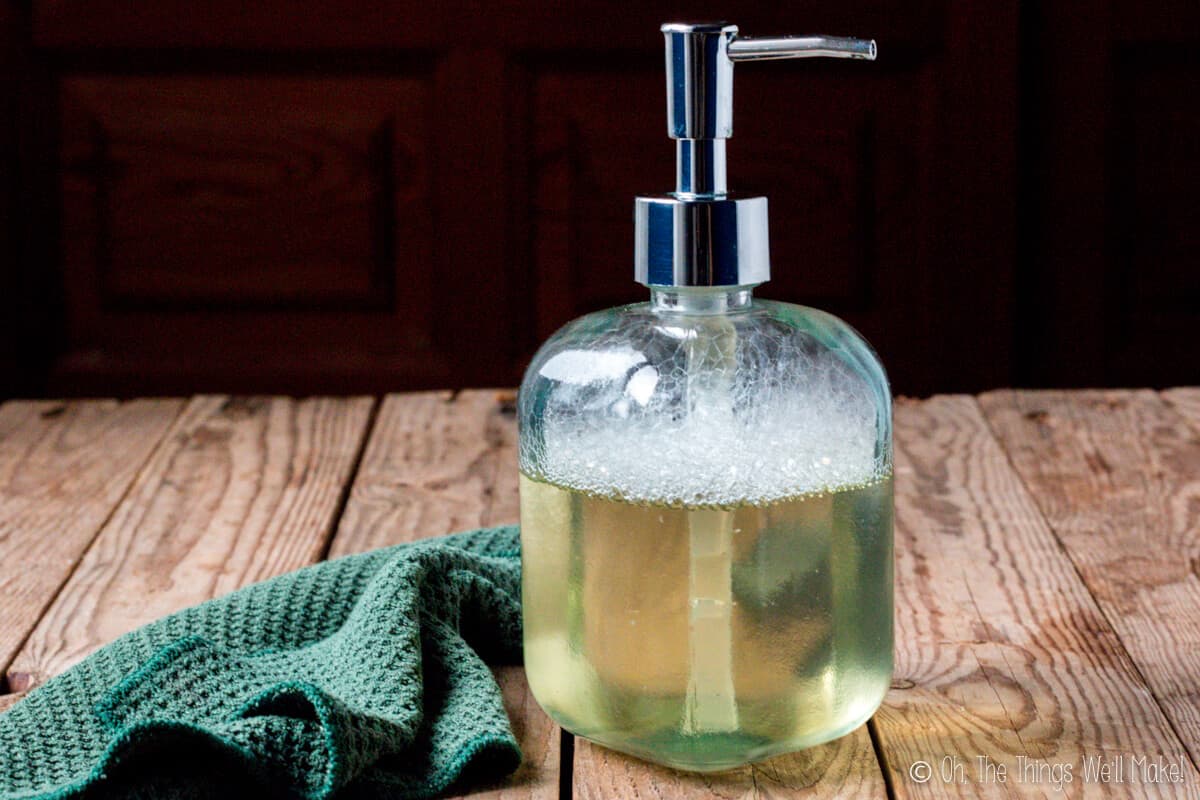
Making your own homemade liquid coconut oil soap is simple, thrifty, and very rewarding. Coconut oil soap provides lots of lather and cleaning power for all-purpose cleaning.
When I first made this soap, I had a great idea. I made a pure liquid Castile soap (made with only olive oil) and this liquid soap made with only coconut oil. My idea was that I would combine them, as needed, for different purposes around the house.
Oils in soapmaking
I had my reasons. Each oil in soap making brings different properties to soap (different from the properties they’d bring to a homemade lotion, for example). In a bar soap, there is a HUGE difference between a pure Castile soap made with only olive oil and soap made with only coconut oil.
Soaps made with olive oil are more conditioning. Olive oil is great for soaps meant for the face and body for that reason. On the other hand, soaps made with only olive oil don’t make much lather and they aren’t as “cleansing” as soaps made with coconut oil. Some people find them “slimy.”
Soaps made with coconut oil are cleansing and they provide a nice bubbly lather, but they can be drying to the skin when used alone.
Most people prefer using a soap with a combination. They want a soap that isn’t too drying, but that has some lather and cleansing ability. That’s why I used a combination of the two oils in my easy beginner soap recipe. I wanted a conditioning soap that provided some lather. If you haven’t tried making soap yet, you may want to begin with that recipe to get your confidence up before moving on to liquid soaps.
Read my post about the best oils in soap making for more information.
Oils in liquid soap making
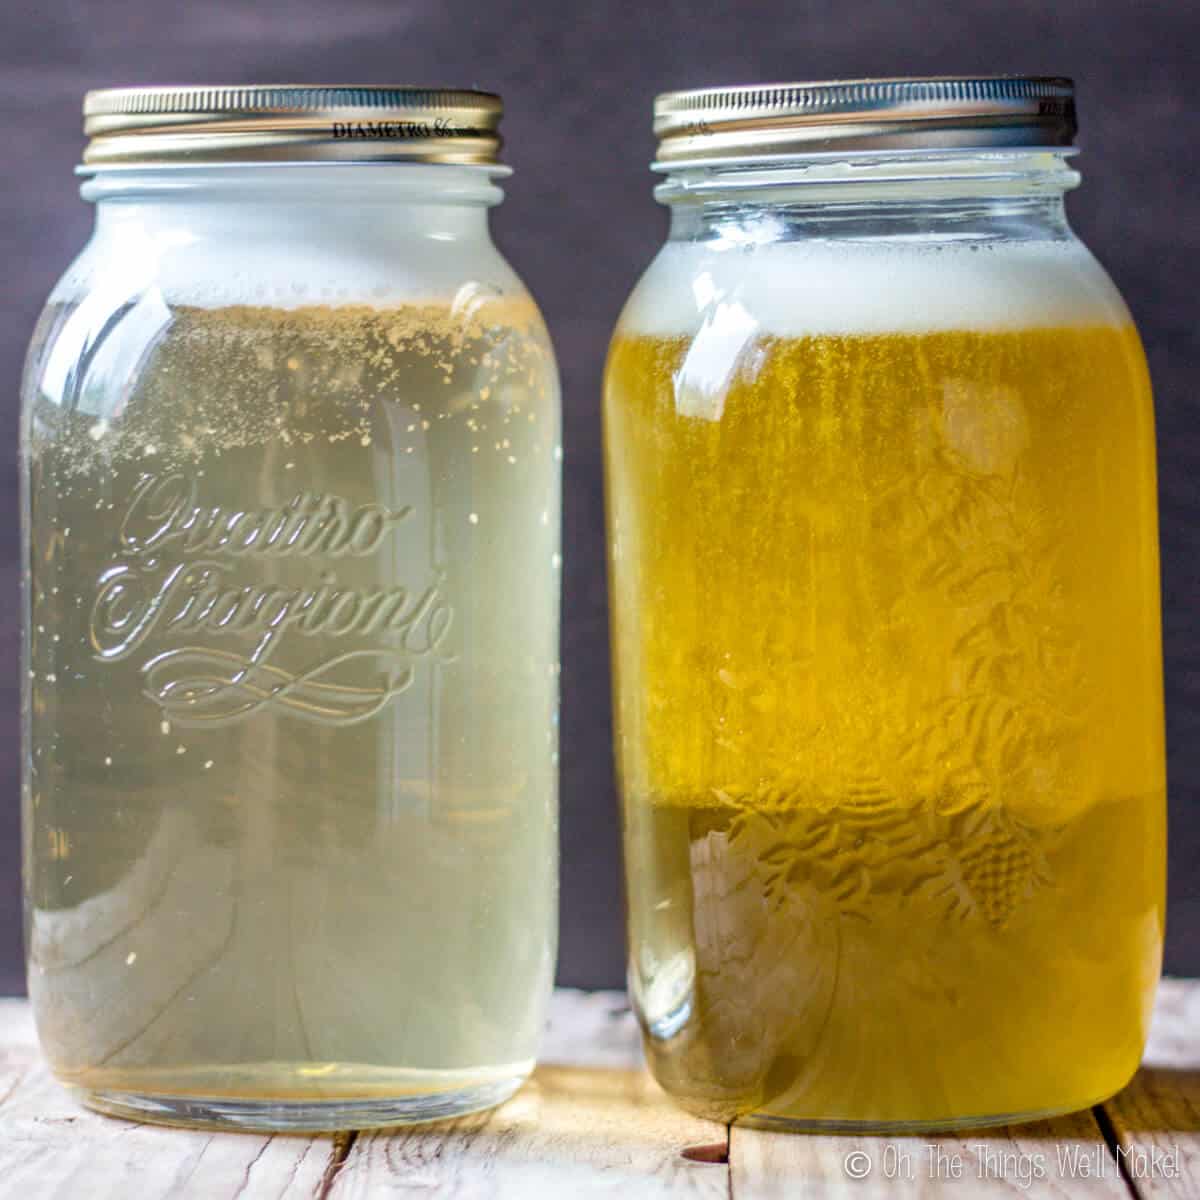
Now that I’ve made these liquid soaps several times now, I have to admit that I don’t notice as much of a difference between the liquid soap made with olive oil and this liquid soap as I thought I would. In fact, I generally make this soap most often.
The biggest differences are cosmetic. This soap is much lighter in color while the liquid Castile soap is more golden in color. They also have a different scent. (If you add essential oils or fragrance oils when you dilute your liquid soap, though, you probably won’t notice a difference.)
I’ve found that both of these soaps provide a lot of lather. This one makes a slightly more abundant and bubbly lather. Neither one is excessively drying, although the one made with olive oil is slightly more conditioning.
My husband prefers my homemade liquid soaps for use in the shower to gels made with other surfactants because he likes the amount of lather they provide. (Yes, even the one made with only olive oil provides a lot of lather.)
Refined coconut oil, sold for soap making, generally is very inexpensive, so I like using it to make soap. I haven’t noticed a difference when using refined coconut oil vs. virgin coconut oil (which I used to use before I could find the more inexpensive coconut oil locally). (I used to make soap with olive oil more often because here in Spain it was the least expensive oil.)
Those with coconut allergies will be happy to learn that pure Castile liquid soap is also a great multi-purpose soap.
Why Make this soap?
Making your own liquid soap makes a lot of sense financially. It’s a bit intimidating, but once you’ve successfully made it, you’ll see it’s not that difficult. Liquid Castile soap is surprisingly expensive. Not only can you save a lot of money by making it yourself, but you are able to control which ingredients you use. This is especially helpful for people with allergies and skin sensitivities.
It’s also more sustainable. You can keep using the same containers and dispensers over and over again, meaning much less waste! One big batch of soap will keep for a very long time.
Before making this soap, you may want to read my post about how to make a liquid soap with general information about the process. It may also help you choose which soap you’d like to make.
Ingredients
This recipe uses only a few simple ingredients.
Coconut oil
Obviously, you will need coconut oil. You can use refined coconut oil or virgin coconut oil. It doesn’t really matter which you choose. Avoid using fractionated coconut oils or coconut oils that have been modified to melt at a different temperature. (If you want to use them, you’d have to run the recipe through a lye calculator and adjust the amount of lye used. Read more about using a lye calculator here.)
Lye (KOH)
Apart from the coconut oil, you will also need lye. In the case of liquid soap, you will need a different type of lye than the one used in bar soaps. For liquid soap, we will be using KOH, potassium hydroxide. (Bar soaps use NaOH, sodium hydroxide). All true soaps use lye. (For more information about lye and why it is needed in soap, read my post about why soap needs lye.)
Do not use NaOH, sodium hydroxide, to try to make liquid soap!
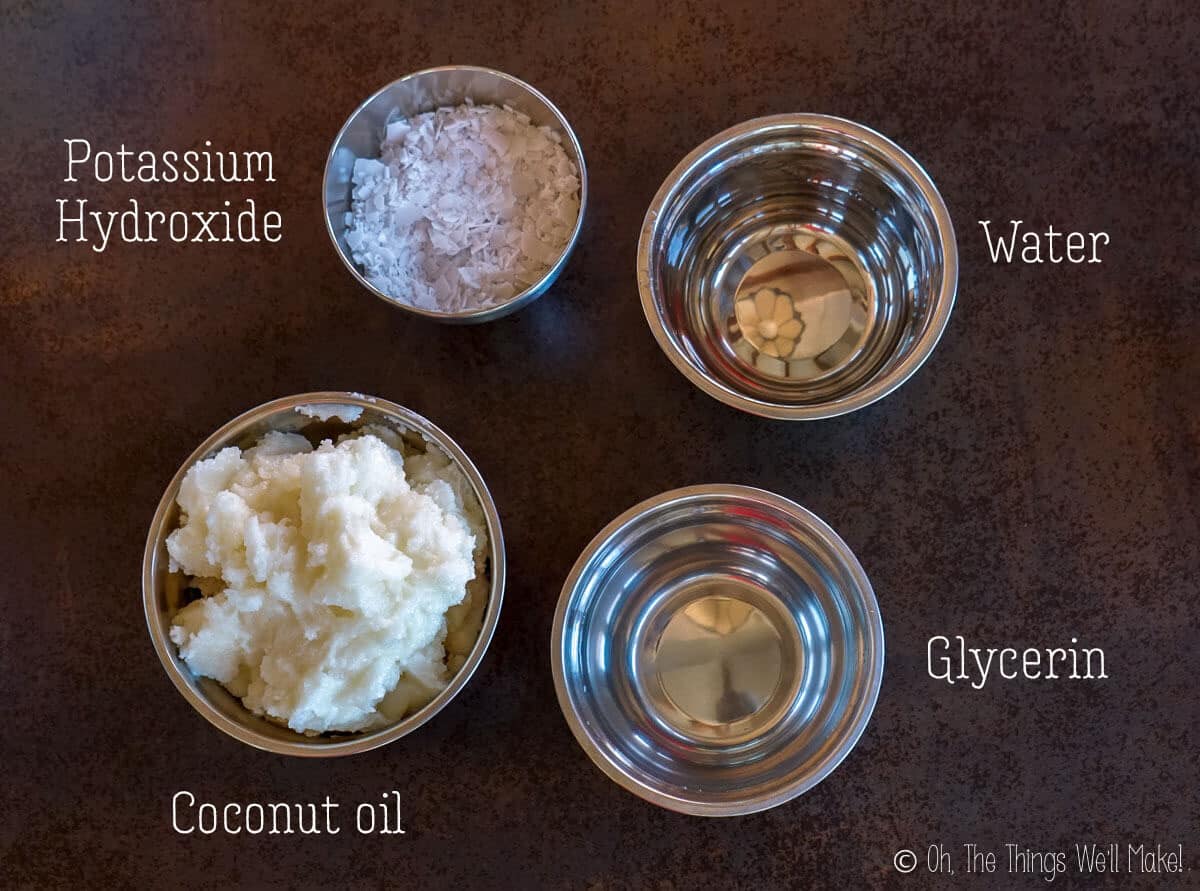
Glycerin
I use glycerin when making liquid soap for several reasons. Glycerin is normally a by-product of the soap making process. Adding more glycerin makes the process of liquid soap making easier and more fool-proof.
Not only is it said to move the process along more quickly, making the process quicker and easier, it also has other advantages. Soap pastes made with glycerin tend to be easier to dilute in water. They also may be more transparent and conditioning to the skin. (Glycerin is a humectant which can draw moisture into your skin.)
If you don’t want to use glycerin, you can just sub it out for more water. Just know that it may take longer to make and your resulting soap may be slightly different from mine.
Water
We’ll also be using water in our lye solution. I recommend using distilled water to avoid adding impurities and minerals that could result in a cloudy soap.
Procedure
Making liquid soap is very similar to making bar soap. Most people hot process their liquid soap, though. That means that they will cook it in some way or another to help finish the process of saponification. (Someday I will write about my experiments in trying to cold process liquid soap.)
In the past, I have recommended making this soap in a slow cooker. Over the years, though, I’ve had many questions about how to make this if you don’t have one. I made my last batch of this soap in the oven, and it worked quite well and was very easy to do too.
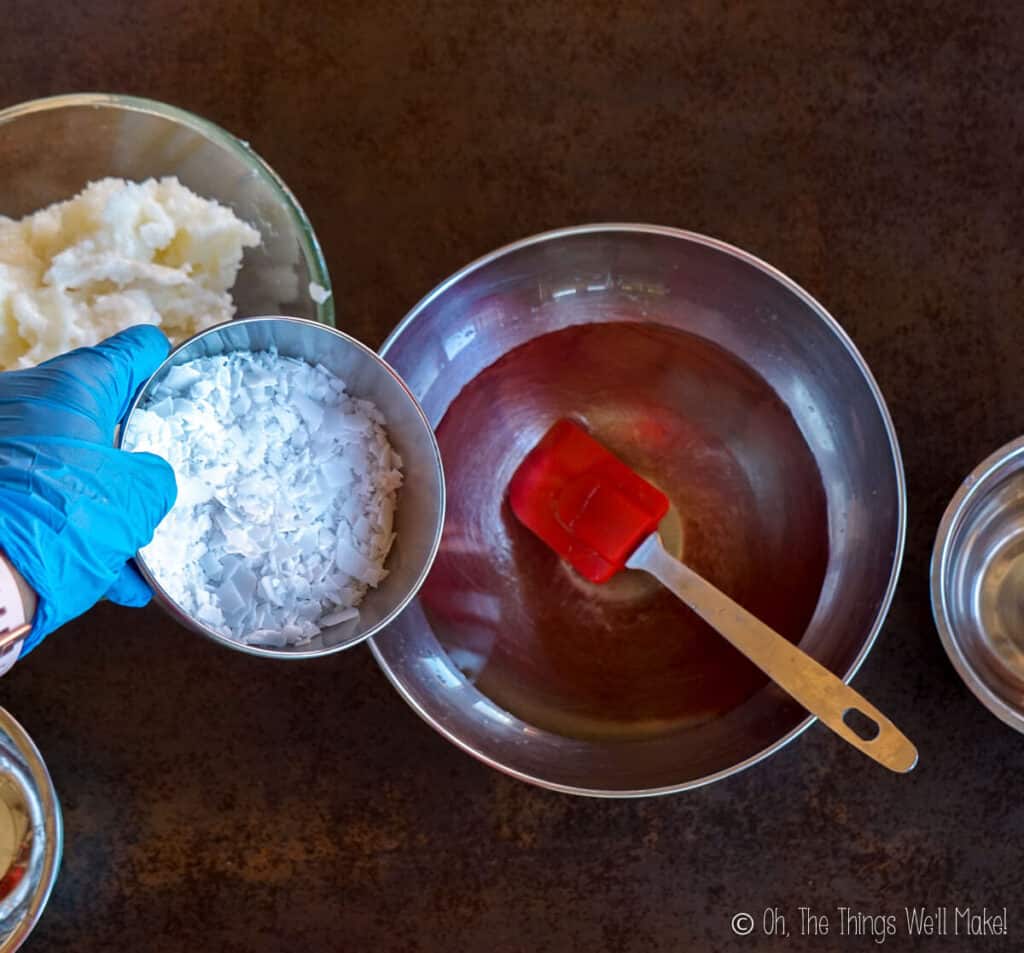
So, if you are using a slow cooker, you can add the weighed out coconut oil to the slow cooker and allow it to melt in there. If not, I’d suggest melting the coconut oil in a large bowl.
Making the lye solution
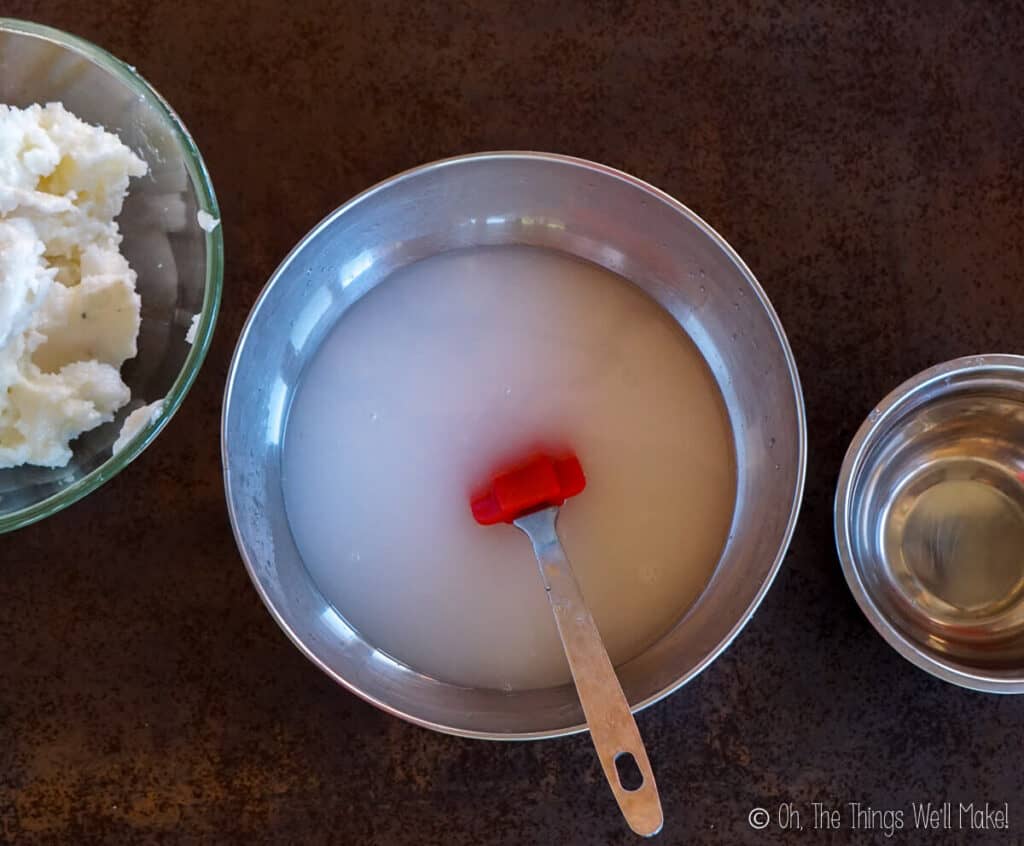
In a separate medium-sized bowl, mix together the water and glycerin. In a separate smaller bowl, weigh out the potassium hydroxide (KOH).
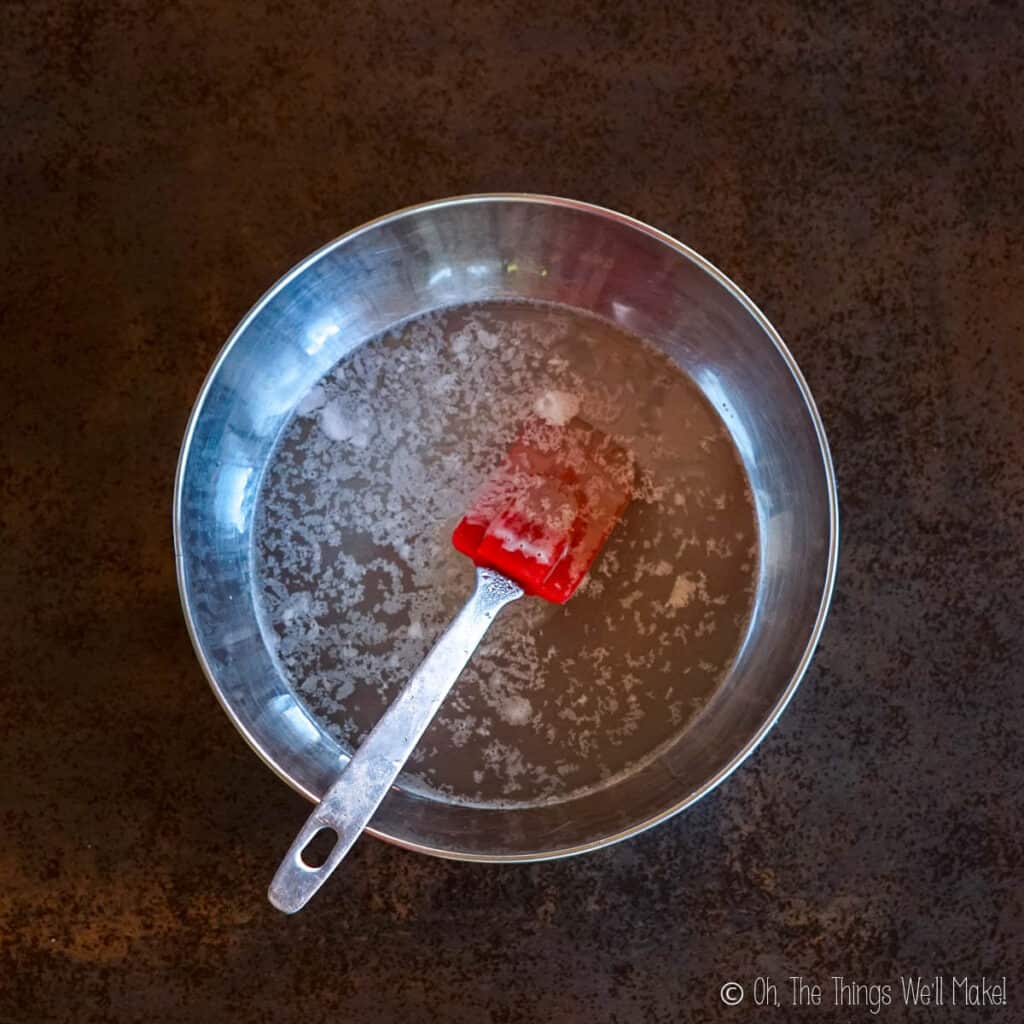
Pour the KOH into the water and glycerine mixture. Mix them together until the KOH is fully dissolved into the water and glycerine mixture. It will be cloudy at first but will clear up. It will also get very warm.

Making the soap paste
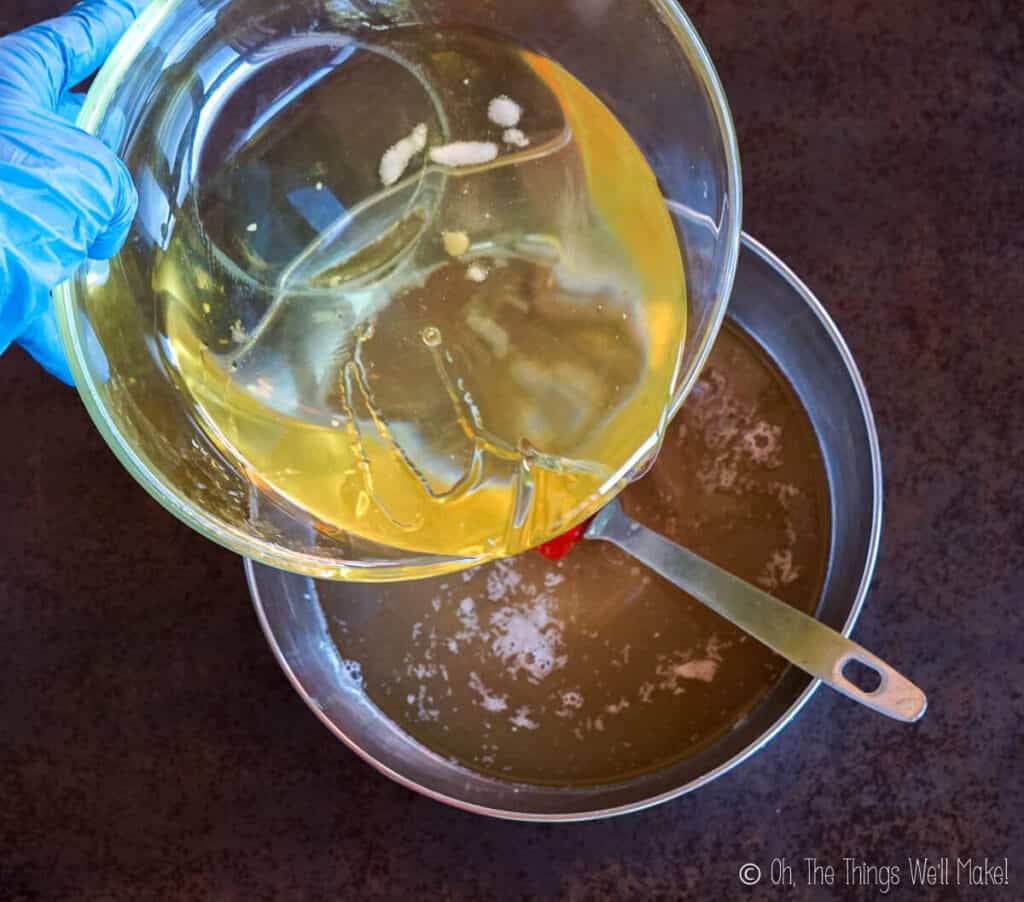
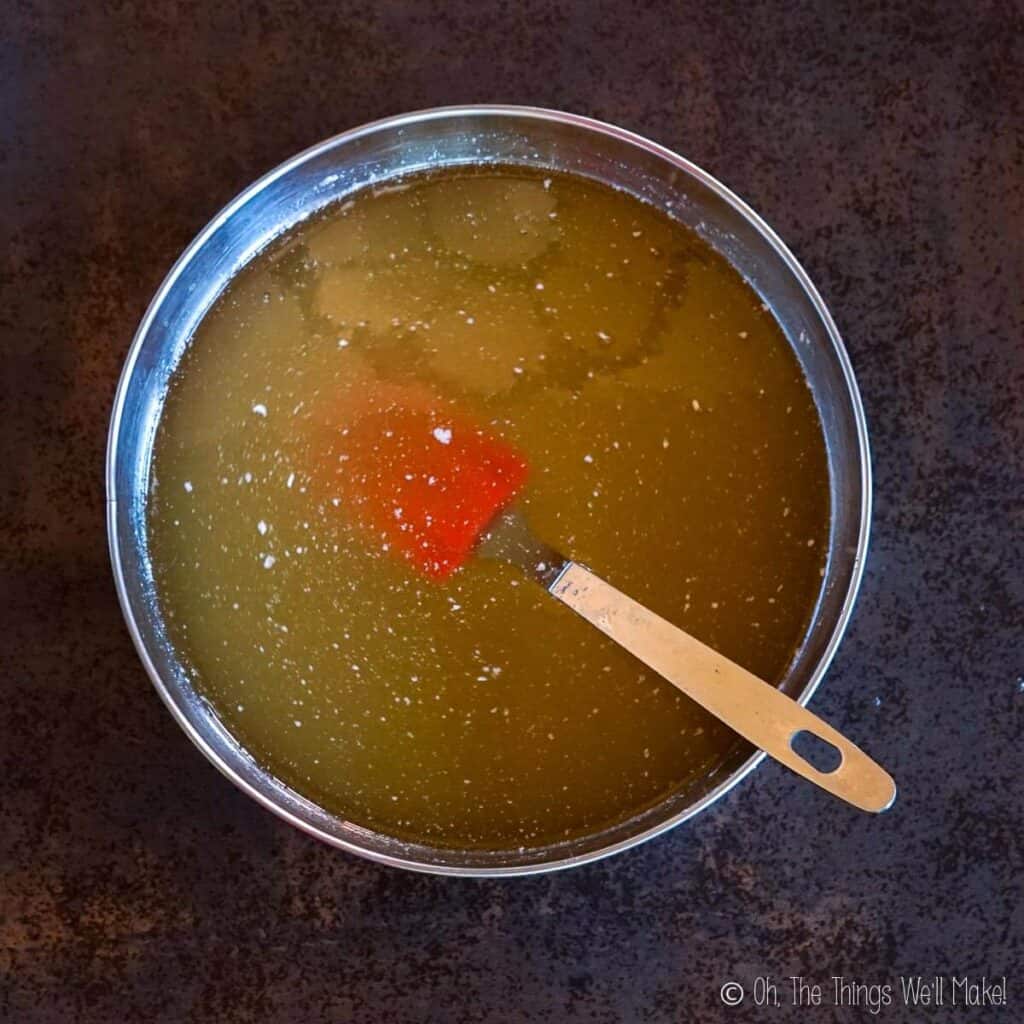
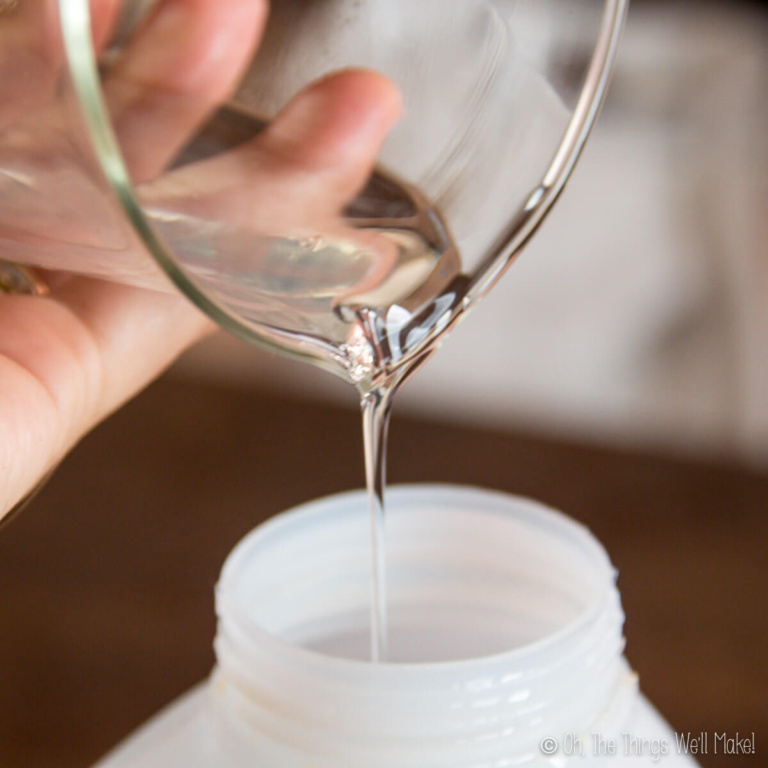
Carefully pour the KOH mixture into the warm coconut oil, and slowly mix them together. This can either be done right in the slow cooker crock or in a large bowl.
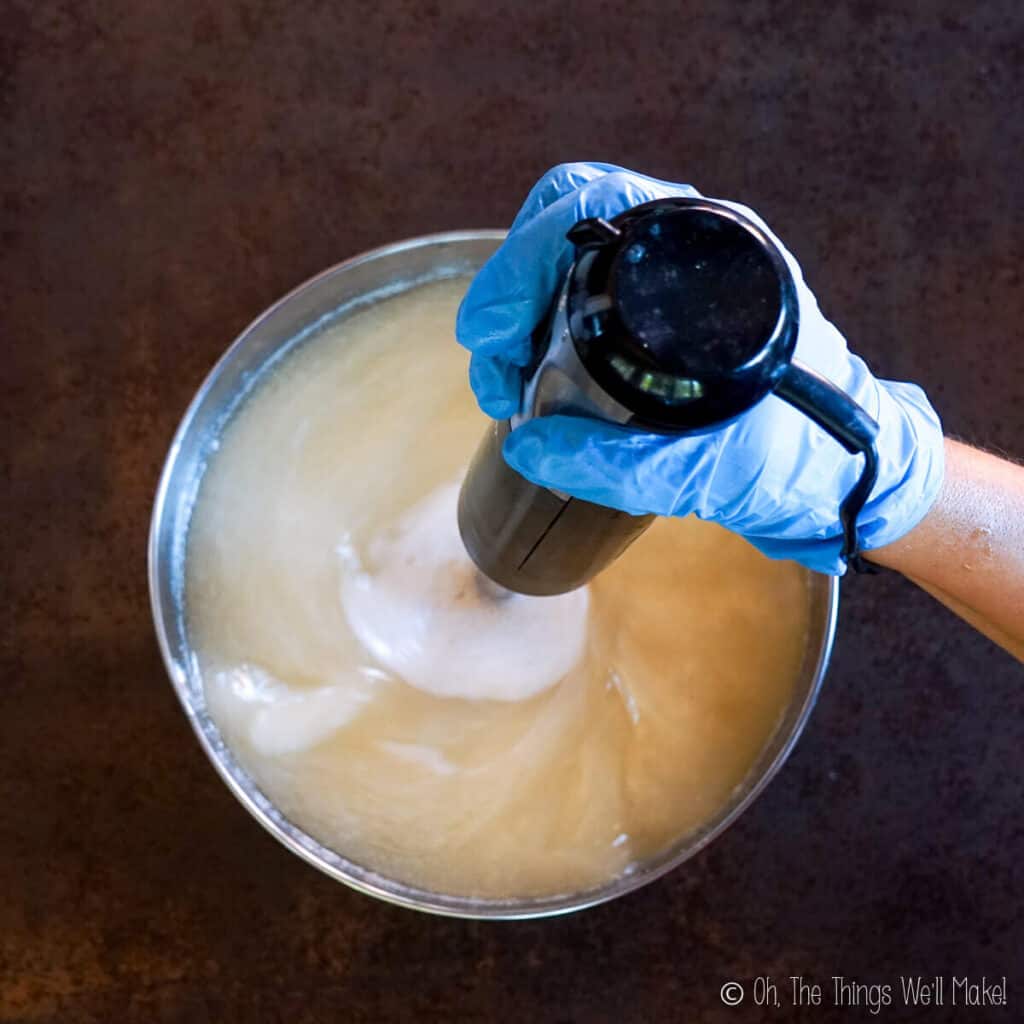
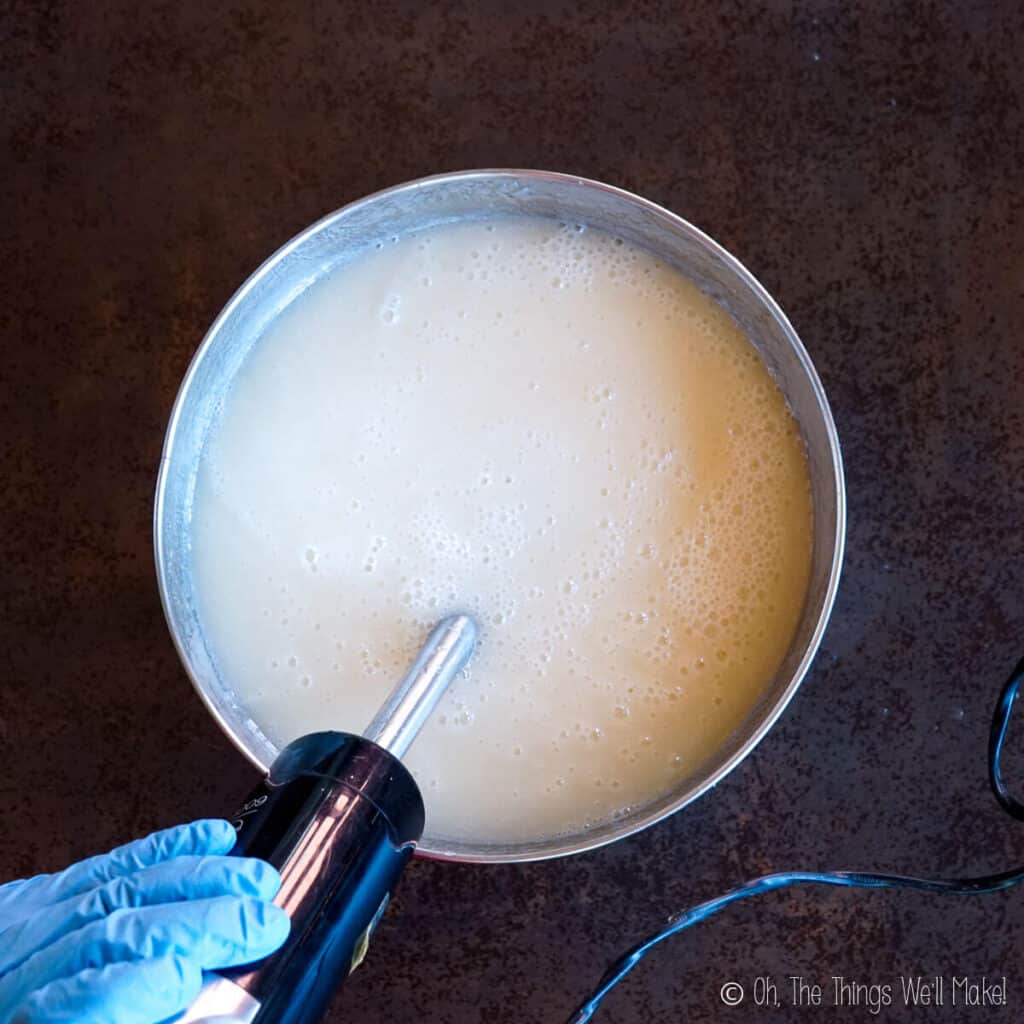
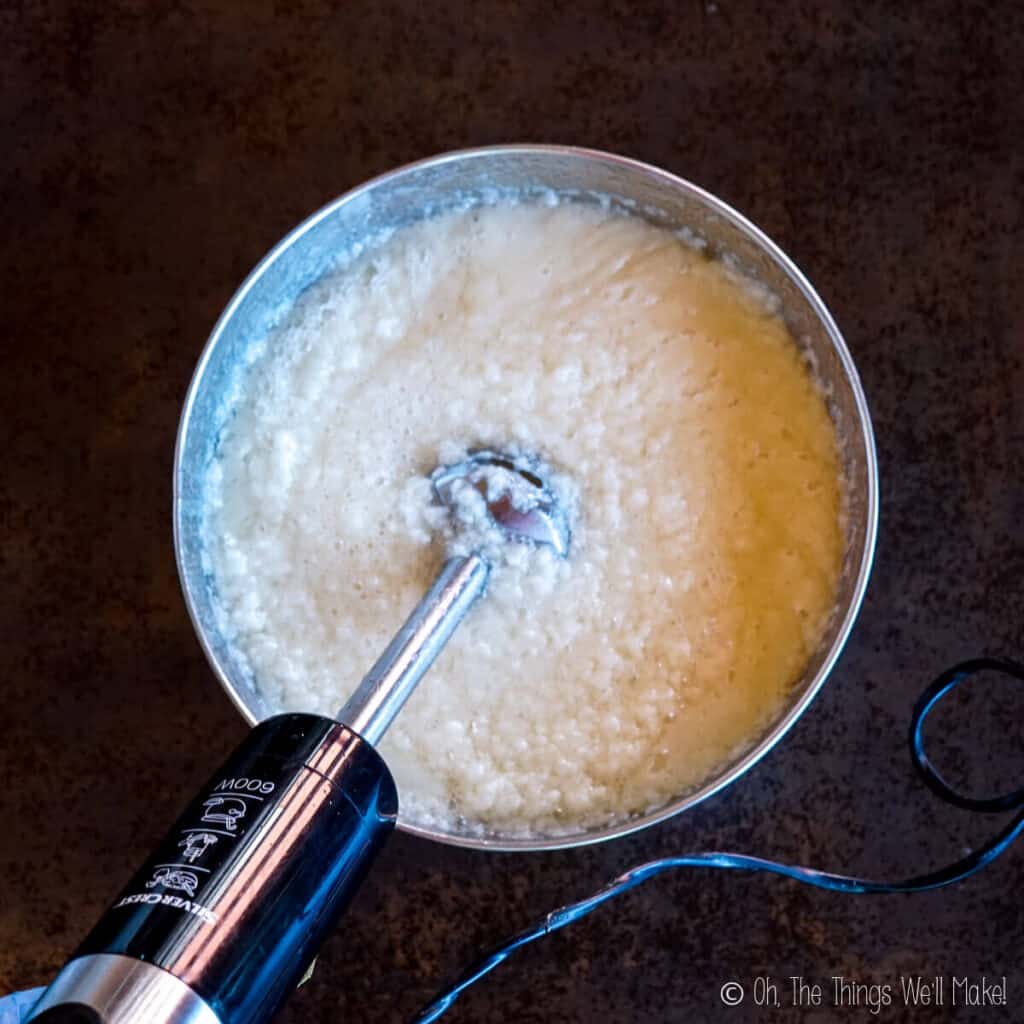
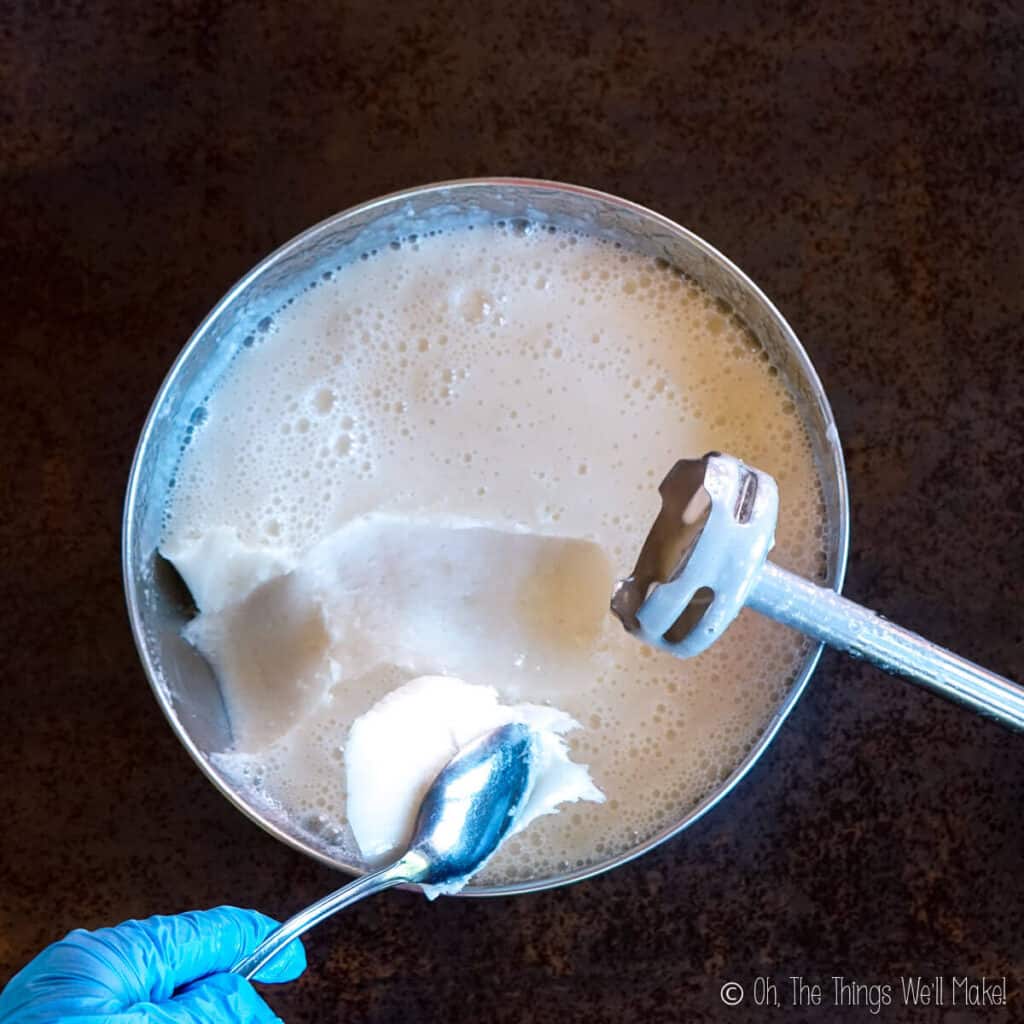
Using an immersions blender, blend the ingredients together. The mixture will begin to thicken after a few minutes. A couple of minutes later, the mixture will probably begin to look grainy. Continue to blend. (You can take breaks to give your blender time to rest. This helps prevent burning out the motor.)
Soon after the mixture gets smooth again, it will start to thicken. At that point, you may want to remove the immersion blender as the mixture turns into a paste pretty suddenly. (You don’t want to burn out the motor of the blender or get it stuck in the soap paste.)

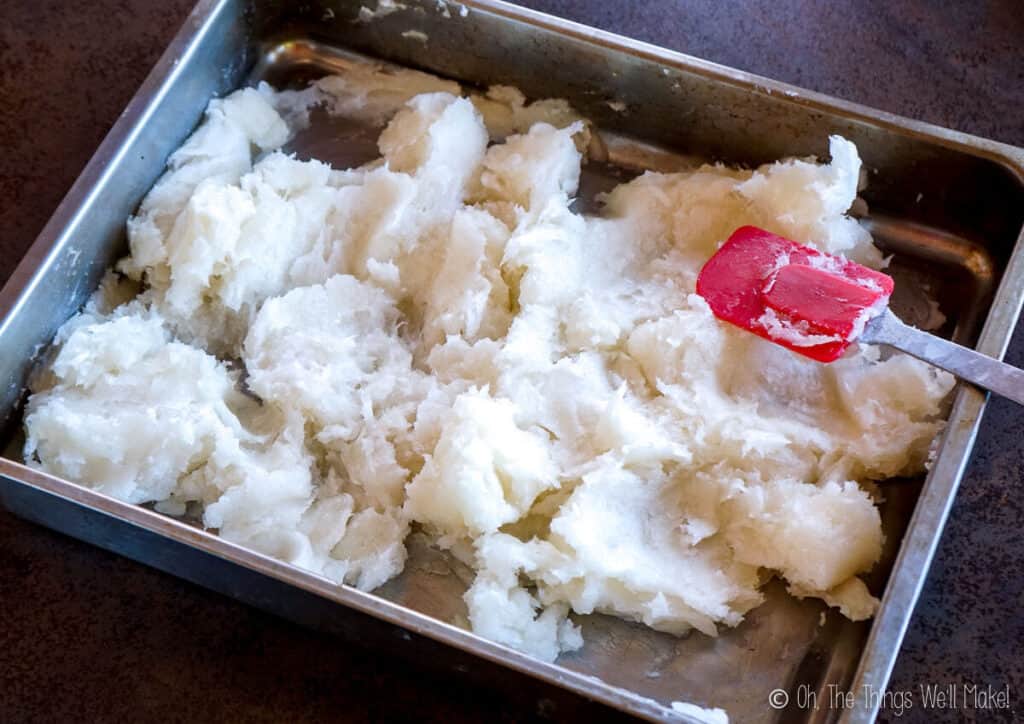
Cooking the soap paste
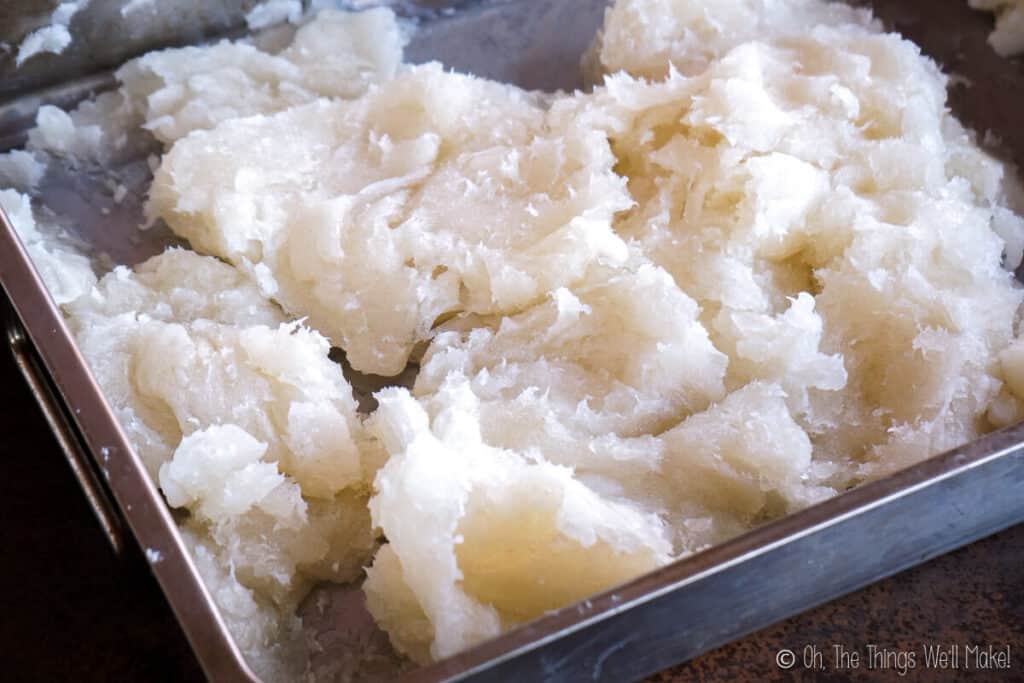
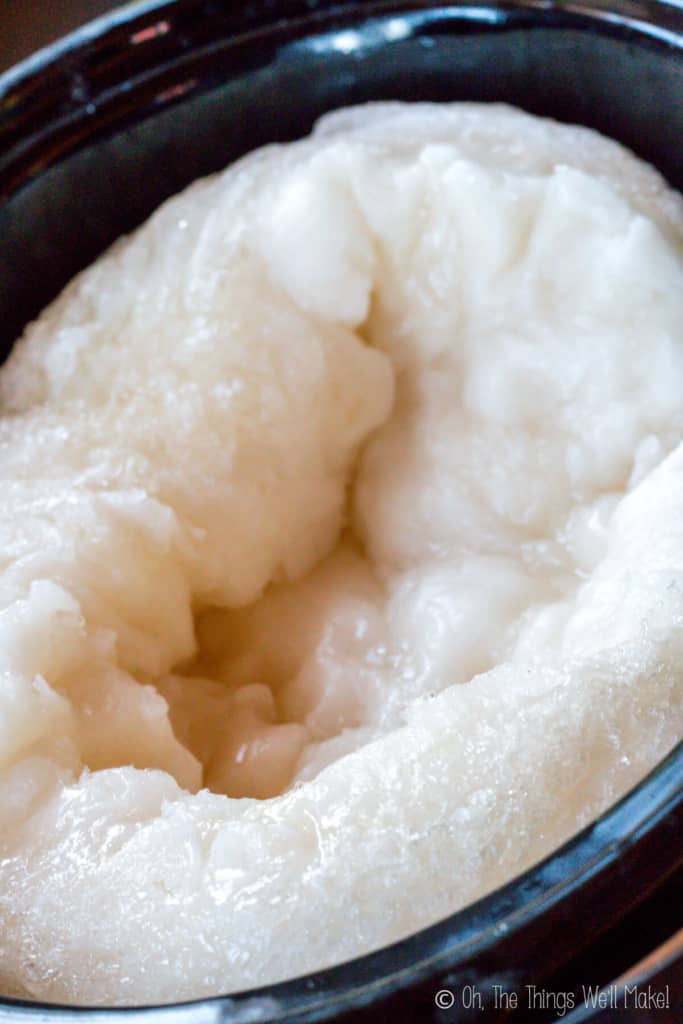
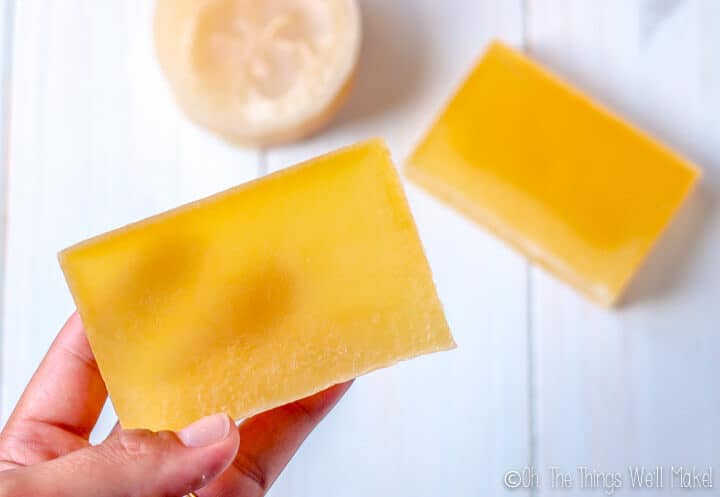
Once the paste has formed, it should be cooked to help finish the saponification process and make a translucent soap. (I’ve tried skipping this step and the paste stayed opaque and the finish soap was on the cloudy side. Even cooking for a short time, though, was enough to get the paste to the point where it could finish the process on its own, with time.)
Cooking in the slow cooker is the best option, if you have one. If you’re using a slow cooker, cover the soap and cook it on low for several hours.
If you don’t have a slow cooker, the paste can be spread out on a baking sheet and baked in the oven at around 70ºC/160ºF. (Ideally, cover the soap paste so that it doesn’t dry out too much.)
I tried cooking my last batch in the oven and my soap paste didn’t get as translucent as it does in the slow cooker. Perhaps, it would have had I cooked it longer and covered it. It may have also helped to increase the temperature slightly. In any case, the saponification process did complete and the soap is safe to use, but it was slightly cloudier than the soap I make in the slow cooker. (See my video!) I’ve found that soap pastes that haven’t gone fully translucent generally improve with time.
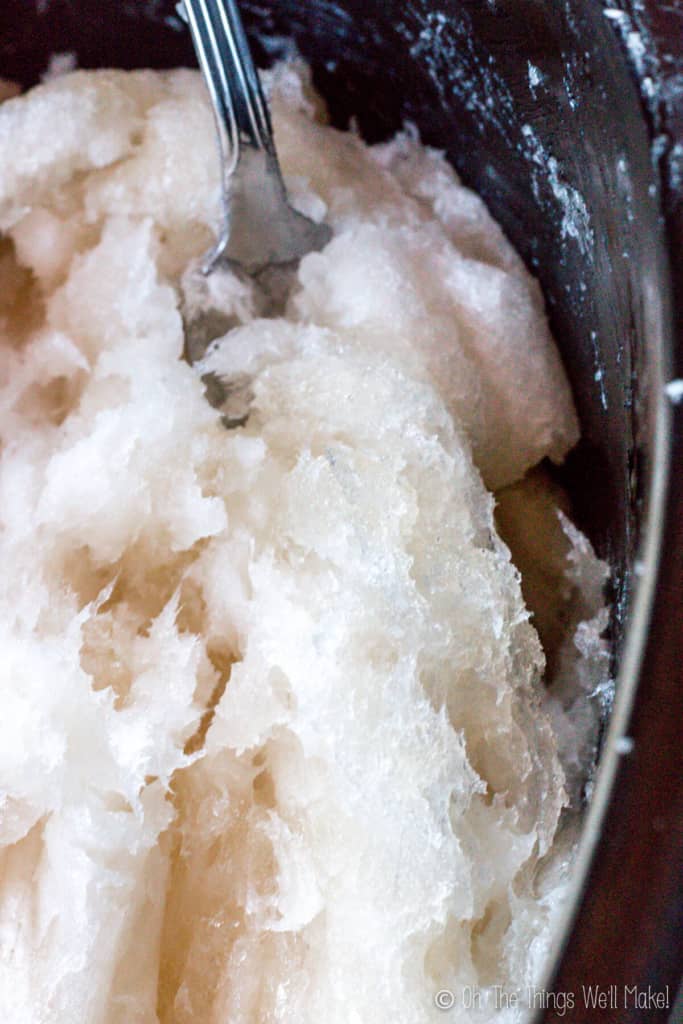
Every half hour or so, try to mix the soap paste as best you can. You can flip it over to expose different parts of the soap paste to cook the paste evenly. As it cooks, the mixture will become more translucent. The process will take 3-4 hours.

Check for doneness
There are several ways to test for “doneness.”
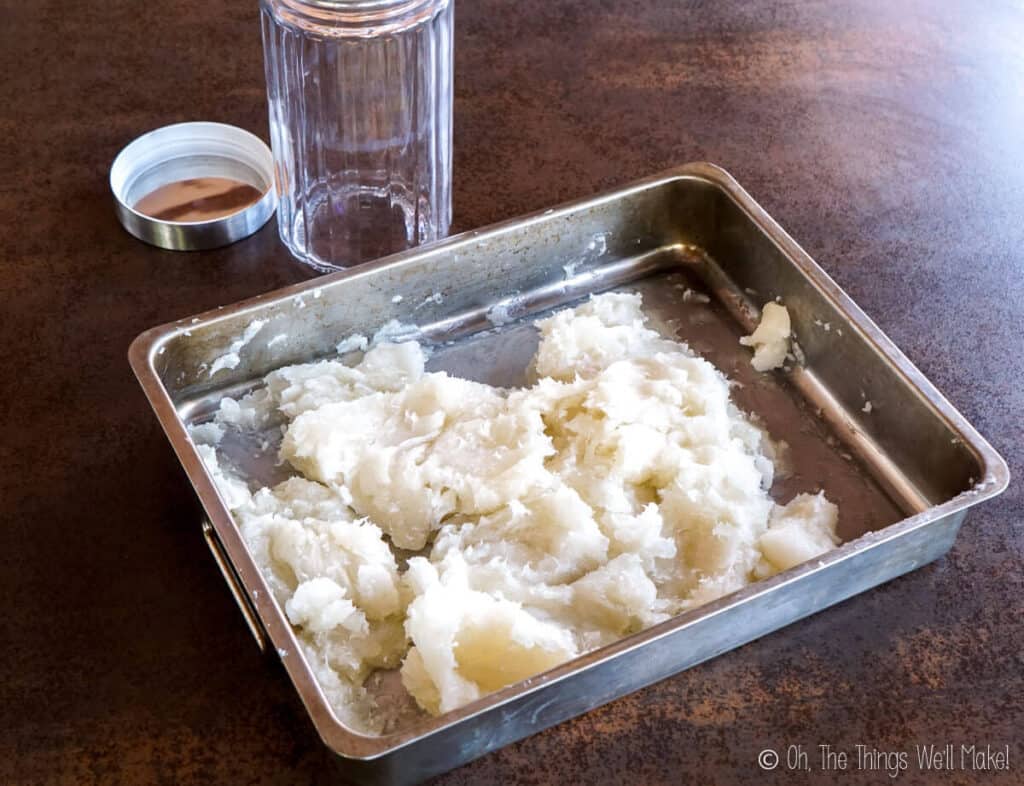
One method is to dissolve a small amount of the paste into distilled water, checking to see if dissolves into a clear soap. If the liquid is cloudy, you can continue to cook the soap in the slow cooker for another half an hour before checking on it again. If it dissolves clear, you are finished making the soap paste.
Another method is to use the zap test.
The zap test
To check for safety of the soap, many soap makers rely on what is called the zap test. To zap test a liquid soap paste, run your wet finger over the surface of the paste and then touch your soap-covered finger to your tongue. If the soap is caustic, it gives a zapping sensation. (This has nothing to do with flavor.)
If the soap doesn’t zap (if you can’t tell, it doesn’t), then it doesn’t have any more active lye, and should be safe to use.
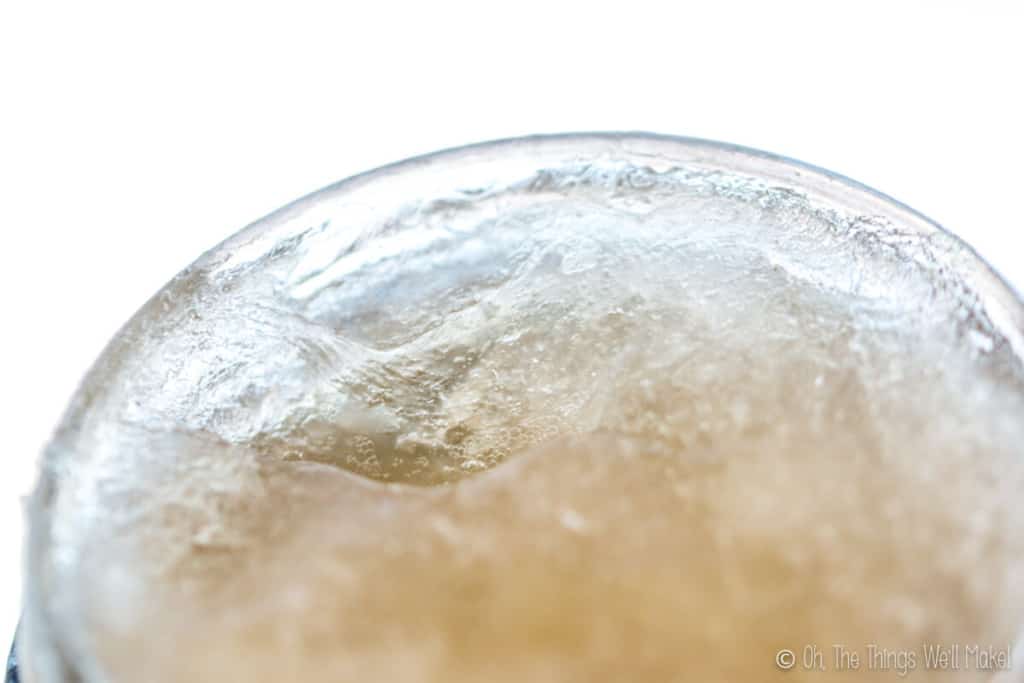
If the paste passes the zap test, but is still cloudy, it’s your call whether or not to continue cooking. Cloudiness is generally only a cosmetic issue and may be caused by a number of factors (including minerals in your water). Often, soap paste that isn’t translucent after cooking for a while will eventually get more translucent on its own.
(I once removed part of a soap paste before it was fully cooked to see what would happen, and after a few weeks, it looked just like the rest of the batch that had been fully cooked.)
Once ready, the soap paste can be stored or dissolved into liquid soap as needed.
Storage
To store liquid soap paste, scoop it into a covered glass or plastic container or in Ziplock type plastic bags. The soap paste can be kept in a cool, dark place for a very long time. (I’ve had soap pastes stored for years without issues.)
Avoid storing in metal containers and avoid contact with metal as certain metals can react with the soap paste and shorten its lifespan. (Don’t ask how I know that. 😏)
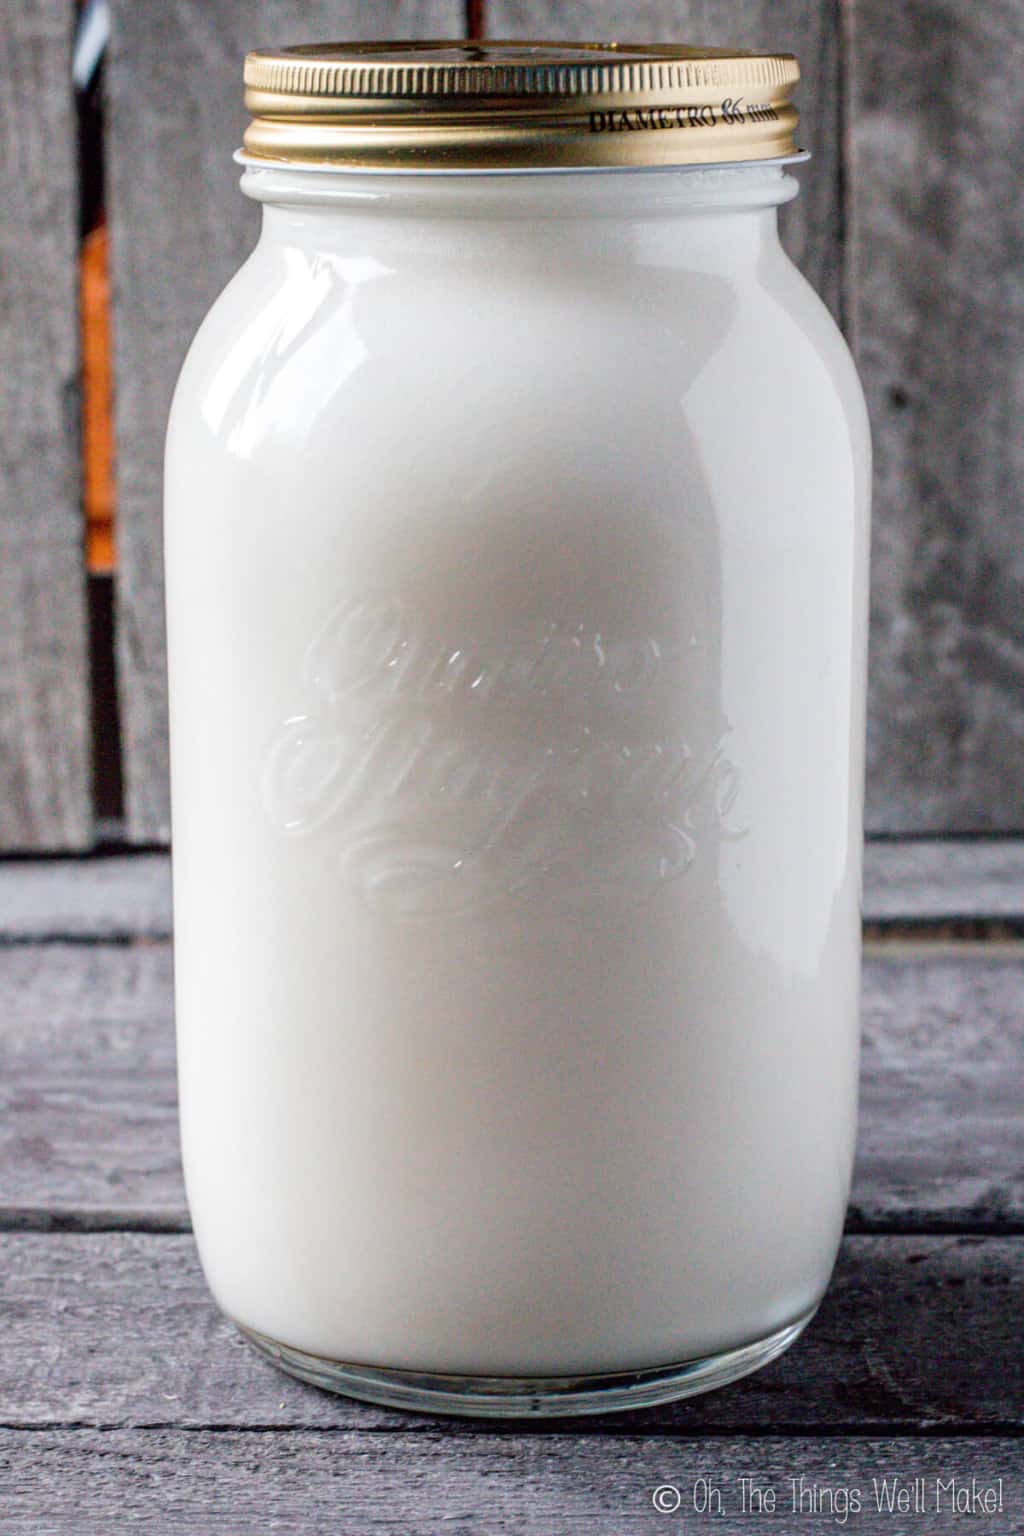
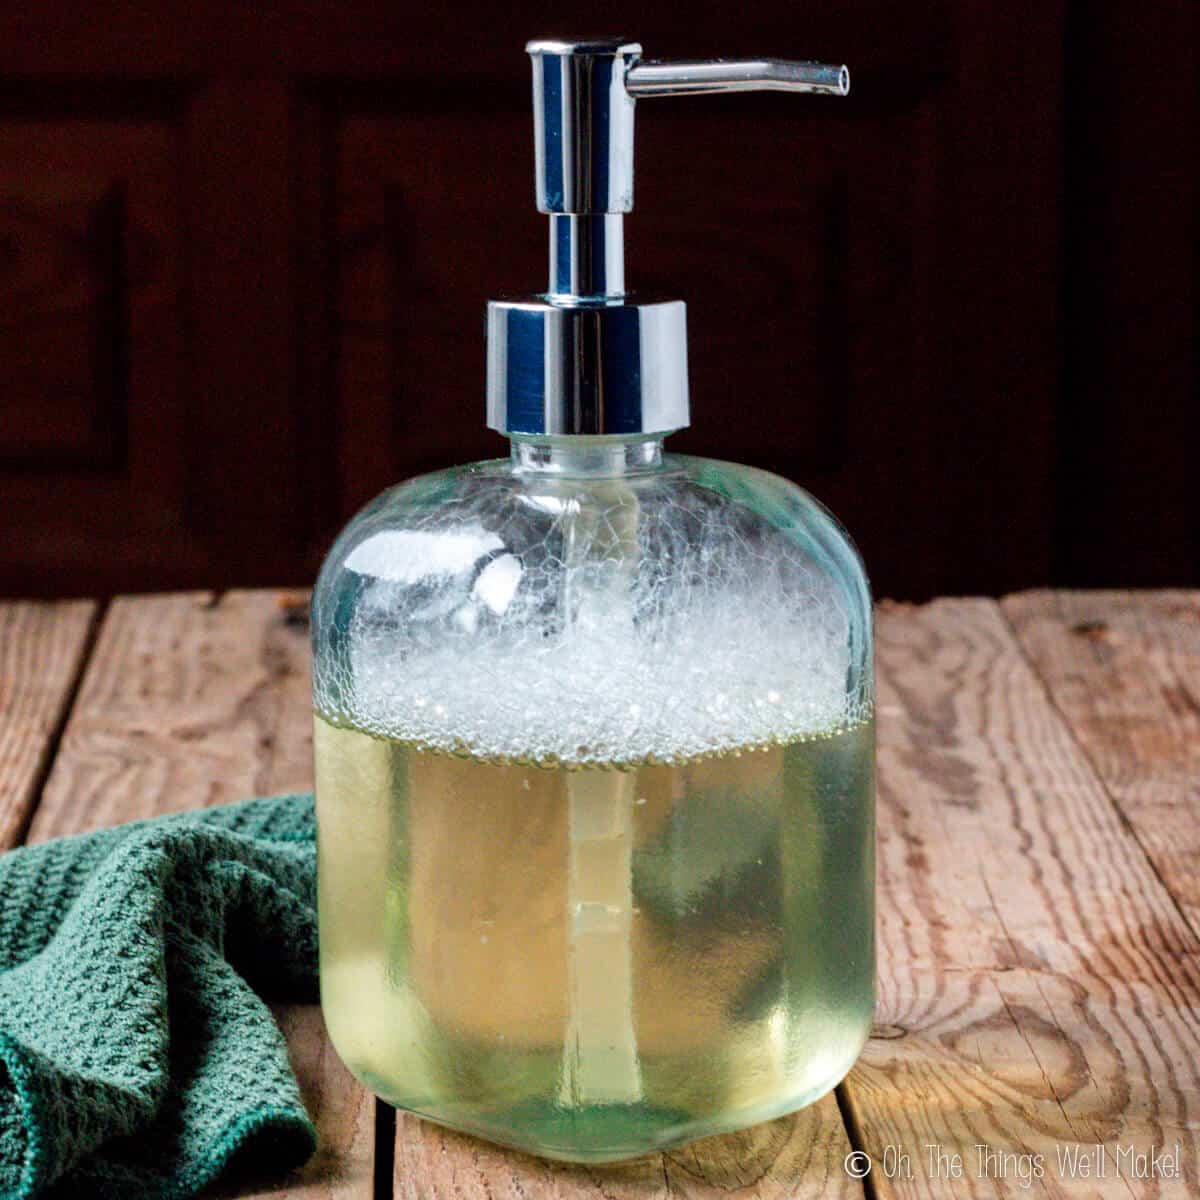
Diluting the soap paste
To use the soap paste, it will need to be diluted in water. I suggest using distilled water to ensure a transparent soap. You can add more or less water, depending on the desired concentration. I generally 1 part soap paste to 1-3 parts water.
For fragrance, I also often add a few drops of essential oils to my liquid soap at the time of dilution.
For more information about diluting the soap paste, read my post on diluting soap pastes.
Troubleshooting
Over the years, I’ve had many people writing me with various problems. One of the most common is that the soap isn’t transparent or that the paste doesn’t get clear no matter how long they cook it. There are several reasons that your soap may not be as transparent as you’d like.
Keep in mind that cloudy soap is generally safe to use, it just isn’t as pretty as clear soap. If your soap paste passes the zap test, it should be completely safe to use.
Temperature
Just as coconut oil turns solid and opaque in cold temperatures, so does this liquid soap, to a certain extent.
My partially diluted liquid coconut oil soap turned an opaque white and thickened up in the winter. When the weather warmed up again, the soap cleared up. This is only a cosmetic issue, but you can dilute it more in the winter than you would in the summer if you want it to be clear.
amzn_assoc_placement = “adunit0”;
amzn_assoc_search_bar = “true”;
amzn_assoc_tracking_id = “nativeads0f-20”;
amzn_assoc_ad_mode = “manual”;
amzn_assoc_ad_type = “smart”;
amzn_assoc_marketplace = “amazon”;
amzn_assoc_region = “US”;
amzn_assoc_title = “My Amazon Picks”;
amzn_assoc_linkid = “79ececd6ba76b6700c7f1df1a7973f22”;
amzn_assoc_asins = “B00H4BZM9M,B001EDK0WK,B00TJTASYG,B004O07LRC”;
Water used
The other most common issue is having used tap water to make the soap. Tap water has minerals and can have impurities that often make the soap look either cloudy or even opalescent.
For other problems, read my post about troubleshooting liquid soap problems.
Video

Homemade liquid coconut oil soap
Materials
- 32 oz. coconut oil
- 8.59 oz. KOH Not the lye (NaOH) used in bar soap.
- 17.77 oz. water
- 8 oz. glycerine
Instructions
Making the soap paste
- Melt the coconut oil. You can do this in a slow cooker or in a large bowl.
- In a large bowl, mix together the water and glycerin. In a separate, smaller bowl, weigh out the potassium hydroxide (KOH).
- Carefully pour the KOH into the water and glycerin mixture (not the other way around). Stir until fully dissolved. It will heat up and go from cloudy to clear.
- Pour the lye solution into the warm coconut oil and begin mixing.
- Use an immersion blender to blend the mixture. It will begin to thicken and may go through a grainy stage. Keep blending until it becomes smooth again and then thickens into a paste.
- Once the mixture reaches a thick, putty-like consistency, stop blending.
Cooking the soap paste
- Cook the soap paste to help finish saponification. If using a slow cooker, cover and cook on low for several hours. If using an oven, spread it on a baking sheet and bake at about 70ºC/160ºF
- Stir or flip the paste every 30 minutes or so to help it cook evenly.
- The paste is ready when a small amount dissolves into clear soap in distilled water.
Dissolving the liquid soap paste
- To make liquid soap, dissolve the paste in water. Start with about 1 part soap paste to 1–3 parts water and adjust as needed.
- Let it sit to dissolve, or use gentle heat and stirring to speed up the process.
Notes
This post was originally published on October 21, 2016. It was rewritten in May of 2021, adding clearer instructions, new photos, and video.


Can I use this as a shampoo?
Hi Esme,
I wouldn’t recommend it. While it will clean your hair, true soap has a naturally high pH, whereas hair and the scalp are healthiest in a more acidic pH range. Over time, using soap as a shampoo can leave hair feeling rough, tangled, or dull, especially if you have hard water.
I explain this in more detail here if you’re interested: Why pH Matters in Homemade Cosmetics.
If you’re looking for a liquid shampoo, I’d recommend using a surfactant-based shampoo recipe rather than a true soap.
I’m excited to try out! how can I go about adding let’s say some argan oilor vitamin e oil to make this more conditioning?
Hi Shandel,
With true soap, you can’t just add extra oils at the end to make it more conditioning. Any oil you add during the soapmaking process needs to be included in the lye calculation or it can throw off the balance.
Vitamin E isn’t really a conditioning oil in soap. It’s more of an antioxidant and won’t survive the high pH very well anyway.
If you want something more conditioning, your best bet is blending some of this with the olive oil liquid soap, or reformulating the recipe with additional oils and recalculating the lye.
This worked exactly as written, thanks!
Thank you for the recipe. My son’s skin reacts to every organic/natural face wash I bought so far, so I plan on making one for him.
I was wondering if the water could be replaced with fresh aloe vera fillet that I grind myself in the vitamix. Also, could another oil be used in conjunction with coconut? Castile soap with just coconut can be a bit more harsh on his very sensitive skin.
Hi Ann,
I wouldn’t recommend replacing the water with fresh aloe that you blend yourself. Fresh aloe contains sugars and other components that can scorch during the lye phase and can also make the soap unstable.
If you want to use aloe, a small amount of commercial aloe juice can sometimes be used as part of the liquid, but I would still stick mostly to distilled water.
As for the coconut oil, yes, you can absolutely combine oils. If your son has very sensitive skin, a higher olive oil percentage will likely be gentler. Just be sure to run any oil changes through a lye calculator before making it.
Works really well!!! Thanks!!
So glad to hear it worked well for you Ashley!
What are the key benefits of using homemade liquid coconut oil soap compared to commercial soaps?
Hi Hendrick,
Great question! One of the biggest benefits of homemade liquid coconut oil soap is knowing exactly what’s in it—no synthetic detergents, harsh preservatives, or mystery fragrances. It’s also incredibly cleansing (thanks to the coconut oil), and it lathers beautifully even in hard water.
That said, because coconut oil soap is so cleansing, it can be drying for some skin types. That’s why many people either dilute it or use it as a base to blend with more moisturizing oils.
Thanks for stopping by and for the 5-star rating!
Do you have any recipes using both liquid soaps? I purchased a large crock pot, and a stick blender at my local community thrift shops and planning to make the liquid Castile today, and anxious to see if you have recipes for face wash, or shower wash? Thanks.
Hi Barb,
That’s such a great find—hooray for thrift stores! I hope you have fun making the liquid Castile soap.
Over the years, I’ve made both the liquid coconut oil and liquid olive oil (Castile) soaps, and what really surprised me was how similar they felt once finished. Aside from the color, I didn’t notice a huge difference in how they performed. That’s actually the opposite of my experience with bar soaps, where the difference is dramatic.
With bar soaps, the oils completely change the final product—coconut oil soaps are super hard, bubbly, and cleansing, while 100% olive oil (pure Castile) bars stay soft much longer and tend to feel slimy or slippery rather than bubbly. It’s almost like comparing two totally different products. But with liquid soaps, that contrast just isn’t as extreme, so you can play around a bit more without worrying too much about the outcome. I often use the coconut oil version for body wash and really love it.
And even though Castile soap traditionally refers to olive oil soap, most modern “Castile-style” liquid soaps (like Dr. Bronner’s) are actually made mostly with coconut oil—so don’t worry about sticking to one “right” formula.
Thanks so much for your comment—have fun experimenting, and let me know how it goes!
I love your approach to creating liquid soaps. I even used it for a tallow recipe.
I havent tried the coconut for laundry soap but look forward to trying it.
Would this be a good option for toilet bowl cleaner or should use something else?
Hi Julie,
For general cleaning, yes, this works great. For toilet bowls, you could try it, but you might want to use something more acidic because mineral buildup and hard water stains respond better to acids than to soap.
This would clean the surface, but for descaling and buildup, something like vinegar or a citric acid solution tends to work better.
Do you need a separate crock pot and blender specifically for this or can I use what I have to cook dinner with? Can the chemicals be washed away?
Hi Stephanie,
You don’t need separate equipment. Once the soap is fully made and neutralized, it’s just soap. I use my regular slow cooker and immersion blender and wash them well afterward.
The only time to be cautious is during the lye stage. Make sure everything is stainless steel, heat-safe plastic, or glass. Avoid aluminum.
After everything is washed thoroughly, it’s safe to use your equipment for food again. (Lye is used in food prep, too, so it’s not really “toxic”. It’s used to cure olives and make the texture on some breads and pretzels.
Hi, it’s my first time making a soap and I am a bit confused about KOH. The KOH online available says 90% active, will it work for liquid soap or should it be 100%?
kindly let me know
Thank you
Hi Sarah,
90% KOH is actually very common for soapmaking and is what most liquid soap recipes are calculated for. (The rest is just moisture/water.)