

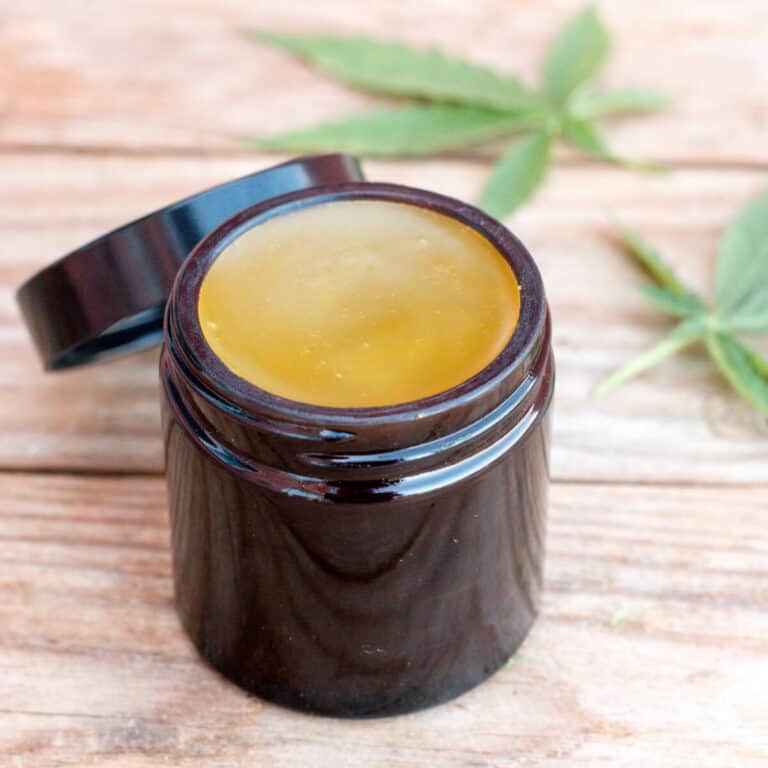
Homemade After Sun Lotion

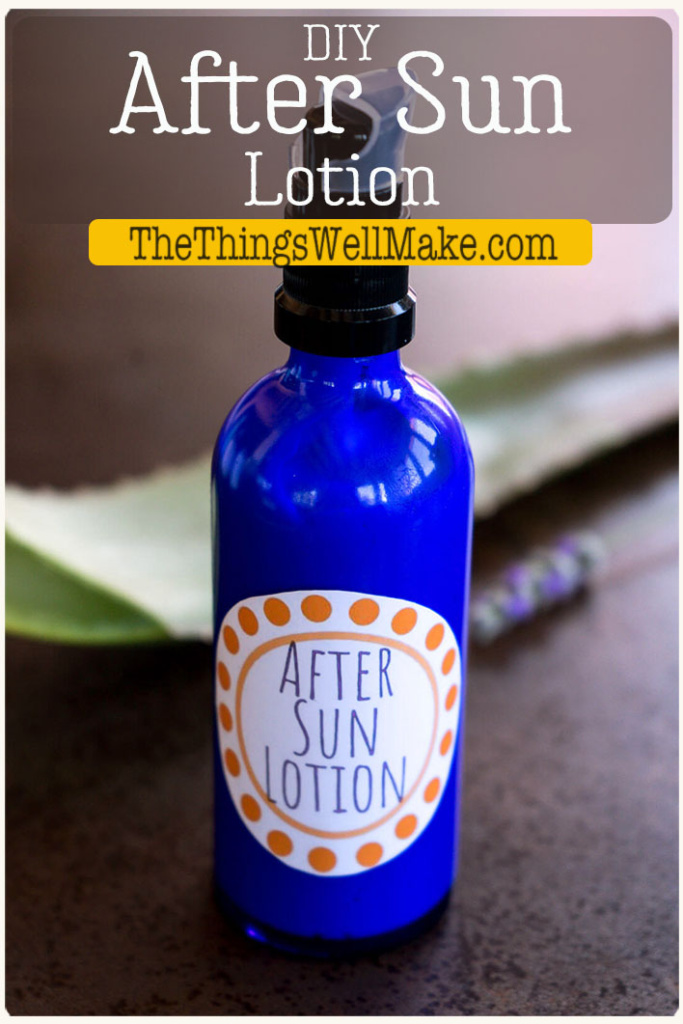
Soothe irritated skin and replenish its moisture after a day in the sun using this homemade after sun lotion that nourishes skin with aloe and other calming ingredients.
When you’ve spent the day out in the sun, your skin tends to dry out more than it normally would. If you haven’t done a very good job of protecting your skin, and have allowed it to burn, you’ll need to be even more careful about what you use on your damaged skin. UV rays can cause the production of free radicals that can lead to cell damage and can prematurely age our skin.
Why use an after sun lotion?
While an after sun lotion can’t perform miracles and won’t be able to undo the damage you may have done to your skin when already sunburnt, it can help provide some relief and can also replenish the moisture lost.
It may also help provide some relief and allow you to recover more quickly.
Ideally, you should protect your skin from damage. Then, use the after sun lotion to hydrate your skin and keep it healthy!
Restore hydration
Because water is the main component of the lotion, moisture will be absorbed into the skin to help hydrate it. A lotion or gel is better than a body butter or solid lotion in cases like this where extra hydration is needed. (Oil-based products, without water, can form a barrier that keeps your skin from getting the hydration it needs.)
To help increase that hydrating effect, especially if you have been out in the sun for a long time, apply the lotion after you’ve rinsed off your skin in a cool shower with your skin still wet.
Keep moisture in
While it’s not ideal to cover the skin with a barrier of oils or butters while the skin is dry, once you’ve restored some moisture, the oils and/or butters will help keep that moisture in.
This lotion uses cocoa butter to help seal the moisture in. Cocoa butter is a popular choice in summertime cosmetics because it’s thought to help prolong the life of your tan.
Help provide healing
While an after sun lotion can’t turn back the hands of time and won’t be able to undo any damage already done to your skin, certain plant extracts and antioxidants may help fight the free radical formation that leads to further damage.
Extending the life of your tan
Using a lotion like this one daily can help prolong the life of your tan by keeping your skin hydrated and preventing the peeling of your skin.
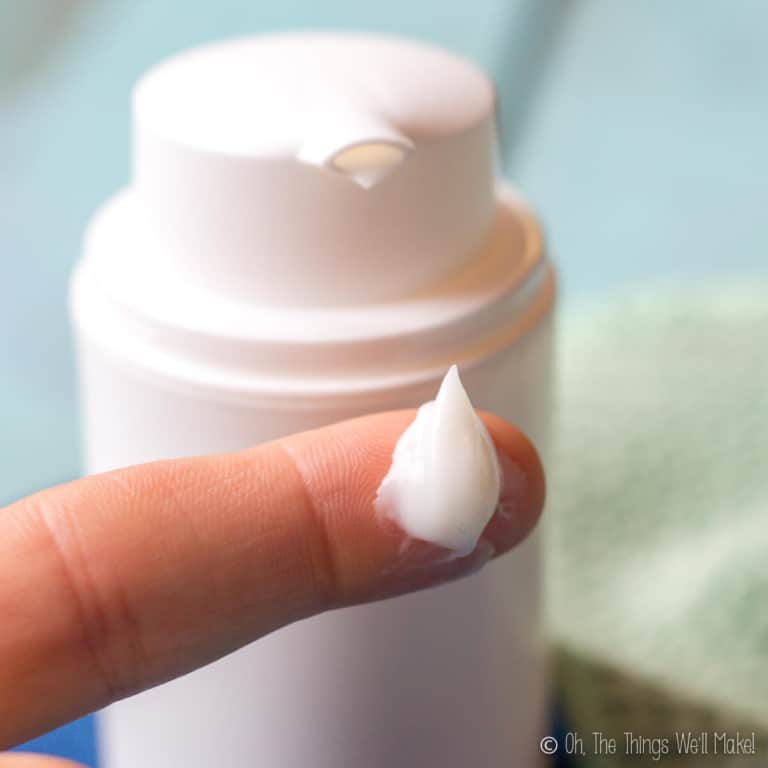
Ingredients
A good after sun lotion will provide hydration, will seal in that moisture, and will provide ingredients that can help heal the skin.
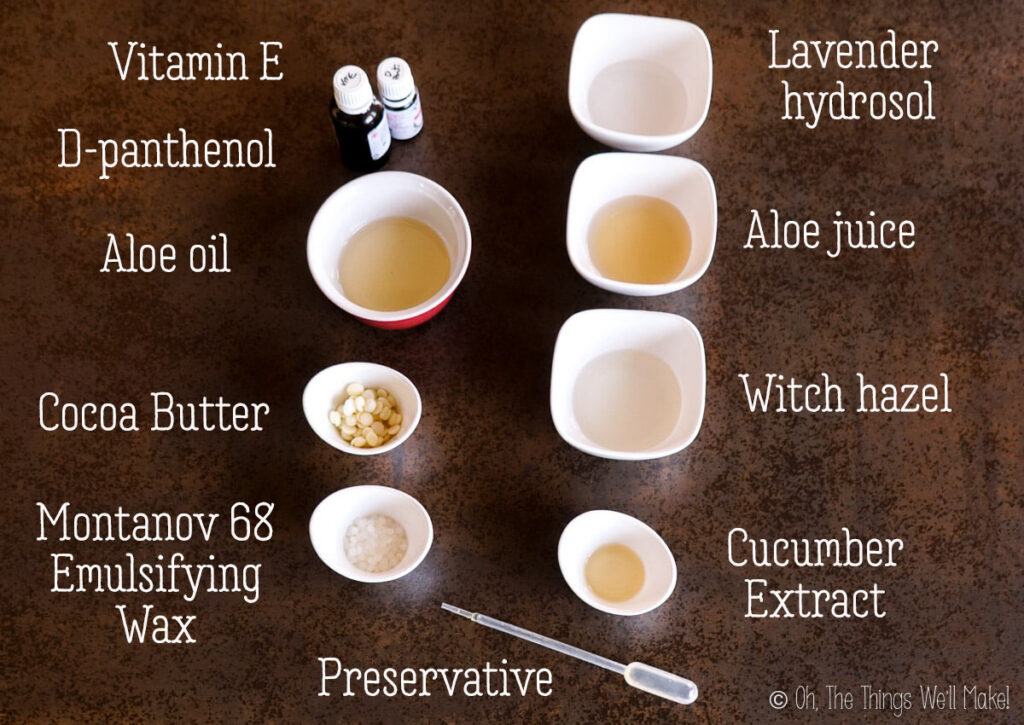
Hydrosols and essential oils
For the water component of my lotion, I used a mixture of a hydrosol, witch hazel, and aloe vera juice. There are a variety of hydrosols that you can use.
The first time I made this, I used a combination of lavender hydrosol and lavender essential oil. Lavender has anti-inflammatory properties that can help soothe your skin. Both the hydrosol and the essential oil can also add a nice fragrance to your lotion.
Mint is another option to consider. Mint gives a cooling sensation that can be pleasant after a day out in the sun. Some people, though, might find it irritating to their skin. (Only using the hydrosol and choosing a different essential oil like lavender, would be a great way to reduce skin irritation when using mint.)
Aloe Vera
One thing that most after-sun lotions and gels have in common is the addition of aloe vera gel. Aloe vera has a soothing, cooling effect on the skin, making it perfect for use after spending a day in the sun.
I decided to use both aloe oil and aloe juice in my homemade after-sun lotion. I made the homemade aloe oil by infusing dehydrated aloe into coconut oil. Learn how to make your own aloe oil.
Too much aloe gel or juice or the addition of freshly harvested aloe gel can make cosmetics more difficult to preserve. Since we are using more natural preservatives, it’s best to use aloe juice or gel from a cosmetic supplier (that is already being preserved properly) and to use a conservative amount.
To boost the soothing, healing effects of the aloe, you can apply a layer of aloe gel (fresh or store-bought) underneath this after sun lotion.
Vitamins and/or antioxidants
Vitamin E is a useful antioxidant that helps extend the life of the lotion. It also helps nourish the skin.
I also added d-panthenol, also known as provitamin B5. D-panthenol is one of my favorite ingredients for both skin and hair care products because it helps with wound healing and epithelial cell regeneration. (In haircare it helps restore moisture and aids in keeping the elasticity of the hair.)
While both of these are optional ingredients, I think that they provide great benefit to the after sun lotion.
I kept this lotion relatively simple, but you could also consider incorporating other vitamins like Vitamin C or niacinamide.
Other extracts
Witch hazel is another ingredient that cools and soothes painful skin. It can help reduce inflammation and shorten healing time. While I think it’s a great addition to the lotion, you can exchange it for more distilled water or use a hydrosol of some sort instead. (Rose water would be another great choice as it also has healing properties.)
Cucumber extract is another skin soother that helps give a cooling sensation. It’s a natural emollient (mine was glycerin-based) that will help draw moisture into your skin. Again, if you choose not to use it, you can either exchange it for water, glycerin, or another extract of your choice.
Cocoa Butter
Cocoa butter is an occlusive emollient. That means that it helps keep the skin moist by forming a protective barrier to prevent water loss. Cocoa butter helps keep skin soft and elastic which may help prolong the life of your tan by helping prevent peeling.
Emulsifying wax
To combine the water-based ingredients with the oil-based ones, we need an emulsifying wax.
I chose Montanov 68. It’s a natural emulsifying wax that gives a really nice, light, silky texture to lotions. I love how it is derived from coconut and yucca and that it is ECO-friendly and allowed in organic products. That said, you can use a different emulsifying wax if you prefer.
For more information about how and why to use emulsifying wax (and some of the ones you can use), check out my beginner’s guide to emulsifiers.
Preservative
Because this product has water-based ingredients in it, it is prone to microbial growth if you don’t use a broad-spectrum preservative.
What does that mean?
If you don’t preserve it, it will start growing mold and bacteria, some of which you may not be able to see or smell. Without a preservative, you would need to treat it more like food: keep this in the fridge and dispose of it after several days (maybe up to a week?).
There are many good preservatives that we can use for our homemade products. I used Sharomix 705 for my batch, but you can use whatever broad-spectrum preservative that you have on hand.
Just keep in mind that you need to dose the preservative according to the amount suggested by the manufacturer or supplier. Also, make sure that your lotion is in the effective pH range for your particular preservative.
Some preservatives, like Leucidal, need to be used in higher concentrations (3-4%) to be effective alone. To compensate for that, you can subtract a couple of grams of water to keep the total recipe at 100g=100%.
For more information about preservatives, check out my beginner’s guide to natural preservatives.
Procedure
Making this lotion is just like making a basic lotion.
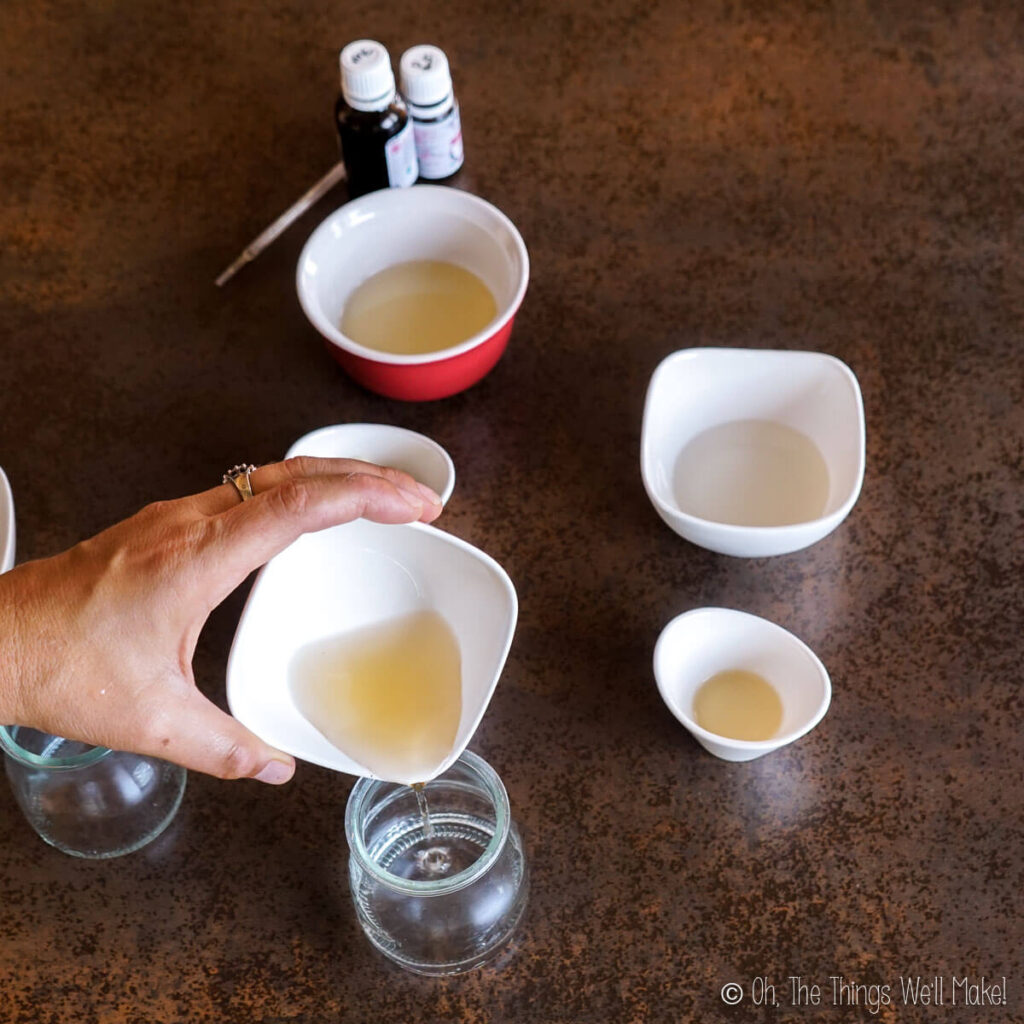
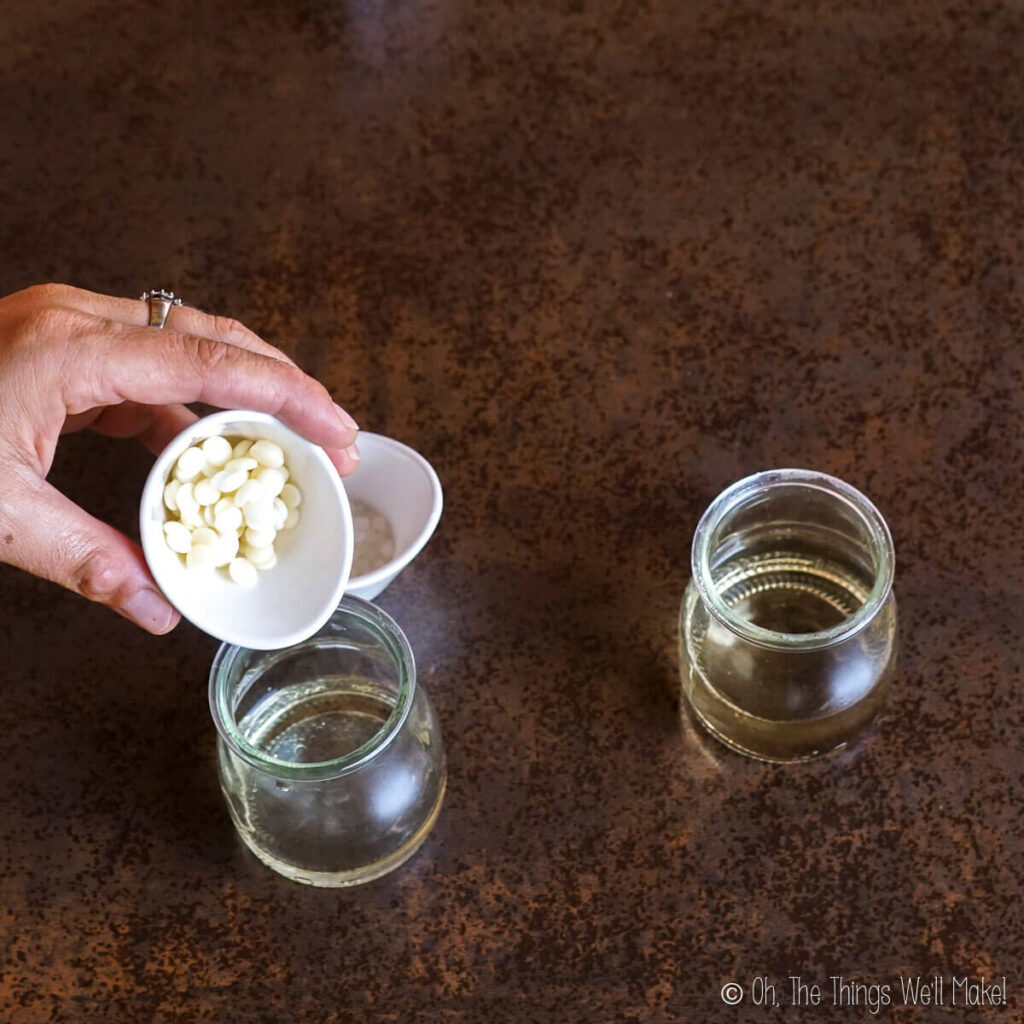
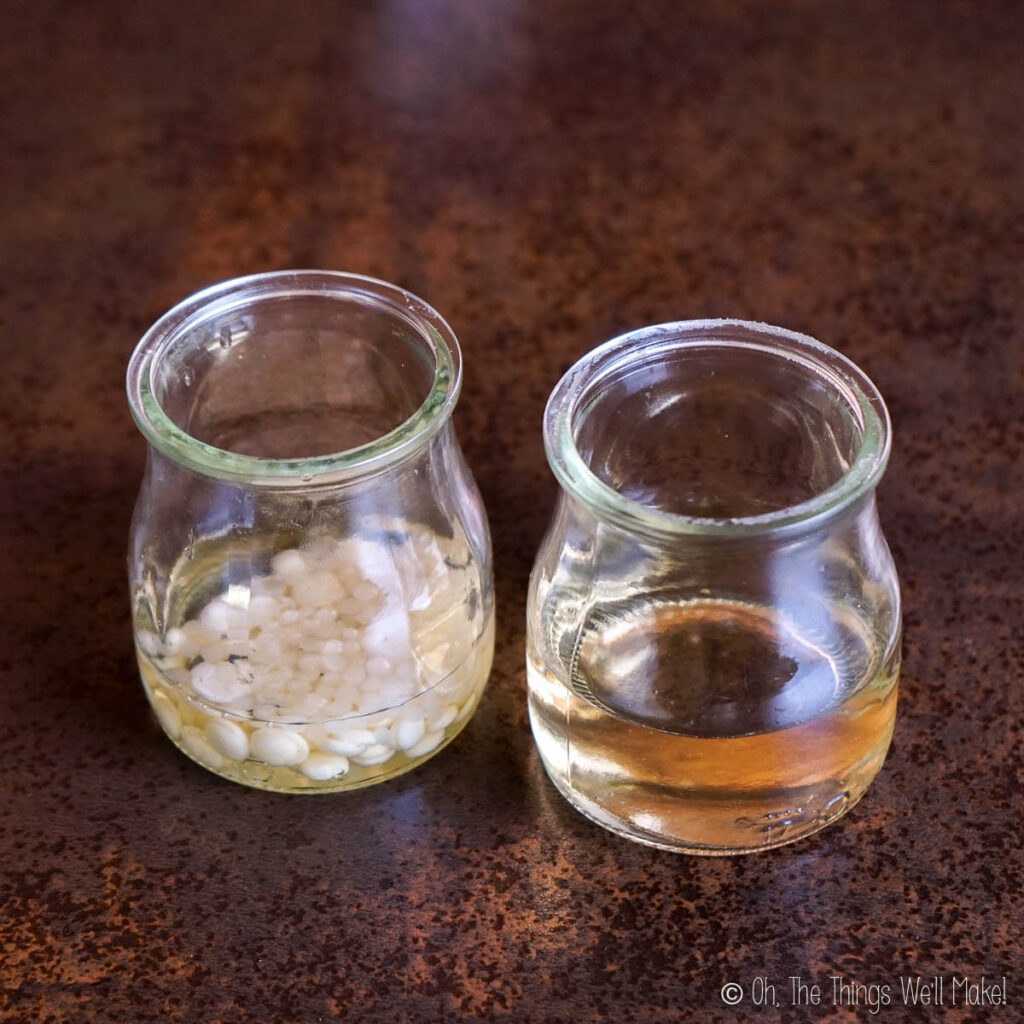
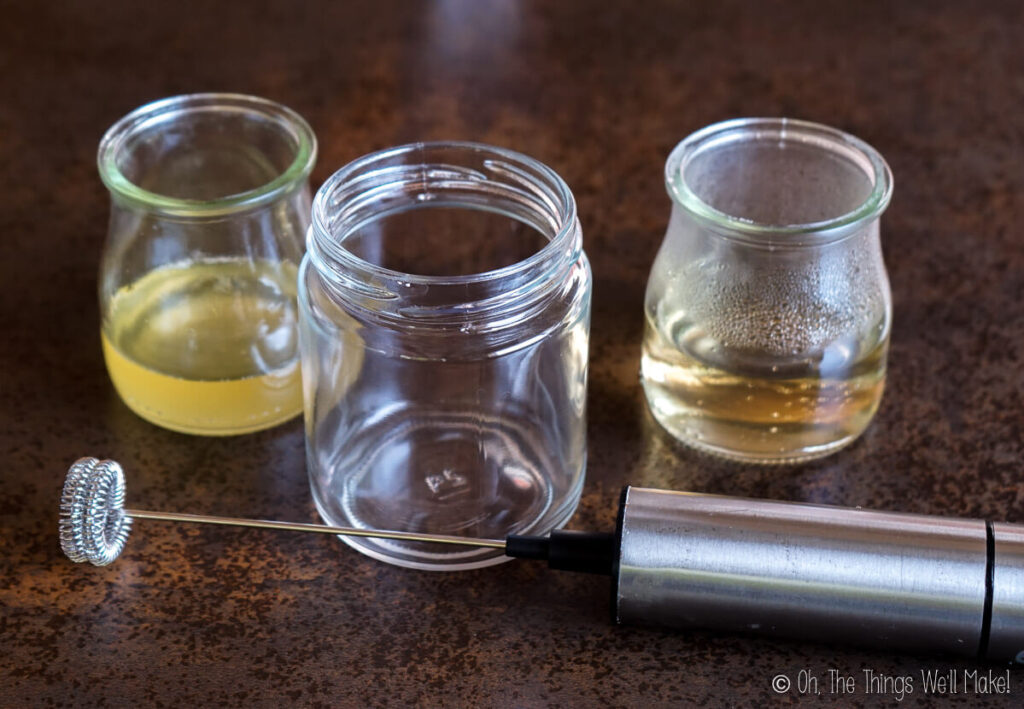
First, combine the witch hazel, aloe juice, lavender hydrosol, and cucumber extract in a heat-safe container. In a separate heat-safe container, combine the emulsifier, aloe oil, and cocoa butter. (You can also use double boilers or double boiler inserts.)
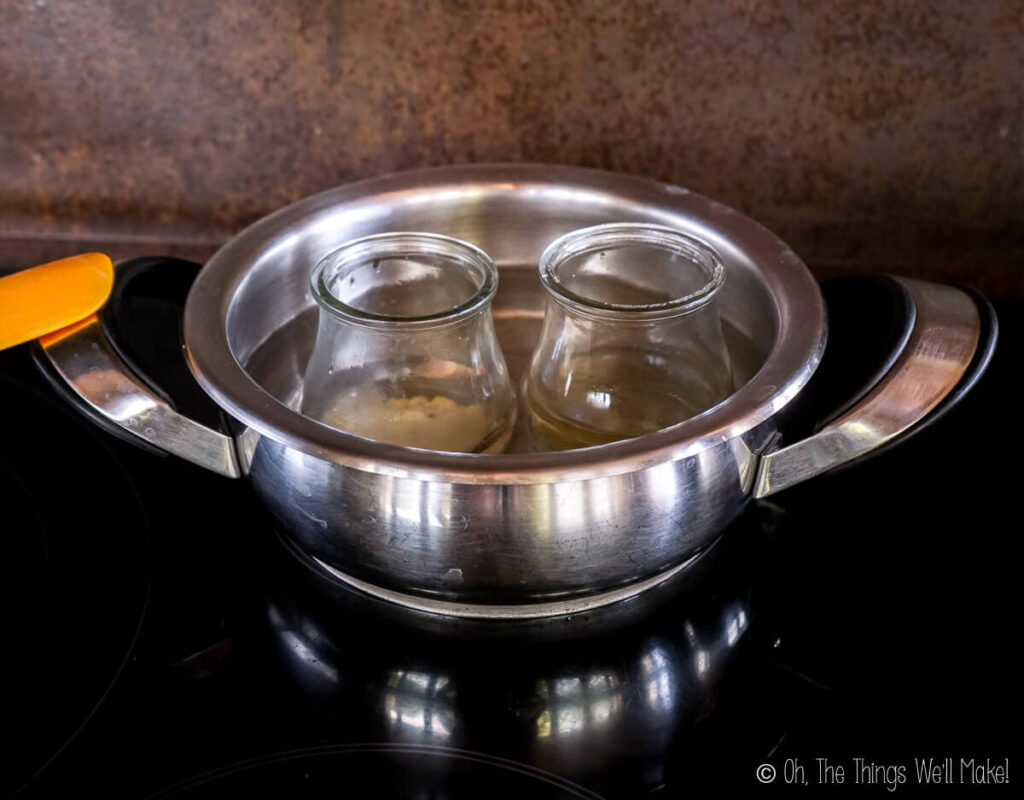
Gently heat the ingredients in a water bath until the emulsifying wax has completely melted. Ideally, both the water and oil phases should be around 75°C/165°F.
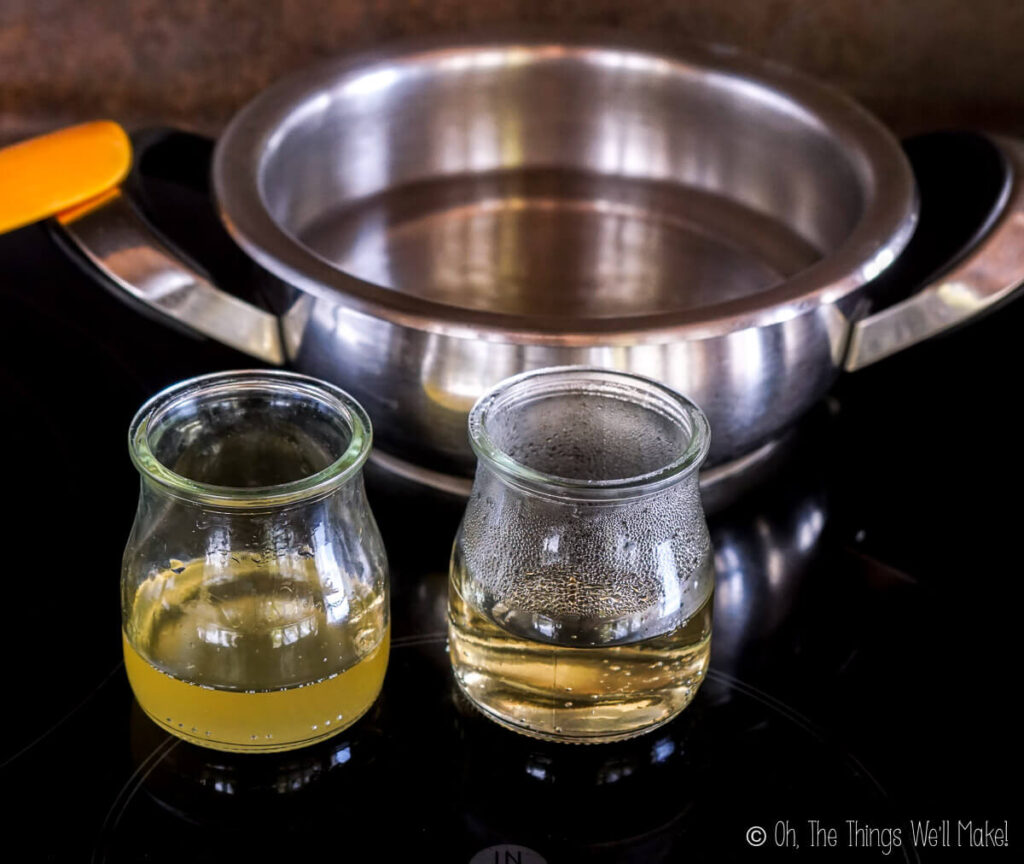
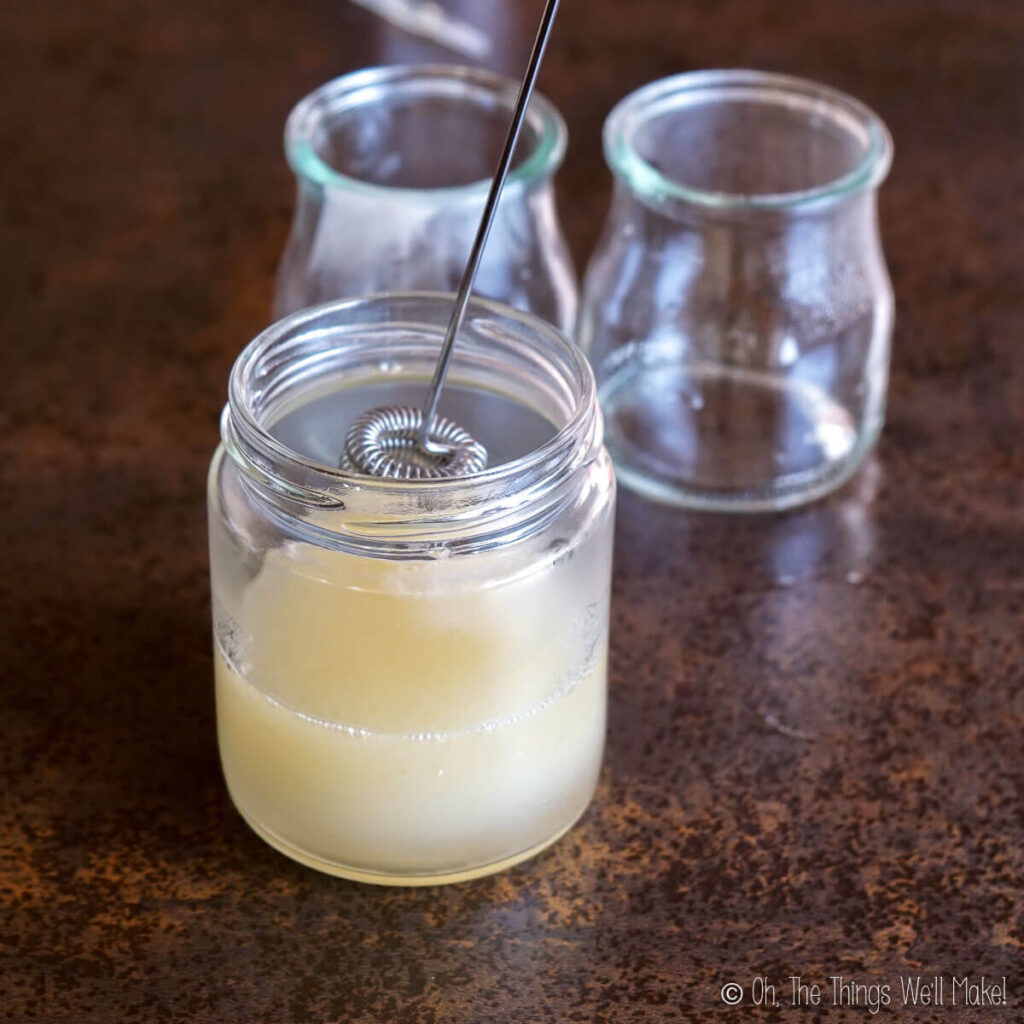
Remove the ingredients from the water bath and combine them. You can use an immersion blender to help form the emulsion. (For small batches like this, a milk frother is a great option.)
It’s very likely that the ingredients will separate again, which is normal. To make a stable emulsion, you’ll need to periodically blend the ingredients again as they cool.
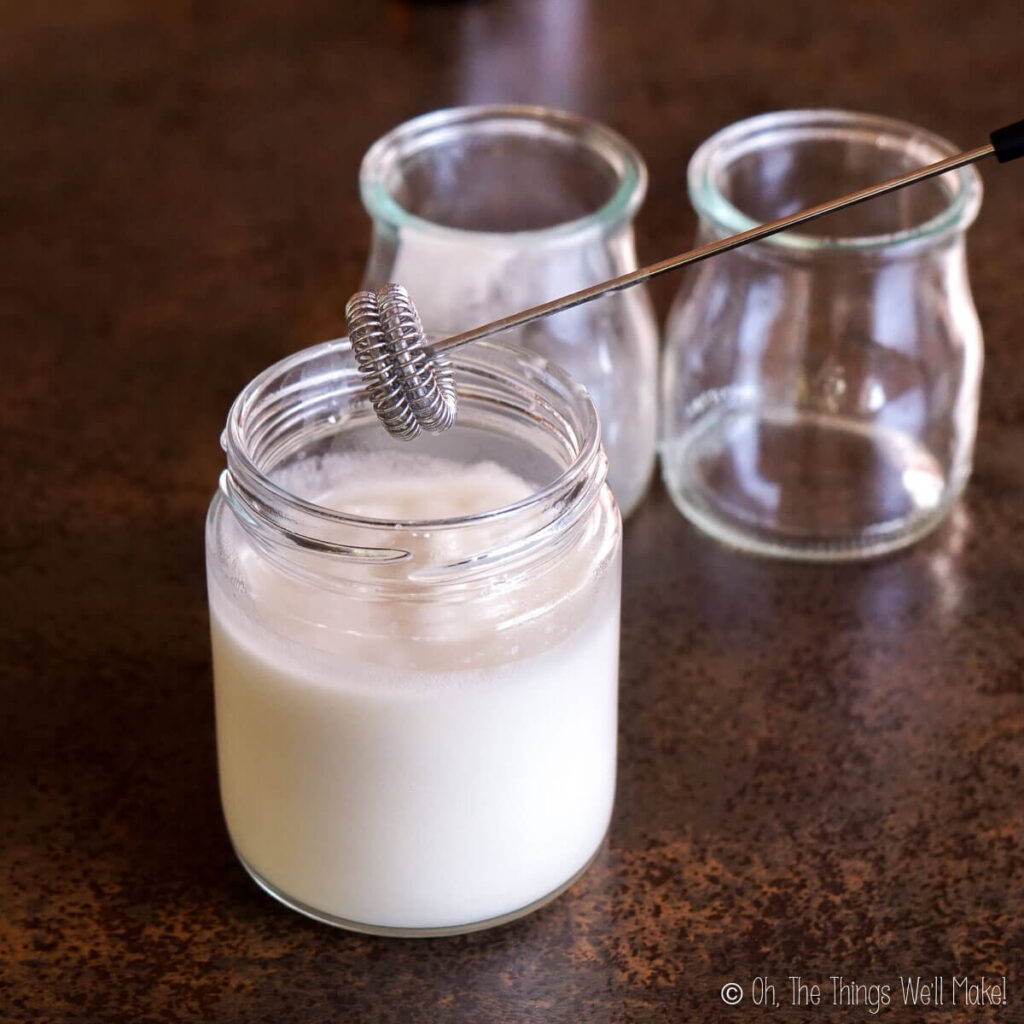
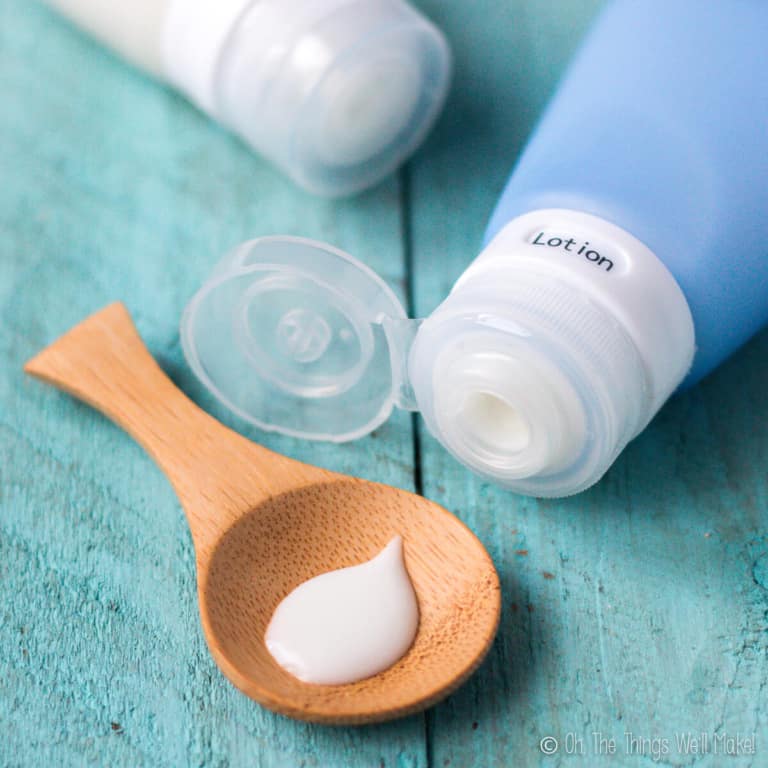
Once cooled, you can add in the heat-sensitive ingredients like essential oils, vitamins, and your preservative. Blend again and then pour into storage containers. (I love using silicone travel tubes or pump bottles for homemade lotions.)
How to apply this after sun lotion
While you can just apply the after-sun lotion to your skin directly after sun exposure just as you would any other lotion, there are benefits to rinsing your skin in cool water first.
Showering in hot water can be drying to your skin. After a day in the sun, a cool shower can be beneficial to gently remove salt, sand, and/or chlorine as well as any sunscreens or other products. The cool water will also help begin to restore some hydration lost with sun exposure.
Once you have cleaned your skin and started hydrating it again, you can apply your lotion. If you apply it while your skin is still slightly damp, that can help hydrate your skin even more. The oils and butter also provides a barrier that will help keep that moisture in.
If your skin is very dry and red, you could also consider applying a layer of aloe vera gel underneath the after-sun lotion.
Customizing the recipe
While I tried making this lotion very basic, there are some ingredients that you may not have on hand and you may want to exchange them.
Substitutes for the water-based ingredients
You can exchange any or all of the water-based ingredients for distilled water to make a simpler lotion. (That includes the hydrosols, aloe juice, witch hazel, and extracts.) You could also choose different hydrosols. Just keep the total liquid amount the same.
The cucumber extract could also be substituted with glycerin. Glycerin is a humectant which can help draw moisture into your skin. While it’s a great ingredients, I wouldn’t suggest using more that 5% of the total recipe (by weight) or it may cause the lotion to feel sticky.
Substitutes for the oil-based ingredients
I used my homemade aloe oil for the liquid oil in this lotion, but you can use plain coconut oil or another carrier oil in its place. It really depends on preference and how your skin reacts to certain ingredients.
For the butter, I chose cocoa butter because it provides a nice occlusive barrier and is commonly used in after-sun products. You could exchange it for another butter like shea butter or mango butter, though.
If you decide to use a different emulsifying wax, you may need to slightly adjust the amount used to get the texture you want. As you add more emulsifying wax, the product will get thicker and more cream-like. If you use too little it can be very thin or may even separate. Check with your supplier for a recommended dosage for whichever emulsifier you choose.
Is this lotion only for after being out in the sun?
Of course not!
This is a great general lotion with lots of benficial, skin-protecting ingredients. It is very soothing and gentle for all skin types.
My husband has been using it on his face as a general moisturizer. I’ve been using it as a general body lotion.
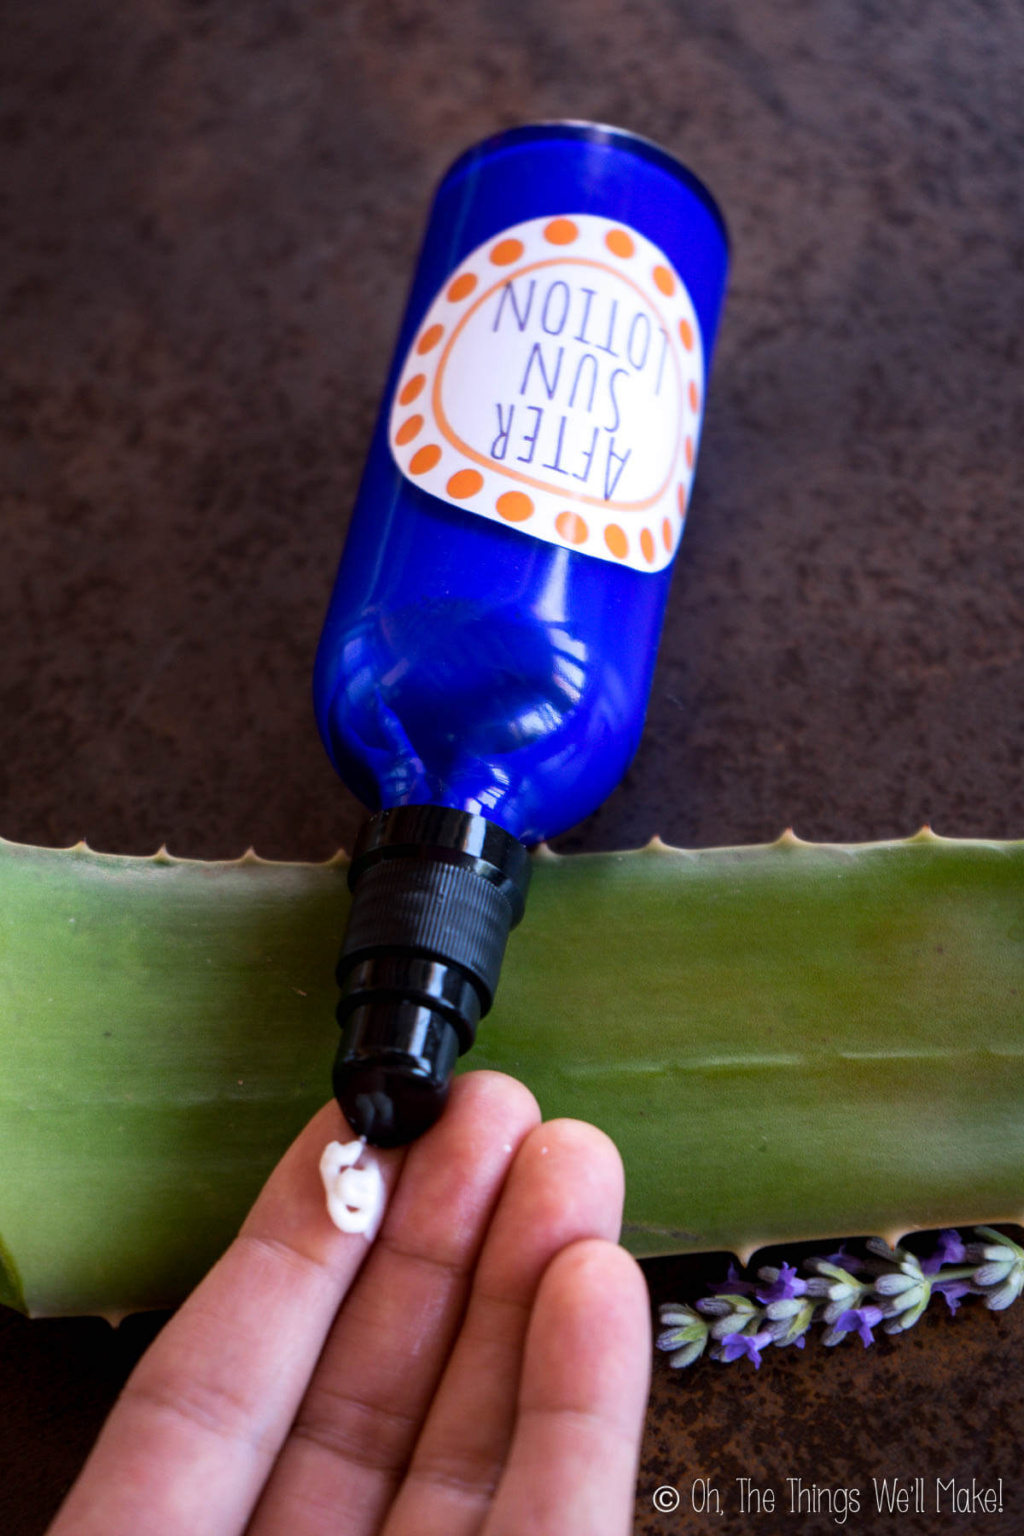
Label
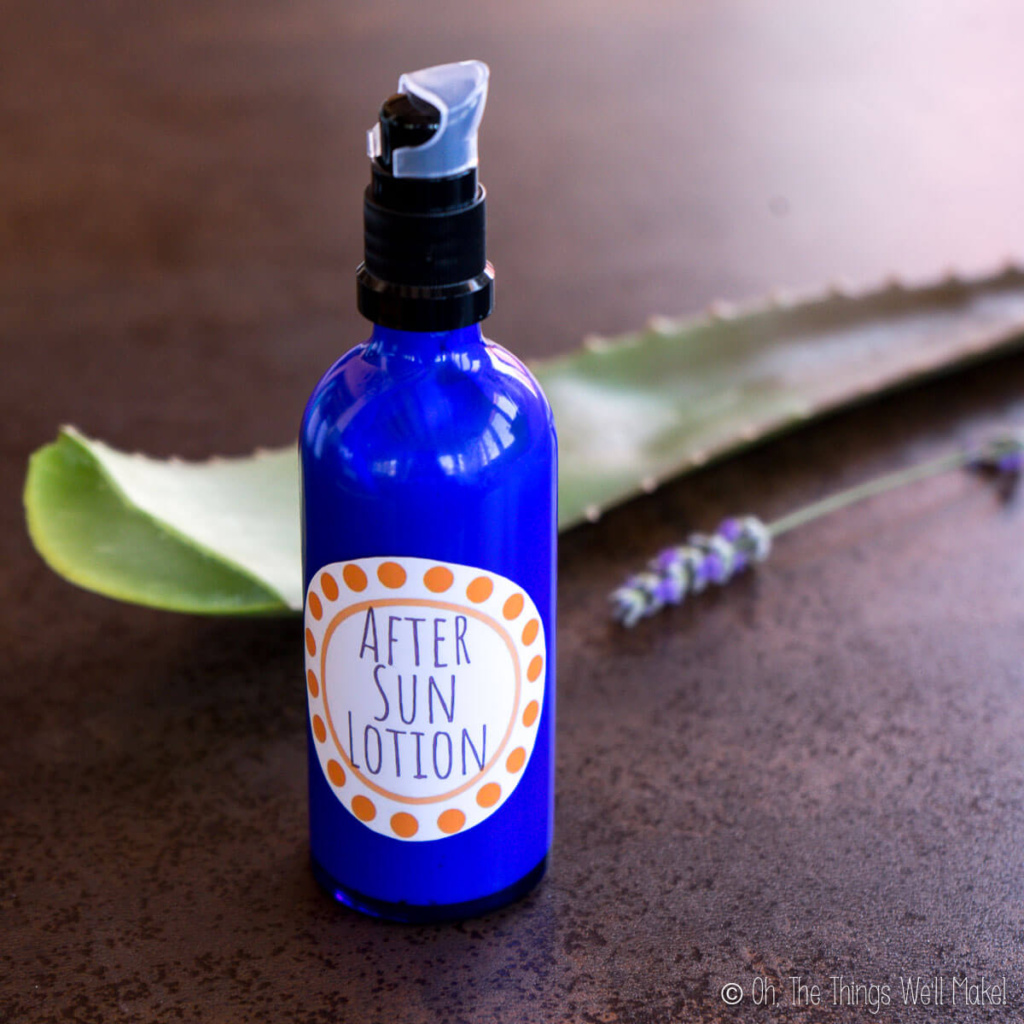
I’ve included my picture for you to use as a label for your after-sun lotion. To save it, right-click on the picture and click on “save image as.” Then, choose where you want to save it.
While you could print on waterproof labels, I printed 2 of these together on 4×6 inch (10x15cm) waterproof photo paper. That gave a good size for using on 100ml (3.4 oz.) bottles. I then cut the circles out and glued them to the bottles.
Video

After Sun Lotion
Materials
Water-based ingredients
- 20 g witch hazel
- 20 g aloe juice or aloe gel
- 20 g lavender hydrosol mint hydrosol is another option
- 3 g cucumber extract
Oil-based ingredients
- 20 g aloe oil
- 8 g cocoa butter
- 4 g emulsifying wax (I used Montanov 68)
Cool down phase ingredients
- 2 g d-panthenol
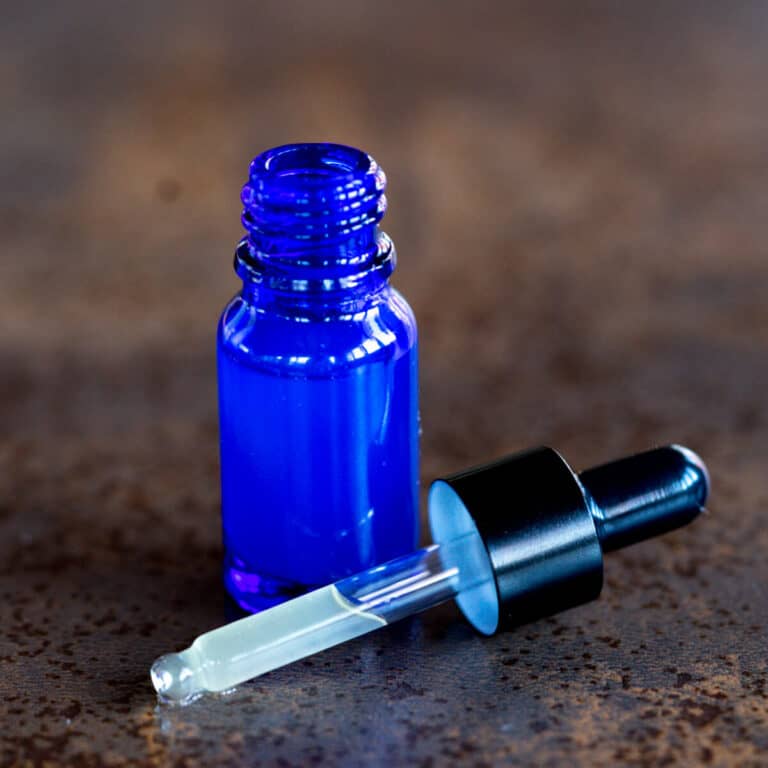
- 1 g Sharomix 705 or other natural preservative in adequate percentage
- 1.5 g lavender essential oil or another essential oil of choice
- .5 g vitamin E
Instructions
- Weigh out and combine the water-based ingredients (the witch hazel, aloe juice, lavender hydrosol, and cucumber extract) in a heat-safe container or double boiler insert.
- In a separate heat-safe container (or double boiler insert), weigh out the oil-based ingredients (emulsifier, aloe oil, and cocoa butter).
- Heat both containers over hot water until the emulsifying wax and cocoa butter melt. Ideally, the temperature of both should be around 75°C/165°F.
- Remove the containers from the heat source and add the water-based ingredients to the oil-based ones. Blend with an immersion blender or a mini blender. (A milk frother also works.)
- While the mixture is still warm, it will likely separate again. To make a stable emulsion, blend it every few minutes while it cools. It will start to thicken and stay together as it gets cooler.
- When the mixture cools to a temperature of around 45°C/110°F, add in the cool-down phase ingredients (the vitamins, essential oil, and preservative). Continue to blend occasionally until the mixture reaches room temperature.
- Pour your mixture into prepared containers. Pump bottles or silicone travel tubes are good options.
- You can now use your homemade after-sun lotion!


Hi, thank you for post this. Where can I buy Sharomix 705? I couldn’t find any links and my google search didn’t bring up any place where I can buy. Thank you.
Hi Diana,
I buy it here in Spain. It is very popular in Europe, but may be less popular in other parts of the world. I’d suggest using whatever preservative is easiest to find in your area and just make sure that it works for emulsions, that it works for the pH of this product, and use the dosage percentage recommended for your preservative.
I use it as a hand lotion. It’s great ?
I’m happy you like it, Christine! 🙂
Is cucumber extract the same as cucumber seed oil?
Hi Jenny,
No, it isn’t the same thing. I should post a tutorial for how to make a cucumber extract. It’s quite simple and involves infusing cucumbers into glycerin.
If you can’t find it, you can leave it out or sub it with a different extract. It’s not a critical ingredient.
Me again 🙂 Happily reading your articles, recipes and all things mixing and making.
Soooo, just wanted to say I’d love that post you were thinking of one day getting to, about different emulsifying waxes. Also, thanks again for an awesome site that keeps me inspired, learning and creating.
Lee
Hi Lee,
Thank you!
I’m working on it. That post may take a bit as I have ordered a few more emulsifying waxes, and I need to spend a few days testing them all out under similar conditions. It’s definitely one of the big ones I have planned for this year, though.
hai i was wondering if it would work if I made an herbal infusion and used that in place of the hydrosol? I’ve been wondering that for a few different recipes but I didn’t know if that would make it go bad quickly?
Hello!
Yes and no! 🤣
Sorry for that answer, but let me explain…
Yes, you can use an infusion in its place, but, yes, you are correct that it may reduce the shelf life of what you are making. It probably depends on how well you are able to filter out the dry ingredients of whatever infusion you are making. (So, I’d suggest using a teabag with tight weave versus a loose metal strainer.)
Adding organic material to a product can cause an increase in microbial growth. However, the extent of this growth depends on various factors. Your preservative should be able to handle certain additions to a certain point. Natural aloe and honey are notorious for making things harder to preserve. So, I probably wouldn’t try adding natural aloe, plus honey, plus an infusion…but just a well-filtered infusion? It probably wouldn’t be too bad.
The problem is that most of us aren’t challenge-testing our products, so it’s really impossible to know for sure. If it were me and I were only making this for myself, I’d go for it and just filter the infusion well. I wouldn’t add other organic material, and I’d just keep an eye on it and toss it if I noticed any changes in color, smell, etc.
Hi Tracy,
Will you be making a sunscreen lotion soon?
Thanks,
Bles
Hi Bles,
I have considered it. The main reason I’ve avoided it so far is that making homemade sunscreens is a bit controversial. It’s said that with home mixers, we can’t properly get the ingredients that work to block the sun (like zinc oxide and titanium dioxide) properly dispersed throughout the product- nor can we really properly determine the amount of coverage we are getting.
In all honesty, though, as long as one knows that going into the project- we can get some protection while making things at home. Perhaps we can’t make a product that we should be selling to others- but for our own personal home use- when used with caution- it should be fine.
Perhaps next summer, I’ll work on a recipe- with that disclaimer. 😉