

How to Make Soy Sauce (Homemade Shoyu)
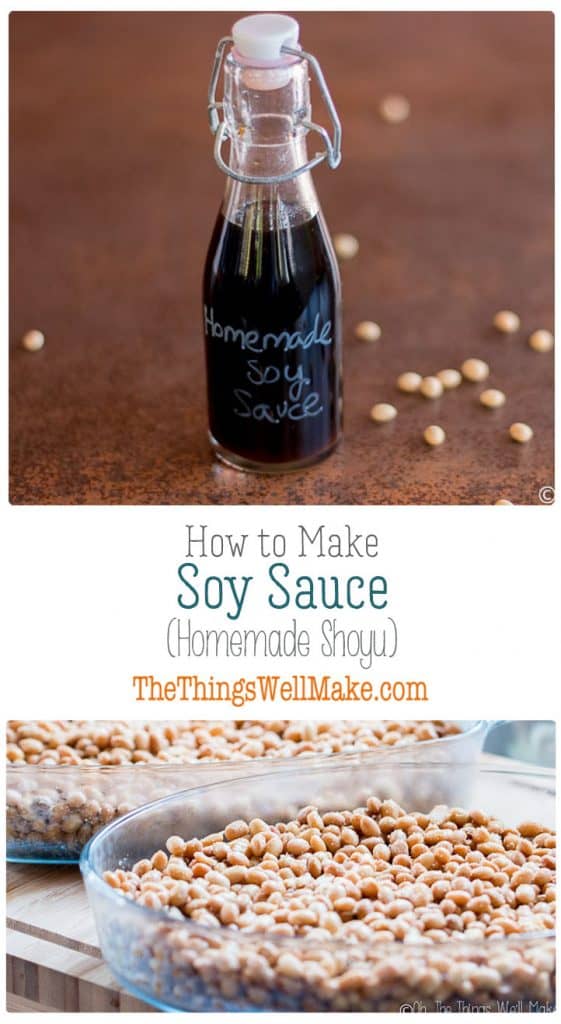
Impress your friends and save money by making your own soy sauce from scratch. Today we’ll learn how to make a homemade shoyu, a fermented soy sauce made from soybeans and wheat berries.
This post has been in the making for several years now. Yes, years!
I’ve had several failed attempts before finally reaching success and making a wonderful soy sauce with complex flavors. Fortunately, my failures were due to misinformation more than they were to a complicated process. Making your own soy sauce does require some patience, but it really isn’t that difficult.
When I first started trying to make my own soy sauce, there wasn’t a lot of information on the web, and the only posts about the process showed people making patties out of soy and letting them grow mold from whatever wild molds might be present in the air. Many of these “recipes” were based on people watching their Asian relatives make soy sauce at home. I guess the whole process sounded a bit risky, but since it’s quite common for people to make sourdough starters from the wild yeasts in the air, I thought the idea had some merit and decided to give it a try. (I mean soy sauce making had to start somewhere, right?)
The problem?
Making soy sauce is a long process, and each time you give it a failed shot, you end up wasting a lot of time.
I tried making a homemade soy sauce with local wild molds, and while trying it didn’t kill me, it didn’t impress me either. Maybe it has something to do with the fact that the wild molds and yeasts here in Spain are different than those in the soy sauce making regions of Asia. (From a bit of further research, it appears that making soy patties that collect local molds is most typical in Korean soy sauce making.)
The process of making it wasn’t easy sailing either. I had to endure foul-smelling moldy soy patties (not to mention my husband’s complaints about the odor.)
We’ll just say that my first homemade soy sauce wasn’t good enough to share on the blog. Just as sourdough starters will vary from region to region, not only can a wildly propagated soy sauce have a lot of variances, but it could be potentially dangerous. That’s why you need to start with a specific fungus for inoculating your batch. Luckily, using a starter fungus also makes for a much more pleasant soy sauce making experience. (Yes, it smells much better too!)
Watch How to Make Soy Sauce (Homemade Shoyu)

What is Soy Sauce?
Soy sauce is a thin, liquidy, Asian condiment normally made from fermented soybeans. Specific strains of fungus are grown on soybeans, and then the mixture of fermented soybeans is allowed to continue to ferment within a salt brine.
Soy sauce varieties vary from region to region, and not all modern day soy sauces are actually even fermented anymore. Most store-bought soy sauce will be pasteurized, too, so it’s great to be able to make your own and add one more unpasteurized fermented food to your pantry. (Plus, if you use a lot of soy sauce, you can save a lot of money with this one!)
What is Shoyu?
Shoyu is the Japanese term for the type of soy sauce that is made with both soybeans and wheat. It is normally what we are used to seeing when we think of “normal” soy sauce.
Shoyu differs from Tamari, another type of soy sauce, in that tamari uses little to no wheat and is sometimes fermented with a different strain of fungus (Aspergillus tamari). Tamari began as a byproduct of making soybean miso. It was the liquid that pooled up on the miso. Nowadays, though, with an increased demand for a wheat free soy sauce, companies work to make more tamari as a stand-alone product.
Is Soy Sauce Vegan?
People often ask this question, and the answer is Yes! Soy sauce is vegan.
Soy Sauce Ingredients
Soy sauce only uses soybeans, wheat, salt, water, and the strain of fungus desired for fermentation, normally Aspergillus oryzae or Aspergillus sojae. Aspergillus tamarii is sometimes used for making tamari.
On my very first attempt at making soy sauce, I went to the health food store and bought the only soybeans that were for sale at that particular store. They were small, green soybeans and didn’t make as nice of a paste or sauce.
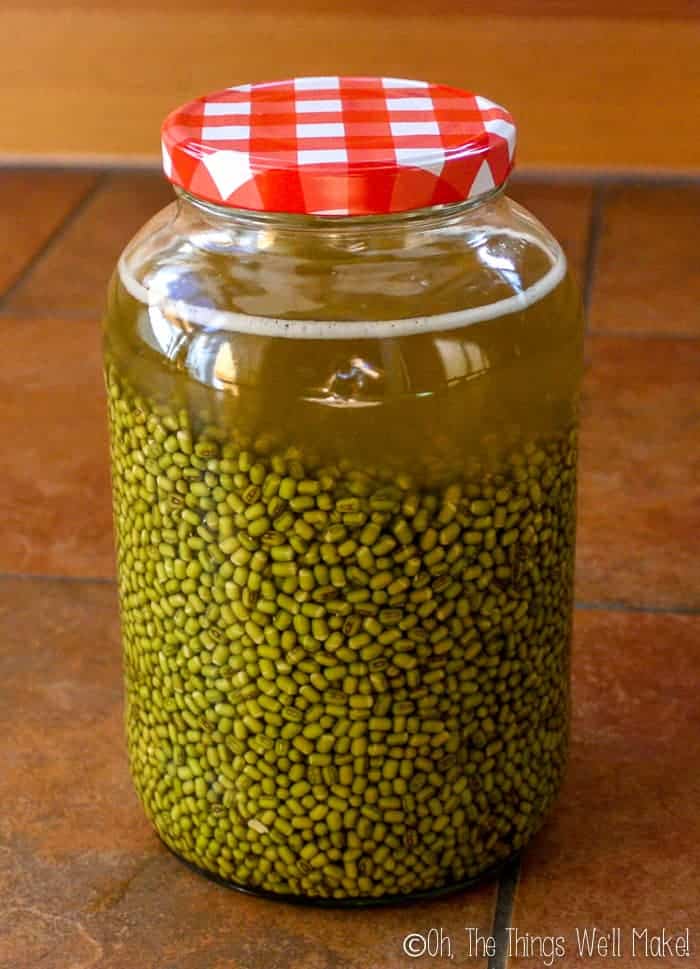
I later saw that you could buy either larger white (beige) soybeans or the tiny green ones. It turns out that the beige soybeans are more mature soybeans, and the green soybeans are younger. The mature soybeans are the ones that are normally used to make everything from soy milk to, well, soy sauce.
How is Soy Sauce Made?

Homemade Soy Sauce (Shoyu)
Makes around 1 gallon
Ingredients
- 1200 g dry soybeans (the white or beige type)
- 1200 g wheat berries Soft wheat gives better flavor than hard wheat
- 7.5 g aspergillus orzyae starter meant for shoyu
For the Brine
- 825 g sea salt
- 3.8 liters water
Instructions
Prepare the soybeans
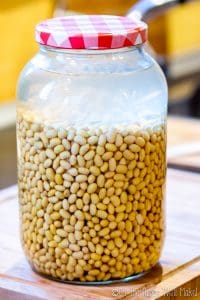
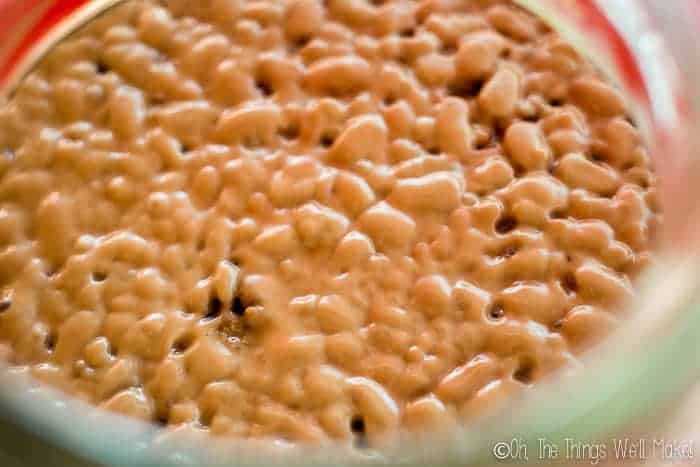
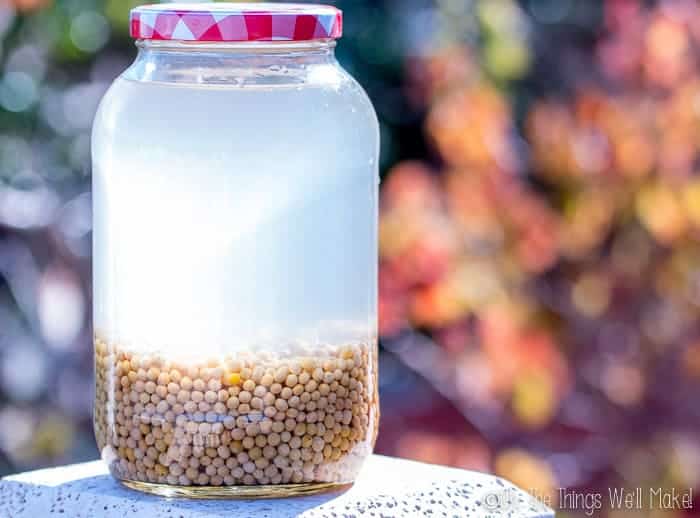
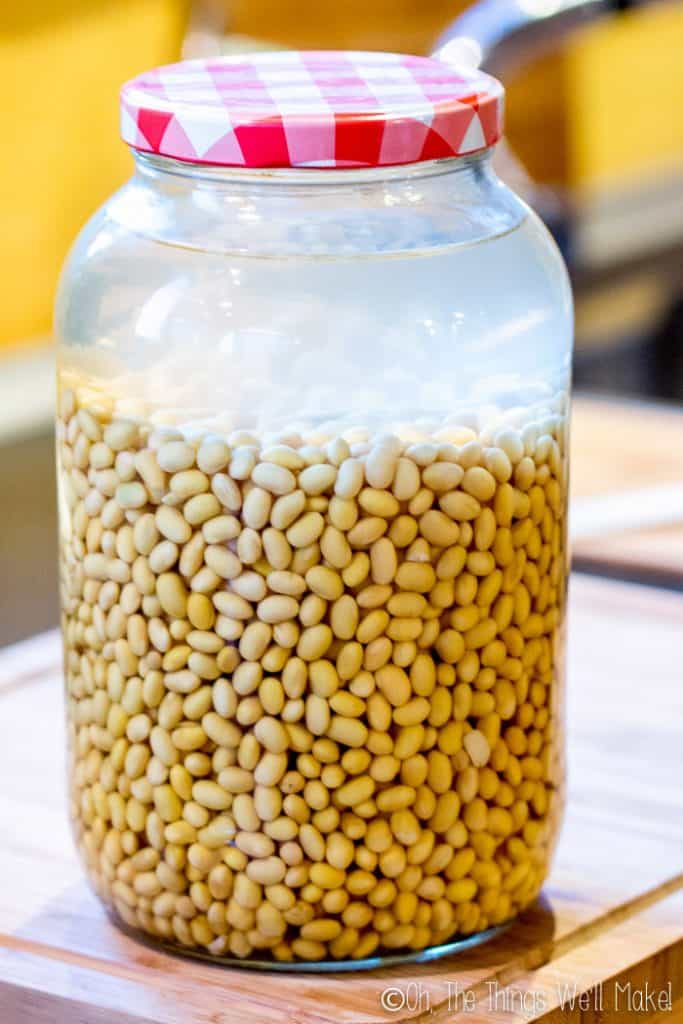
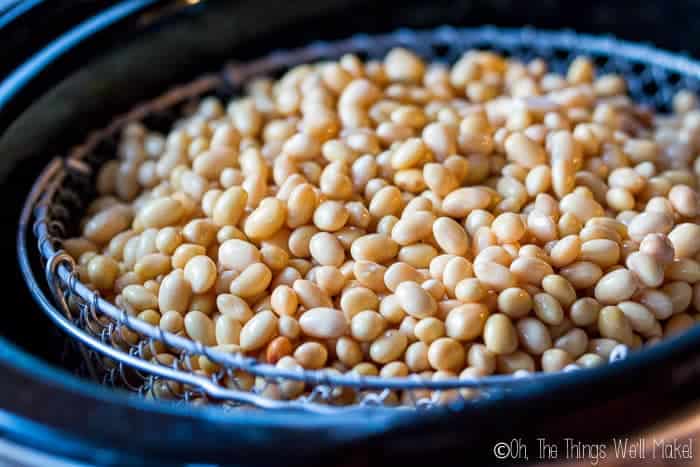
- Rinse the soybeans and cover them with water in a large glass jar or another suitable container. Keep in mind that they will double in size when they absorb the water.
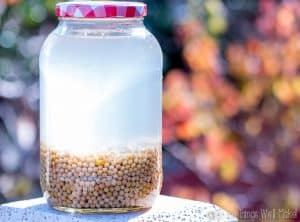
- Soak them overnight, or for 12- 16 hours. (Add more water, as needed, to allow them to fully hydrate.) Notice in the photo that they have doubled in size once hydrated.
- Drain the soybeans and cook them by steaming them in a pressure cooker for an hour and a half, or cook them in boiling water for around 6 hours. A slow cooker is a good option in that case.
I used a pressure cooker and poured water in the bottom of the pressure cooker. I then put a stainless steel steamer basket over the water and filled the basket with the soaked soybeans. I set the pressure cooker to cook for an hour and a half.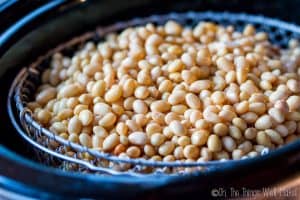
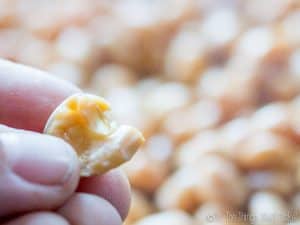
- When fully cooked, you should be able to easily crush the soybeans with your fingers.
Prepare the wheat
- Brown the wheat berries in a skillet for several minutes until they turn golden brown. You can also broil them in the oven, spread over a baking sheet, stirring every couple of minutes to prevent burning, if you prefer.
- Grind the wheat coarsely using a food processor, grain mill, or another type of grinder. You are aiming to break each grain into several pieces. You don’t need to completely pulverize the wheat berries into powder.
Preparing the koji
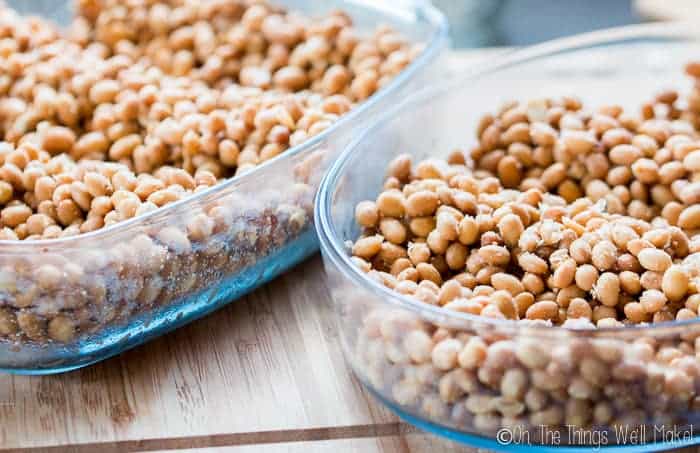
- Mix together the ground wheat berries and the cooked, drained soybeans in a large mixing bowl. Allow the mixture to cool.
- Sprinkle a koji starter over the wheat and soy mixture and thoroughly incorporate it into the mixture.
- Spread the inoculated mixture over glass or stainless steel trays or bowls. (Use something with a broad base so that you can spread out the shoyu koji.)
Make furrows (small valleys) in the mixture every 2 inches or so to avoid having thick layers where hot spots emerge. (Hot spots are areas where the mold gives off too much heat.)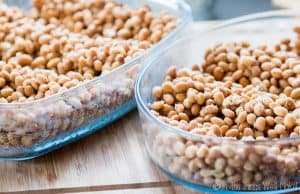
- Place a thermometer in the koji and cover the trays with either a plastic wrap or a tight weave cloth to help keep the moisture inside. Incubate the trays at around 85ªF (32ºC). (I used my oven with the oven light on to keep the temperature slightly elevated. You can also use hot water bottles or ice cold water bottles under the trays in an ice chest to raise or lower the temperature as needed.)
- Check the koji temperature every few hours to make sure it is staying in the 80-95ºF (27-35ºC) range. If the temperature gets too high for too long (over 104ºF (40ºC), unwanted bacteria can grow in the koji and spoil it. Each time you check on the koji, stir it, breaking up clumps as needed, and spread it out and add the furrows back in before covering and incubating again.
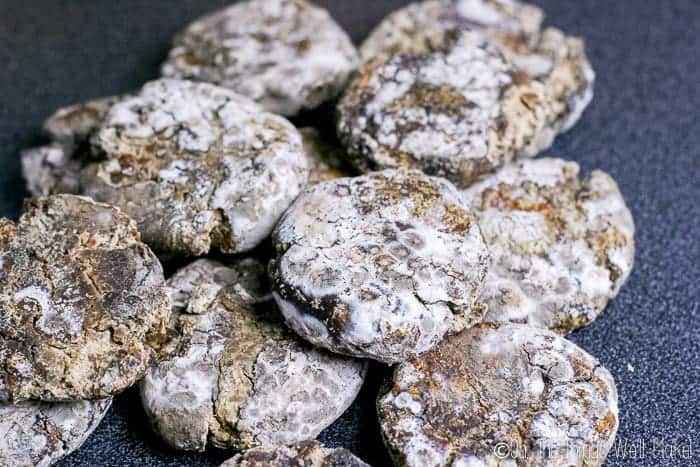
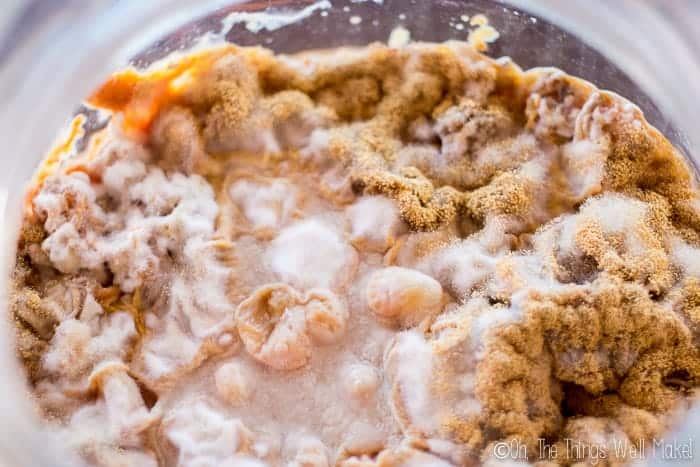
After 2- 2.5 days
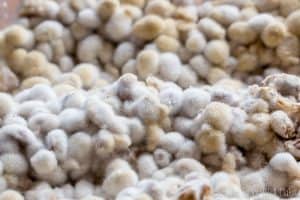
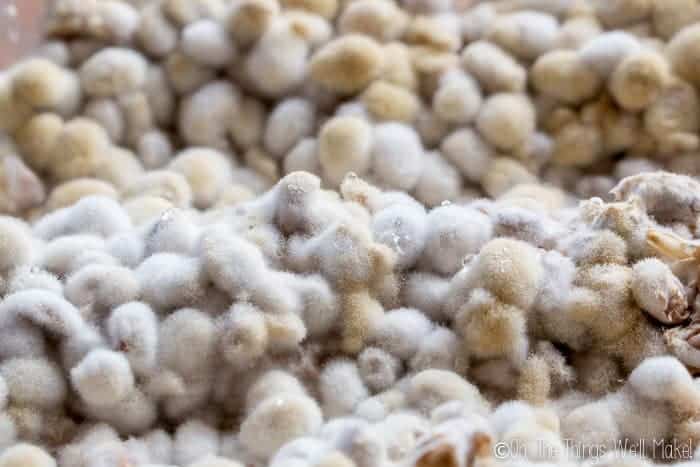
- Continue to monitor the koji for 2 to 2 and a half days. You’ll notice that a fuzzy, soft white mold will cover the koji.
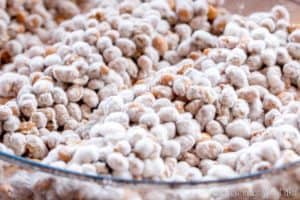
- It’s OK for some areas to begin to turn yellow or even a light yellow-green color. The yellowish green color is the formation of new koji spores. (Discard any koji that has grown black, or dark green mold. You also want to avoid any koji with shiny or sticky spots.)
Prepare the brine solution
- In a large glass container (around 2 gallons), mix together 1 gallon of filtered or spring water with 3.5 cups of sea salt. Stir until the salt has fully dissolved.
Prepare the moromi
- The moromi is the mixture of the koji and brine solution. Stir the koji into the brine solution and cover the mixture with a tight fitting lid. Label it with the date.
- Keep the moromi in a warm spot to continue to ferment. Stir the mixture daily for a week or so. After than, keep it in a warm spot (ideally around 77ºF (25ºC)), stirring it at least once a week for around 6 months.
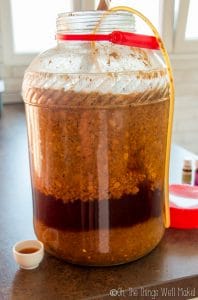
- After around 6 months, you’ll notice that the color of the moromi will have darkened into a deep rust brown color. It may be either have separated into a liquid and solids (like mine) or be more or a homogenous thicker mixture.
Straining the moromi
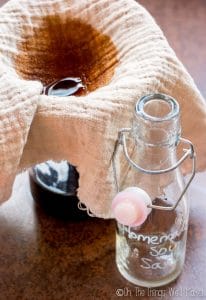
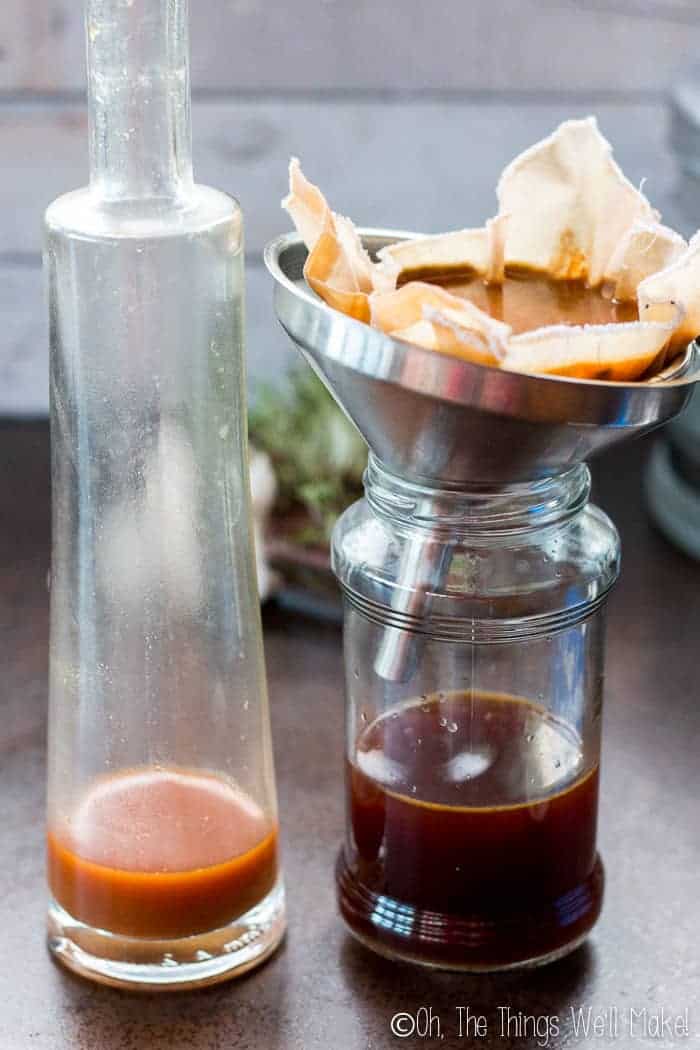
- After 6-12 months fermentation, you’ll want to strain the moromi to obtain your homemade shoyu. The easiest way is probably to pour it into a cloth-lined strainer and pour some of the mixture into the strainer. You can then twist the cloth to press the filtered liquid through the cloth into a bottle.
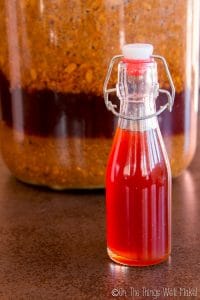
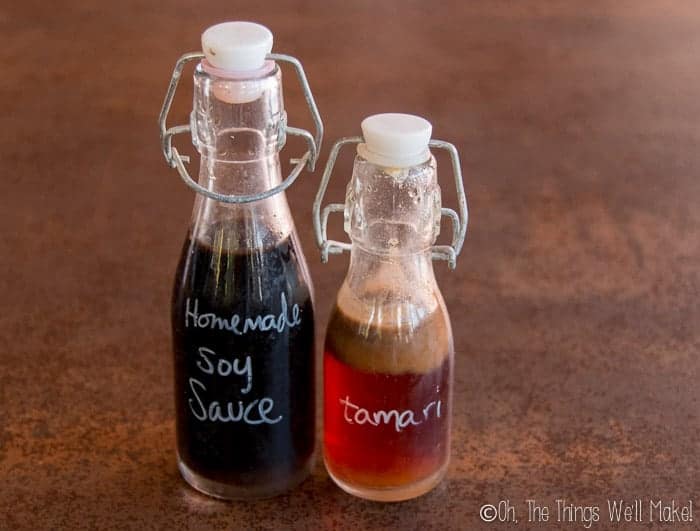
- After around 9 months, around 3 months ago, I strained mine and it was a light, rust-colored liquid that tasted and smelled like soy sauce, but was much lighter in color.
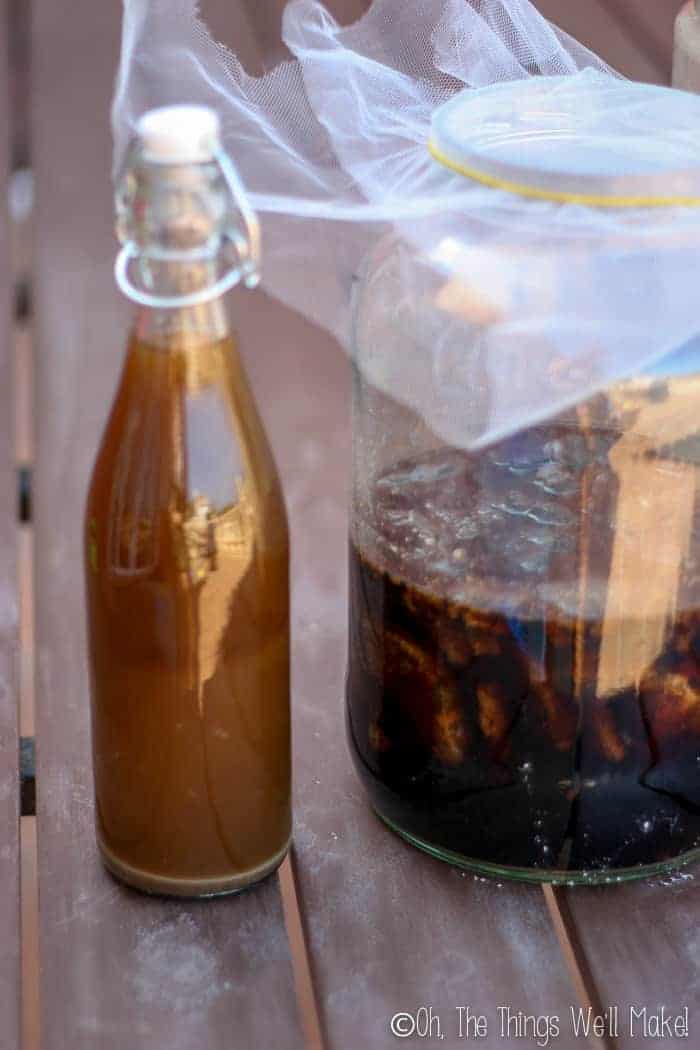
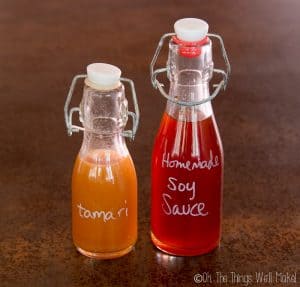
- I was making homemade tamari at the same time (I’ll share that process soon- or as soon as I’m happy with the result), and this shows the 2 bottles I strained out 3 months ago. (I left the rest in the jar to continue fermentation there with the soybean and wheat mixture.)
Obtaining a dark-colored soy sauce
- One thing I had learned from my first failed attempts at making soy sauce was that one of the things that helped achieve a dark-colored soy sauce with complex flavors was to allow the sauce to ferment in the hot sun. So, I placed both bottles (of soy sauce and tamari) out in the hot sun from the end of June until the end of September. I was happy to see that both sauces had darkened with time out in the sun.
- You’ll notice that after 3 months outside in my sunny terrace, not only did they darken, but they also separated slightly leaving a bit of soy residue floating on top of the bottles. I strained the mixtures to obtain my sauces.
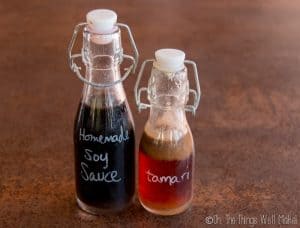
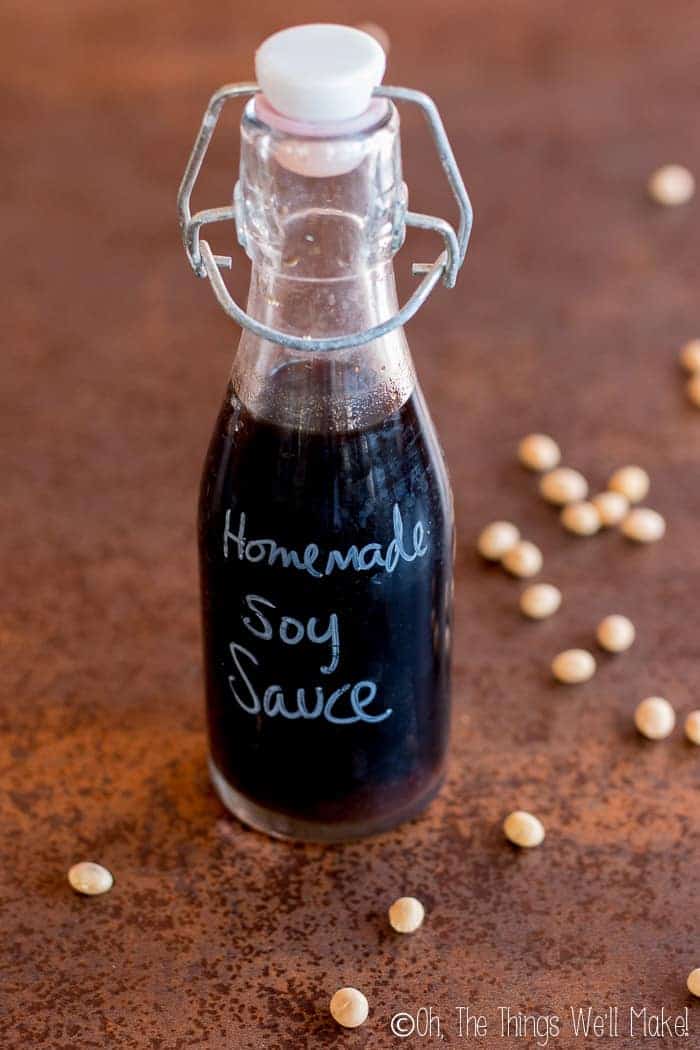
- I filtered the soy sauce again through a cloth to remove any soybean residue. The resulting liquid was a wonderfully dark colored shoyu with wonderful flavor.
Notes
What to do with the leftover soybean mash
While some people discard the soybean mash leftover after having strained out the soy sauce, others, like me, use it as they would miso in recipes.
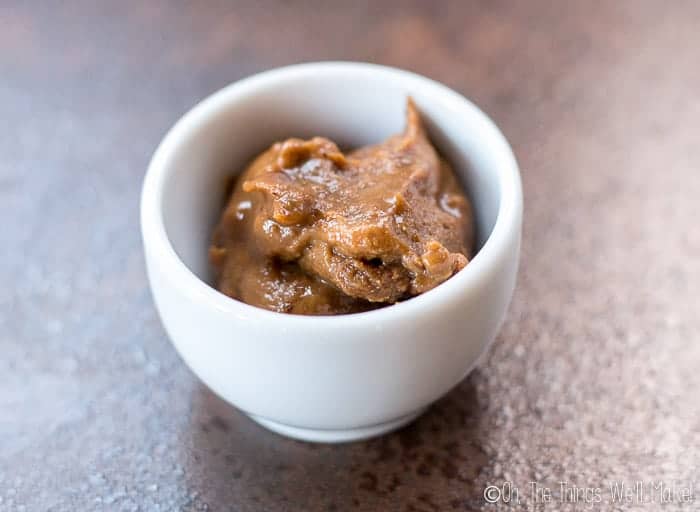
Miso paste can be stirred into other sauces or mayonnaise to add a bit of saltiness and umami. It can be stirred into hot water, especially that boiled with seaweed varieties like kombu and wakame, to make a miso soup. The paste can also be added to stir fries.
Troubleshooting the soy sauce making process
My moromi is forming a mold on top
As a bit of an experiment, I had a separate jar of moromi fermenting that I left undisturbed. If you don’t stir the mixture very often, mold can form on top. After a bit of research, most soy sauce fermenters believed that it is OK to remove the top layer of mold and continue to ferment the sauce below.
In this case, the mold forming had the same colors and scent as the soy koji that I had made in the beginning, so I scraped peeled off the mold (it had a similar texture and held together as the koji had), continued to ferment the soy sauce, stirring occasionally. The resulting sauce didn’t appear any different than the other batch.
Use common sense here. If your moromi forms an unusual mold with a dark color or foul odor, while it may break your heart, you may be best to throw it away.
My moromi is forming a slimy layer
After having scraped off the moldy layer of my experimental batch of homemade soy sauce, I once again left it undisturbed. This time it didn’t form a mold, but instead formed a bit of a slimy layer on top. The top layer didn’t smell unpleasant, but I wasn’t sure I wanted to mix it in with the rest of the batch either.
My best guess is that this is some type of yeast that is forming on top. It gives off a yeast-y beer-like scent. Even though it wasn’t offensive, I scraped off most of the layer and mixed everything together again.
My soy sauce is too light in color
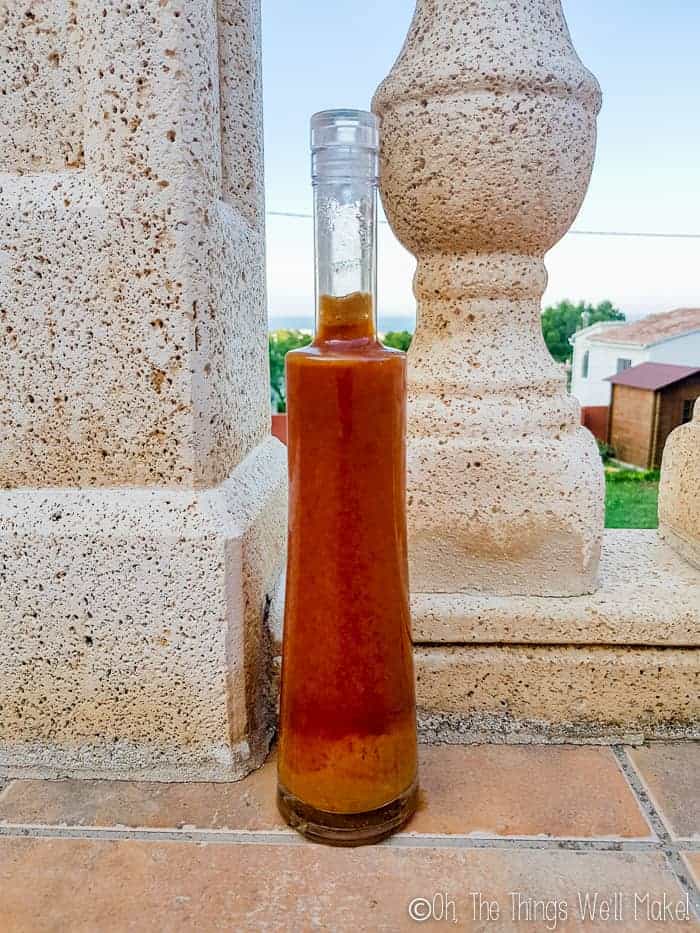
If I had only followed the instructions that came with my shoyu starter, I would have ended up with a dark amber colored soy sauce. In fact, most of my large batch still looks like the bottle above. (I took this picture this week of a bottle that I just strained.)
So, how did I end up getting such a beautifully dark soy sauce as shown in the first picture?
Well, two things help darken the soy sauce.
First, just filtering out any residual soybean paste will leave behind a darker color. After a couple of days, the soybean paste settled to the bottom, making the soy sauce look darker in color. To get it looking even darker, I filtered it through a tightly woven cotton cloth. You can see the huge difference in color already! It takes a bit of patience, but it’s worth the effort.
Second, it appears that one of the secrets to dark soy sauce is the same as the secret to dark skin in the summer… the sun!
The instructions that came with my starter never said anything about exposing the sauce to the sun, but through my earlier experimentation with making soy sauce using wild fungus, I learned that the sun may be your best friend when trying to make a dark, rich homemade soy sauce!
I read several accounts of people remembering their family members making soy sauce in Asia. They talked about the importance of using the sun, even to help prepare the brine for the koji. These people made the salt water ahead of time and allowed it to steep for several days in the sun before adding in the koji. They then proceeded to add the koji and allowed the mixture to ferment in the hot sun!
While I didn’t experiment with doing the whole fermenting process in the sun, I was a bit disappointed with the color of my homemade soy sauce, so I decided to experiment with leaving that outside in my terrace. I wasn’t sure if I’d be hurting the soy sauce, so I only strained out a small bottle and left it in a sunny part of my terrace for several weeks. (Looking at the dates on my photos, it appears that I actually left it there for almost 2 months.)
When it was time to take a look at it again, I was really happy to see how dark it had gotten. So, I’m now sunning out another bottle of soy and am tempted to bring out the whole unstrained batch!
Should you pasteurize your soy sauce?
It is said that pasteurization of the soy sauce will help extend its shelf life, and the cooking of the sauce helps to enhace its flavor and aroma. The idea is that you are killing off the bacteria in the sauce, and also beginning a Maillard reaction to deepen the flavor.
While that seems to be the general consensus, I’m not 100% sure if either of those statements is completely true. I’ve seen home brewers say that they like to leave half of their soy sauce unpasteurized because they think unpasteurized soy sauce has a more complex flavor profile. They pasteurize in the hopes of having their soy sauce last longer.
In a similar bit of skepticism, I really have to wonder if killing off the bacteria in the sauce will really extend its shelf life. When you make something like a homemade sauerkraut, some people say that the beneficial lactic acid bacteria that form also help preserve it. In fact, Leucidal, a natural preservative that I introduced when I shared how to make a lotion, uses Leuconostoc kimchii, a lactic acid bacteria formed when fermenting radishes, to restrict the growth of other microorganisms.
So, in the end, I’d say that experimenting and pasteurizing a small part of your batch is probably the best idea. That way you can decide if you prefer the flavor and aroma of unpasteurized soy sauce or not. You can also judge how long your sauce tastes best, and if you think that the pasteurized sauce lasts longer or not. I haven’t had mine for long enough to give you my opinion just yet…
I’ll try to update this post as I experiment with pasteurizing part of my batch.
How do you pasteurize soy sauce?
Cook the soy sauce at 160ºF (70ºC) for at least 30 minutes.
Does Soy Sauce Expire?
It takes between 6 months and a year to even be able to make a decent soy sauce. After that, it is usually said that soy sauce will last for around 3 years as long as you have it in sealed containers. It’s not necessarily that the soy sauce will “go bad” after that, but the quality of the sauce may deteriorate with time.
Here, again, I can’t speak from experience yet, and also have read accounts from home brewers who have said that their soy sauce has improved with time. Perhaps, here, the answer is it really depends on the batch, the method used for making the soy sauce, and your expectations of what makes a good soy sauce. Soy sauce may be like a good wine that improves with time- to a point! After a certain amount of time, some wines will begin to taste like vinegar. They aren’t toxic to drink, but they aren’t pleasant anymore either.
I’ll be keeping an eye on my own soy sauce, and will let you know my thoughts in a couple of years. Meanwhile, I’d love to hear from those of you with experience making your own soy sauce. 😉


may i know where did you get the aspergillus orzyae starter ? seems out of stock online on amazon
Hi Mel,
Of course! I bought it from Gem Cultures. They send internationally, and I was able to get them even here in Spain! 🙂
what can I use to strain/press a small amount of mash?
seems like not much comes out and needs to be pressed.
thanks
Hi Kari,
To be honest, I just poured it into a cloth lined bowl and then twisted the cloth to help wring out as much liquid as I could. They do sell food presses- and we actually even have one- but I’ve found that for smaller projects like this, I just resort to the cloth method. I’m not convinced that the press is really that much more (if any) effective.
I love your blog. Stumbled on it looking for “no salt” soy sauce. As a semi-retired biochemical geneticist / microbiologist and an avid cooking enthusiast, I love your take on things. Please if possible, I’d like advice on a possible salt brine substitute. Do you know the brining step?
I know that commercial low salt soy is simply a 1:1 dilution with water. However for several bar-b-q purposes, a soy sauce containing braising liquid is reduced to generate a thick glaze: far too much salt. Suggestions?
Hi David!
Thank you so much!
That’s a very interesting question. I’m afraid my answer won’t be very helpful, but I’ll do my best anyway.
When making soy sauce with a lower salt content, I’d be concerned about the formation of unwanted molds, bacteria, and other microbes. Any time you have anything with a high enough water content (actually, more specifically, a water activity above 0.6- but that’s a whole other topic for another day ?), you’ll need to add something that makes it inhospitable to pathogenic microbes. In ferments, you’re generally using salt (as in sauerkraut, kimchi, and, well, soy sauce) or allowing it to get acidic (like when making vinegar or kombucha by fermenting sugars). I have to admit that I’m not sure why yogurt and kefir keep so well. I guess that the amount of beneficial bacteria take over in such a way that it inhibits the growth of pathogenic ones. The pH is also lowered during the fermentation process, so that may be part of it.
Anyway, the problem is how to determine the minimum amount of salt that would be needed to prevent the growth of anything harmful. In the case of soy sauce, there are several fermentation steps. You first grow the wanted yeasts and molds, and then do a second fermentation with salt. I’m not sure if the beneficial molds obtained in the first step are enough to significantly lower how much salt would be needed? It’s an interesting question, but I don’t feel comfortable even making a good guess about that sort of thing. As much as I love to experiment (and I’m probably a bit too lax on my experiments with ferments- taste-testing just about anything I’ve made without really worrying about possible consequences), I wouldn’t dare share something here that I think could be potentially hazardous to my readers.
I’m pretty careful about always trying to make sure everything is completely safe- and have been updating older posts as I learn more every day.
In this case, I think there is a potential to be able to lower the salt content somewhat, but I have no idea how much would be possible. With it being such a time-intensive project to begin with, it makes it much more difficult and intimidating to do experiments. (I was actually working on this post for years before I was able to publish it with something I liked.)
Sorry I couldn’t be of more help. If you do find any information about it, I’d also love to hear it. Any time I can share something that will help other readers, I try to do so.
Hello, I’m about to make my first batch of soy sauce using your recipe, do you think I can use my Sauerkraut pot to make the sauce or is best to use glass ? When you refer to put it on the sun, you mean since the moromi is ready, or after you have the liquid ready ?
Hi Rafael,
I would think that you should be able to use the sauerkraut pot. That’s what I use to make kombucha these days. I didn’t sun mine until quite a while later. I don’t think it’s really a necessary step, but may help to get a darker color. I’m not sure if it changed the flavor at all. You could experiment and try sunning part of it.
I put the whole mixture in the sun. I didn’t strain it until later on, when I was ready to use it.
Next time, I would probably experiment, and leave some out of the sun to see how much difference there is between doing it and not doing it.
Can I reduce the salt by 3/4 to achieve a low salt soy sauce, which is the reason I want to make my own? Would that be safe? I know salt is used to kill bad bacteria. But what’s the absolute minimum amount of salt needed??
Hi Barry,
To be honest, I’m not really sure. When it comes to fermenting vegetables, like when making sauerkraut, they generally recommend using 1-3 tablespoons per quart of water which is a lot less than what is used here. It seems that if it is safe to ferment vegetables that way, you may be able to get away with reducing the salt in that way.
I have made three different batches of Shoyo, using the same quality ingredients, but different methods.
I ground my soft wheat berries into a flour and mixed it with boiled crushed soy beans then Kogi. Covered and let stand for 48 hrs. Aroma was intoxicating and pan was warm. Mixed with ocean salt and ROI water, it has been solidifying with the mash floating to the top in one gallon glass jars.
Same recipe in 2 gallon jar has mash settling at the bottom of the jar with blue mold (kogi ?) growing on the surface.
Third recipe, I toasted the wheat berries and milled to a very coarse grind. Mold was much more aggressive. After the same 48 hours, I placed mixture into 1 gallon jars. Water is much darker after only one week. Mash seems to be breaking up and settling on the bottom instead of floating.
Hi Robert,
Thanks so much for your insight. That’s really interesting!
I’ve been meaning to experiment more with it too. When I made more of a flour, I had a harder time filtering the soy sauce. The whole mixture was thick and was pretty much suspended throughout the brine.
I’ll have to give it another shot. I still have quite a bit of sauce left, but as the process takes a while, it’s a good idea to start making more soon! 😉
Thanks for your advice on the proper amount of liquid Tracy. I’ve had my morami in 3 one gallon jars for about a month now. I used 5 kilos of substrate consisting of 5 pounds of cracked wheat and 5 pounds of cooked soy beans (about 2.5 pounds of dry soy beans). I had a difficult time keeping my culture under 100 (f) after about 42 hours and the entire culture had turned light green and it was very, very dusty when I went to break it up. So I went ahead and placed it in the brine. It may have gone from white to green during my sleep, but I never saw a large amount of white spores. I’m guessing I’m ok, your thoughts on cutting it off at 42 hours?
Now a question. My ferment looks exactly like your photo’s, including the black specks that can be seen in yours under close inspection. I’m assuming I’m Ok. Am I? I have no idea where these specks came from but they apparently need no air to develop.
Hi Garry,
I think you were right to place it in the brine if you were already getting a yellowish-green cover on yours.
I’m not sure what specks you’re referring to. It could just be bits of soy solids floating in the liquid. If it looks like mine, you’re probably fine. Mine turned out delicious!
best and interesting information would like to visit again
One of the best and my favorite blog ever. Aala stuf and best quality.
hi, thank you for all the great tips!
I’m actually not making soy sauce at the moment, but tamari, the byproduct of my sunflower seed miso.
it has some white gunky clusters floating in it. any idea? it doesn’t smell or taste bad, so I think I’m just going to remove and continue.
anyways I’m curious about your tamari experiments, as there is not that much to find on the interwebs.
all the best!
Hello!
I think I would have done the same as you.
In my experiments, I haven’t liked the final tamari, but it used a different culture than the shoyu did. I want to try it out with the same culture once the weather warms up again. I’d love to hear how your experiment goes as a lot of people are looking for a solution to making a gluten-free soy sauce at home.
Hi, currently i’m making my own soy sauce. After just 1 month old, my moromi suddenly get a lot of bubble and form some liquid kinda soy sauce at the bottom of the jar. I don’t know why it suddenly bubbles, it did smell nice and not alcoholic/sour, just nice soy sauce smell, but it actively bubbles. I’m afraid of contamination happened in my moromi. What do you think? Thank you so much!
Hi Anthony,
I wouldn’t worry too much about it if it otherwise looks good. Bubbles tend to be a sign of fermentation. In theory, the sauce does continue to ferment, so it would make sense that it could bubble. I don’t really remember seeing bubbling in mine, but that doesn’t mean it didn’t happen and I just didn’t notice it.
Honestly, as long as it smells and tastes normal, I wouldn’t worry about it. (I have to admit that I tasted mine quite a few times throughout the process.) 😉
I don’t know about soy sauce but in kumbucha ( fermented tea) and Tepache (fermented pineapple jiuce) as the fermentation process converts the sugars the liquid forms CO2 which makes the liquid fizzy. It’s normal. Just leave some headspace and don’t tightly seal the bottle or burp the bottles every so often.
Hi Angela,
At first, I was going to say that things are probably a bit different with sugar-based ferments, but then I thought about how even sauerkraut, a salt-based ferment, can bubble up. I didn’t really see it with my soy sauce, but that doesn’t mean that it wasn’t there. In any case, that’s probably a good suggestion, just in case. 😉
Any update on a tamari recipe? Or tips? Is it just replacing the wheat with all soy?
Hi John,
I’m sorry. I was going to try to make it again this spring/summer, and got busy with other things and never got around to it. (I still have a lot of shoyu left, so I haven’t been as motivated!)
I really want to try using the shoyu starter without wheat, though, to see what happens. I think it’s the tamari starter that I didn’t like. Without actually doing it, though, I guess I’ll never know.
Hello Anthony,
I have the same bubbles in my batch. But mine started after around 2 month.
Still smelling and tasting good…
It would be interesting for me to know what happened to your batch. Any problems? Did it stop bubbling? ??
Greets
Axel