

How to Make Apple Cider Vinegar

Not only does homemade apple cider vinegar taste better, but it’s easy and frugal to make. Find out why and how to make your own vinegar from apple scraps, apple juice, or whole apples.
Why make your own apple cider vinegar?
Apple cider vinegar is one of those pantry staples that many people use for cooking, cleaning, or for its health benefits.
There are several reasons that you may choose to make your own apple cider vinegar rather than buying it at the store.
Save Money
Sure, you can find inexpensive apple cider vinegar at stores, but if you are looking for high quality, organic unpasteurized apple cider vinegar sold in a glass bottle, it can be rather pricey. By making your own vinegar, you can save yourself a lot of money, especially if you have access to inexpensive apples or have your own apple tree (like me).
Using apple scraps
Another thing to keep in mind is that you don’t have to use the entire apple for making vinegar. You can use just the peels and cores of the apples, something you’d otherwise compost or throw away. That makes this project a frugal way to limit waste when making apple recipes like homemade apple butter, apple fries, or apple crumb cake.
If you don’t have enough apple scraps for making a decent size batch of vinegar, you can always freeze them to combine with more scraps later on.
Using apple cider or juice
Another option for making apple cider vinegar is to use store-bought apple cider or apple juice. By allowing the juice or cider to ferment, it will first become alcoholic (a “hard” cider of sorts) and will then convert to vinegar.
Because store-bought apple juice is usually pasteurized, I like to add some form of yeast to help get the batch started when making vinegar from store-bought juice (more on that below).
Better Flavor
Many people opt to take apple cider vinegar for its health benefits, but they don’t enjoy the taste. Homemade apple cider vinegar tends to have a milder, better flavor.
You can also adjust the process slightly to have a resulting vinegar that better suits your taste. This can be done by adding more or less sugar, changing the types of apples used, and/or changing the environment during the fermentation process. (You should experiment to find what works best for you.)
Once you are happy with the flavor, you can store the vinegar in the fridge. This slows the fermentation process and keeps it from getting more acidic as quickly.
Video
Health benefits
Many people swear by taking one to two tablespoons of apple cider vinegar daily for its purported health benefits.
Apple cider vinegar is antimicrobial and can fight against pathogenic microorganisms like E. coli, and Candida Albicans. It may help fight heart disease. It’s also been shown to help improve insulin sensitivity in diabetics with insulin resistance and improve their blood glucose levels.
For those who worry about their cholesterol levels, it’s interesting to note that the cholesterol levels in rats fed vinegar were significantly lower than the rats on the same diet without the vinegar.
Vinegar may also help suppress tumor size, therefore prolonging the lifespan of those with cancer.
While those (among the many health benefits) are great, many people choose to use vinegar in the hopes that it will help them lose weight and/or stay thin.
Does vinegar help with weight loss?
Interestingly enough, there are some studies that do support the idea that apple cider vinegar can help you in your weight loss efforts.
The idea of vinegar helping with blood sugar levels isn’t only helpful for diabetics. In the same way, it lowers the glycaemic index of a meal with bread which can help increase satiety in normal subjects too! (That means you aren’t as hungry, so you theoretically will eat less when you consume vinegar.)
Those who were given vinegar with their meal tended to eat 200-275 kcals less over the course of the day.
It was also shown to reduce the risk of obesity in rats fed a high-fat diet.
Other uses for Apple Cider Vinegar
It’s not just for your salads, apple cider vinegar can also be used in many other ways. It’s delicious when combined with maple syrup or honey in a healthy beverage called the switchel.
Ginger Switchel
You can also try using it as a…
- Hair rinse
- General, all-purpose cleaner around the house.
- Natural deodorant
- Fruit fly trap
- Facial toner (when diluted).
- Foot soak.
How to Make Apple Cider Vinegar
So, have I convinced you to try making your own apple cider vinegar? I hope so because it’s easy and very rewarding!
First, clean the apples and remove any rotten areas and the stems.
Should you remove the seeds?
I like to try to also remove some of the seeds during the process. It probably isn’t entirely necessary, but apple seeds have a substance known as amygdalin inside them. When the seeds are crushed, the amygdalin is exposed. When we eat crushed seeds, our digestive enzymes react with the amygdalin, and a small amount of hydrogen cyanide is released.
Because there is a possibility that the hydrogen cyanide may also be formed during the long fermentation process, even if the seeds haven’t been cut open, I prefer to remove some of the seeds to stay on the safe side.
The amount of hydrogen cyanide that could be formed would be quite low, so it’s not something you need to be obsessive about. Still, it’s good to be aware of the possibility and remove at least some of the seeds if this worries you. It’s especially important if you are making a batch of vinegar using only apple core scraps (because you’ll have more seeds).
Making a “hard cider”
In the first part of the vinegar making process, alcohol will be formed. If you were to seal up the fermenting jar so that gas could escape but that air wasn’t reaching the liquid inside, a “wine” or “hard cider” would be made instead.
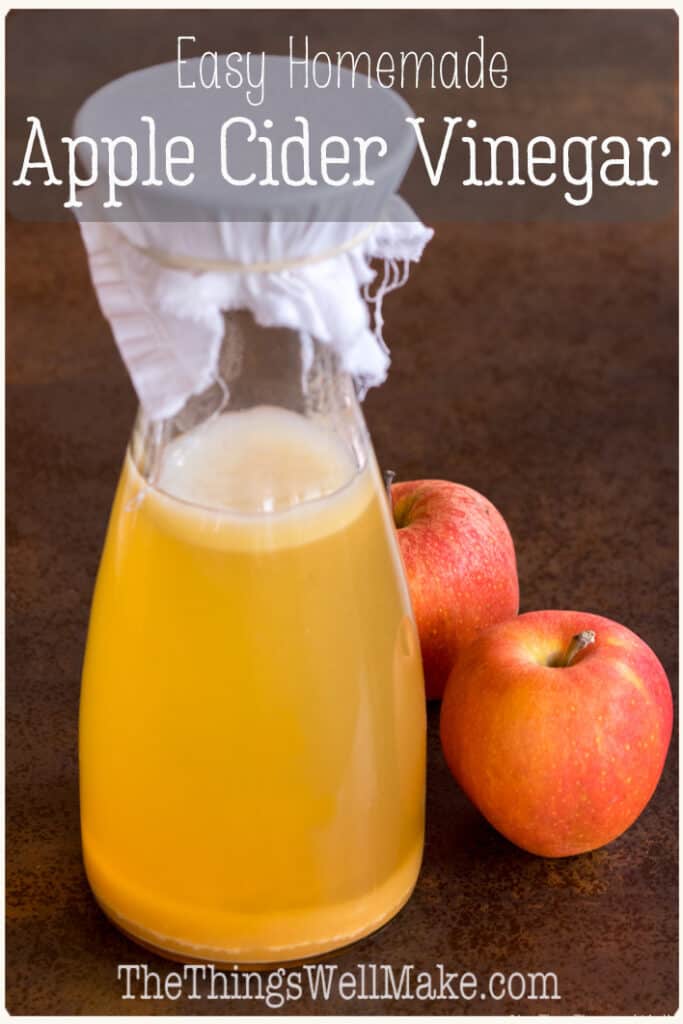
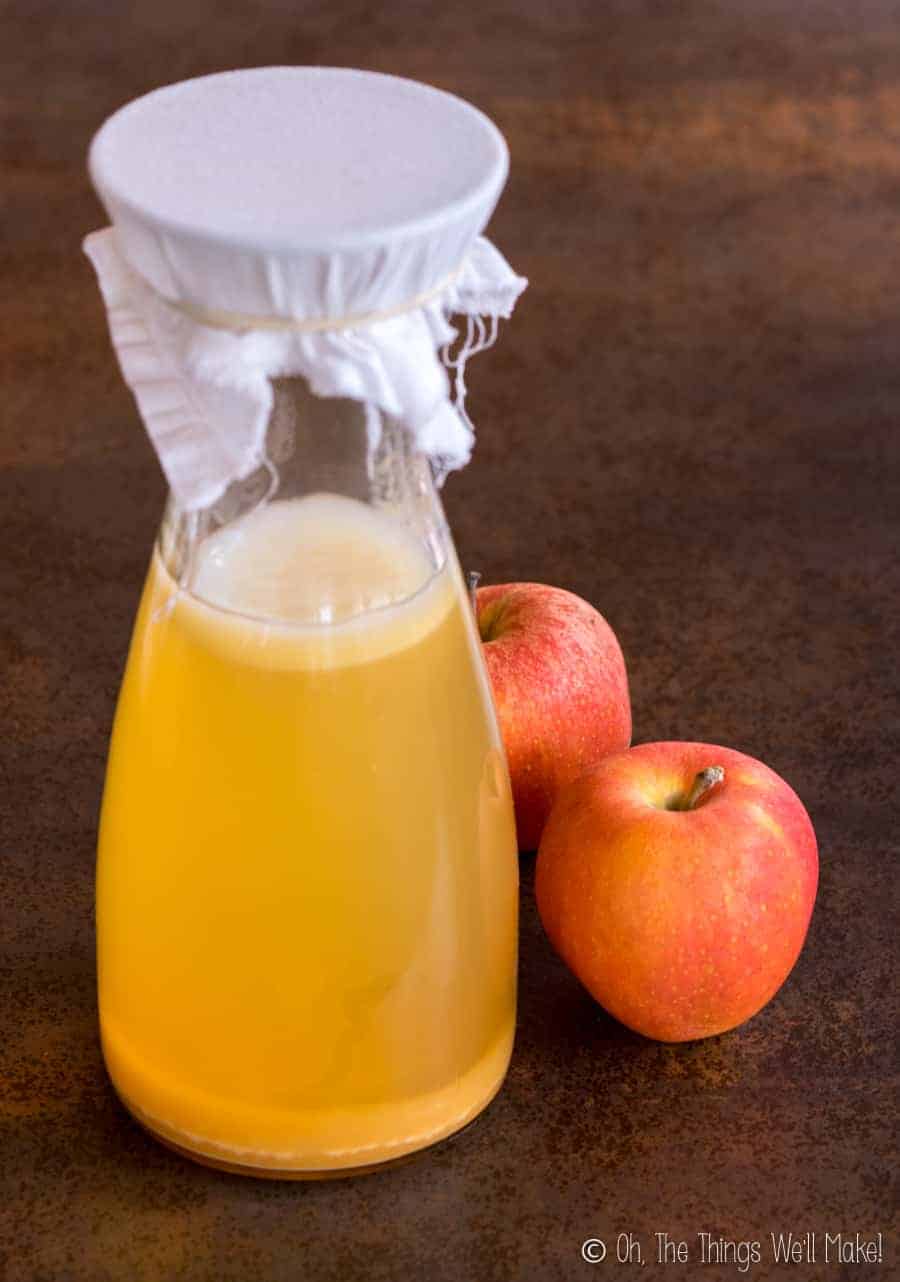
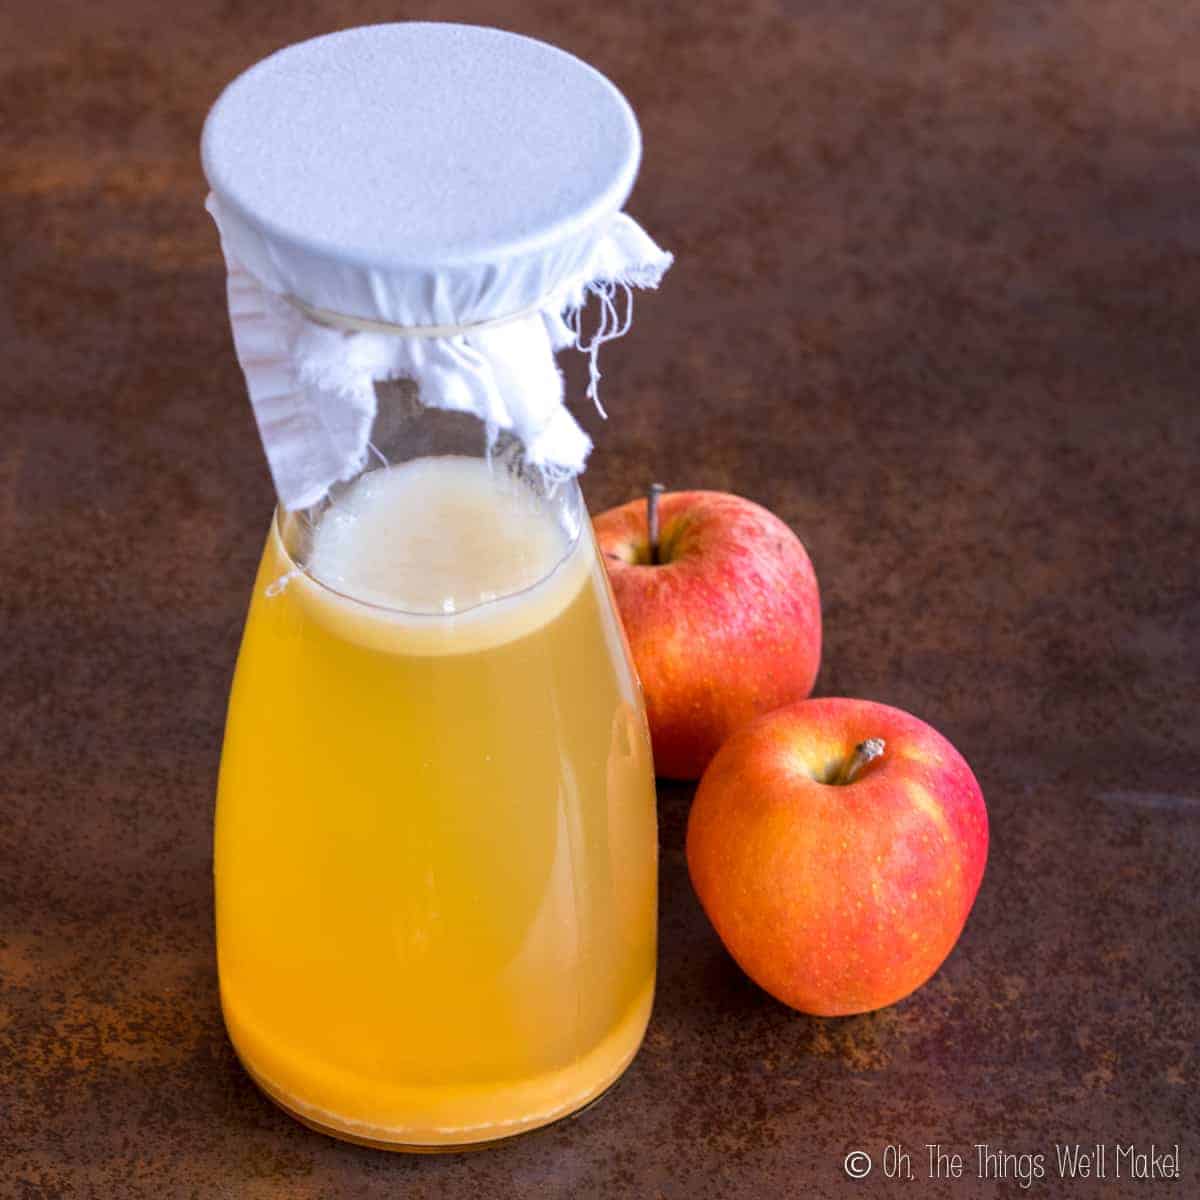
To make vinegar, we will be allowing air to reach the liquid. You should cover the jar with a cloth that will allow air to flow, but that will keep insects out.
Be careful if using cheesecloth or a cloth with holes large enough for small insects to get through. Insects can ruin your batch of vinegar! When using cheesecloth, try doubling up the cloth, as needed.
Once you’ve removed the rotten areas, stems, and seeds, you can cut everything else into small pieces and place them in the bottom of a large jar.
To the jar, add around a teaspoon of sugar for each apple added. If you are using apple scraps, just eyeball it. This isn’t a precise recipe. It’s very forgiving.
Once you’ve added the sugar, stir the apples with the sugar and cover them with water. A good estimation is that you will need around 1 cup of filtered or spring water for each apple and teaspoon of sugar. Again, using an exact amount isn’t important. What is important is to fully cover the apples with water.
I recommend using filtered water because it won’t have chlorine or fluoride or other substances that could interfere in the fermentation process.
Preventing mold formation
There are several ways to help ensure that mold doesn’t form, ruining your batch.
First, you should make sure the jar and knife and cutting board are all thoroughly clean. You can wipe them down with vinegar to help sanitize them. (Remember: vinegar is antimicrobial.) ?
One way to help reduce the probability of mold forming is to add a splash of vinegar to your new batch. Not only is the vinegar antimicrobial, but the living microorganisms in the vinegar can help quick-start your batch. (If you’ve made vinegar in the past, you can use part of your past batch to quick start the new batch.)
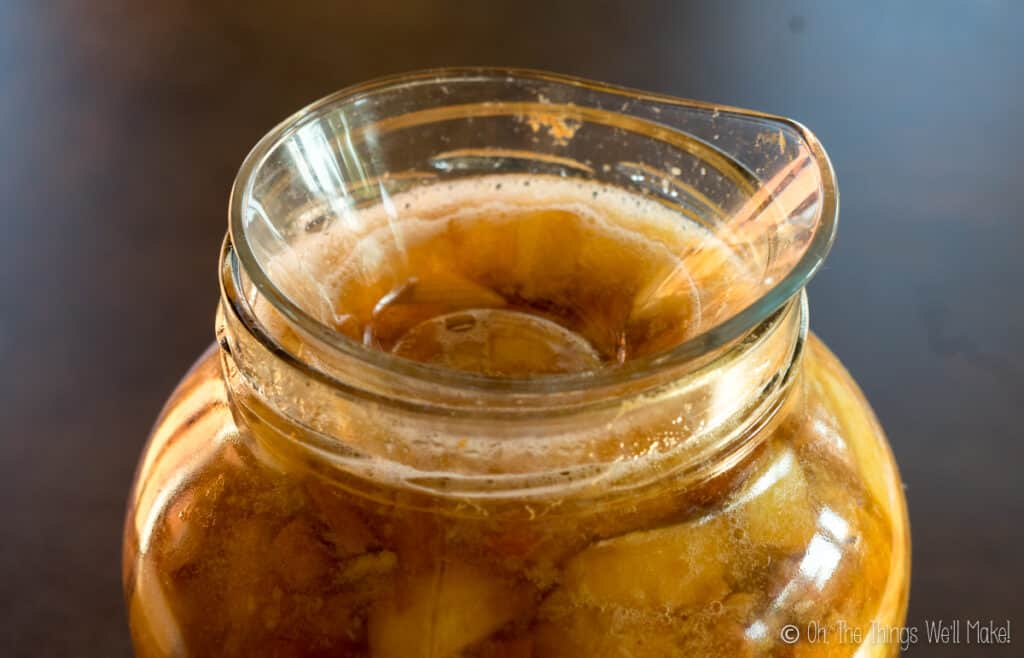
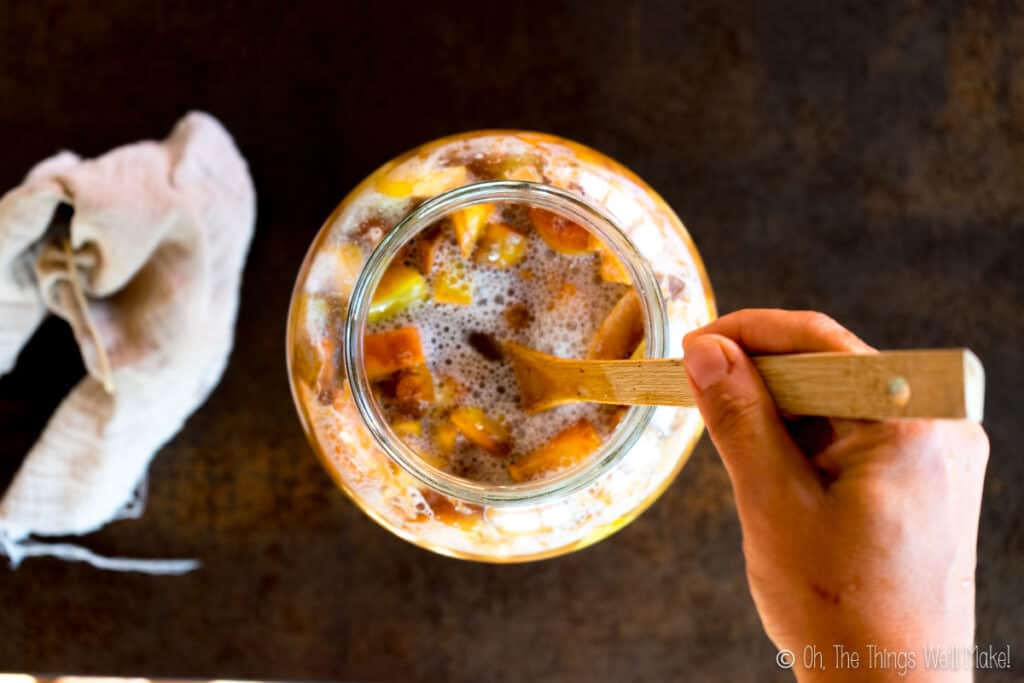
At first, the apples will float. Ideally, you want the apples to stay under the surface of the water to prevent mold formation. To keep the apples submerged, you can either press them down with a fermentation weight or a bowl.
If you decide to allow them to float, you can still prevent mold by stirring the apples several times a day during the first days of the fermentation process. By stirring the apples often, they will temporarily be submerged and bathed in the liquid which will make it difficult for mold to form.
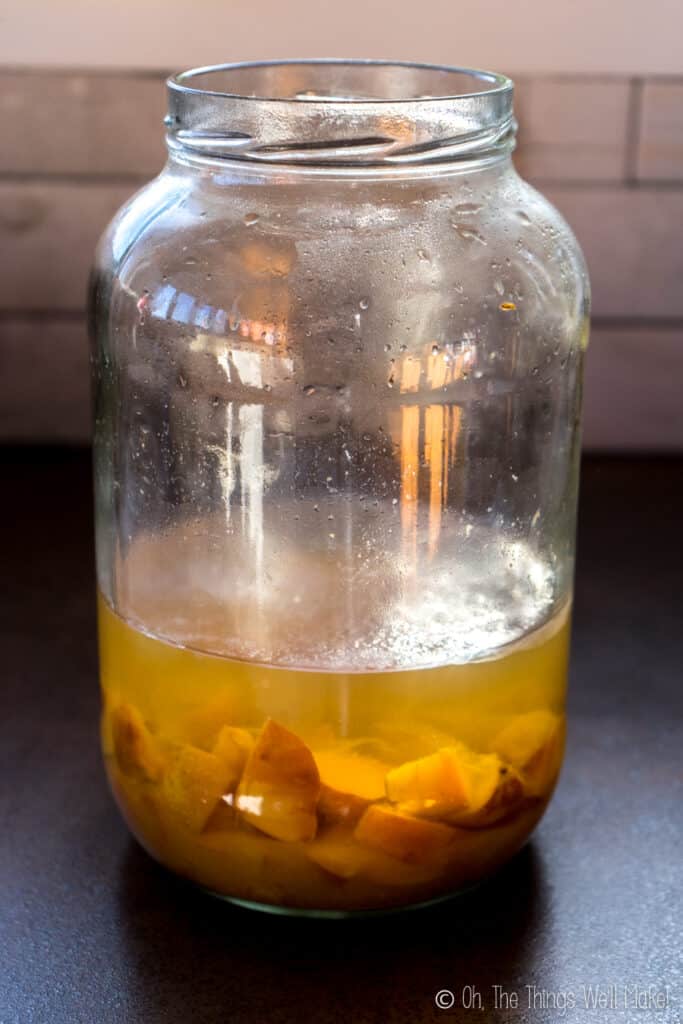
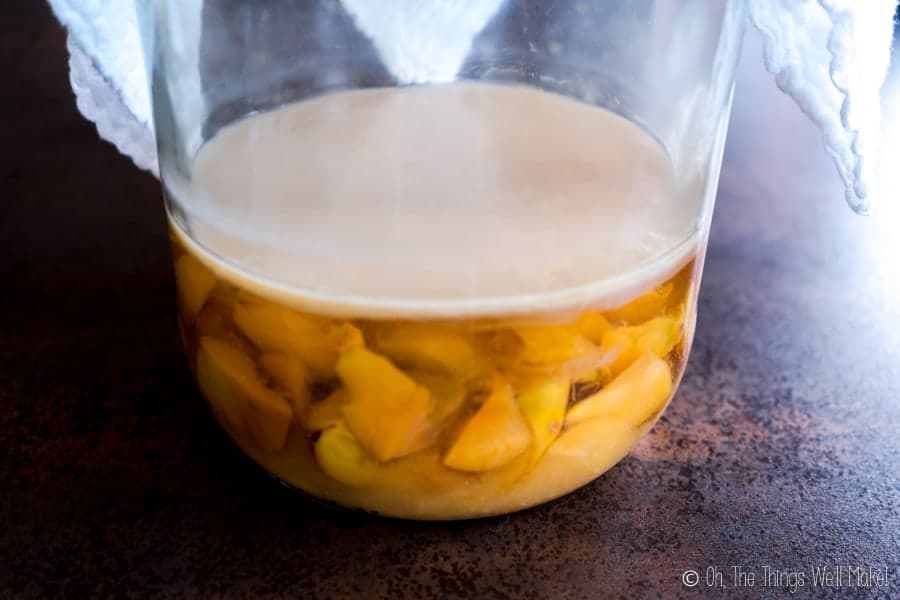
After the first days, it is very unlikely that mold will form anymore so you won’t need to be as vigilant and won’t have to stir as often. As the mixture ferments, an alcohol will form. Later, the pH will drop considerably (that also helps deter the growth of molds and/or unwanted bacteria). Plus, the apple pieces will eventually sink to the bottom of the jar and will no longer be in contact with the air. (At that point, you no longer need to stir at all.)
Bubble formation
Over the next few days, bubbles will begin to form. This is a great sign and shows that the fermentation has begun. If you taste the liquid at this point, you’ll notice that it has begun to develop a mild alcoholic flavor.
Converting to Vinegar
Once the bubbles stop forming, you can strain the apples out. They are no longer necessary. (It’s also fine to leave them and strain them out later.) At this point, the alcohol has begun to convert to vinegar.
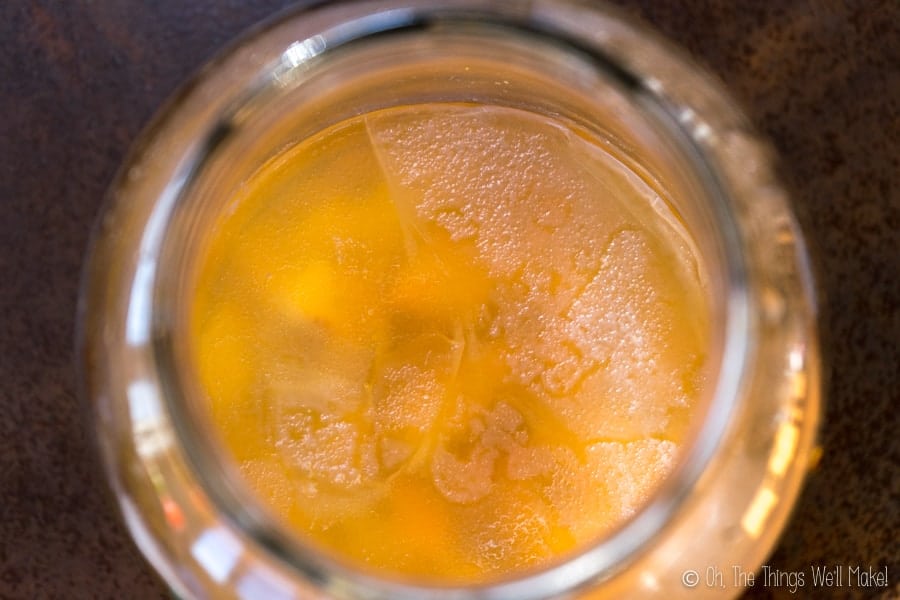
If you notice that a mother has begun to form on the surface of the liquid at this point, you may prefer to leave the apples so as not to disturb the mother.
At this point, the low pH of the mixture (and the fact that the apples have sunk to the bottom and are no longer in contact with the air), keeps mold from forming. There is no longer any need to stir the mixture. In fact, you probably will want to leave it undisturbed so that a mother can form.
Leave the vinegar undisturbed for several weeks. At that point, you can begin to taste the vinegar for flavor.
Using Wild Yeast
While I wasn’t very successful using wild molds and yeasts when making my homemade soy sauce, I do usually make homemade vinegar by relying on the wild yeasts and other microorganisms in the air. (To use wild yeasts, just follow the instructions I gave above.)
Using Brewing Yeast
On the other hand, some people prefer to use brewer’s yeast to have more control over the outcome of the vinegar. To use a brewer’s yeast, first cook the apple, sugar, and water mixture to over 160ºF to kill unwanted bacteria and yeasts that could compete with the yeasts you are adding.
Once the mixture has cooled, add a small amount of brewer’s yeast to help add strain-specific yeasts that will help ensure a good-quality homemade vinegar.
Using a “Mother”
During the course of making homemade vinegar, a mass of cellulose will eventually form on top of the liquid. This is very similar to the “SCOBY” (symbiotic culture of bacteria and yeast) that forms on homemade kombucha. In this case, it’s called the “mother” of vinegar.
While you can choose to discard the mother or even eat it, you can also save it to help quick-start subsequent batches of homemade vinegar.
Other uses for the mother
If you’ve finished making vinegar and don’t know what to do with the mother, how about some of these ideas…
- Store it in vinegar until you are ready to make more vinegar.
- Give one to a friend who loves to make things from scratch.
- Use it in smoothies or eat it as-is.
- Try making a different type of vinegar with it. (Experiment!)
- Add it to the compost bin.
- Feed it to your pets or chickens.
Straining the vinegar
Once you are happy with the flavor, you can bottle your homemade vinegar. If you didn’t remove the apple scraps at the time the liquid stopped bubbling, now is the time to strain out the apples.
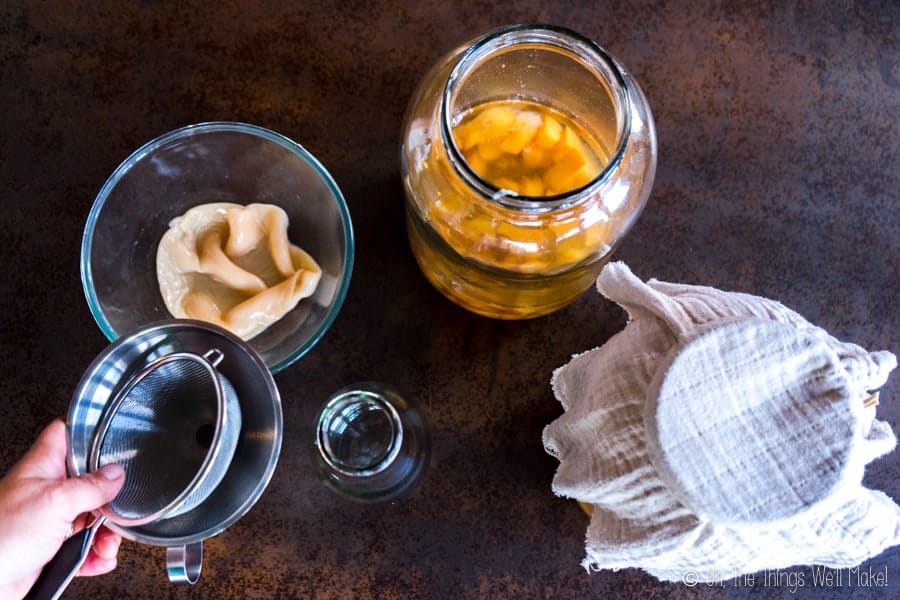
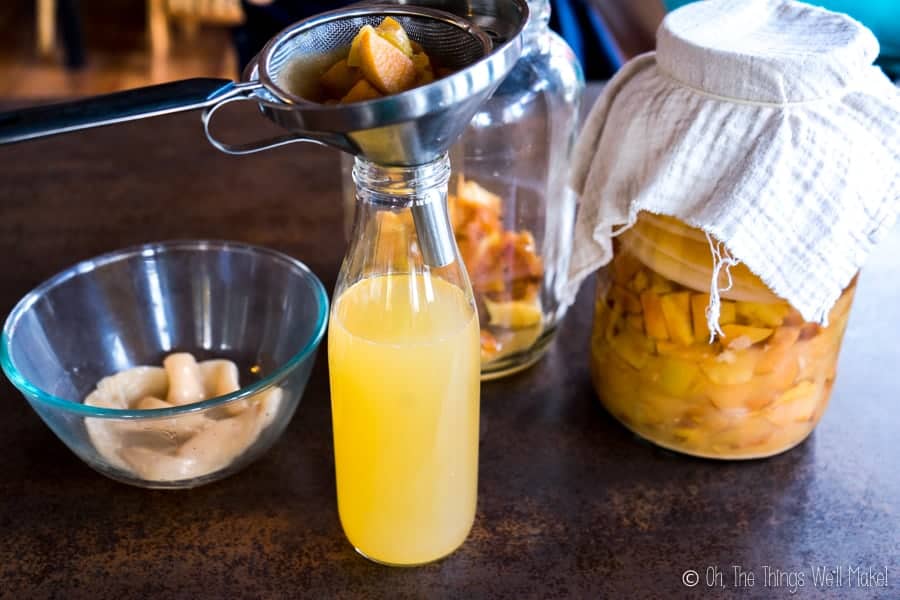
You can choose whatever method you prefer for straining out the apples.
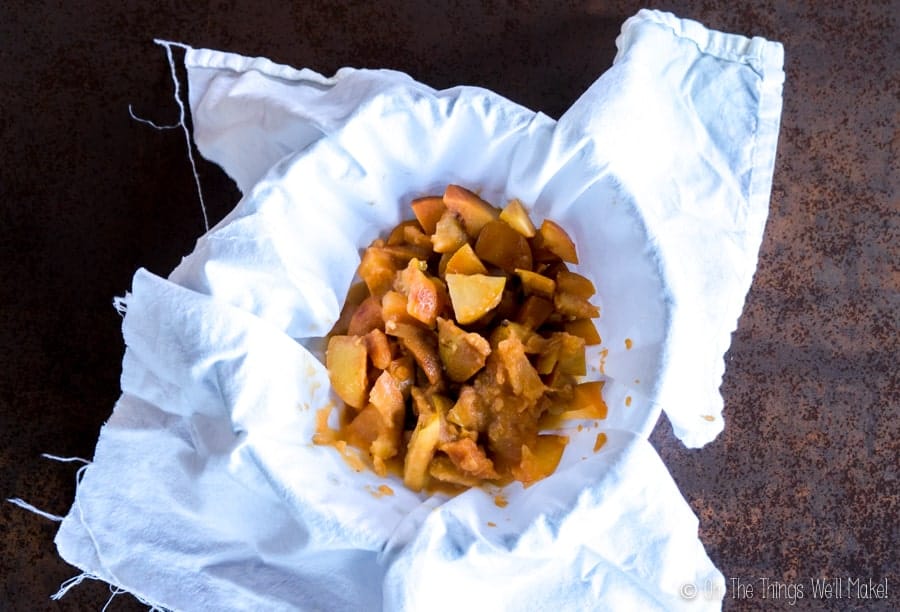
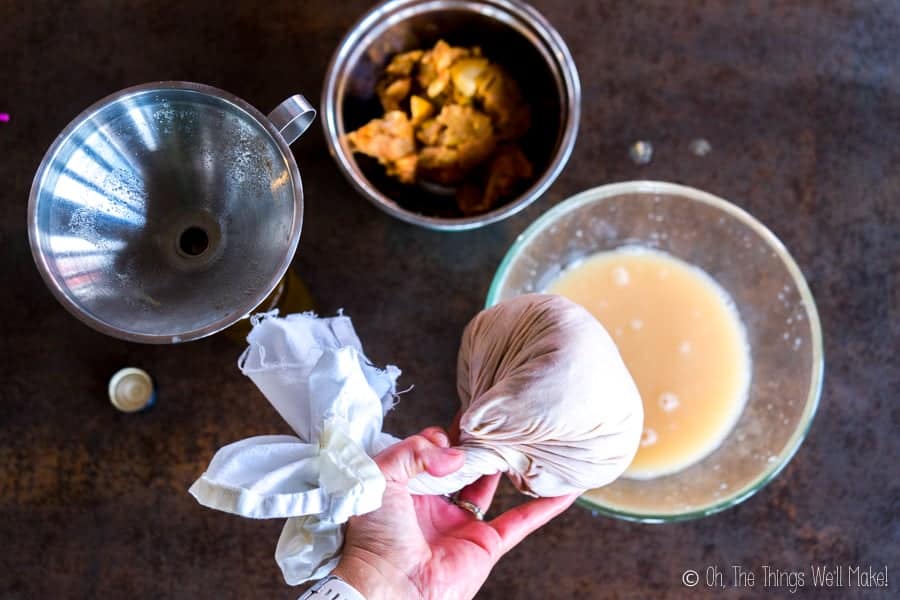
I usually use a stainless steel strainer and a funnel to remove the apples from most of the liquid. Once I’ve removed the apples, I pour them into a bowl that has been lined with a clean cotton cloth. I then twist the cloth to squeeze out any excess vinegar remaining in the apples.
The remaining apple mush can either be eaten, thrown into the compost bin, or fed to pets like chickens. (That’s what I usually do.)
Apple Cider Vinegar Recipe
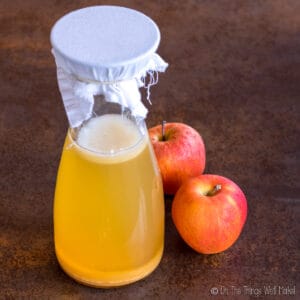
Homemade Apple Cider Vinegar
Equipment
Ingredients
- 9 apples (or apple scraps)
- 3 Tbsp sugar
- 9 cups water or enough to cover the apples
Optional ingredients to help quick-start the vinegar
- 1 dash apple cider vinegar to quick-start the process and help suppress microbial growth.
- 1/2 tsp. brewer's yeast or yeasts meant for making wine or cider
Instructions
Preparing the Mixture
- Rinse and dry the apples and remove any rotten areas and the stems. (You can also remove the seeds.)
- Cut the apples into small pieces and place them in the bottom of the glass jar.
- Add around 1 tsp. sugar for each apple used. Mix together.
- Cover the apples and sugar with water until they are fully covered.
- If you will be using a brewer's yeast and want to kill off any competing wild yeasts, heat the mixture to above 160ºF for a few minutes. Allow the mixture to cool and then add in the yeast of choice.
- Optionally add a dash of vinegar to help quick-start the process and help prevent unwanted molds and bacteria from forming.
- Ideally, the apples should stay under the surface of the water to help prevent mold from forming. You can press down on them with a bowl or use a fermentation disk to weigh them down. Cover the mixture with a clean cloth, coffee filter, or paper towels to allow air through but to keep insects away.
Fermentation begins
- For the first days, remove the cloth and stir the mixture several times per day. (Make sure to cover it again as soon as you are finished each time.)
- When the mixture begins to bubble, you can add in a vinegar mother to help speed up the fermentation process.
- Once the apples fall to the bottom of the jar, you no longer need to stir the mixture.
- Days later, when the mixture stops bubbling, you can strain out the apples if you like. If a mother has begun to form on the surface, you may choose to leave the apples so as not to disturb the mother.
- After several weeks, you can begin to taste test the vinegar. When you are happy with the flavor, you can bottle the vinegar.
Straining and Bottling the vinegar
- Remove the apple solids by pouring the mixture through a funnel with a strainer into glass bottles.
- To obtain more of the vinegar from the apples, pour the apples into a cloth-lined bowl. Pick up the ends of the cloth and wring it, pressing out any excess vinegar.
Storing the vinegar
- Vinegar is best stored in a cool, dark place. You can store it in the refrigerator, but it's not necessary. Cool temperatures help prevent further fermentation.To age vinegar properly, you want as little airspace as possible. That's why bottles are ideal (vs. jars). This will help prevent another mother from forming and, again, further fermentation).


There is no need to boil the apple cores etc. if you will add brewer’s yeast. That yeast is developed to be very aggressive and kill of other yeast strains. You can even get a yeast strain that is designated as a “killer yeast”, such as Lalvin EC-1118 or K1-V1116, to ensure this.
Hi Mats,
Thanks for chiming in! You’re right that strains like EC-1118 and K1-V1116 are super aggressive and can outcompete most wild yeasts. That said, even when I’ve used brewer’s yeast, I haven’t personally found it necessary to boil the scraps beforehand either—but I’ve seen others recommend it as an extra precaution for those worried about competition from wild microbes.
In my post, I included boiling as an optional step for those looking to be extra cautious, but it’s definitely not required—and I usually skip it myself. Appreciate you taking the time to share your input—it’s always great to explore the different methods people use!
Thanks tor sharing, i’ll try to make it.
I am confused about the white layer of foil left on top of the cider. Do I remove it before straining the apples, or remove it completely?
Hi Merilee,
That white layer is most likely the vinegar “mother.” It’s a normal part of the fermentation process. You can remove it before straining the apples or just lift it out afterward when you bottle the vinegar.
When I filtered out the juice I s queezeed it through a jelly cloth. I ended up with a thick layer of apple sauce on top. Should I strain the sauce out
Hi Margie,
Yes, you can strain that out if you prefer a clearer vinegar. When you squeeze the apples through a cloth, it’s common to end up with some apple pulp or applesauce-like sediment. You can strain it again through a finer cloth or coffee filter, or simply let it settle and pour off the clearer vinegar from the top.