

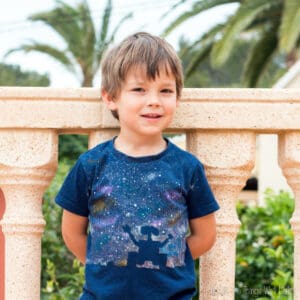
Easy Galaxy Wall-E T-Shirt (& Disney Castle Shirt)
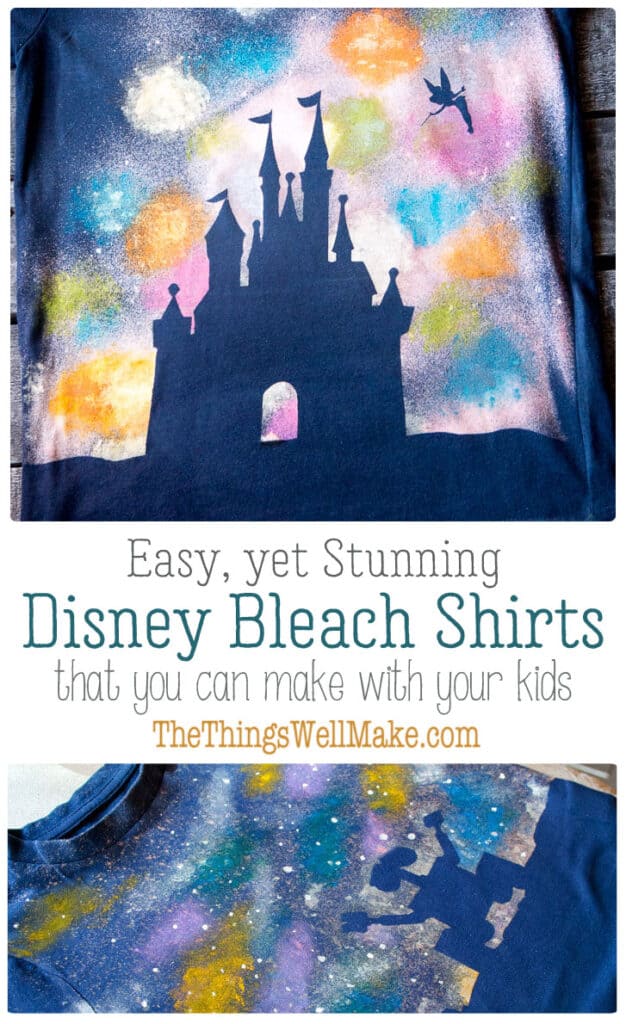
Kids love making these easy Disney shirts with some supervision. Learn to make a galaxy Wall-E t-shirt or a Disney castle fireworks t-shirt using the same simple method.
When I first wrote this post in April of 2013, my son was obsessed with Wall-E. Unfortunately, it was almost impossible to find Wall-E merchandise. My son wanted a Wall-E t-shirt, and since I love making t-shirts, I was happy to oblige.
The first Wall-E t-shirts I made him ended up being more complex than I hoped. I wanted something easier for the blog.
While watching the movie for the 48th time (that may be an exaggeration), the idea came to me!
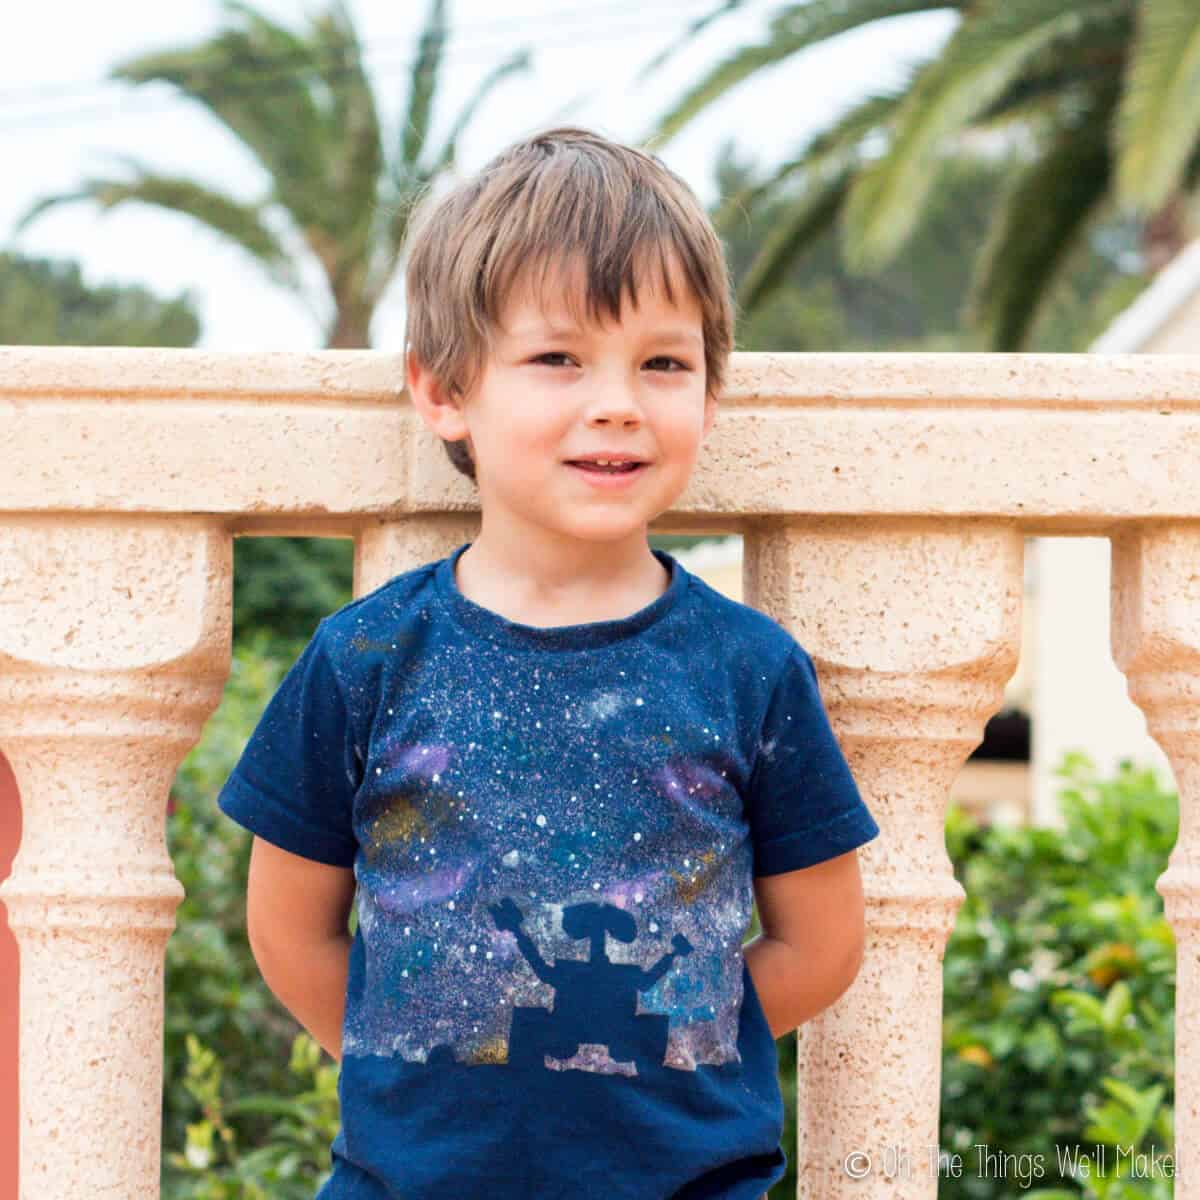
I loved the scene of Wall-E reaching into the stars, and thought there must be a way to make a galaxy t-shirt with a silhouette of Wall-E.
We later ended up making another one of these t-shirts for his Wall-e birthday party.
DIY galaxy t-shirt
I didn’t expect that I was the first person to want to make a galaxy t-shirt. (Although I imagined that I might be the first person to want to make a galaxy wall-E t-shirt. ? )
So, I did a search for “how to make a galaxy t-shirt,” land came across a tutorial that used a basic bleach technique and fabric paint. (I used to link to the tutorial I followed, but it has since been removed.)
I wanted to take it one step further, though. My idea was to mask out an area with freezer paper. The freezer paper protects the material underneath from bleach and paint. That allows the silhouette to really stand out.
Materials
- A dark blue or black t-shirt
- Freezer paper
- A spray bottle
- Bleach – If you can find a gel-type laundry bleach, that’s best.
- Fabric paint
- Sponges
- A fine paintbrush or old toothbrush
- An iron
- Parchment or baking paper
Making the silhouette t-shirt
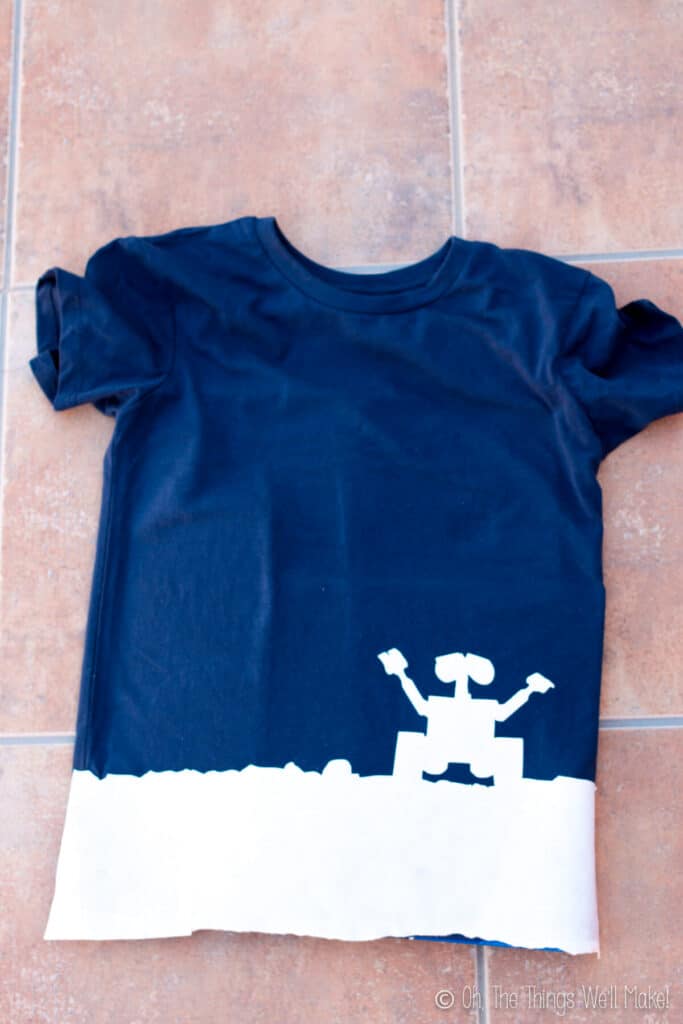
First, choose the silhouette you want to use. I chose a silhouette of Wall-E for our first shirt. (I’ll show you an alternate idea for a Disney princess castle shirt below!)
I then cut that shape out of freezer paper. You can cut it out by hand using a pair of scissors or an x-acto knife.
If you happen to have a Silhouette Cameo, though, I made a silhouette cameo stencil. Click on the link to download the studio file for the Cameo if you have one.
The cool thing about freezer paper is that you can iron it onto fabric (shiny side down) and it will cling to the fabric. It can later be peeled off and won’t leave a residue on your shirt. That makes freezer paper an ideal stencil for t-shirts and other cloth projects.
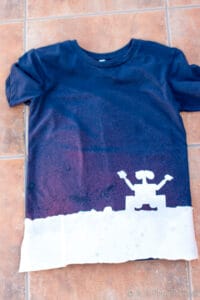
Spray on bleach
Using a spray bottle, spray bleach over the stencil and lightly over all areas you want to be lighter in color.
Before you spray with bleach or paint the t-shirt, place a piece of cardboard between the top and bottom layers of the t-shirt. This will keep the bleach and paint from bleeding onto the backside of the t-shirt.


Before spraying the bleach on the t-shirt, practice with water in the spray bottle on a different surface. That will allow you to adjust the nozzle to the right amount of spray. Once you are able to control the spray, switch the water for bleach.
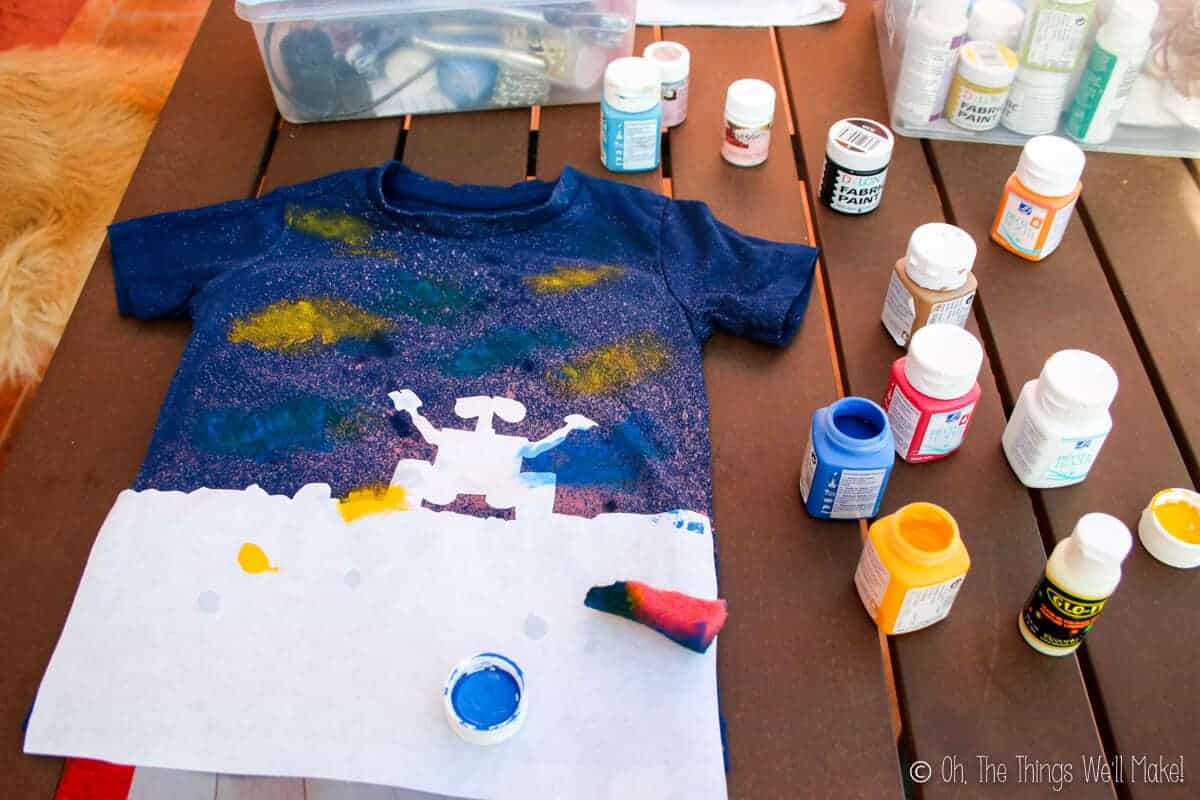
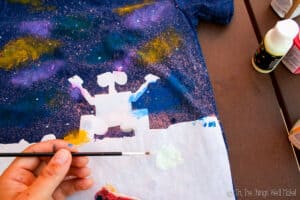
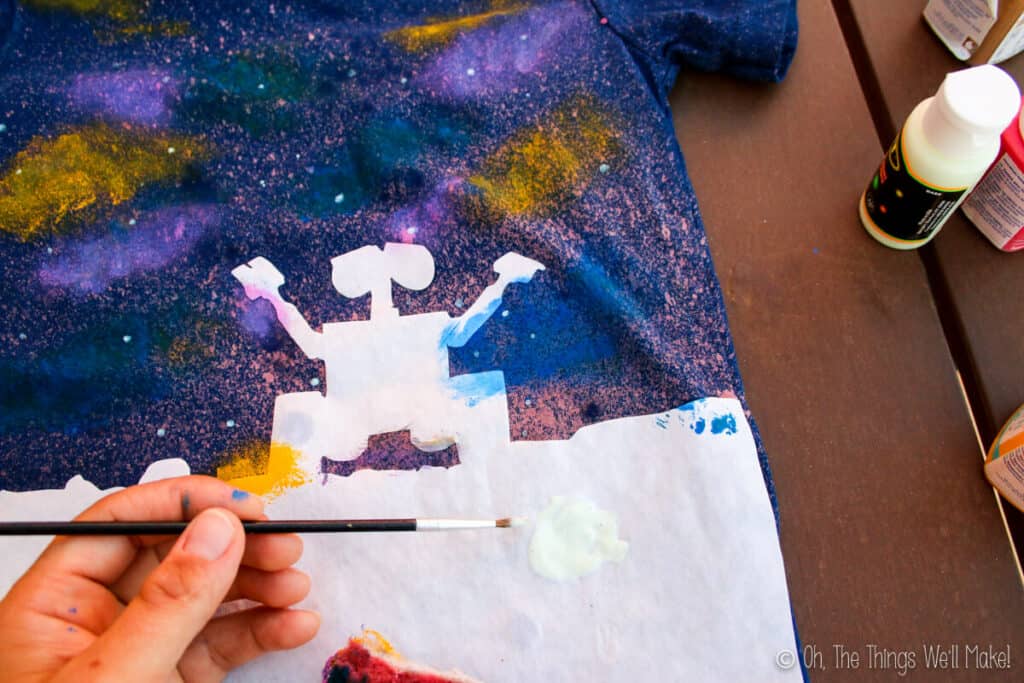
Add Fabric Paint
Next, dab on paints in a variety of colors to represent different groups of stars in the galaxy. I cut an old sponge into tiny pieces and used that to lightly dab on the colors.
To highlight individual stars, you can either splatter on some white stars with an old toothbrush, or you can manually paint them on with a fine paintbrush. You might even choose to use a combination of both techniques.
Try painting some stars with glow-in-the-dark fabric paint for make the t-shirt even more fun!

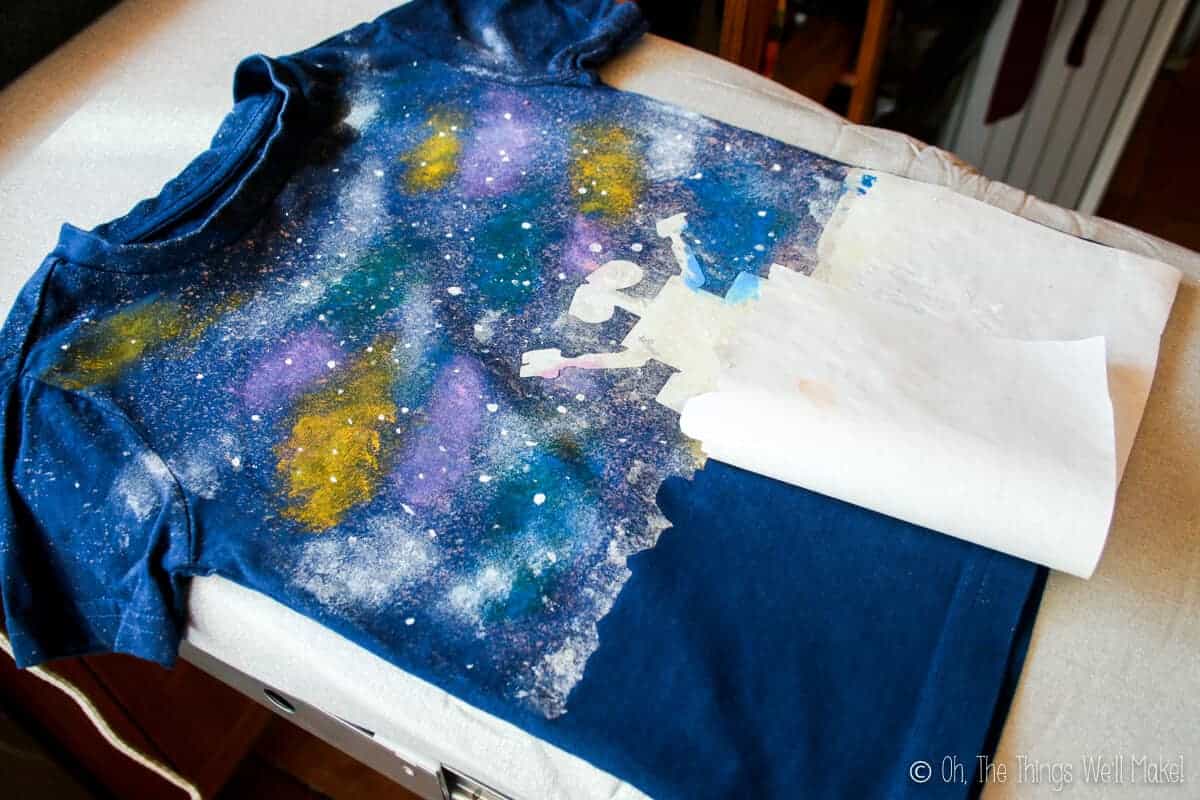
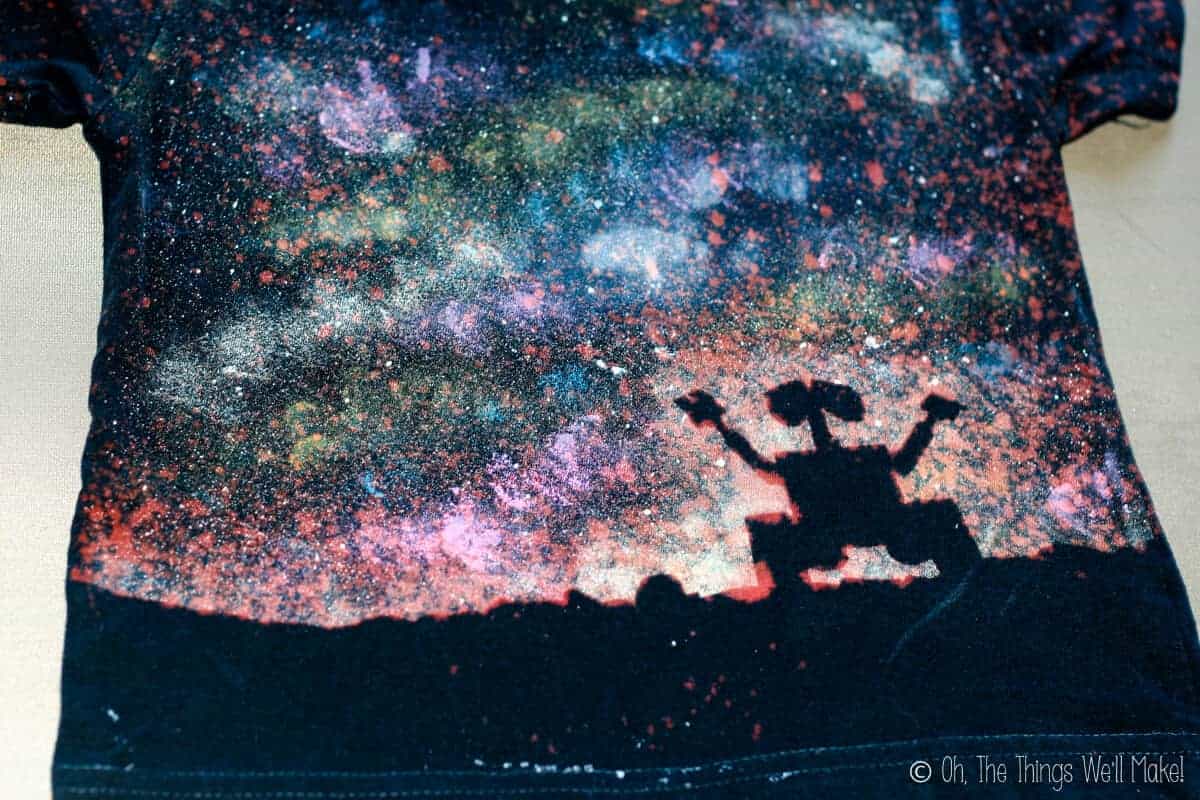
Once you’ve finished painting, carefully peel off the freezer paper stencil. Admire in awe how Wall-E admires the beautiful colors of the galaxy around him!
If you have problem areas, you can fix them now or wait until after you’ve finished washing the shirt. (See troubleshooting below.)
Setting the t-shirt
Set the fabric paint with a hot iron. Follow the instructions for setting your particular fabric paints.
To protect your iron, I suggest covering the painted t-shirt with parchment paper or baking paper before ironing it.
Wash the shirt immediately after setting the paints to stop the bleach action from continuing!
If you wait too long, the bleach may damage the t-shirt.
Troubleshooting
Bleach bleeds under the stencil
The first time I made this shirt, some bleach soaked underneath my stencil. I had used a lot of liquid all-purpose bleach.
On other attempts, I’ve used a more viscous gel-type bleach made for laundry. (Here in Spain, some types of bleach are sold in the cleaning section and other types are sold in the laundry section.) When I have used that type of bleach, even at full strength, I haven’t had the same issue with bleeding underneath.
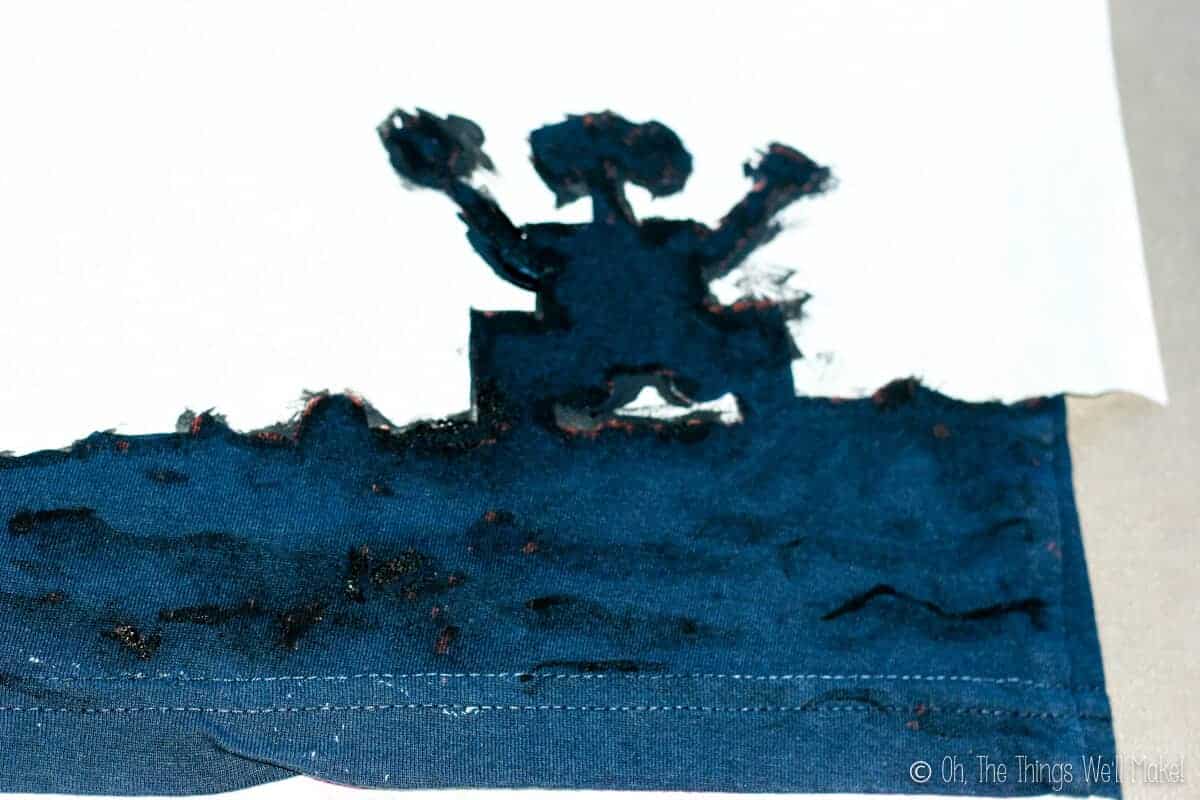
I fixed the problem areas by covering them with black paint. I dabbed the paint on, making it look like there were stones and other objects in the dark, shaded parts of the t-shirt.
To preserve the lines of the silhouette, I used the unused half of my stencil to protect the painted areas. I ironed it onto the painted areas, leaving only Wall-E’s silhouette and the ground area in front of him exposed. I then sponged those areas with black paint, concentrating on the areas that were bleached.
Paint blotches
If you flick the white stars on the shirt with a toothbrush, you may end up with some white blotches occasionally. Those blotches can be easily dabbed into the shirt to make another colored cloud.
Too much bleach
My son loves this shirt so much that we’ve it several times already. This last time, I decided to add a little bit of bleach at the very end of the process. I forgot, though, that I had already twisted the spray cap in order to close it. Rather than spray out in a fine stream, I ended up with big streams across the front of the shirt.
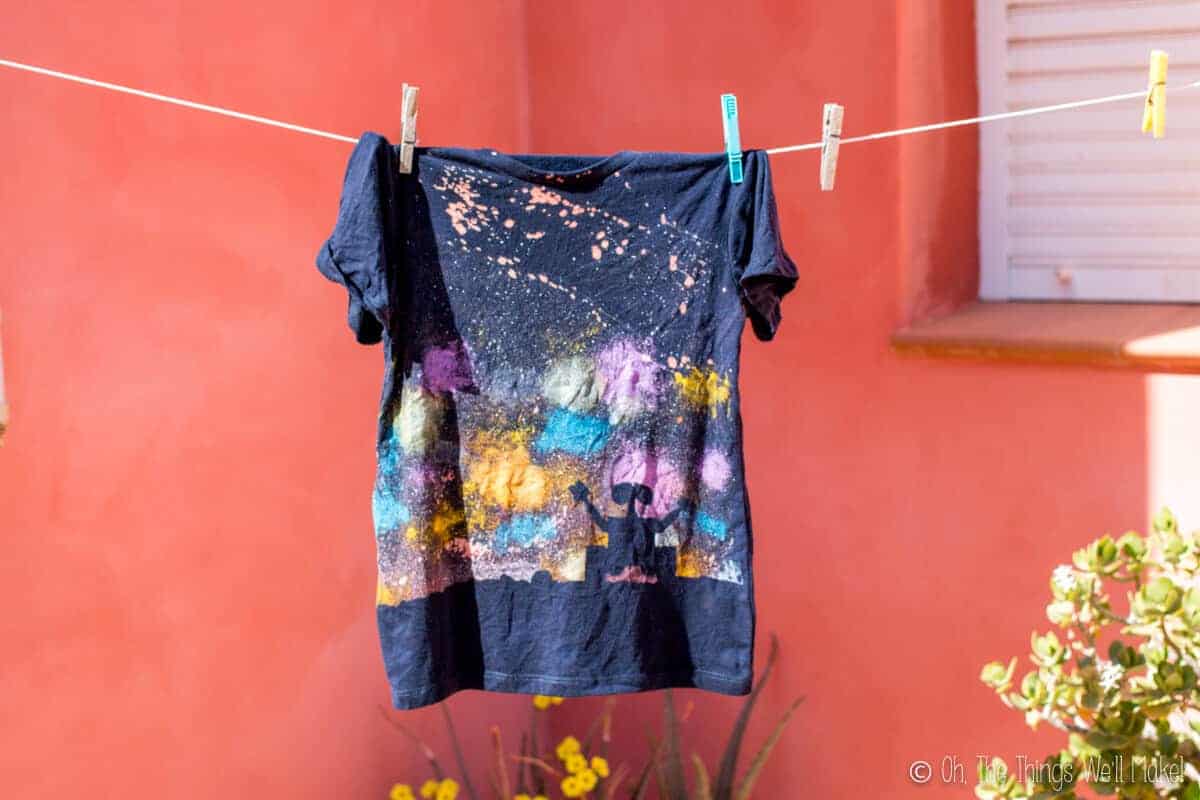
There isn’t much of a fix for too much bleach, other than camouflaging it with more paint. It wasn’t the look I was going for, but I think it looks pretty good anyway.
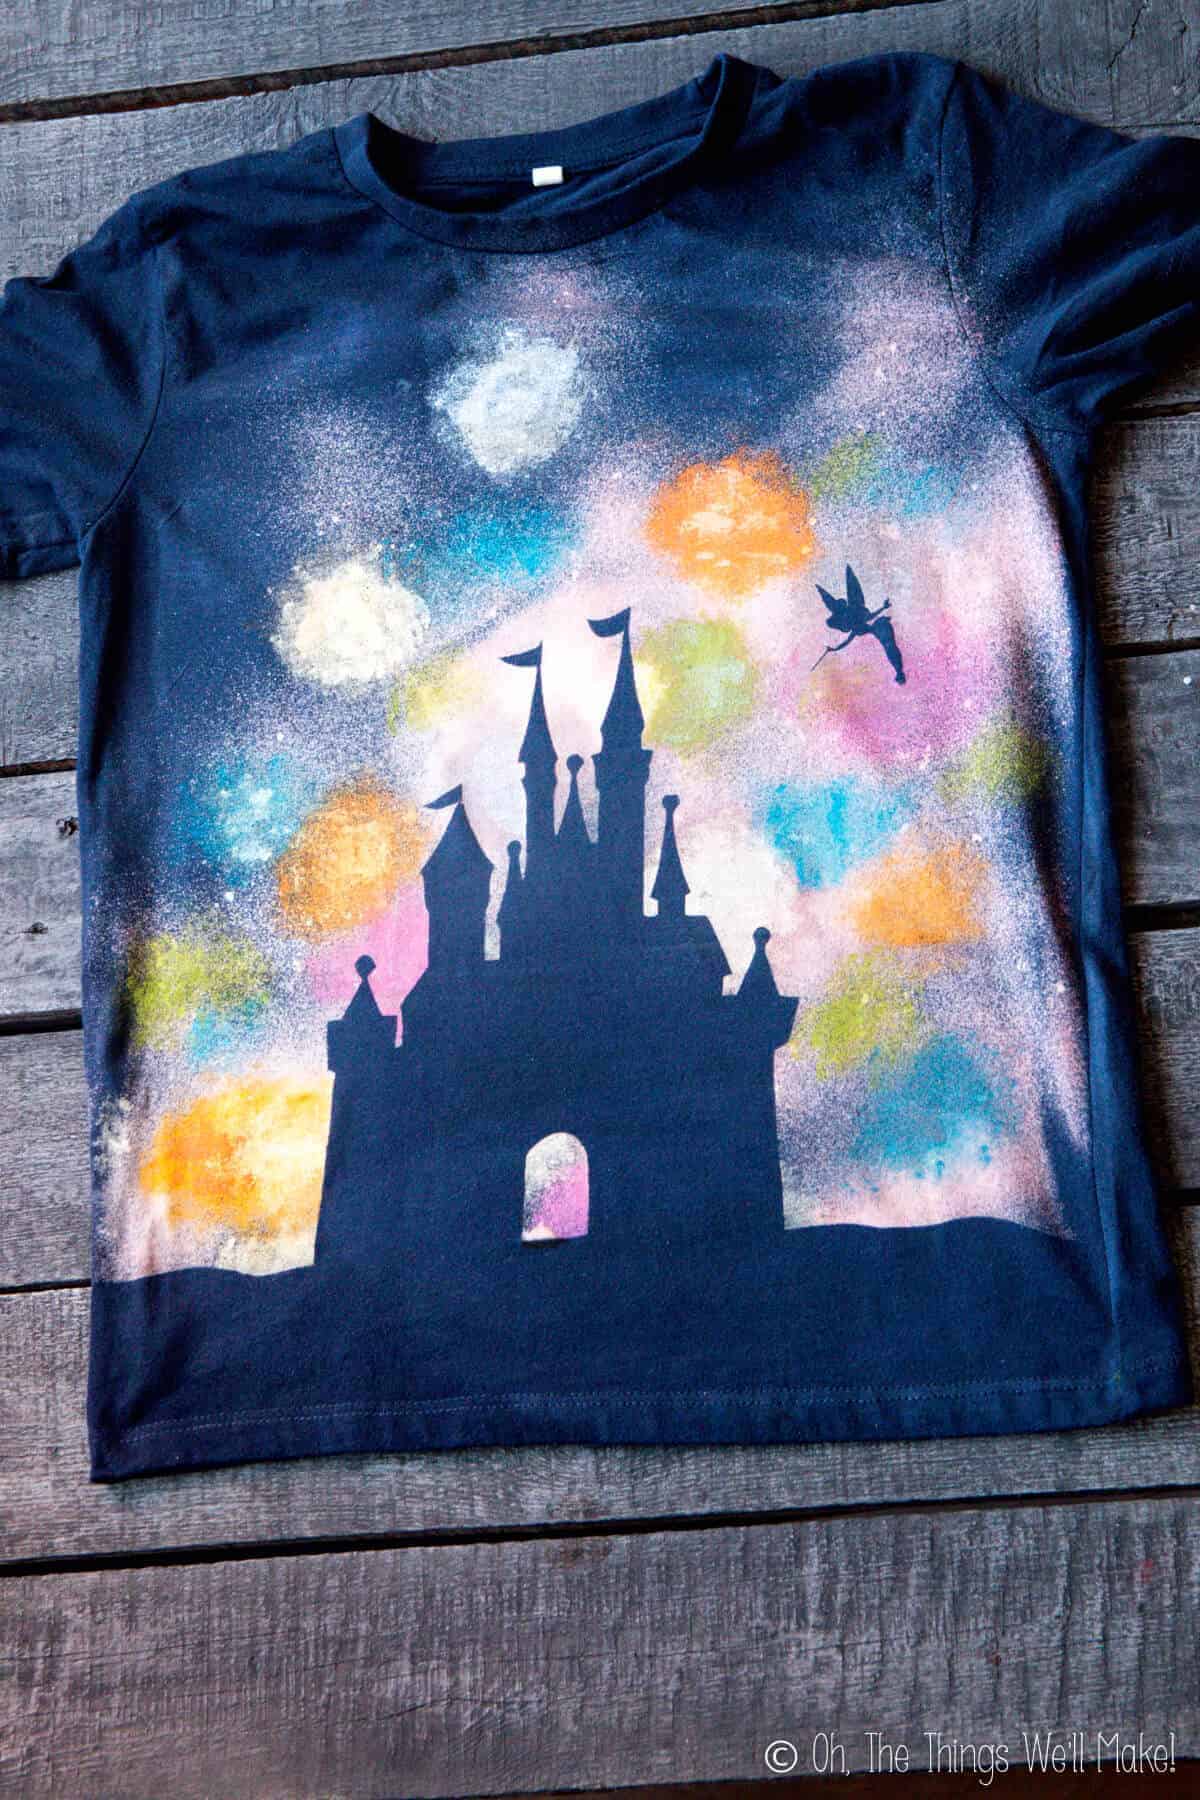
The Disney Castle Tinkerbell t-shirt
My niece liked my son’s shirt so much that she wanted to make one for her trip to Disneyland Paris. We were going to make another Wall-E shirt, but I came up with another idea…
I remembered seeing the beautiful fireworks displays around the Disney castles, and it occurred to me that fireworks are a lot like the colorful stars of the galaxy. I thought the idea would be perfect for a new kind of “galaxy silhouette” t-shirt.
We decided to use a silhouette of one of the Disney castles with Tinkerbell’s silhouette flying nearby for a bit of fun!
If you have other ideas for this technique, I’d love to see them!
Video
Disney Bleach t-shirts
Equipment
- spray bottle
- sponges
- scissors
- Silhouette Cameo (optional for easily cutting out pattern)
- paintbrush or old toothbrush
Instructions
- Once you've chosen and cut out your silhouette from freezer paper, place the freezer paper silhouette onto the bottom of a dark, navy blue t-shirt with the shiny side down. Iron it at medium to high heat, until it has fully adhered to the t-shirt.

- Spray on some bleach. Spray the bleach over the t-shirt, concentrating on the areas near the stencil so that the silhouette is highlighted.
- Dab on Fabric Paint with a sponge: I used pink, light blue, yellow, and silver, blending them together in random clouds. Concentrate on the edges to make the silhouette stand out!

- Paint on some white stars: You can either splatter on some white stars with an old toothbrush, or you can manually paint them on with a fine paintbrush.
- Peel off the stencil and admire your work! Set it with an iron and wash immediately before wearing it. (Notes below)

Notes
This post was originally posted on April 17, 2013. It was rewritten and updated with new information in June of 2020.


Hi Tracy!
My family and I were looking on pinterest for easy DIY t-shirt ideas for our upcoming trip to Disney next month and we came across your Wall-E galaxy t-shirt!! My son loves it!! I don’t have a Cameo to dowload your file, would you be able to email me a jpeg of the file you used, please??
Thank you sooooo much!!!
Amanda
Hi Amanda,
Thank you!
First, let me say I’m a bit jealous. We were able to go to Disney in June and had a wonderful time. I hope your trip is as great as ours was. 🙂
I didn’t add the photo to my post because it isn’t my own photo, but let me link to it.
This is the photo I traced to get a good silhouette: https://www.flickr.com/photos/jmcangel/5733981443/in/album-72157627407503089/
I’m now noticing it’s a creative commons picture, so I should be able to use it as long as I give attribution to the artist. I’m going to look into it and see if I can update the post to make it easier for everybody! I wanted to get you the link right away, though, so you could get to work on it ASAP.
Luckily it’s a pretty simple outline, so you shouldn’t have any problems doing it by hand with an x-acto knife or something like that.
I hope you have fun making it. I’ve made several already as my son outgrows them. hahaha
He’ll be able to help me make the next one. 🙂
Do you have any other pics from party
Hi Laura,
Did you see my post about his Wall-E party?
You can find it here:
http://thethingswellmake.com/wall-e-birthday-party/
I got busy with Halloween and Christmas stuff right after his birthday, and didn’t get around to posting more detailed “how to” posts about some of the party favors. I’ll try to get some in this summer. It’s hard to get stuff done with my little guy home from school, though. I’m trying to enjoy this summer with him. I’ll try to get more up and get them better organized as soon as I can.
He already has me planning his next birthday party for September. 🙂
I love the shirt and want to make one for my son for our Disney World trip but I can’t get the image to Download.
Hi Jessy,
Thanks!
Is there a problem with the Silhouette Cameo file link, or are you looking for just the shape of Wall-E’s silhouette to cut out on your own?
I just traced a pic that I found online that I linked to in the comment to Donna.
I haven’t uploaded it to allow for downloading because the photo isn’t mine, but just linked to the picture.
Thanks so much for your reply, Tracy! Planning to try this, this weekend. I hope mine turn out as great as yours! Think I’ll try 50/50 bleach & water as I’ve read about many others doing it that way. Planning to use a Mickey Mouse silhouette template in place of Wally…for our family trip to Magic Kingdom. Fingers crossed that it all works out! 🙂
This is a great design! Thanks so much for posting! Did you have to rinse out the bleach to stop the bleaching process before adding the t-shirt paint colors?
Hi Donna,
Thanks!
I didn’t rinse out the bleach before painting the shirt, but I worked quickly. I was worried that the bleach might weaken the material if it sat there too long.
If you think it will take you a long time to get the painting done and you are worried about it, you could also try using a lower concentration of bleach just in case.
I’ve made the shirt twice now (since I had to remake it when my son outgrew the first one), and my son “helped” me the second time around. Even with my slow help, we didn’t have a problem with the bleach on either shirt.
Both shirts held up well to multiple washings and drying in the dryer.
I have heard of some people having issues with bleached shirts weakening. Luckily I’ve never had a problem with it. (Knock on wood!) 😉
Could you please email me the image? My 2 year old is in love with Wall E, and we are going to Disney World next month. I would love to be able to make this for him for our trip! Thank you!
It’s not my picture, but I basically traced the silhouette of this image.
It’s a great movie for young toddlers because it’s so visual. I hope that it works out for you, and that you have a great trip!
We are looking into getting over to the US to make a Disney World trip ourselves. When I was growing up, we’d drive down from Michigan during spring break quite often. I loved it!
I’ve already had to make two of these shirts for my son because when he outgrew the first one, he wanted another. 🙂
Luckily it’s pretty simple to make, unlike some of the others I have made for him.
Enjoy!
Hi Tracy!
I love the Galaxy effect on this t-shirt! I was wondering if you used a spray bottle for the fabric paints as well? Can’t wait to try this!
Thanks so much!!
Hi Caitlan.
Thanks!
I probably should have better clarified how I did it. The first time I made the t-shirt I actually used a stiff brush and flicked the white paint over the shirt to make the stars. I made a bit of a mess, though, so when I made it this year, I just manually painted on a bunch of stars by quickly dabbing it on with a very fine brush all over the place.
I made my son another one this year before his birthday, at the last minute and it was really quick and easy to do. This time I was more careful and didn’t get any bleach bleeding under my Wall-E. These things are often intimidating, but I really found this project to be easy and fun.
Hey Tracy, Im crazy in love with your Wall-E stencil creation!!! We are planning my 5 year old Sons first Disneyland trip early next month and I’d LOVE to make him a shirt before we go…. Would you possibly send me the link to view the stencil? After several attempts at downloading, it just doesn’t want to work for me:/
Pretty please with Mickey sprinkles and a cherry on top:)
Thank you so much, Ashley!
It’s a Silhouette Cameo file, so unless you have a Silhouette Cameo, it probably won’t work. I can email you the information, though. 🙂
I’m so jealous! I’d love to go to Disneyland! I hope you have fun!
This shirt is super adorable! I also couldn’t download the image. Is is possible you could email it to me as well? So excited to try this technique! Thank you again for posting such great DIY shirts
You’re very Welcome Jolene. I just sent you an email, and I hope you have fun making the shirt.
Now that summer is coming, I feel the “making shirts” bug, and hope to make and post more projects soon. 😉
We’ve been busy with construction at our house, so I haven’t been crafting or posting as much as I like lately, but I hope to be back to posting more often very soon!
This is awesome! I’m totally making one for my son for our Disneyland trip. I couldn’t download the file though. Do you mind emailing it to me?
Thank you!
Sure, Beth!
I just sent the file. Let me know if you have problems using it.
Have a great trip! (I’m jealous!! I can’t wait to bring my son to one of the Disney parks!)