

Make Wall-E and Eve Stencils and T-Shirts
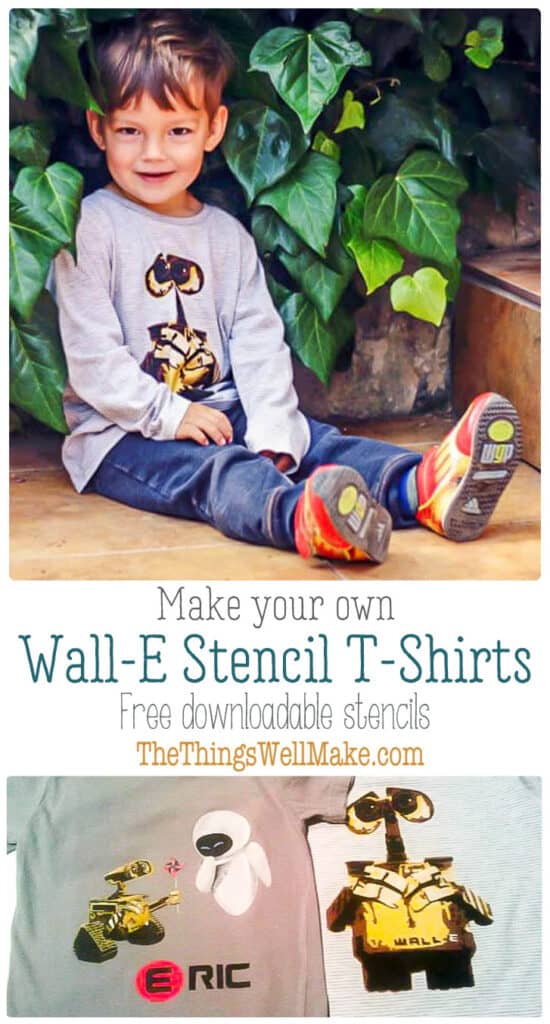
You can make fun and professional looking Wall-E and Eve t-shirts with these stencils, some freezer paper, and some fabric paints.
In my last post, I wrote about the more complicated Wall-E and Eve freezer paper t-shirts that I had made, but I didn’t give a tutorial on how I made them. Originally, I had searched for Wall-E and Eve stencils online, but I couldn’t find anything on the usual free stencil websites, or anywhere else for that matter. I did find one person’s incredible homemade stencil of Wall-E, though, and I fell in love with it. Unfortunately, he didn’t have a link to the files of the stencils. He only had a link to a picture of his stencils.
I did learn a lot from seeing his work. Instead of making a one or two color stencil for my design, I decided to copy his idea of using 4 colors to get a much nicer effect. His combination of gold, brown, black and cream worked perfectly, so I decided to use the same combination.
The first tricky part was making the stencil.
In the past I have always used this tutorial which shows how to make a stencil using thresholds in Photoshop. I highly recommend the tutorial because it is very well explained, and works perfectly.
Last year I made my son one of his favorite t-shirts with a stencil of our dog, Sheena, using this method.
I wasn’t sure how to make so many different levels for the different colors, though, so I searched for a new tutorial, and found this one. I ended up using a picture of Wall-E I found on the internet. Then, I used a combination of the two tutorials on making stencils with photoshop, to come up with the four stencils needed to complete the first t-shirt.
I was excited to see that my stencils turned out very similar to the Wall-E stencil that I had loved so much!!
For those who want to use my files, now that I have done the work making them, I have Silhouette Cameo Studio files available. Just go to the links for each separate layer.
How to make a Wall-E stencil t-shirt (4 colors)
1. Paint the yellow layer. (links to studio file for Silhouette Cameo machine)
(If you can’t use the studio file, this is the jpg file so you can cut it yourself with a cutter.)
I cut the design in freezer paper, and ironed the background part onto the t-shirt, and airbrushed yellow paint onto the open center.
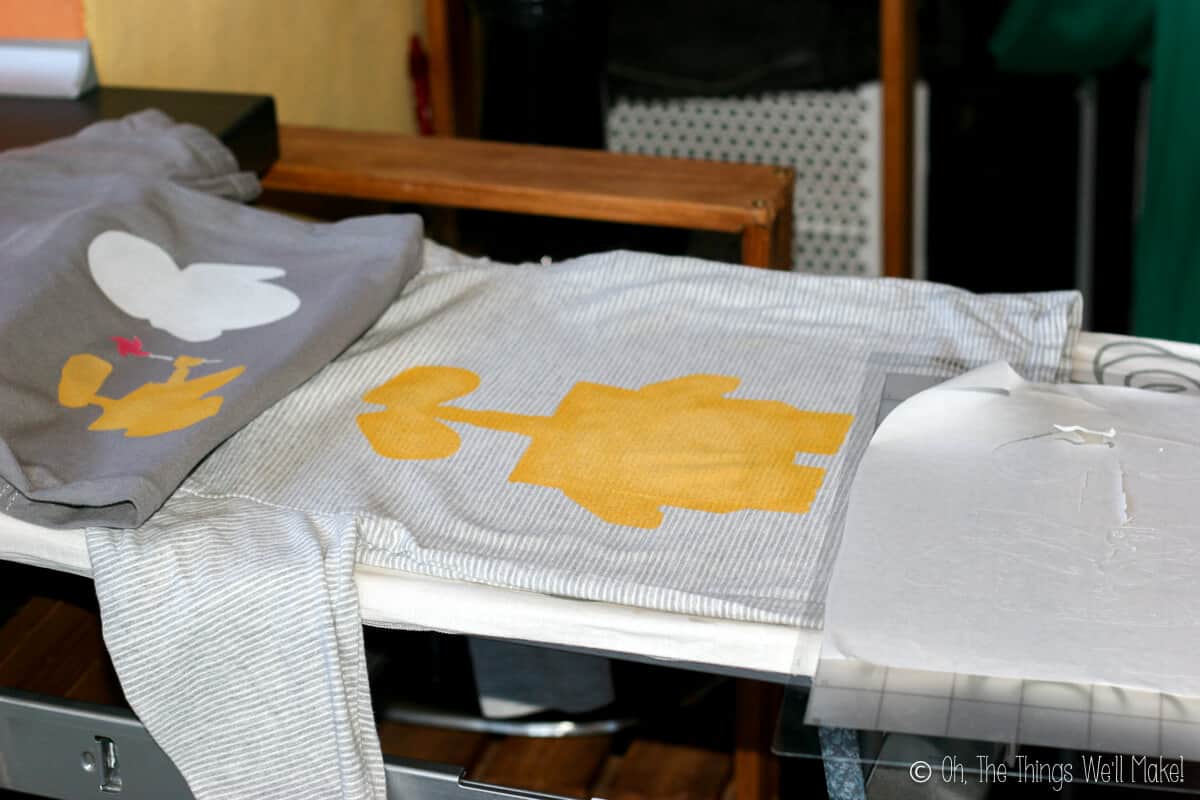
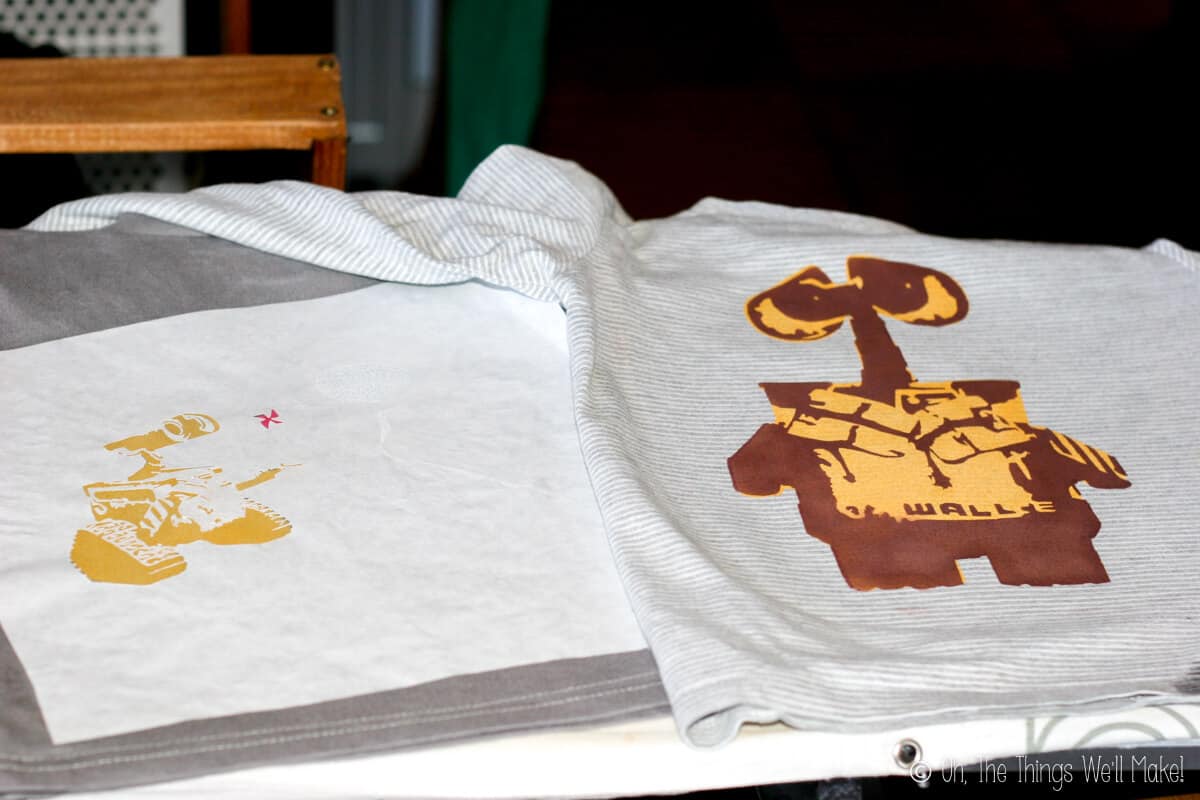
I was making the two t-shirts at the same time, so for the Wall-E and Eve shirt I used the same method, but instead of painting the whole open space one color, I divided it into sections. I painted the open spaces with yellow on Wall-E, white on Eve, and red and white on the pinwheel of this stencil (jpg). You can see both t-shirts after that first step in the picture above.
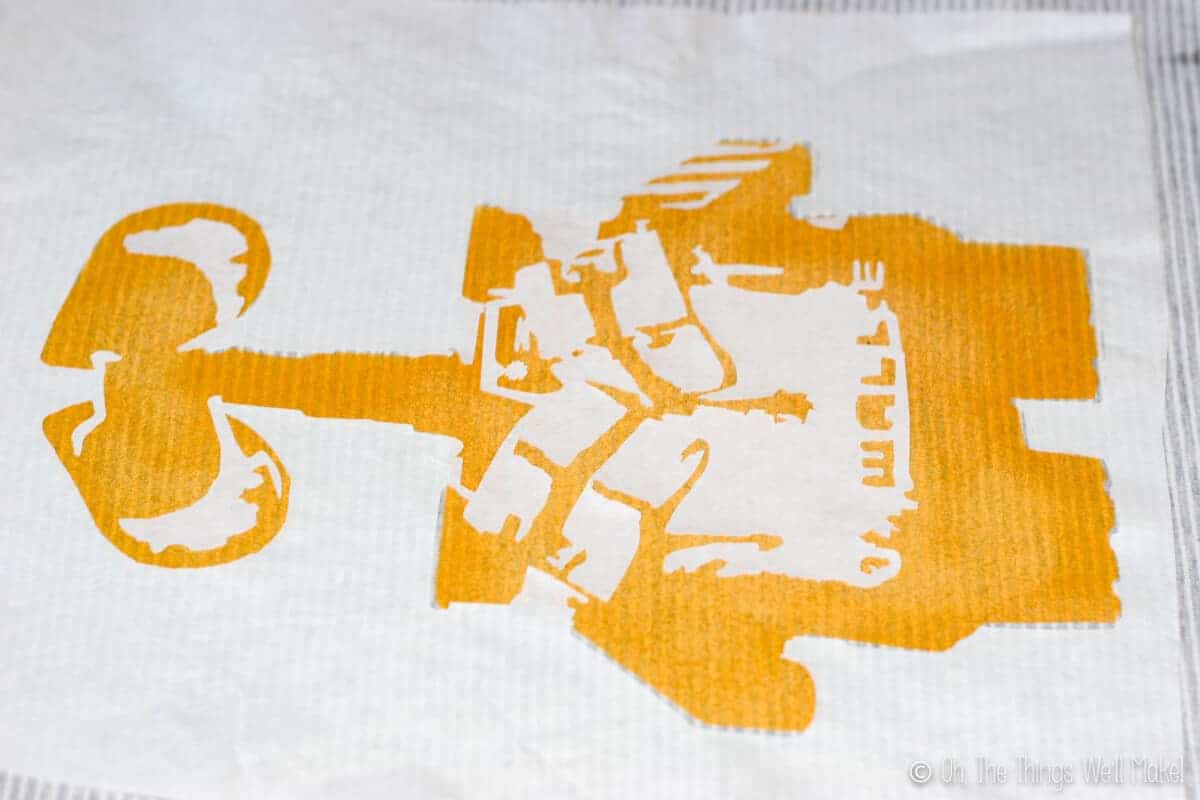
2. Paint the brown layer (jpg).
I ironed on the second Wall-E stencil over the yellow layer, as you can see in the picture. This will now cover the parts we want to stay yellow, and exposes what we want to paint brown.
You can also probably see that the stencil doesn’t perfectly line up. I usually have this problem with multi-layer freezer paper t-shirts. Sometimes I feel like either the freezer paper or the painted t-shirt areas shrink up a little when they are ironed. Another problem, though, is that the stretchy nature of a t-shirt makes it tricky to keep things perfectly lined up. So, you may have to play around with the stencil to line things up as best as possible. If things are too far off, the freezer paper can be lifted off, repositioned, and ironed again onto a new place. Luckily, for this type of abstract art, things don’t really need to be perfect.
Once the second stencil was in place, I airbrushed brown fabric paint over it.
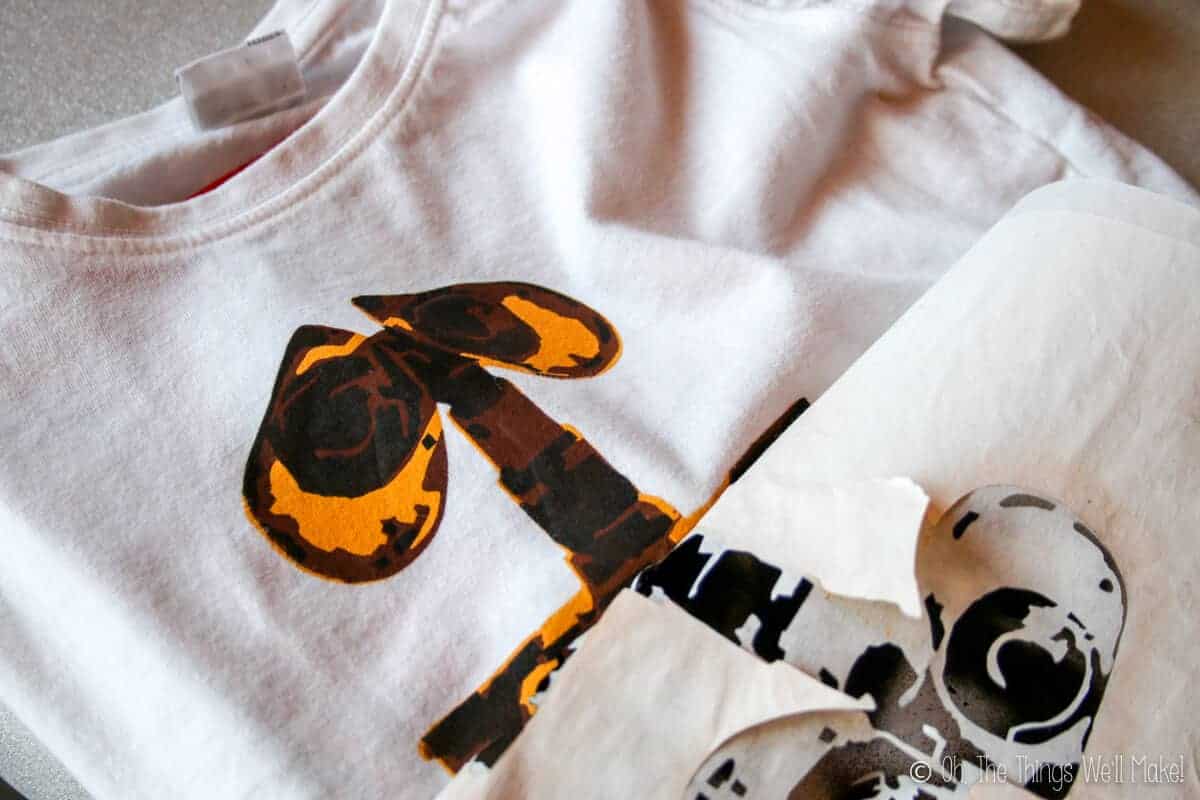
3. Paint the 3rd layer black
In the picture above, I hadn’t put the next stencil on the Wall-E shirt yet, so you can see that it already looks pretty good with just the first two layers done. I then got things ready for the third, black layer (jpg).
In the picture, you can also see that I had already ironed on the second and final stencil (jpg) for the black layer on the Wall-E and Eve shirt. (Because Eve was painted white, it’s hard to see her part on the stencil, but it is there.) Before having placed the Wall-E and Eve stencil, though, I lined everything up to see where Eve’s eyes would be, and I painted them blue. I then covered the blue with the cut-out of her eyes so that they would stay blue when I airbrushed the black on, but that they would have the tiny black lines across them.
4. Paint the final layer a light beige.
Continue as before. This time you’ll line up the last layer over the other three. This layer adds highlights to the design, and is the light beige layer (jpg).
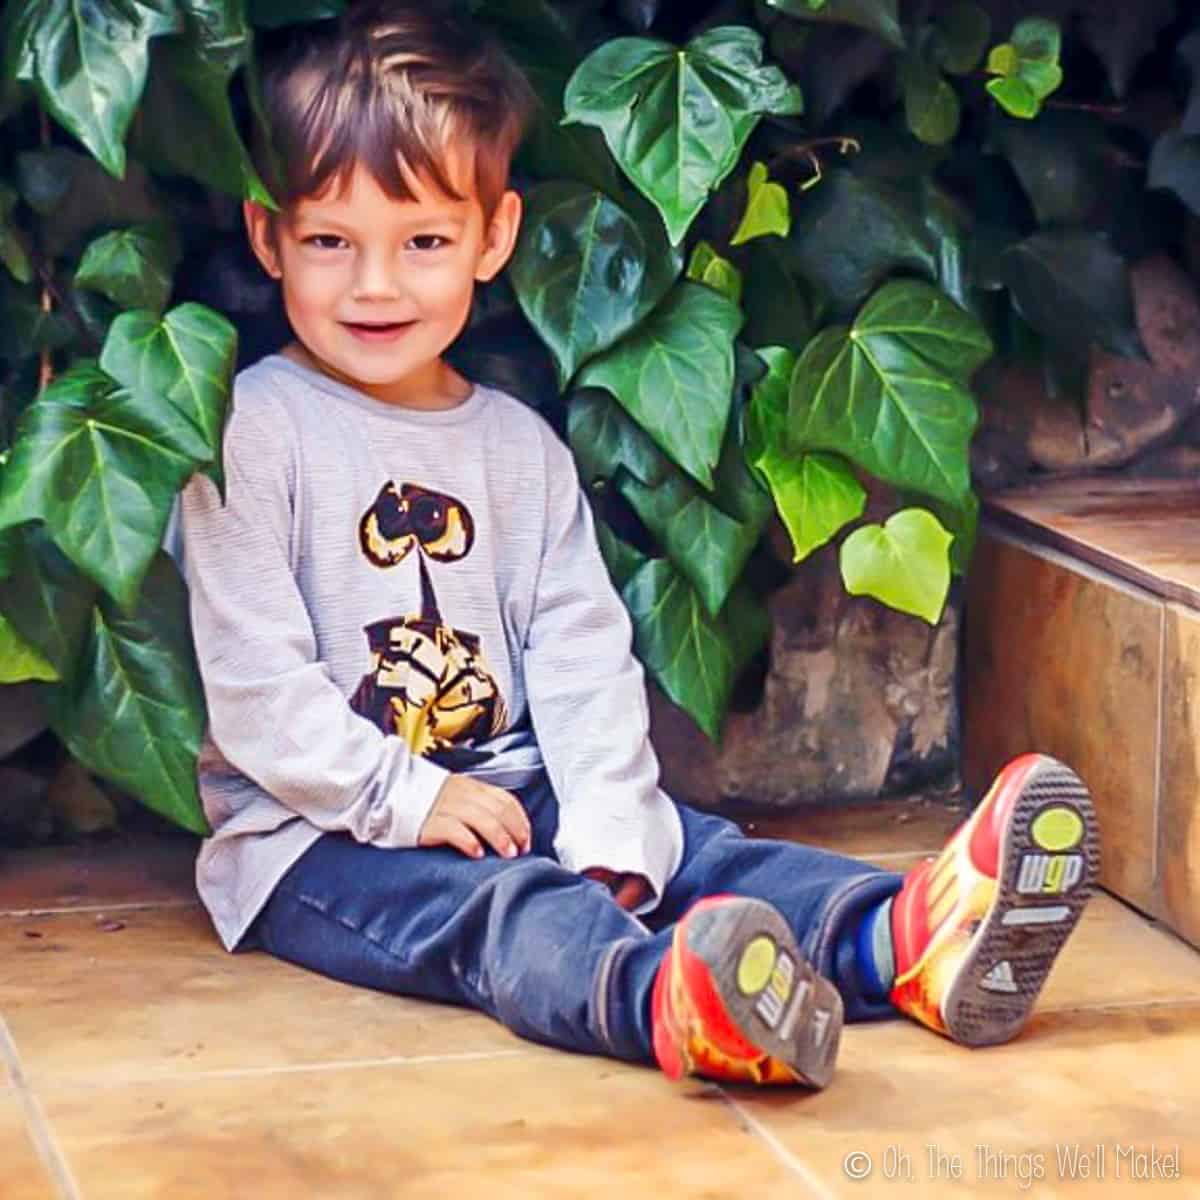
This is the final result…
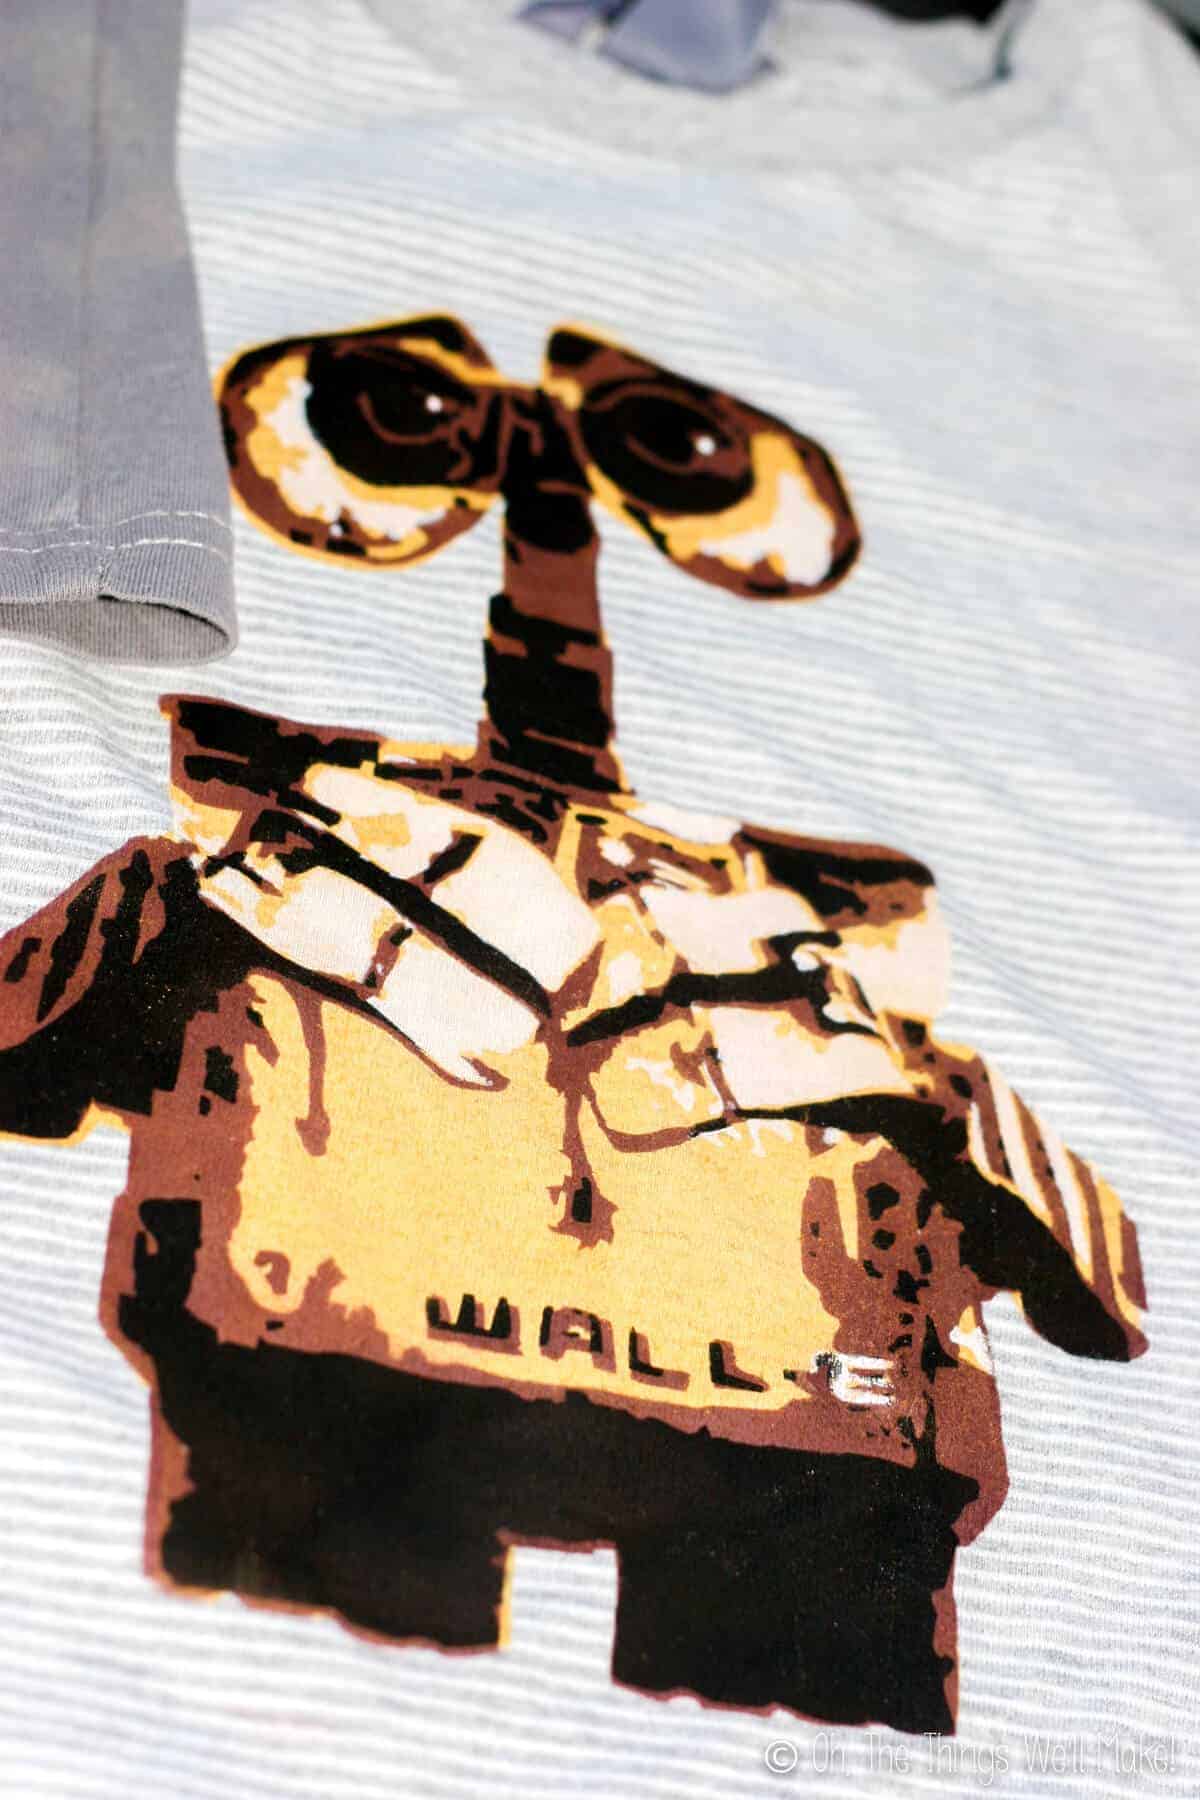
I was pretty happy with the way that it turned out.
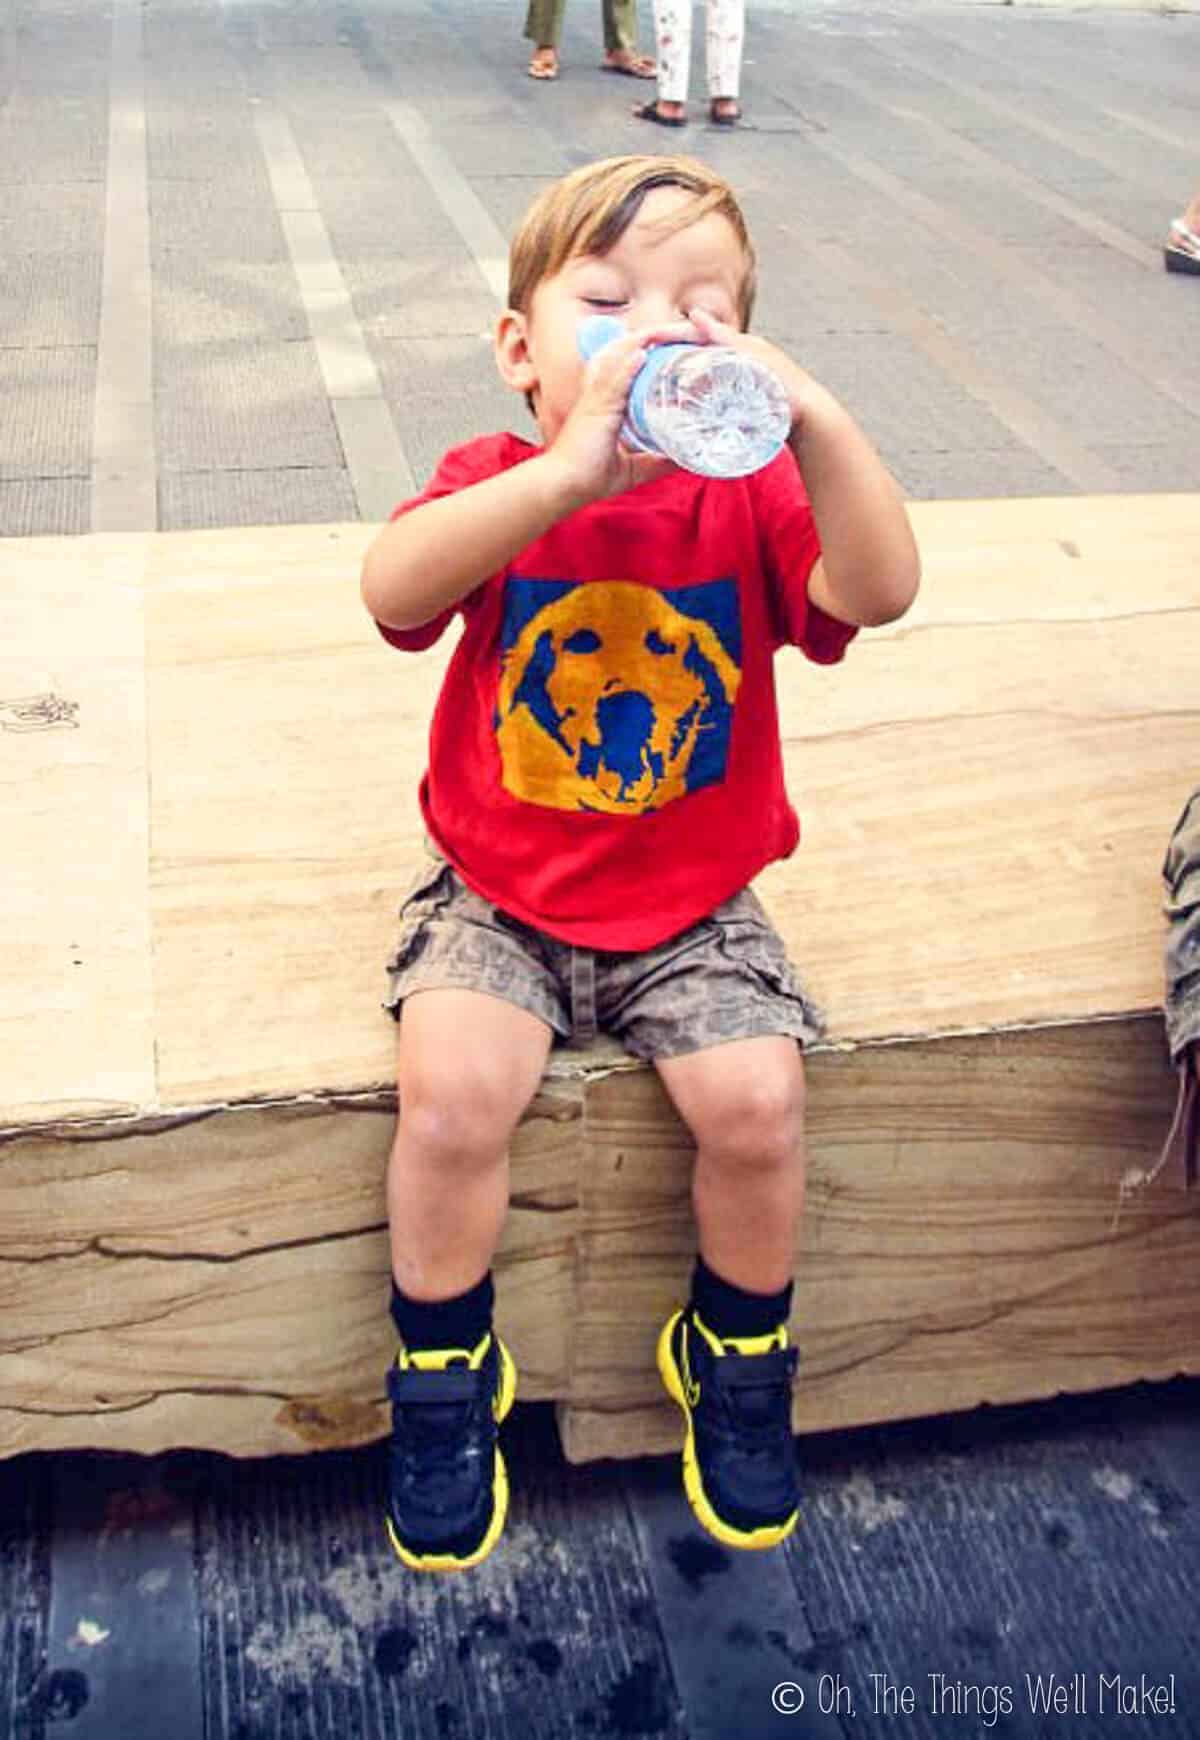
Finishing up the Wall-E and Eve Shirt
The Wall-E and Eve shirt, on the other hand, just seemed a bit too plain.
I wish I had taken a picture of it before I ended up fixing it with paint, but, unfortunately, I didn’t. It was just too black and white, and needed some more texture. So, having learned from the other t-shirt, I decided that adding some brown and gray shading would make it look better. I did all of that randomly by hand.
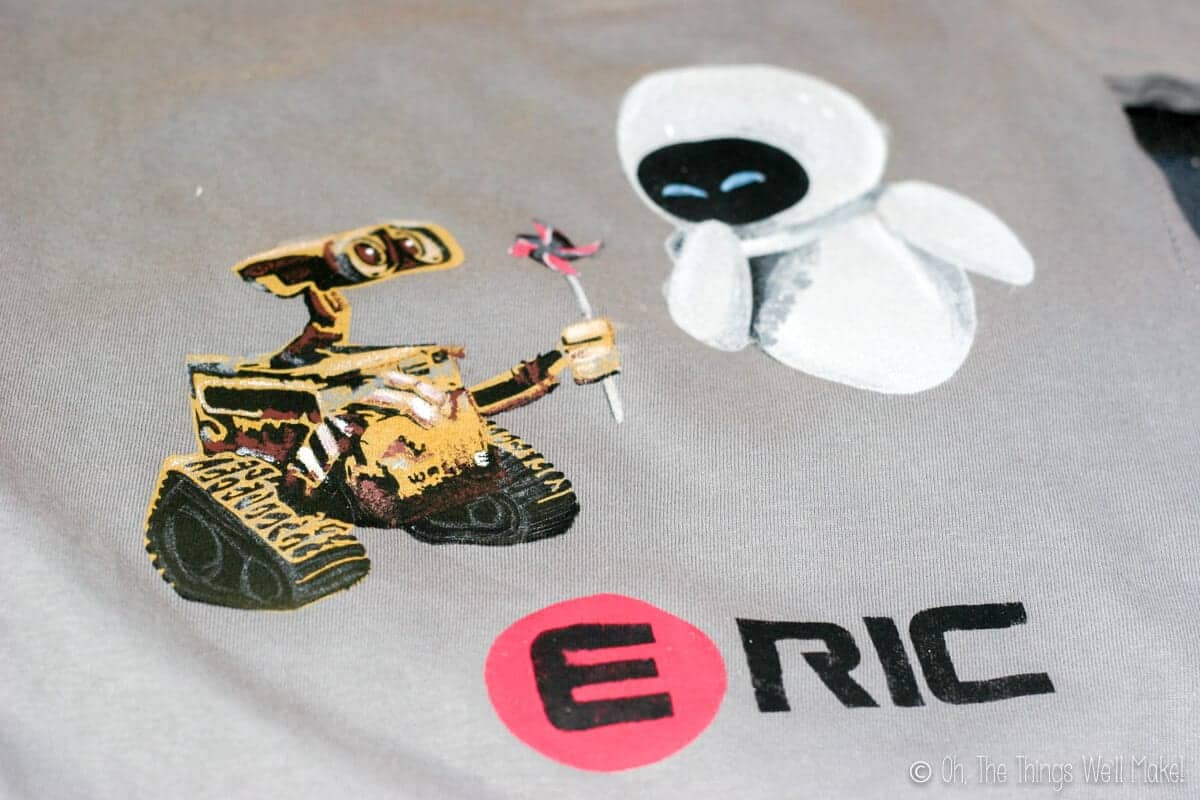
The shirt turned out much, much better, but I felt like it still needed something fun. So, I added my son’s name with a Wall-E like font. You can download the font (gunship) for free here. In typical Wall-E style, I cut out a circle around the E and painted it red.
Once again my son was very happy with his t-shirts, and asks to wear them all of the time. That, of course, is what makes it all worthwhile!
If you do end up making either of these shirts, or use the stencils for something else, I’d love to see them!
I’ve gotten a few e-mails from people showing me their work, and I LOVE them!!

WOW!! That turned out awesome!
Thanks! 🙂
Hi there I wanted to try this but the only link that work for wall-e is the first layer. Can you fix the links for the other stencil images ? Thank you so much can’t wait to try it !
Hi Jen,
I tried them all and haven’t had any problems. What files are you trying to download, the studio files for Silhouette Cameo or the jpg files? The jpg files are the second ones in parentheses.
Ok now it is working ! I just have been clicking the wrong link (silly me) I can’t wait to try it out !
best i have seen using freezer paper
Thank you so much!!
I’m glad you liked them!
Awesome job.
Thank you!!