

Easy Galaxy Wall-E T-Shirt (& Disney Castle Shirt)
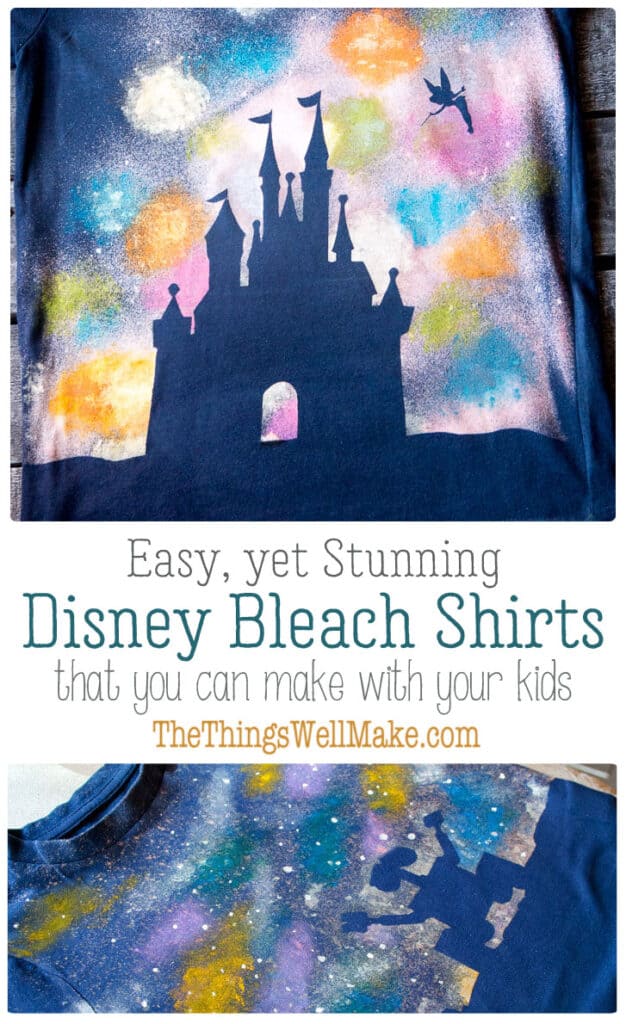
Kids love making these easy Disney shirts with some supervision. Learn to make a galaxy Wall-E t-shirt or a Disney castle fireworks t-shirt using the same simple method.
When I first wrote this post in April of 2013, my son was obsessed with Wall-E. Unfortunately, it was almost impossible to find Wall-E merchandise. My son wanted a Wall-E t-shirt, and since I love making t-shirts, I was happy to oblige.
The first Wall-E t-shirts I made him ended up being more complex than I hoped. I wanted something easier for the blog.
While watching the movie for the 48th time (that may be an exaggeration), the idea came to me!
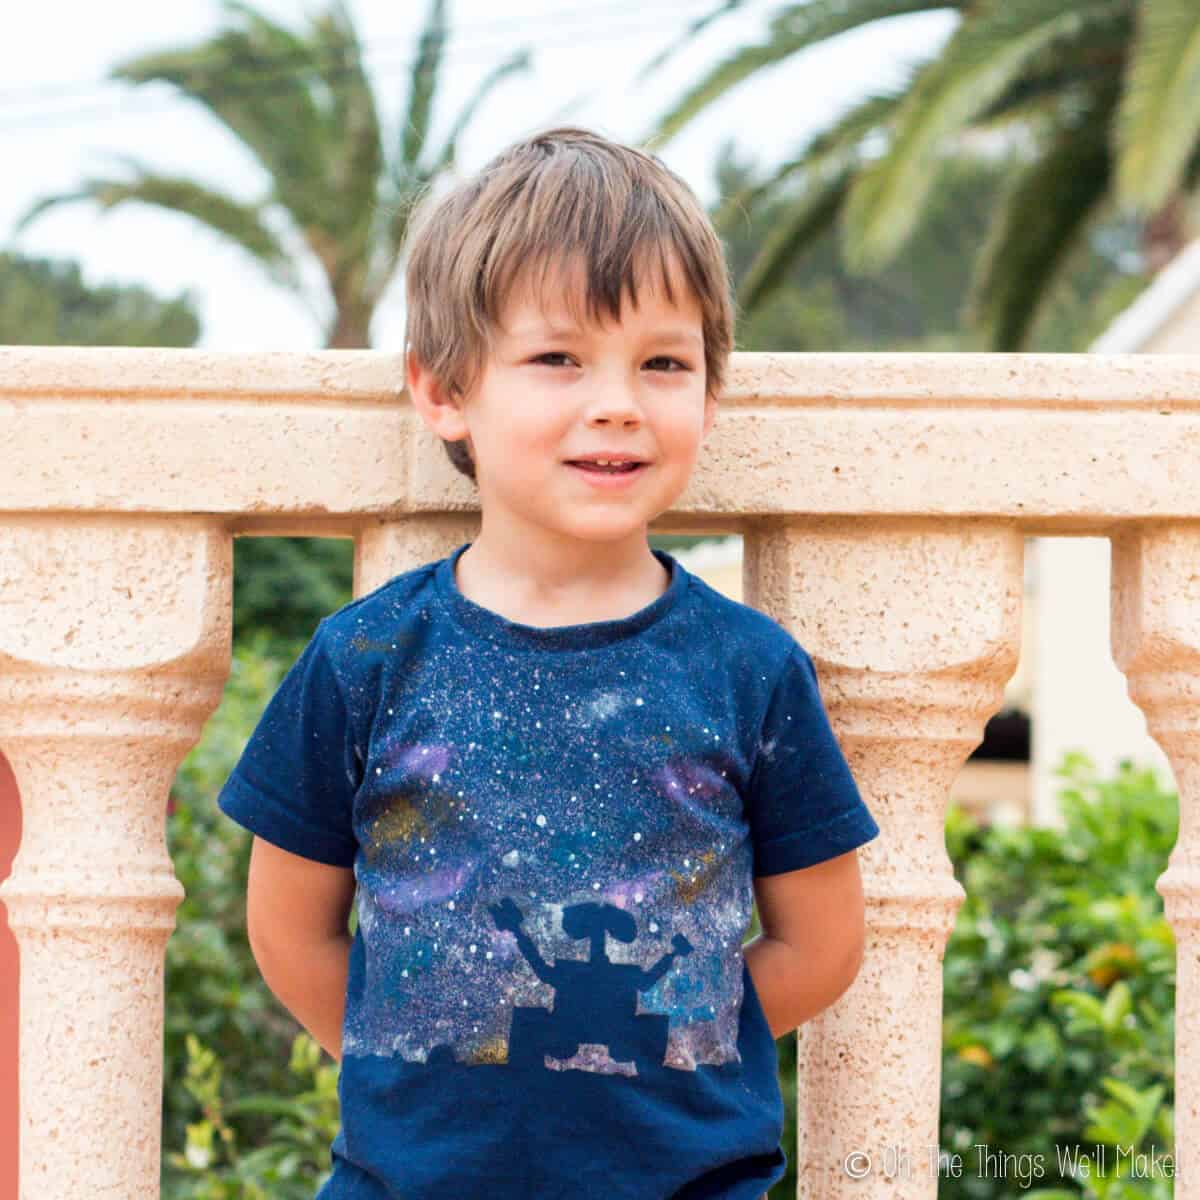
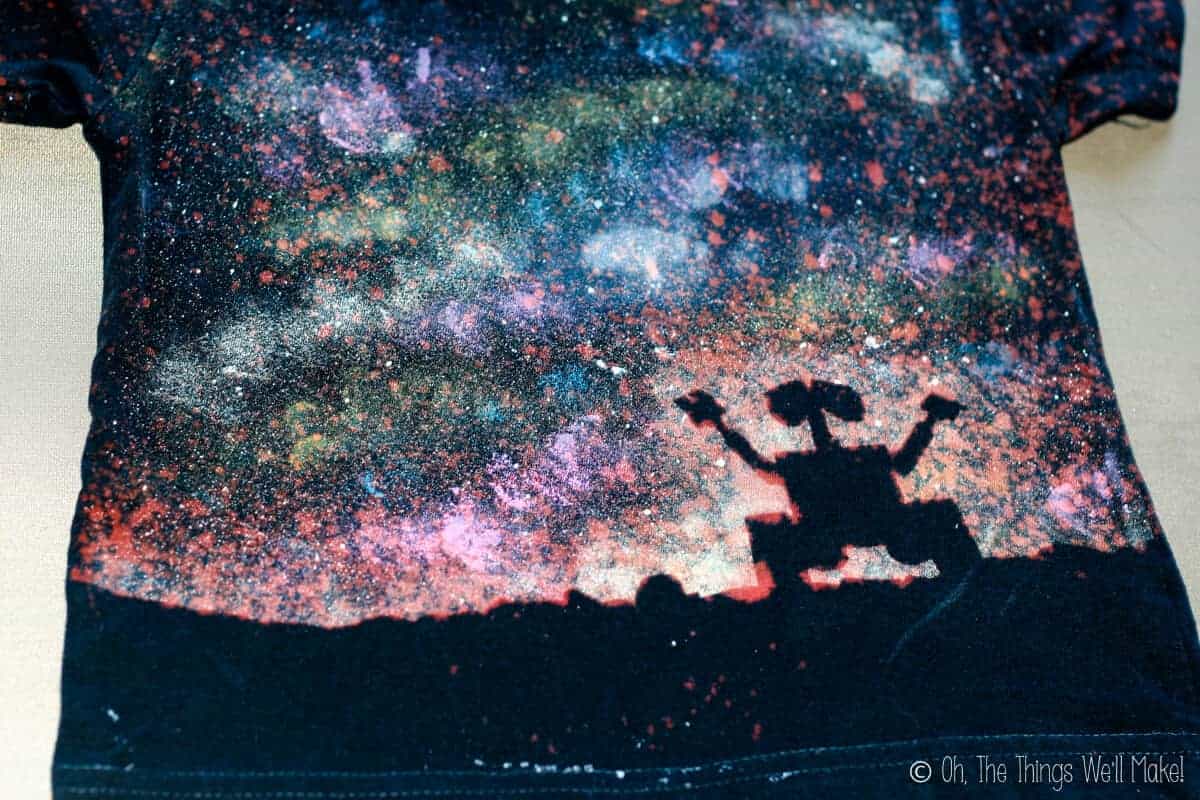
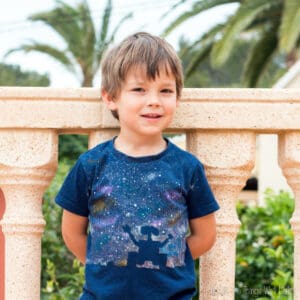
I loved the scene of Wall-E reaching into the stars, and thought there must be a way to make a galaxy t-shirt with a silhouette of Wall-E.
We later ended up making another one of these t-shirts for his Wall-e birthday party.
DIY galaxy t-shirt
I didn’t expect that I was the first person to want to make a galaxy t-shirt. (Although I imagined that I might be the first person to want to make a galaxy wall-E t-shirt. ? )
So, I did a search for “how to make a galaxy t-shirt,” land came across a tutorial that used a basic bleach technique and fabric paint. (I used to link to the tutorial I followed, but it has since been removed.)
I wanted to take it one step further, though. My idea was to mask out an area with freezer paper. The freezer paper protects the material underneath from bleach and paint. That allows the silhouette to really stand out.
Materials
- A dark blue or black t-shirt
- Freezer paper
- A spray bottle
- Bleach – If you can find a gel-type laundry bleach, that’s best.
- Fabric paint
- Sponges
- A fine paintbrush or old toothbrush
- An iron
- Parchment or baking paper
Making the silhouette t-shirt
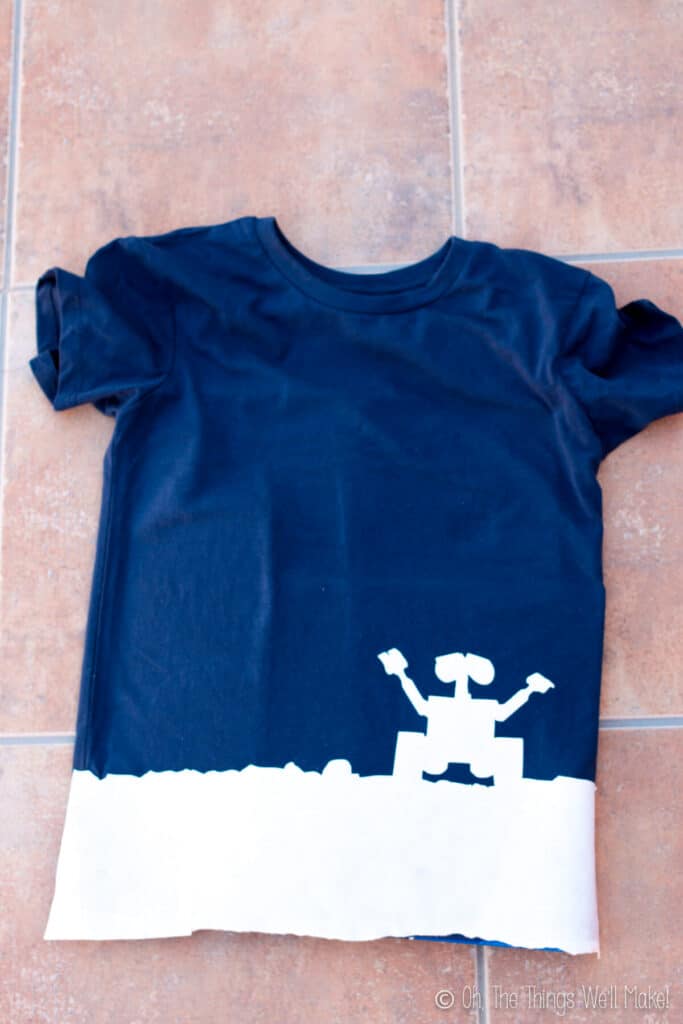
First, choose the silhouette you want to use. I chose a silhouette of Wall-E for our first shirt. (I’ll show you an alternate idea for a Disney princess castle shirt below!)
I then cut that shape out of freezer paper. You can cut it out by hand using a pair of scissors or an x-acto knife.
If you happen to have a Silhouette Cameo, though, I made a silhouette cameo stencil. Click on the link to download the studio file for the Cameo if you have one.
The cool thing about freezer paper is that you can iron it onto fabric (shiny side down) and it will cling to the fabric. It can later be peeled off and won’t leave a residue on your shirt. That makes freezer paper an ideal stencil for t-shirts and other cloth projects.
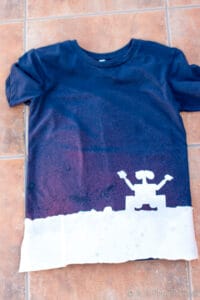
Spray on bleach
Using a spray bottle, spray bleach over the stencil and lightly over all areas you want to be lighter in color.
Before you spray with bleach or paint the t-shirt, place a piece of cardboard between the top and bottom layers of the t-shirt. This will keep the bleach and paint from bleeding onto the backside of the t-shirt.


Before spraying the bleach on the t-shirt, practice with water in the spray bottle on a different surface. That will allow you to adjust the nozzle to the right amount of spray. Once you are able to control the spray, switch the water for bleach.
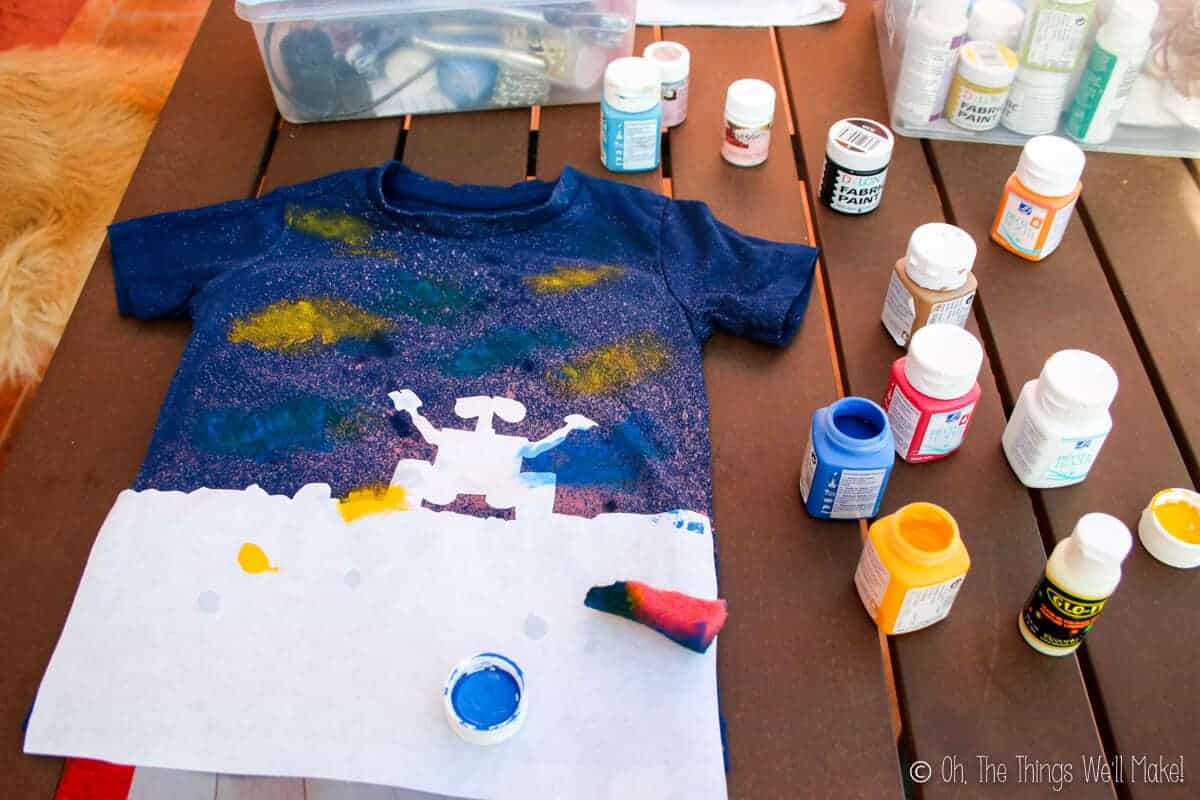
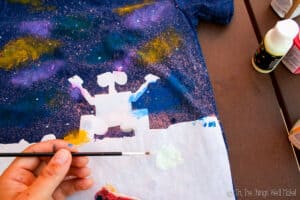
Add Fabric Paint
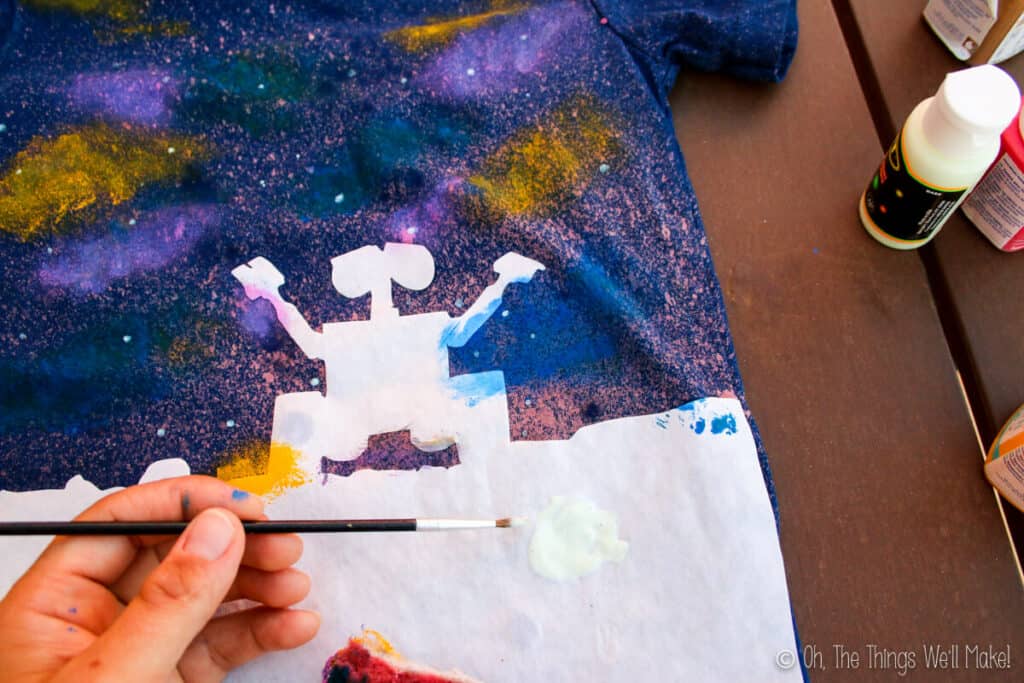
Next, dab on paints in a variety of colors to represent different groups of stars in the galaxy. I cut an old sponge into tiny pieces and used that to lightly dab on the colors.
To highlight individual stars, you can either splatter on some white stars with an old toothbrush, or you can manually paint them on with a fine paintbrush. You might even choose to use a combination of both techniques.
Try painting some stars with glow-in-the-dark fabric paint for make the t-shirt even more fun!

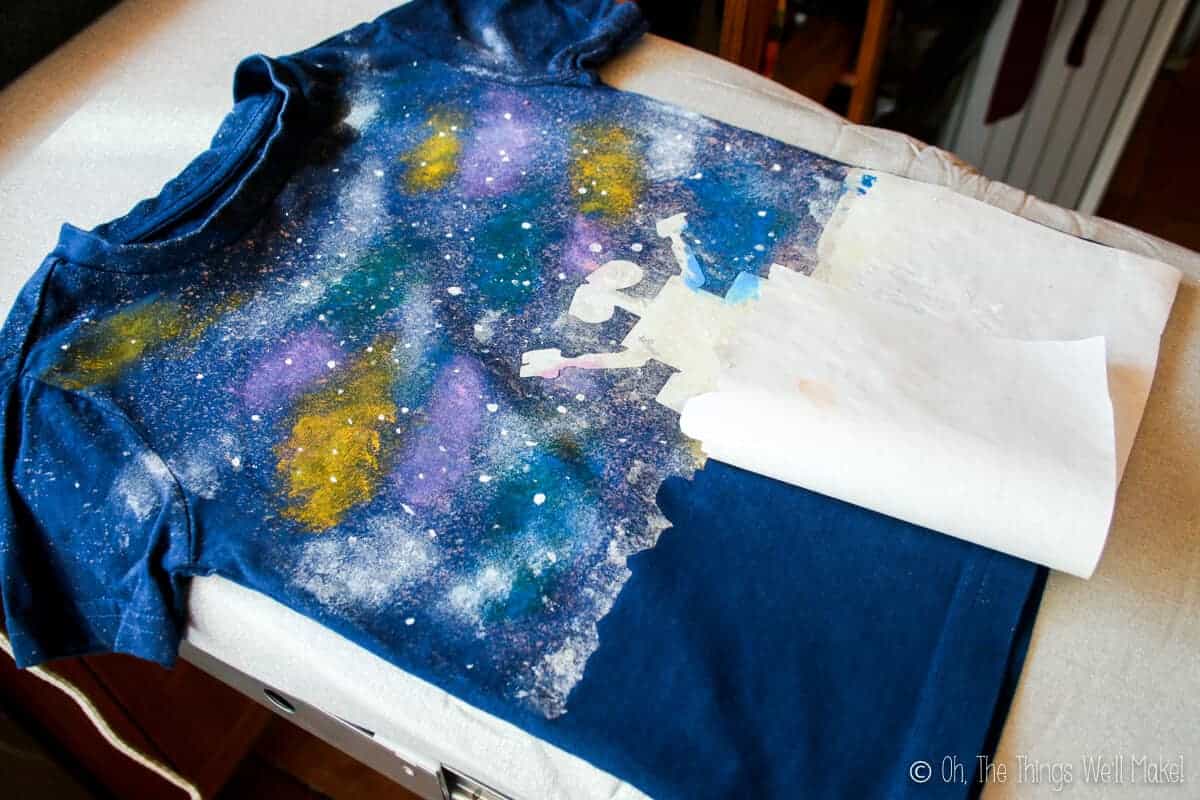
Once you’ve finished painting, carefully peel off the freezer paper stencil. Admire in awe how Wall-E admires the beautiful colors of the galaxy around him!
If you have problem areas, you can fix them now or wait until after you’ve finished washing the shirt. (See troubleshooting below.)
Setting the t-shirt
Set the fabric paint with a hot iron. Follow the instructions for setting your particular fabric paints.
To protect your iron, I suggest covering the painted t-shirt with parchment paper or baking paper before ironing it.
Wash the shirt immediately after setting the paints to stop the bleach action from continuing!
If you wait too long, the bleach may damage the t-shirt.
Troubleshooting
Bleach bleeds under the stencil
The first time I made this shirt, some bleach soaked underneath my stencil. I had used a lot of liquid all-purpose bleach.
On other attempts, I’ve used a more viscous gel-type bleach made for laundry. (Here in Spain, some types of bleach are sold in the cleaning section and other types are sold in the laundry section.) When I have used that type of bleach, even at full strength, I haven’t had the same issue with bleeding underneath.
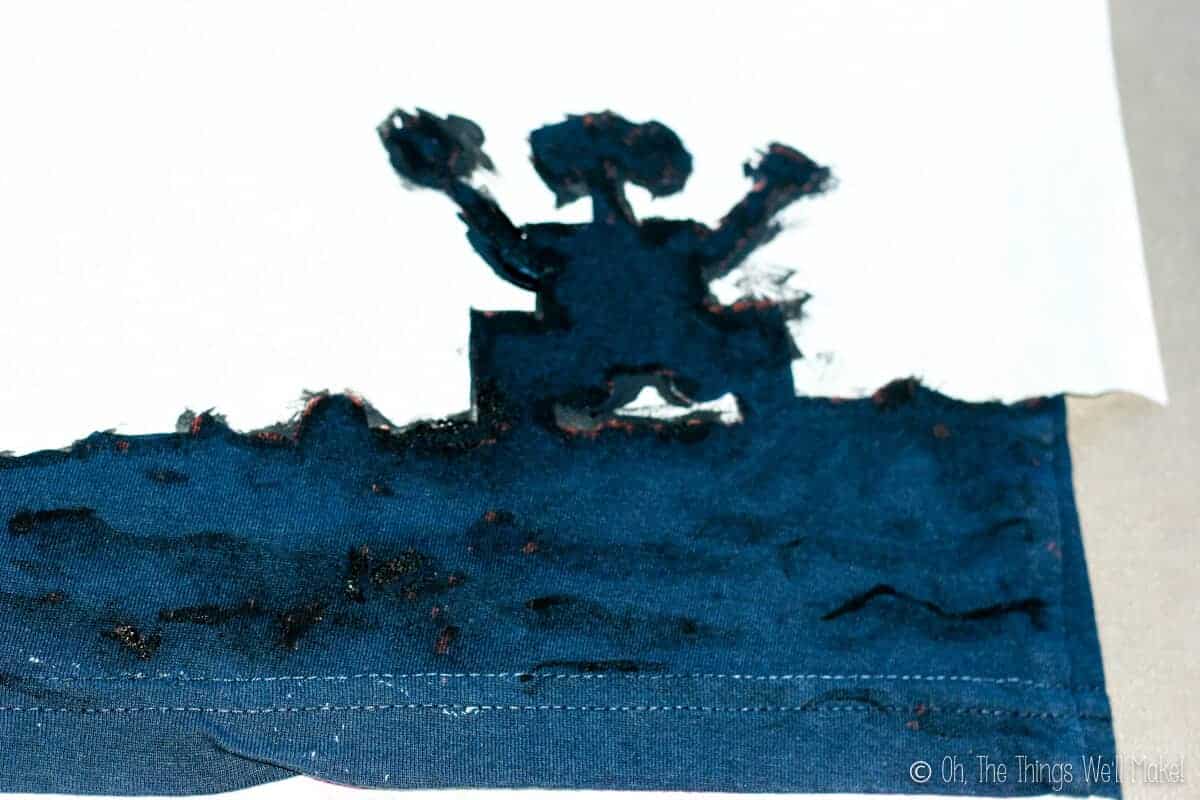
I fixed the problem areas by covering them with black paint. I dabbed the paint on, making it look like there were stones and other objects in the dark, shaded parts of the t-shirt.
To preserve the lines of the silhouette, I used the unused half of my stencil to protect the painted areas. I ironed it onto the painted areas, leaving only Wall-E’s silhouette and the ground area in front of him exposed. I then sponged those areas with black paint, concentrating on the areas that were bleached.
Paint blotches
If you flick the white stars on the shirt with a toothbrush, you may end up with some white blotches occasionally. Those blotches can be easily dabbed into the shirt to make another colored cloud.
Too much bleach
My son loves this shirt so much that we’ve it several times already. This last time, I decided to add a little bit of bleach at the very end of the process. I forgot, though, that I had already twisted the spray cap in order to close it. Rather than spray out in a fine stream, I ended up with big streams across the front of the shirt.
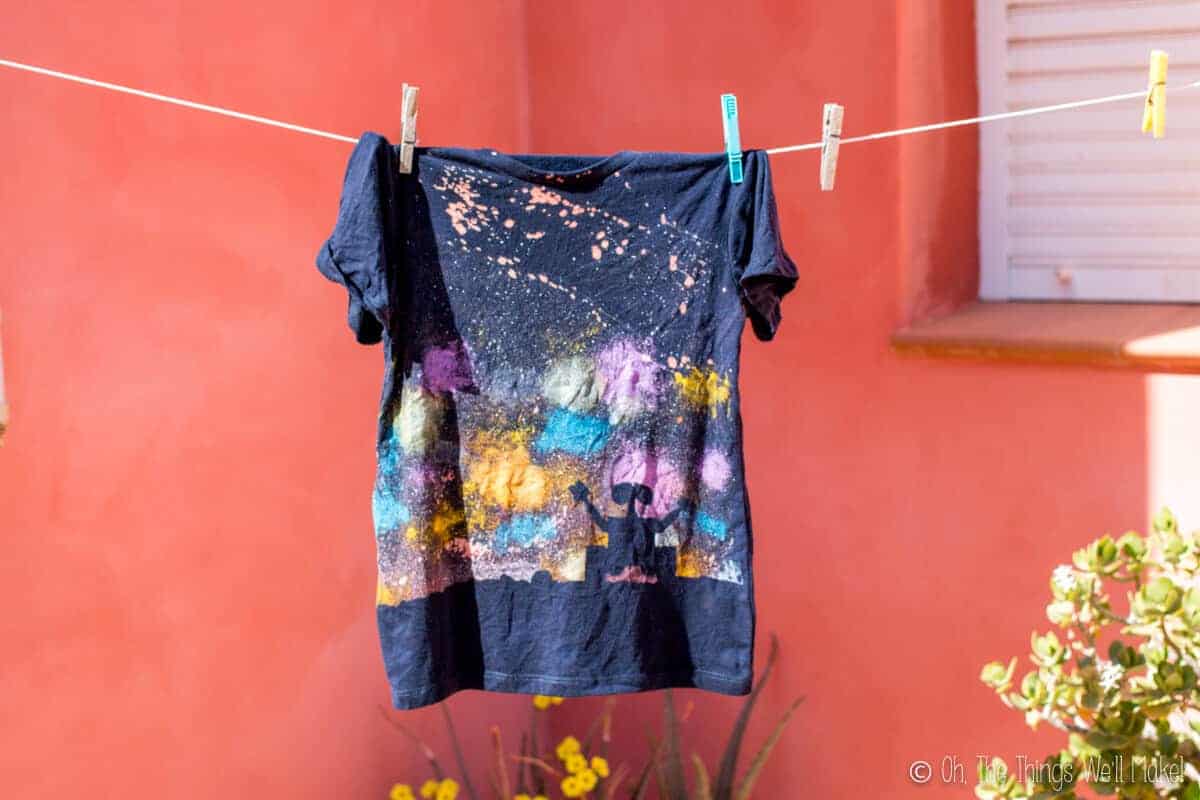
There isn’t much of a fix for too much bleach, other than camouflaging it with more paint. It wasn’t the look I was going for, but I think it looks pretty good anyway.
The Disney Castle Tinkerbell t-shirt
My niece liked my son’s shirt so much that she wanted to make one for her trip to Disneyland Paris. We were going to make another Wall-E shirt, but I came up with another idea…
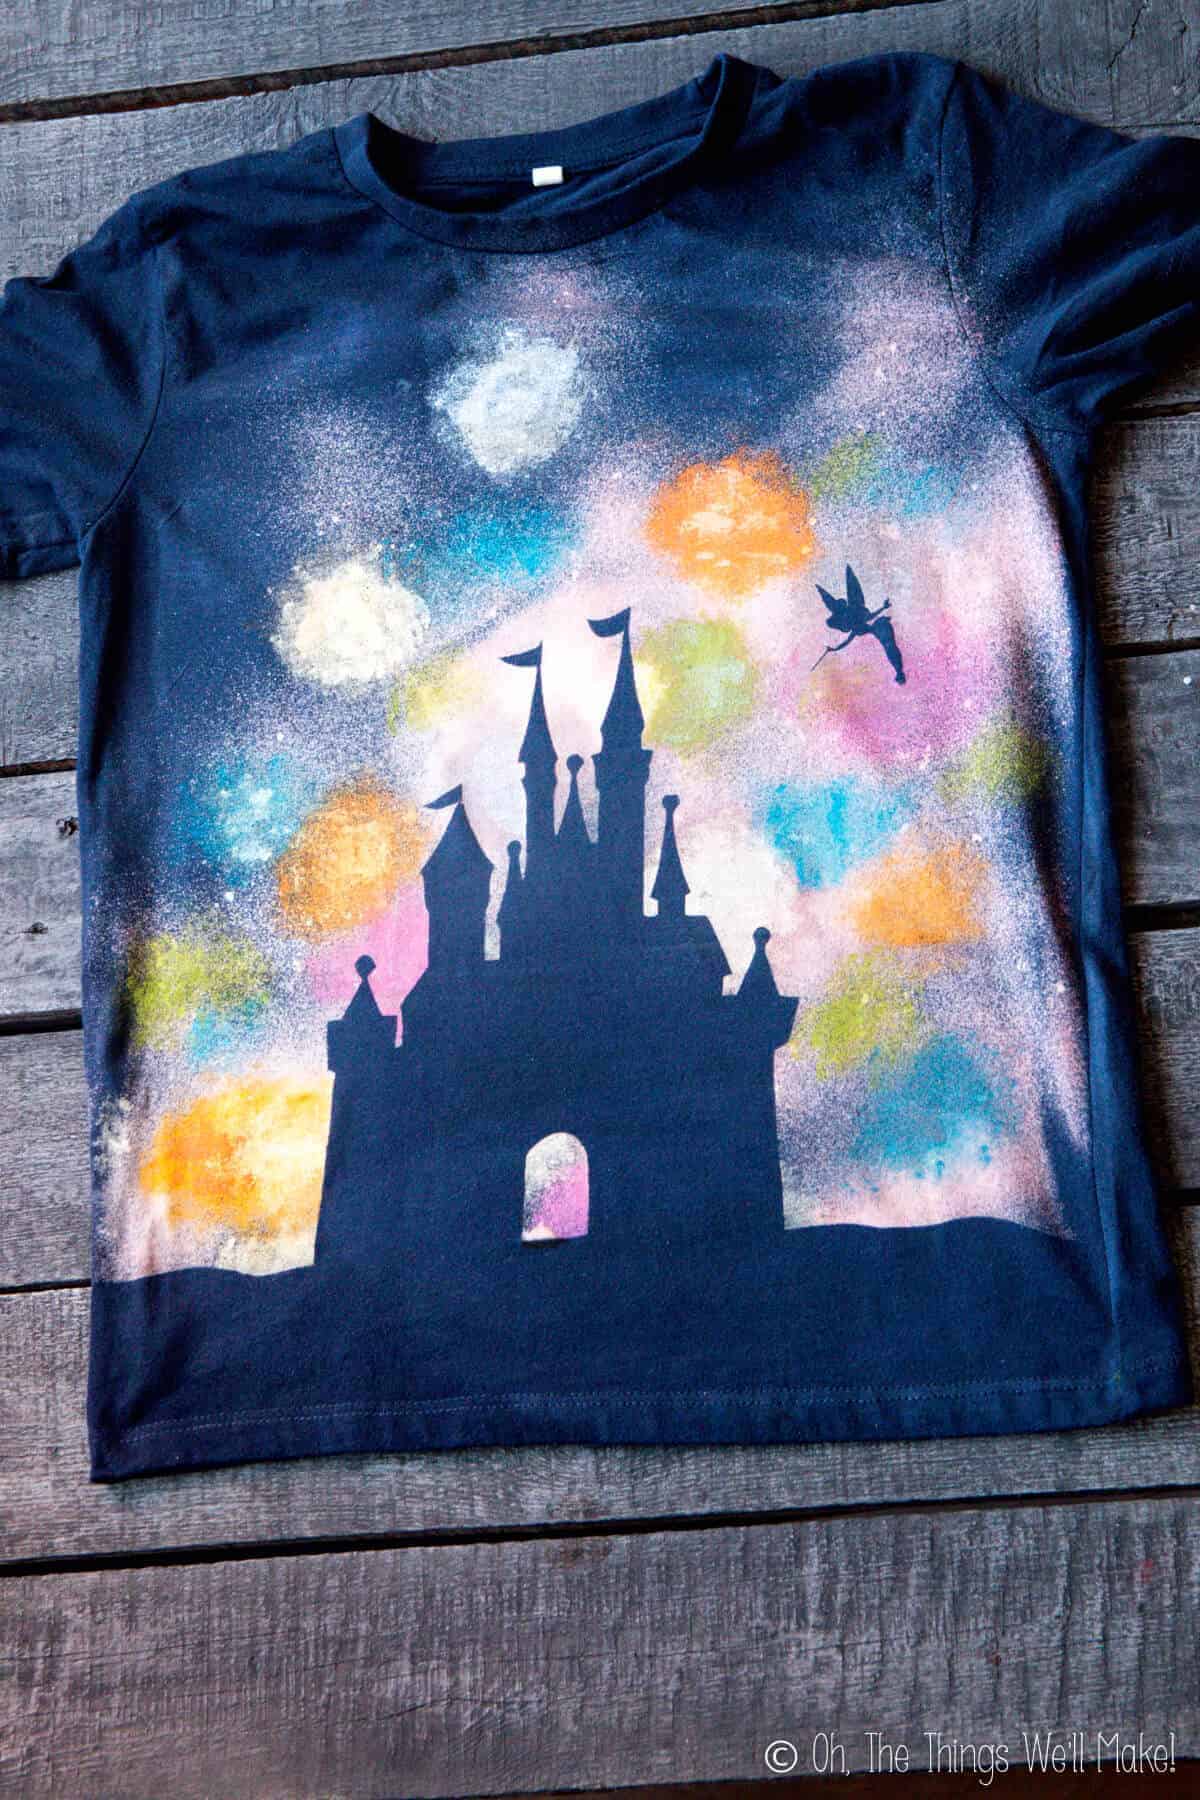
I remembered seeing the beautiful fireworks displays around the Disney castles, and it occurred to me that fireworks are a lot like the colorful stars of the galaxy. I thought the idea would be perfect for a new kind of “galaxy silhouette” t-shirt.
We decided to use a silhouette of one of the Disney castles with Tinkerbell’s silhouette flying nearby for a bit of fun!
If you have other ideas for this technique, I’d love to see them!
Video
Disney Bleach t-shirts
Equipment
- spray bottle
- sponges
- scissors
- Silhouette Cameo (optional for easily cutting out pattern)
- paintbrush or old toothbrush
Instructions
- Once you've chosen and cut out your silhouette from freezer paper, place the freezer paper silhouette onto the bottom of a dark, navy blue t-shirt with the shiny side down. Iron it at medium to high heat, until it has fully adhered to the t-shirt.

- Spray on some bleach. Spray the bleach over the t-shirt, concentrating on the areas near the stencil so that the silhouette is highlighted.
- Dab on Fabric Paint with a sponge: I used pink, light blue, yellow, and silver, blending them together in random clouds. Concentrate on the edges to make the silhouette stand out!

- Paint on some white stars: You can either splatter on some white stars with an old toothbrush, or you can manually paint them on with a fine paintbrush.
- Peel off the stencil and admire your work! Set it with an iron and wash immediately before wearing it. (Notes below)

Notes
This post was originally posted on April 17, 2013. It was rewritten and updated with new information in June of 2020.


Did you wash the shirt by hand the first time? I’m making two of the same shirts for my goddaughters. I didn’t know if I could wash them in the washer together or separate.
Hi Rachel,
Yes, I washed in the machine without any issues. The day that my niece came over, we made two at once- the one with the castle for her and a new Wall-E shirt for my son. We washed them together too…
Just try to make them at the same time and immediately wash them together so that the bleach isn’t eating away at the shirt for too long. 😉
Love this idea of combining the bleach with fabric paint! How much bleach and how much water do you put in the spray bottle?
Hi Sally,
I’ve tried different combinations, and don’t really notice much of a difference. I’ve used full strength bleach and have also watered it down to a 1:1 ratio.
do you happen to have a link to the Castle and tinkerbell image u used? =) i really love this idea thanks!
Hi Laura,
Thanks!
What I did was to Google search “silhouette Cinderella’s castle” and I found a lot of options. You can see some here: http://clipartmag.com/disney-castle-silhouettes
I think I didn’t cut out the windows.
Then I did the same thing for Tinkerbell. Here’s an example (at the bottom of the page): http://www.tattoobite.com/tattoos/tinkerbell-tattoos/page/51/
I hope that helps.
I love this so much! I’m definitely going to be making some of these with my daughter! I was wondering what you put over the shirt when you iron it- is it a fabric or some kind of paper? Thank you!
Hi Elora,
Thank you! 🙂
I use a baking (parchment) paper.