There are lots of ways to make a t-shirt into a bag or backpack. I’ll show you eight great ways to do it, and you don’t even need to know how to sew for some!
In the last year, here in Spain, a ban has been implemented on giving out free plastic shopping bags at supermarkets. Despite being a person who composts, and recycles, and tries to minimize waste, I have to admit that I had mixed feelings about the ban at first.
Here in Spain, it is very unusual to see any alternative bag types being offered at the stores. I guess now that the stores are charging for plastic bags, there is no incentive for them to offer alternatives to those who need bags. I wish that stores would offer paper bags, or other compostable alternatives, rather than just charge a few cents for a plastic one, especially since I love using/recycling the brown paper for so many things. It would be great to have free brown bags for things like wrapping presents and a weed control/compost layer in the garden. Heck, that brown paper would be great for making origami planting pots for starting seeds in the garden.
Hopefully people are using less plastic, rather than just paying more for the bags they use. I’m not so sure that’s the case, but hope it is.
Watch me make some of these t-shirt bags
Why Make a T-shirt bag?
While recycling is better than throwing things away, it still is best to make something like a t-shirt bag that can be used over and over again.
T-shirt bags are really great because they are lightweight and elastic. They are able to hold lots of heavy items, conforming to the shape of almost anything you try to shove into them. The cashiers always appear to be amazed at how much I can fit into just one bag, and, knock on wood, I’ve never had one break on me!
A warning about reusable shopping bags
I read something interesting about reusable shopping bags in general that you should definitely keep in mind.
There are a lot more (an estimated 34% more) visits to emergency rooms for E. Coli based food poisoning, with a %50 rise in deaths from E. Coli since plastic bag bans have gone into place.
It seems that 97% of people that use reusable bags for shopping don’t wash their bags regularly. Or ever.
These bags become contaminated and reused with new, fresh foods. When you take a look at some of the reusable bags being offered, made of materials like raffia that aren’t very easy to clean, I guess that makes sense.
That’s where a t-shirt bag comes in handy. It’s much easier to throw in the wash and clean thoroughly between uses!
I have to admit to being one of the 97% who hadn’t washed several of the bags I own and use, but now that I know better, I plan to being much better about it. I also plan on switching to t-shirt bags for most of my food shopping.
How to prevent bacterial contamination from reusable shopping bags
The ideal solution would be to have several bags with their own color code or label so that you can separate your meats from your fruits and vegetables and other items. That would help prevent contamination between washings.
Having several lightweight, but strong, bags that will hold up to multiple washings definitely helps. You’ll want to be especially careful about washing any bags that hold meats often.
How to make a t-shirt bag
There are already tons of tutorials over the internet on how to make a shopping bag from a shirt. I have seen, and tried, many of them. Some I have liked more in theory than in practice, and others I have liked with some personal tweaking. I’m going to share with you some of my favorites, along with the way I almost always make them now.
1. Basic sewn t-shirt bag:
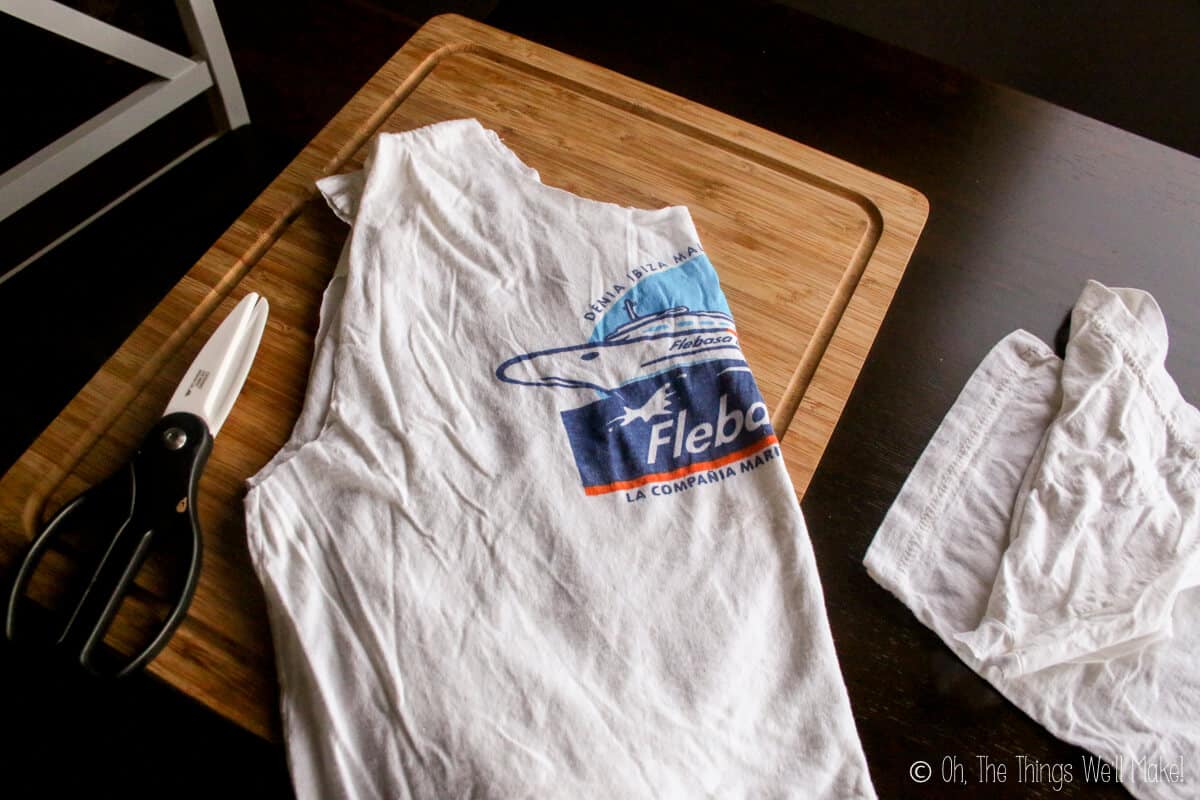
Here is Martha Stewart’s version, but there are many tutorials on how to make the basic, straight on t-shirt bag. It is probably the most common way to make a bag from a shirt that you can find on the internet. It is also probably the best way to make a printed t-shirt into a bag, if you actually want to see the printing, because the printed motive stays on the “front” of the bag.
All you do to make this basic t-shirt bag is to cut the neck and sleeves off the shirt, and then sew across the bottom. (You’ll want to flip the shirt inside out before sewing to keep the seam on the inside of the bag.)
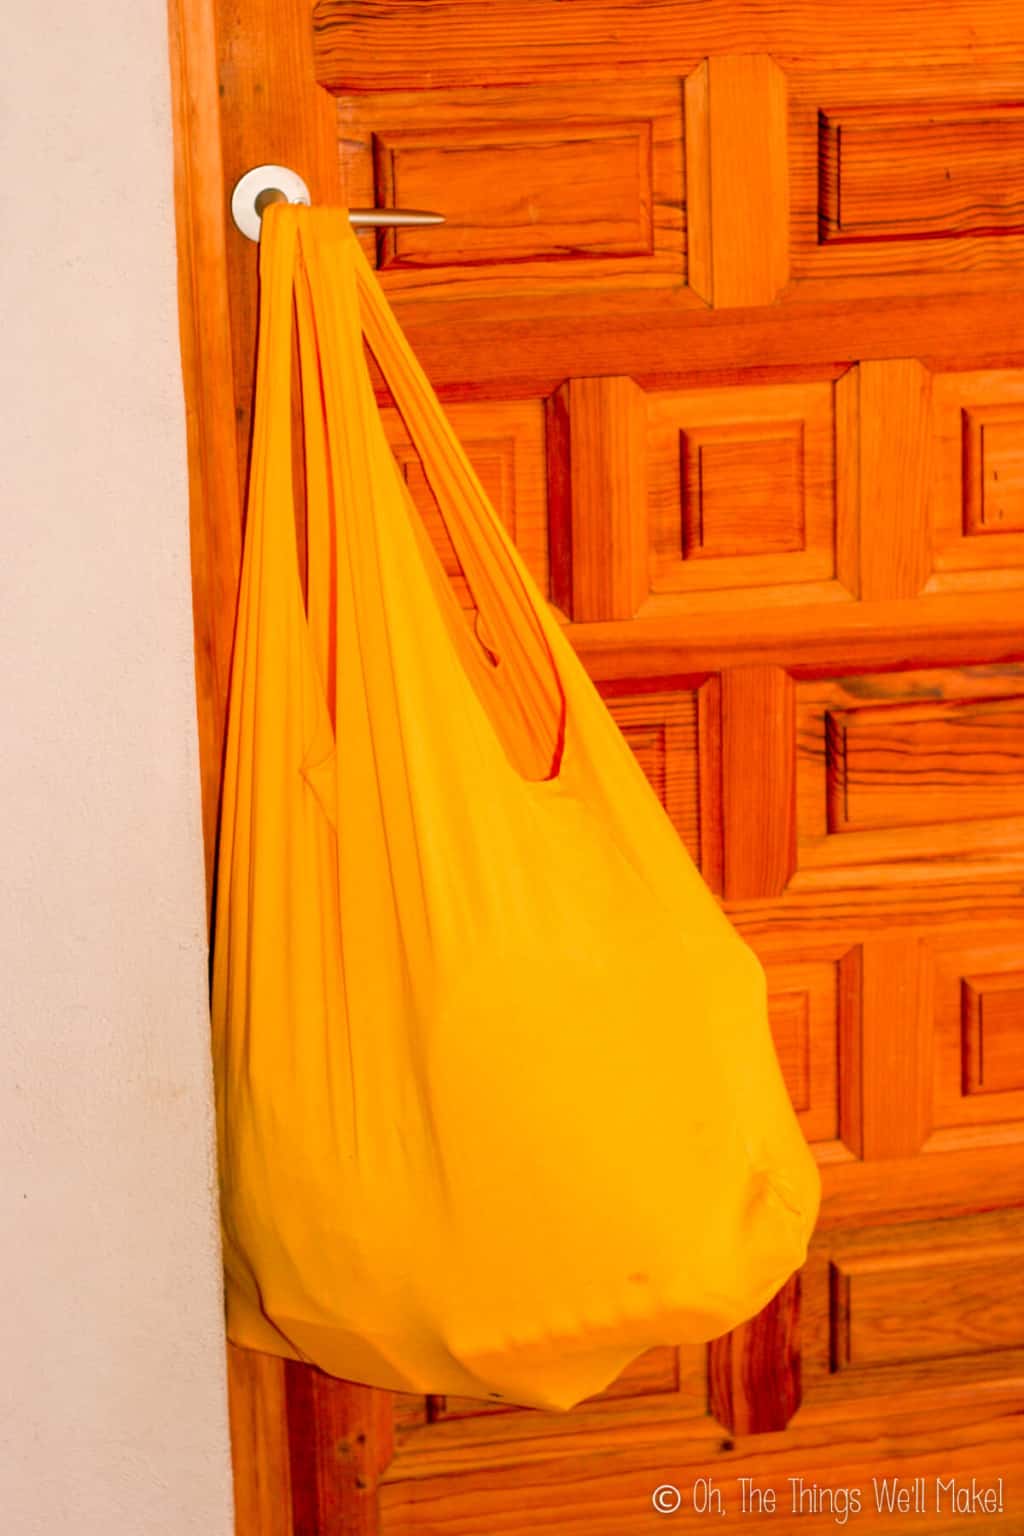
The problem with this basic t-shirt bag is that when you hold the bag by the handles, the front of the shirt really becomes the side of the bag. When you wear the bag as you normally would, the corners of the bag sort of poke into your side. That makes this bag a lot less comfortable, which is why I don’t normally make my t-shirt bags like this. (My yellow bag in the picture above was made with this method. It was the first bag I made years ago before I experimented with other methods.)
A tank top can be converted, in this manner, even easier, because the sleeves are already gone. They usually have a deeper scooped neckline, too, so you can usually get away without cutting anything at all, leaving the edges more finished. The only problem with that, is that the front usually scoops lower, so your bag won’t be 100% symmetrical in all directions.
2. Twisted Tank Top Tote:
Once again, there are numerous tutorials all over the internet on how to make a tank top tote. The link above goes to one of my favorites. Instead of just sewing the bottom shut while the tank is open as in the first example, you turn the tank on its side, and line up the straps at the top. When you sew across the bottom, you have a much more “credible” tote. (What I mean by that is that it no longer looks like a tank top sewn across the bottom, and is actually much more attractive as a bag.)
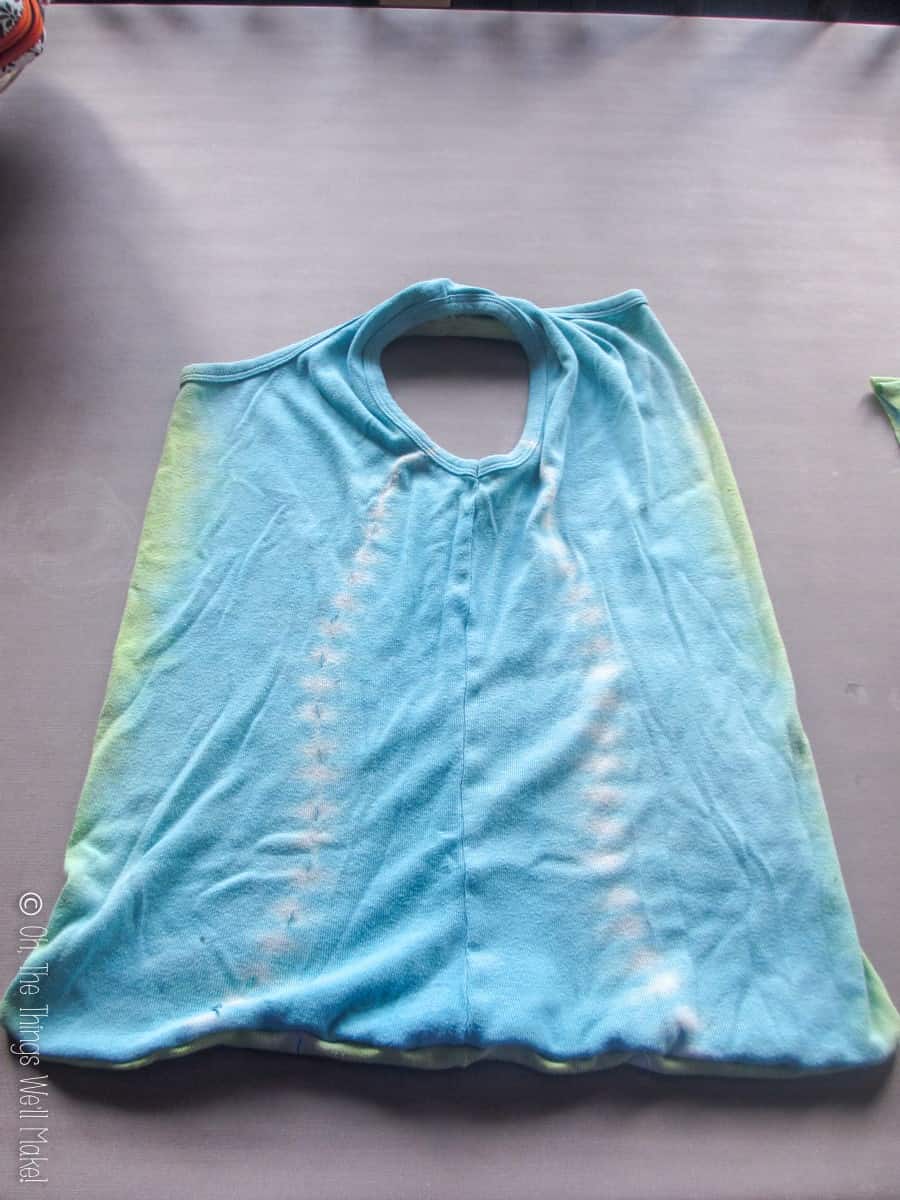
The thing to keep in mind here, if you want to keep the finished edges from the top of your tank top, is that you should have a tank top that is as close to symmetrical between the front and the back as possible or it will look a bit off. When you’re actually wearing the bag, though, you don’t really notice it.
3. The no-sew, fringed t-shirt bag:
For those who don’t have a sewing machine, or who need to improvise a bag when a sewing machine isn’t around, you can make this bag. When I had first written this post, I still hadn’t tried making one. The pictures online didn’t really do the bag justice, So I wasn’t too motivated to try it. I hadn’t thought to try to make one using my method of flipping the bag to line up the sleeve holes to make a hobo style fringed bottom bag.

I finally got around to making one myself, but using my flipping method for the top. In the end, I think mine turned out pretty darn cute!
It’s really easy to make one of these in a pinch, using just a t-shirt and scissors. Rather than sew the bottom, you cut slits into the bottom, and start tying the front and bottom pieces together. If you want to make one of these, but don’t want the fringe to show, you can flip the shirt inside out before tying all of the knots. When you flip the shirt right side out again, the fringe will be in the inside.
I think this would be a great activity for kids!
4. No-sew drawstring bottom t-shirt bag:
If you don’t have a sewing machine, this is the quickest, easiest way to make a t-shirt in just a few minutes! This bag makes use of the bottom hem of the t-shirt to convert the bottom into a drawstring closure.

I loved how clever this was, especially since I’ve been using the same method for making drawstring bags out of t-shirts and pouches out of t-shirt sleeves for quite some time now. I’ve even flipped shirts over to make a backpack with a top drawstring closure in the same way, but didn’t think to close up the bottom that way.
All you need to do here is to make a slit through the top layer of the hem enclosure and run a cord through until you come back out the same hole. To close up the bottom, pull the cord closed as tight as you can, and tie it shut! That’s all there is to it!
5. Produce bag (Or Beach bag):
The produce bag can be made from any of the other types of bags. The idea is to put a lot of slits into the bag to give it a bit of style. It will also allow the bag to stretch even bigger than it normally would.

Overall I like these bags for storing sandy or dirty things, like when you are going to the beach or when you are storing kids shoes or toys. I use it for my son’s beach toys when we go to the beach.
I’m not convinced that I love it for produce because you need to make the slits small, or buy large produce, to keep everything from falling out. In plastic produce bags, the holes are there to allow the produce to breathe, but if you make a regular t-shirt bag, the cotton fabric already allows some air through. Plus, you’re more likely using the bag to temporarily transport your food, rather than for full-time storage.
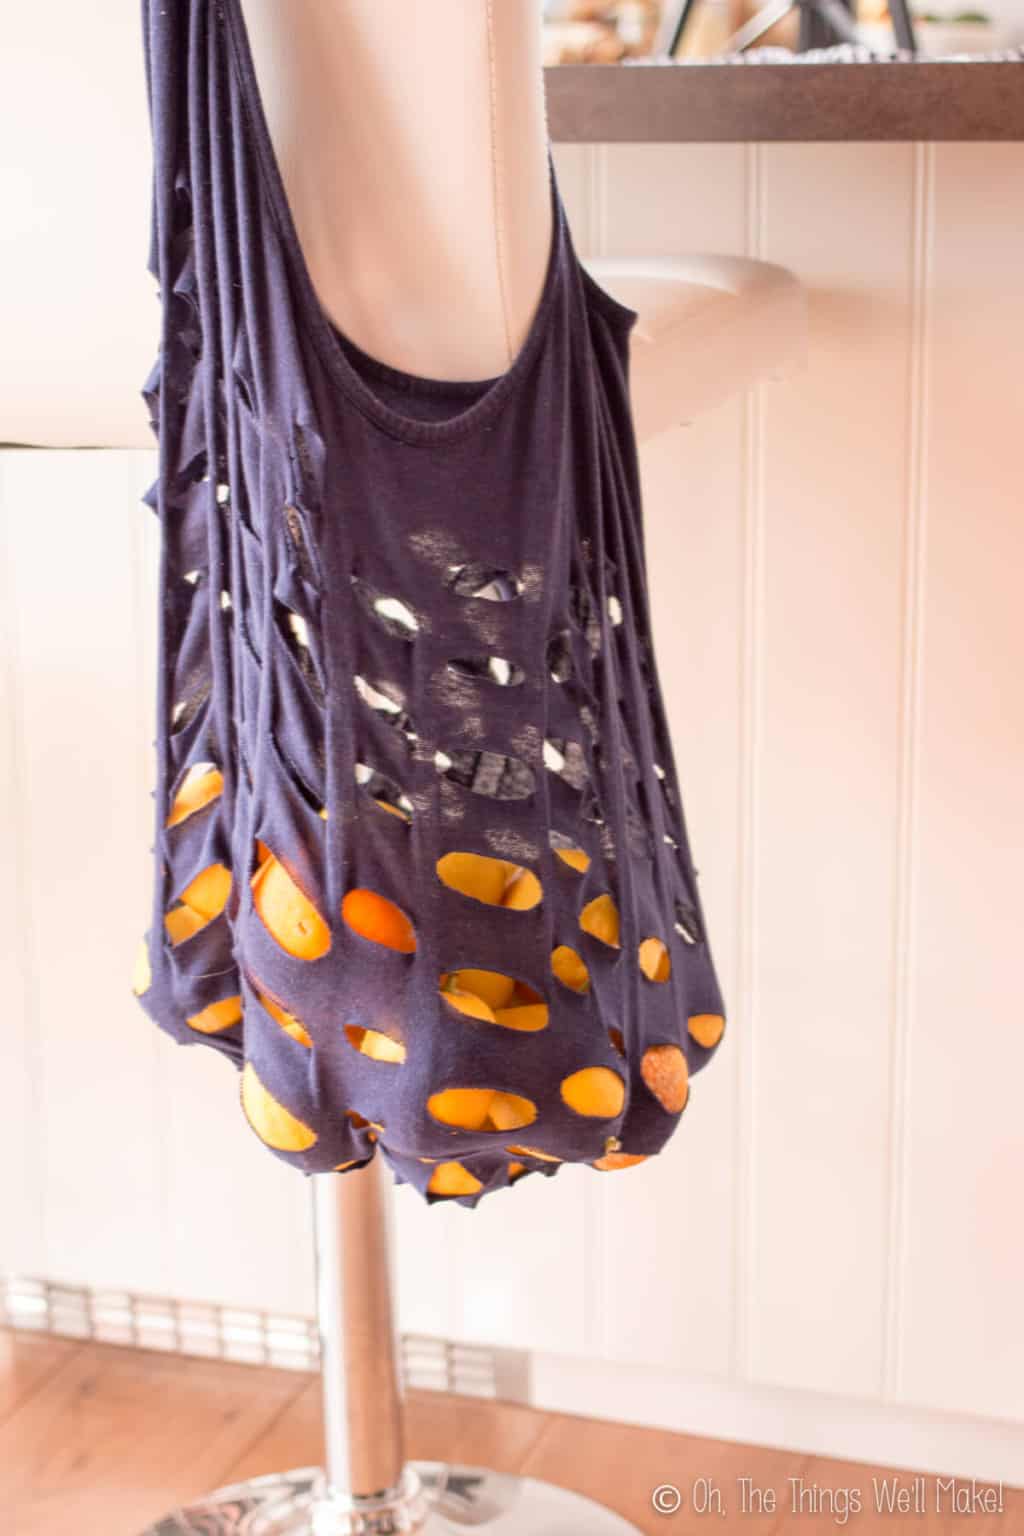
I made mine in a different way than what I have normally seen done online because I didn’t feel like drawing a lot of lines, or measuring and trying to cut with a rotary cutter. Instead, I used the idea of accordion folding. If you accordion-fold something and cut the sides in an alternate pattern, you get the result that you are really looking for in the produce bag.
There are a couple of things you should keep in mind if you try the accordion fold method.
1. Any cut that you make will actually be twice as long when you unfold it. I hadn’t counted on the stretchy nature of the t-shirt material making the holes even bigger, so I made my slits way too big. While I’m able to use the bag for bringing my son’s sand toys to the beach, I have to make sure to put smaller toys into a pail or something so they don’t fall out.
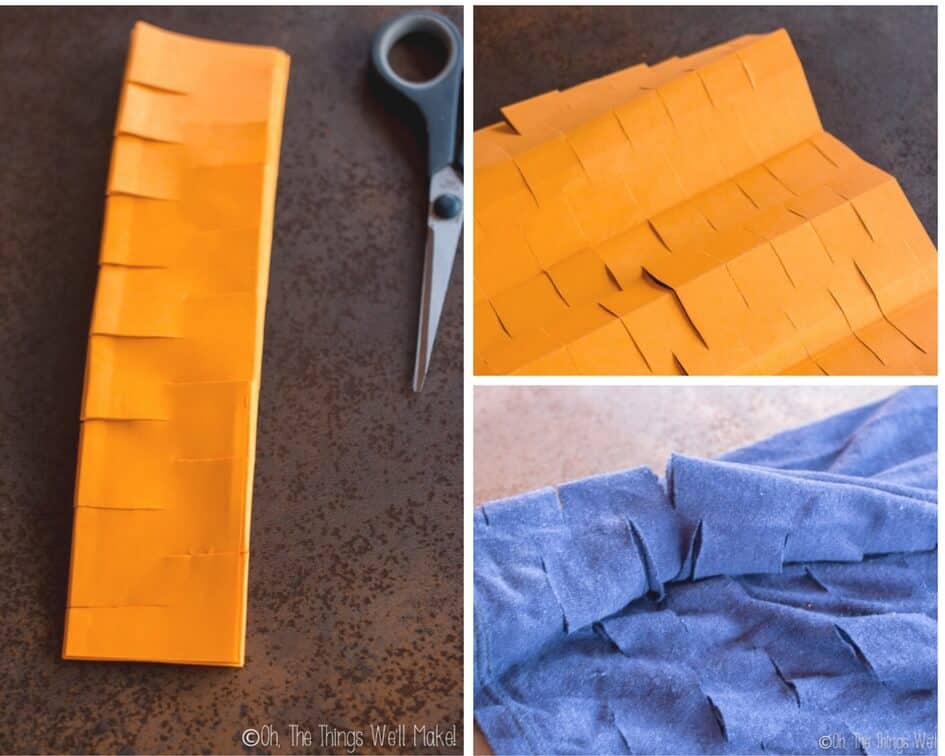
2. When you try to accordion fold the entire bag, it gets a bit too thick to be able to cut all of the slits at once.
To deal with this problem, I partially accordion folded the shirt before beginning to make my slits. Then, I pulled back the end side and folded down the next section, making slits right where the other cut slits from other folded sections already were. I kept doing that until I had finished making slits throughout the whole bag. I know that might not make a lot of sense, but I think you will see what I mean if you actually try to do it yourself. I’ll work on getting a video up soon!
6. My drawstring backpack from a baby shirt:
I made this cute little backpack out of a boy’s long-sleeved shirt that was given to me by another local mother. I was offered a lot of her clothes when her son had outgrown them. The fabric of the shirt was rather stiff, and, while I thought it was cute, I found it a bit too busy to wear as a t-shirt. Instead, I envisioned it being a much cuter little backpack.
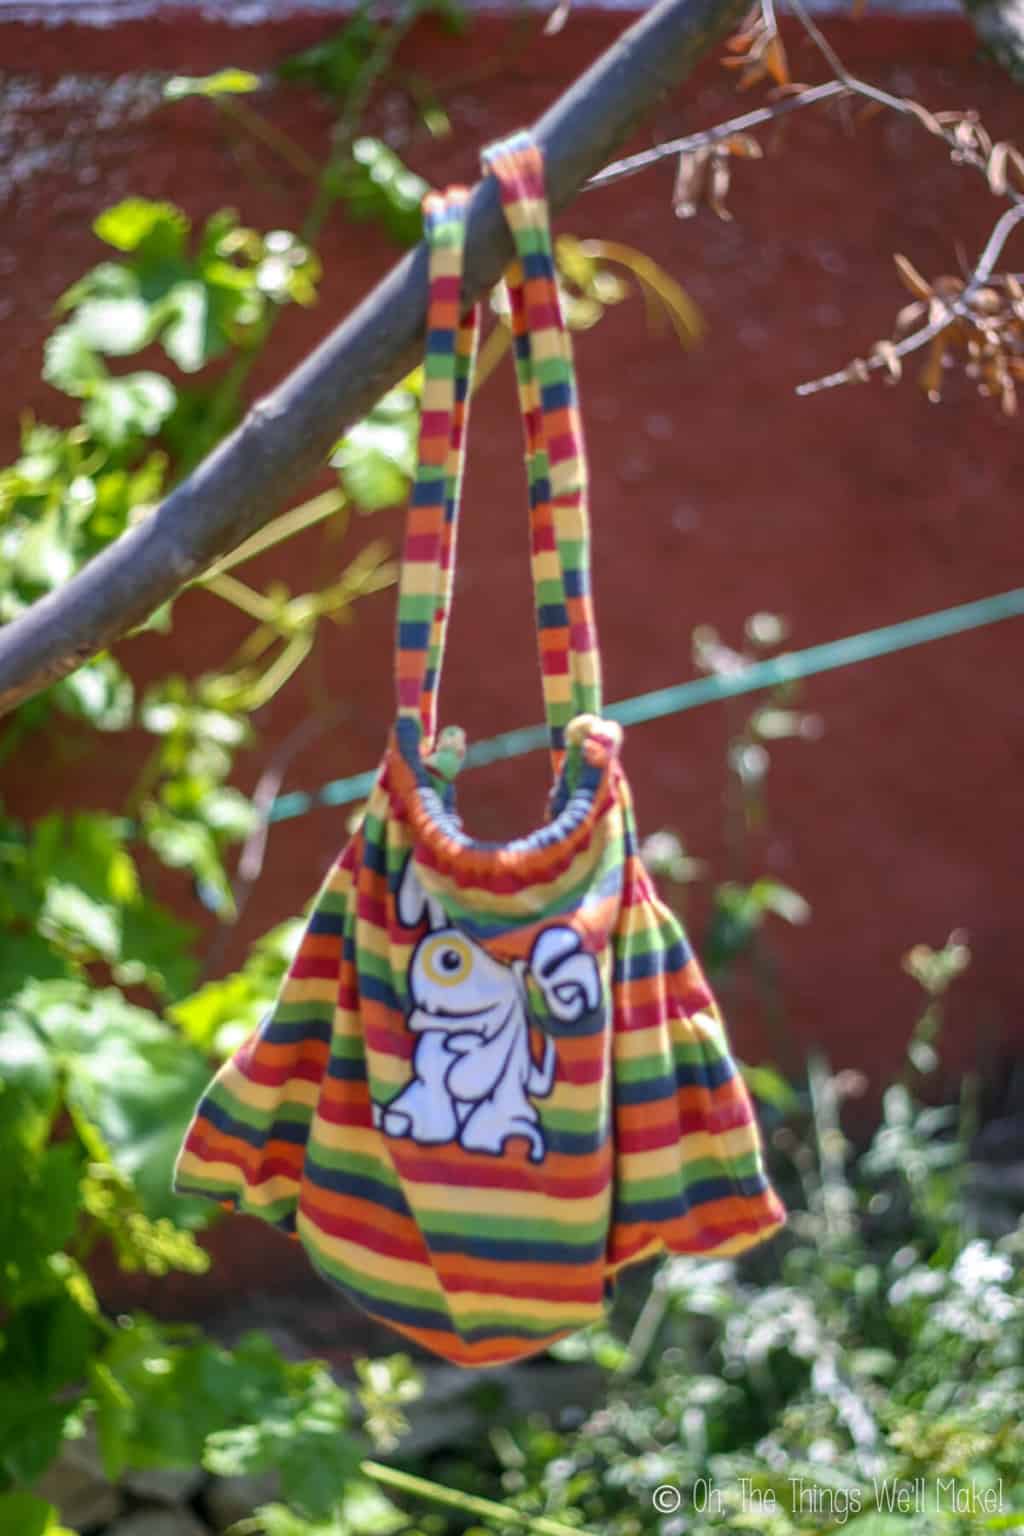
To make it, I first cut off the sleeves and the collar, cutting it straight across as high up as I could to maintain as much fabric as possible. In the case of this backpack, to keep the little monster right side up, I couldn’t use the bottom hem as my drawstring enclosure. But if you don’t have any pictures on the front of your shirt, you can save yourself lots of time by flipping the shirt and using the bottom hem for your drawstring.
To make a new drawstring enclosure at the top of the backpack, I hemmed down the fabric, sewing it just over a centimeter down from the fold, to create a small tube for the straps to go through. I only had the sleeves’ fabric to use for the straps, so I had to piece together several strips that I cut from the sleeves in order to make them long enough. To make things simpler, though, you can use some cord for the straps and drawstring instead. (That’s what I normally do).
If you want to make your own straps from the sleeve material, though, cut fabric strips just over an inch wide. You’ll want to sew them together to form two long strips of fabric from each sleeve. Then, fold them lengthwise, with the right sides facing each other, and sewed across the open edges along the sides and on one end. I made one long tube from each sleeve and used a skewer to help me turn the tubes back right side out to form my finished straps.
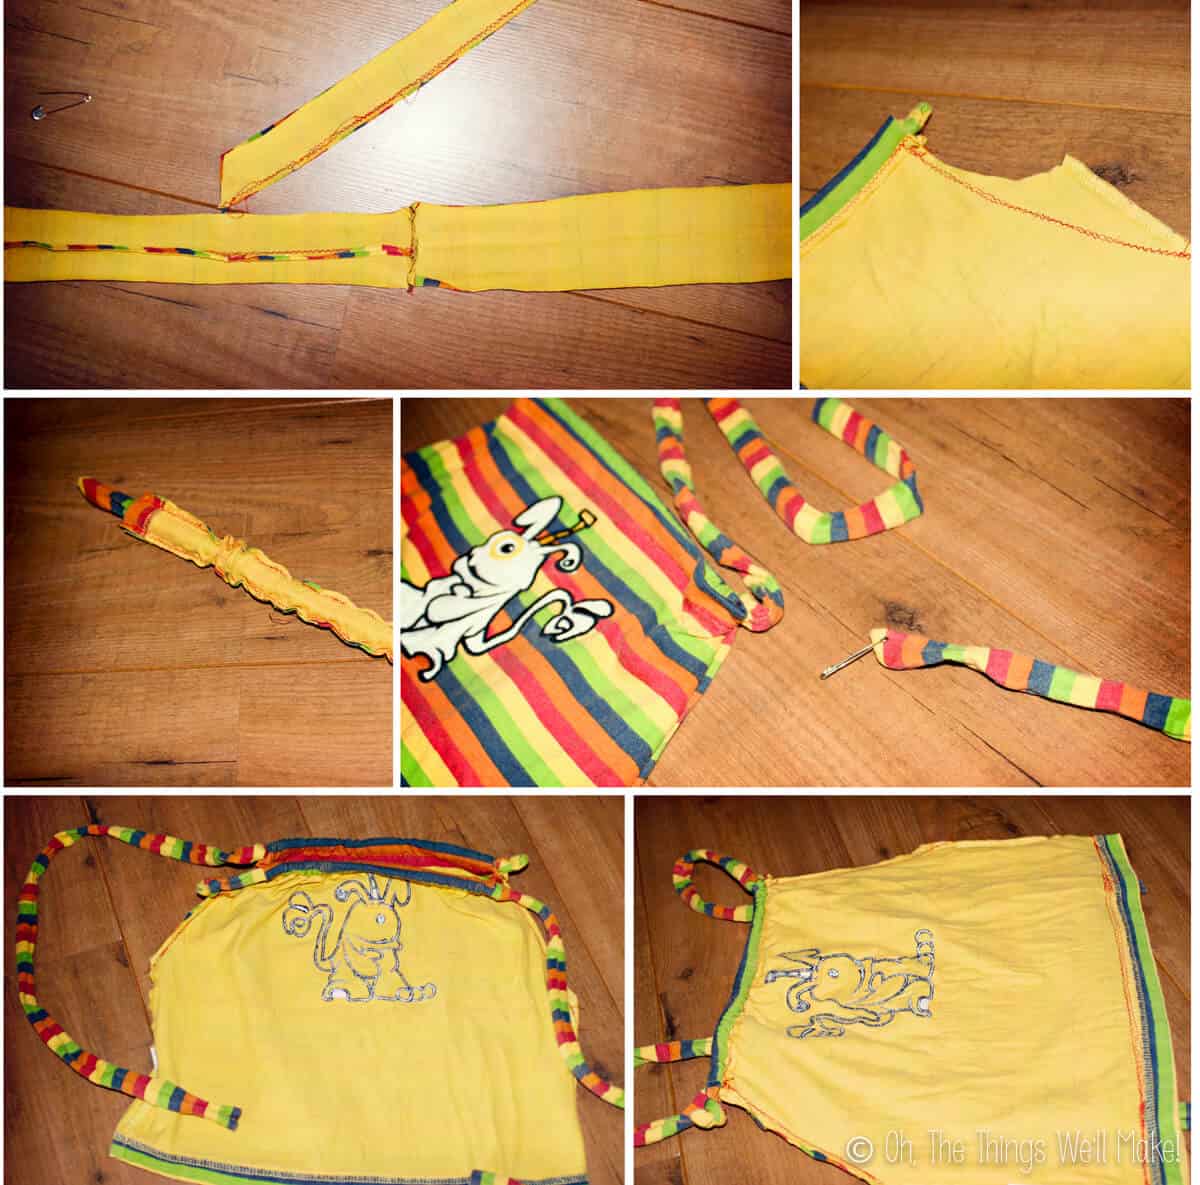
I closed up the backpack, and gave it better shape, by flipping it inside out and sewing up the sleeve holes just up to the hem at the top, but not across the hem!
Next, you want to thread your straps through the drawstring closures at the top. If I have a longer cord, I normally thread the cording through all the way around the top, ending up back at where I began on both sides. In this case, I didn’t have enough fabric to make the straps go all the way around the top, so I threaded one side thought the front, and the other side through the back hem. I knotted one on the left side, and the other on the right, to prevent the straps from coming out of the hem later on when closing the backpack.
To finish off the backpack, you want to sew up the bottom hem. Make sure your shirt is inside out first, and then pull the straps through the inside of the tube (which is actually the outside because it’s inside out, but anyway. Hopefully you understand. 😉 ) You want to pull the straps through the bottom before sewing across the bottom hem so that you catch the straps inside the hem. One strap should be on either side of the bottom hem. (Can you see what I mean in the photo above?
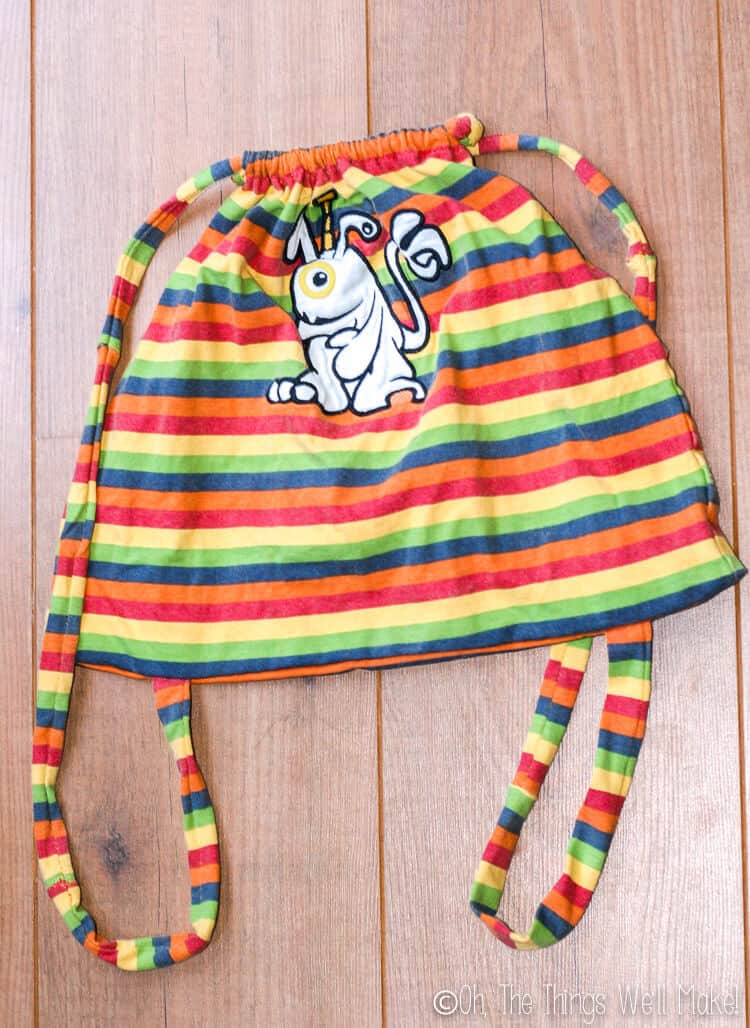
Flip it right side out, and you end up with a cute, drawstring backpack in which the straps also serve as the drawstring which opens and closes the bag.
7. Super Easy t-shirt backpack
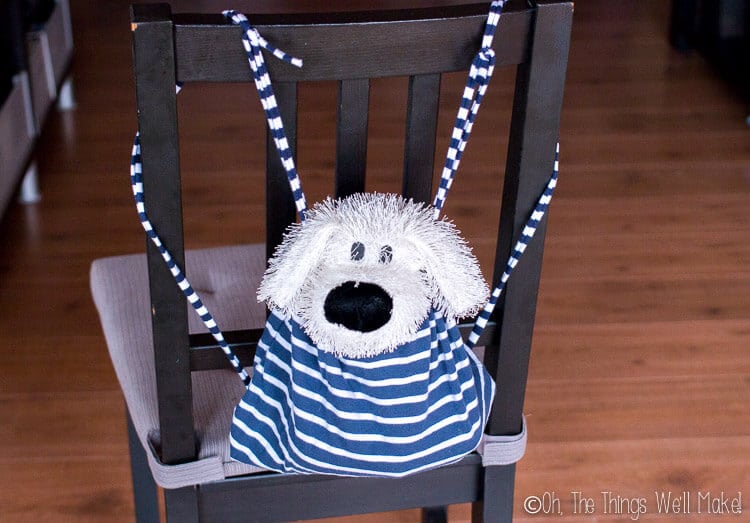
I’m editing this post to add this backpack as a different method, so I can better show you what I meant for how to make an upside down t-shirt backpack.
If your shirt doesn’t have any pictures on the front, you can easily make a backpack using the bottom hem of your shirt as the top drawstring enclosure! This saves a lot of time, and means you can pretty much make a t-shirt backpack with only one seam!
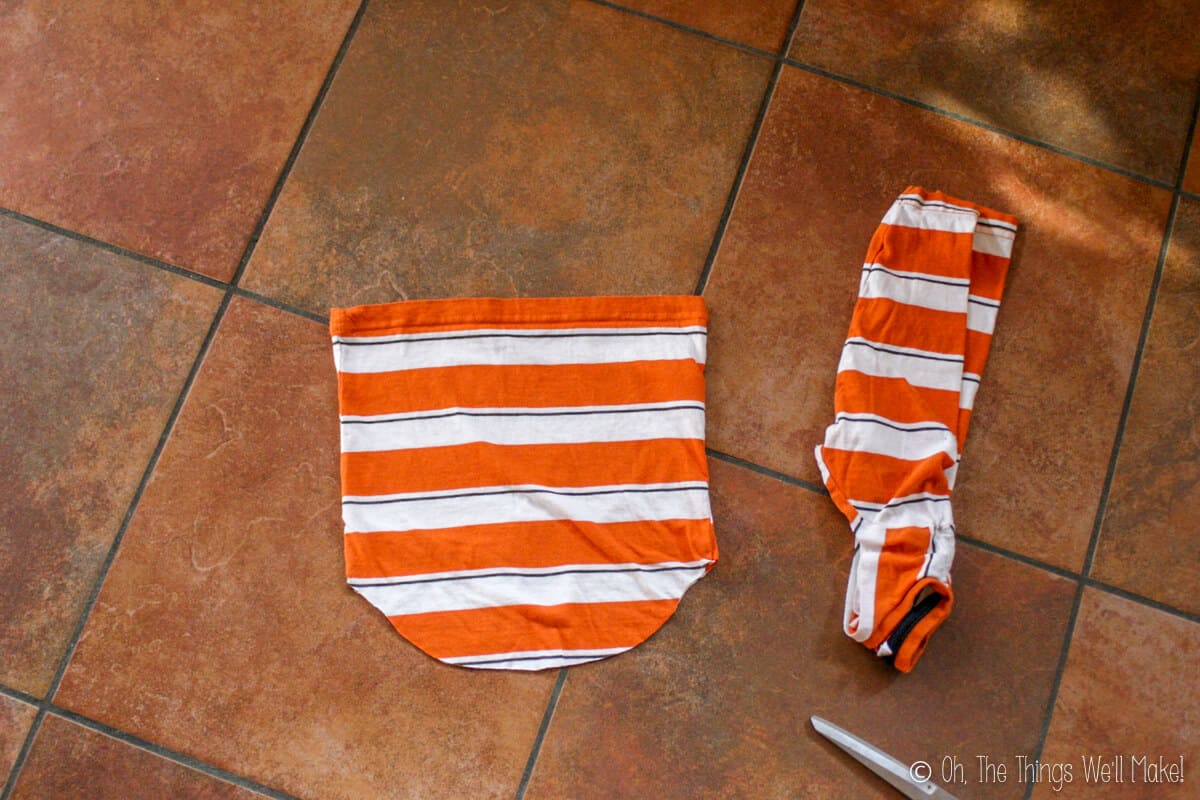
This is super simple and involves cutting off the sleeves and neck. I make sure it’s symmetrical by folding the shirt in half and then cutting it in a rounded shape, preserving as much fabric as possible.
You want to turn the shirt upside down and see the bottom hem as your drawstring enclosure and the backpack will now have a rounded bottom. Follow the same steps as in the other backpack above. You’ll now want to sew the straps into your bottom seam and run the other end through the hem that is now at the top.
When using cording, I like to run the cording through the hem both ways as you would when making a double drawstring enclosure. Once that is done, you’ll want to flip the bag inside out and run the cords through the center of the bag before sewing across the bottom. (See what I mean in the backpack above.)
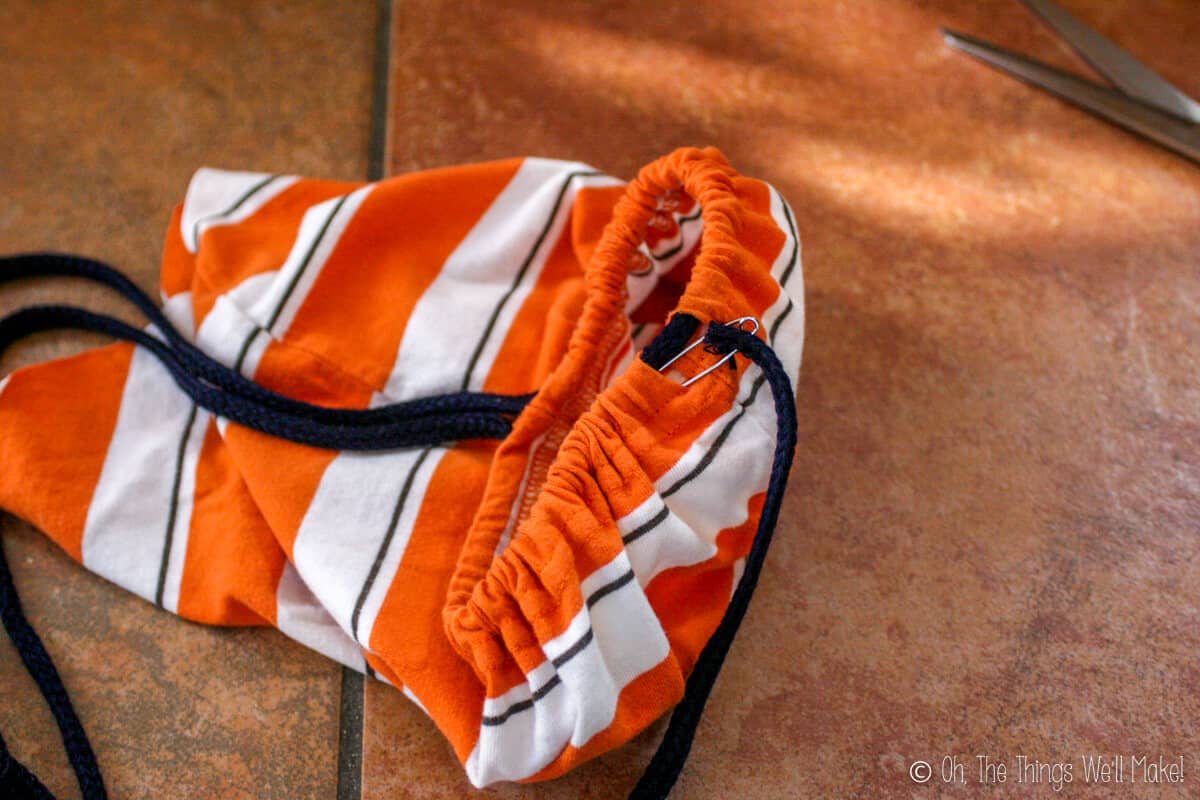
Here you can see how I run the cording through. I run one cord through one way, and the other cord through the other way. I then flip the shirt inside out before sewing the cord into the bottom seam to hold it in place. (See the pics for the other backpack to see where they need to go.)
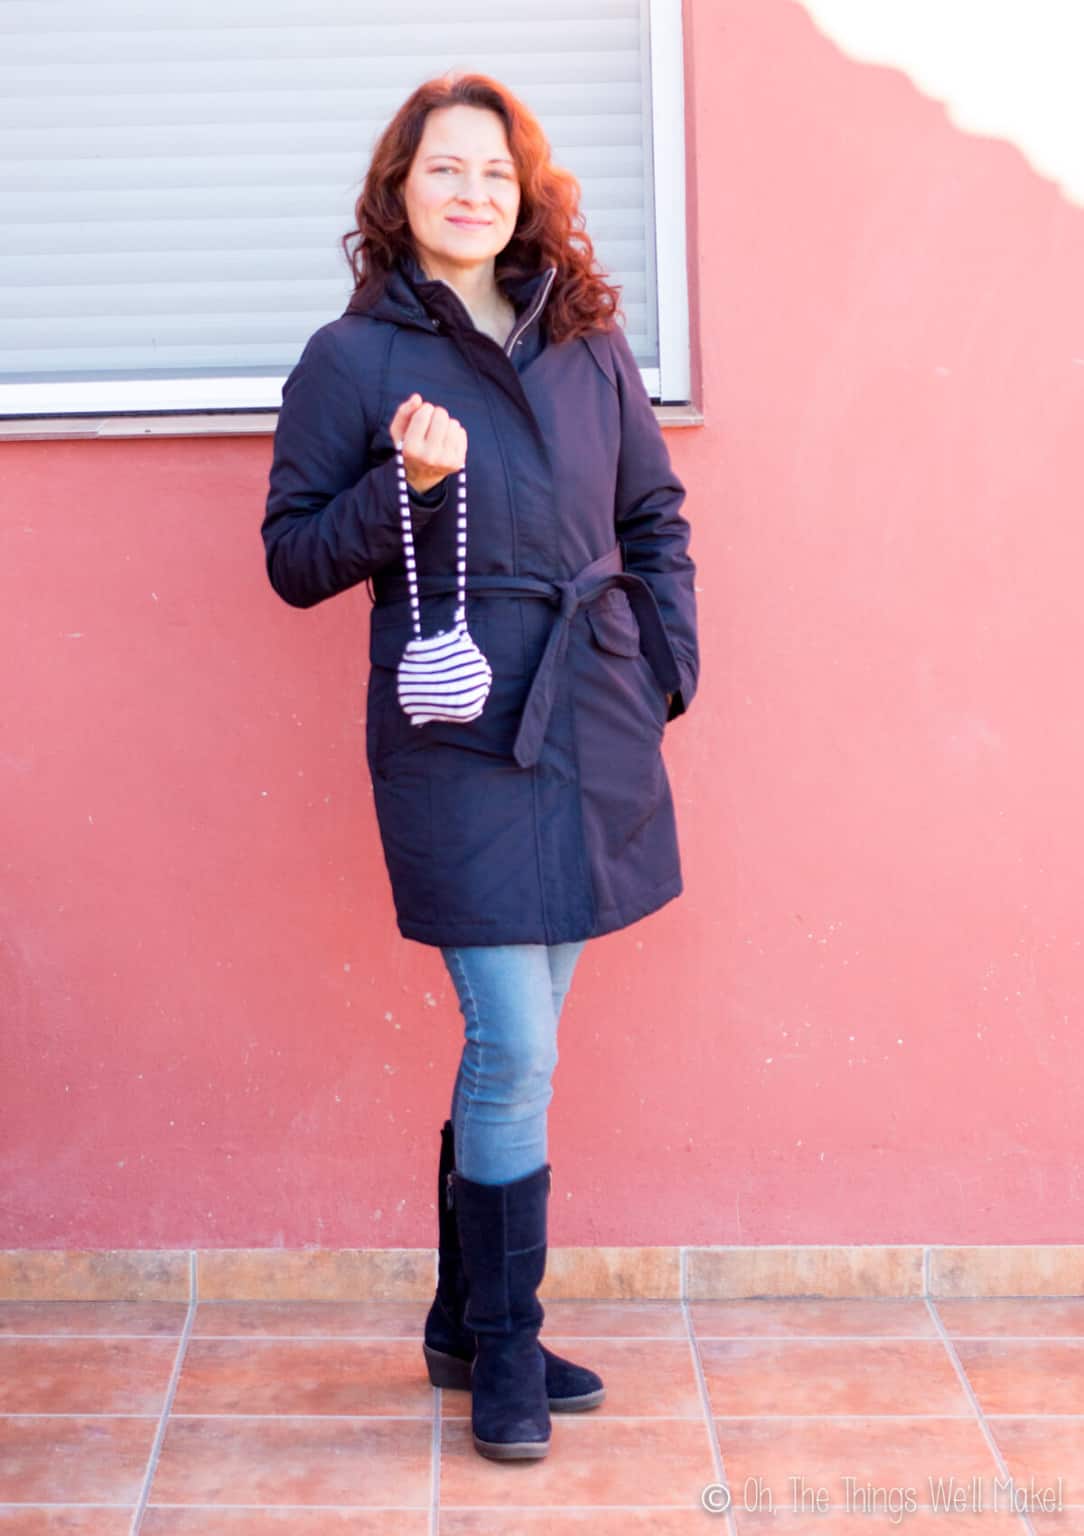
8. My favorite way to make a t-shirt bag, with matching drawstring carrying pouch
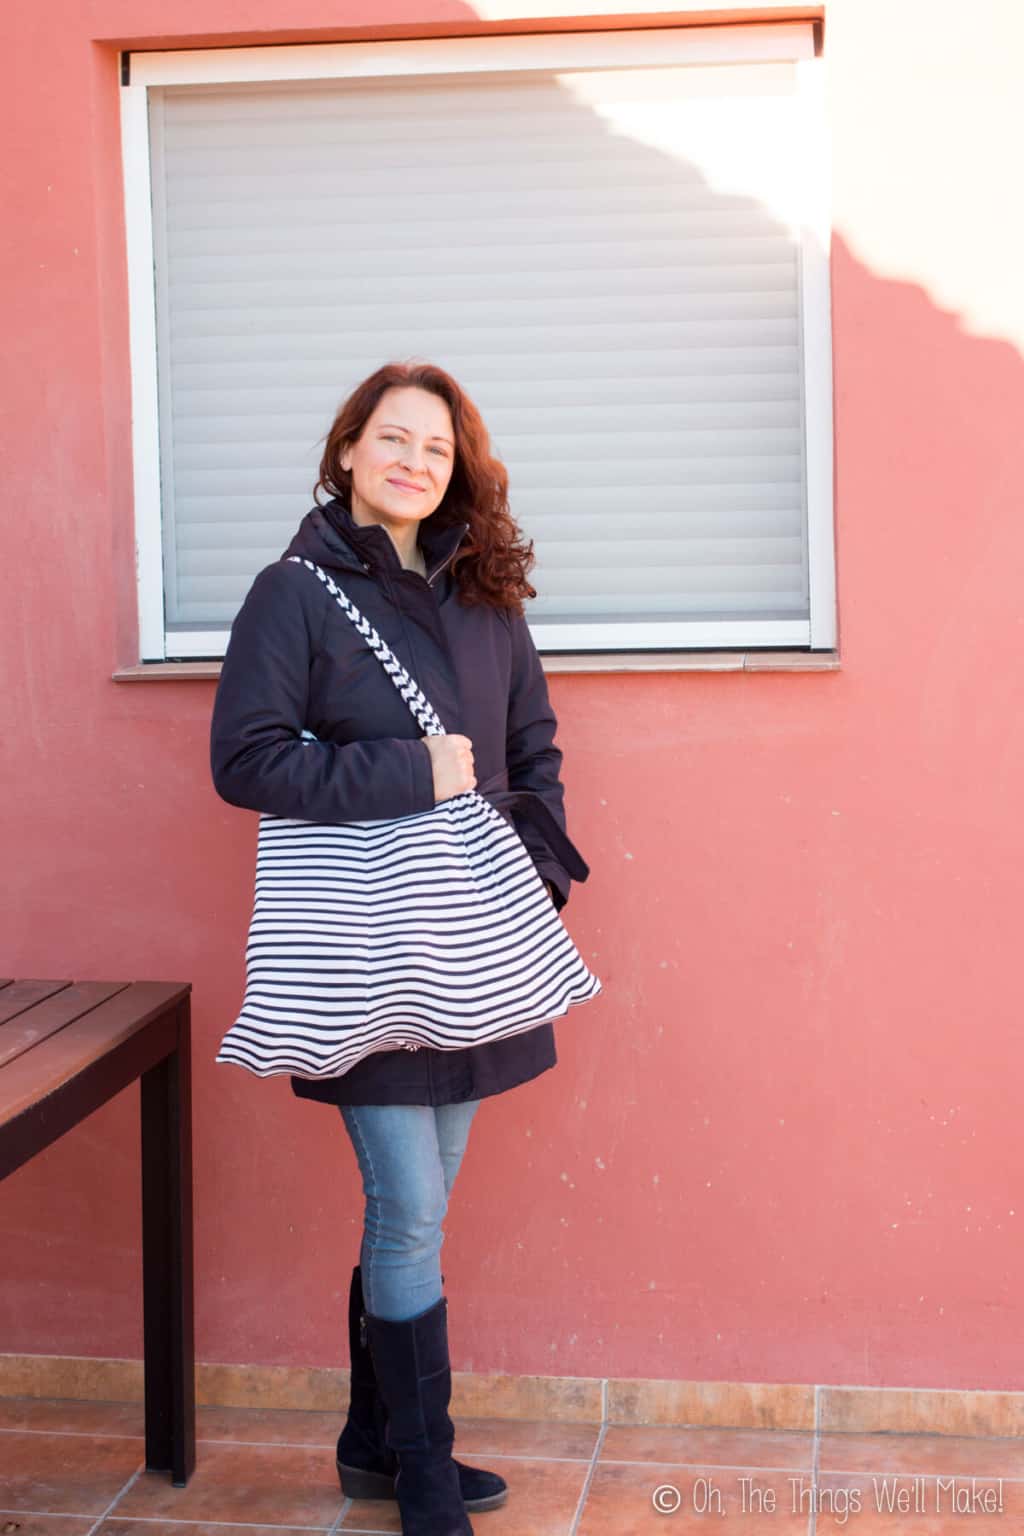
Above, I have already hinted at how I make my t-shirt bags.
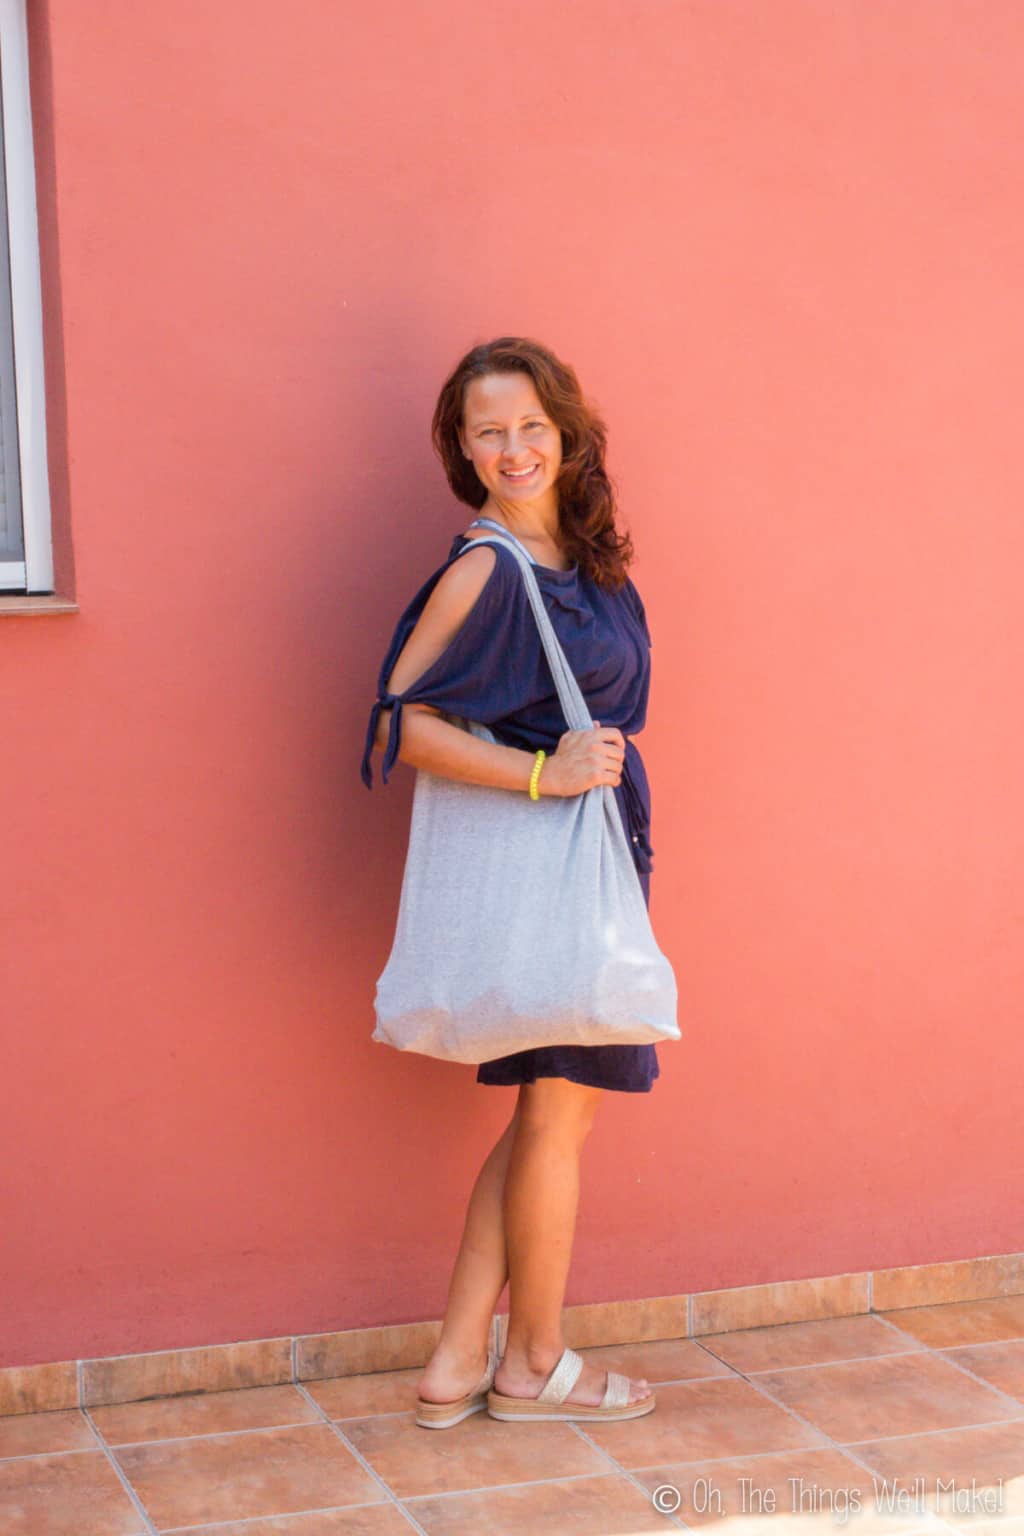
Rather than just cut off the sleeves and neck and sewing across the bottom, I flip the shirt, lining up the sleeve holes, first. The result is a bag that points from front to back when worn on the shoulder, not one that points outward (and jabs into your side).
Remember that this method is best for blank, non printed t-shirts, especially those without side seams. Side seams aren’t really a problem, but they do end up on the front and back of the bag when worn as you can see in the picture of my striped t-short bag above. If there are no side seams, there is a blank space for decorating the once-side-of-the-bag, which is now the front. Make sense?
How to make a t-shirt bag – my method!
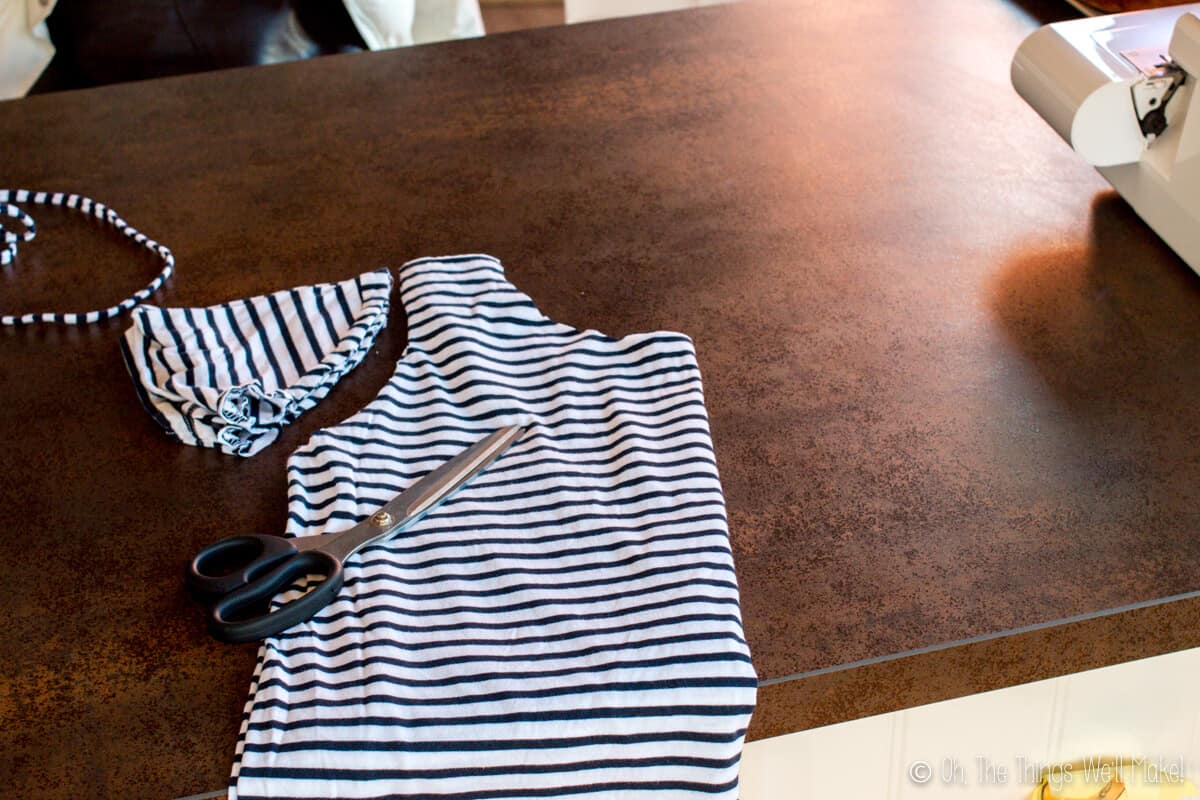
1. Fold the t-shirt in half, and then cut the neck and sleeves off your t-shirt. While you don’t really need to fold the t-shirt in half first, I find that it’s easier to end up with a perfectly symmetrical bag that way. It’s also very quick and easy as you can cut both sleeves off in one cut.
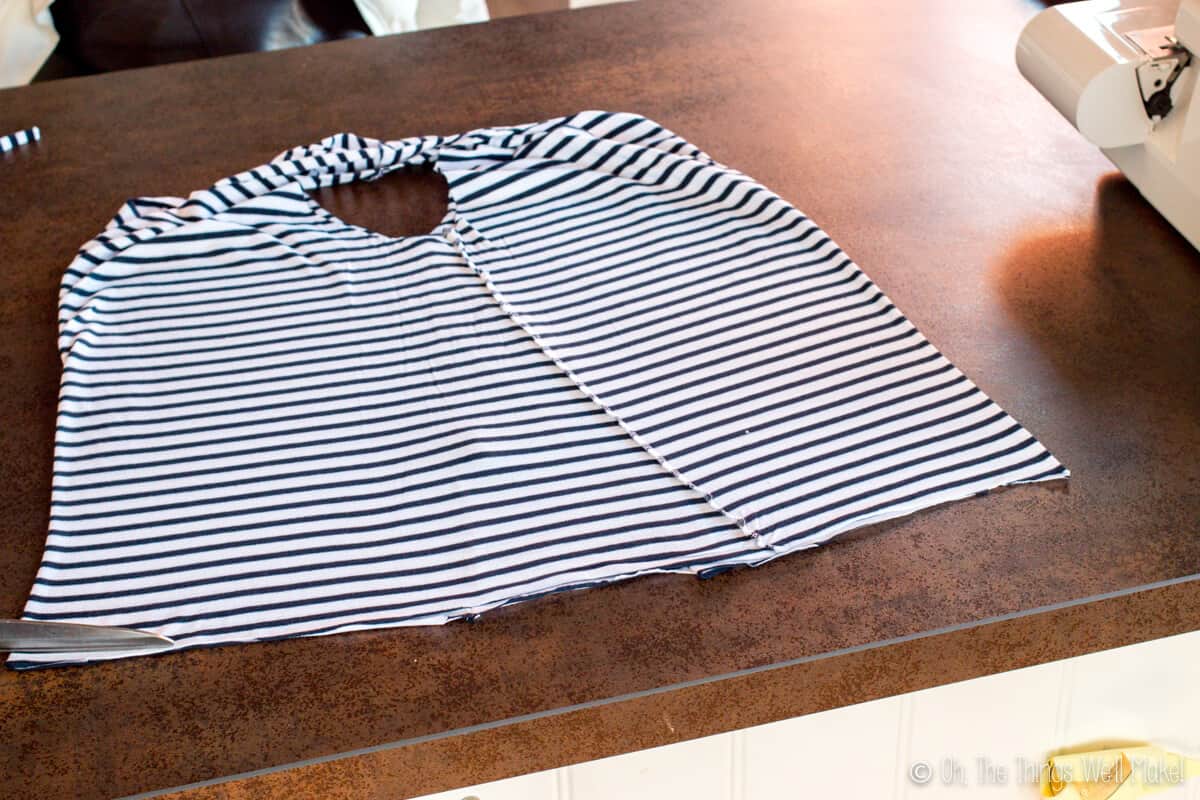
2. flip the shirt inside out and fold the shirt so that the sleeve holes line up together at the top, center of the shirt. If your shirt had side seams, they will now be touching in the center of the shirt.
3. Sew the bottom shut. (If you want to attach your pouch in the seam, read my notes below first.) I like to use a serger to make the seam tidy, but you can use a regular sewing machine too. If using a sewing machine, I’d probably use a zigzag stitch for the seam, and would then trim off the excess.
If you want to attach your sleeve pouch to your bag, you can either sew it into the bottom seam or sew it someplace else. Remember, your shirt is inside out, so if you want the cord of the bag to be on the inside of the bag, leave it on the outside.
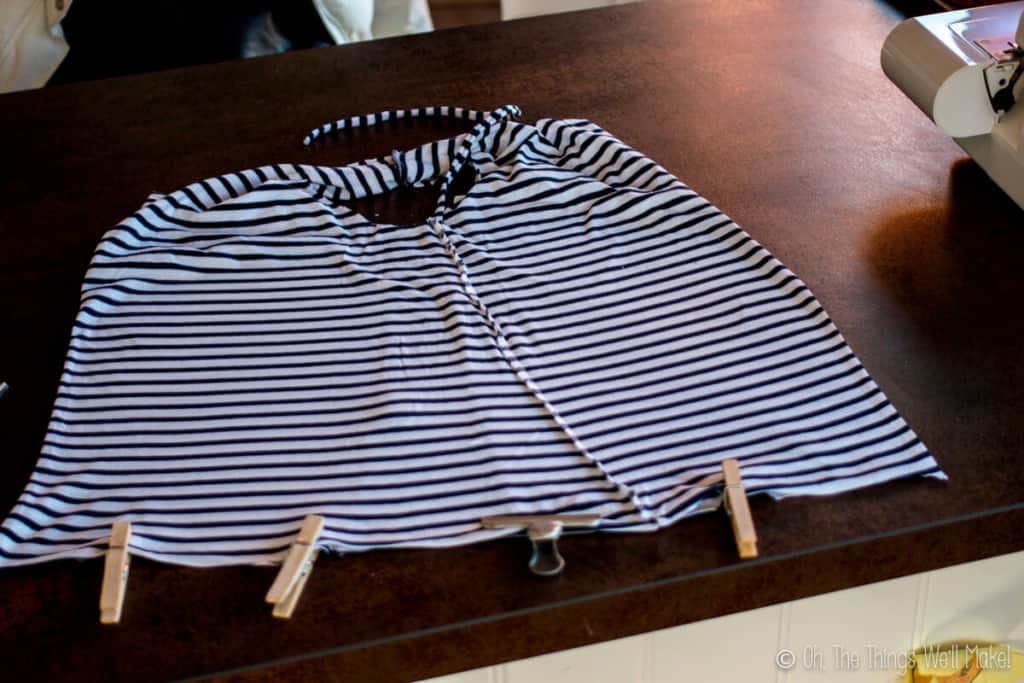
If you want the cord on the outside, you’ll have to run it through the center of the shirt, and will have to make the cord long enough so that your pouch will reach the inside of the bag when in use. (If you do it that way, you end up with a handy long cord for carrying your pouch like a purse.)
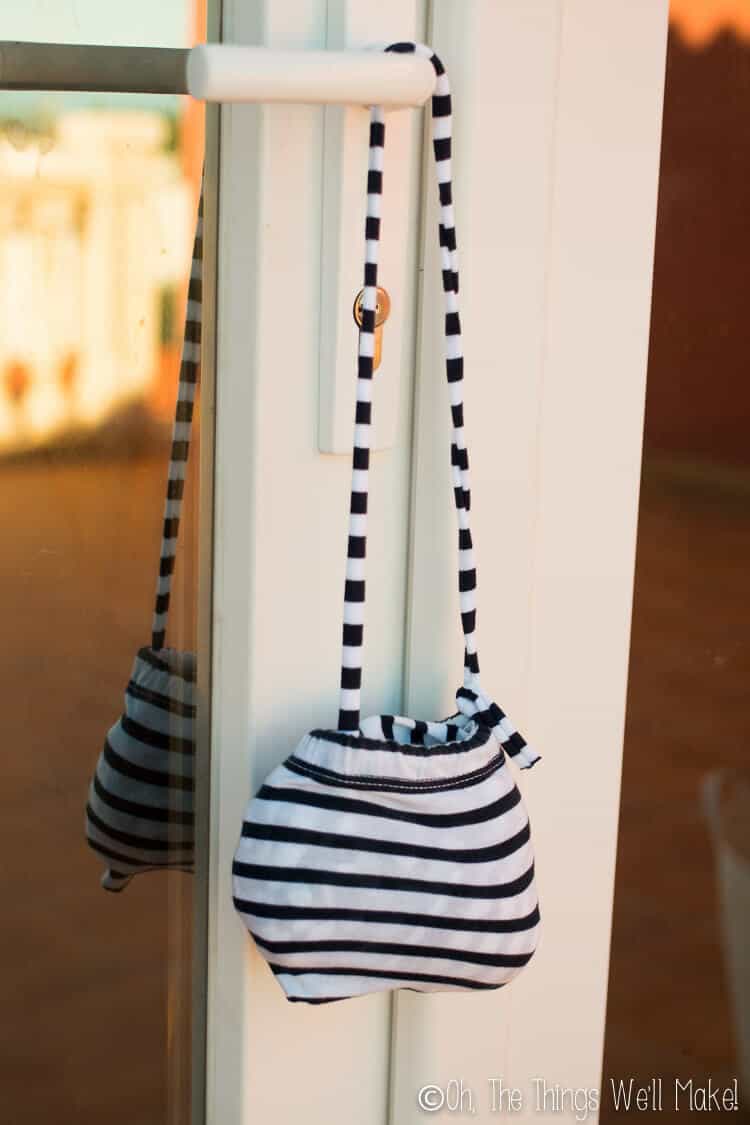
4. Turn your bag right-side out and, voila, you are done with the bag part!
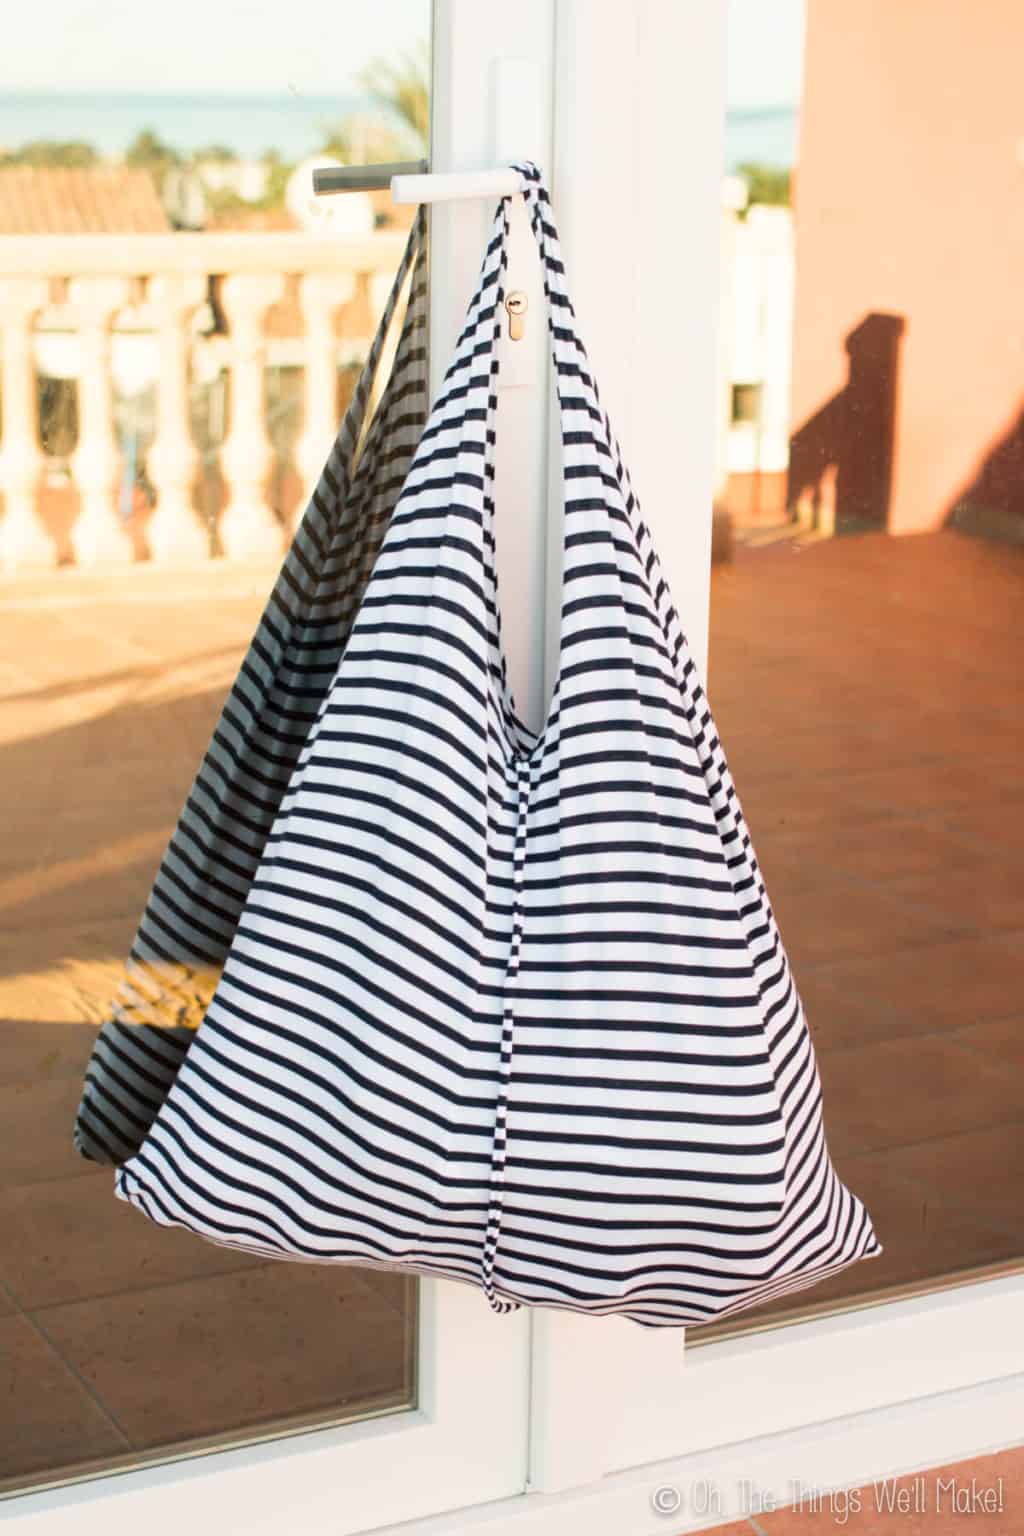
How to make the pouch from the sleeve
Since you have to cut the sleeves off when making your bag, why not put them to great use and make a pouch from them?
This is a super quick and easy project because sleeves have a hemmed bottom that can be used as a pre-made drawstring closure. My full tutorial for how to make a drawstring bag from a sleeve can be found in the link, but I’ll give you a general gist, as to how it pertains to making it fit this project, here:
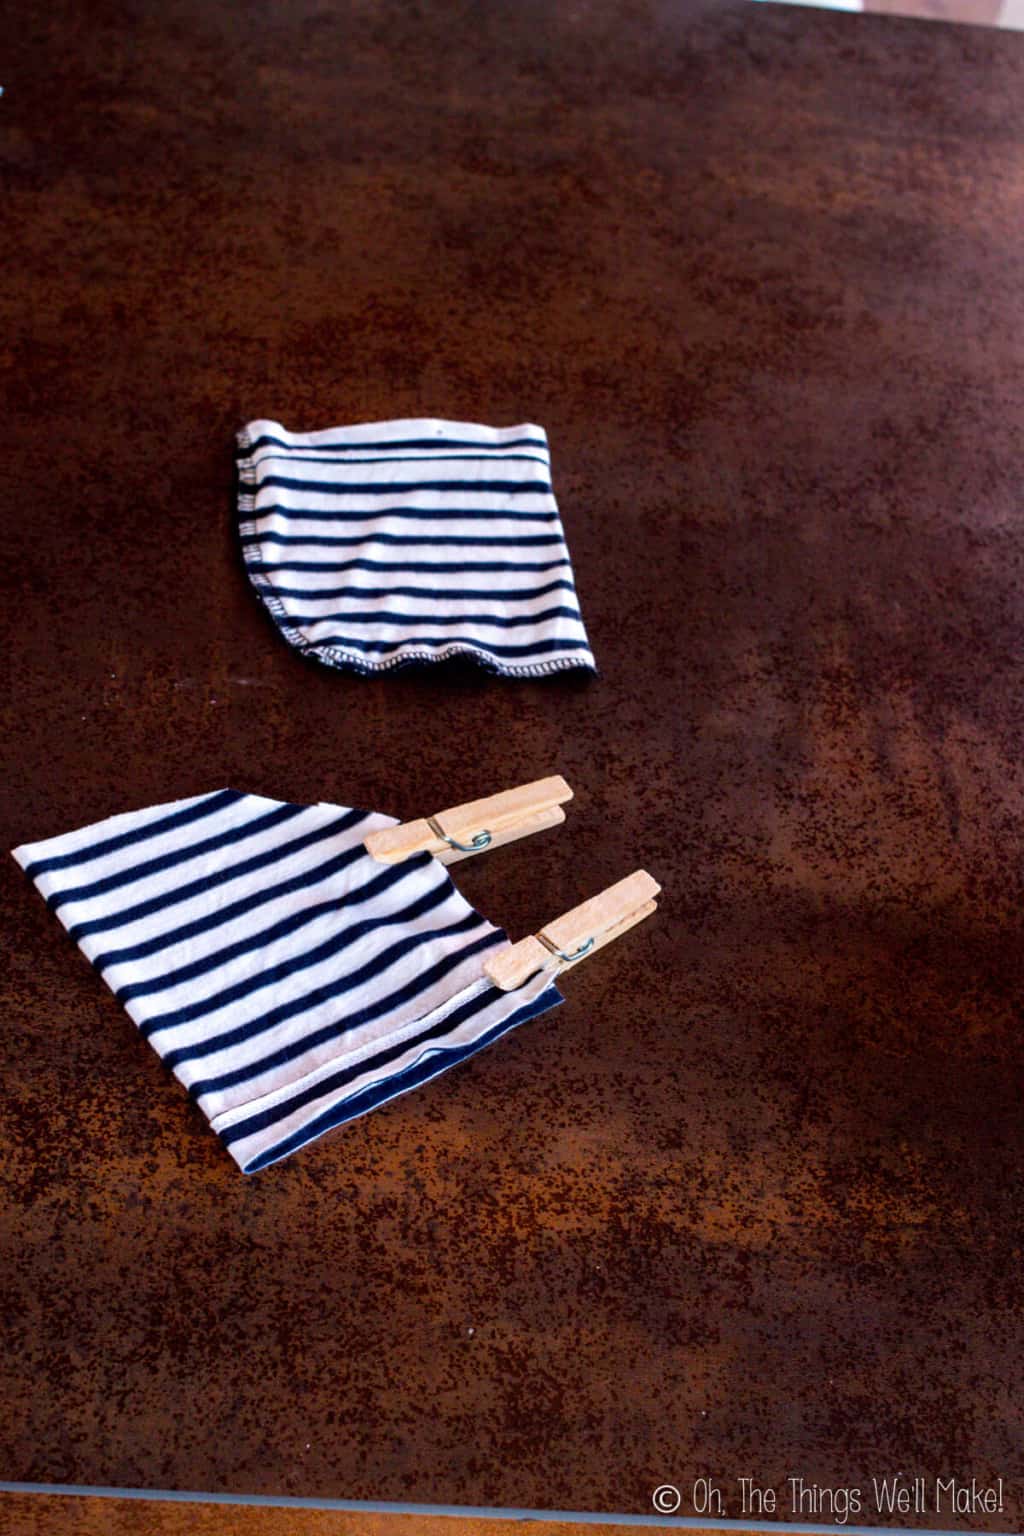
First, you want to flip the sleep inside out. You’ll then want to sew across the bottom. Whether or not you need to sew down the sides depends on the type of sleeve you are using and if you need to shape the sleeve to get a nicer looking pouch. (More details about this can be found in the post about making a drawstring bag.)
For this bag, you don’t need another cord for your drawstring closure, but will instead use the cord that you sewed into the bottom seam of your bag. Flip your pouch right side out and then cut slits into the top layer of the hem enclosure. Run the cord all the way through the hem, having it come out of the same hole you started at. (If your pouch has seams on either side, you’ll need to make more slits to be able to pass the seams with the cording.)
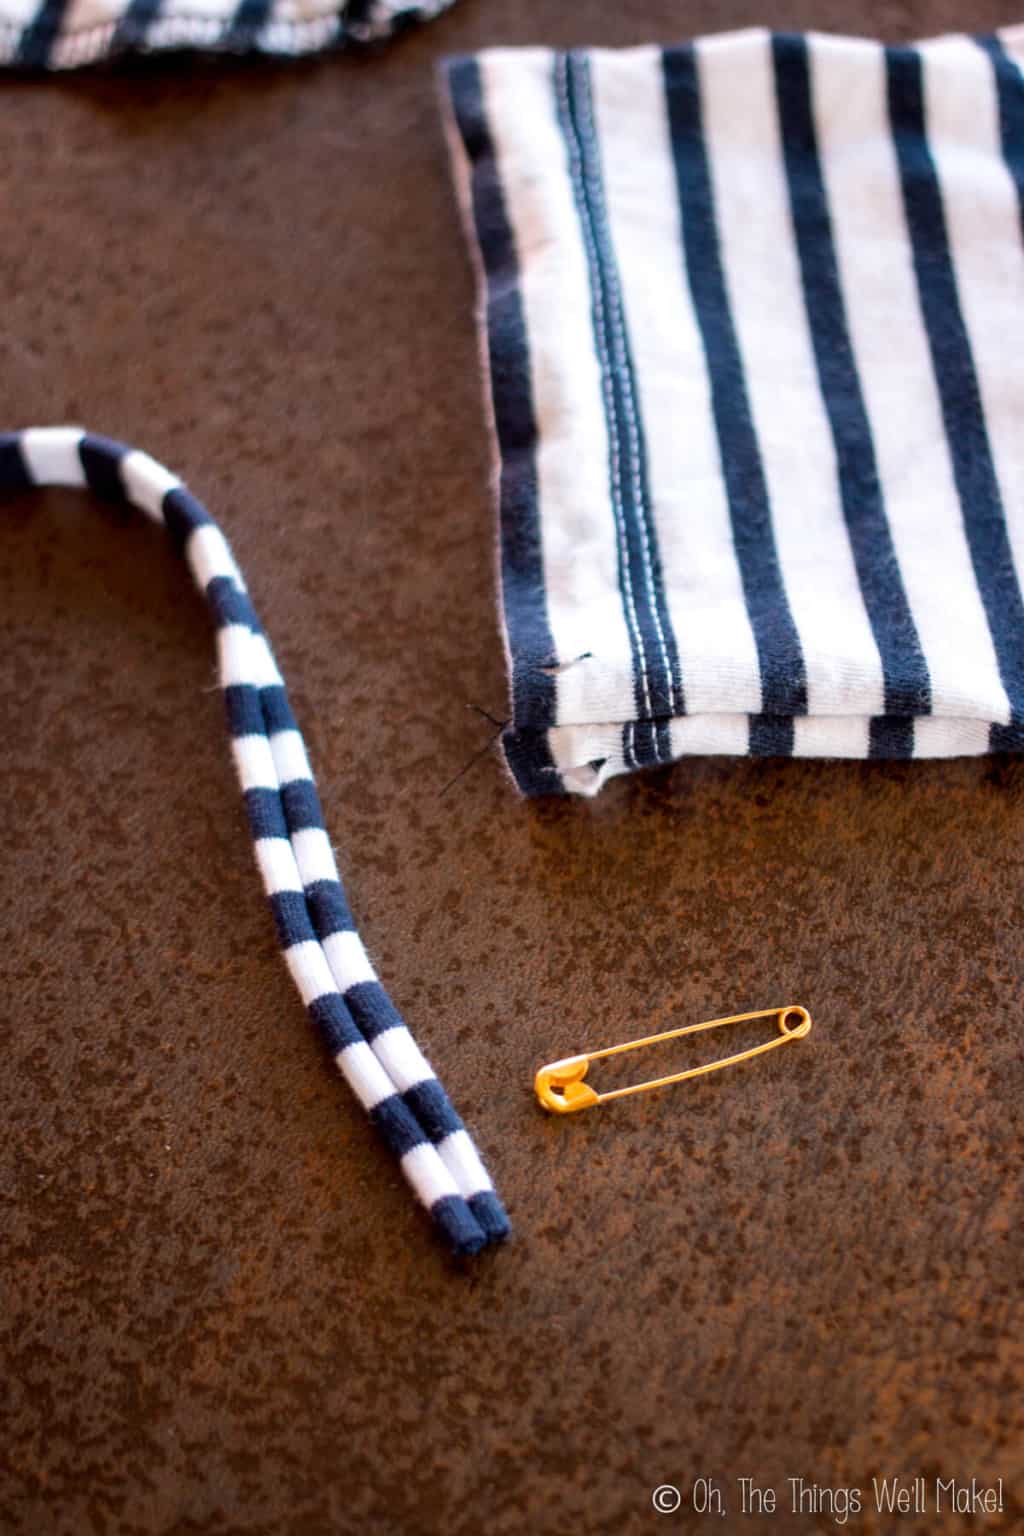
Leave enough cord to easily open the pouch, and then tie the end to the cord at the point where the bag can comfortably open. You are finished!
You can now stuff your bag into the pouch, leaving the extra cord out as a handle for easy carrying. When you are ready to use your bag, take it out of the pouch and keep the pouch in the bag while it’s in use.
I hope you like these t-shirt bags as much as I do. Now you are free to decorate them as you like!
Which is your favorite?
 Español
 Make Wall-E and Eve Stencils and T-Shirts
Leigh
I just was gifted a sewing machine, I’m going to try this for our fall craft fair! thank you.
Tracy Ariza, DDS
Awesome! They’re super handy to have on hand. I hope you have fun with it!
Marion
These bags are a good thing to donate to the food banks.
Tracy Ariza, DDS
Great idea, Marion!
Lily Rose
I did the same type of tote several years ago but attached the drawstring pouch to the inside of the bag.
Mike
I love reusable shopping bags. Eboli is a point well made even though I wash mine without thinking about that aspect and hang them on a drying rack instead of using a electric dryer. I have a friend that takes a old t shirt or jeans and makes a shopping bag out of it. It works for her.
Jay
Do you have a video of you making the last one
Tracy Ariza, DDS
The last shopping bag should show up in the video. I don’t have video of me making the backpack, though (yet?). 😉
Carmen
Hmmm, if you have multiple sleeves that you cut off, would it be an idea to turn that into a patch work bag? Or use the sleeves to create a pouch for your reusable t shirt bag
Tracy Ariza
Hi Carmen,
You can use the sleeves for all sorts of things. I normally make them all into pouches that I use for all sorts of things. They’re great for storing small things that accumulate all over the house like safety pins, clothes pins, q-tips, hair ties, etc., etc. 😉
Melissa
Awesome. You have some ideas I hadn’t heard of before! Thanks.
Mary-Ruth Flores
Just FYI, if the tee shirt is a well used one the sleeves can carry BO even if we’ll washed
CJ
This is perfect for our crafts committee for our church bazaar. We are looking for Eco-friendly projects and this can be done by those who sew–or don’t sew.
Tracy Ariza
Hi CJ,
Yes, the no-sew options would be perfect for that! I’m so happy I could help! Have a great time at the bazaar! 🙂
Donna Harrison
I did the same type of tote several years ago, but attached the drawstring pouch to the inside of the bag
Tracy Ariza
Hi Donna-
They’re great- and handy- right?!?
I actually made one like that the other day and filmed it to make a video for the blog. I’ve been wanting to make a post of it and fix up this post into smaller sized posts to better highlight each type of bag. This was the second post I ever wrote, years ago, and I’ve been putting off fixing it up for way too long. 😉
Mary Tillotson
How can I access the blog, I do better with pictures
Tracy Ariza
Hi Mary!
Well, actually, the last bag here uses the connecting a drawstring bag enclosure idea. You can easily make a drawstring bag out of one of the sleeves that you’ve cut off. (I linked to my tutorial).
Then if you take a longer cording to go through the drawstring enclosure and sew the opposite end into the bottom hem of the bag. Just leave it on the outside if you’re sewing it into the hem while the bag is inside out. I was being dumb and put mine inside, and my pouch ended up being sewn to the outside of the bag rather than the inside as you can see in the final pictures. It’s not a big deal because I made the cording long enough to store the pouch inside the bag, but it would have made more sense to have just sewn it inside in the first place. 😉
yango
no
Tracy Ariza
?