• Skip to main content
  • Skip to header left navigation
  • Skip to header right navigation
  • Skip to site footer
es_ES EspaƱol
  • About
    • Meet Tracy!
    • Contact Me
    • Disclaimers & Disclosures
    • Terms and Conditions
    • Cookie Policy
    • Privacy Policy
  • Holidays
    • New Years Eve
    • Valentine’s Day
    • St. Patrick’s Day
    • Easter
    • Fourth of July
    • Halloween
    • Thanksgiving
    • Christmas
  • es_ES
Oh, The Things We'll Make!

Oh, The Things We'll Make!

Make it yourself so that you control the ingredients!

  • Recipes
    • Appetizers & Snacks
    • Soups & Salads
    • Breakfast
    • Lunch & Dinner
    • Desserts & Sweets
      • frozen treats
    • Breads & Wraps
    • MIY Pantry Basics
    • Condiments & Sauces
    • Beverages & Smoothies
    • Story Archives
  • Make it Yourself
    • Arts & Crafts
    • Face & Body
      • Cleansers, Soaps, & Gels
      • Deodorants
      • Hair
      • Skin Care
      • Oral Care
      • Baby & Toddler Care
    • Home & Garden
      • Cleaning & Laundry
      • Garden & Hens
    • Soap Making
    • Upcycling
  • About
    • Meet Tracy!
      • More About Me
    • Contact Me
    • Disclaimers & Disclosures
    • Cookie Policy
    • Privacy Policy
  • Recipes
    • Appetizers & Snacks
    • Soups & Salads
    • Beverages & Smoothies
    • Breakfast
    • Lunch & Dinner
    • Desserts & Sweets
      • frozen treats
    • Breads & Wraps
    • Condiments & Sauces
    • MIY Pantry Basics
    • Story Archives
  • Make it Yourself
    • Arts & Crafts
    • Natural Face & Body
      • Cleansers, Soaps, & Gels
      • Natural Skin Care
      • Natural Hair care
      • Oral Care
      • Deodorants
      • Baby & Toddler Care
    • Soap Making
    • Home & Garden
      • Cleaning & Laundry
      • Garden & Hens
    • Photography
    • Upcycling
  • Holidays
    • New Years Eve
    • Valentine’s Day
    • St. Patrick’s Day
    • Easter
    • Fourth of July
    • Halloween
    • Thanksgiving
    • Christmas
es_ES EspaƱol
3 bowls of liquid, one turquoise, one pink, and one purple, in front of a bottle of liquid made from red cabbage, and next to a fresh red cabbage head sliced in half.

DIY Magical, Color Changing Food Coloring

Last Modified: May 17, 2021 // by Tracy Ariza, DDS // May 17, 2020 I may receive a commission if you purchase through links in this post. Learn more here.

es_ES EspaƱol

Jump to Recipe Print Recipe

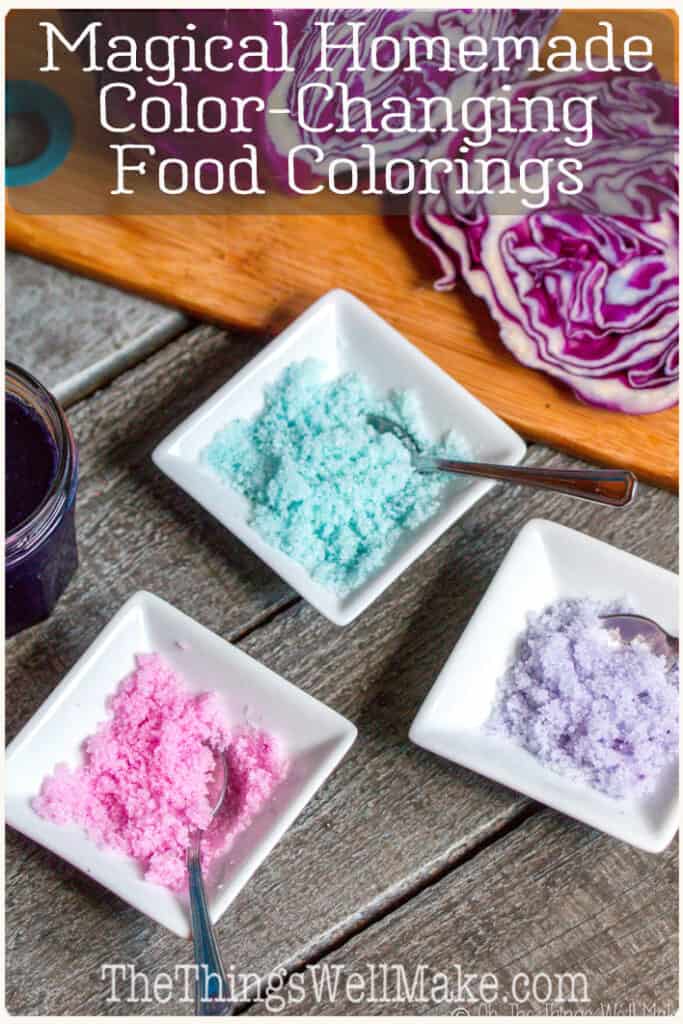
Fun for all ages, these magical, color-changing food colorings are obtained naturally from foods with special pigments whose hue changes in different pH environments.

overhead view of 6 bowls of shredded coconut that has been colored with red cabbage and butterfly pea flowers. The two on the right are turquoise, the middle ones are blue and purple, and the ones on the left are pink. To the right of the bowls is a bowl of butterfly pea flowers, and on the left are some red cabbage leaves.
Top colors extracted from butterfly pea flowers and bottom colors from red cabbage.
Pin this post for later!

When I first wrote this post, I was really excited about it! My blog’s tagline at the time was “real food can (and should) be fun!” So, this really jived with me because it’s about as fun and natural as it gets!

I’ve always loved things that change color like opals and Alexandrite or silly things like mood rings. In the ’80s, I bought some color-changing lipstick and had a collection of t-shirts that changed color with heat. On one of our cruises, I stocked up on things that changed color when the sun hit them: everything from color-changing hair clips to color-changing nail polish (probably not a very natural product). 😉

The color-changing food coloring that I’m about to show you today, though, is 100% natural! Even my husband was impressed and admitted that this was pretty cool! (He’s not a huge fan of crafty things or holiday fun like me!)

I discovered the first version, made with red cabbage, completely by accident…

Red cabbage food coloring

3 small bowls of colored sugar crystals, one pink, one purple, and one light blue, in front of a sliced open red cabbage on a bamboo cutting board.

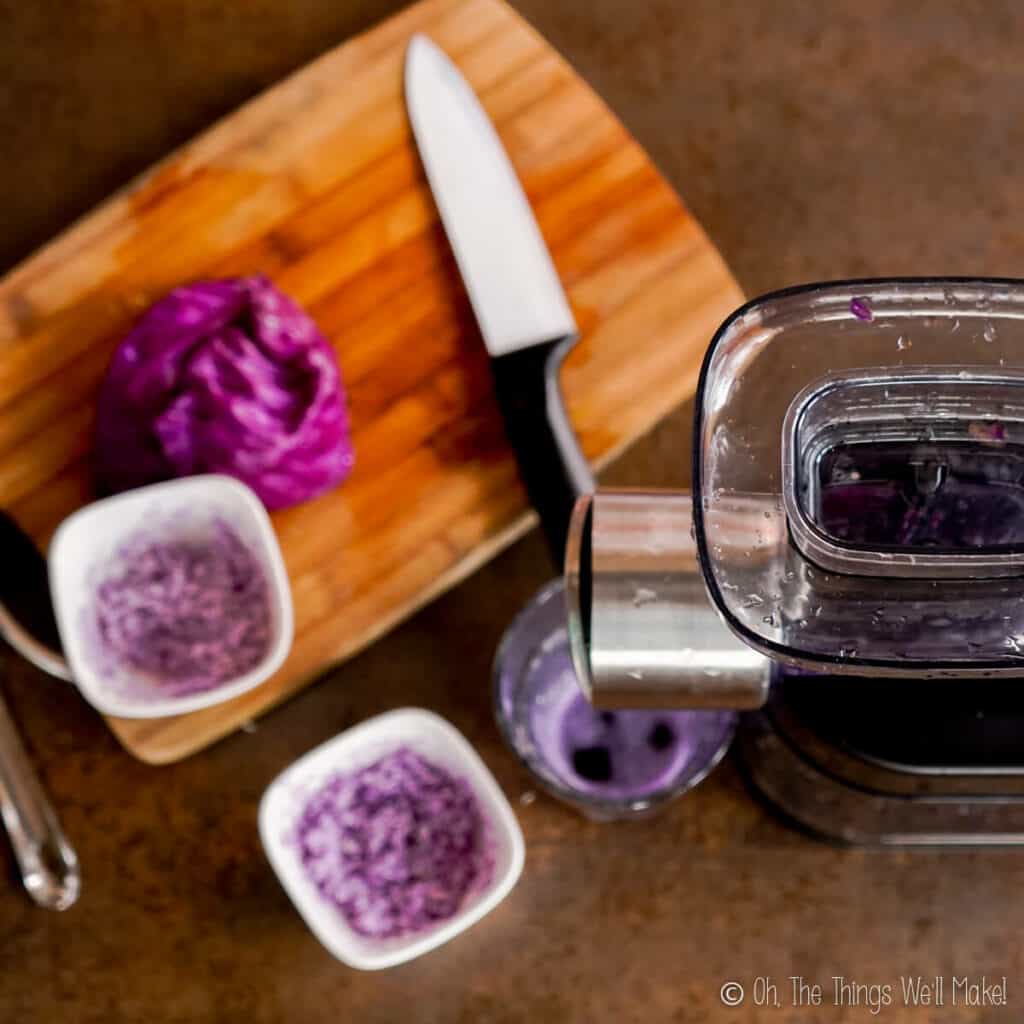
This started when I was making a variety of natural homemade food colorings.

One of them was a pretty violet one that I made from red cabbage leaves. And that was that. Or, so I thought…

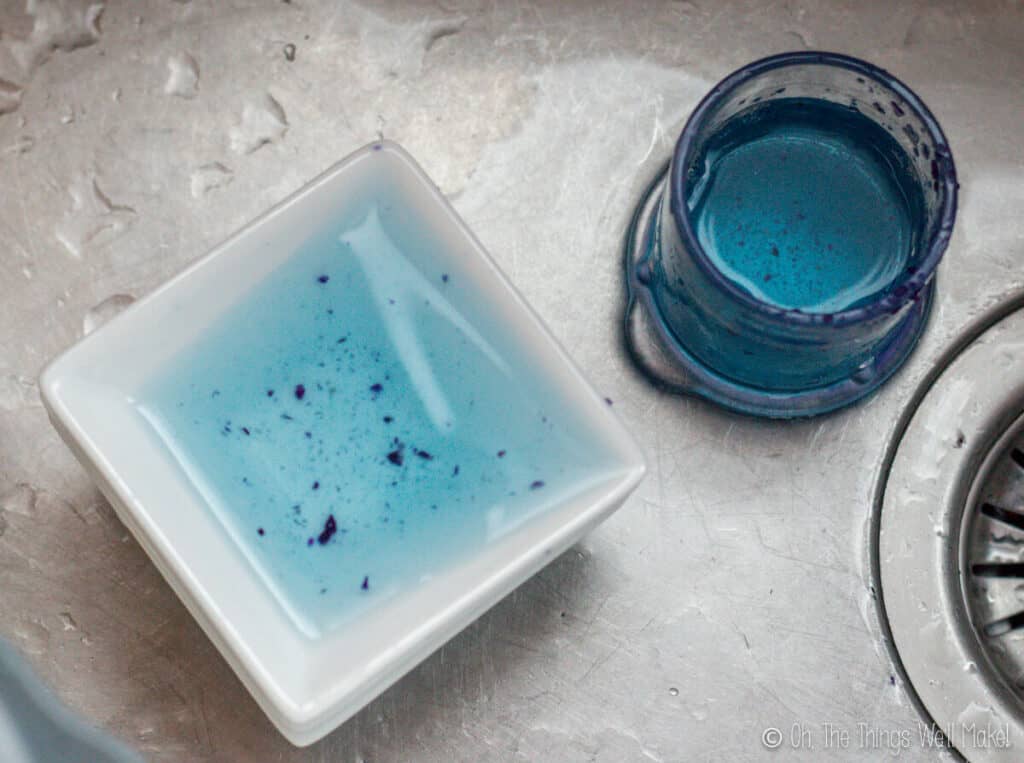
When I went to clean up my blender, I noticed something strange happened when the water hit it!

My homemade violet food coloring was no longer purple, but instead was blue!!

overhead view of blue liquid in a bowl and a glass in a sink with bits of red cabbage floating in the blue water.
When hit with water from my sink, my violet liquid turned blue!

How they change colors

I wasn’t quite sure what happened to change the color, but one thing did occur to me.

Our water here along the Spanish Riviera is extremely hard. I suspected that the high pH of the water might be affecting the color of the purple cabbage. A bit of online research confirmed it.

Red cabbage obtains its color from a class of bright pigments called anthocyanins. Not only are these pigments rich in antioxidants, but they have an interesting property, their color is pH dependent. In an acidic environment, they are pink or red, and in an alkaline environment, they turn blue.

Other color-changing pigments

Red cabbage isn’t the only food with anthocyanins. They can also be found in blueberries, grapes, and eggplants. Most of those aren’t ideal sources for extracting a homemade food coloring.

I did find a wonderful source, though…

Butterfly pea flowers

When I first wrote this post, I hadn’t yet worked with butterfly pea flowers. These flowers are sold whole for making tea, but are also sometimes sold in powdered form as “blue matcha”. I decided to buy some to try making a blue food coloring with them.

  • a cup of blue tea with butterfly pea flowers around it.
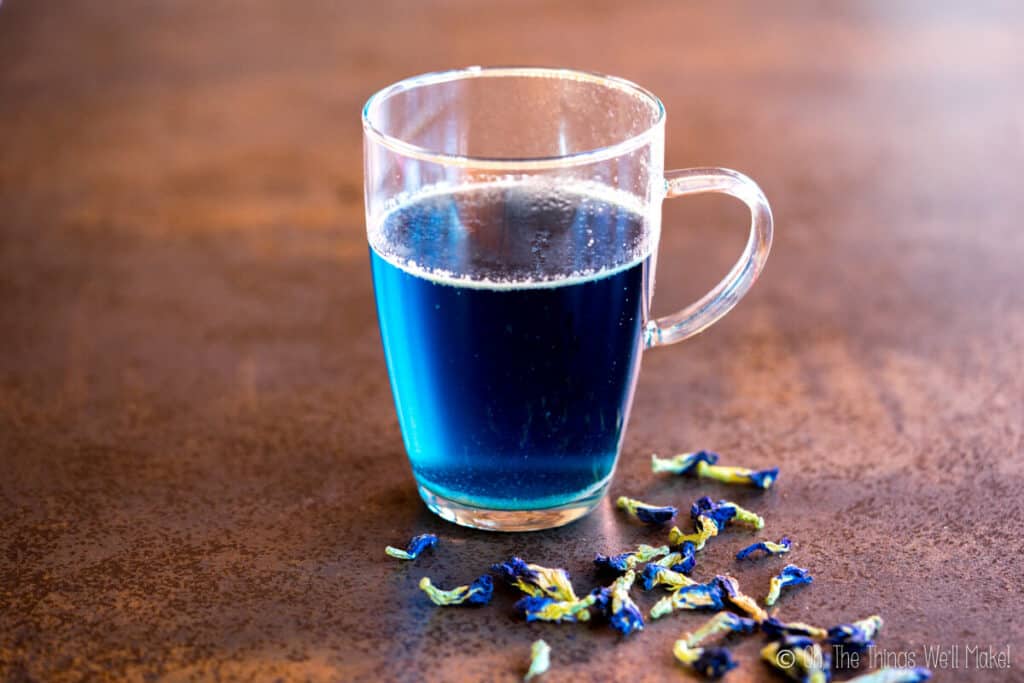
    Butterfly pea flower tea
  • a cup of purple tea with a lemon slice over the edge of the glass and butterfly pea flowers around it.
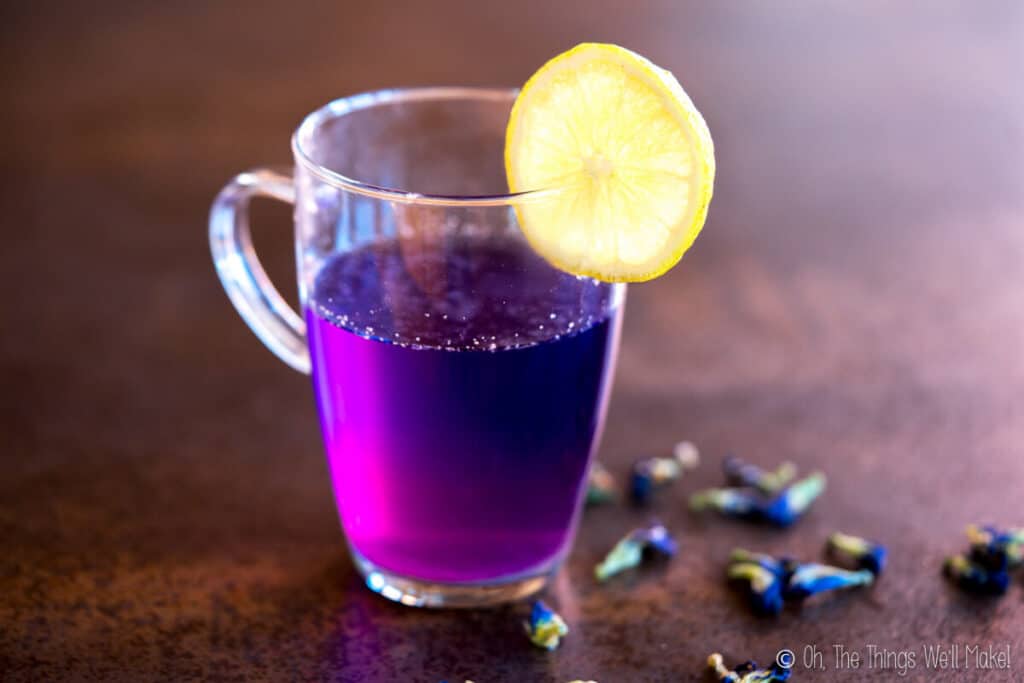
    Same tea with lemon juice
  • Overhead view of 4 bowls, one with butterfly pea flowers, and 3 with colored shredded coconut, the top one is pink, the middle is blue, and the lower one is turquoise colored. There is also a bottle of pigment extracted from the flowers in the background.
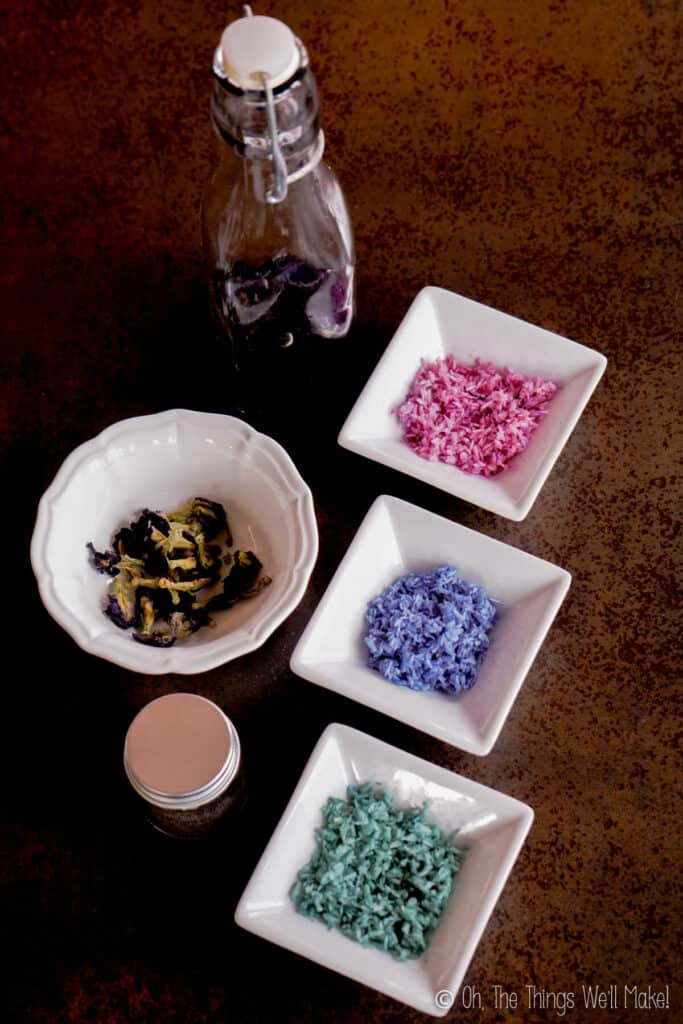
    Colors obtained from butterfly pea flowers
  • Squeezing lemon juice into a small bowl with shredded coconut. It's turning pink. Another bowl with turquoise colore coconut is behind it.
    Adding lemon turns it pink.

What I didn’t realize when I ordered them, though, was that they, too, have anthocyanins. So, when I make a tea with butterfly pea powder, it’s a beautiful blue color. If you add lemon juice to it, though, it turns violet or even pink.

What’s wonderful about using butterfly pea flowers as a food coloring is that they have a very mild flavor. They don’t really negatively affect the flavor of the foods you are trying to color. (Red cabbage, on the other hand, can leave an off-putting flavor if used in high concentrations.)

Extracting the food coloring

There are several ways to extract color from cabbage leaves or butterfly pea flowers.

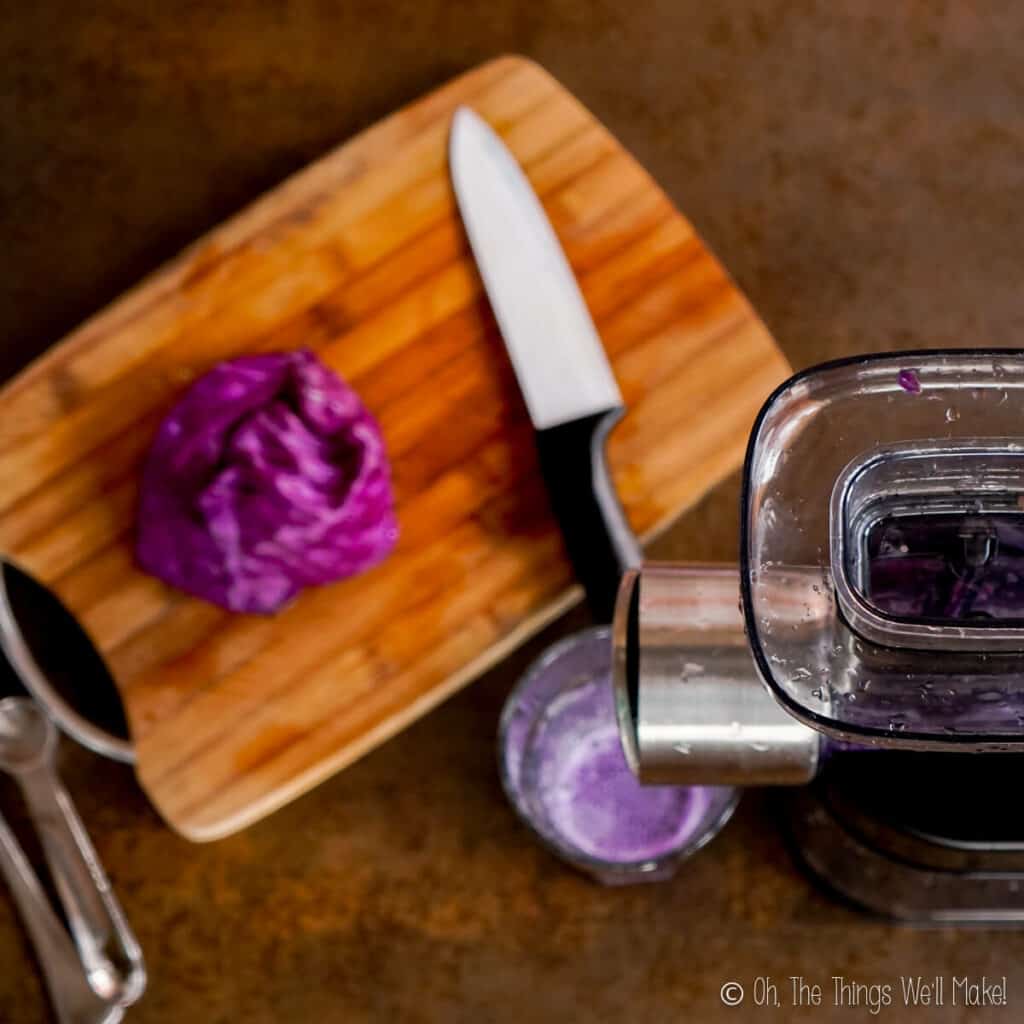
Juicing red cabbage leaves

You can just juice red cabbage leaves and use the juice immediately as an instant food coloring. For a longer-lasting one, though, the juice can be combined with alcohol. The alcohol, if the final concentration of the mixture is above 20%, helps prevent microbial growth that could make the coloring unsafe to use with time. (For more information, read my post about natural preservatives.)

Steeping in alcohol or glycerin

You can also steep the dried flowers or the cabbage leaves in alcohol to extract the coloring from them. The cabbage leaves can be added to the alcohol or glycerin either fresh or dehydrated.

For the first batch I made, I dried some red cabbage leaves and let them steep in some 40% vodka overnight. The next morning, I filtered out the plant material using a tightly woven cloth. It worked beautifully, leaving gray cabbage plant material behind, and filtering out a pretty purple liquid. That purple liquid is the DIY magical, color changing food coloring, of course!

  • dried red cabbage leaves next to a bowl filled with a powder obtained from grinding the cabbage leaves.
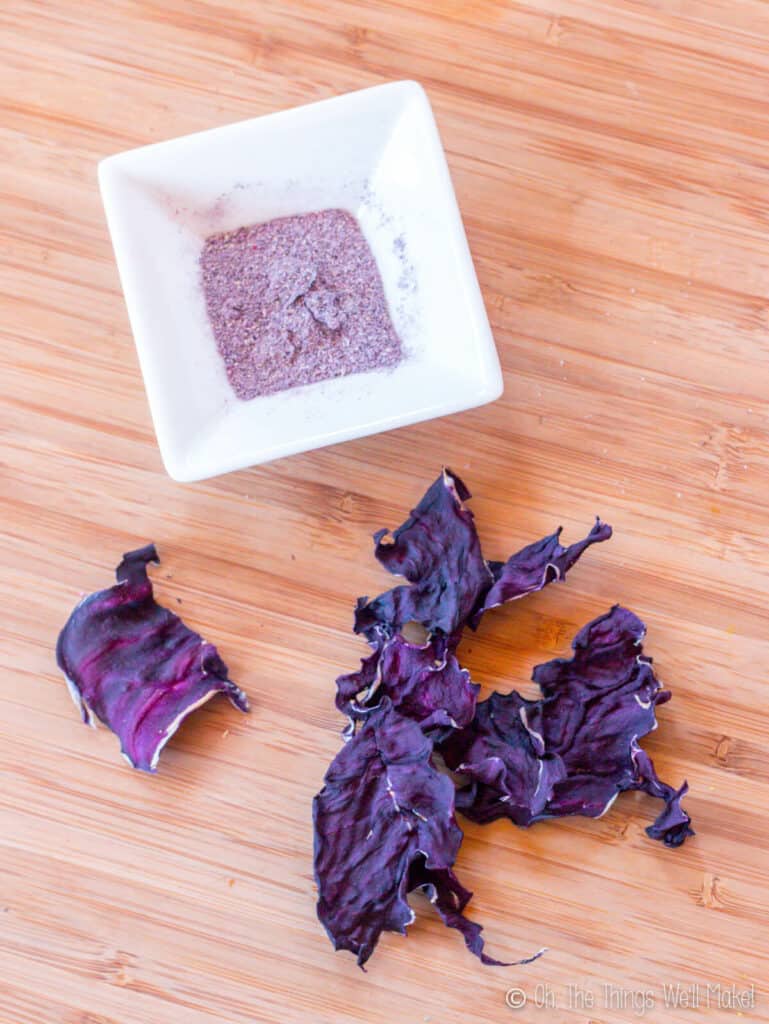
    Dried cabbage leaves (with some ground into a powder)
  • overhead view of dried red cabbage leaves, a bowl of powder made from the dried leaves, and another bowl where the powder has been mixed with alcohol.
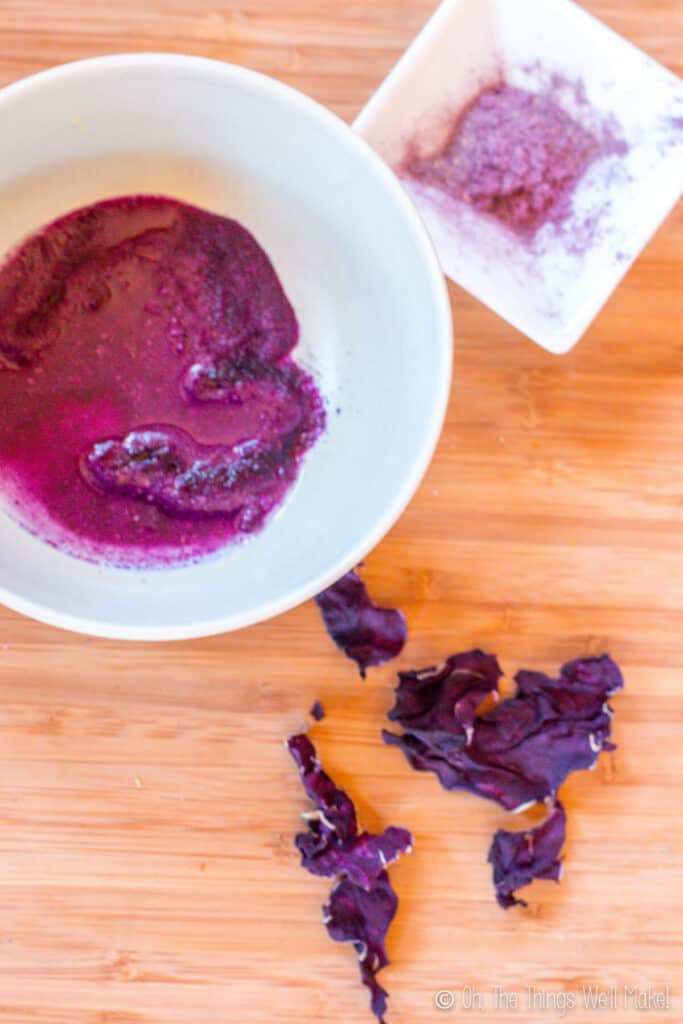
    Soaking the dried cabbage in alcohol.
  • Overhead view of a funnel lined with cloth being used to filter out a purple liquid made from red cabbage
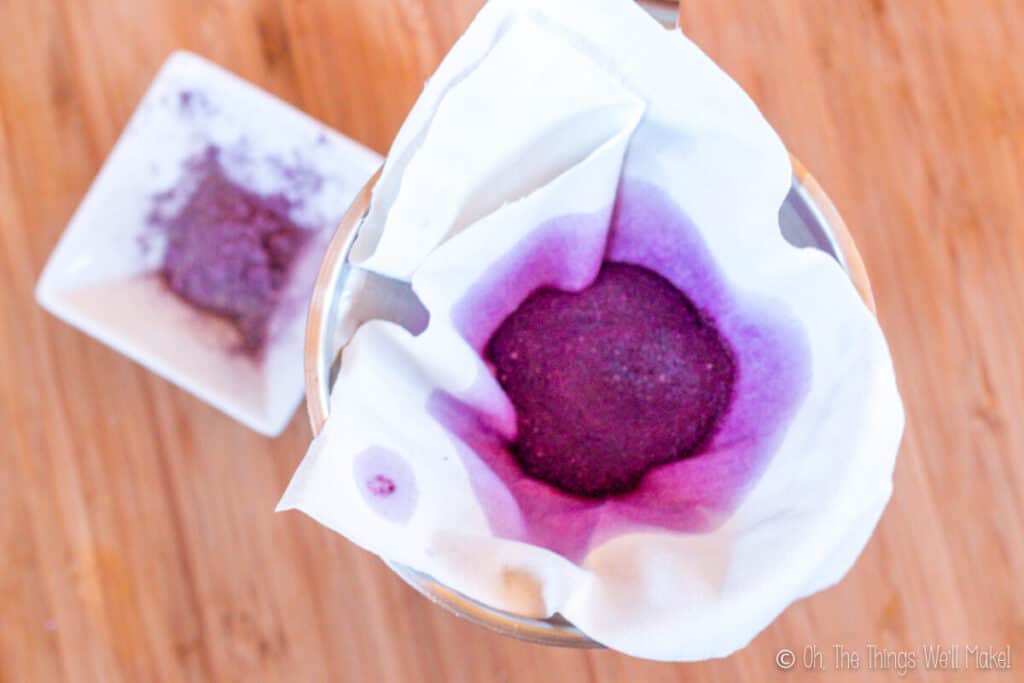
    Straining out the powder
  • filtering out a purple liquid through a cloth lined funnel into a small bottle below.
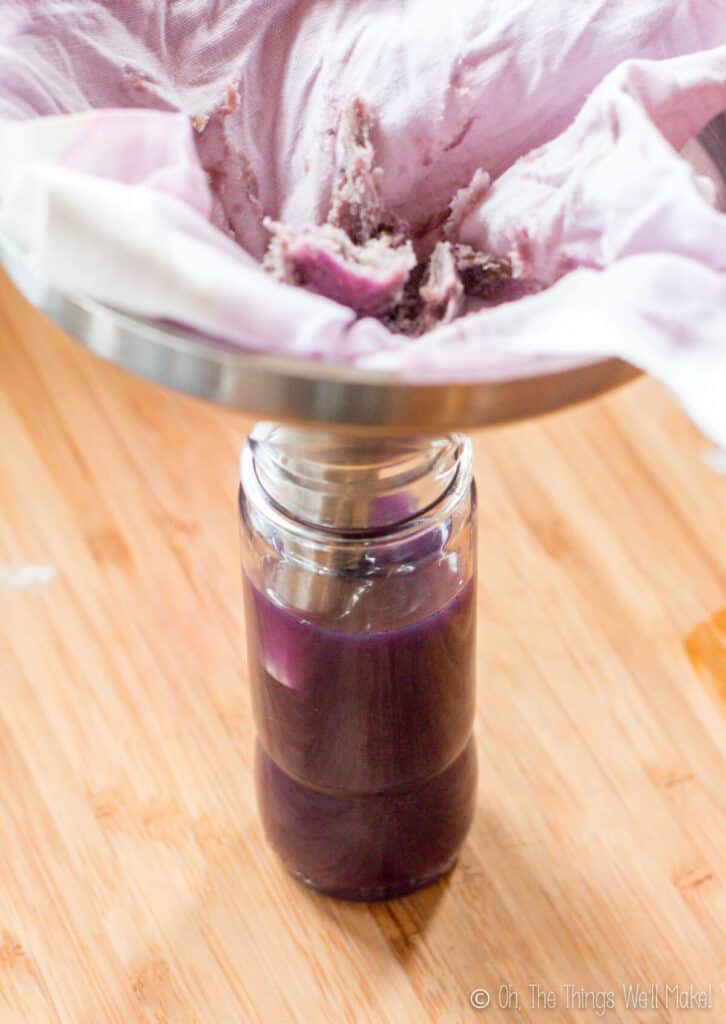
    Straining out cabbage leaves.
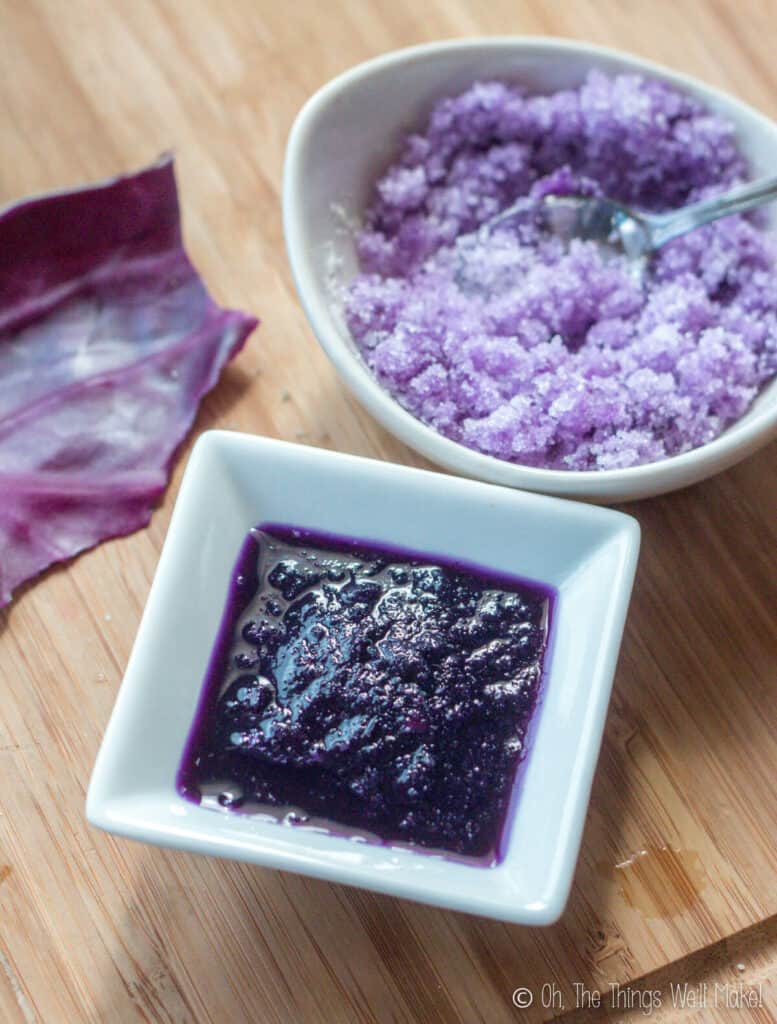
  • A bowl of purple sugar above a bowl of purple puree of cabbage leaves, next to a red cabbage leaf.

Changing the colors

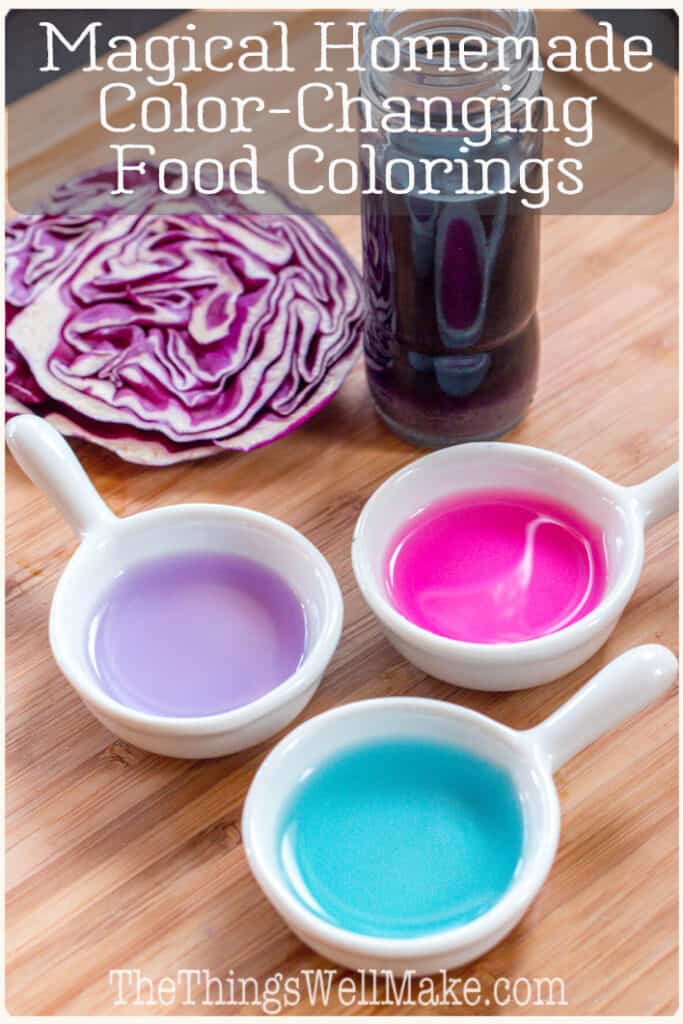
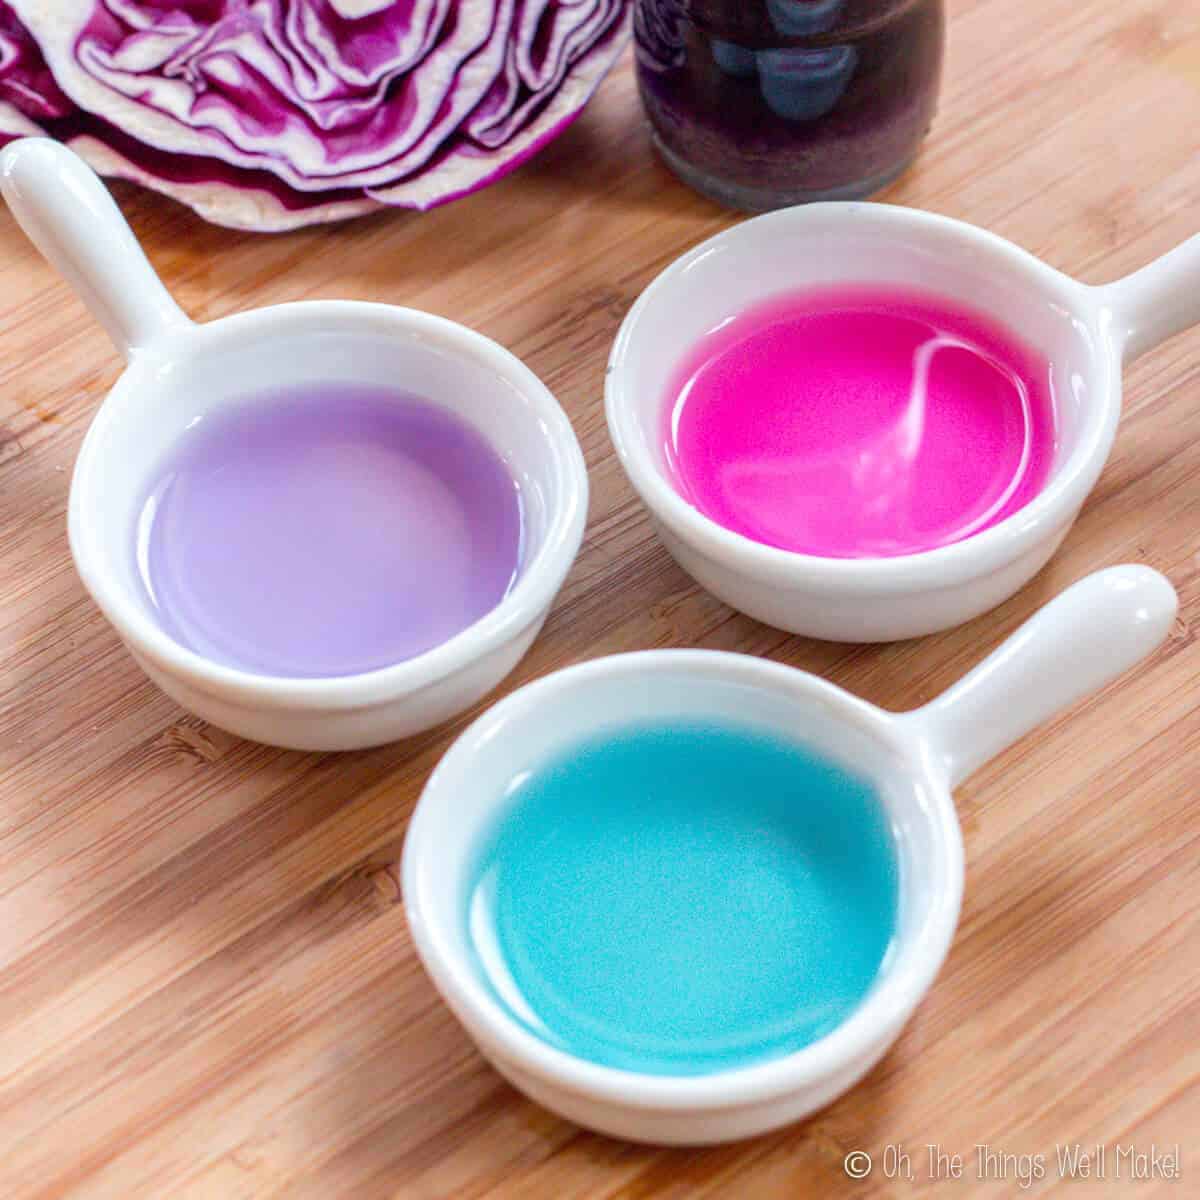
To test out my coloring, I added some of the purple pigment to 3 different white bowls filled with distilled water. I used distilled water because my tap water is so alkaline that it affects the color of the pigment.

3 bowls of liquid, one turquoise, one pink, and one purple, in front of a bottle of liquid made from red cabbage, and next to a fresh red cabbage head sliced in half.

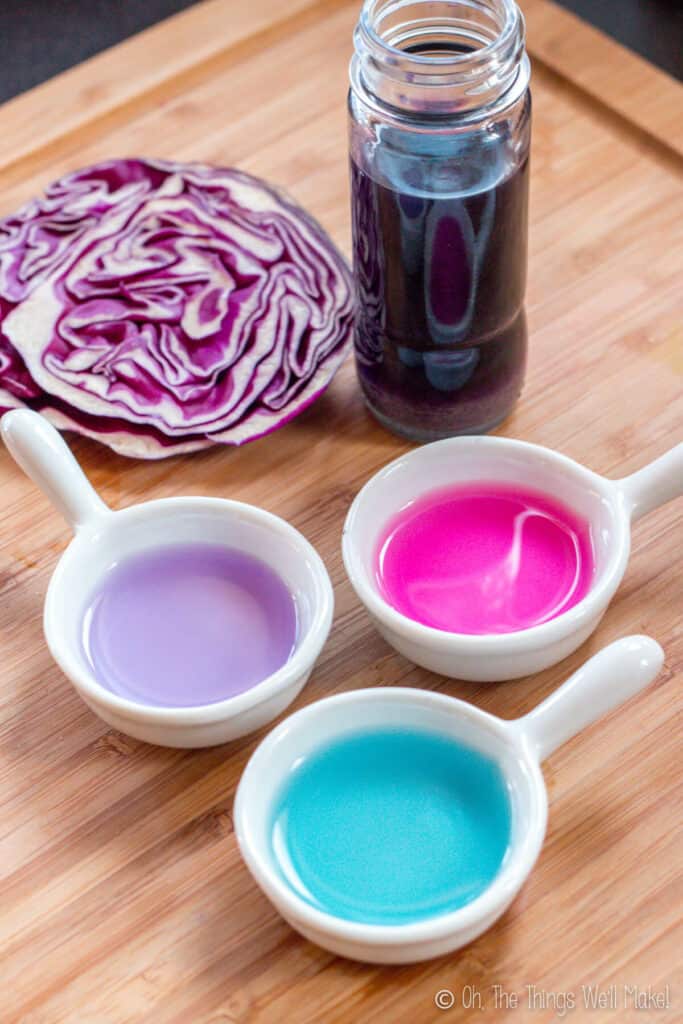
I then looked for pantry items that would change the ph.

Adding an acid to the water turned it a bright shade of pink. Adding some baking soda to the water turned it bright turquoise blue!

To raise the pH

To raise the pH and turn the coloring blue, you need something that is alkaline. I chose baking soda. Unfortunately, the flavor of baking soda isn’t ideal.

You could use a stronger alkali like lye (sodium hydroxide) to test out the change, but you have to be very careful using it and it isn’t practical for use with food (although some foods, like lye-cured olives, do use it).

The calcium carbonate in eggshells and mollusk shells is also mildly alkaline but would be difficult to use. You could perhaps use calcium carbonate powder. I haven’t tried it, but I imagine it would be simple to use and wouldn’t alter the flavor of foods as much as baking soda.

To lower the pH

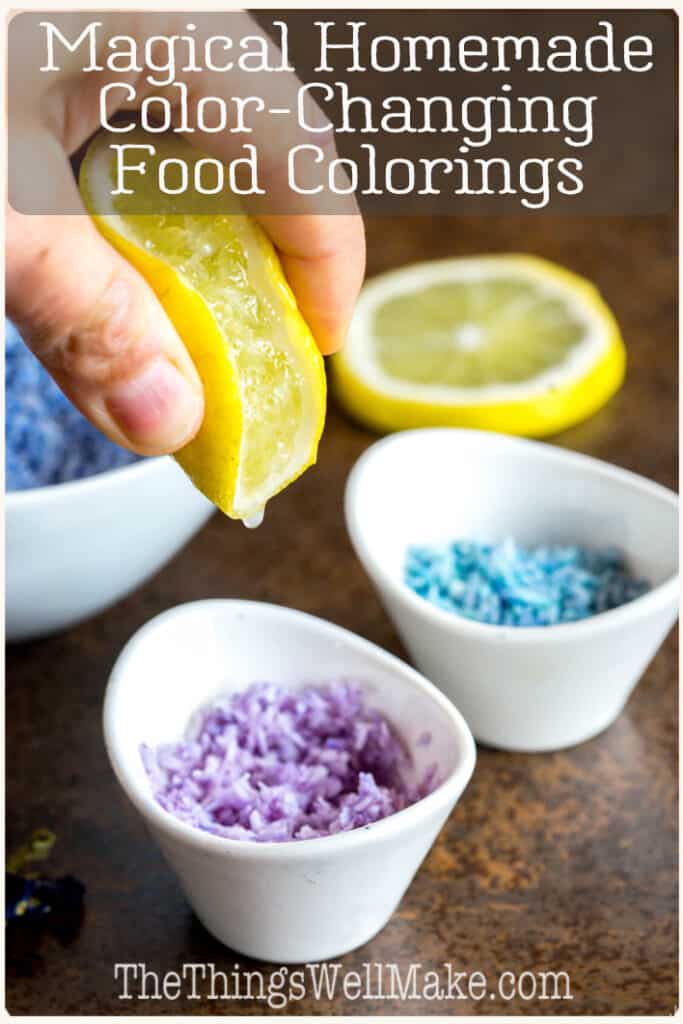
Lowering the pH with common kitchen foods is a bit easier.

You need something acidic like lemon juice or vinegar. Lemon juice gives a pleasant flavor that can work in a lot of different foods.

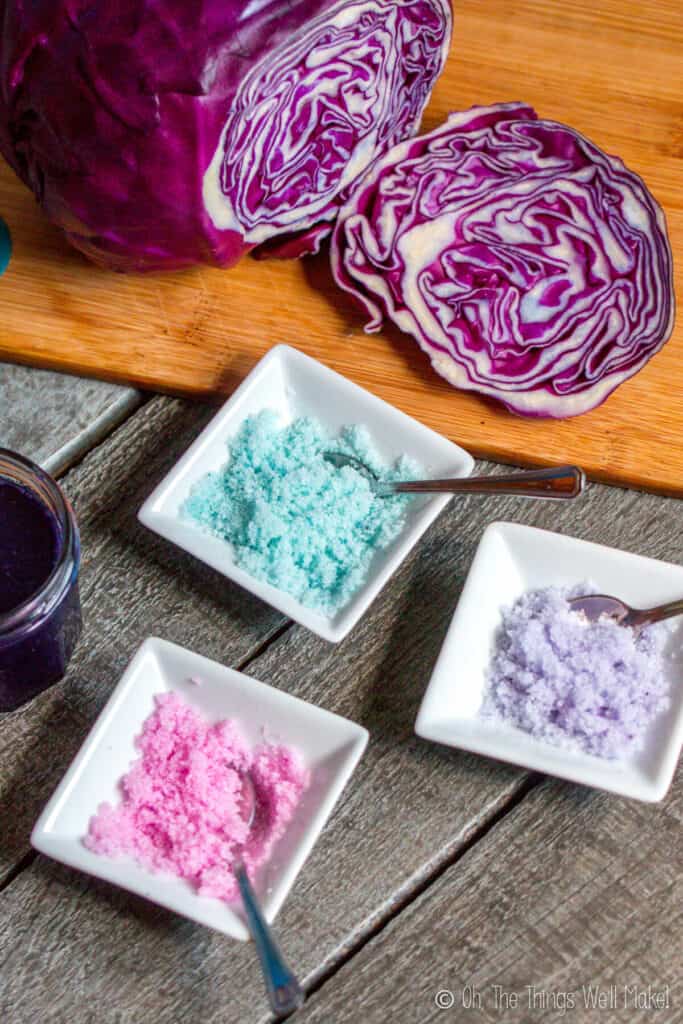
While experimenting, I chose ascorbic acid powder because I was going to mix up some colored sugar crystals and didn’t want to add any excess liquid that could dissolve them.

How to use it

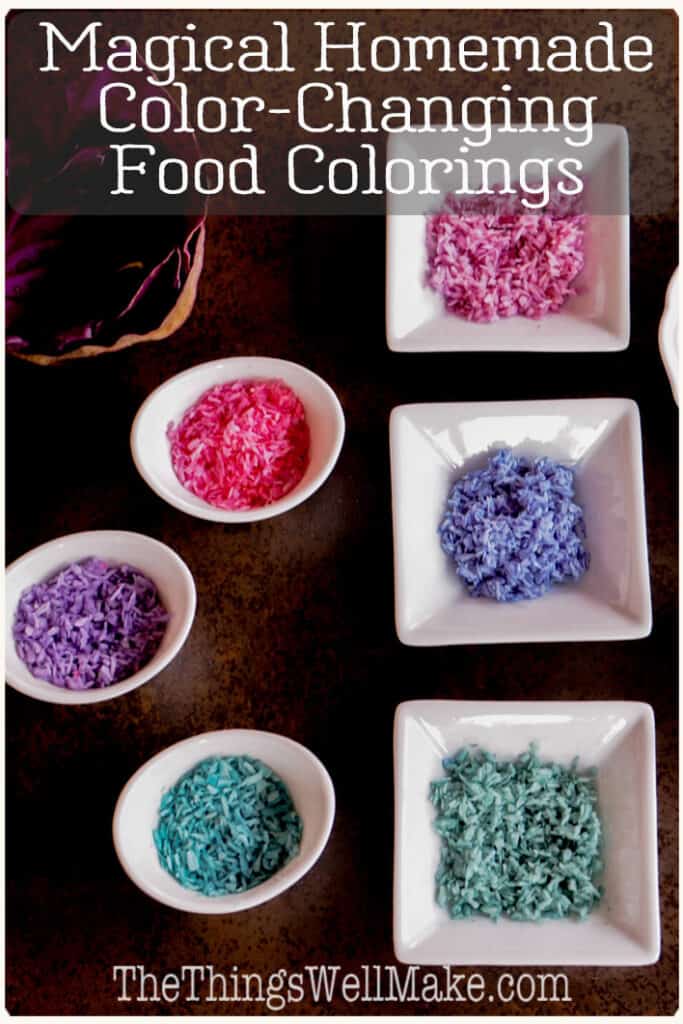
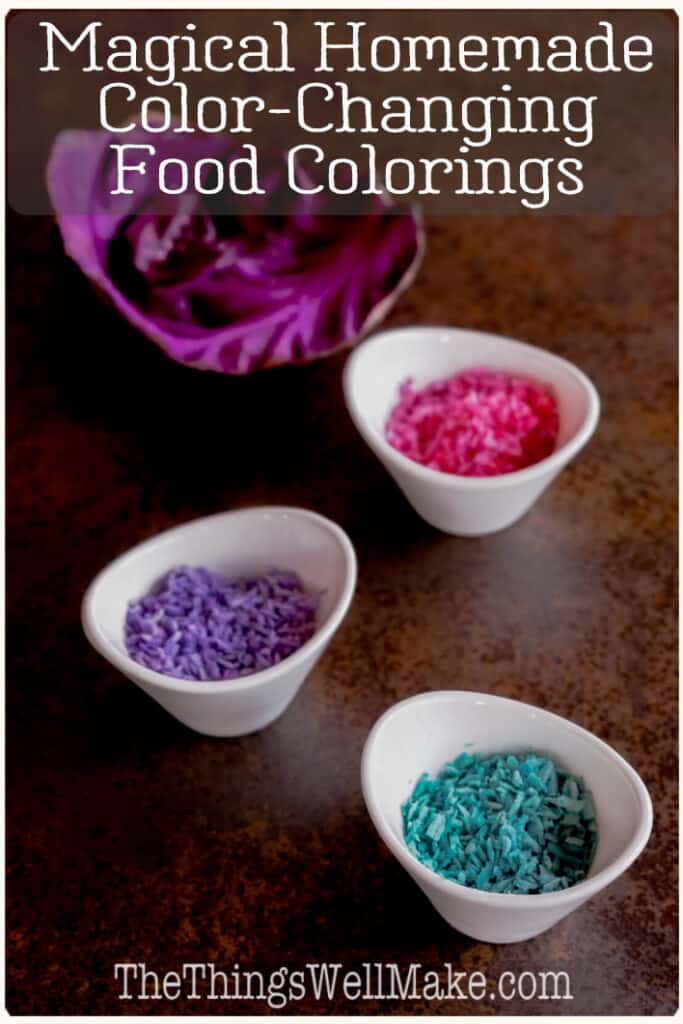
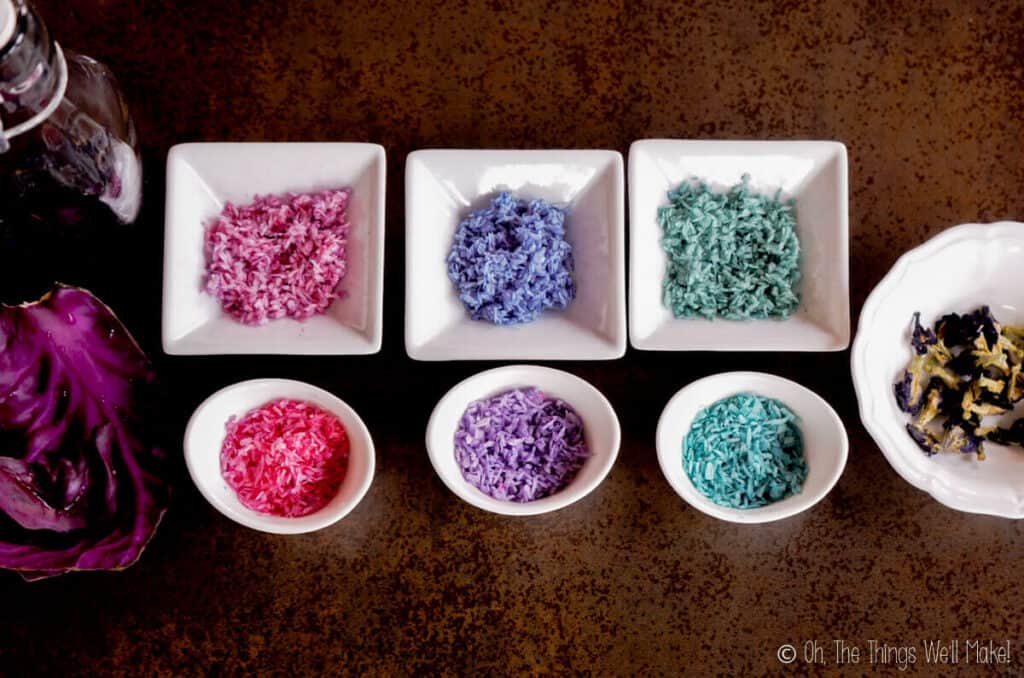
These colorings can be used to color a variety of foods. I’ve used them to make colored sugar crystals, but have also used them on shredded coconut to make healthy vibrant colored sprinkles. You can see the sprinkles being used to decorate my homemade marshmallow peeps.

One of my favorite uses, though, was to make vibrant blue homemade colored boba for bubble tea. (You can even serve them in tea made from the flowers.)

  • Overhead view of 3 small bowls of colored shredded coconut next to a bowl of butterfly pea flowers and a bottle of blue liquid obtained from the flowers. The top bowl has pink shredded coconut, the middle one has purple, and the bottom one has turquoise shredded coconut.
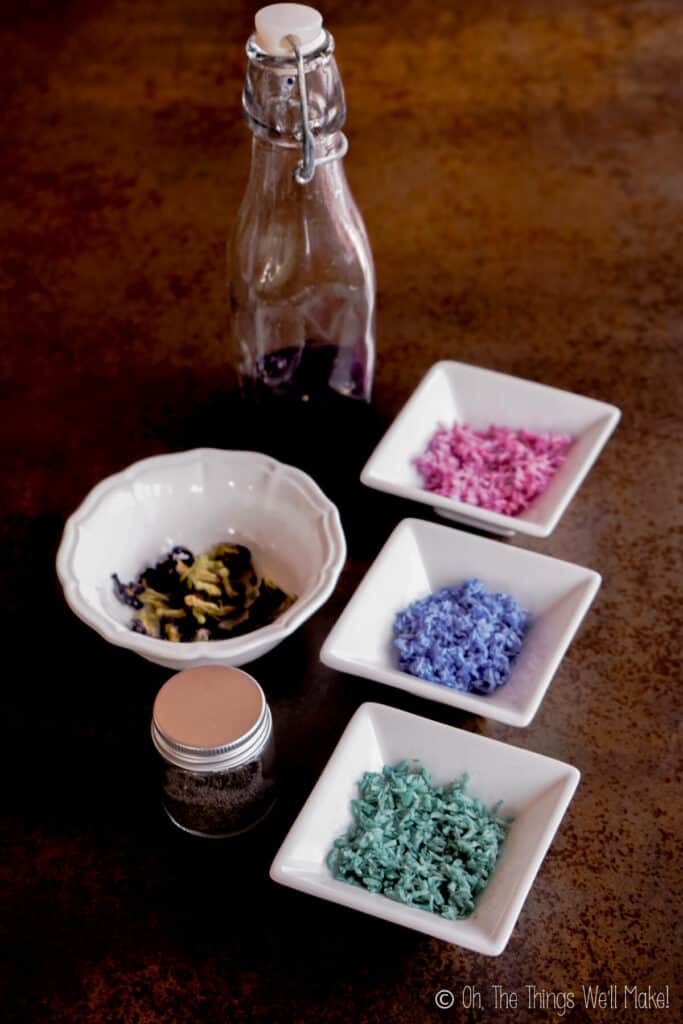
    Sprinkles made with butterfly pea flowers
  • Overhead view of 3 small bowls of colored shredded coconut next to a cabbage leaf. The top bowl has pink shredded coconut, the middle one has purple, and the bottom one has turquoise shredded coconut.
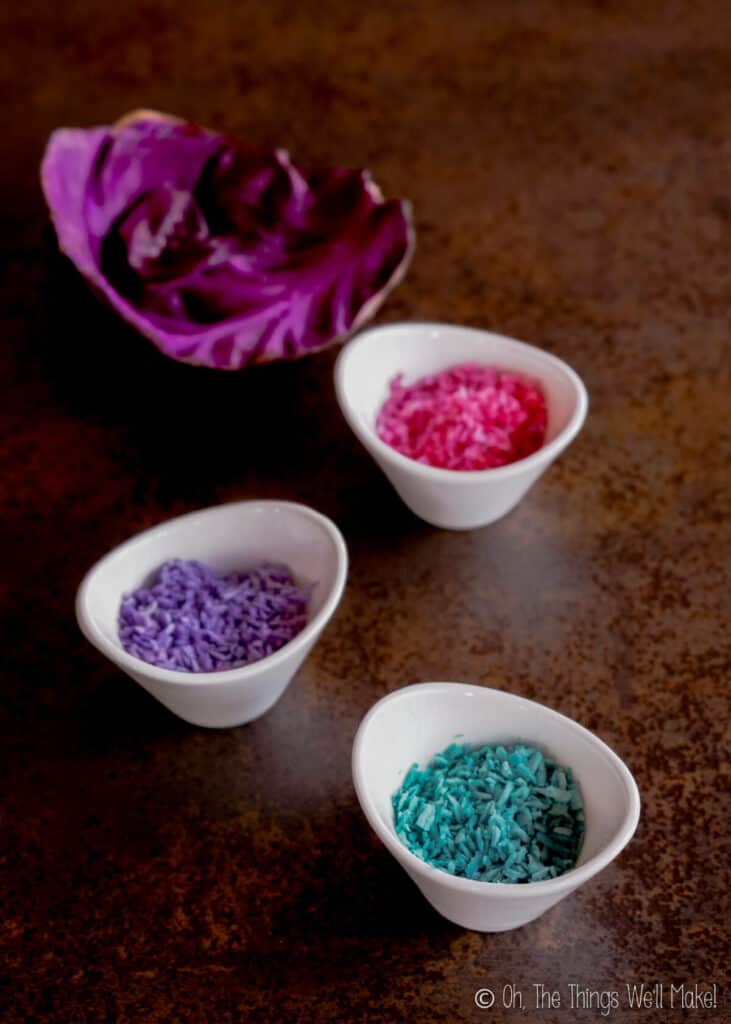
    Sprinkles made with red cabbage
  • 2 bowls of colored sugar crystals. The one on the right has purple sugar crystals. The one on the right is a bowl of purple sugar crystals with a spoon and the crystals around the spoon are light blue.
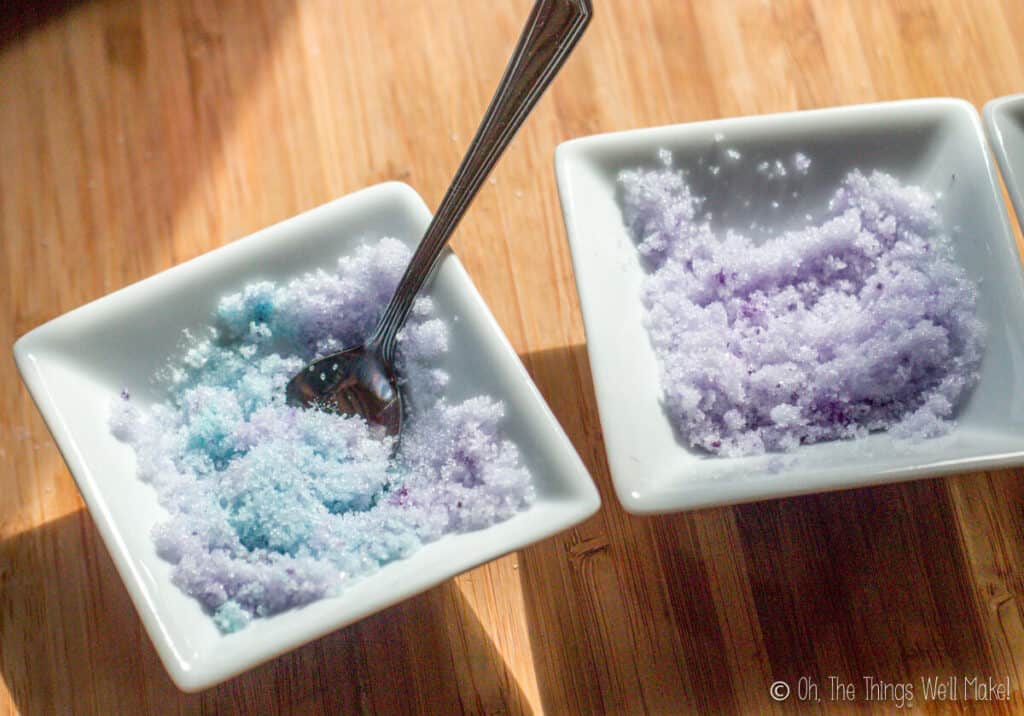
    Sugar crystals made with red cabbage
  • Overhead view of homemade blue boba in a white bowl
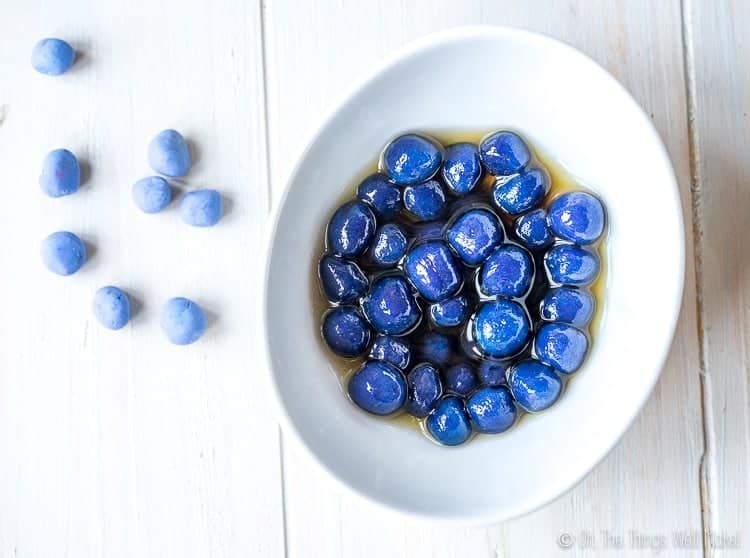
    Blue boba made from butterfly pea flowers

While the final colors of both pigments are quite similar, the butterfly pea flowers make more of a blue color while the red cabbage makes more of a purple color.

Another difference to keep in mind is that butterfly pea flowers have a milder flavor than red cabbage does. So, coloring made with the flowers works well in most recipes. The cabbage flavoring may be overpowering if you need a bright color for certain desserts.

Watch the Magical, color changing food coloring in action

Craving more?Subscribe to my newsletter for the latest recipes and tutorials!
3 bowls of liquid, one turquoise, one pink, and one purple, in front of a bottle of liquid made from red cabbage, and next to a fresh red cabbage head sliced in half.

Natural, Color-Changing Food Colorings

These fun, natural food colorings change color when exposed to a different pH. Kids love seeing them change from pink to purple to blue.
5 from 1 vote
Print Pin Rate
Prep Time: 10 minutes
infusion and straining time (optional): 3 hours
Total Time: 3 hours 10 minutes
Servings: 16 tsp.
Calories: 12kcal
Author: Tracy Ariza, DDS

Ingredients

For blue coloring

  • 1 Tbsp. butterfly pea flowers or 1 tsp. of the powder

For purple coloring

  • 2 red cabbage leaves

For extracting the colors

  • 1/3 cup vodka or other high proof alcohol, or glycerin

Instructions

  • Choose one of the colorant choices above and one of the extration ingredients (alcohol or glycerin).

When using fresh cabbage leaves

  • Either cut the leaves into small pieces or juice them. Add the pieces to a small bottle or jar with enough alcohol to fully cover them. If using juice, mix the juice with alcohol to dilute the color and help preserve your coloring. (The final alcohol concentration should be over 20% for safe preservation.)
  • After steeping for several hours, the plant material can be strained out by pouring the mixture through a cloth or coffee filter.

When using dried flowers or powders

  • Mix together either butterfly pea flowers or one of the powders (a powder made from the flowers or dried cabbage leaves) with some alcohol or glycerin. (Water can also be used if you aren't concerned with preserving the homemade coloring.)
  • The mixture can be used as-is immediately or allowed to steep for several hours. After steeping, the powders can be strained out with a cloth or coffee filter (or it can be used without straining). Straining may lighten the color of the coloring. Experiment to find the look that works best for your project.

Storing

  • Colorings made without alcohol or glycerin should be stored, covered, in the refrigerator and used within 5 days.
    If the alcohol concentration is high enough (over 20%), you can keep your coloring for longer. Pour the liquid into small bottles and store in a cool, dry place for up to several weeks. (After that time, it's probably still safe to use them, but I find that the colors often change with time.)
    If using glycerin, it should make up 50% of the concentration for safe storage.

Notes

The nutritional information is an estimate for 1 tsp. of a vodka-based homemade food coloring. It will vary slightly depending upon the ingredient used to color the vodka. 
Glycerin can also be used to make an alcohol-free coloring.
To preserve the colorings, make sure that the final concentration of alcohol is above 20% or that the final glycerin concentration is above 50%. Keep in mind that some fresh foods may give off water to the alcohol or glycerin which may lower the final percentages. 
Course DIY Pantry Foods
Cuisine global
Special Diets Gluten Free, Low Calorie, Low Fat, Low Lactose, Low Salt, Vegan, Vegetarian
Keyword coloring
Other Diets Dairy free
Tried this recipe? Tag me today!Mention @thethingswellmake or tag #thethingswellmake!
Serving: 1tsp. | Calories: 12kcal | Carbohydrates: 1g | Protein: 1g | Fat: 1g | Saturated Fat: 1g | Sodium: 1mg | Potassium: 3mg | Fiber: 1g | Sugar: 1g | Iron: 1mg

This post was originally published March 28, 2015. It was rewritten in May of 2020, adding new photos, video, recipe card. The update also added the option of using butterfly pea flowers for making the color changing food coloring.

Category: Arts & Crafts, MIY Pantry Basics

About Tracy Ariza, DDS

Tracy Ariza, B.A., D.D.S., left dentistry and the United States to found Oh, The Things We’ll Make!, writing to you from the Spanish Riviera. She loves making things herself in order to keep control of what goes in them. While far from perfect, she strives each day to live a healthier, more sustainable lifestyle.

Previous Post: « 3 bottles of homemade food coloring behind 7 bowls of coconut that has been colored in a variety of colors using the homemade food colorings. DIY Natural Food Coloring and Homemade Colored Sugar Crystals
Next Post: Homemade Healthy Sprinkles (Paleo) 4 glass jars filled with 4 different types of colorful sprinkles made from shredded coconut. From left to right: green, purple, yellow, and bright pink. »

Reader Interactions

Comments

  1. Steve

    April 26, 2021 at 8:59 AM

    Hi, this is a very interesting read, and landed on your page by sheer coincidence, I would love to pick your brains if I may please… I am trying to design a wedding fruit centrepiece but must have the colour lilac in it, is it possible to soak white grapes in a particular dye to obtain the delicate lilac colour? I would really love to hear your thoughts on this please if you have time.

    Reply
    • Tracy Ariza, DDS

      April 26, 2021 at 9:46 PM

      Hi Steve,
      So, let me try to understand- You want to tint the grapes a light violet color?
      I’m not sure how easy it would be to tint the skin of grapes- even with stronger dyes.
      Maybe a mix of the butterfly pea powder and beets? Or the butterfly pea powder- adjusting the pH to get the right color?
      But again, I’m not sure about how easy it would be to dye grape skins.

      Reply
  2. Shan R.

    January 20, 2020 at 3:14 AM

    This is just wonderful and exciting! Kitchen science at it’s best. We will definitely be trying these things out in our kitchen. I will need to gather things before I try. I wanted to ask if you had found a way to make a shelf-stable green. I don’t even know if you;ll check this board, but I figure I will give it a try! Thank you for your fun posts!!

    Reply
    • Tracy Ariza

      January 22, 2020 at 1:41 PM

      Hi Shan,
      Yes, of course! I always read comments and try to respond as quickly as I can. Little by little, I’m rewriting and republishing all of my posts. I want to keep them all up to date. When I get to this one, I want to add another alternative. It’s called butterfly pea flower. It’s sold as a tea. Anyway, it makes a wonderful color-changing colorant too!
      You can see how I used it to naturally color my homemade boba blue.

      Reply
  3. Emily

    February 3, 2017 at 7:26 PM

    I’m wondering about the blue sprinkles, and how well they hold up. Does the baking soda melt or make them bleed or change colors again once you put the sprinkles on something, like a cupcake?
    Sorry if you already talked about this. I didn’t read very many other comments šŸ™‚
    Thanks.

    Reply
    • Tracy Ariza

      February 5, 2017 at 9:04 AM

      Hi Emily,
      Which sprinkles are you referring to?
      I used this with shredded coconut to make paleo sprinkles of sorts, and they held up really well. I used them on my marshmallow peeps and they didn’t change colors when used on the peeps.
      I would guess that as long as you have them on something like a frosting, it won’t be in contact with something with enough of a pH difference to change the color of the sprinkles. They should really only change in the presence of a liquid and frostings tend to have a high fat content. You need an aqueous solution for the pH to really matter. When making the sprinkles themselves, you are adding the acid or base to them while they are still wet to get the pH to change to your liking, but once they are dry, they shouldn’t change again unless they come in contact with an aqueous solution with enough of a pH difference to change them. I hope that makes sense.
      I did make some sugar crystals with this, but in the end, I decided that I didn’t like using the sugar crystals with my marshmallow peeps because they absorbed humidity and became syrupy. I don’t think there were any issues with the colors changing, though, and I didn’t have any problems with the baking soda melting them; all of the colors melted with time because of the extreme humidity here. It was more a matter of me realizing that I liked using the coconut much better (plus it’s healthier). They held up nicely, tasted good, and absorbed the colors so well that the colors were very vibrant, especially when using beetroot powder and turmeric.
      I hope that my explanation helps somewhat.

      Reply
  4. Danai

    October 4, 2016 at 12:41 PM

    If this will make you feel better, I will confess that every single step I did for this cake was a complete disaster concerning the looks of the cake. Thank God it was delicious, at least. But it took many tricks to hide all the bad things that happened! That’s why I used so many roses on it! šŸ˜€

    So, no worries, things happen and what counts is the love we put to them. šŸ™‚

    Reply
    • Tracy Ariza

      October 4, 2016 at 3:40 PM

      Ha! Thanks Danai.
      I’ve moved on by now.
      On to new disasters. šŸ˜‰ hahahaha

      Reply
  5. Danai

    September 29, 2016 at 4:26 PM

    Soooo! Hello again! I hope your cakes came out fantastic! As for mine, it was a disaster, lol! I used a 70% alc white rum and then made a syrup out of it. I made a beautiful blue color syrup but unfortunately the smell of the cabbage was still too strong so I could not use it afterall in the frosting. But thats ok, I just made a white cake with lots of white roses for decoration which my mother loved but I will try again to find out if there is any way to make a blue syrup without the strong cabbage smell.

    Thank you for all the tips anyway, I am looking forward to many more! šŸ™‚

    Reply
    • Tracy Ariza

      September 29, 2016 at 5:40 PM

      Oh, that’s too bad. I think the liqueur I used with mine had such a strong scent itself that I didn’t notice it too much. I would guess, though, that with frosting you would need a lot more quantity too. I’m not sure if another extract could camouflage the scent enough.
      My cake wasn’t perfect either. I always use the same recipe, but for some reason this year it turned out really dense. I can’t be around so much sugar for so long, so I just went with it. I didn’t feel like making a new one. It was OK, but I did get an honest comment from somebody I specifically asked about it, and she told me it wasn’t as good as other years. (I didn’t actually personally try it this year as I’ve been avoiding wheat and refined sugars.)

      Reply
  6. Danai

    September 11, 2016 at 11:42 AM

    Hello there!

    Thank you, thank you, thank you for this post! I’ve been hopping from page to page just to find how to make a beautiful natural blue hue as it is my mother’s birthday next week and I really want to make an ocean-feel-like cake! All I found was using baking soda or vinegar to boiled cabbage’s juice but I would never thought I’d be so lucky to find your experiments! I may not be 5 years old but boy, did I get super excited about this!

    So, I am thinking of a blue cream cheese frosting but I my question is, will the baking soda alter the frosting’s taste at any level? How much “cabbage liquer” would you suggest that is enough for tinting the frosting blue?

    Reply
    • Tracy Ariza

      September 12, 2016 at 10:28 AM

      Hi Danai,
      I’m glad you like it. I think it’s really fun!
      Depending on the pH of the cream cheese frosting, I don’t know what color you’d be starting with. I would think that if you were to use a swiss buttercream, for example, that you wouldn’t really need to add any baking soda because I think the egg whites are already basic enough to get the coloring almost green. (This is coming from an experiment with trying to make green eggs and ham, and not from actually trying it out on swiss buttercream itself, where the other ingredients might affect the outcome.)
      I have no idea what color the cream cheese frosting would begin, so I don’t know if it would need to go more acidic or basic. Obviously, if you need to add a lot of baking soda, you’d notice the flavor. I didn’t have to use much for my experiments, so it wasn’t too much of an issue. In the case of frosting, you’ll probably need quite a bit. I’m not really sure. I didn’t need so much for coloring the coconut or the sugar, but frosting would probably need more. The hues are more subtle than with artificial colorants, of course (although the turmeric and beet colorants did get really bright!) The cabbage is a lot more subtle. If you can use the thinnest, brightest parts of the leaves, it works a lot better without altering the flavor much.
      I’d probably do a test on a very small amount of the frosting before going all in. I’d almost be tempted to dye coconut sprinkles and cover the frosting with that. Of course, if you don’t like coconut, and that doesn’t go with the flavor of the cake, that’s probably not an option either.
      I’d love to hear how the experiments go. I’m making cakes this week too. I have both my husband’s and son’s birthdays in the next 2 weeks. We have a big party planned for Saturday, but I’m keeping the frosting white this year. I’ve made bright fondant figures for the top of the cake that nobody will eat. šŸ˜‰

      Reply
      • Danai

        September 13, 2016 at 12:24 PM

        Tracy,

        thank you so much for getting back to me! The frosting will be cream cheese with whipped cream and a bit of confectioner’s sugar. I was thinking of boiling the blue liquid along with sugar so that I come up with a syrup-y color to add in the cream cheese frosting. Maybe that way I won’t need that much? After all, the color I want to achieve is powder blue and just for the bottom of the cake as I am willing to give an ombre look from powder blue to white! Now, for the decorating I am thinking of blue macarons but I guess I won’t need to add any baking soda to the color I will put in the macaron batter, right? Lots of work, lol! I think I need to test first, both the macaron batter and the cream cheese frosting to see how it works! I will certainly let you know about my experiments! So, happy birthday to our beloved ones! Love is the best color for frosting! šŸ˜‰

        Reply
        • Tracy Ariza

          September 13, 2016 at 10:43 PM

          I’m not sure I’m understanding right, but are you planning on boiling the leaves of the cabbage in a liquid?
          I’m asking because in my experience that doesn’t work very well to get much color. I boiled an entire bag of spinach after having read on a blog that boiling the spinach would give you water that worked as a natural colorant. It didn’t work.
          It was from observing that raw spinach gives such great color without adding much to smoothies, that I decided to try with raw. The colors are so much more vibrant and they work much better for coloring. That’s part of the reason I went with the alcohol to help extract more color; plus I figured the alcohol would help conserve the colors for at least several days, which is helpful.
          If you are planning on boiling that extract, I’m not sure how the heat will affect the colors. That’s something I haven’t experimented with. I just want to give you a heads up that it could affect the coloring, but I’m not sure.
          As for the macarons- well, my guess is that with the egg whites that, yes, if anything the pH would throw it towards the green end of the spectrum, but I have no idea how the other ingredients will affect it.
          I really hope it works out for you. I look forward to hearing about it.
          I wish the cabbage were as bright and vibrant as the beet root powder. That would make things so much easier! šŸ™‚

          Reply
          • Danai

            September 14, 2016 at 3:52 PM

            No, no! I am not going to boil cabbage but rather do it with alcohol as you say in your post! However, I have tried boiling cabbage and then adding vinegar to make it blue in order to naturally paint easter eggs as you can see here: https://www.instagram.com/p/BEvCyfMkFu_/?taken-by=danailama . I liked the color although I didn’t use the right tin and the water was not enough at all sides to prevent those stains you see. But now, for the frosting, I was thinking of using alcohol as you suggest with raw cabbage to get the color and then simmer it with sugar to get a colored syrup! I am going to experiment and see how that goes and if simmering affects the quality of the color. And btw, I am certainly going for some beet root powder! I read you post about this vibrant powder and I can’t wait to try this too! Your blog is gold!

          • Tracy Ariza

            September 15, 2016 at 9:15 AM

            That sounds great! I’d love to hear how it goes.
            I actually have a tip for you.
            I want to update the beetroot powder post because I’ve been experimenting more with it right now having harvested beets from my garden, and I’ve found something interesting. (I’ll be updating as soon as my birthday party is over this weekend- right now I’m kind of over my head! šŸ˜‰ )
            When I made beetroot powder the first time, it was a very bright pink color as you can see in the pictures. This year, I sliced the beets into thicker slices by hand and dried them before pulverizing, and I got more of a mauve color- still pretty for makeup shades, but not the bright pink I wanted for my peeps. I actually would have thought it would be the other way around- leaving thicker slices would brown slightly on the outside or something, and would leave a brighter pink on the inside, but no! It’s the only difference I can think of between batches. The other was very thinly sliced in my food processor!
            I need to experiment to make sure it’s not just that my beets last year were brighter, but I have a feeling that that is what makes all of the difference!

  7. Krystal Wight Armstrong

    September 10, 2015 at 7:27 PM

    Hi! This is such a fun post. I am searching for ways to make naturally purple liquid to grow sugar crystals in, and to color macaron shells (both for my daughter’s little birthday party next week).
    I think I need help with the details of the first step in your process, so just hoping to clarify… Did you put fresh red cabbage leaves in a blender with alcohol, blend to a paste, then strain before using the colored alcohol to dye the sugar?

    I don’t have any clear alcohol right now, but can you make a dye with jut water?
    For my sugar crystals (growing them on the ends of wood sewers, I just need to dissolve a bunch of sugar in some colored water to make a syrup that I’ll stick the wood in to get lightly tinted purple crystals to grow- I hope!).

    And then I need just a few drops of food coloring to mix into the macaron mixture before baking those.

    I have a head of red cabbage and distilled water ready, just not sure how to start or what method to use for the things I’m needing to color. (also, our blender is down, but I do have a spice grinder)
    Any help or advice would be so appreciated! I’ve got one week, and limited time when baby girl is napping!
    Thanks again and Happy Thursday! : )

    Reply
    • Tracy Ariza

      September 11, 2015 at 7:45 AM

      Hi Krystal,
      Thanks! Yes, I had a lot of fun with this.
      Let me see if I can try to help you out.
      To answer your question, you had it right about blending the leaves with alcohol and then straining to just use the alcohol as a dye.
      There were two reasons that I used alcohol.
      1. I was going to be dyeing sugar crystals at first and I didn’t want them to dissolve. I figured the alcohol would evaporate quickly and make less of a mess than using water alone.
      2. I was hoping to make a dye that would be shelf stable to a certain point. I did make one that lasted quite awhile before starting to smell funny by first dehydrating the leaves, grinding them into a powder and them mixing them with alcohol. After several hours, I strained them out. I was hoping to remove as much water as possible to help keep bacteria from forming.
      In your situation, the alcohol isn’t really necessary. You are going to be dissolving your sugar anyway, and will be using your dye right away.
      There is something to keep in mind if you are going to be using water to make your dye…
      The pH of your water may change the color of the dye so that it is no longer purple (You have distilled water ready, though, so that isn’t a problem in your case). BUT…this also applies to when you use this dye with foods.
      If we’re talking French macarons made with egg whites, I’m pretty sure that egg whites will turn the dye blue or even green!
      As you can see, the thing that’s cool about this dye can also be quite frustrating if you want a certain color and the pH of what you want to dye just isn’t right. I don’t know if you’d be able to add an acid to the recipe to balance out the color and not screw up the flavor/the way the recipe works.
      The sugar crystals solution shouldn’t be a problem in that sense. The only thing that worries me about that idea is that if the cabbage solution is sitting for a really long time (days) to get the sugar crystals forming, that there could be a potential problem with bacteria forming and making things smell funky- which would also mean that I would be worried about the potential health problem, of course. I’ve never made sugar crystals before, so I don’t know how long it takes or if it would work in the fridge to help possibly keep the solution fresher for longer.
      As for doing this with a spice grinder and not a blender…
      I guess it depends on your spice grinder. Does it allow for liquids? Some have the motor on the bottom and aren’t liquid friendly (like mine), so if I was stuck using that one, I’d probably dehydrate the leaves and make a powder to mix into the water.
      If yours has the motor on top and a washable container, though, you should be fine using that.
      I hope that helps somewhat.
      Of course I’ve never tried either of those things, but I’m giving you my best guesses to try to help save you any potential frustrations with the project.
      My son’s birthday party is next week too, so I will be a busy bee along with you. I wish you the best.
      May we both survive and have fun! šŸ˜‰

      Reply
      • Jeanette

        January 15, 2017 at 4:44 AM

        This is probably going to sound like too much work if you were not selling the crystals, but here are my thoughts:

        The availability of water would be quite low in a super-saturated solution used to make the sugar crystals. It makes the possibility of mold and fungus very small. Of course, as the sugar crystalizes out of the solution, the availability of water increases. But it also evaporates at the same time, so the increase is going to depend on the surface area of the solution as well as the humidity and temperature of the air (how fast the water is evaporating). One could use a digital scale to weigh the amount of water at the end, and record it, as the amount of sugar would stay constant. You would also need to find a way to measure the weight of the sugar crystals without loosing any of the solution. Your end calculations would tell you if the availability of water increased to a pathogen supporting level or not.

        http://ucfoodsafety.ucdavis.edu/files/133655.pdf

        Reply
        • Tracy Ariza

          January 15, 2017 at 9:22 PM

          Thanks, Jeanette, for your thoughtful comment.
          It could be an interesting project. šŸ™‚

          Reply
  8. Susan

    July 20, 2015 at 9:23 PM

    Beets, both yellow and red give some great color. But be careful, they stain everything. Went to a Mid Eastern restaurant and ordered pickled turnips. They were most gorgeous color of magenta ever. I asked them what they used and was told red beets. Nothing artificial.

    Reply
    • Tracy Ariza

      July 21, 2015 at 12:50 AM

      Hi Susan,
      Yes, you’re right! Thanks for your comment!
      That’s why a lot of people use them to naturally die fabric too. šŸ™‚
      You would think that cloth dyed in beets would stay that beautiful magenta, but, sadly, when washed they become more of a beige. (Yes, I’ve tried it.)
      On the other hand, turmeric stays a beautiful yellow. I still need to post about my experiments in dyeing fabric with food. šŸ˜‰

      Reply
  9. lu

    April 2, 2015 at 5:20 AM

    I’d like to find a way to dye my soaps and get the colors to stay true when added to sodium hydroxide. So far none stay true once they are cured. A pretty lavender or rose, citrus etc for my all natural bath salts and other bath and body products.

    Reply
    • Tracy Ariza

      April 2, 2015 at 11:36 PM

      Hello Lu,
      I have been planning on trying out adding natural pigments to my soaps. Some ideas that I have read work fairly well are certain spices and clays. I would think that for a rose color, you could try a rose colored clay perhaps. Paprika supposedly gives a pretty reddish color, but I’d guess it would end up being more on the orange-y coral spectrum rather than purplish. If I find something while experimenting, I’ll let you know. I haven’t made soap since Christmas, but I’ve been wanting to make more soon.
      For bath salts, I’m guessing that beet root powder would work OK. It doesn’t work for soap, though, because it turns brownish if I remember right.

      Reply
  10. Masha Ellis

    March 30, 2015 at 10:51 AM

    Wow! this is so amazing! I once made a very pretty purple color from purple kale and colored play doh with it šŸ™‚ I am definitely going to experiment with changing colors – my 5 yo will love this.

    Reply
    • Tracy Ariza

      March 30, 2015 at 2:12 PM

      My 4 year old is definitely in love. We’ve been experimenting with lemon juice and more common stuff in the kitchen, and he tries to guess what color the water will turn. šŸ˜‰

      Reply

Leave a Reply Cancel reply

Your email address will not be published. Required fields are marked *

Recipe Rating


Sidebar

Search

  • Email
  • Facebook
  • Instagram
  • Pinterest
  • Twitter
  • YouTube

Hello, I’m Tracy!

I love making my own natural products like soaps and lotions and my own pantry items like yogurt and salad dressings.
Why do I do it? Sometimes to save money, sometimes because it's healthier, but I always love having control of the ingredients!​
Oh, the things we'll make!...

More about Tracy

I am a participant in the Amazon Services LLC Associates Program, an affiliate advertising program designed to provide a means for us to earn fees by linking toĀ Amazon.comĀ and affiliated sites.

Featured on Buzzfeed, Lifehacker, Fitness, Shape, Country Living, Healthline, Redbook, Redfin

Closeup of 4 bars of homemade soap. Two of them have been wrapped in brown paper and wrapped with ribbons. One soap is wrapped with red ribbon and the other with white ribbon.

Making an Easy, Basic Beginner Soap, and Then Making it Fun!!

Homemade prawn crackers on a plate in front of uncooked homemade prawn crackers and a roll of prawn crackers dough.

Prawn Crackers from Scratch

Impress your friends and save money by making your own soy sauce from scratch. Today we'll learn how to make a homemade shoyu, a fermented Japanese soy sauce made from soybeans and wheat berries. #shoyu #soysauce

How to Make Soy Sauce (Homemade Shoyu)

Two bottles of a homemade conditioner next to a wooden comb and a washcloth.

Easy DIY Hair Conditioner for Natural Hair

A small glass jar filled with an emulsified sugar scrub with a wooden spoon in it.

Easy Emulsified Sugar Scrub

Over head view of a spoon full of tomato paste over a jar full of it. A couple of fresh tomatoes lay next to the jar.

Easy Homemade Tomato Paste Recipe

Featured on Buzzfeed, Lifehacker, Fitness, Shape, Country Living, Healthline, Redbook, Redfin

White logo for Oh, The Things Well Make! website

Copyright © 2023 Tracy Ariza · Disclaimers and Disclosures · Privacy Policy · Cookie Policy