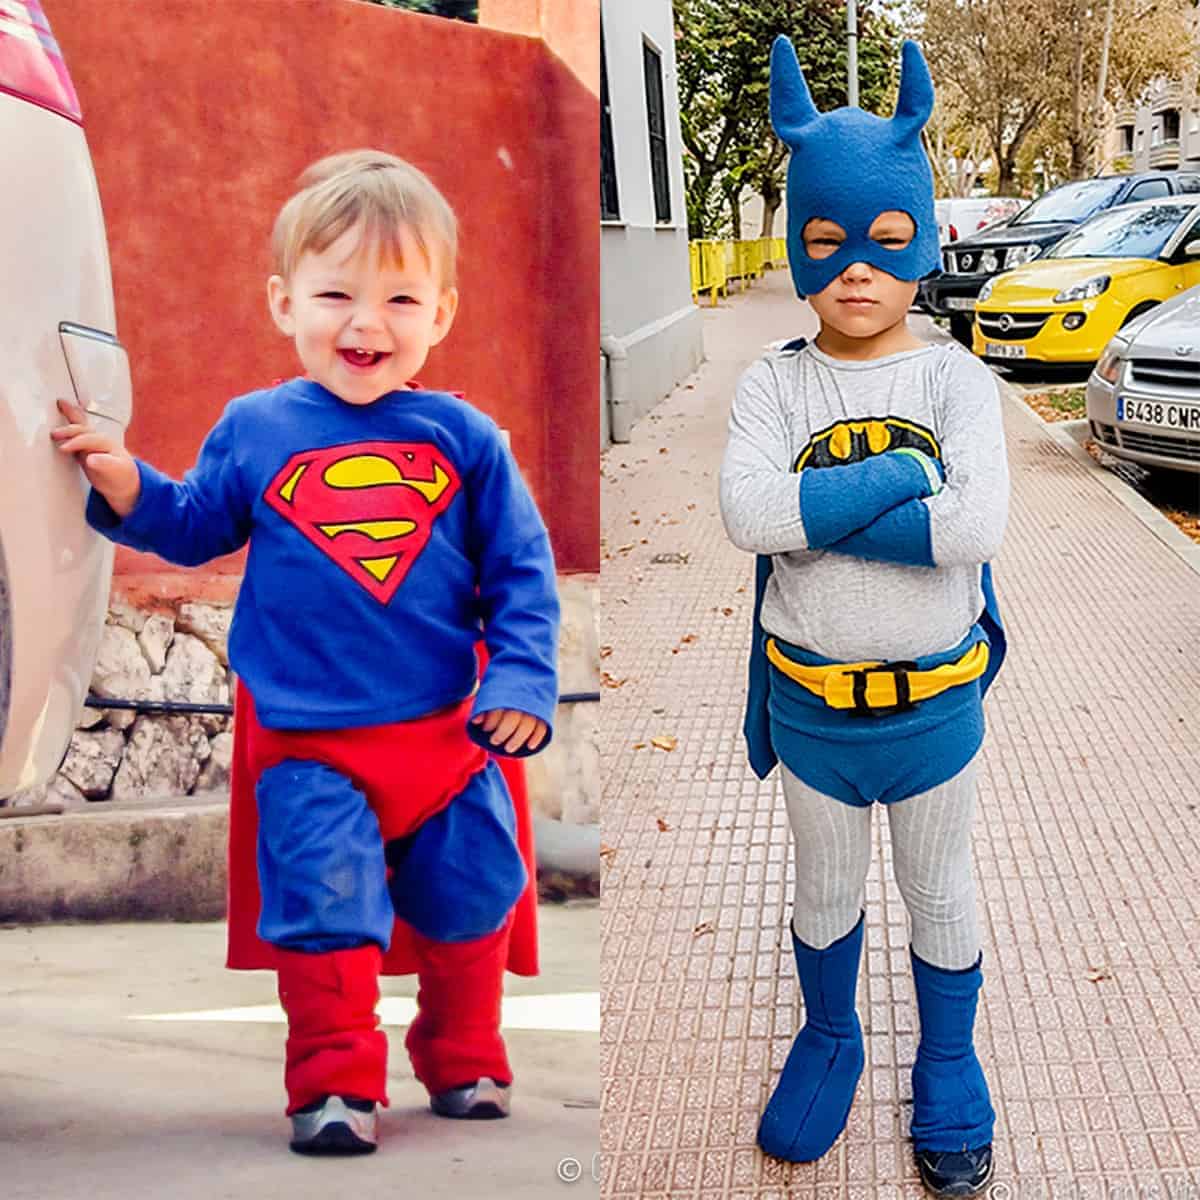
Easy Homemade Superhero Costume: Batman & Superman
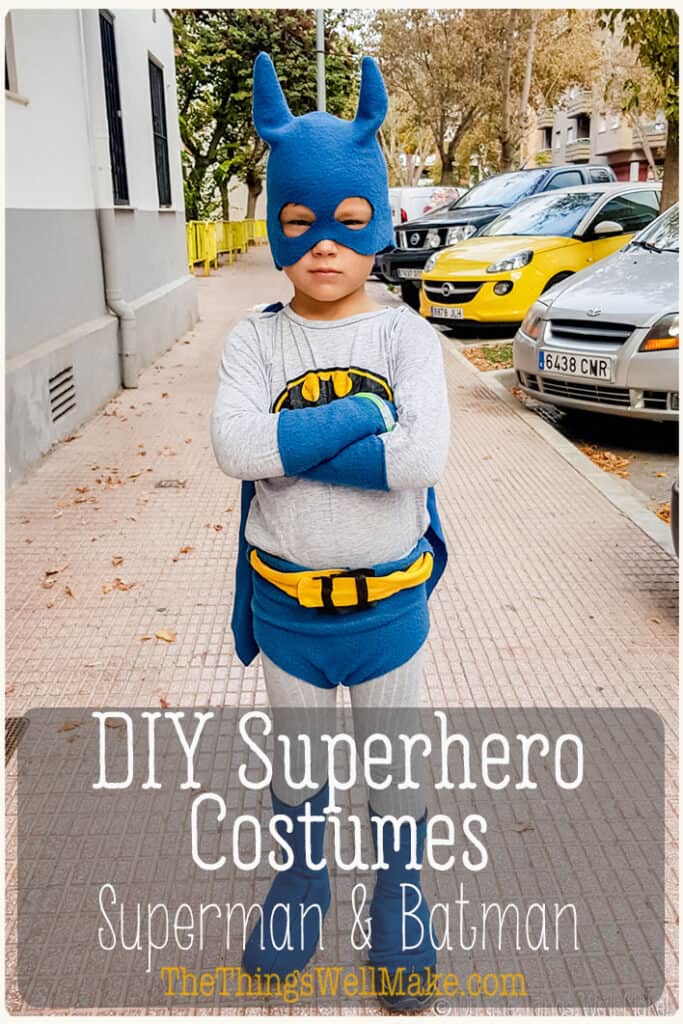
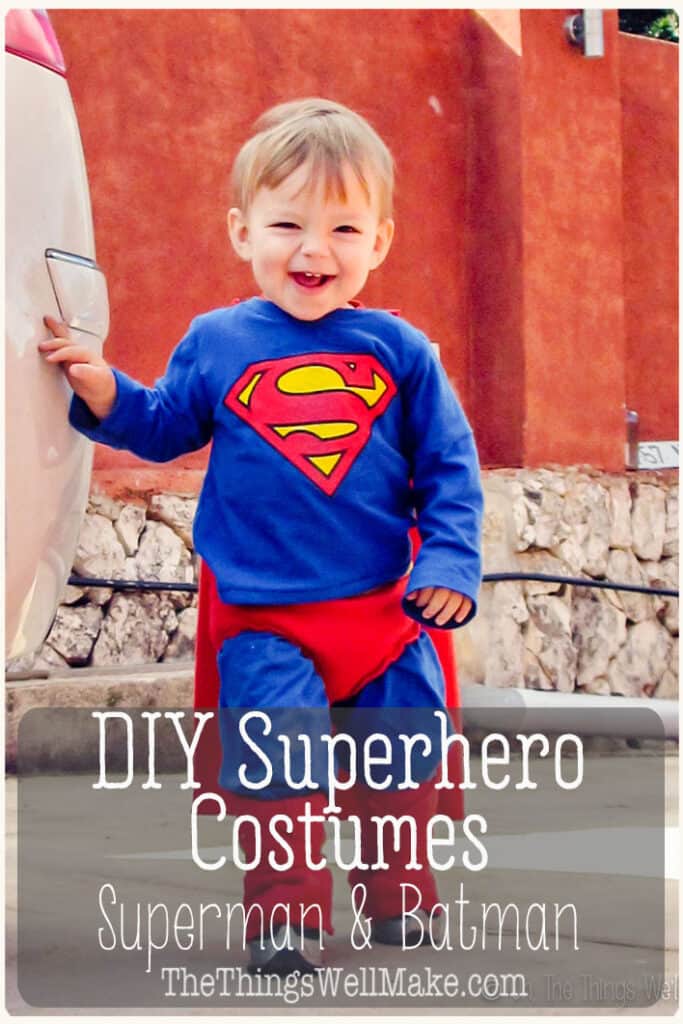
Need a last-minute Halloween costume, or just want to make an easy superhero costume? These homemade batman and superman costumes can be whipped up in just a few hours.
Over the years, I’ve made my share of superhero costumes. When my son was younger, he loved transforming himself into the various superheroes. I’ve already shown you how to make a Captain America costume and how to make a Thor costume.
Those costumes, while super cute, are also a bit more complex. On the other hand, when I made those, I had also already made a couple of simpler superhero costumes that I hadn’t shared with you, until now: Batman and Superman.
Because both the Batman costume and the Superman costume were made in the exact same manner, I decided to combine them into one post.
Both costumes are based on buying or making a superhero t-shirt and then adding an easy cape, gloves, and boots. That may sound like a lot of work, but once you get started, you’ll see how easy it really is!
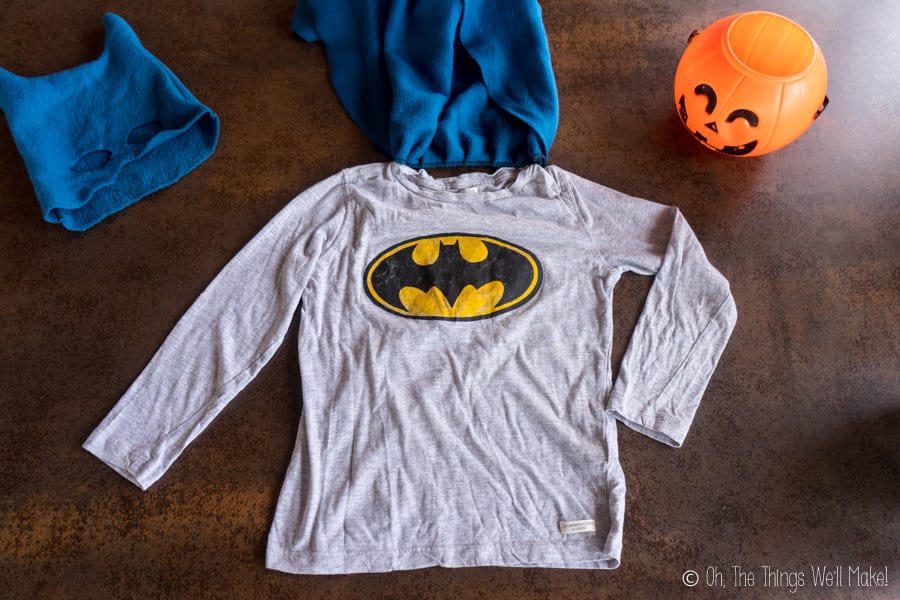
The superhero t-shirt
You can either buy or make the t-shirt that will be the center focus of your homemade superhero costume. I made mine, trying different methods each time. If you already have a Batman or Superman t-shirt, though, you can save yourself a bit of time.
Buying the t-shirts:
Obviously, the easiest way to make your superhero costumes is to buy the t-shirt already made. It’s easiest to use a long-sleeved t-shirt, but you can make it work with short sleeves too.
You can buy locally, or find the logo superhero t-shirts for sale online.
- Youth Superman t-shirt
- Adult Superman t-shirt
- Youth Batman t-shirt (In this case, pj’s was the best I could find.)
- Adult Batman t-shirt
Making a superhero t-shirt
To save yourself a few dollars and to earn bragging rights for making the whole costume, there are a few ways you can make the logo t-shirts yourself.
T-shirt transfers
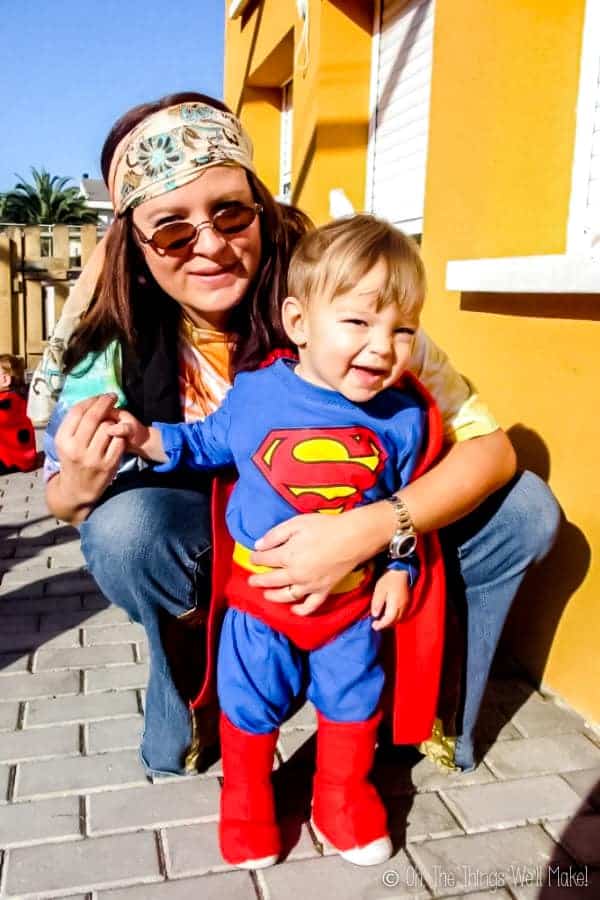
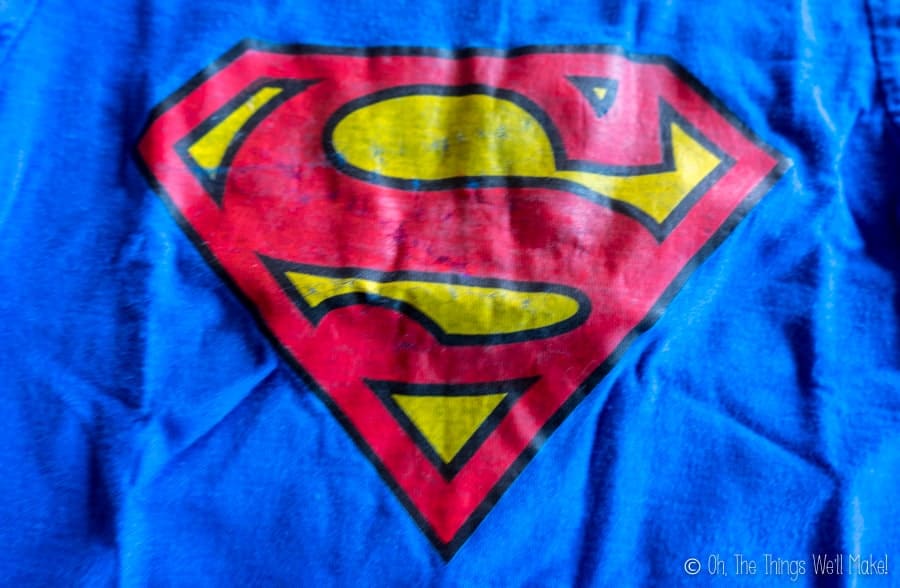
The easiest way to make the t-shirt is with an iron on t-shirt transfer for dark-colored t-shirts. I made my son’s first superhero costume, a Superman costume, using this technique.
Make sure you choose transfers for dark-colored t-shirts rather than the more commonly found transfers for light-colored t-shirts. Transfers for light-colored fabrics are translucent and will allow the color of the t-shirt to show through. On the other hand, transfers for dark fabrics have an opaque white layer that results in a bright logo that is unaffected by the color of the shirt beneath.
Print out the desired logo onto the transfer sheet, according to the instructions for your transfers.
Print at a size that will be proportional to the shirt you are using. I usually measure across the width, leaving a few inches on either side of the t-shirt so it’s not too big.
Unlike with transfers for light-colored shirts, you don’t iron these face down onto the fabric. So, you don’t need to make a mirror image of the logo when using them.
Instead, you print out the logo onto the transfer, as directed on the package, and then you peel off the backing.
Once you’ve peeled off the backing, you place the transfer in the desired location, cover it with parchment paper (or a special paper that comes with the transfer sheets) and then iron according to the instructions.
Superhero logos
Here are some logos you could use…
Freezer paper stencils
I decided to make the Batman shirt using freezer paper and fabric paints. It’s slightly more difficult and time-consuming than using transfer paper, but it also makes for a more durable t-shirt that can be worn time after time without wearing away.
Freezer paper is great for helping to paint professional-looking designs onto fabric. It’s a type of paper that looks like regular paper on one side, but has a protective type plastic layer on the other side.
We can take advantage of the freezer paper’s unusual ability to temporarily adhere to fabric when ironed onto it. The paper layer is the perfect place to draw out or print out our design while the plastic layer binds into the mesh of the fabric when heated. Yet, it’s easily removed once you are finished painting.
To make a superhero shirt using freezer paper…
You’ll need:
- T-shirt (Gray or black for Batman; royal blue for Superman).
- Freezer paper (For printing directly on it, try these sheets!)
- Carbon paper and pencils for tracing the logo
- An x-acto knife (hobby knife) or cutting machine like the Silhouette Cameo
- Fabric paints
Instructions:
Trace the logo onto freezer paper. You’ll want to measure the width of the shirt and draw or print the logo at a size that is proportional to the shirt.
(To make things even easier, you can print the logo directly onto freezer paper sheets that can be used in inkjet printers. Just make sure to print onto the paper side and not the plastic side.)
Cut the logo out carefully. You can use an x-acto knife over a cutting board or can use a cutting machine like the Silhouette Cameo.
Once you’ve cut the various parts of the logo out of freezer paper, you’ll want to iron the outer area (The paper that surrounded the logo) to the t-shirt. You should see an open oval that is ready to paint. For the batman logo, I painted the entire oval with yellow fabric paint.
Once the paint dried, I ironed on the freezer paper piece that corresponds to the “yellow” section, the part that goes around the black bat over the paint. Center it so that you have an open area around that section (which will end up being the black oval line). You should be seeing a yellow bat and a yellow oval line- and the rest of the logo will be covered with paper.
Paint over those yellow areas with black fabric paint.
Once the paint has dried, remove the freezer paper. You should end up with a yellow and black Batman logo, just like mine!
For a longer-lasting design, set the freezer paper with an iron, according to the directions that came with your particular fabric paint.
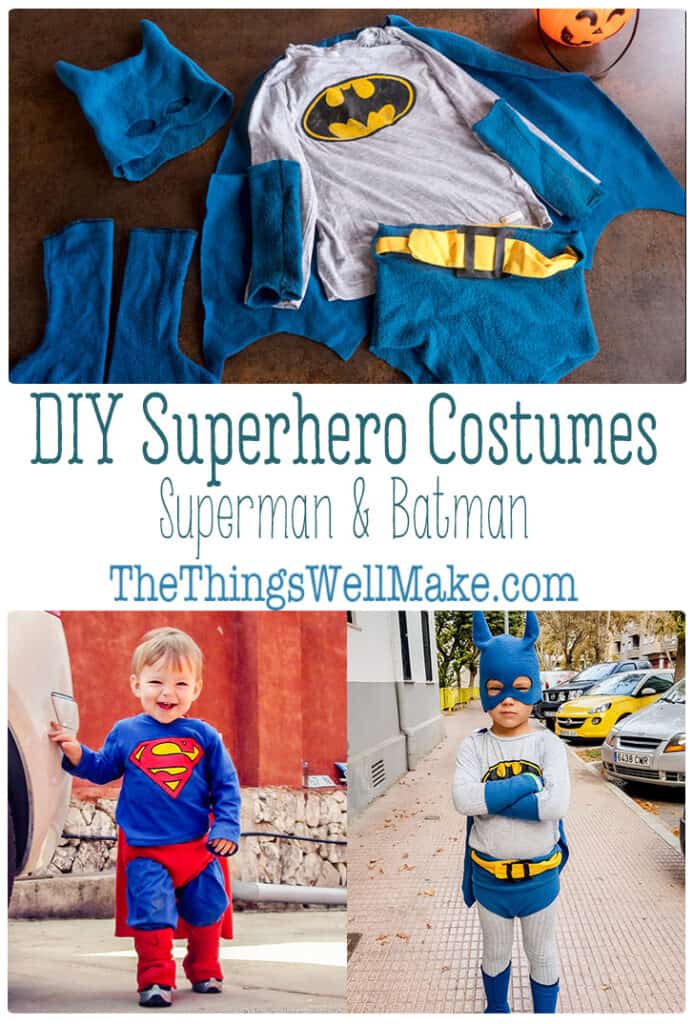
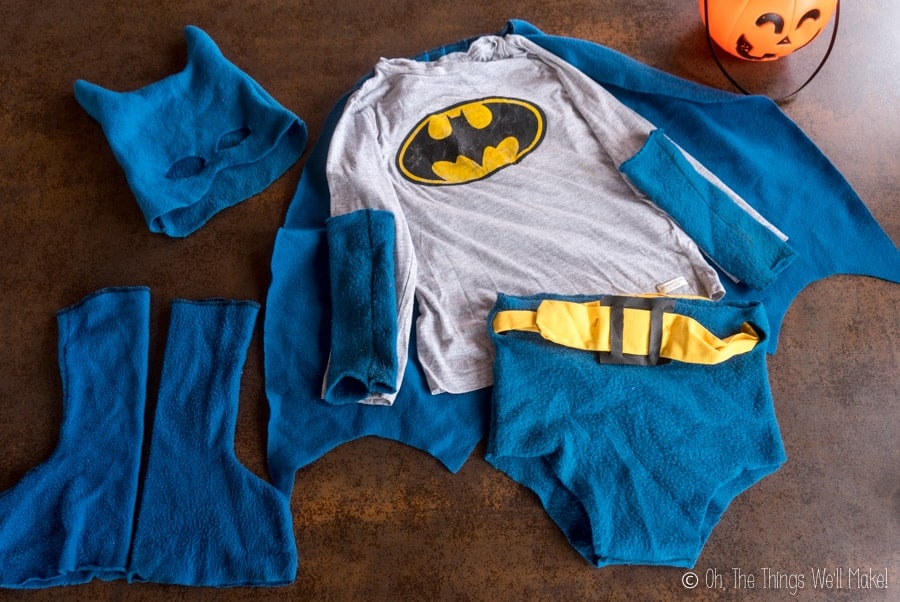
Making the cape, gloves, trunks, and boots
For the cape, gloves, trunks, and boots, I used polar fleece fabric.
Polar fleece is perfect for making costumes for kids because it doesn’t fray or unravel (so there is no need to finish the edges), it holds its shape well, and it stretches to fit, making it a very forgiving fabric to work with.
Even if you don’t calculate the shape of your design and the size perfectly, it normally turns out fine anyway.
Polar fleece options
Luckily, our superheroes wear the same colored gloves, boots, and trunk as their cape, so we only need to buy one color fabric.
I was lucky enough to have inexpensive polar fleece blankets at home in both red and the right color turquoise-grayish blue for both costumes. I upcycled them for this project. If you don’t have cloth or blankets on hand, though, you can buy the cloth too. Depending on the size of the person who will be wearing the costume, one yard of fabric may or may not be enough.
- Blue polar fleece for vintage Batman.
- Red polar fleece for Superman costume

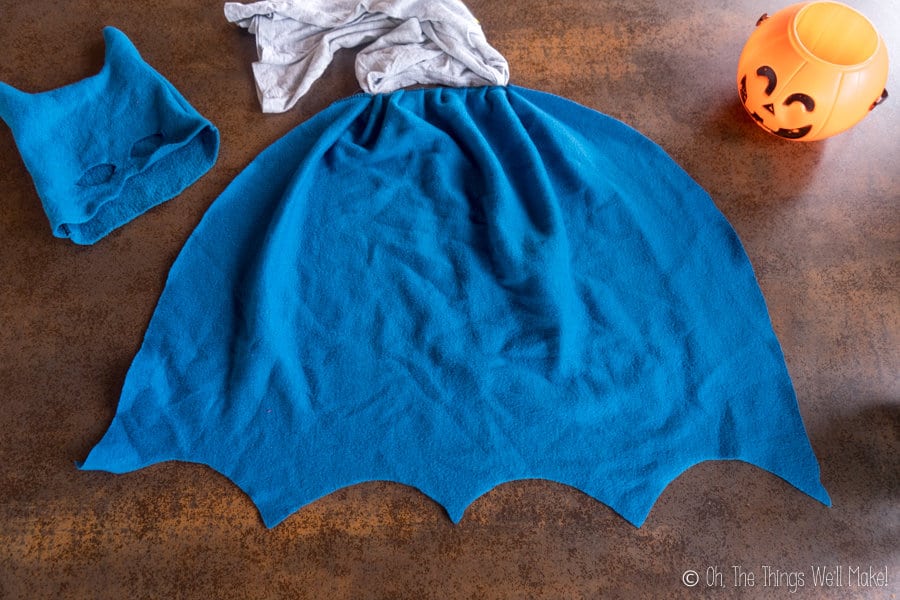
Make the cape
Superman’s cape is just a simple trapezoid, while Batman’s follows a similar shape but has a scalloped bottom edge, resembling a bat’s wings, of course!
Calculating the general shape of the cape
To calculate the size of the cape, I measure across the shoulders and add a few inches (optional) to the width to allow for gathering the top slightly. That is the top width of your cape.
I then add a few inches to either side for the bottom width measurement.
Most superheroes wear their capes down to their knees or calves, but kids may be uncomfortable with a cape that long. Measure for the height of the cape by measuring from the shoulders down to the knees (or however long you want your cape to be).
To make things symmetrical, it’s easiest to fold the fabric in half lengthwise and then cut accordingly.
For Batman’s scallops, with the cape still folded in half, draw scallops across the bottom with chalk or fabric marking pencils. Calculate it so that the scallops begin and end on either side of your fabric. (You don’t want to end halfway through the curve.)
Sewing the cape (or not)
To make a gathered top of the cape, there are a few things you can do…
Sew on elastic
The first time I made my son the Superman cape, I cut a piece of elastic at the same width of his shoulders. I then sewed across the top of the cape while stretching the elastic after securing the ends of the elastic to the ends of the fabric.
By sewing while stretching the elastic, you end up with gathered fabric at the top of the cape. (I have since misplaced the cape, so I couldn’t take a picture.) 🙁
Sew pleats
For one of my Batman capes, I sewed pleats into the top of the cape by folding down some fabric over itself right before sewing over the fold. I didn’t do a lot of calculation, and just made the pleats as I went along (just like the girl in this video).
No-sew using hot glue
You can make pleats in the top of the cape by following the same idea as shown above, but gluing the pleats together with a few dabs of hot glue.
Gathering with a cord
Another easy way to gather the top part of the cape is to use a needle and thread to make a running stick across the top of the cape with a strong cording.
Once you’ve sewed across it, you pull on the end of the cording while gathering up the fabric. (See how to do it in this video.)
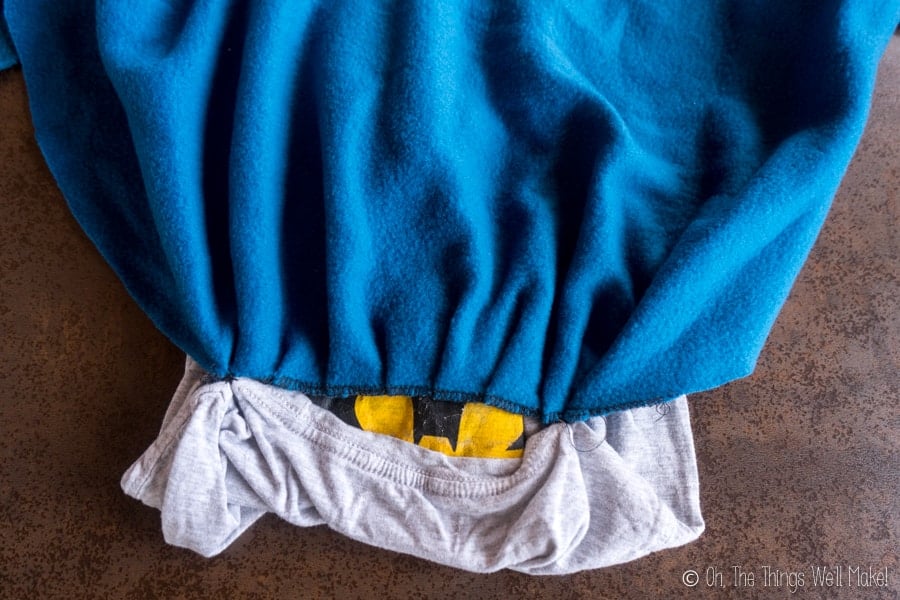
Attaching your cape
You can then hand sew or safety pin the cape onto the t-shirt.
Some people prefer to add cording or ribbon for tying it around the neck, but I think that makes it more uncomfortable for kids.
Another fun option is to add velcro squares to both the cape and the place on the shirt where you want to attach the cape.
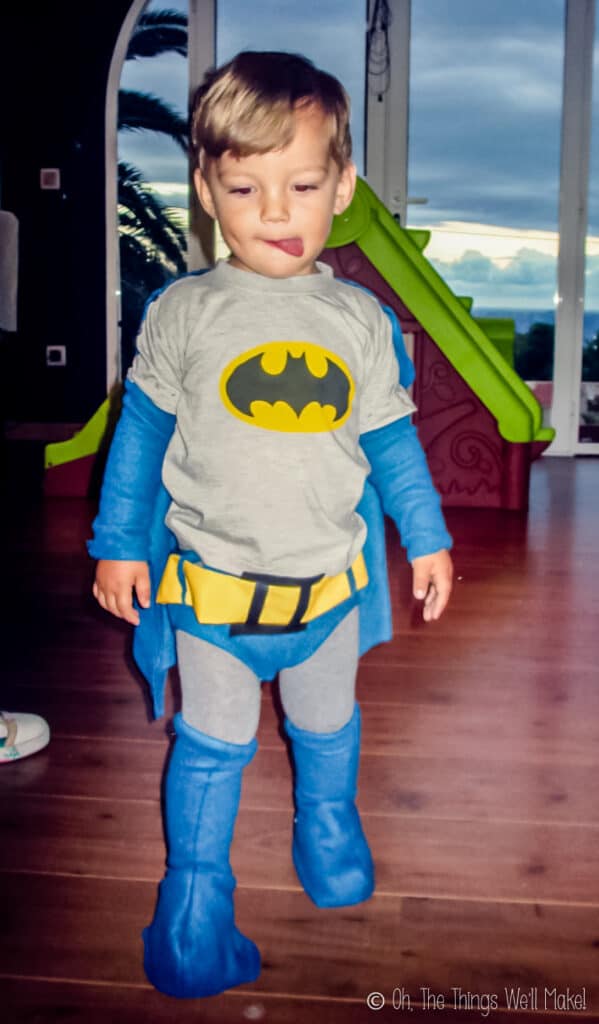
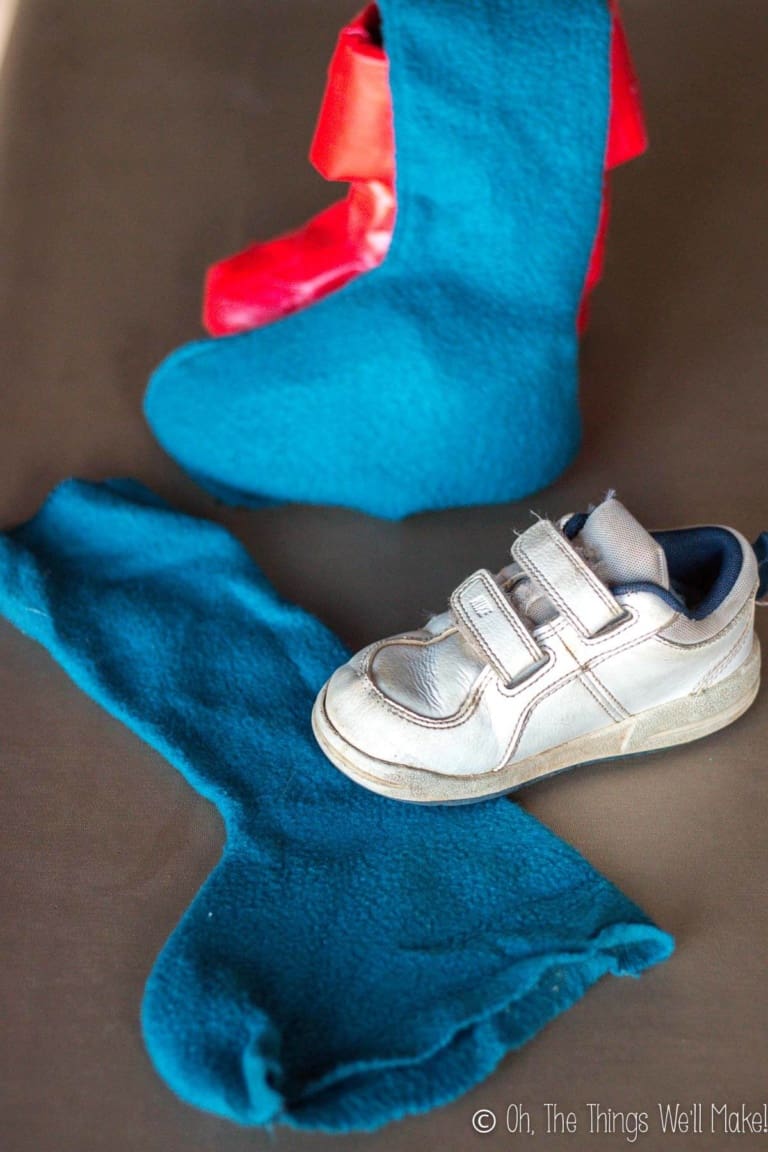
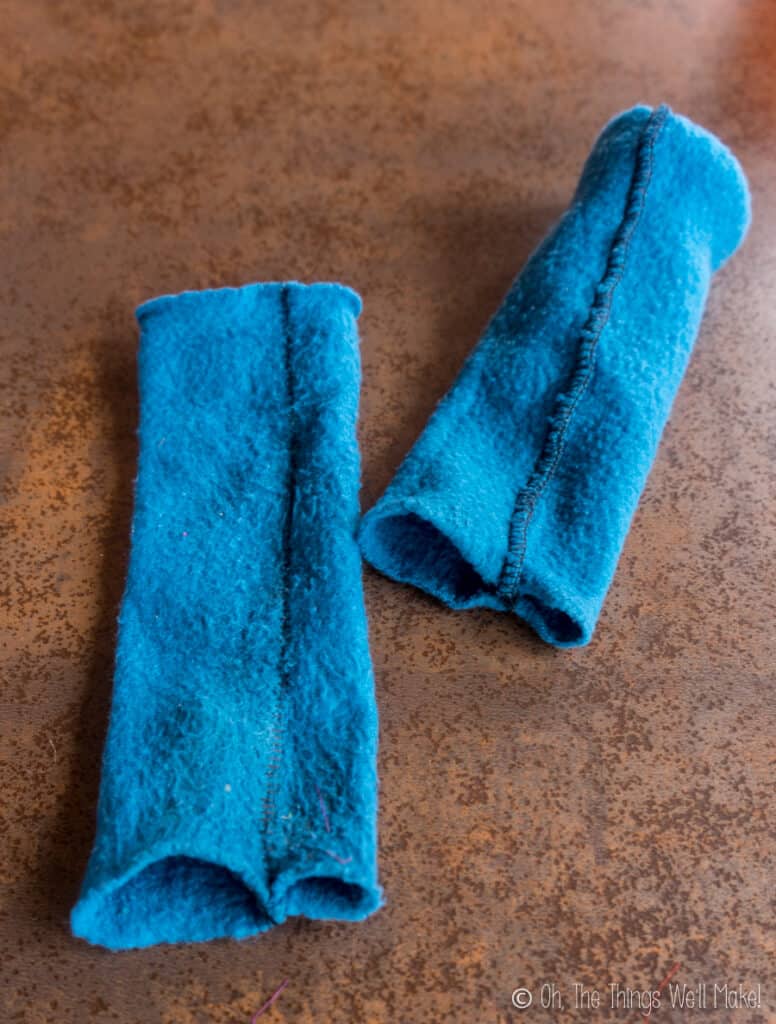
Making the Boots
Superhero boots are actually quite easy to make using polar fleece. You’re basically making two tubes of fabric that you wear over your shoes.
I made a full tutorial on how to make superhero boots (with 2 versions).
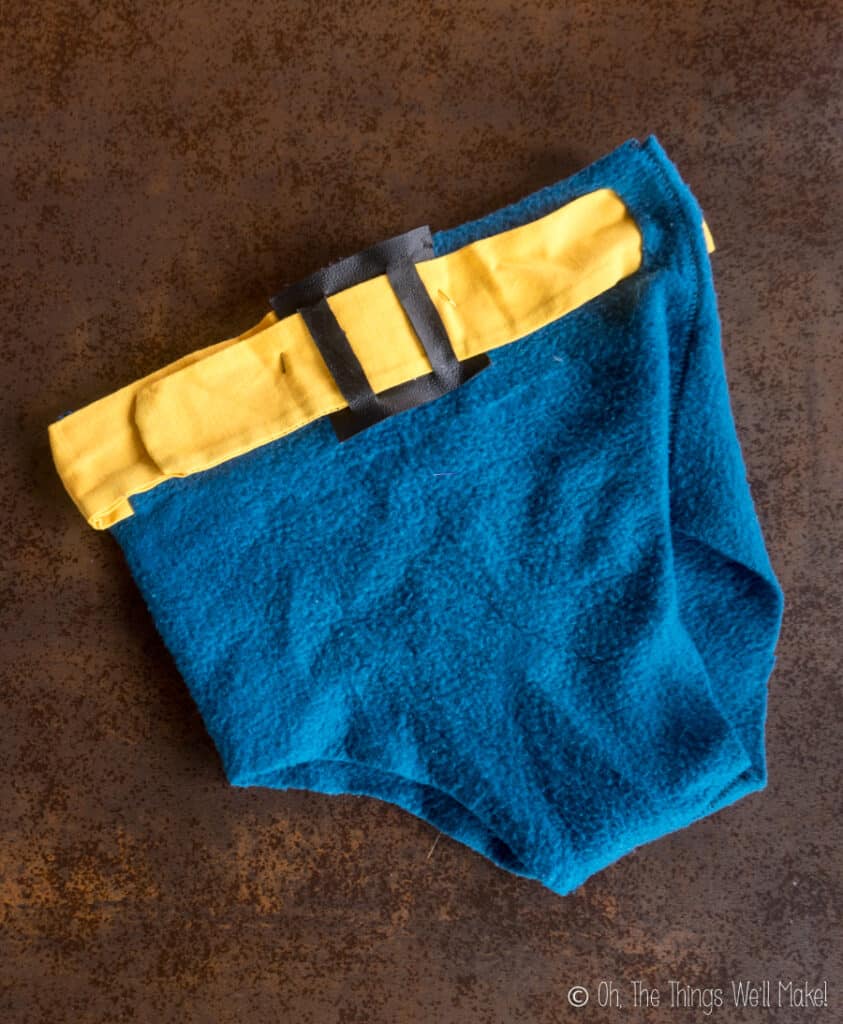
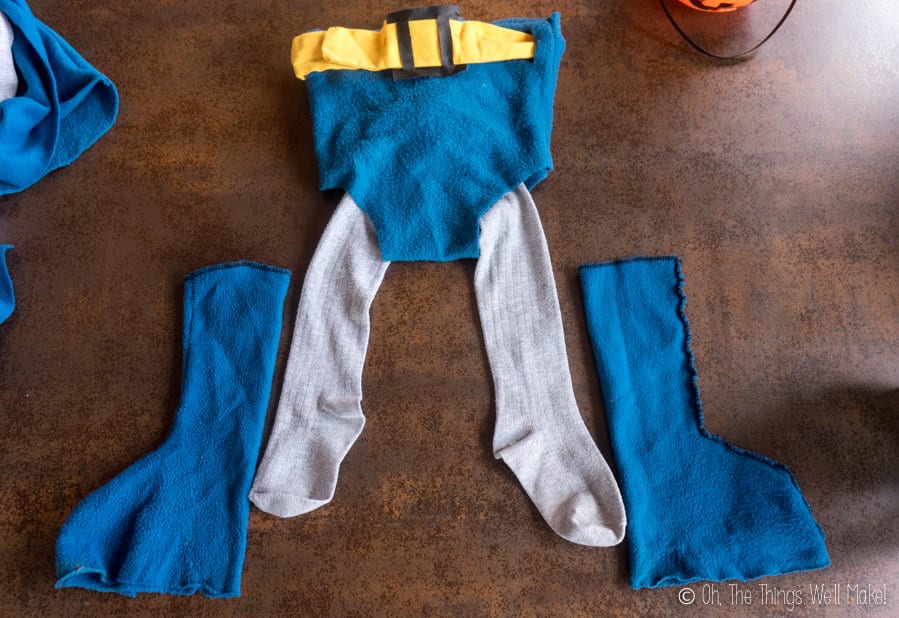
Making the Trunks
What some people call the superheroes’ outer underwear, are officially known as trunks.
To make the trunks for your superhero, take a pair of his or her real underwear to use as a pattern.
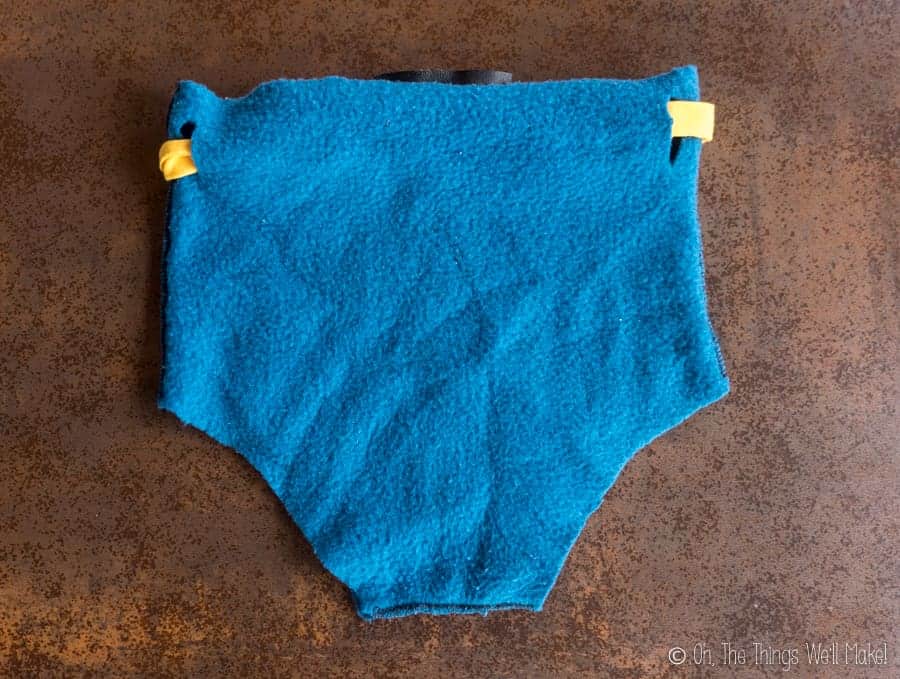
Because we don’t want these too tight, you’ll want to add a couple of centimeters all the way around. You can always tighten them up later if need be, but it’s harder to make them bigger if you cut it too small.
It’s also a good idea to add height to them to allow for adding a belt to them. I added several inches to the top of mine.
Cut 2 pieces of fabric in the calculated shape, and with right sides together, sew across the bottom and down both sides.
Flip the trunks right side out and have your superhero try them on. Make any adjustments as needed.
The first time I made one of these costumes, I tried sewing elastic around the edges of the openings for the legs. In the end, I didn’t find that it improved the costume at all. It only made for extra work.
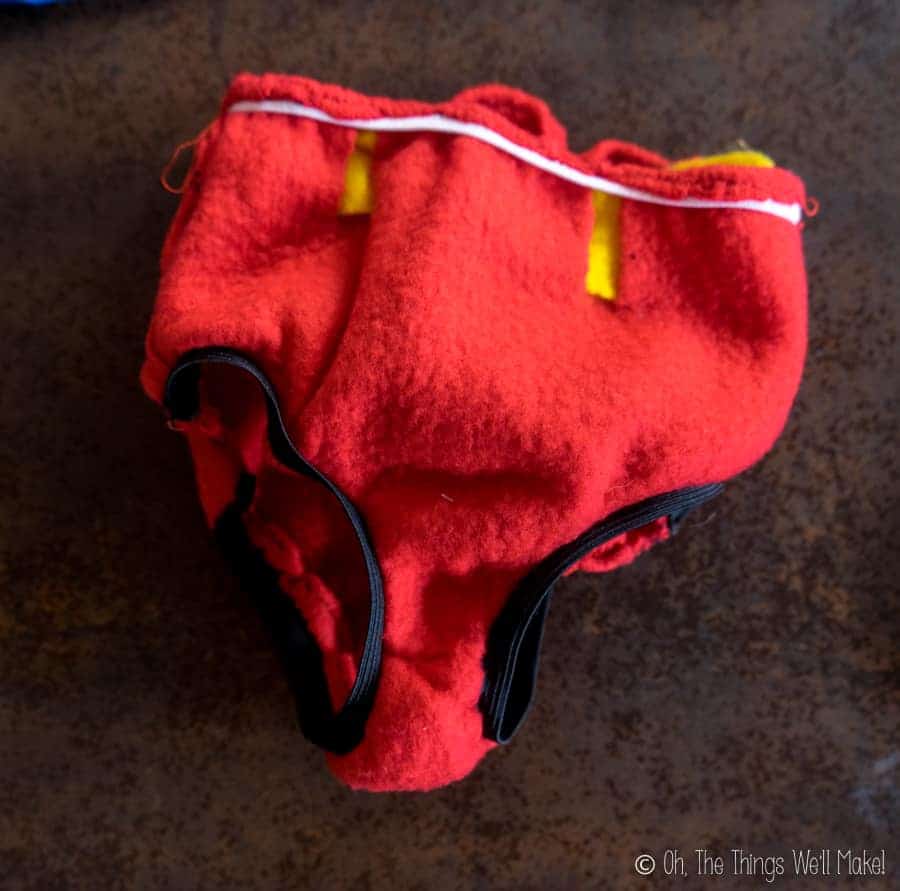
To help hold a belt in place, you can cut a couple of slits on each side of the trunks and thread a band of yellow fabric through them. (Both superheroes wear yellow!)
I cut a buckle shape out of vinyl and hot glued it in place.
Making the Gloves
Making superhero gloves is, again, quite simple.
Measure out the width of the fabric by wrapping it around the arm of the person who will be wearing the costume. Mark the width and the desired length of the gloves.
These gloves are fingerless gloves and will go up almost to the knuckles of the person who wears them.
- To make the gloves, cut one rectangle for each glove with the marked length and width.
- Fold the rectangles in half lengthwise (right sides facing) and sew together the open ends down the long length of the tube. Leave both the top and bottom ends (short sides) unsewn.
- Flip the tubes right side out.
- Place the tubes over the person’s hands/arms, with the top of tube at the base of the thumbs.
- Adjust the size as needed.
- Mark the area between the thumb and the rest of the fingers.
- Sew together the layers at the top of the tube at the marked place.
- Wear the gloves by pushing your thumb through the small opening and the rest of the fingers through the larger opening.
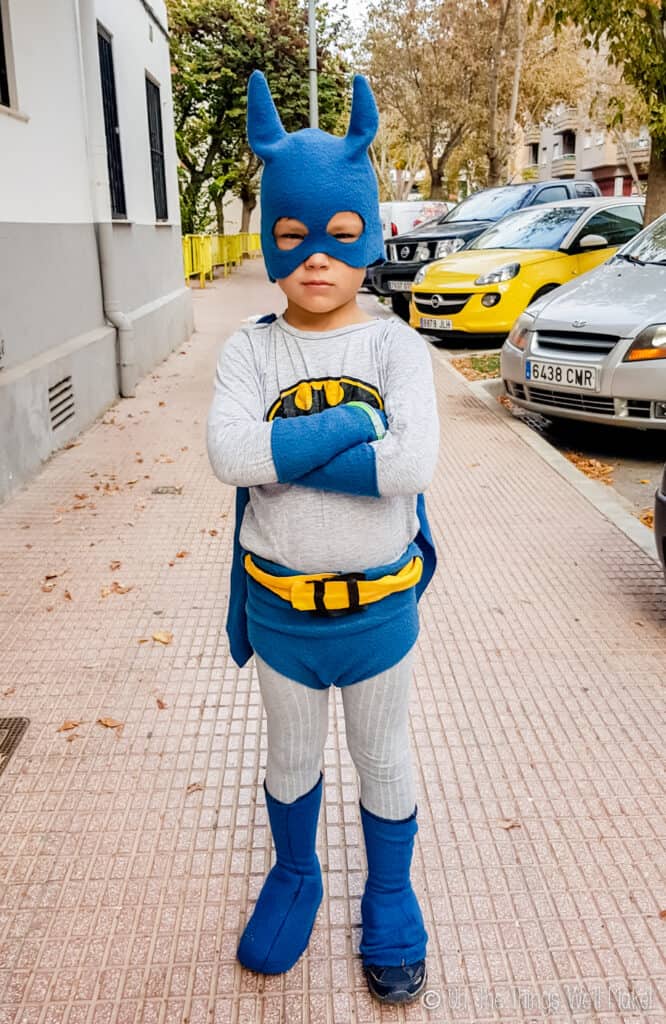
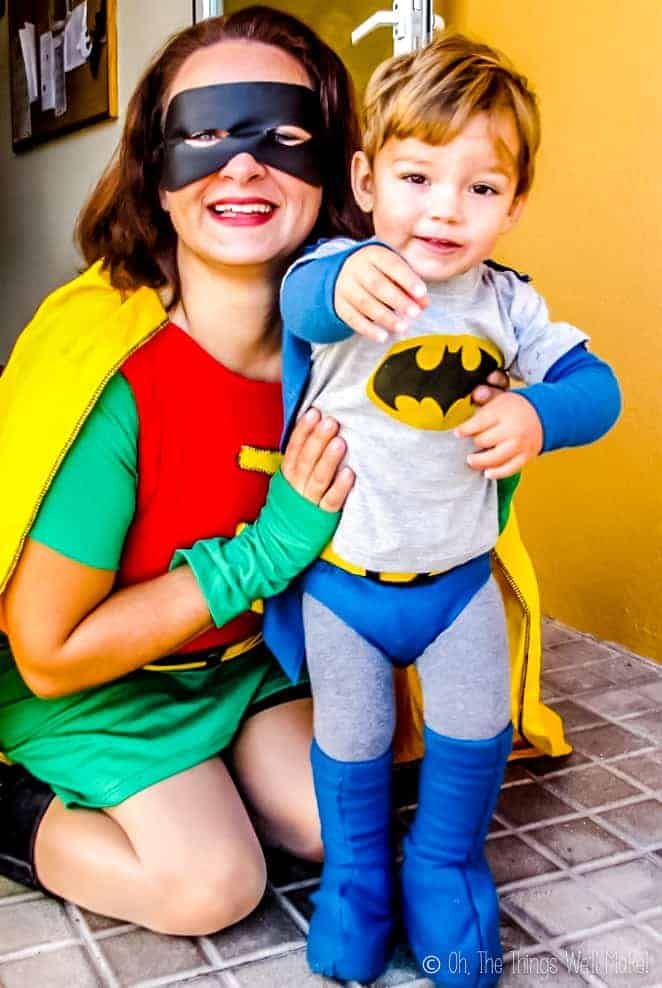
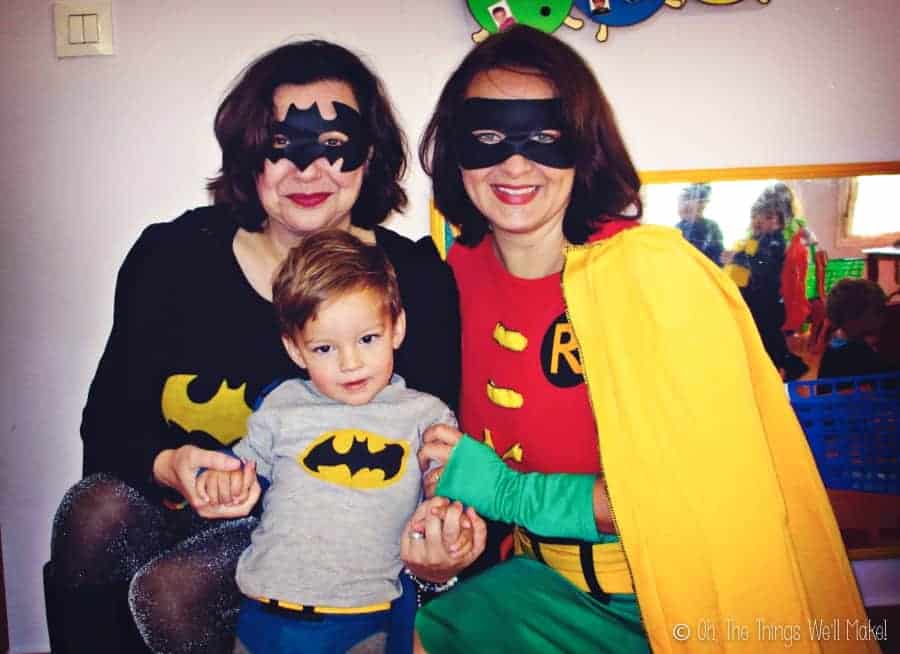
Making the Optional Batman Mask
While my son didn’t wear it most of the time, I did quickly throw together a Batman mask, just in case. To make one similar to mine, do the following…
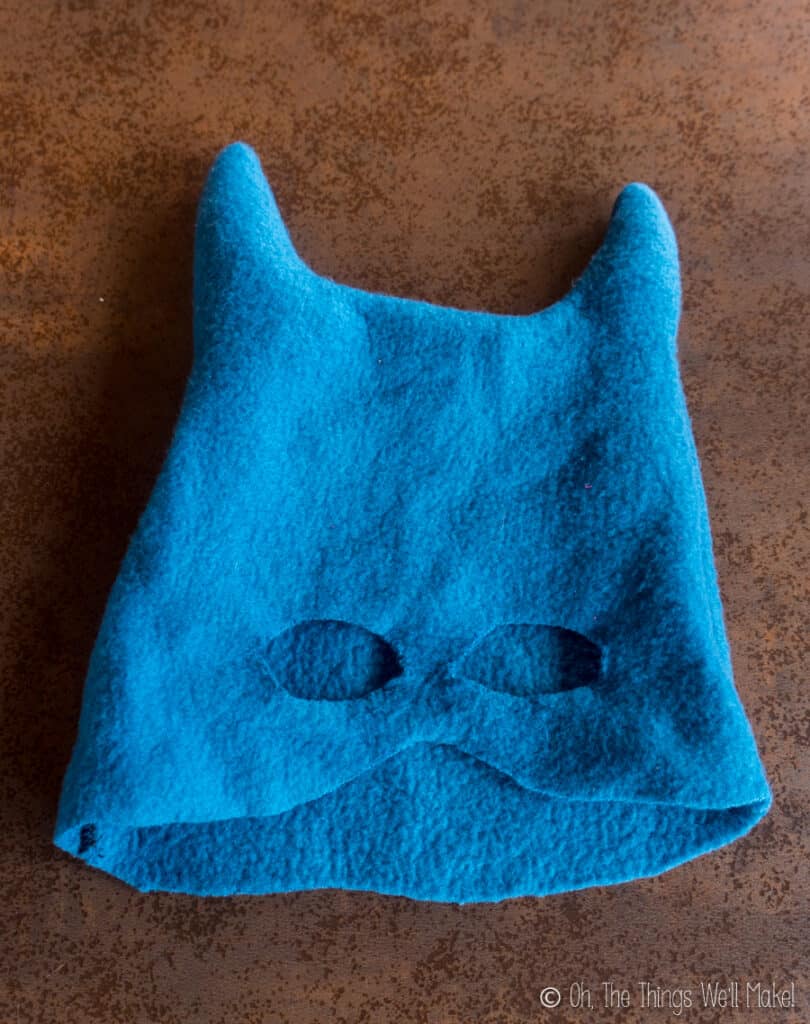
- Measure around the head to get a general idea of the width and also measure out a general length to just below the nose. You can use a knit hat as a pattern for the general shape, if you have one on hand. Don’t worry about where to place the eyes just yet.
- Batman’s mask has hornlike projections on either side. Draw out the shape of the horns, freehand over the shape of a round ski mask.
- Cut out 2 identical pieces, one for the front and one for the back of the mask. It’s easier to get a symmetrical shape by folding the pieces in half lengthwise while cutting out the shapes.
- Place the two pieces together with right sides facing each other.
- Sew around all of the edges except for the bottom. Leave the bottom area open.
- Flip the mask right side out.
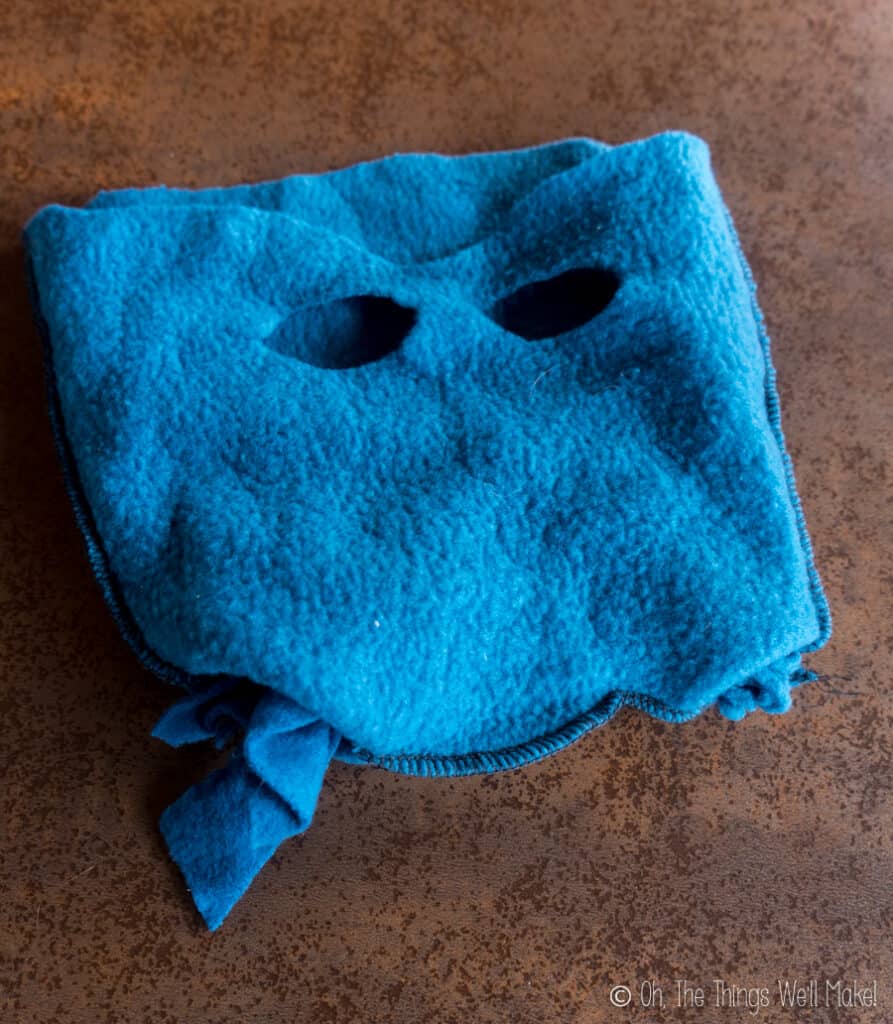
- Try the mask on and mark where the eyes and nose are on the front of the mask.
- Cut out holes for the eyes and an area for the nose in the front.
- Try on the mask and make any adjustments as needed.
- To keep the horns standing upright, I filled them with scraps of fabric.
Putting it all together
Now that you have finished making the various component of your superhero costume, it’s time to put it all together!
You’ll need:
- Superhero shirt
- Gloves
- Cape
- Trunks (with optional yellow belt)
- Tights or leggings- in royal blue for superman or gray for Batman
- Superhero boots
- Tennis shoes.
- Put on the tights or leggings.
- Put the trunks on over the tights.
- Put on the superhero boots followed by the shoes that will be work with them. Pull the bottom edges of the boots over the shoes. (Optionally use double-sided tape to hold them in place.)
- Put on the superhero shirt.
- Put on the gloves, pulling them up over the sleeves of the shirt.
- If you haven’t already sewn the cape on the shirt, pin it in place or attach it however you like.
- Optionally put on the Batman mask!
Now go out and be a superhero!
And have fun!
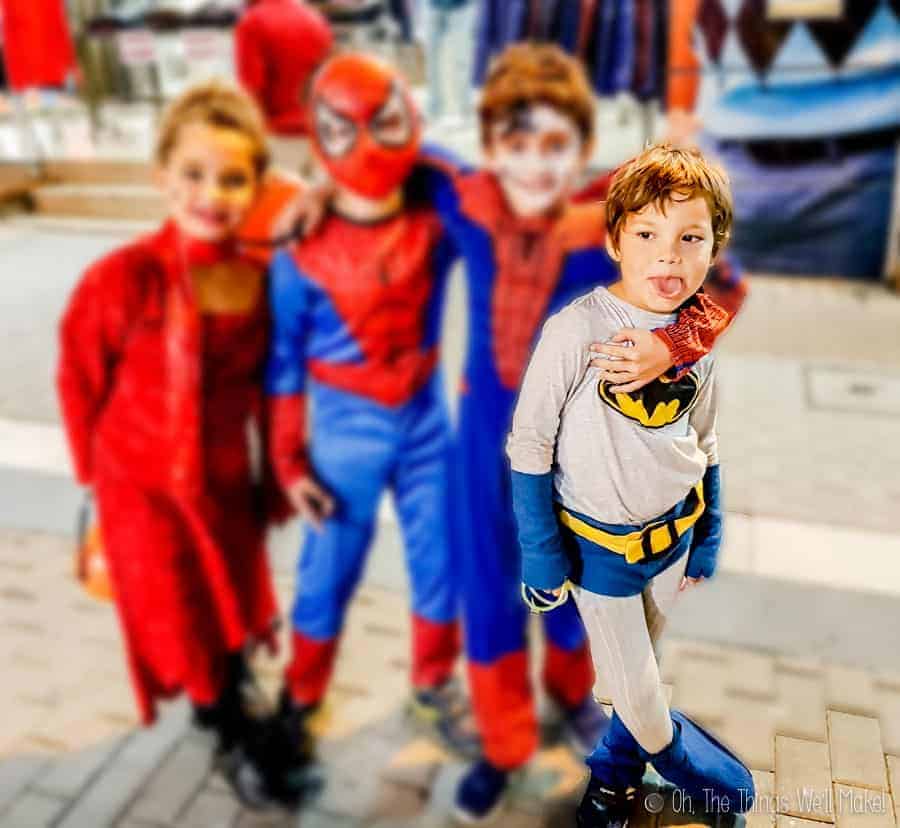
Happy Halloween from us here in Spain!

Superhero Costume: Batman & Superman
Materials
- 1 superhero t-shirt (Instructions above for making your own)
- 2 yards polar fleece (Red for Superman, Blue for vintage Batman) For a large child or adult, you may need more fabric. For a small child, you can probably get away with less.
- 1 yellow belt (You can make your own from yellow cloth.)
- 1 pair tights or leggings (Royal blue for Superman or gray for Batman)
Instructions
Make the cape
- Measure out the width of the shoulders of the person who will be wearing the costume and the distance between their shoulders and their knees.
- Cut out a trapezoid shape of the polar fleece with a height equal to the the distance between the shoulders and the knees (or desired length of the cape). The top width should equal the width of the shoulders plus a few (4-6) inches and the bottom width should be that width plus a few more inches (4-6 inches more).
- Gather the top of the cape. This can be done by making pleats, sewing a running stick across the top and pulling on the free end to gather the fabric, or by sewing it over elastic while pulling on it. You want to end up with a width that is similar to the width of the shoulders of the person who will be wearing the cape.
- If making a Batman cape, fold the cape down the center lengthwise (to make symmetrical cuts) and cut scallops into the bottom of the cape.
- Attach the cape to the shirt with pins or by hand sewing it on.
To Make the Boots
- Follow the tutorial for making superhero boots out of polar fleece. (Linked to in notes)
To Make the Fingerless Gloves
- Cut 2 rectangles out of the polar fleece. The height should equal the desired length of the gloves. The width should equal the distance needed to wrap the fabric around the arms of the person who will be wearing them.
- Fold the rectangles in half lengthwise (right sides facing).
- Sew down the long open ends of the rectangles.
- Turn the tubes right side out.
- Try the gloves on and mark the area between the thumbs and the rest of the fingers.
- Hand-sew a few stitches at that point to separate the thumb section of the glove from the section for the rest of the fingers.
Make the Trunks
- Using a pair of underwear as a pattern, draw out the shape of the trunks onto the polar fleece (using chalk or a fabric marking pencil). Draw the shape 1-2 cm larger than the underwear all the way around them, except for at the waist area. At the waist, make the trunks 2-3 inches taller than the underwear. (This is to leave room for a belt.)
- Cut out 2 identical pieces of the marked design.
- Place the two pieces together with the right sides facing each other.Sew down both sides and across the bottom (crotch area).
- Turn the trunks right side out.
- Cut 2 slits for the belt on each side of the waist. Run a yellow belt through the slits.
Make the optional Batman mask
- Use a ski-type hat as a pattern for the main shape of the mask. Place it on the polar fleece and trace around it. Make it longer than the cap by extending it down a few inches longer than the ski cap. (This is because it will be worn over the eyes.)
- Flip the cap right side out and try it on.
- Batman's mask has horn-like projections coming up from either side. Draw them on your pattern freehand.
- Cut out the drawn pattern twice. You want 2 identical pieces.
- Place one piece over the other and sew around all edges except for the bottom.
- Mark where the eyes and nose are when the mask is worn.
- Cut out holes for the eyes and cut out the bottom of the mask, leaving room for the nose.
- Fill the "horns" with fabric scraps so that they will stay up when the mask is worn.
Putting it all together
- Put on the tights or leggings and the t-shirt.
- Put the trunks on over the tights or leggings. Fasten the belt.
- Put the polar fleece gloves on over the sleeves of the long-sleeved shirt. Pull the polar fleece boots on over the leggings.
- Put on some athletic shoes and pull the boots down over the shoes to cover them. You can use some double-sided tape to help hold them down in place.
- Put on the optional Batman mask.
- Go Save the world!
Notes
- Polar fleece is strechy yet lightweight making it very forgiving to work with.
- The Superhero boots tutorial can be found here.
- If using a short-sleeved t-shirt, consider making polar fleece sleeves that are hand sewn to the bottom of the sleeve vs. making the gloves as shown. (You can make the “tubes” for the arms in the same way and just omit the step of sewing the stitch between the thumb and the area for the fingers.)