

How to Make a Captain America Shield


Making a superhero costume couldn’t be complete without the right props! Find out how to make a Captain America shield easily by repurposing inexpensive items.
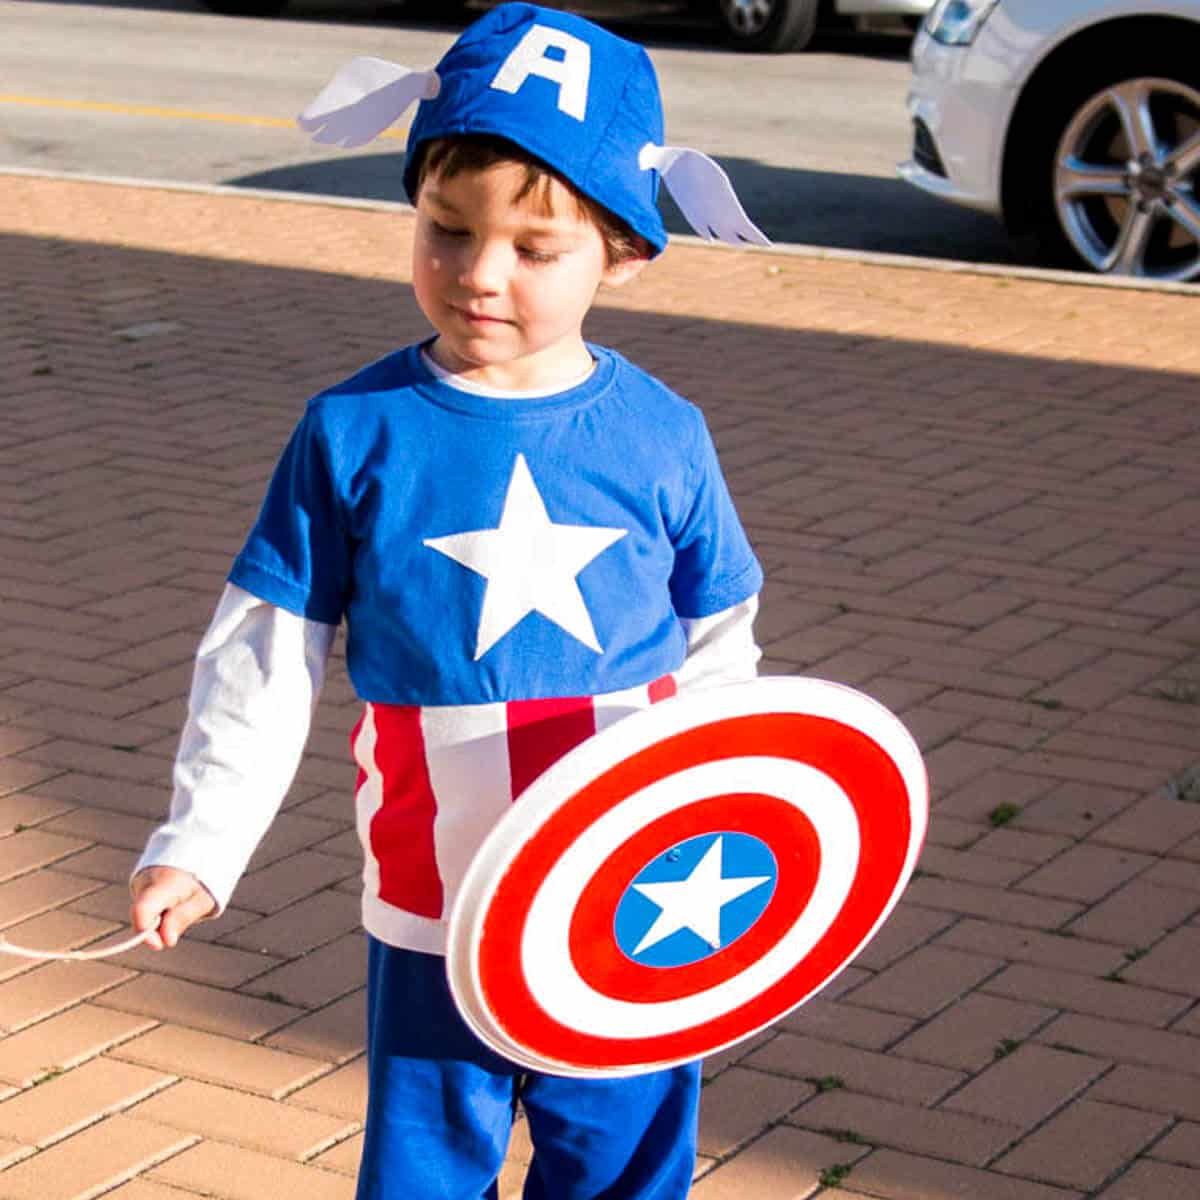
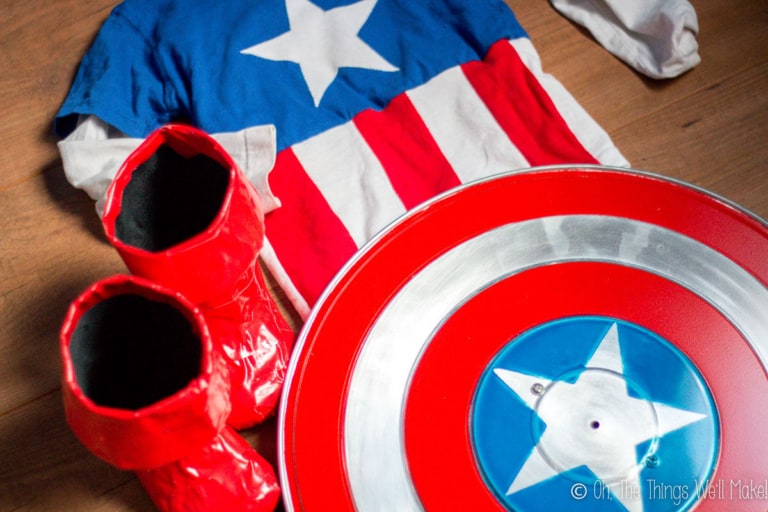
For Halloween, I made my son’s Captain America costume by recycling some t-shirt fabric scraps. I also made homemade Captain America boots using red duct tape.
The whole process took me a while, but that was only because I didn’t have a plan. Deciding how I was going to make each component of the costume was what really took the longest. If you follow my instructions, you should be able to quickly whip out a fun, original Captain America costume in much less time than I took.
How to Make a Captain America shield
No Captain America costume would be complete without this very important prop.
In the end, I ended up making 2 different shields. I know, crazy! But my madness will help show you the different ways you can make your own. So, I’ll share both methods here…
Captain America Shield #1 (Plastic)
The first Captain America shield that I made used a small plastic tray. The shield was smaller and more portable, so it was the one I sent with him to school. (It’s the one he’s holding in the picture above.)
You will need:
- Flat plastic tray
- Drawer pull handle
- Drill
- Contact paper
- Spray paint (Red and Blue)
Instructions:
1. Find an ideal tray. For our shield, I found an inexpensive round, flat, white platter with a bit of a rim to it. I bought it at the Spanish equivalent of a dollar store (where nothing is a dollar), and it cost me about 2 Euros.
2. Add the handle to convert your tray into a shield. We want the bottom of the try to be the front of our shield, so we’ll put the handle on the top.
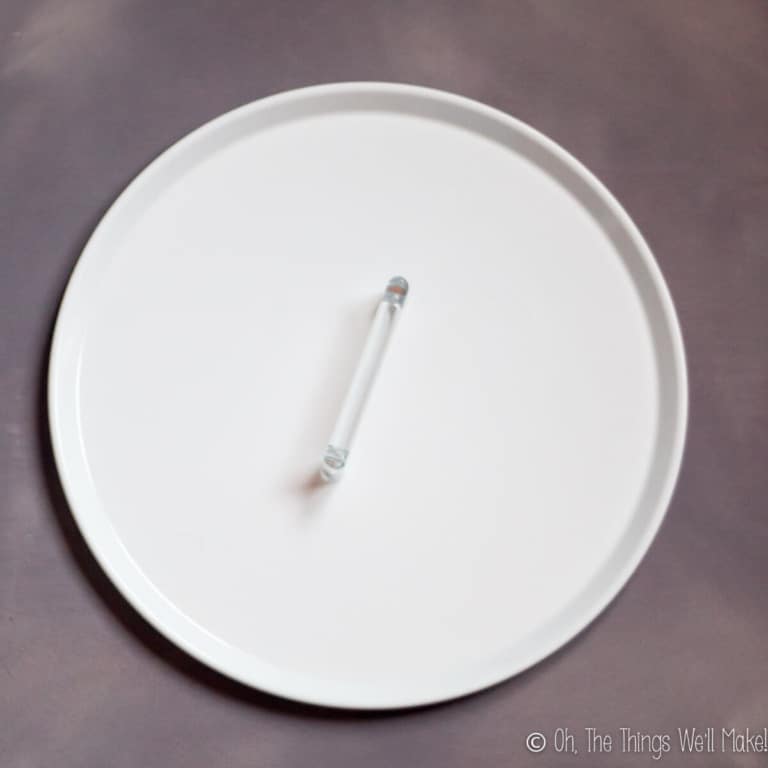
Take your drawer pull and place it on the shield in an ideal spot in the center of the tray.
3. Mark where you want it to go and drill small holes through the marked places on the shield.
4. Push the screws that came with the drawer pull through the holes from the bottom and screw them into the drawer pull on top. You now have a blank shield!
5. To decorate the shield measure out the size of your tray. We need to determine the size of each concentric circle of Captain America’s shield. The easiest way to calculate the ideal size is to find a clipart version of the shield and resize it to fit the dimensions of your shield in a program like photoshop.
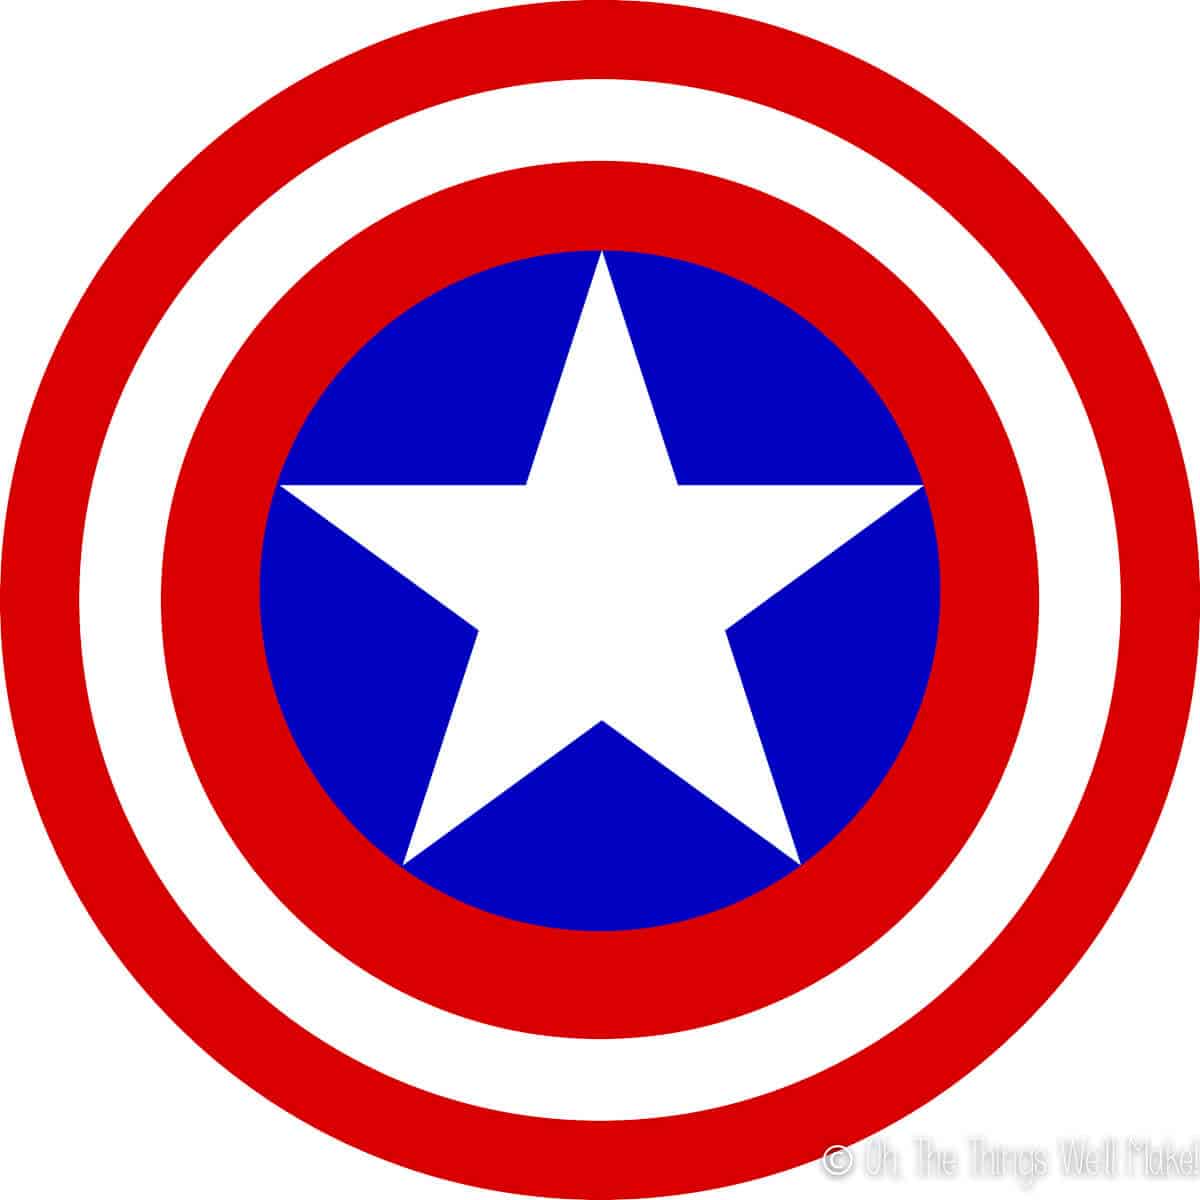
6. Print out the logo in the desired size and trace it out onto contact paper.
7. Cut out each section of the logo from the contact paper. (An x-acto knife can be handy for this.) We will now be attaching different sections of the contact paper to our tray to block them off when painting.
8. To keep the rim clean, tape it off. I used a special masking tape for curves. It’s great for these sorts of projects!
9. Carefully stick the contact paper sections that correspond to the blue and white areas of the shield onto the tray. (Use the other sections to guide the placement.)
Having already cut out the star, I decided to tape off the cut marks to make sure the spray paint wouldn’t get through.

In the above photo, you can see the parts that I covered before painting on the first coat of red, plastic-friendly spray paint. Don’t throw away the “scraps” of contact paper from between the circles used here just yet, though. You’ll need the smaller one in a moment…
10. Spray the red paint over the prepared shield and let it dry. Use as many coats as you feel is needed.
11. Cover the small uncovered circle area (in white above, but it will now be painted red) with the contact paper section that corresponded to it. This will protect our red circle when we paint the blue section.
12. Pull off the tape that was placed over the star and remove the circle of contact paper that surrounds the star (the area where the blue paint needs to go).
13. Paint the newly uncovered area with blue paint.
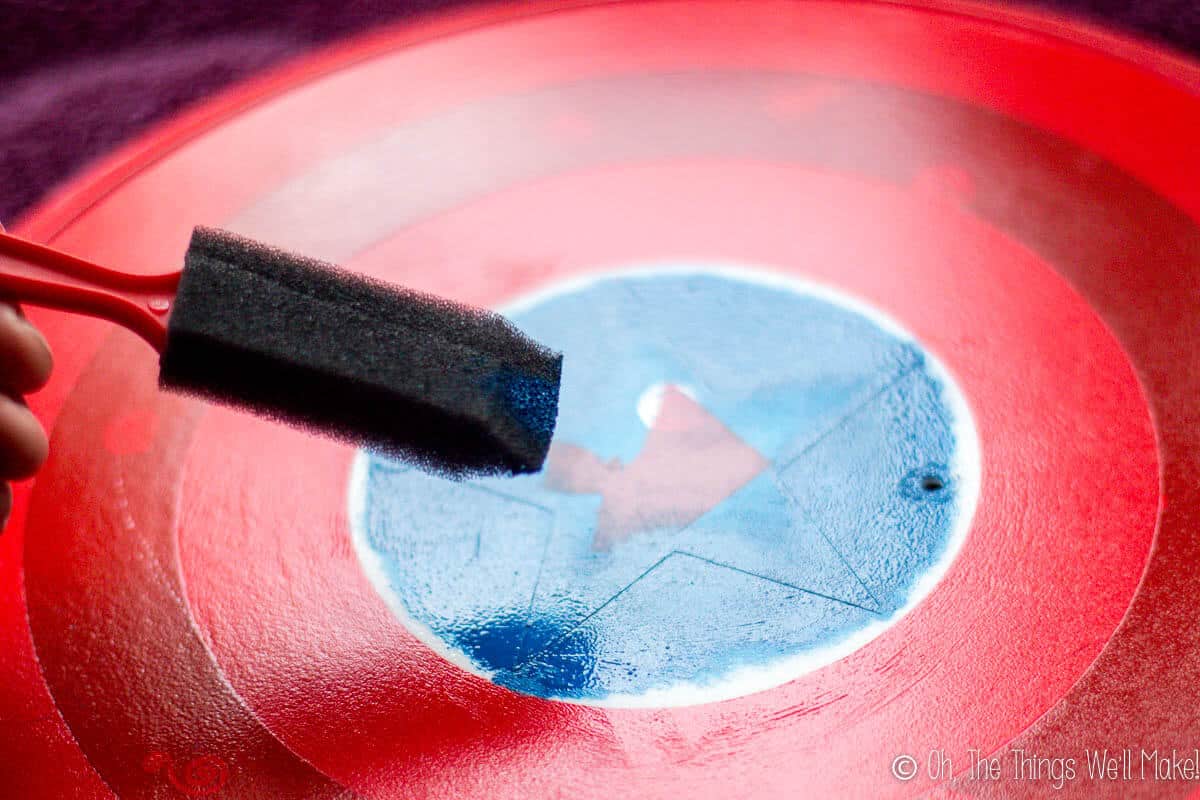
While you can use spray paint again, I painted that small area by hand with an enamel paint I already had at home in the right color. To paint it evenly, I lightly dabbed it on all over the open area, making sure not to push paint under the edges of the tape and contact paper.
If you prefer to use spray paint again, you will have to carefully cover the rest of the shield to keep the paint from hitting either the white areas or the newly painted red ones.
14. Once the blue paint has dried, you can take off all of the contact paper and masking tape.
Shield one is finished!
Captain America shield #2 (Metal)
I had already finished the first shield, when I came across something that was too perfect to pass up! I was in another “chino,” the Spanish equivalent of a dollar store where nothing is a dollar ?, and I saw a lightweight aluminum oil spatter cover that had the perfect markings for Captain America’s shield.
I just couldn’t resist making yet another super shield!
I was hoping to be able to link to a perfect aluminum pan cover like mine, but this is the closest thing I could find. The spacing isn’t really ideal for the circles, but you could use two circles for each color of the shield.
This other aluminum pan cover could be easily used with the method above (for the first shield), though. It has the added perk of already having a handle in place!
Anyway, if you find something similar to mine, here’s the easiest way to do it…
You will need:
- A aluminum pan cover
- Corrugated masking tape for curves
- Spray paint
- A drawer pull handle
- A drill
Instructions:
1. Sand the entire surface of the pan cover. This will help the paint adhere to it. Plus, the matte finish gives off the impression of metallic white stripes rather than shiny silver ones. I actually think this looks much cooler than painting white stripes!
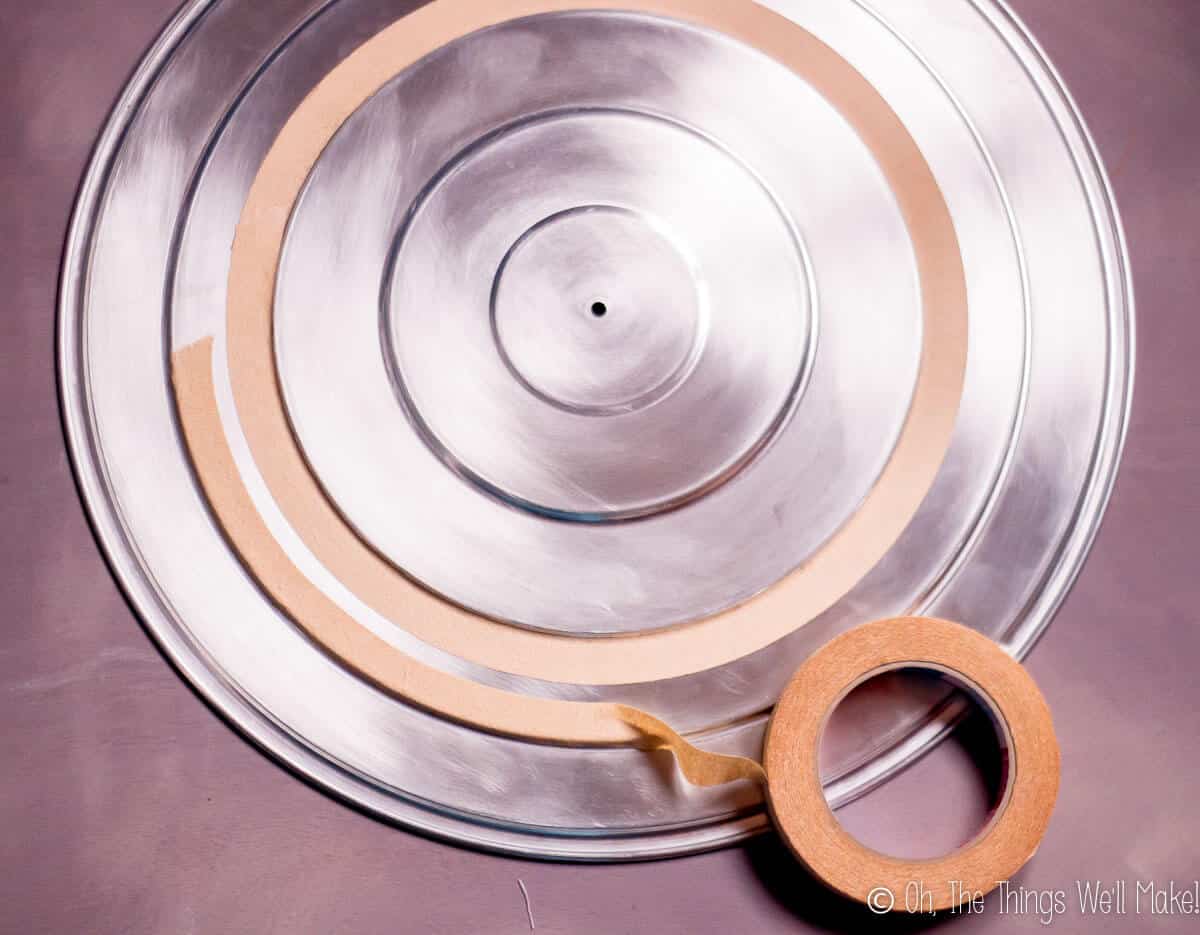
2. Tape off the areas you want to stay silver or blue with a masking tape for curves.
(I also masked off the edge to give our shield a silver border.)
3. Paint the shield with red spray paint and allow it to dry.
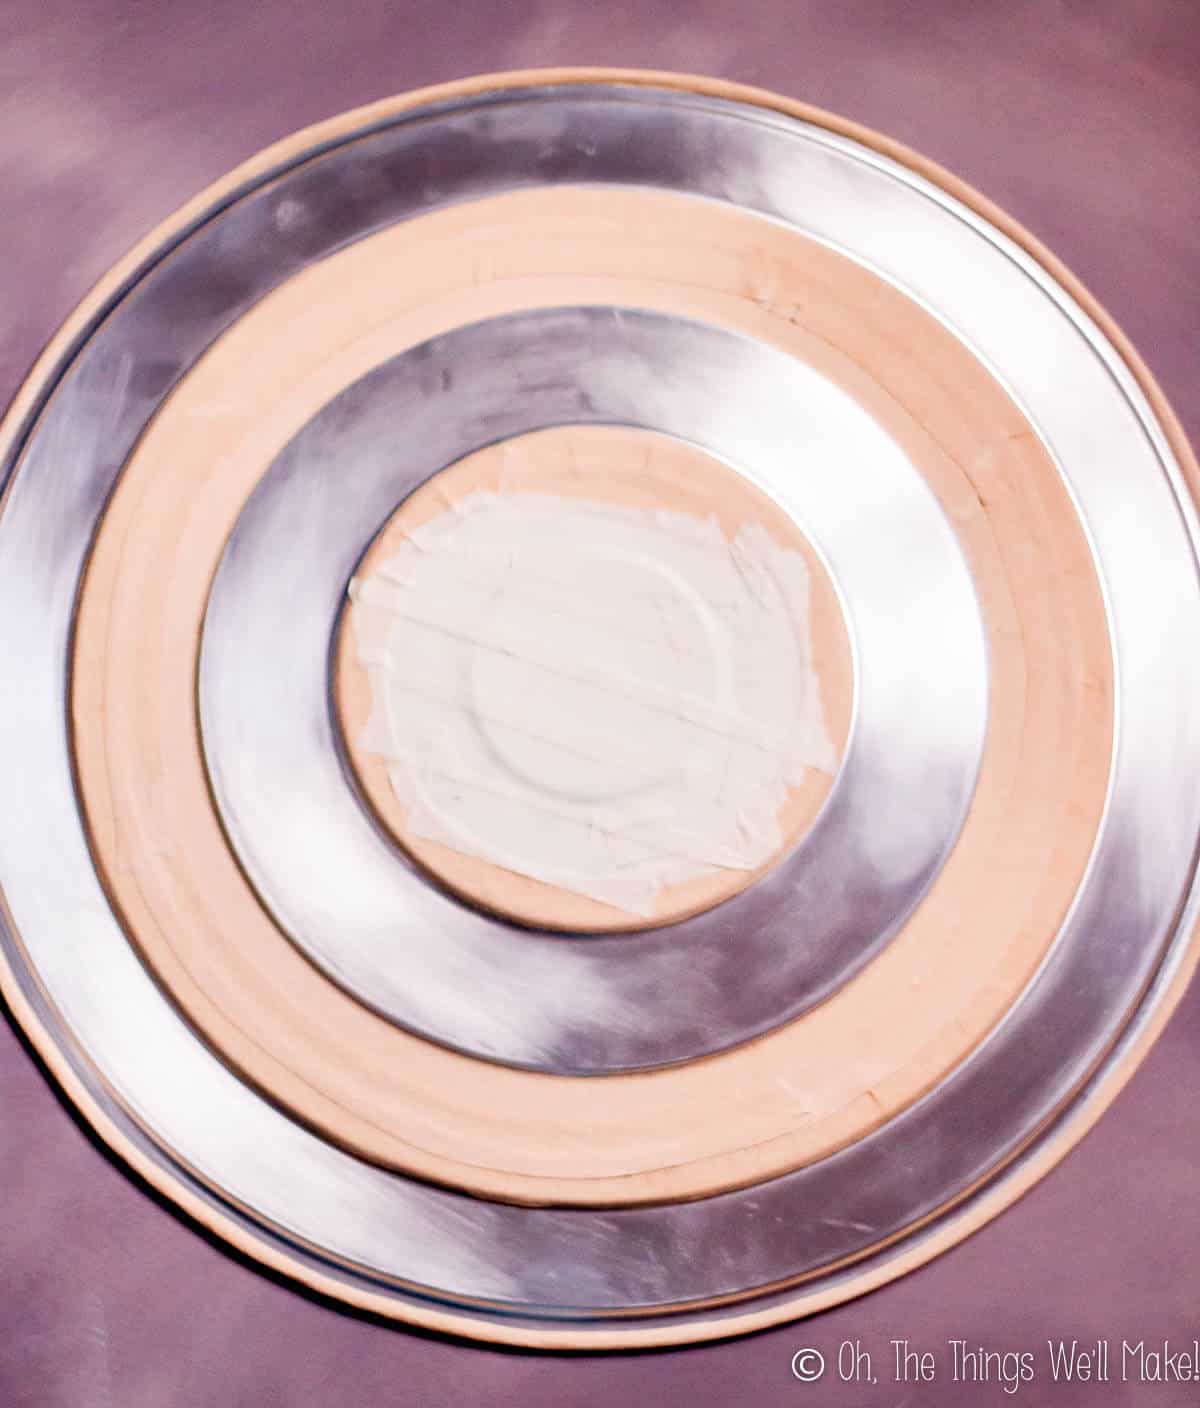
4. Mask off the smallest red circle in the middle of the shield and remove the tape in the center section.
Measure the diameter of the silver center section to cut a star that fits.

5. Cut a star out of contact paper in a size proportional to the small circle in the center of the shield.
I used a clip art star and resized it to fit my shield in photoshop. I then printed it out and used it as a pattern to cut the contact paper.
6. Carefully place the star in the center section and painted around it with blue paint. You can either mask off the rest of the shield and use spray paint or paint it by hand.
7. Once the blue paint dries, remove all of the masking tape and contact paper.
8. Add a handle by drilling holes through the shield and aattaching a drawer pull handle to the back of the shield.
I removed the little black handle that came with the lid, leaving a hole in the center. If you have a similar issue, you can try covering it up somehow if you like, but I just left it alone.
Printable Instructions
Captain America Shield
You’ll Need:
- 1 Tray or pan cover
- spray paint or enamel paint (red, blue)
- contact paper
- corrugated making tape
- 1 drawer pull
Instructions
Painting the shield
- Measure your tray or lid.
- Print out a Captain America shield logo design in the size that corresponds to the tray or lid chosen. This will be your pattern. Cut the sections of the logo out of contact paper.(If you are using a lid with circle markings, you can skip this step.)
- Using the cut sections of contact paper, cover any areas that should be white or blue on the shield to protect them. (If using a lid with marked circles, use corrugated masking tape to follow the marked circles, covering any areas that should be white or blue.)
- Paint the exposed areas of the shield with red paint and allow it to dry thoroughly.
- Cover the smallest red circle with either contact paper or masking tape.
- Remove the tape or contact paper of the smallest circle section, leaving the star in place if you used a contact paper logo. (If not, cut a star out of contact paper and place it in the center of the shield.)
- Paint the area around the star with blue paint. (If using spray paint, make sure to cover any other exposed areas first.) Allow the paint to dry.
- Remove all tape and contact paper.
Adding a handle
- Place the drawer pull handle in the center of the back of the shield in a place where it would be comfortable to hold it. Mark the areas where it touches the shield with a pencil.
- Drill small holes in the marked areas.
- Push the screws that came with the drawer pulls up through the holes from the front of the shield. Screw them into the drawer pull.
- Enjoy your new shield!
Notes
- Touch up any areas where paint has seeped underneath the contact paper or masking tape by rubbing a cue tip with paint thinner lighly over those areas until the stains are gone.
- If using a metal lid, sand it before painting it. This gives the metal a cool matte look and also help the paint adhere better.
- If you prefer, you can paint over the metal areas with white paint, but I think it looks super cool with its metallic finish!
I hope you can find the perfect plate, platter, or lid for making an easy Captain America shield for your favorite superhero!
*This post was originally published Oct. 26, 2015. It was updated in October 2019 with clearer instructions, printable instructions, and new photos.


Sister,I have tried making shield and helmet as during lockdown I didn’t go to market and tried with the things which are available at home.when I will finish with all things,I will send you images.all inspired from your blog.
thank you
Hi Pratima,
Thanks so much!
I’d love to see the pictures. You can send them to [email protected]!
Very nice! I made a shield out of the lid of an Ikea waste basket (KNODD, smaller version). We just put the handle on the inside and painted the lid.
The basket itself contains all swords and sticks the boys collected over the years.
Awesome, Angela!
I love IKEA hacks! 🙂