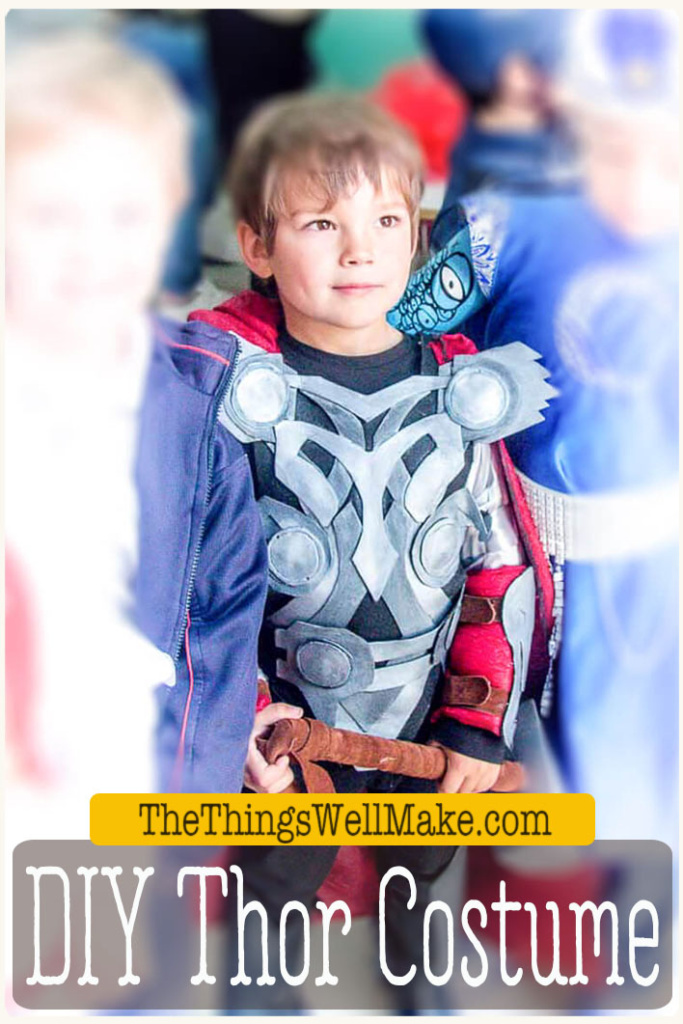
With a bit of hot glue, craft foam, felt, and paint, you can whip out this fun DIY Thor costume complete with a homemade hammer, vambraces, and helmet.
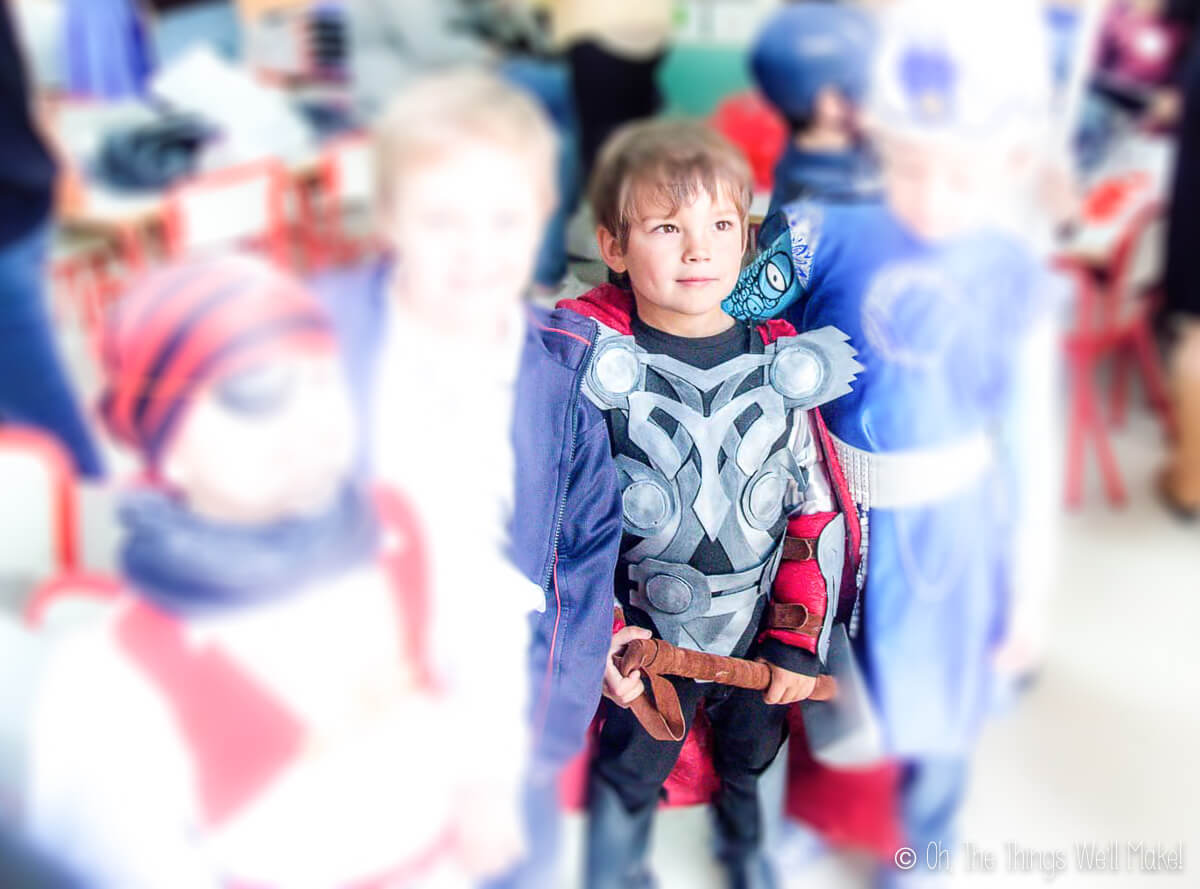
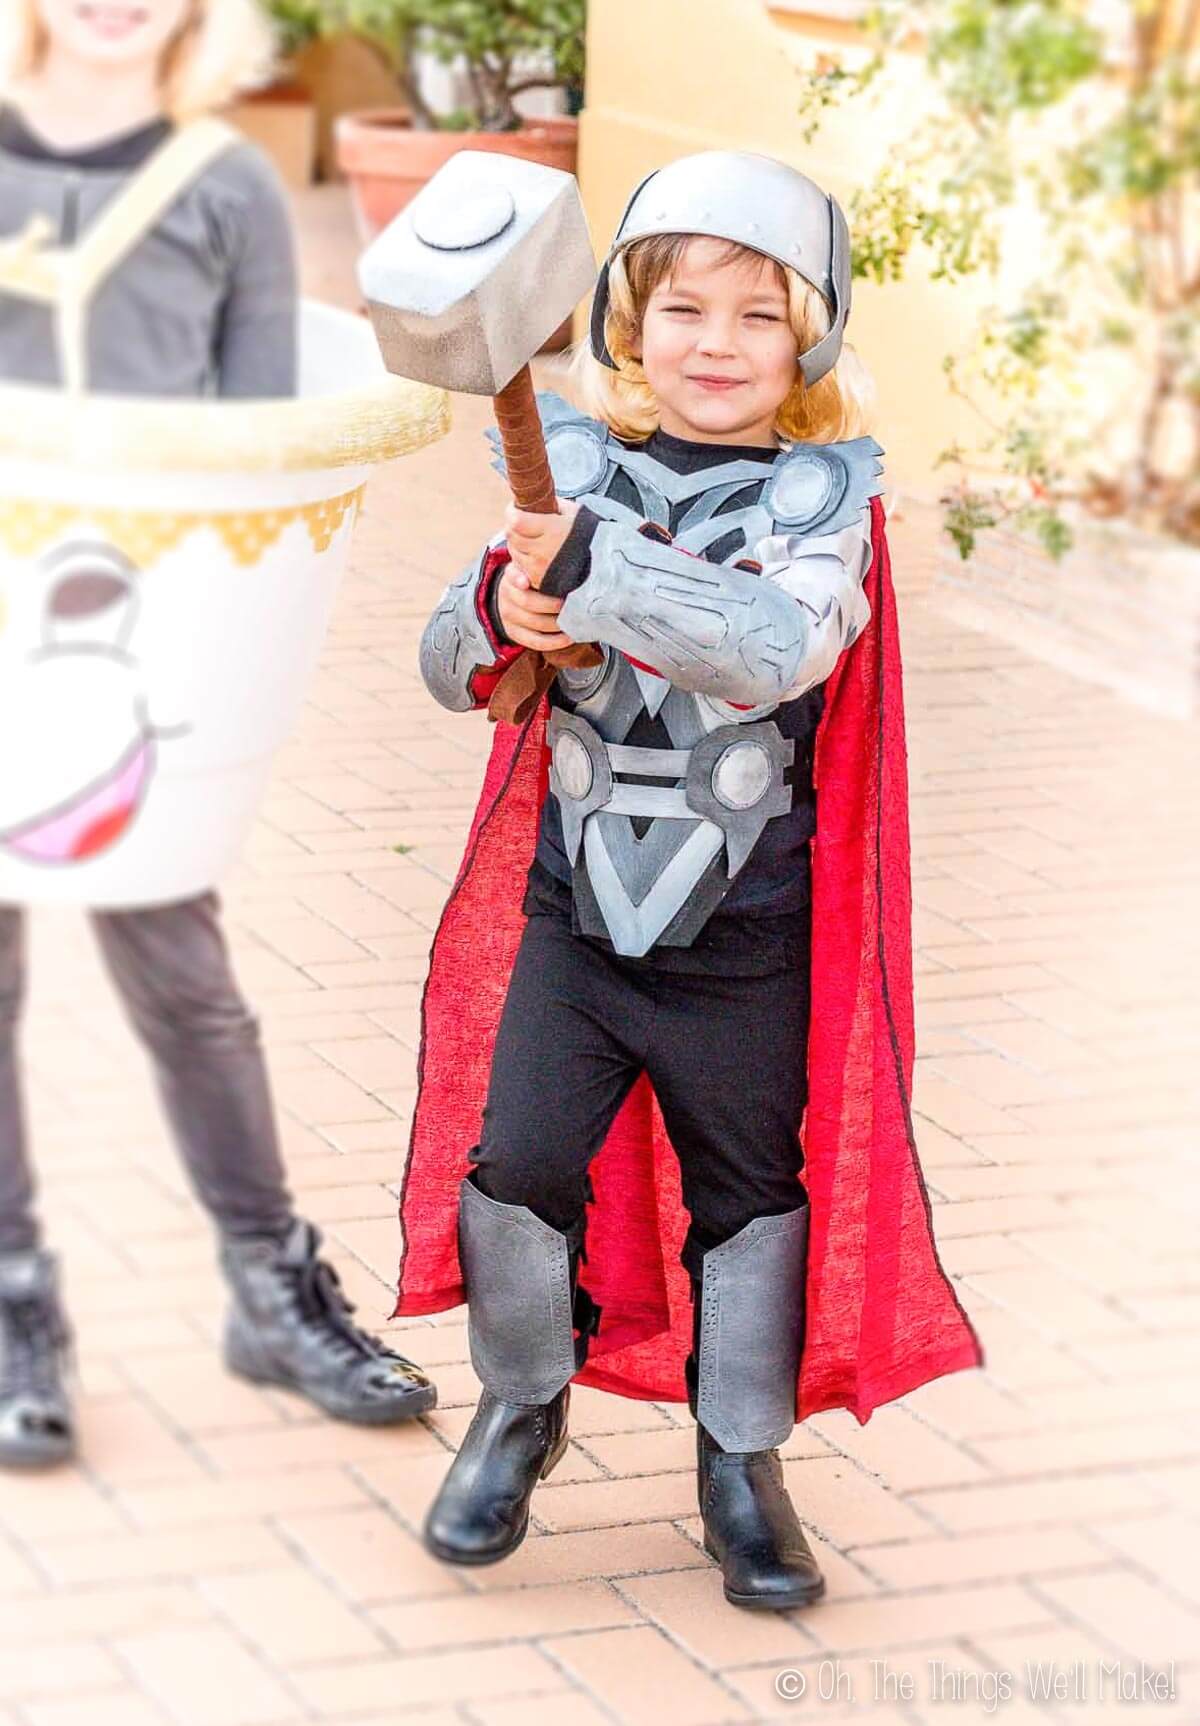
With Halloween coming soon, I wanted to update this post on how I made my son’s Thor costume several years ago. I allowed my son to choose his costume idea, and he liked the idea of being one of The Avengers. Since we had already made a Captain America costume the year before, we decided on Thor.
I should have planned on documenting the process better, but at the time, I wasn’t thinking about the blog and was focused on making his costume. I think it turned out really well, though, so I wanted to share this project with you as best I can after the fact. I’ll also fill you in on things I would have done differently if I were to make it again!
(For more ideas, I also have a post about how to make Superman or Batman costumes.)
How to make Thor’s Hammer
No Thor costume would be complete without his iconic weapon of choice, the Mjollnir (aka. hammer).
To make it, you’ll need:
- Floral foam
- Packing or duct tape
- Newspapers
- White glue
- Wooden dowel (In the desired width and length for the handle)
- Wall putty (spackling)
- Black and silver acrylic paint
- Suede
- Hot glue or other strong glue
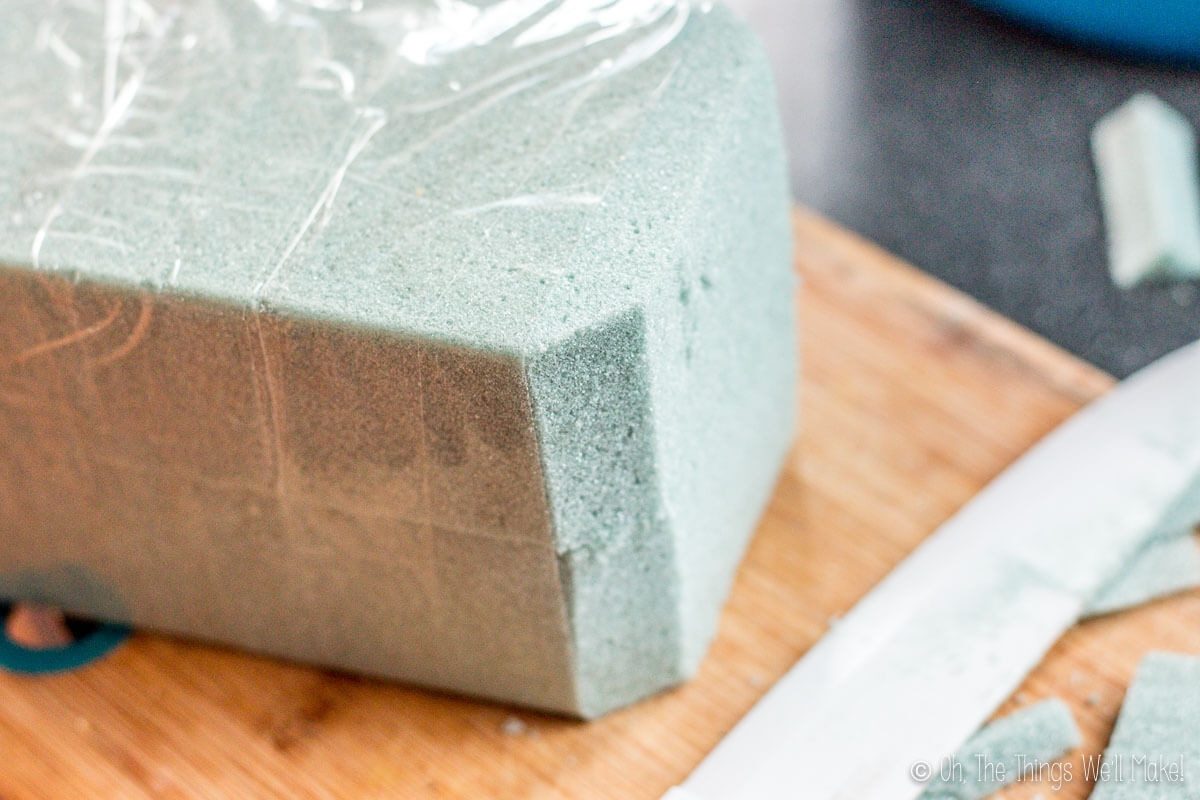
To make the hammer as I did, cut some floral foam into the general shape of Thor’s hammer. If you don’t want to use floral foam, you could use something else such as styrofoam. Wood would make a more rugged yet heavier hammer, you could also use wood.
I could only find thin sheets of floral foam, so I layered two pieces together and, after slicing off the corners, held everything together with packing tape.
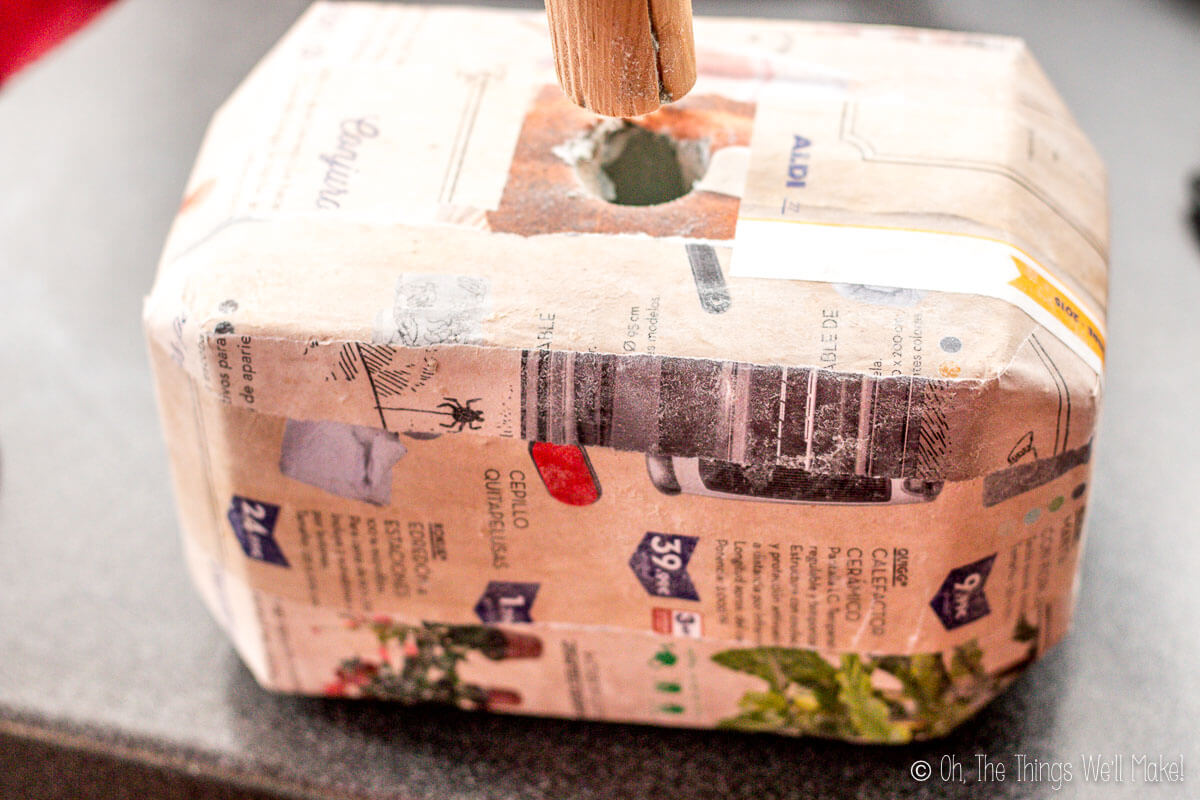
Once you’ve formed the shape of the hammer, cover it with several layers of paper mache. I used a mixture of white glue and water for the paper mache, rather than flour and water, to try to keep the hammer as smooth as possible. Once dried, I pushed a dowel into the center of the hammer to use as the handle.
Because the craft soam compresses easily, I added some paper mache inside the hole to strengthen it and make the handle more secure. I used paper towels, rather than more newspaper, because I found it easier to push them into place with the dowel. If you use a more durable material like wood, this step wouldn’t be necessary.
Once the paper mache is dry, glue the handle in place.
To give the hammer a smoother surface, cover it with some wall putty. You could also use some fiberglass filler. when dry, sand the entire surface.
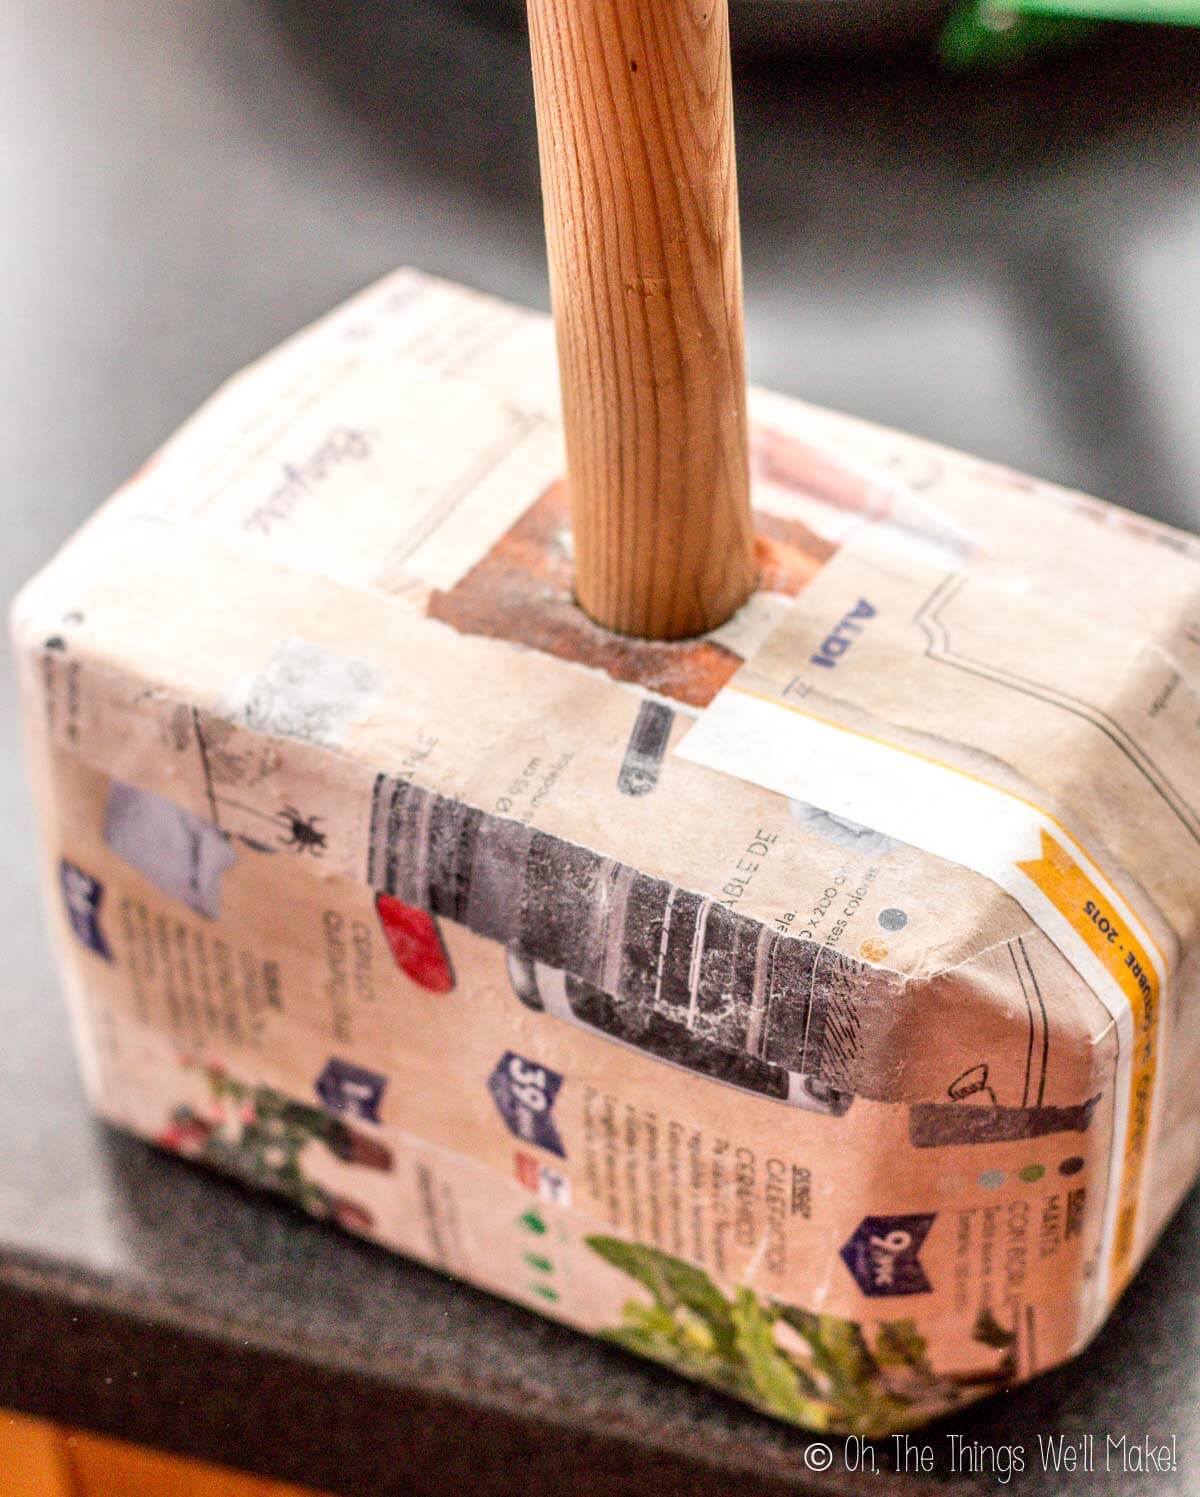
Here you can see the hammer with the dowel inserted. 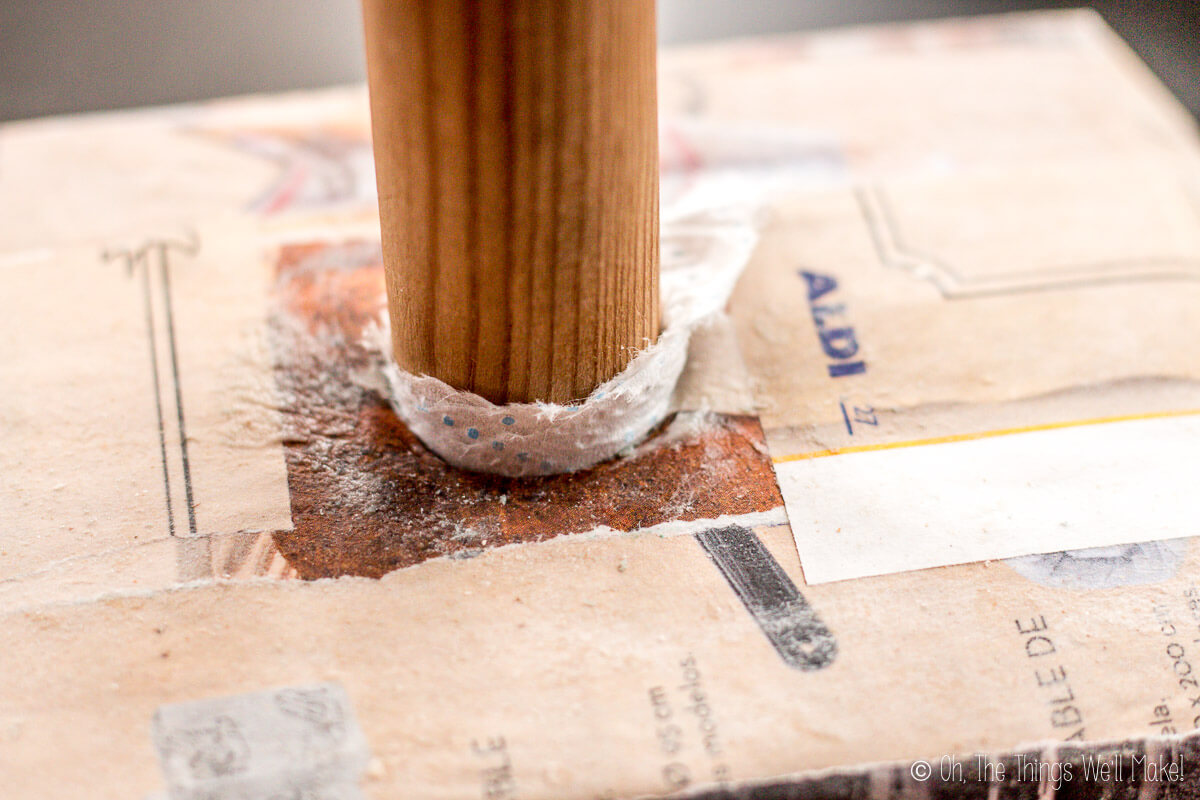
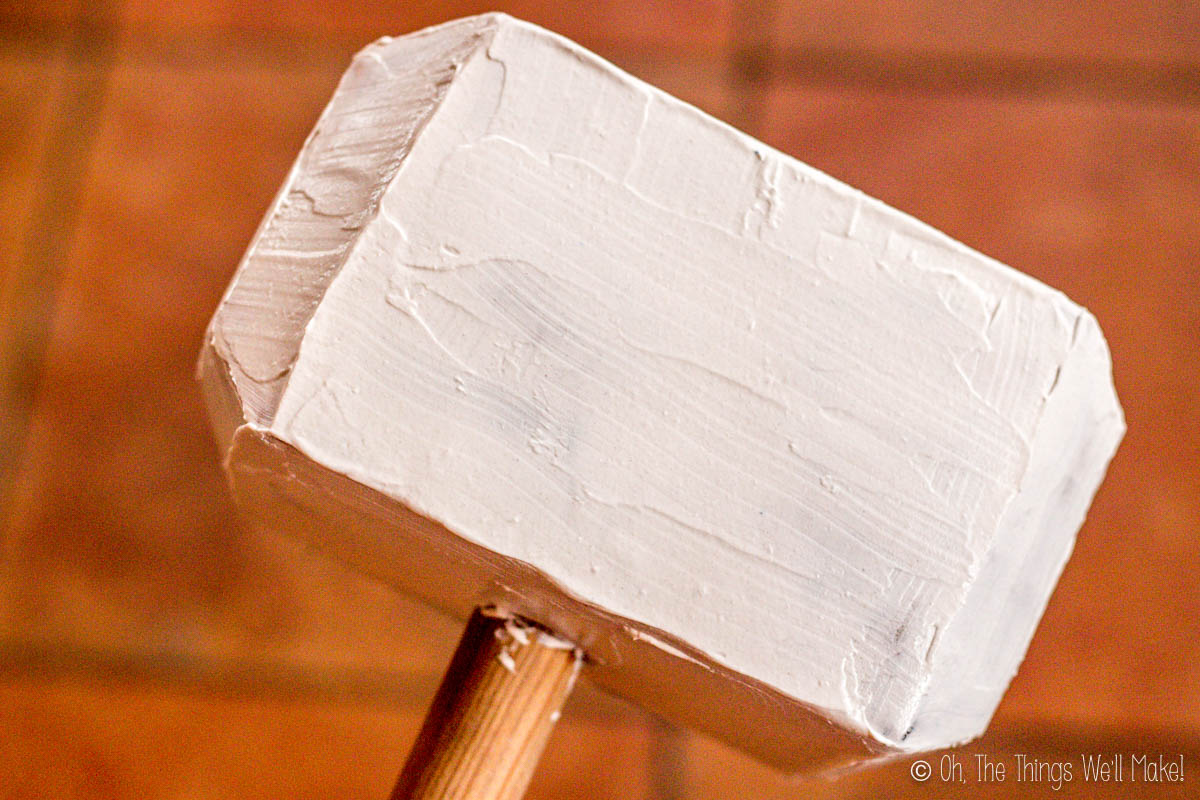
If you look at photos of Thor’s hammer, you’ll see that it has a round disk on the top. To reproduce that, I cut a cardboard disk and covered it with the same wall putty. I then glued the cardboard disk to the top of the hammer.
Finishing the hammer
After gluing it together, I painted the entire hammer black.
Once the black paint had dried, I covered it with a layer of silver spray paint. I intentionally allowed some black to show through, making the hammer look more realistically metallic.
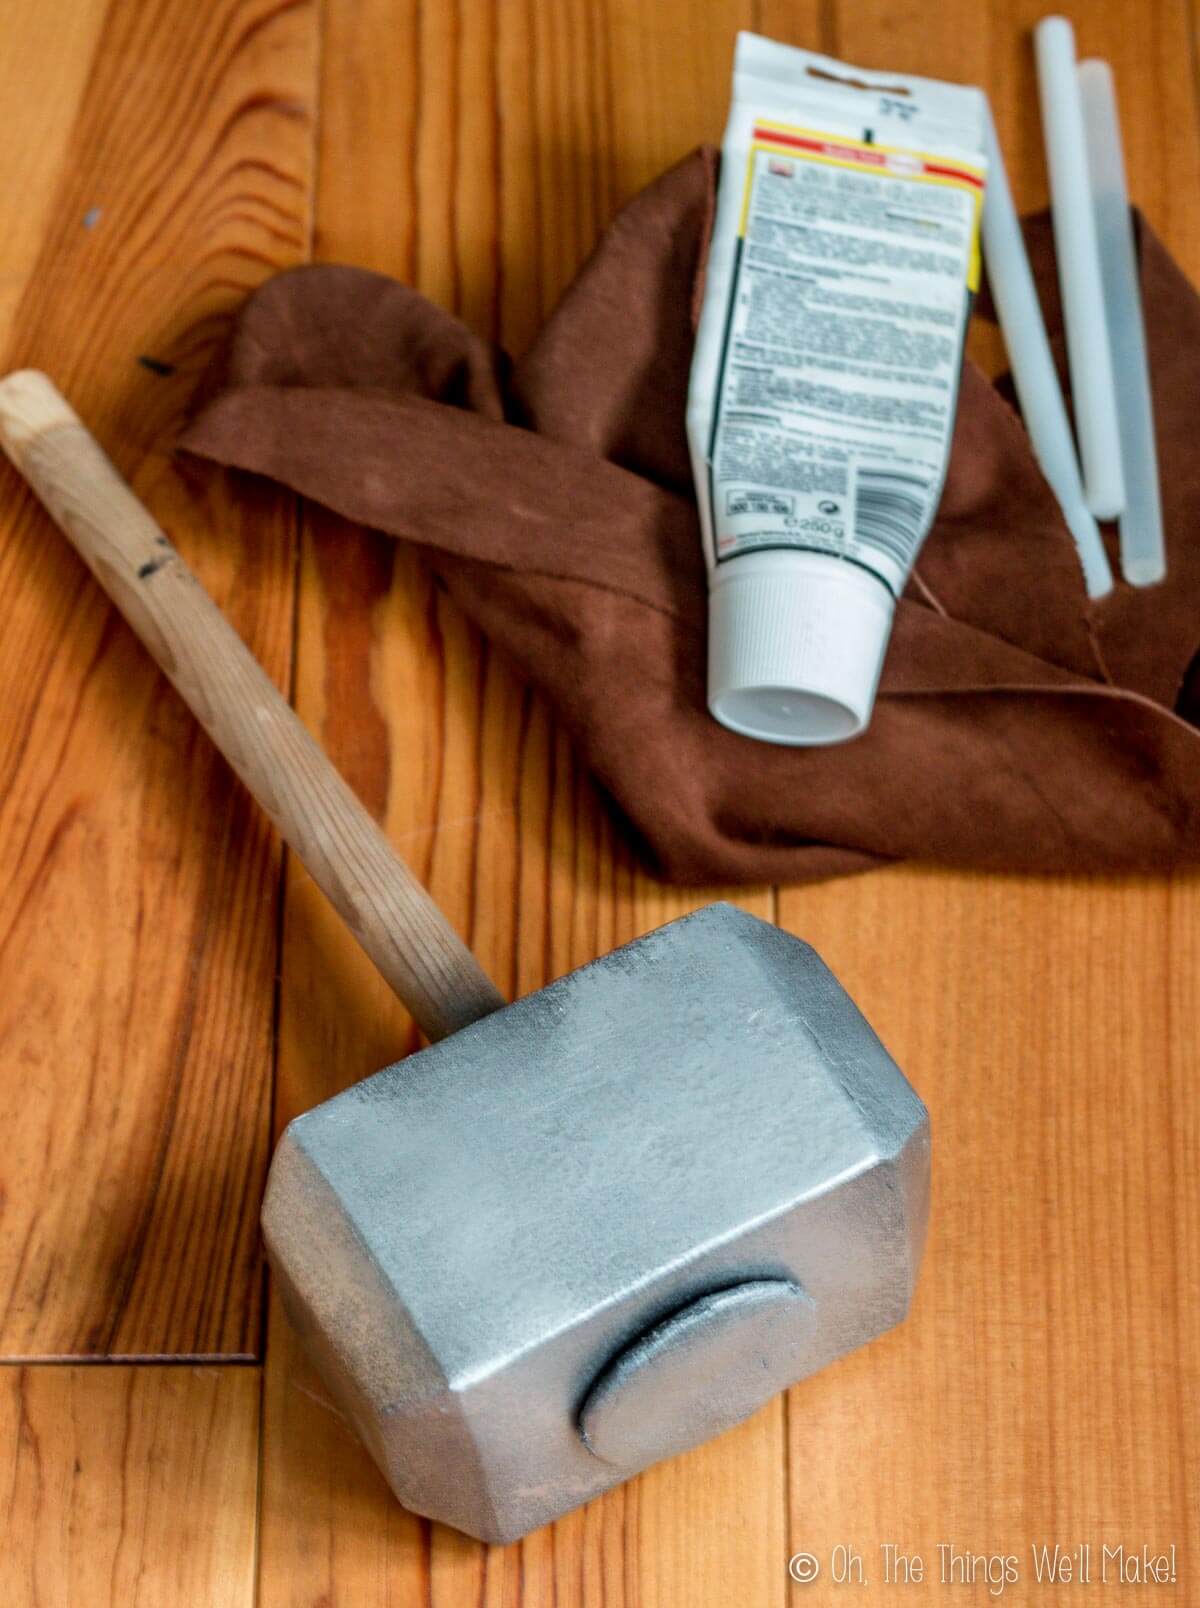
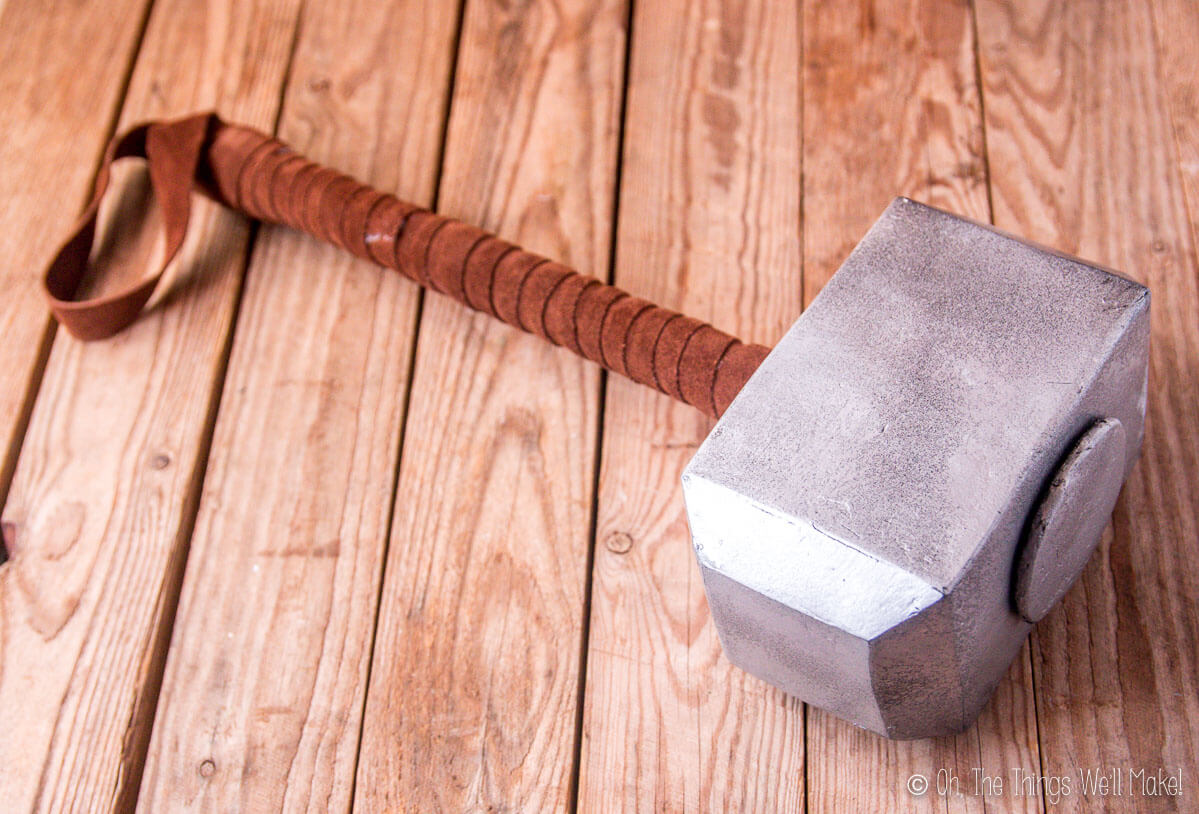
After the silver paint dried, I cut thin strips of brown suede, and used a combination of hot glue and other glues to wrap the handle of the hammer with it.
Thor’s Chest Armor
I decided to make Thor’s chest armor out of felt and craft foam using pictures of different Thor costumes to guide me. I took bits and pieces of what I liked from different ones, but I later realized it wouldn’t be acceptable for those who do serious cosplay. (They work to recreate specific costumes exactly, using the same sleeves with the same chest plate with the same boots, etc.)
Because this was a kid’s Halloween costume for school, I wasn’t too worried about it, but make your own costume accordingly.
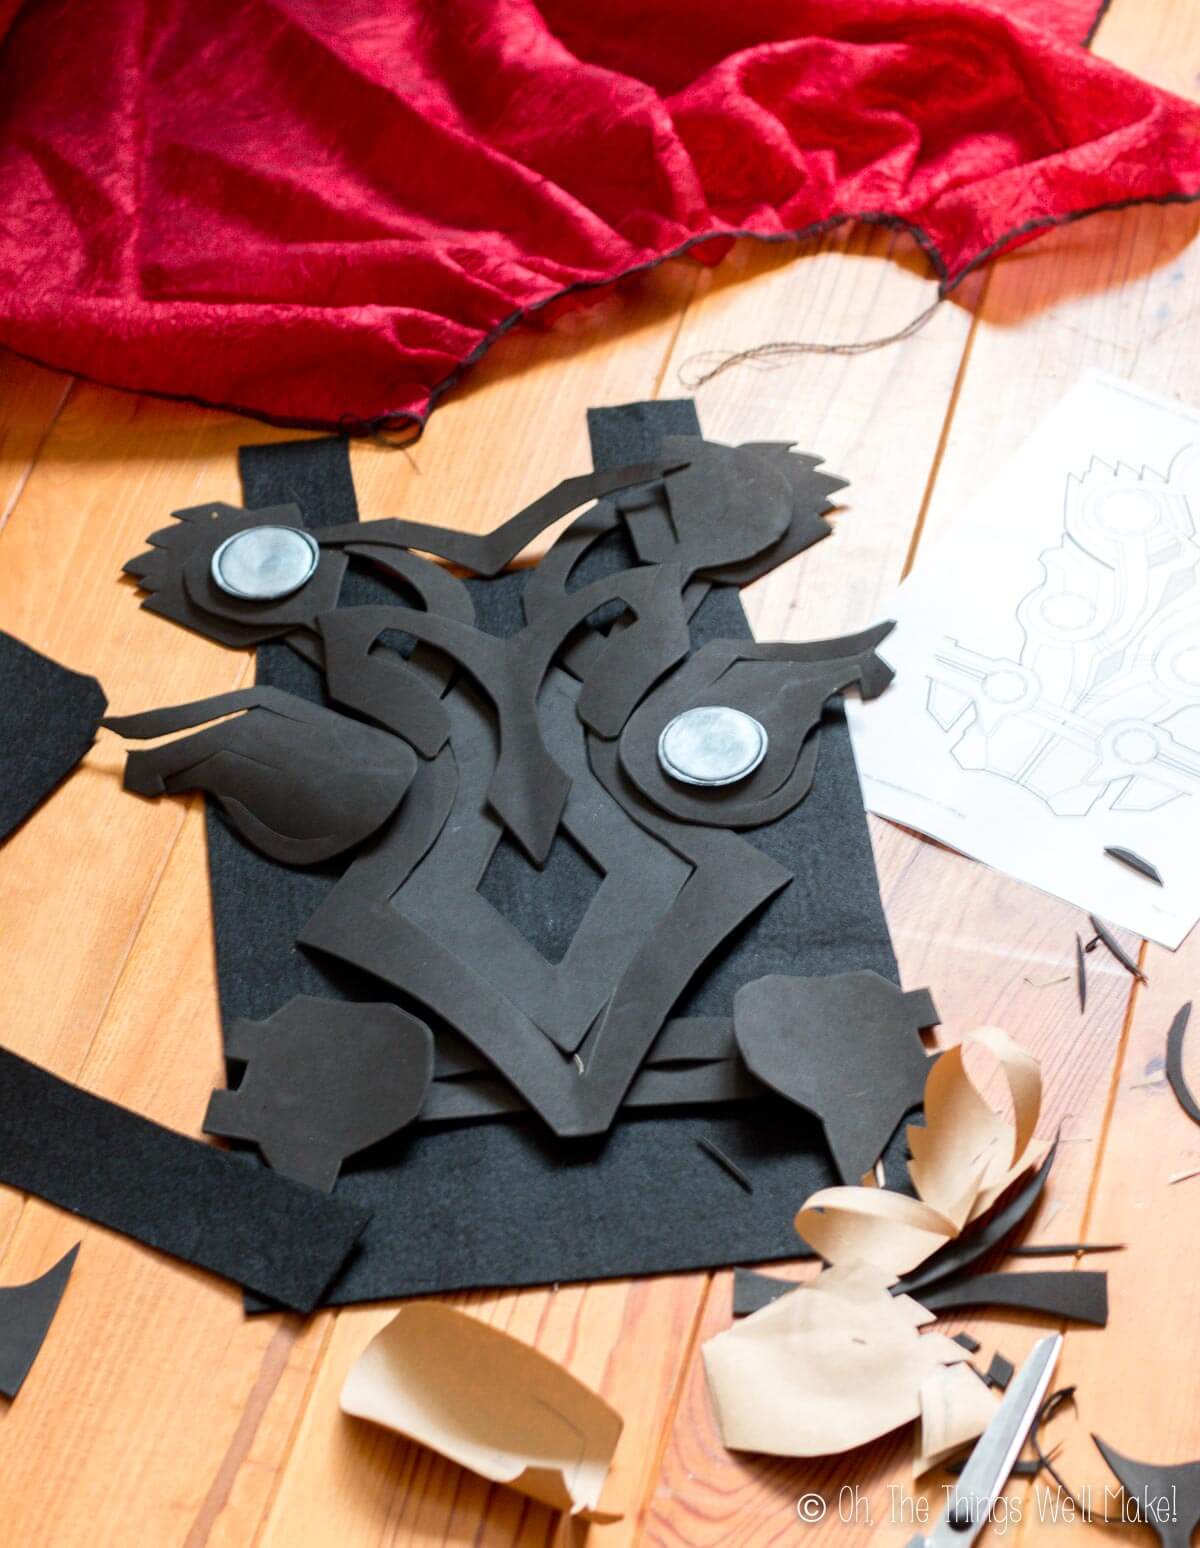
To make Thor’s chest armor, you’ll want to decide on a design. At first, I made up my own design, but later found this diagram for Thor’s chest armor which would be a great guideline for making your own. To use it, print it out after increasing size according to the size of the wearer. (Measure the person who will be wearing the costume to get an idea of how large you need it.)
Trace out the pieces onto craft foam and cut them out. I used black craft foam which I later painted with silver acrylic paint.
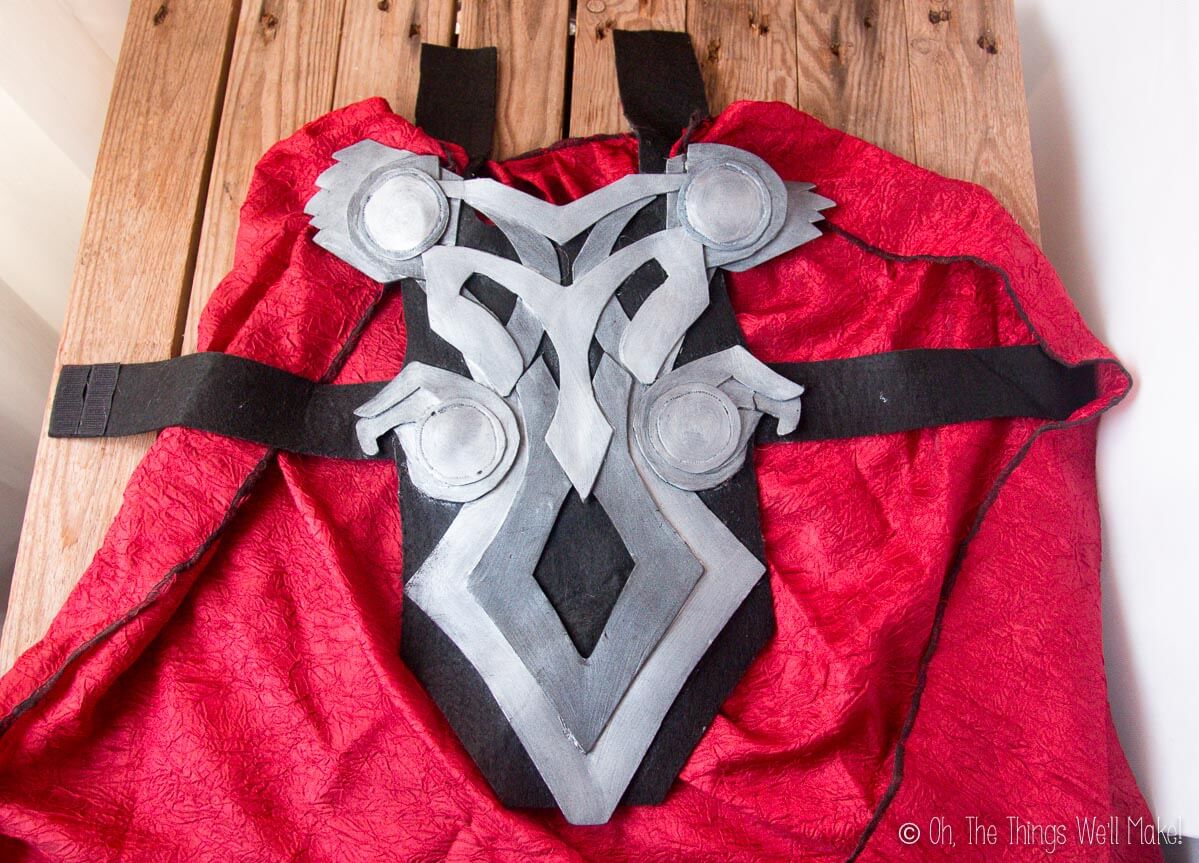
After measuring across my son’s chest and down just past his waist, I cut a rectangle of felt out in that size. I then cut out armholes and a neck hole so that the felt piece resembles the front of a tank top. Using a hot glue gun, I glued the craft foam pieces to the felt piece.
To hold the armor in place, I cut out strips of felt and hot glued those to the upper waist area. I then hot glued velcro to those strips so that we could easily fasten the chest armor behind his back. The top part was held in place with the cape using safety pins. I left the felt long on the shoulders to help bulk up the cape in the shoulder area.
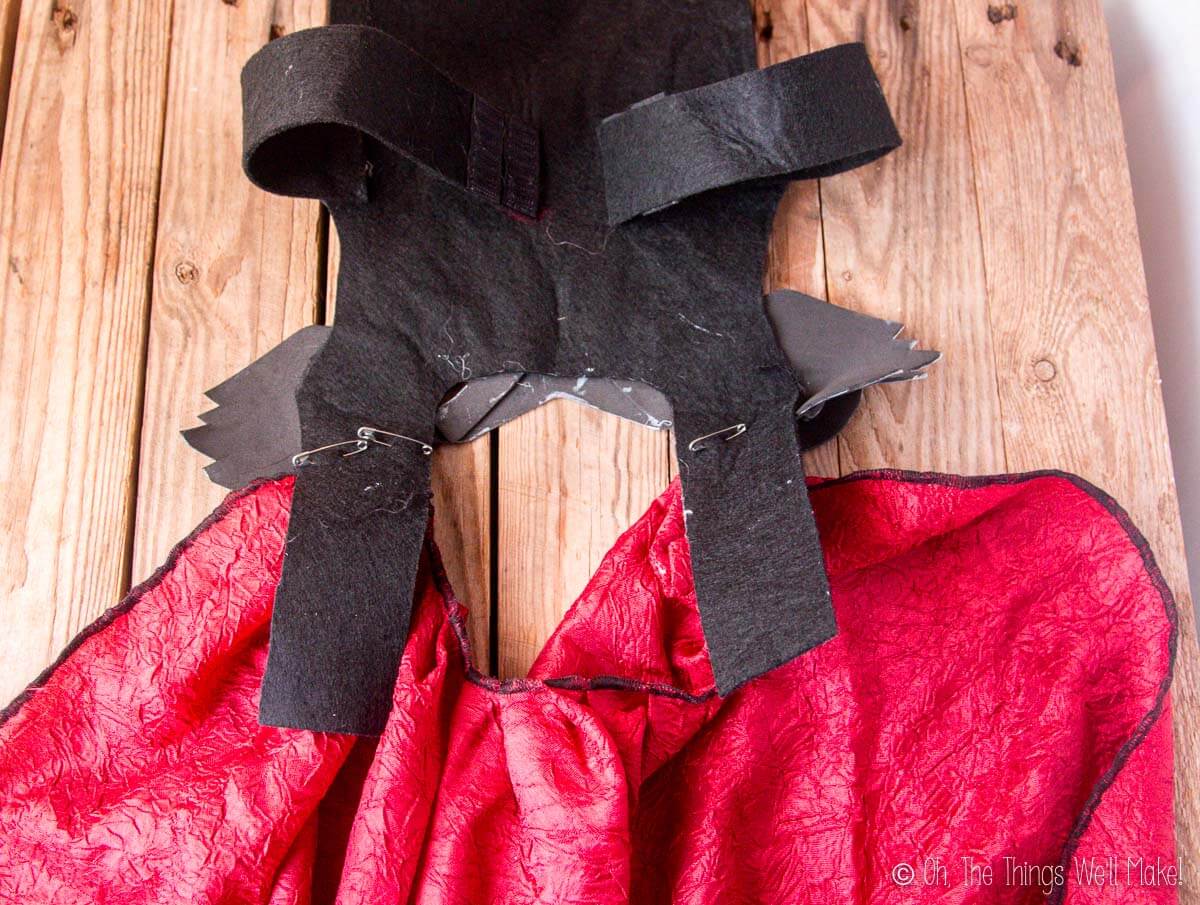
Thor’s Cape
I quickly threw a cape together by cutting a rectangle of bright red curtain fabric. (You can find cheap fabric by upcycling things you find at a thrift shop!)
To make the shape of the cape, take the top seam and fold it like a paper fan, making a series of pleats. Then, sew over the edge to hold the pleats in place. (I used a serger to cut off the excess fabric as I sewed. To finish off all edges, I serged around the entire cape. If you don’t have a serger, you can fold over the edges and sew them or use fusible seam tape to quickly finish the edges! (If using jersey fabric or polar fleece, there is no need to finish the edges.)
Thor’s Belt
The belt, like the chest armor, was made from craft foam and felt that hot glued together (and painted with silver paint). To give texture to the disks on the belt and chest armor, I used the tip of a soldering iron to burn a design around the edges.
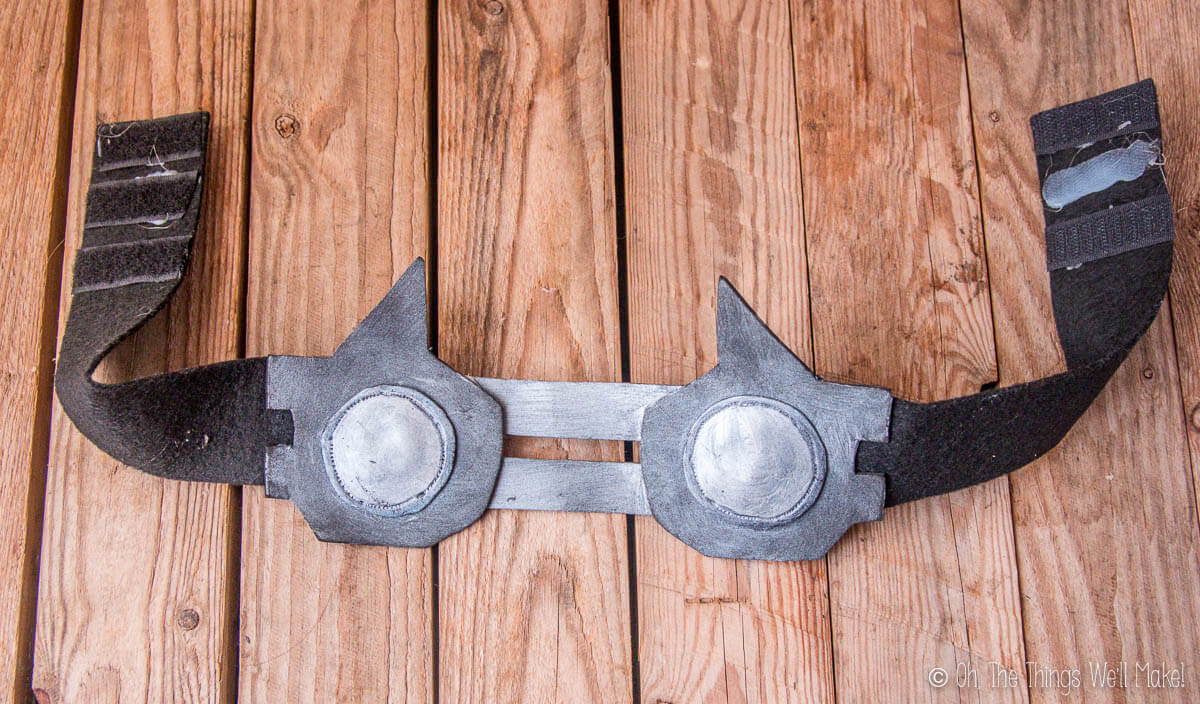
Thor’s belt as seen from the front. 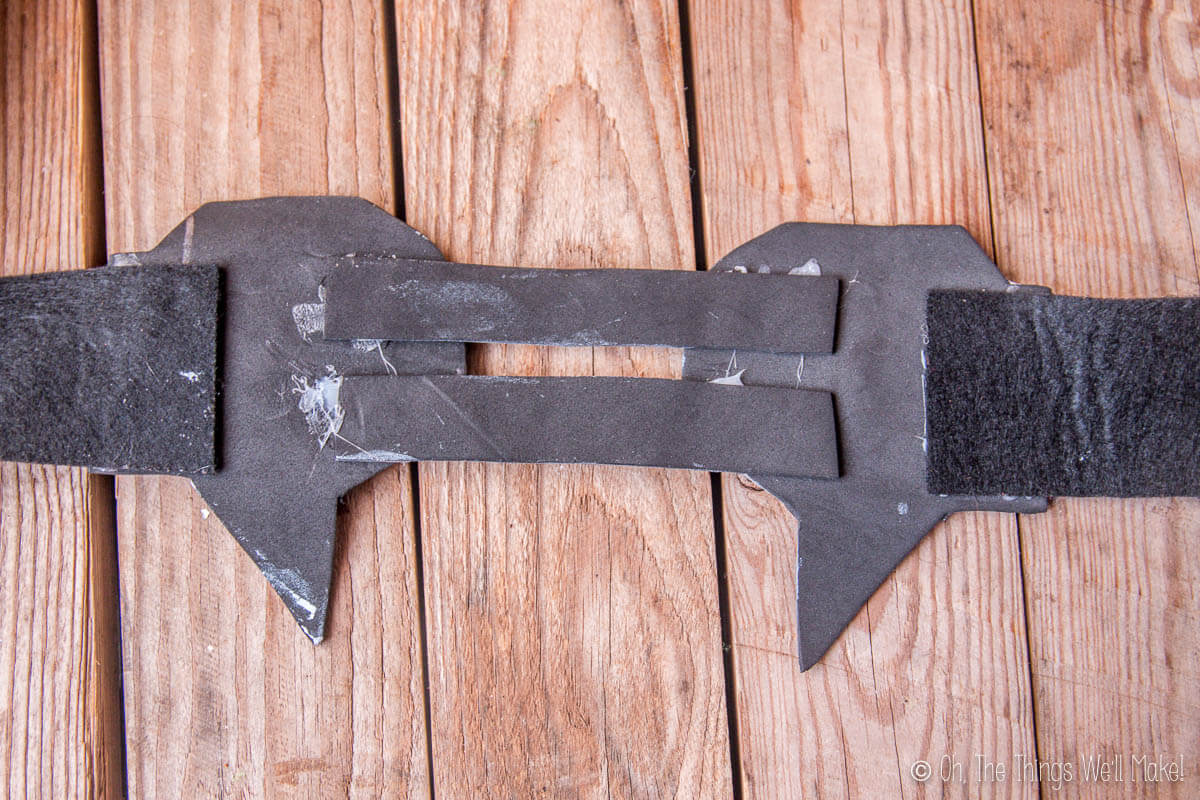
Belt from the back.
At one point I was going to glue the bottom “belt” onto the bottom part of the armor, but I decided to leave it as a separate belt so that my son could adjust it as needed for comfort. There is a caveat to doing it that way: it shifts a bit from one side to the other every once in a while because, well, kids move a lot. 🙂 So, I’d probably do it the same way again.
How to Make Thor’s Vambraces (Arm braces)
To make the design for the vambraces, I looked for online patterns and found this pattern on another blog. After shrinking it to fit my son, I traced it onto two pieces of craft foam, one layered over the other, and glued them together. I, once again, used black craft foam and painted it silver.
To “cut” the line details into the design, I once again used the tip of a soldering iron to burn the design.
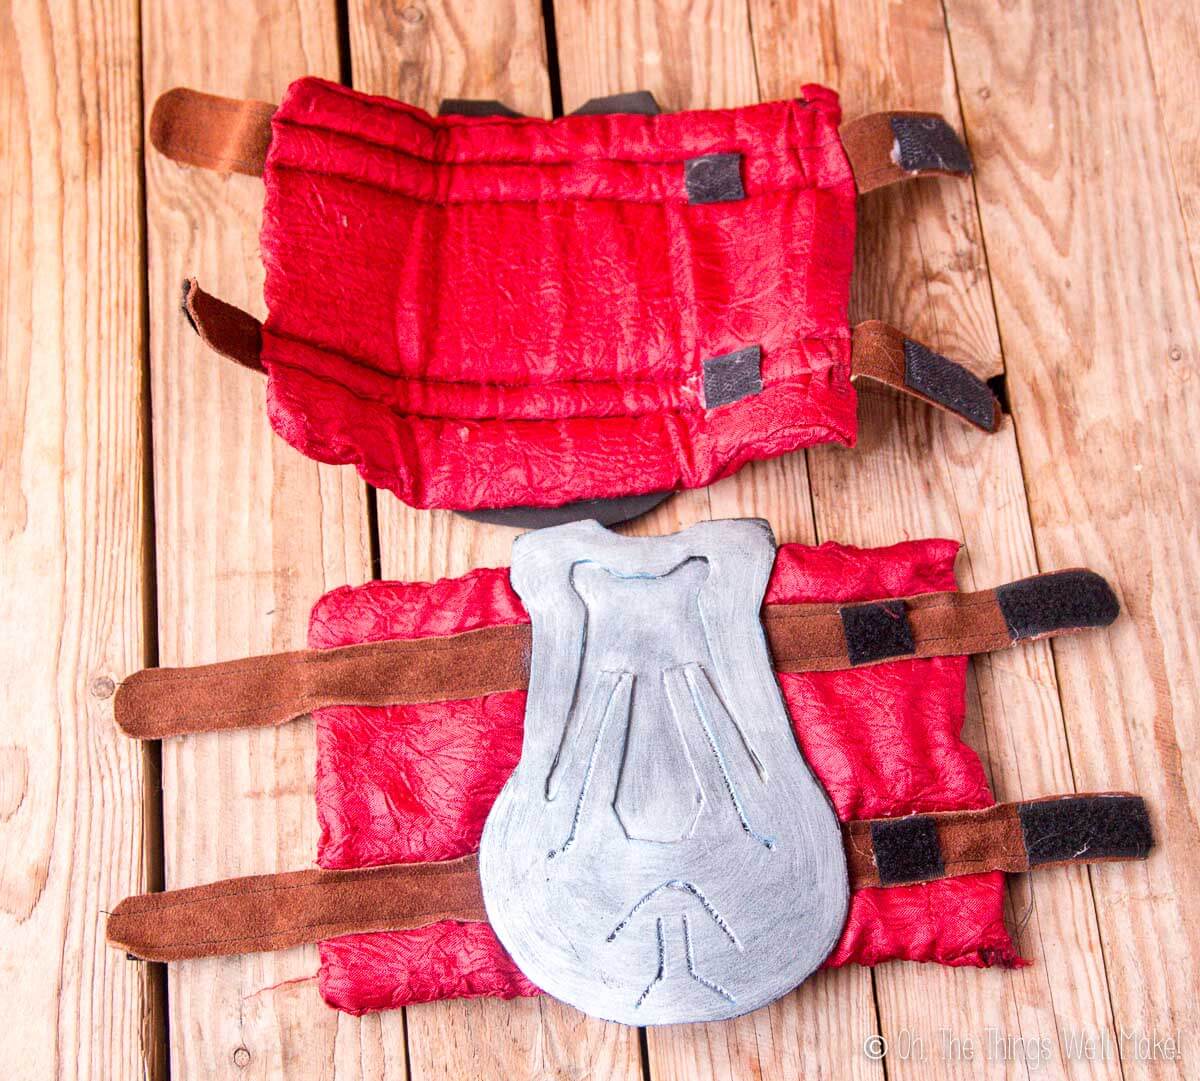
To fasten them, I cut two rectangles for each arm out of some leftover cape fabric. The rectangles were wide enough to wrap around my son’s forearms and had the height of the craft foam vambrace.
After layering the two rectangles on top of each other with the right sides of the fabric facing each other, I sewed around the edges, leaving a small gap on one side for flipping the fabric right side out. I then flipped the fabric right side out and filled the space with some quilting batting. Then, I hand sewed the opening shut.
For fastening, I used strips of suede leather and cut them to be just longer than the cloth rectangle, long enough to fasten around my son’s arms. I was going to use buckles to fasten them and make them look more realistic but was in a hurry so I just hot glued velcro in place to fasten them instead. Using my sewing machine, I sewed the leather strips onto the red rectangles, sewing over the velcro to further reinforce it. I followed the stitching to the end of the leather strips for strength/appearance.
Once again, I used hot glue to glue the craft foam onto the cloth, completing Thor’s vambraces.
Thor’s Boots
Let’s be honest. I normally make homemade superhero boots. I’ve already shown you two different methods for making superhero boots, but this time wanted to try something different.
I had come across a pair of black boots on sale for super duper cheap and decided to save my time and buy them. (And, no, I never told my son they were girl’s boots!)
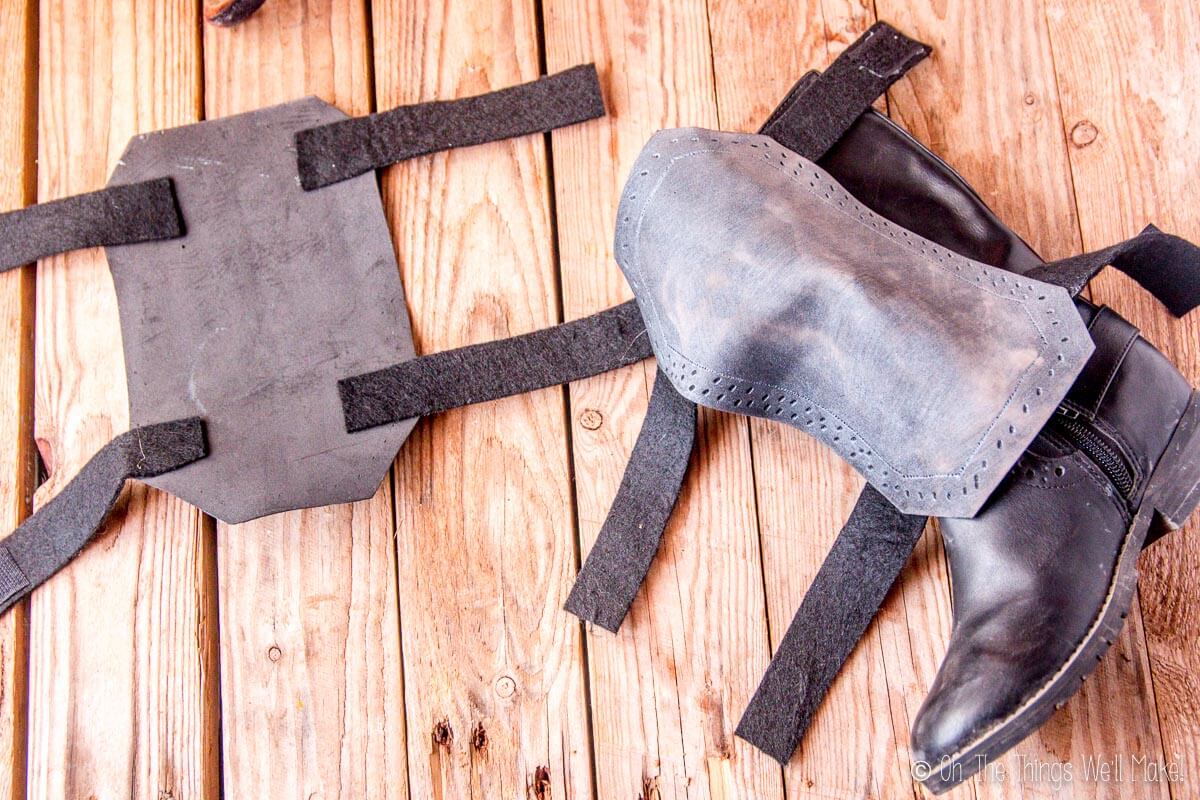
To make the girly boots manly enough for a powerful superhero, a used the vambrace idea and cut out craft foam plates that I could wrap around the top of the boots. I didn’t use a pattern, and just sort of followed the same idea, burning a design into the craft foam with my soldering iron and using felt and velcro to fasten them in place.
How to make Thor’s Sleeves
Thor wears silver patterned sleeves in the last movies, and I wanted to replicate that look but wasn’t sure how.
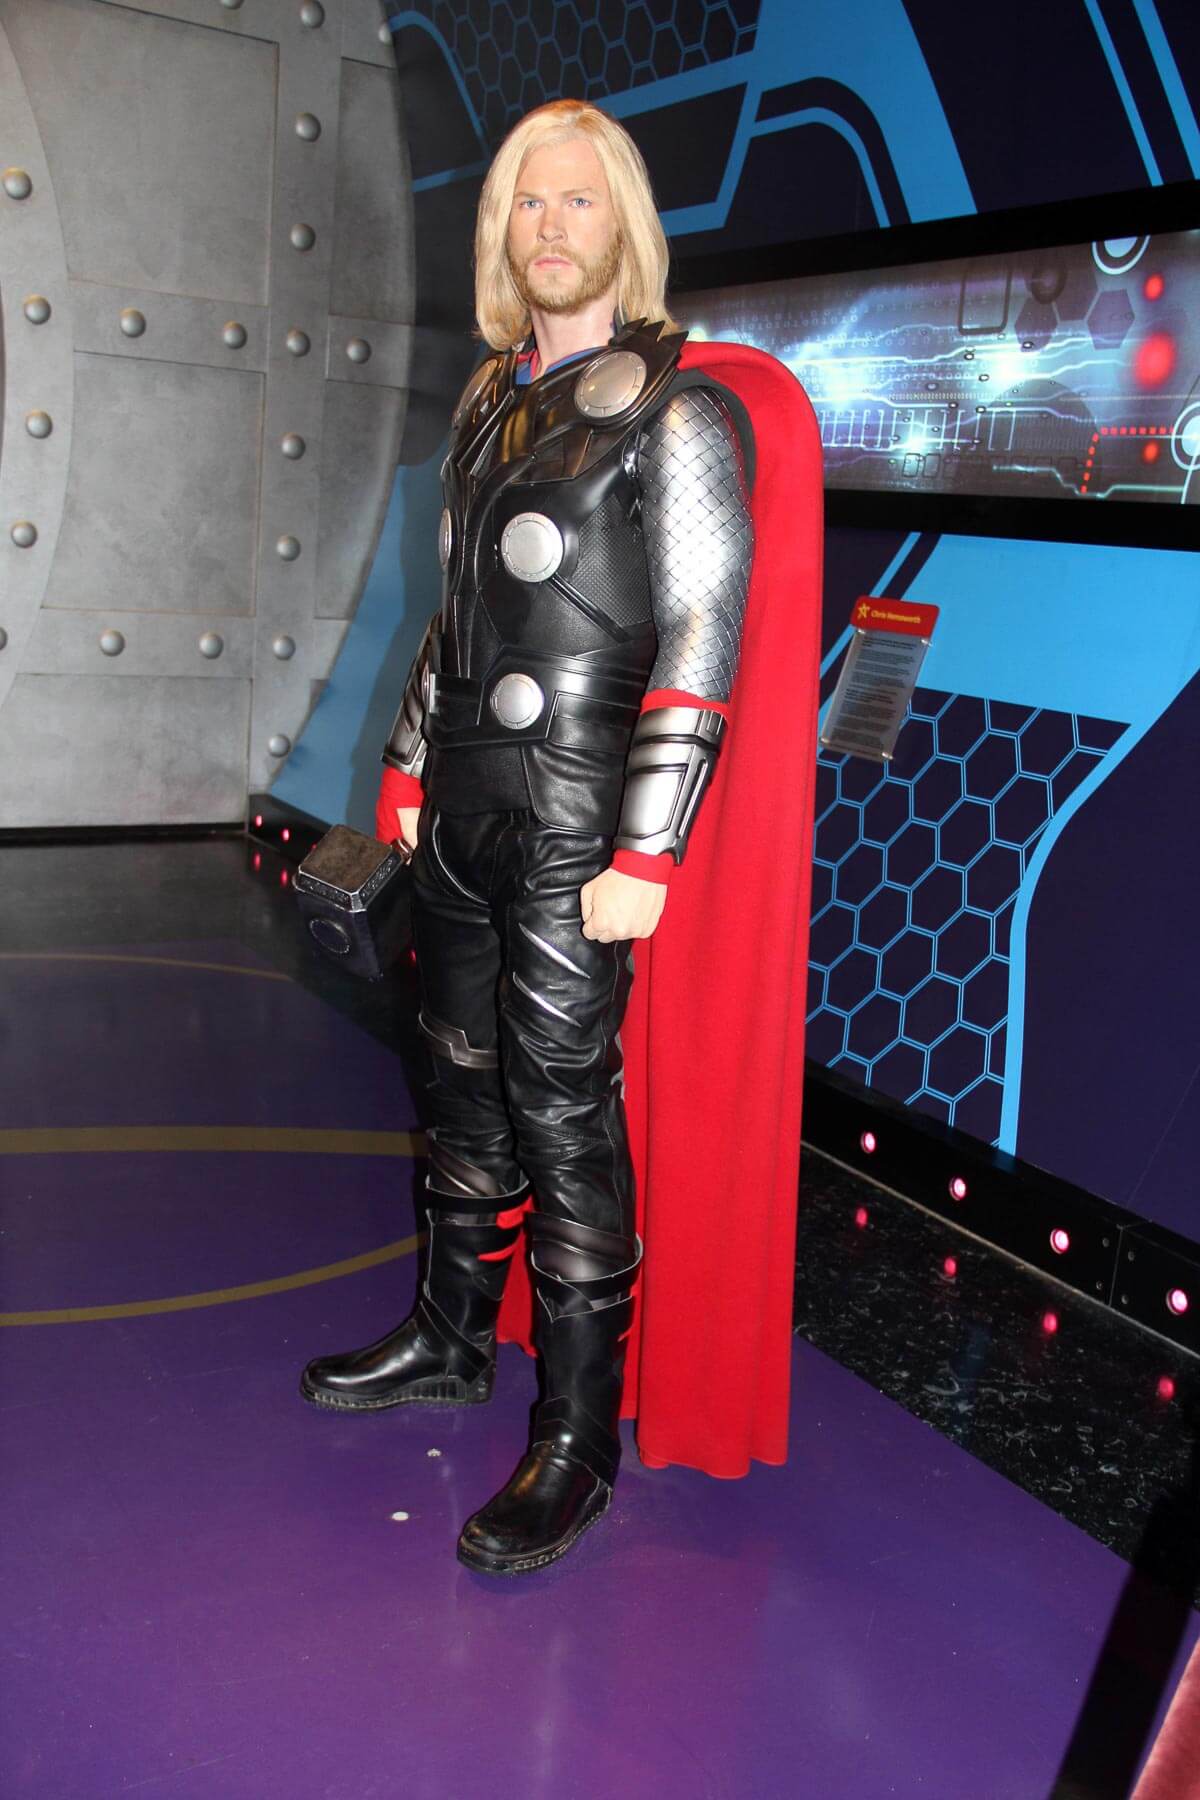
At first, I was going to make a square or diamond-shaped stamp out of craft foam. (We made similar stamps when we decorated our trick-or-treat bags.) I figured I could stamp silver diamonds all over black sleeves. That probably would have worked great and would have made a comfortable costume.
I also considered trying to wrap the sleeves in fishnet stockings with big squares. The idea was to spray silver paint over the stockings before removing them, leaving the perfect pattern behind. I liked the idea, but it sounded messy and I wasn’t sure it was going to work well.
In the end, I did something even more difficult and decided to weave a piece of fabric out of silver satin ribbons. I then sewed that fabric into sleeves that I attached to a black tank top!
Making the silver “fabric”
To make sleeves like mine, you’ll first have to weave 2 large panels out of silver ribbons.
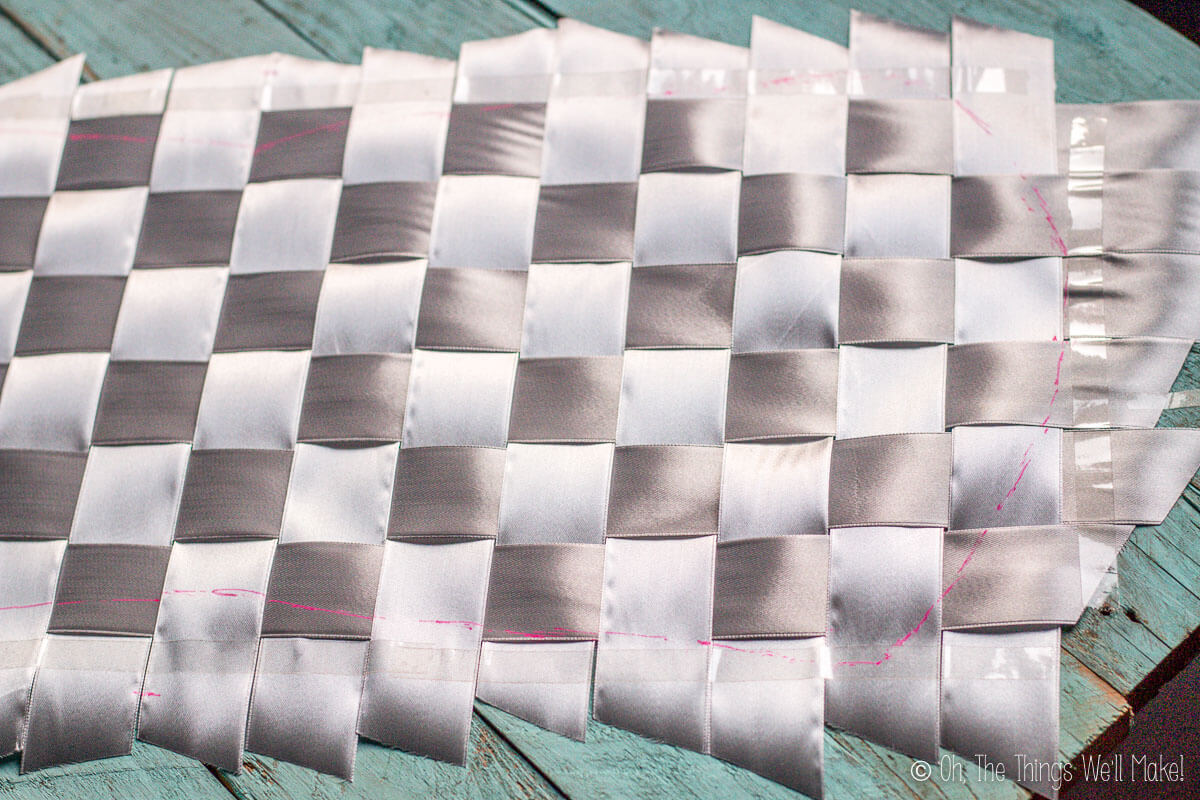
To make that ribbon “fabric” into sleeves, I traced out the shape of a sleeve of one of my son’s old shirts, leaving extra space for seams and movement. (The sleeve I traced was from a knit shirt which allows for more movement. The ribbon isn’t elastic, so the sleeve needed to be bigger.)
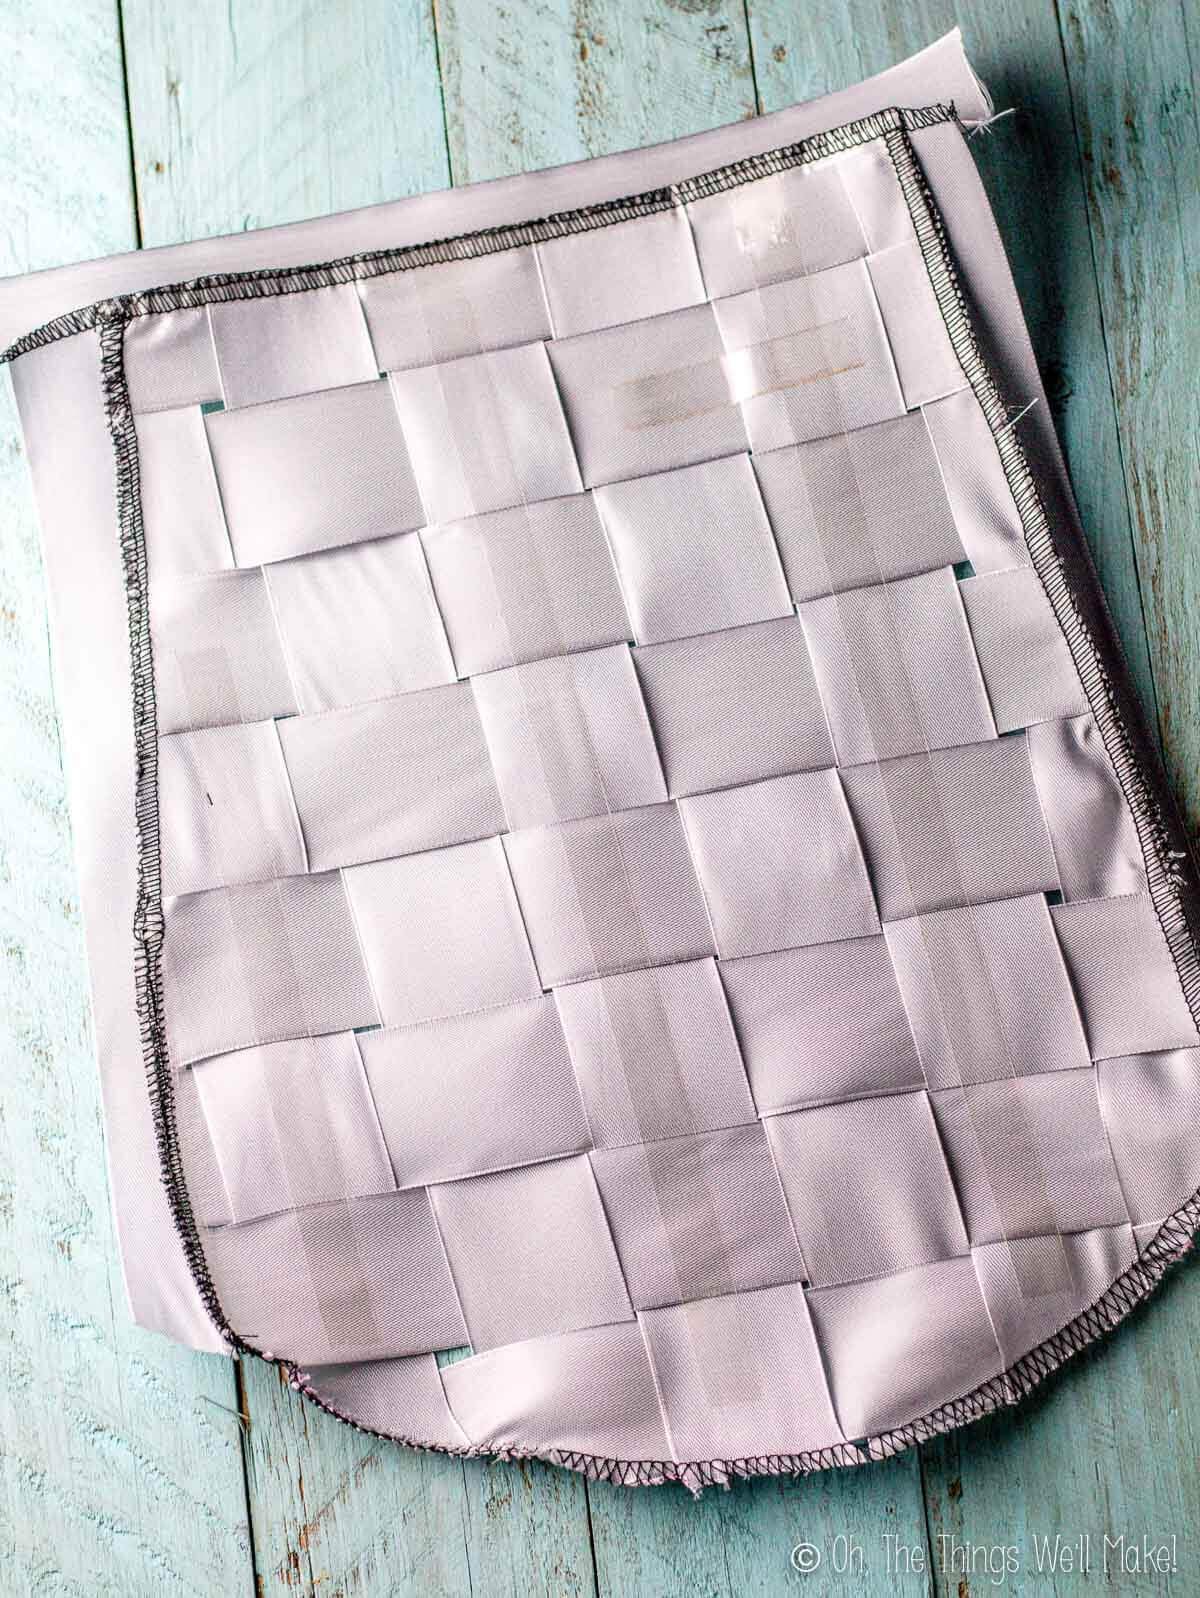
If I were to do this again, I would have ironed a sheet of fusible web on the back to keep the ribbons in place and easier to sew. I instead held mine together temporarily with tape thinking that by sewing the ribbons together that they would stay in place well. The problem is it was tricky putting the sleeves on each time because my son’s fingers would get stuck in the spaces between the ribbons! Plus, the ribbons tend to move around and not stay perfectly in place like they would if you were to iron fusible web to the back of them.
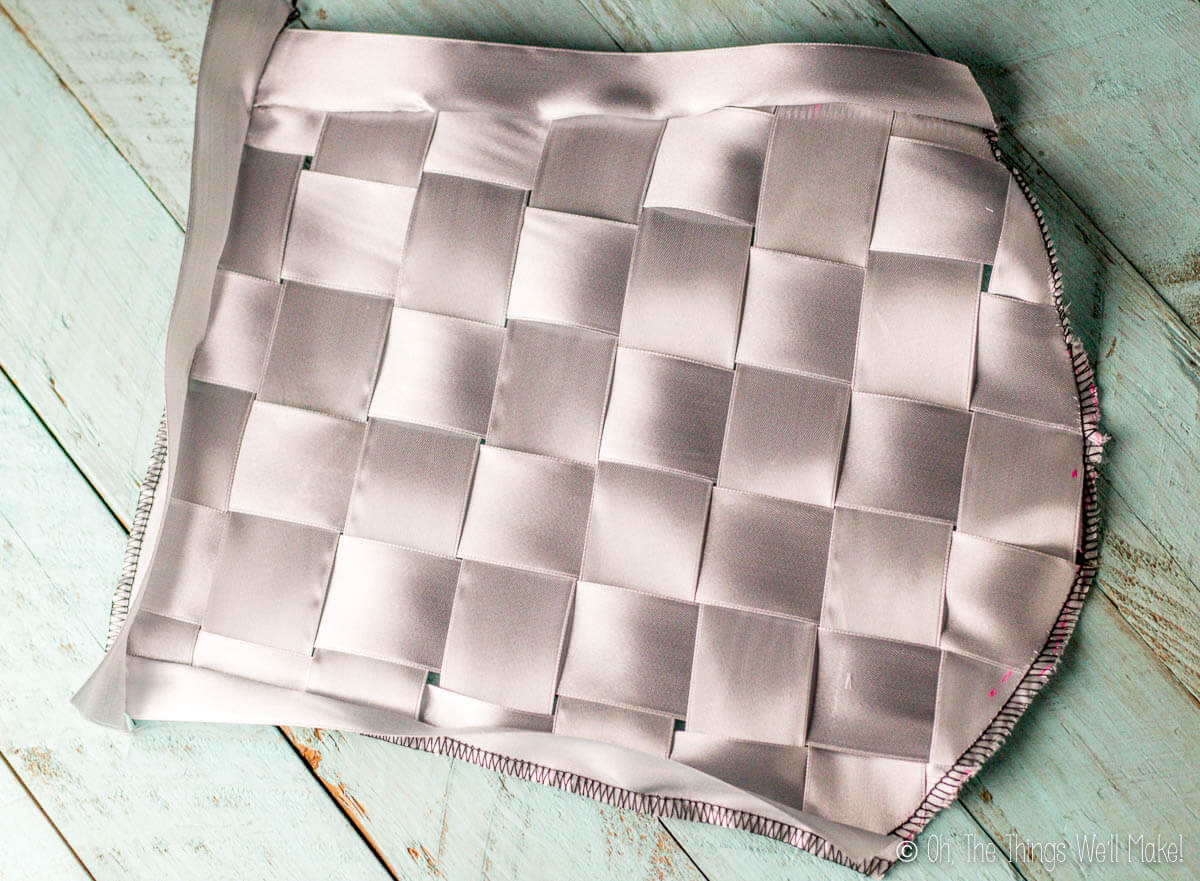
Sewing the sleeves
I finished the edges by sewing a piece of ribbon at the wrist. You can see that I also decided to sew ribbon onto the side edges, but that was really only because I was afraid that I had cut the sleeves too small, not leaving enough room for the seam, and wanted some extra space.
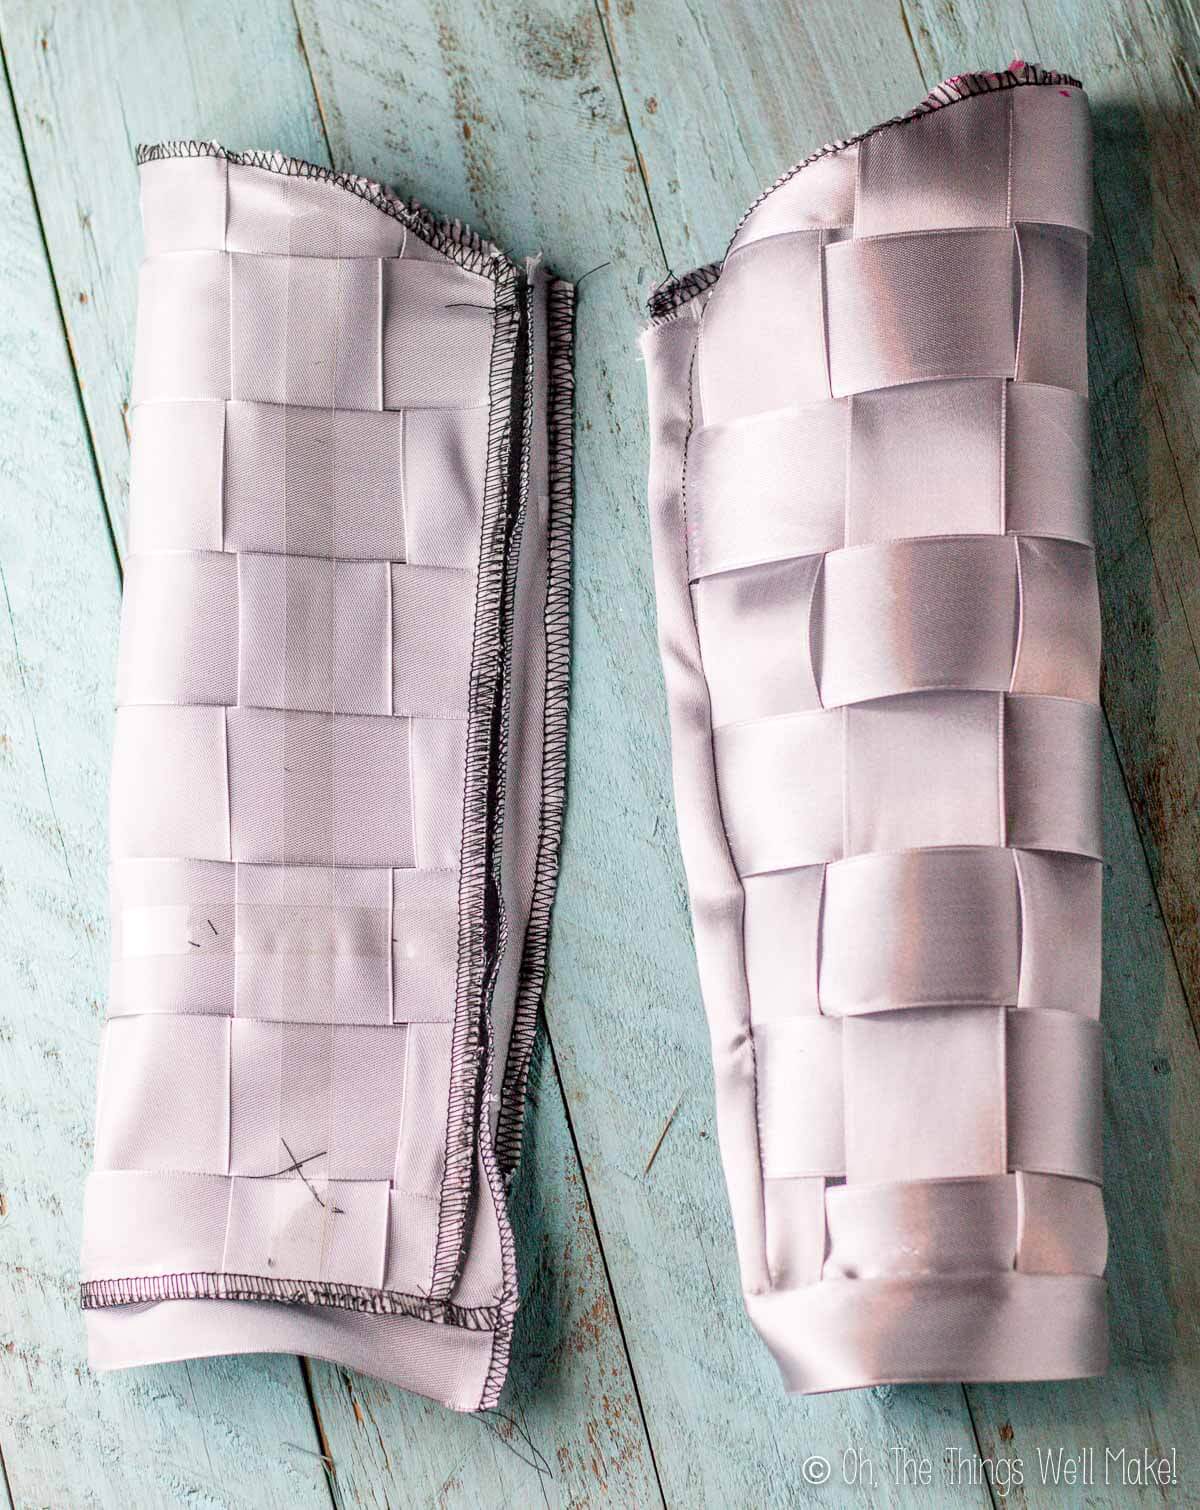
To finish the sleeves, I folded them together, right sides facing each other, down the length of the sleeve, and sewed down the long edge with my serger.
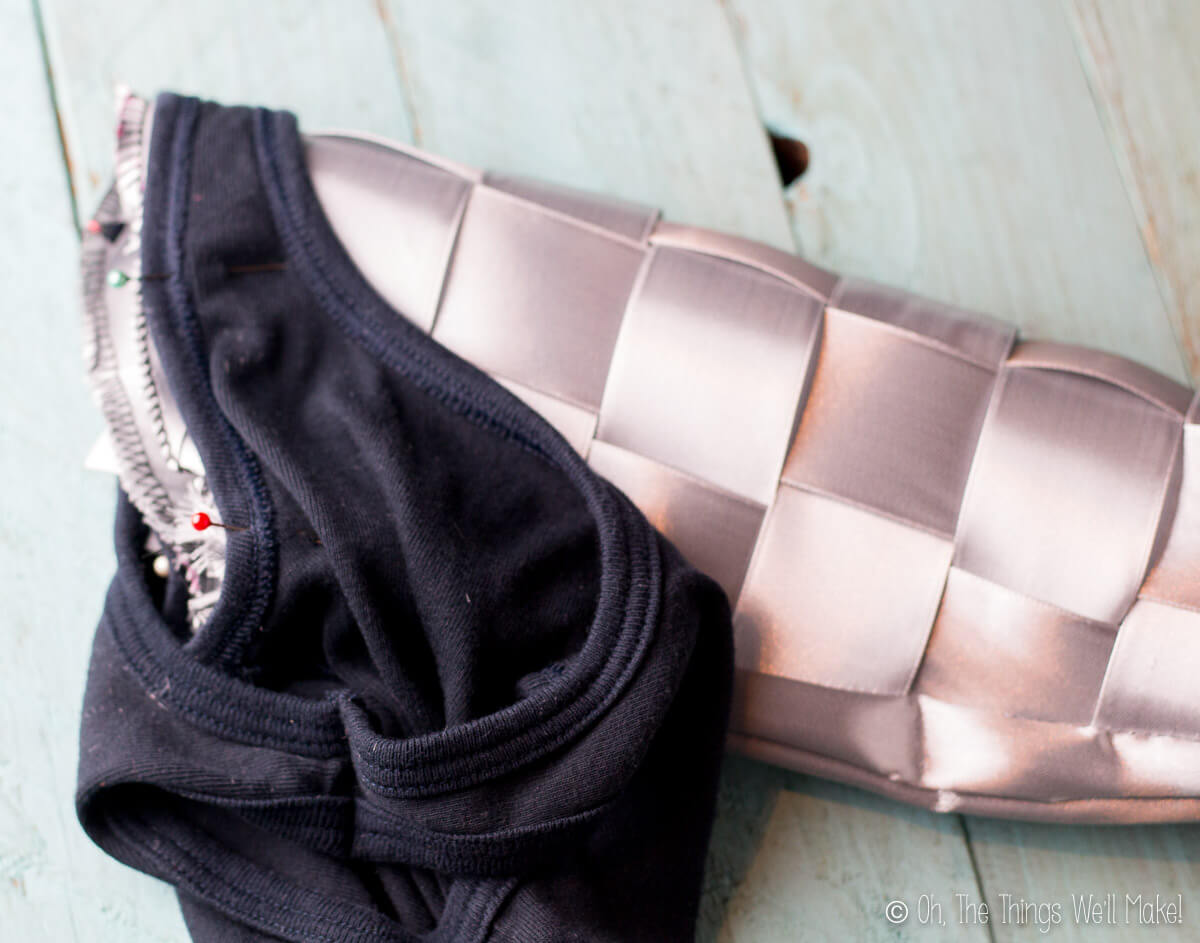
Once I had a sleeve made, I attached it to a tank top by hand sewing it in place.
Thor’s Helmet
I was going to try to make a helmet, but found a super cheap Viking helmet (with horns) at a costume shop and decided to use it. It was a gold color, so my first step was to spray paint it silver.
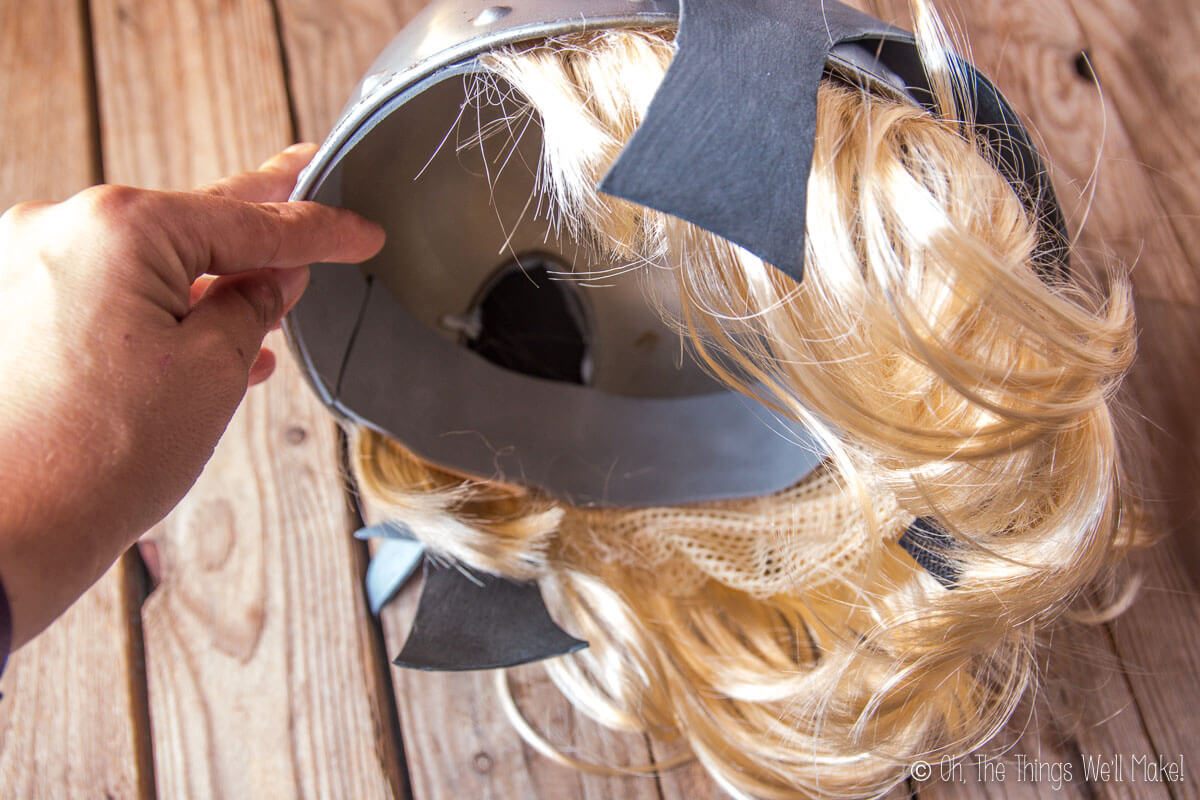
The helmet was a bit too big for my son. To help fix that, I decided to glue some hair inside the helmet to give my son long, blonde hair and make the helmet a tiny bit smaller at the same time. (It would look better with a separate wig, but I knew my son wasn’t gonna go for that!)
To add the hair, I bought an inexpensive wig and cut it apart. I then hot glued strips of the hair inside the helmet. To finish it off and help keep it from bothering my son, helping make the helmet even smaller, I glued a strip of craft foam over the hair.
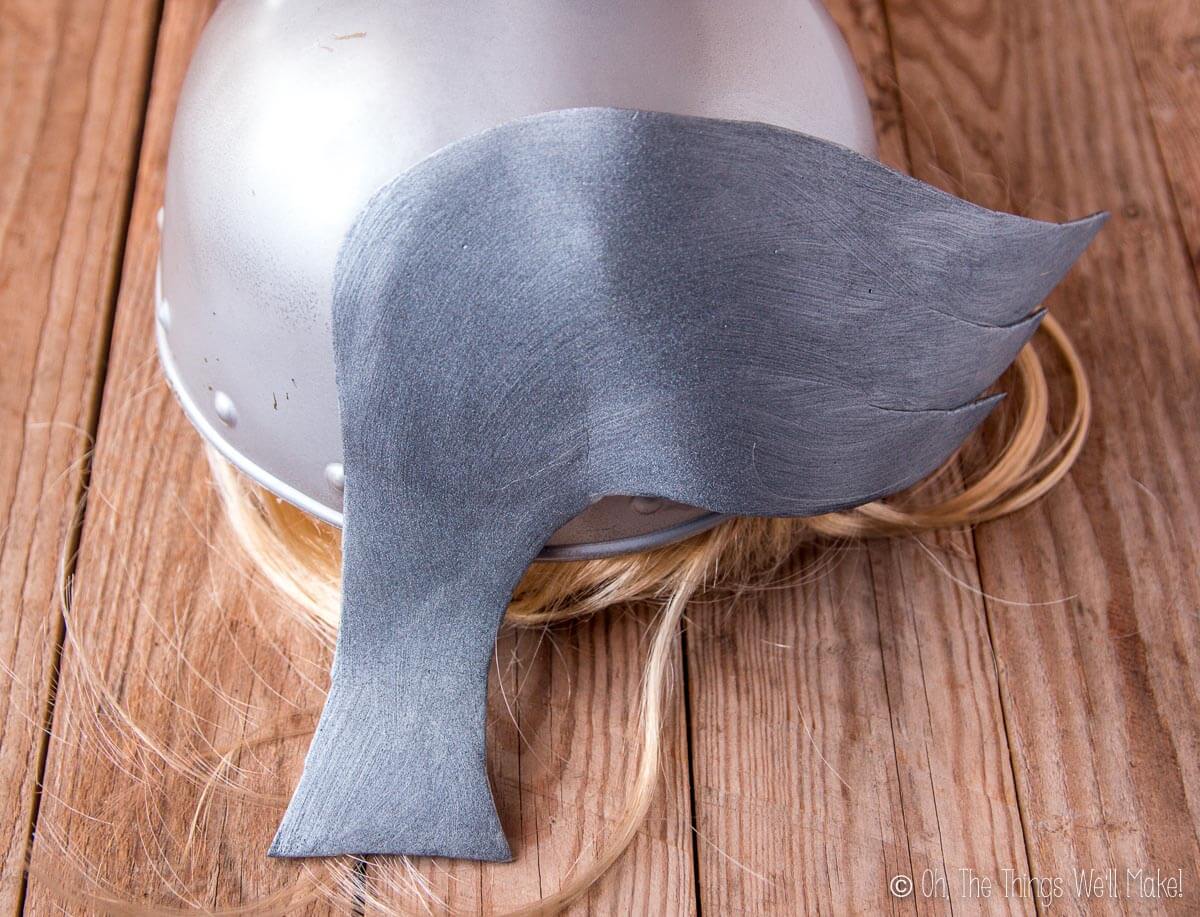
The horns of the helmet were removable, so I took them off, but that, of course, left the helmet with two big holes on the sides. To cover the holes and make the helmet look more like Thor’s I cut two wings out of craft foam and hot glued them into place.
Did I follow a pattern for the wings of the helmet?
No, I just “winged” it.
Sorry, this is a long post and I’m getting silly. 🙂
My son wore the helmet for a while, but he took it off a lot. I think he looked just as cute, maybe cuter, without it.
Putting the costume together
Putting the costume together is quite easy. Apart from these pieces, you’ll need a pair of black pants or leggings.
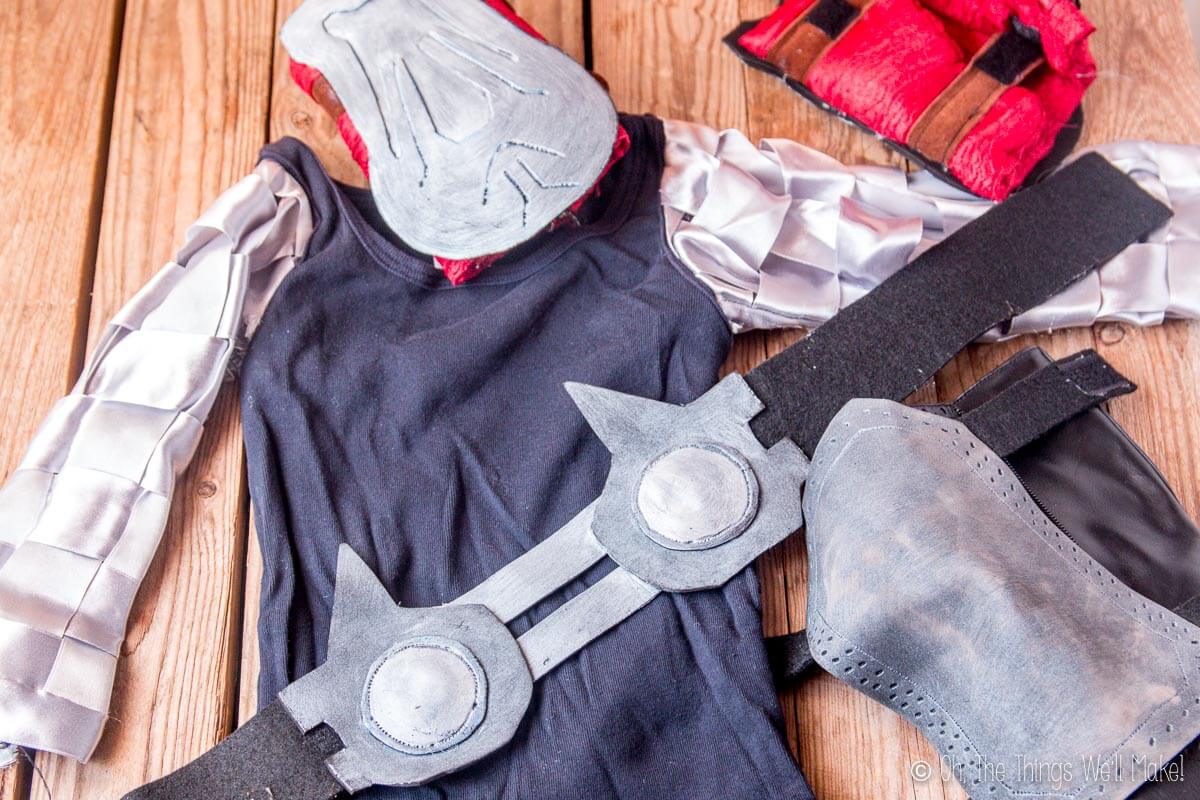
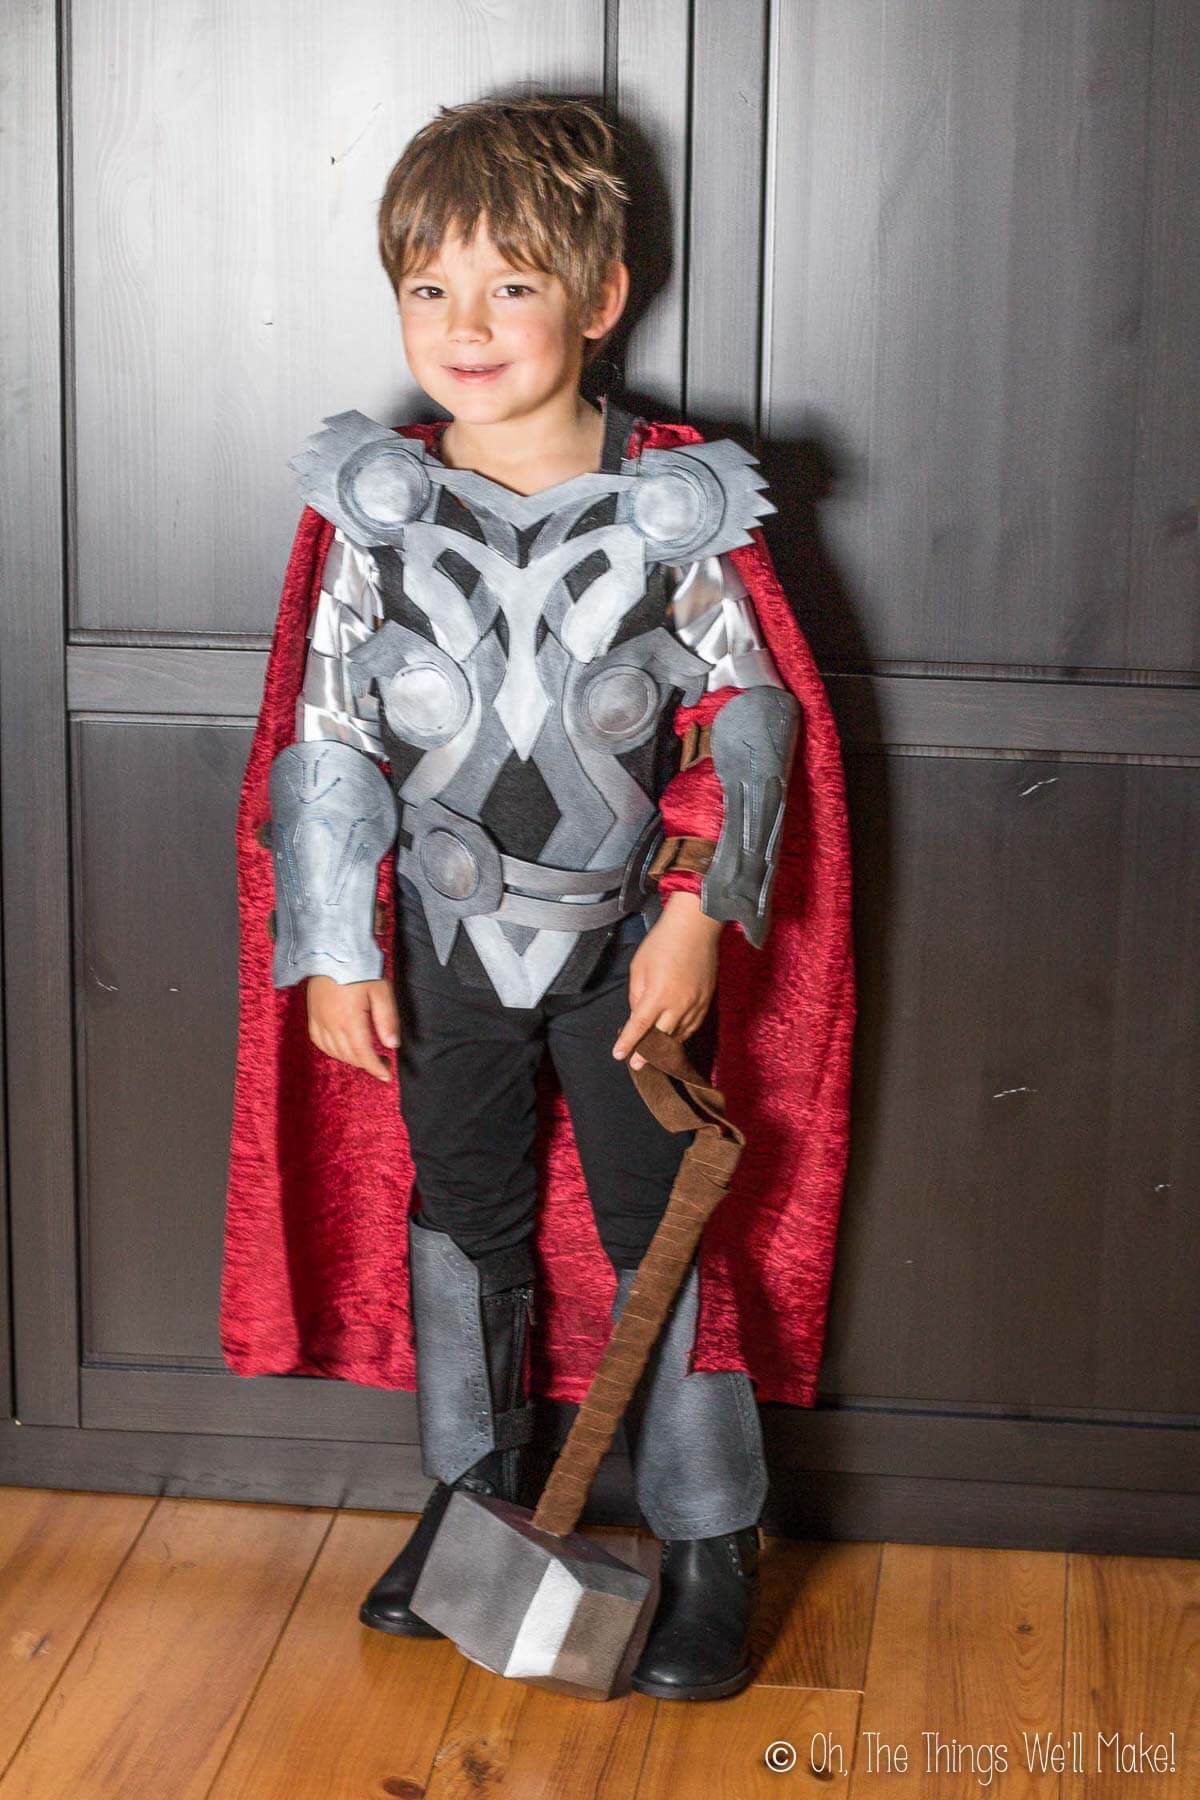
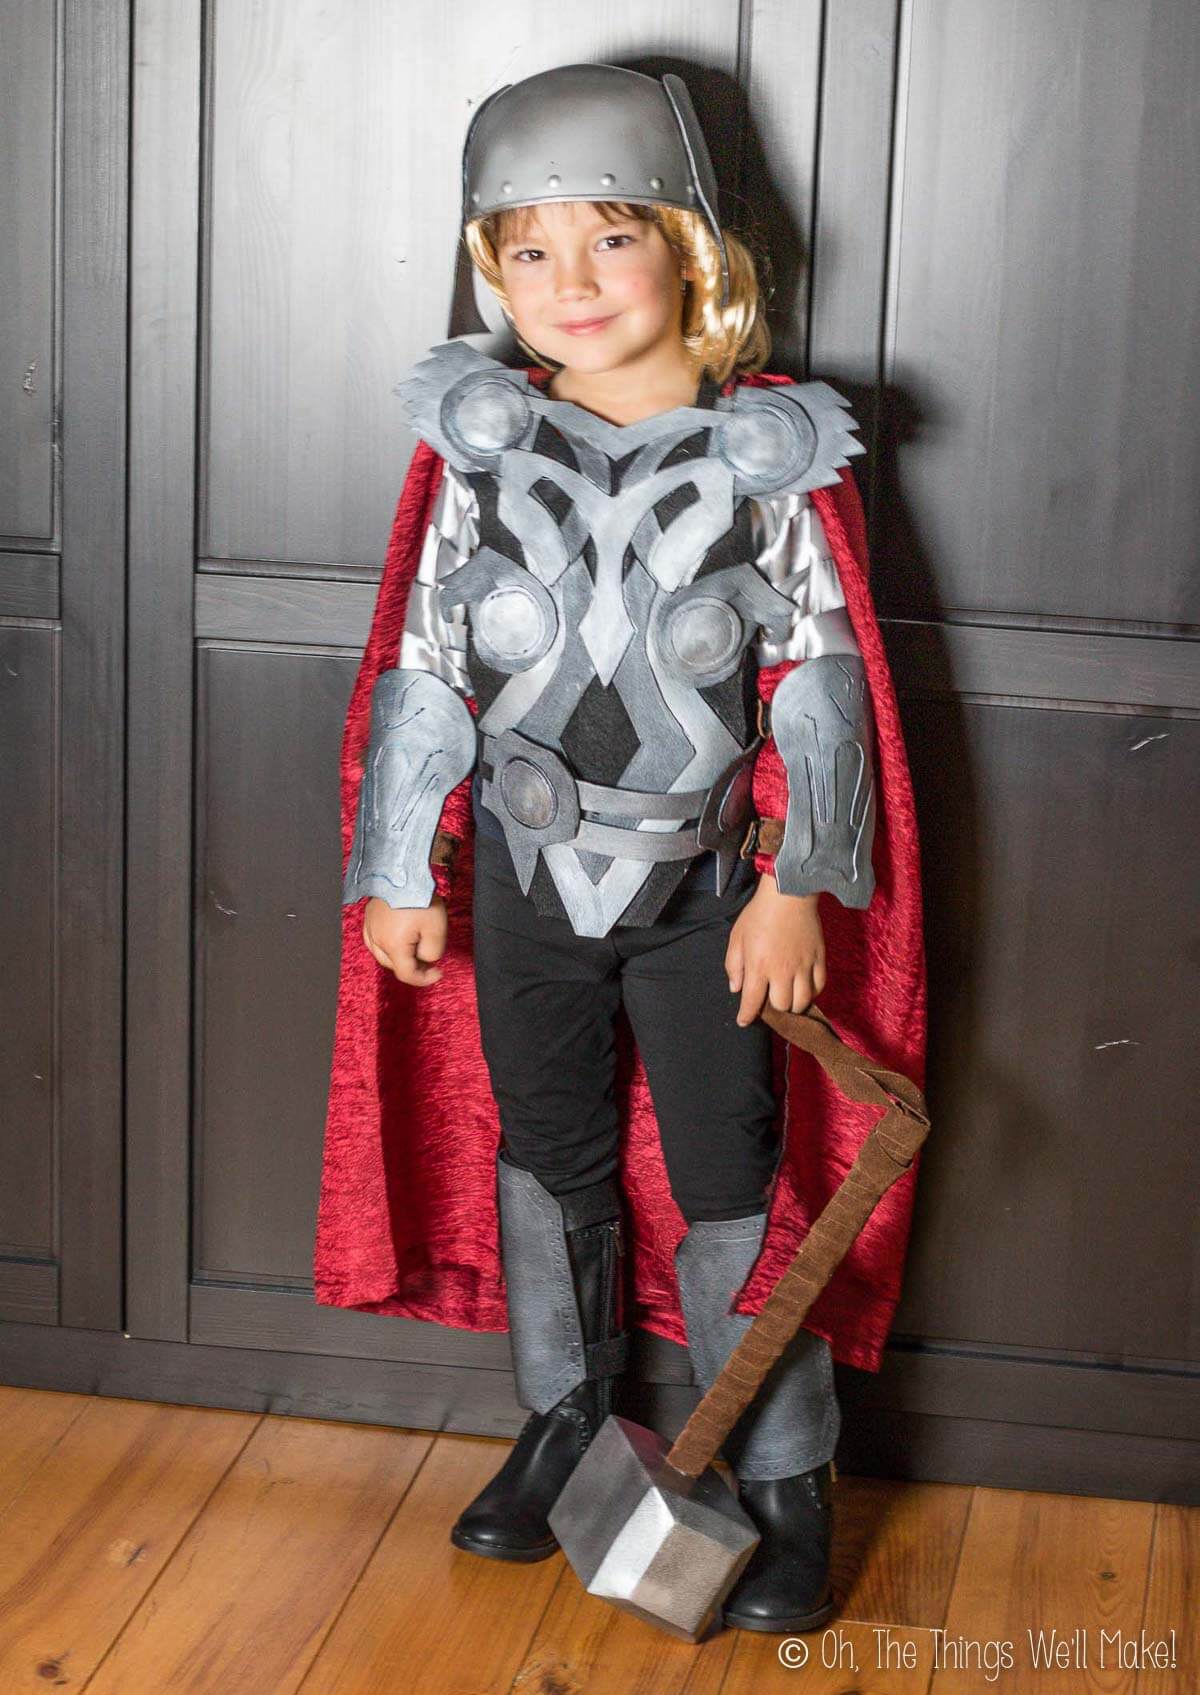
Put on the black pants and the black tank top with fancy sleeves. Then place the chest armor in place, using the velcro to secure it. (If the cape is fastened to the armor as shown above with safety clips, just slip it over the wearer’s head and fasten the velcro strips behind the person’s back, under the cape.) Secure the belt over the chest armor.
Next, put on the pair of black boots and fasten the leg braces over them. Also fasten the vambraces over the sleeves.
That’s all there is to it! To finish off this super cuter (easier-than-it-looks) Thor costume, the hammer and helmet are the finishing touches.
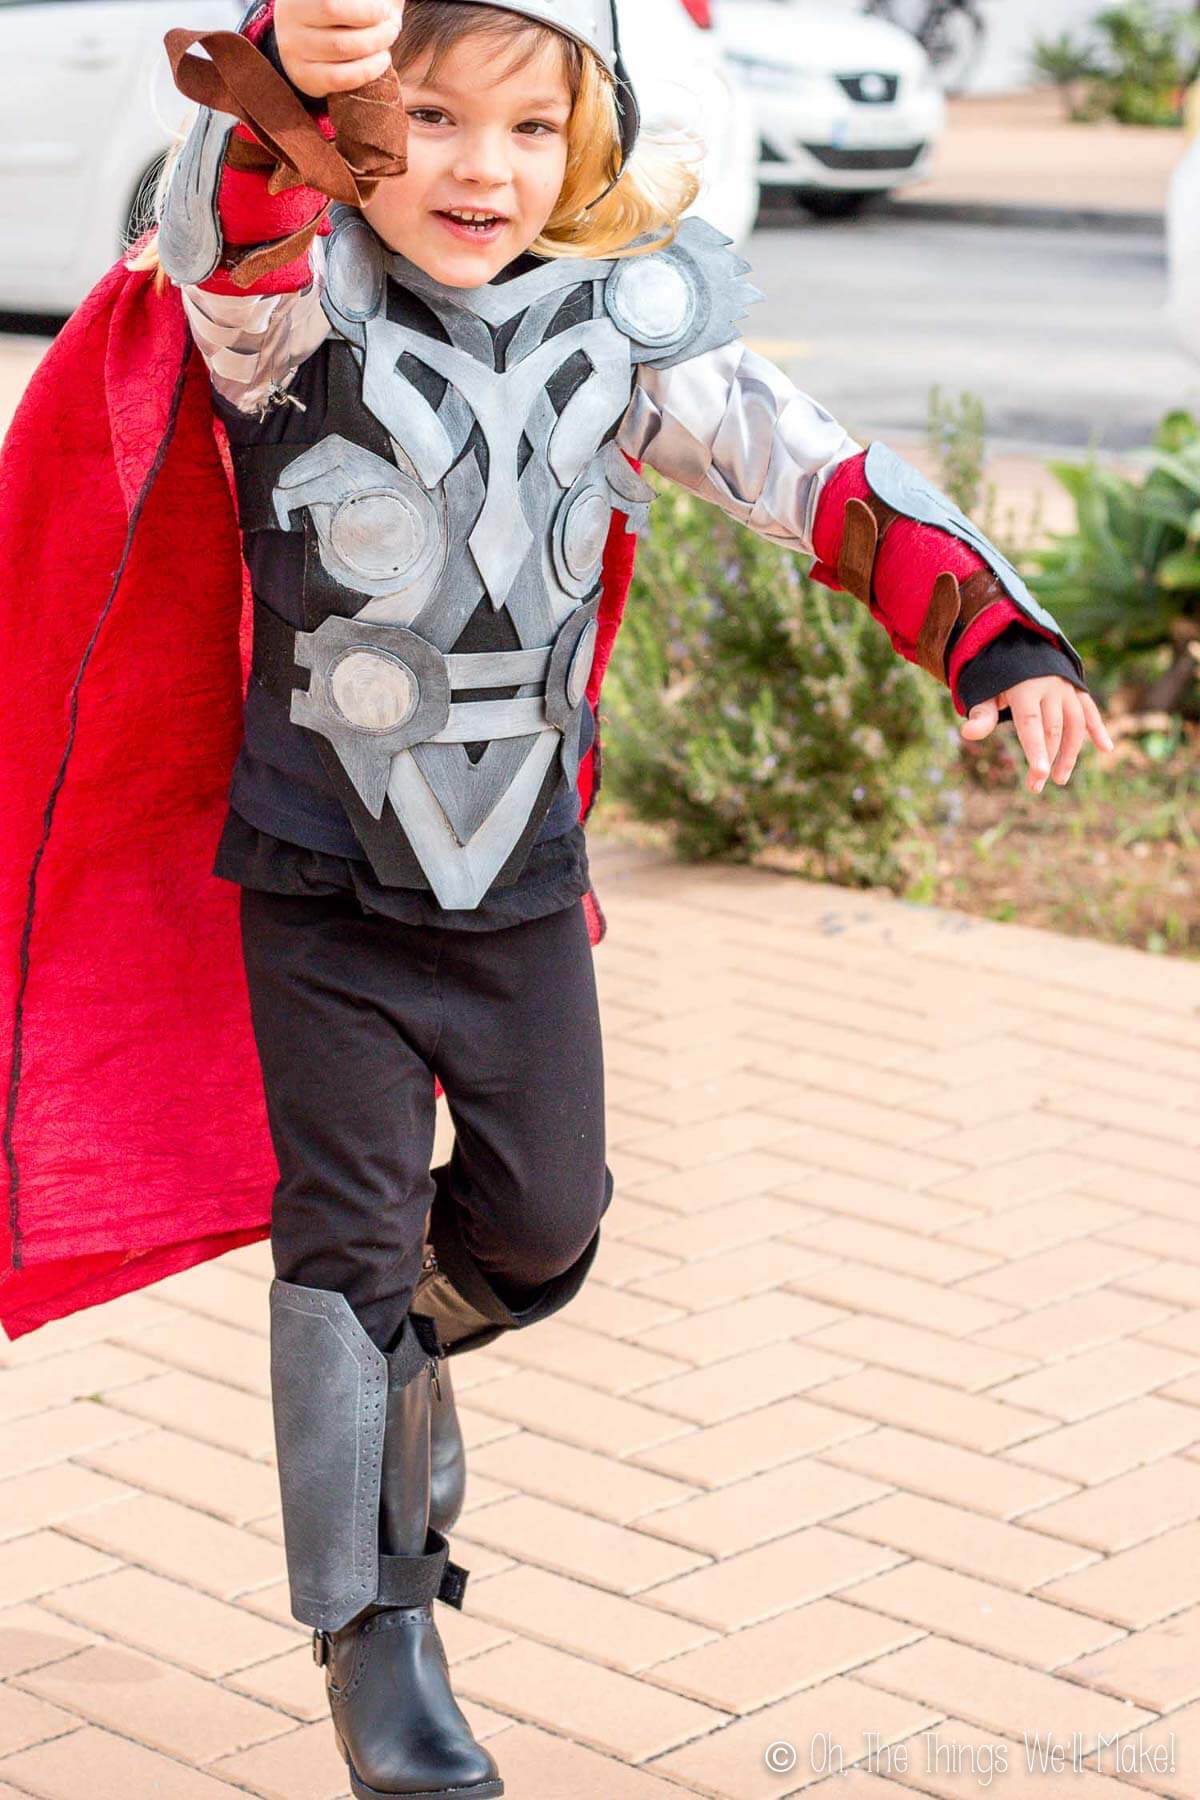
Have fun saving the world(s)! (And Happy Halloween!)
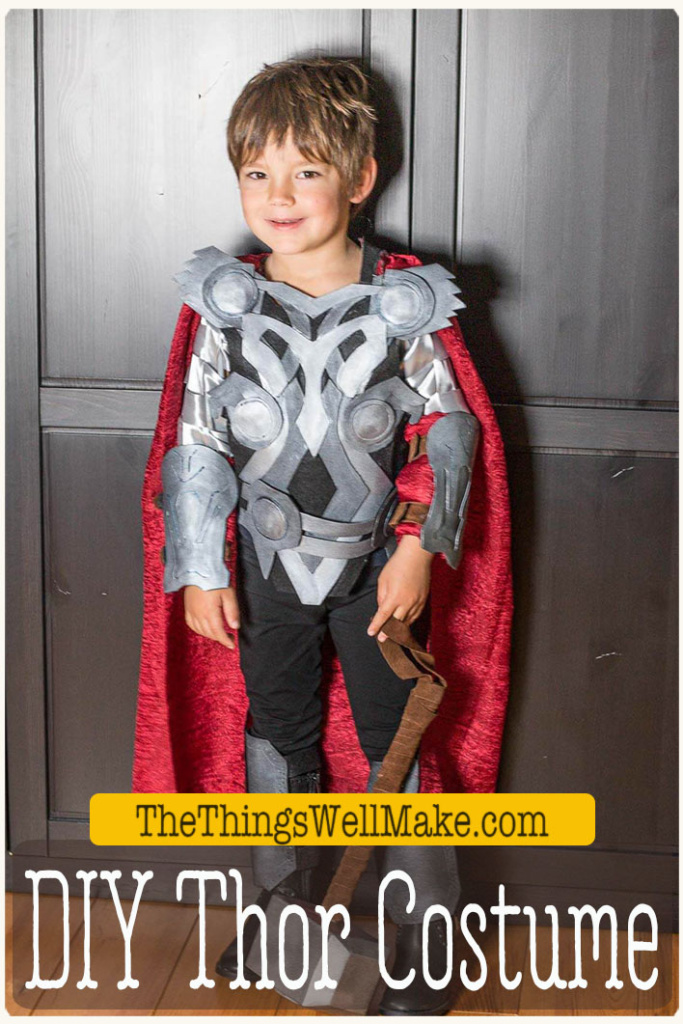
DIY Thor Costume
Equiment
- hot glue gun
Materials
For the Hammer
- floral foam
- packing or duct tape
- newspapers
- white glue
- wooden dowel In the desired width and length for the handle
- Wall putty spackling
- sandpaper
- black acrylic paint
- silver acrylic paint
- buede
- hot glue or other strong glue
For the armor, cape, boots, and vambraces
- 1 pair black boots
- black craft foam
- silver paint
- black felt
- velcro
- red curtains or other red material
For the outfit
- 1 pair black leggings
- 1 black tank top
- silver ribbon
For the helmet
- 1 helmet
- craft foam
- 1 blonde wig
- silver acrylic paint
Instructions
Making Thor's hammer
- Cut some floral foam (Or styrofoam or wood) into the general shape of Thor’s hammer. If needed glue several pieces together and hold them better with duct tape. Slice off the corners with a serrated knife to form the shape of his hammer.
- Cover the foam with several layers of paper mache. To do so, mix some water and white glue and dip newspaper strips into the mixture. Layer and overlap them over the entire form.
- Press the dowl into the center of one of the long sides of the hammer to form the opening for the handle. Paper mache small strips of paper towels or napkins inside the hole to strengthen it and make the handle more secure. (If you use a more durable material like wood for your handle, this step isn't necessary.)
- Once the paper mache is dry, glue the handle in place.
- To give the hammer a smoother surface, cover it with some wall putty or some fiberglass filler.
- When dry, sand the entire surface.
- Cut a cardboard disk with a diameter just smaller than the width of one of the long sides of the hammer.
- Cover the disk with the wall putty. When it dries, glue the cardboard disk to the top of the hammer.
- Paint the entire hammer black.
- Once the black paint had dried, cover it with a layer of silver spray paint, intentionally allowing some black to show through to give a metallic effect.
- After the silver paint dries, cut thin strips of brown suede. Wrap the handle of the hammer with the strips of suede, gluing them in place with hot glue or another strong glue.
Thor’s Chest Armor
- Print out a pattern for Thor's chest armor at the needed size for the person who will be wearing the costume.
- Trace out the pieces onto black or silver craft foam and cut them out. If using black craft foam, paint it with silver acrylic paint.
- Cut a rectangle of felt the width and length of the front armor (from neck just below the waist). Cut out rounded areas for more comfort at the arm openings and the neck. (The felt piece should resemble the front of a tank top.)
- Using hot glue, glue the craft foam pieces onto the felt.
- To hold the armor in place when worn, cut out strips of felt that can reach from either side of the felt piece and are long enough to overlap behind the person's back. Using hot glue, glue the strips in place on either side. Also, glue velcro to the ends of the strips in a way that you can easily fasten the chest armor behind the wearer's back.
- Attach the cape to the top of the felt piece on either side using safety pins.
Thor’s Cape
- Cut a large rectangle of bright red curtain fabric. It should be wider than the person who will wear the cape and should reach from their shoulders to a point above their knees.
- To form the shape of the cape, take the top seam and fold it like a paper fan, making a series of pleats.
- Sew over the edge to hold the pleats in place. If using a fabric that frays, finish the edges by hemming or using a serger to sew and cut around all edges.
Thor's Belt
- Following the same design of the armor, cut out craft foam pieces and black felt to form a belt. To give texture to the disks on the belt and chest armor, you can use the tip of a solder iron to burn a design around the edges.
- Glue together the belt with hot glue, adding some velcro for fastening in the back when worn.
Thor's Vambraces (Arm braces)
- Trace two of the vambrace patterns onto craft foam. (You'll end up with 4 pieces of foam). Layer together one of each type and glue them together.
- Paint the craft foam silver. Optionally, burn the line details into the design with a soldering iron.
- Cut two rectangles for each arm (4 rectangles) out of some leftover cape fabric. The rectangles should be wide enough to wrap around the forearms and have the height of the craft foam vambrace.
- Layer the two rectangles on top of each other with the right sides of the fabric facing each other. Sew around the edges, leaving a small gap on one side for flipping the fabric right side out. Then, flip the fabric right side out and fill the space with some quilting batting. Finally, hand sew the opening shut.
- To fasten the vambraces, cut strips of suede leather just longer than the cloth rectangle (long enough to fasten around my son's arms). Sew the leather strips onto the red rectangles, adding velcro or bucles for fastening them around the forearms of the wearer.
- Using hot glue, glue the craft foam onto the red cloth, completing Thor's vambraces.
Thor’s Boots
- Using the vambrace idea, cut out craft foam plates that can be wrapped around the top of a pair of black boots.
- Burn a design into the craft foam with a soldering iron. Again, glue felt strips and velcro to them so they can be fastened in place.
Thor's Sleeves
- Weave 2 large panels of fabric out of silver ribbons.
- To make that ribbon "fabric" into sleeves, trace out the shape of a sleeve, leaving extra space for seams and movement.
- Iron a sheet of fusible web on the back of the ribbons to keep them in place while cutting them out and sewing them.
- Fold the sleeves over, right sides facing each other, and sew down the length of the sleeve.
- Finish the wrist area by sewing on a piece of ribbon along the bottom edge on each sleeve.
- To finish the sleeves, fold them together, right sides facing each other, and sew down the long edge.
- Attach the sleeves to a black tank top by hand sewing them in place.
Thor’s Helmet
- If using a Viking helmet, remove the horns. If it isn't silver, spray paint it silver.
- Cut apart an inexpensive wig and hot glue strips of the hair to the inside of the helmet. Glue a strip of craft foam over the edges of the hair.
- Cut two wings out of craft foam and hot glued them into place over the holes in the Viking helmet.
Putting the costume together
- Put on the black pants and the black tank top with fancy sleeves. Then place the chest armor in place. Since the cape is fastened to the armor with safety clips, just slip it over the wearer's head and fasten the velcro strips behind the person's back, under the cape.
- Secure the belt over the chest armor.
- Next, put on the pair of black boots and fasten the leg braces over them. Also fasten the vambraces over the sleeves.
- Grab the hammer and you're ready to go save the world(s)!
Notes
This post was originally published on October 9, 2016. It was republished years later after rewriting it with clearer explanations.
 Español
 Spooky Homemade Gummy Eyeballs
Anush
Thanks Tracy.
Made one for my son. Though not exactly the way you did it, the final product was a replica and you were so helpful.
It was awesome.
Thank you,
Anush
Tracy Ariza
Hi Anush,
Your costume was awesome! Thanks for sharing it with me on Facebook! Mind if I upload the picture here?
I’ll add the link for now. We’ll see if it’s available for everyone to see that way!
Anush
Pls do feel free to upload.
Wow!
Thank u,
Anush
Joie
Cool! I thought he ready had blonde long hair haha!
You’re great 🙂
Tracy Ariza
Hahaha!
Thanks, Joie! 🙂
Lindsey
Awesome! Definitely using a few of your ideas to create my sons costume thanks,
Tracy Ariza
Yay! I hope it goes well for you, Lindsey! 🙂