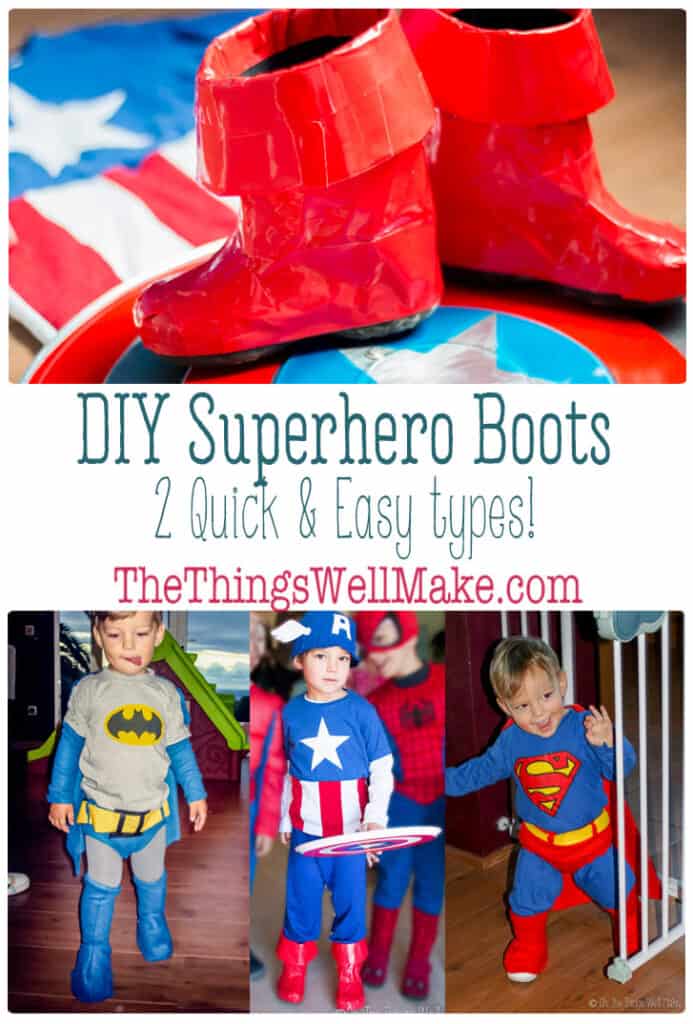
No homemade superhero costume would be complete without some DIY superhero boots. I’ll show you two quick and easy methods to make costume boots in a flash.

Over the years, I’ve made many a superhero costume for my son!
I’ve already shown you how I made him a Captain America costume, complete with a homemade Captain America Shield. I also showed you how to make a Thor costume using craft foam.
One thing every superhero needs, though, is superhero boots!
Table of contents
Superhero boots from polar fleece
When my son was only a year old, I made him his first superhero costume, a Superman costume. He was so small at the time, that I was able to make the entire costume (shirt and pants) out of one of my husband’s old t-shirts!
Making pants out of an old t-shirt isn’t as difficult as you might think. (This tutorial will show you how to make kids’ pants from a t-shirt.)
I didn’t really know how to make the shirt, though. After looking all over for a royal blue long-sleeved shirt in his size, I couldn’t find one anywhere. So, I went totally DIY and somehow managed to sew one with scraps of fabric. (I’m still amazed it actually turned out OK.)

For that first costume, I wanted to make some quick and easy boots that would be comfortable for a small toddler to wear.
I didn’t have a lot of cloth on-hand for making the costume. To make matters worse, fabric stores here in Spain are very rare, small, and overpriced.
Lucky for me, I had a red, old, inexpensive polar fleece blanket and decided to use it for all of the red fabric of the costume.
While it was by accident that I discovered how wonderful polar fleece is for making costumes, it was, indeed, a wonderful discovery.
Why use polar fleece?
The great thing about polar fleece is that it doesn’t unravel, so you don’t have to finish any cut edges.
Plus, it’s lightweight, soft, and stretchy, making it perfect for a kid’s costume.
The stretchiness of polar fleece makes it very forgiving when making these boots. Yet, because it has more consistency than stretchy jersey fabric, it’s a lot easier to work with. (Think- it’s like working with a stretchy type of felt!)
I used the red polar fleece for making the cape, the iconic red trunks (aka. underwear or tight shorts, if you so prefer), and, of course, the boots!
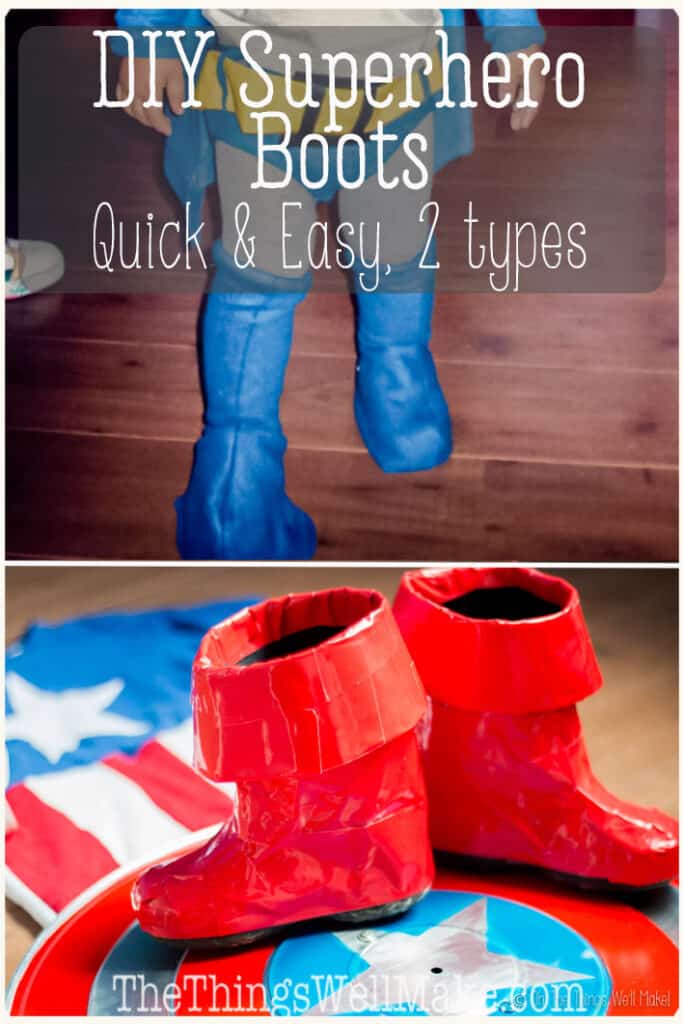
That first year, I cut the bottom section a little too short. So, while they did look pretty cute, they kept creeping up off of his shoes as you can see in the picture above. (You could help remedy that by using double-sided tape to hold them in place, something I haven’t bothered doing as of yet.)
Later on that year, for Halloween, I repeated the same process, making Batman’s boots (This time a little bit longer)!
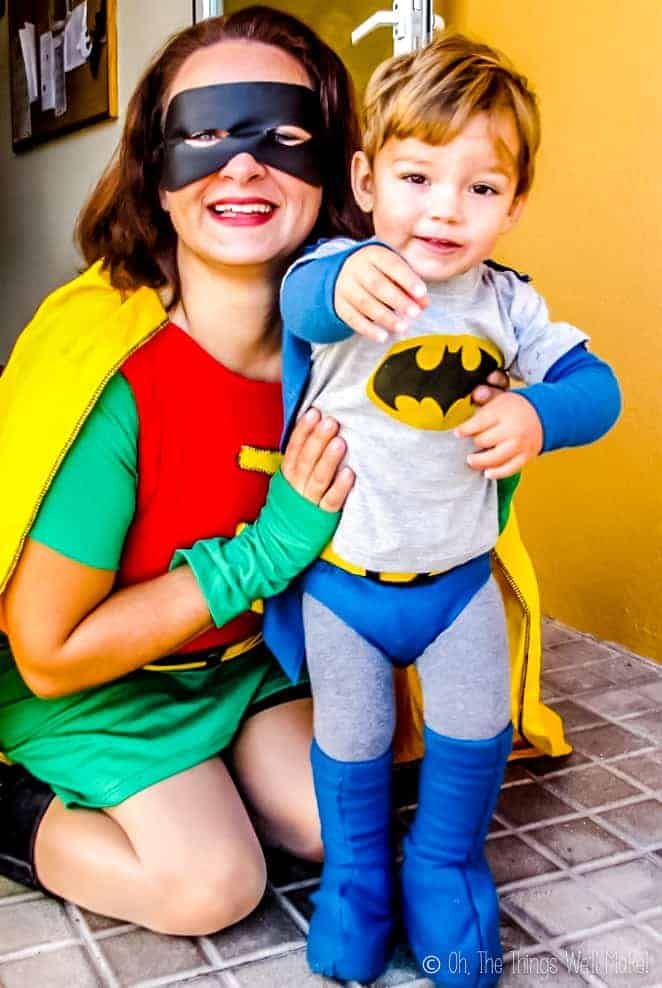
Batman’s boots stayed in place better. I had made them longer than what I thought I would need and pulled them over the bottom of the shoes somewhat. I didn’t tape them in place or anything, but you should definitely consider it if it bothers you that the fabric can creep up off the shoes.
How to Make DIY Superhero Boots from polar fleece
The superhero boots that I made for both the Superman and Batman costumes couldn’t be easier to make.
You will need:
- Polar fleece in the color of the boots you want to make
- Thread or hot glue
- A pair of shoes for drafting the pattern (Use the shoes that you will be wearing underneath the boots if possible).
Instructions:
1. Place your shoe on its side with the bottom of the shoe along the bottom edge of the fabric. Leave 1-2 centimeters of fabric underneath so that the “boots” won’t ride up and off the shoes when you wear them.
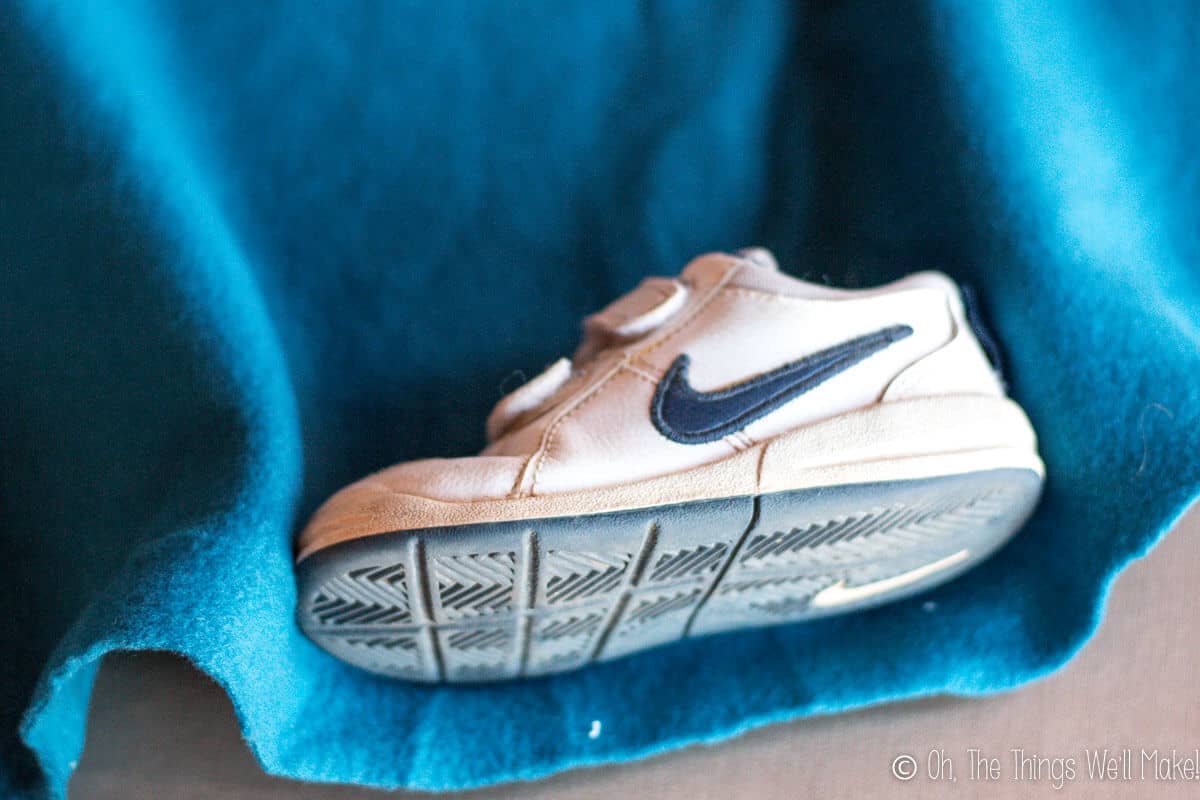
2. Pull the fabric up around the sides of the shoe. Mark where the fabric hits the center of the shoe in both the front and the back.
You will be cutting two identical pieces of polar fleece to make each boot, sewing them together at the center. Knowing where the halfway point is makes the process much easier.
Because polar fleece is stretchy fabric, and we want the boots to stay in place, directly mark the halfway point without adding more room for a seam allowance. (You want these to be slightly small so they stretch to fit in place.)
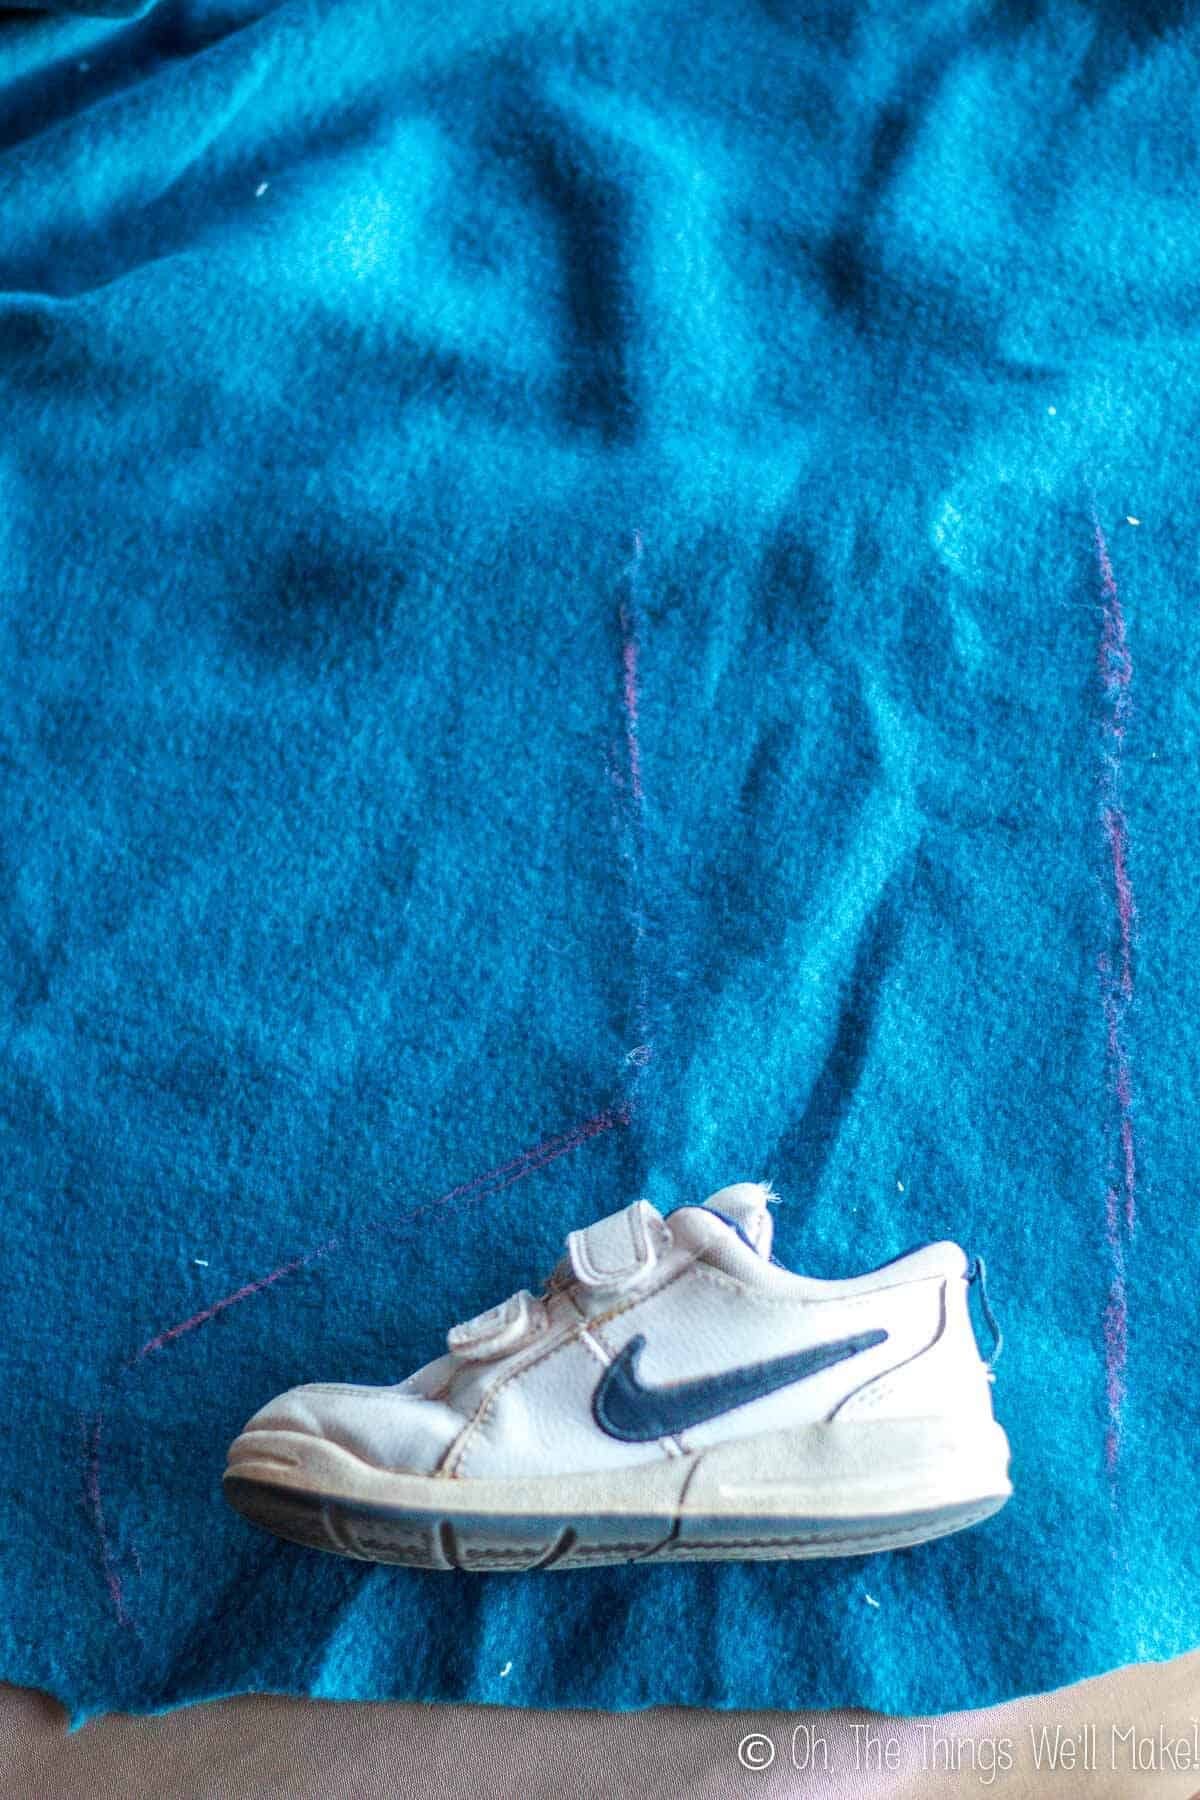
3. Leaving the shoe on its side in the same place on the fabric, mark a line straight up from the center point you marked at the heel up to the height you want your boots. (It’s actually a good idea to make them a little longer than you think you will want them because you can always cut them down to size later on.)
In front of the shoe, draw a line following the shape of the shoe, stopping before reaching the shoe’s opening. Leave a space between the line and the shoe. The width of the space should equal the distance between your marked point and the front of the shoe.
Continue by drawing another line upwards, parallel to the one on the back and up to the same height you drew the other line.
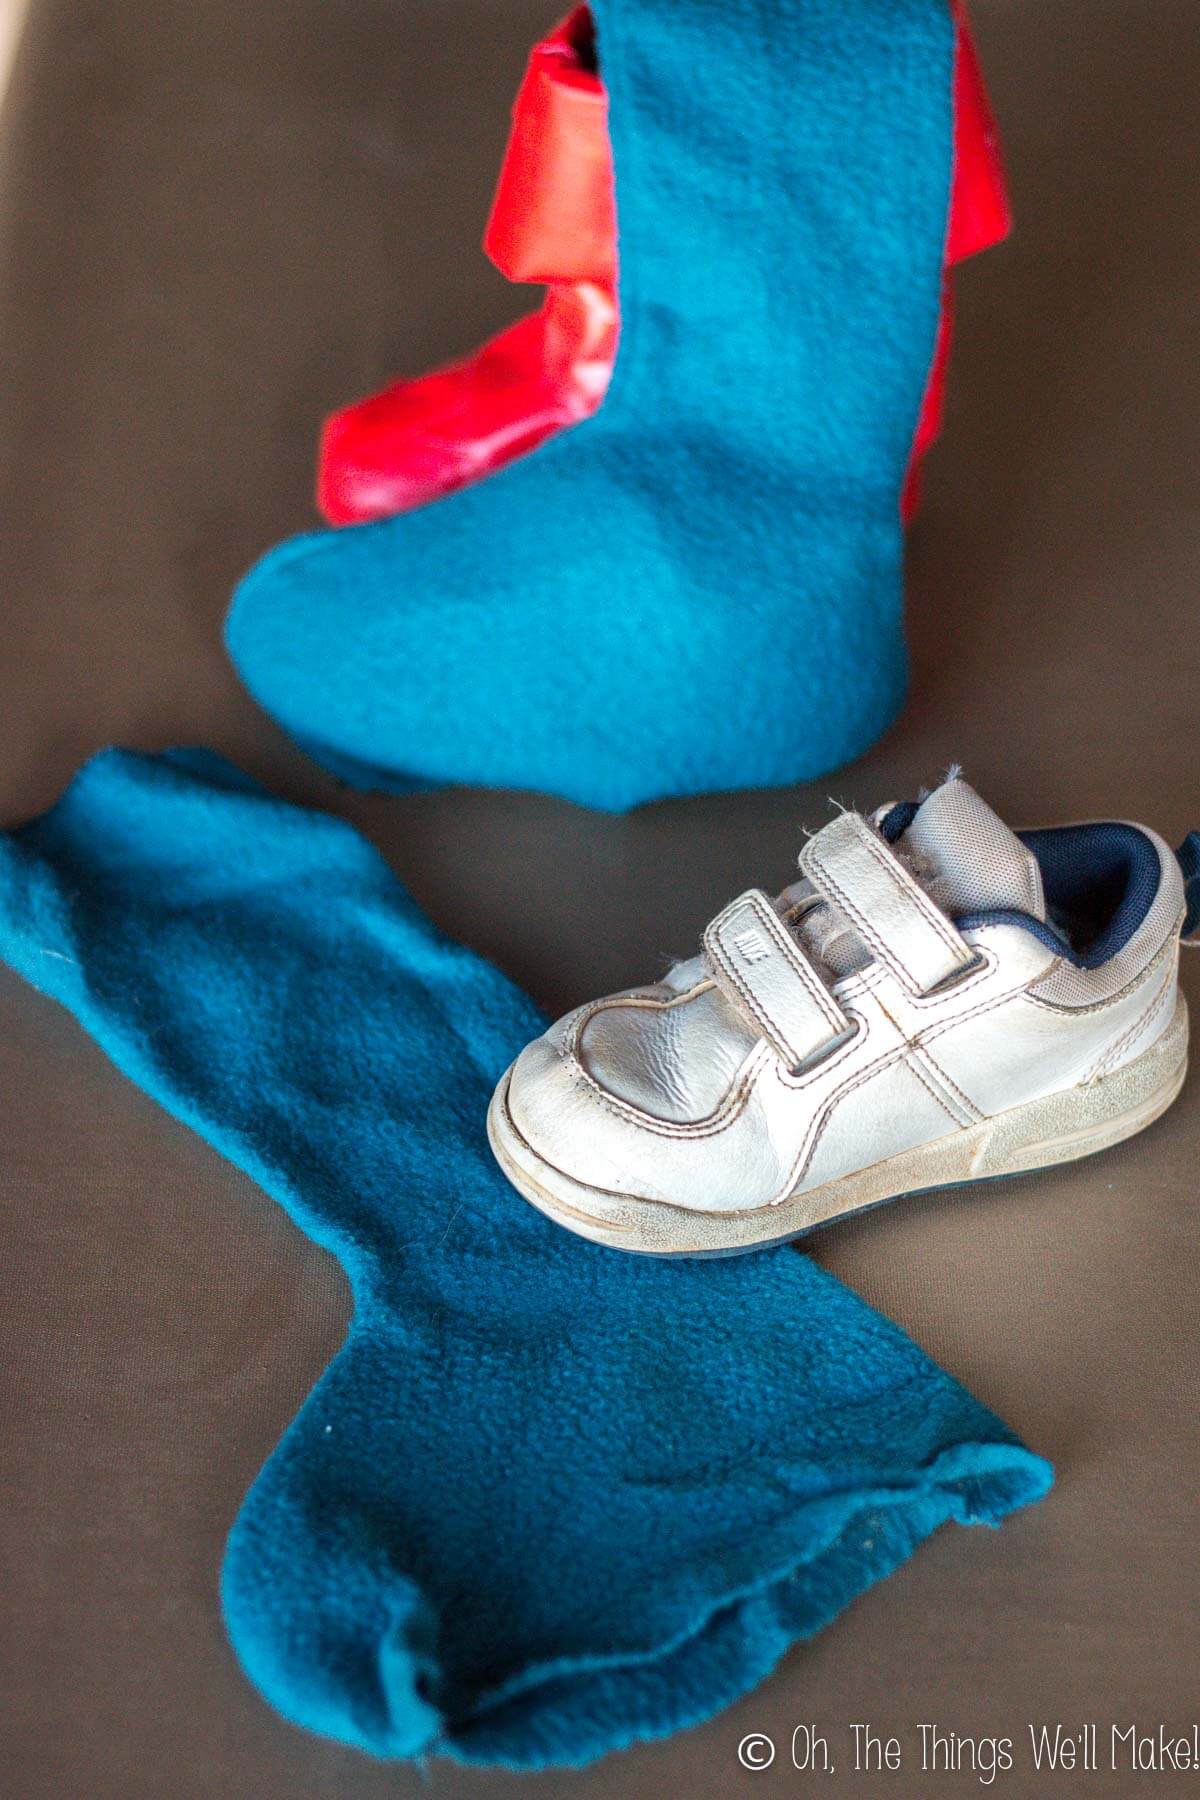
4. Cut out the fabric, following your markings.
5. Once you have the fabric boot piece cut out, use it as a pattern to cut out 3 more identical pieces. (You wan 4 identical pieces total).
NOTE: If you are using a fabric that has a right side and a wrong side, you will actually need 2 identical pieces and two pieces that are mirror images of those pieces.
6. Place two of your cut pieces together (right sides facing each other, if it makes a difference in your fabric) and sew along both side edges (the front and back of the shoe), leaving the top and bottom unsewn. You’ll end up with a boot-shaped tube.
You can use hot glue to glue along the edge if you prefer.
7. Flip the boot right side out and try it on over your shoe. Make any adjustments as needed.
8. Repeat the sewing process for the other boot.
You have now finished your easy, DIY superhero boots!
Making Captain America’s Boots
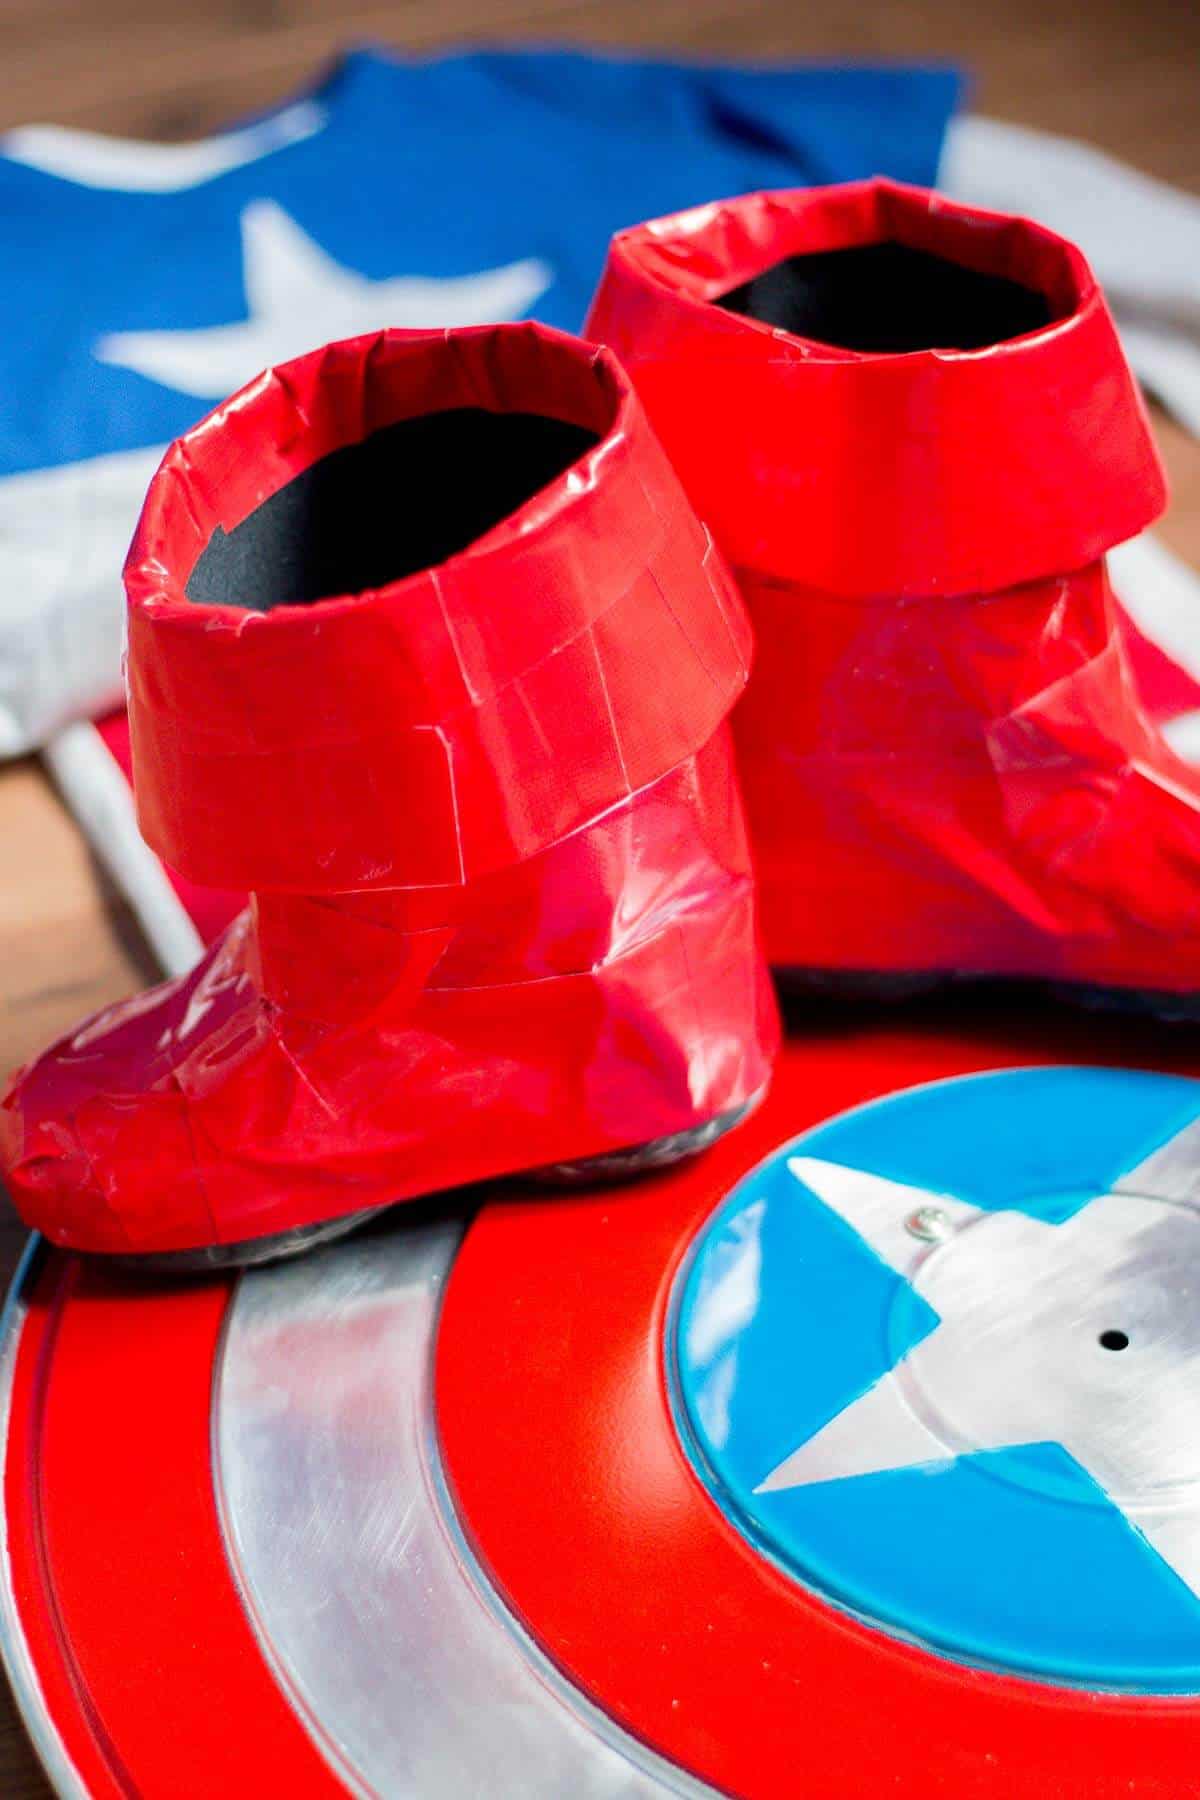
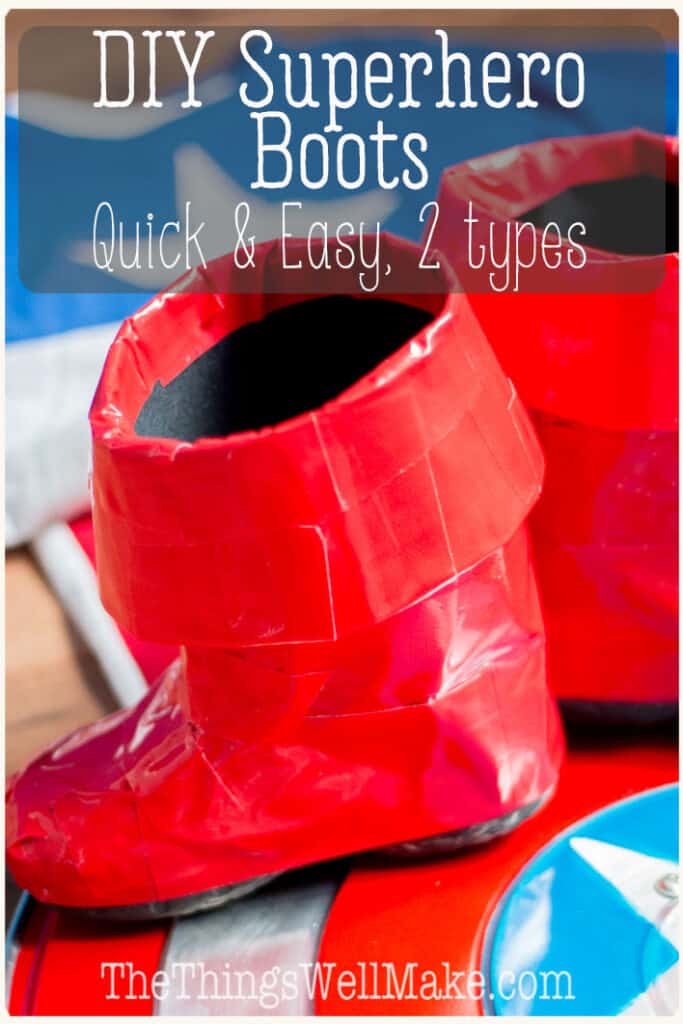
This year, when I was about to embark on the task of making yet another superhero costume, I realized that Captain America’s boots were a little different than the rest. Captain America’s boots had a cuff. They are also a bit clunkier than the other superheroes’ boots.
I was tempted to use the same method as above, making the boots longer and wider at the top. I decided against it because the seems would then be visible if I folded the top part down.
I did come up with a few ideas about how to fix that, but meanwhile, it occurred to me to try something else…
While browsing in my garage, I saw some red tape and couldn’t help but wonder if it was possible to make superhero boots out of duct tape.
(Once again, I thought I was a genius, but, once again, it turns out I’m not the inventor of superhero duct tape boots!) There are actually already several tutorials showing how to make superhero boots out of duct tape.
But, again, Captain America’s boots are different so I was going to have to improvise anyway.
DIY Superhero Boots Using Duct Tape
You will need:
- Old shoes for the base/soles of the boots
(For removable boots, use wide shoes that are easy to remove like Crocs. Keep in mind that you will have to take apart the boots to have access to the shoes again.) - A pair of old socks or tights (size and style is dependent upon the type of boots you want to make)
- Duct tape in the color you want your boots to be

Instructions
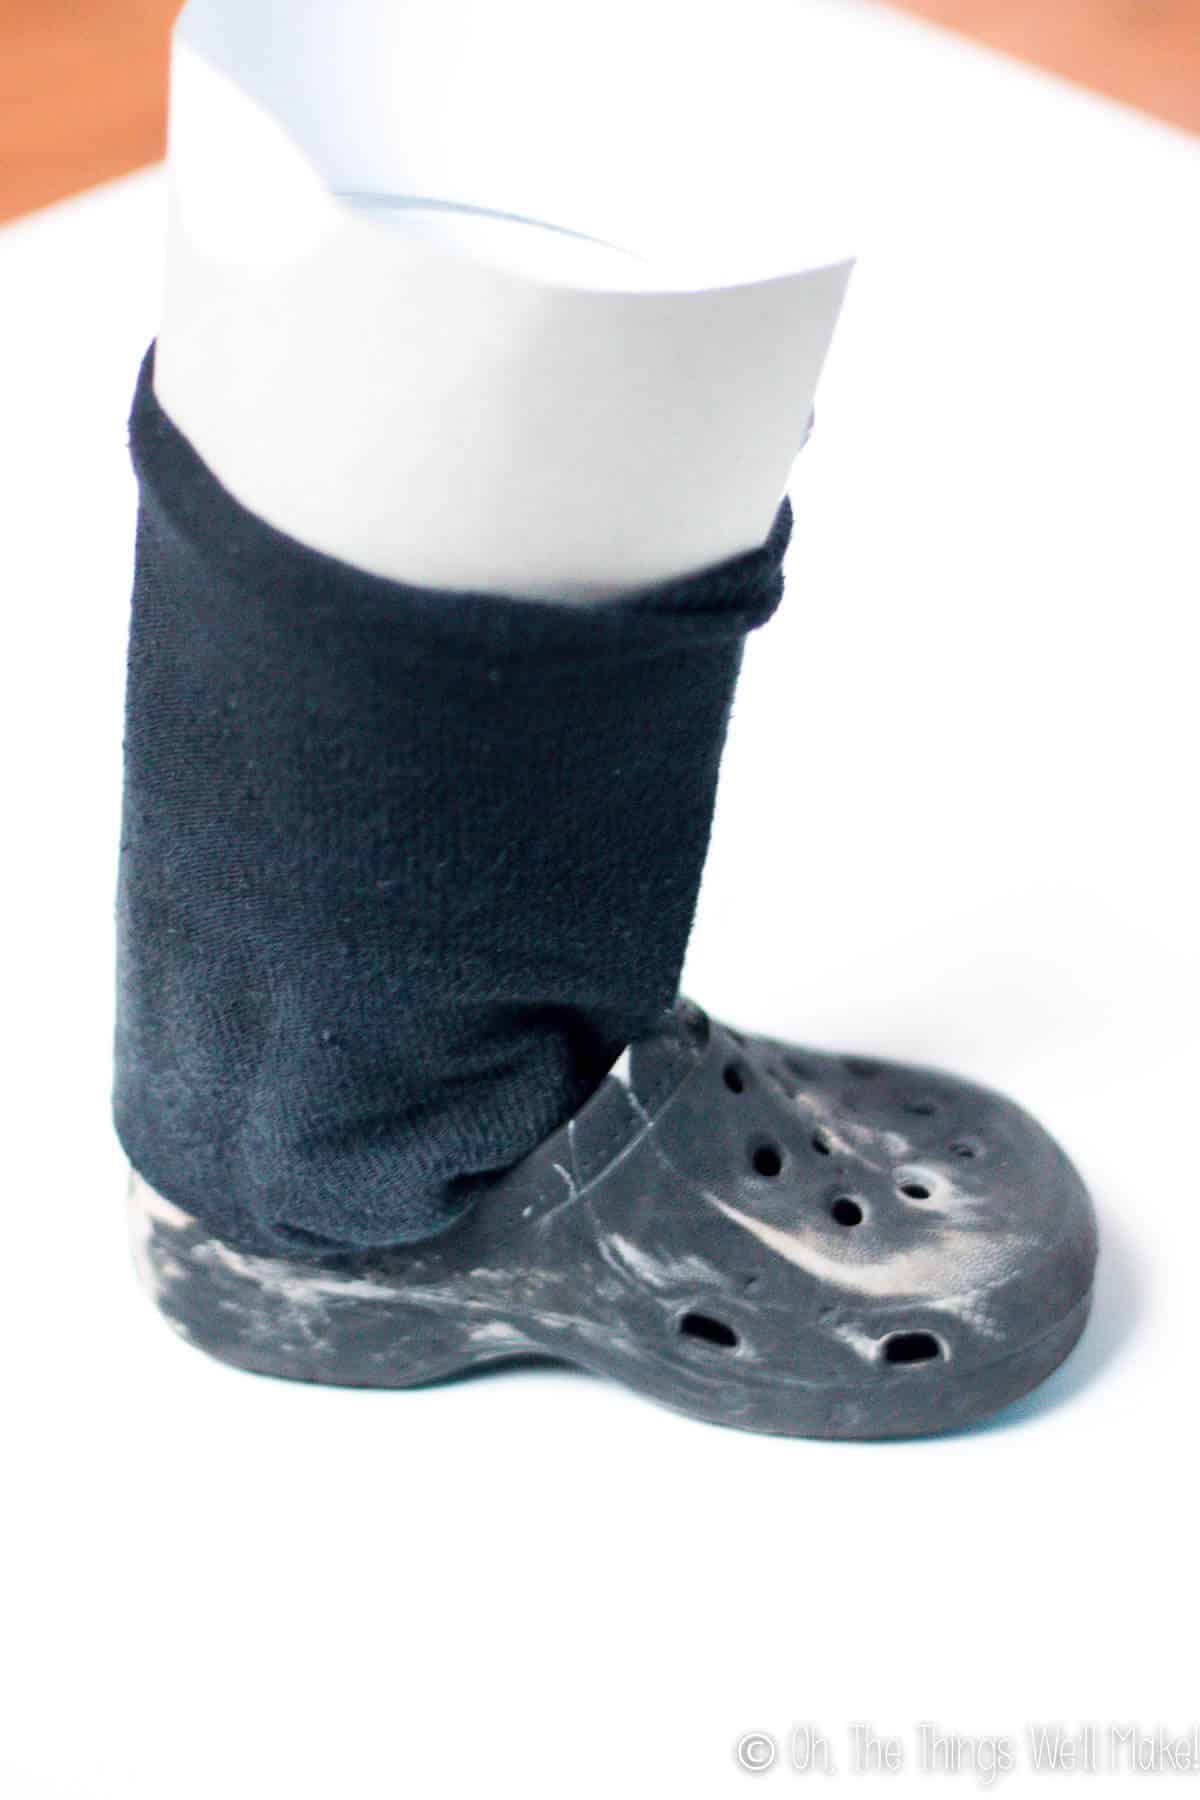
1. Pick out a pair of shoes to use as the base of your boots. I wanted clunky boots that would be easy to remove, so I used a pair of slightly oversized croc-type shoes.
If you are making narrower superhero boots for one-time use, you can use flats like ballerina type shoes (for girls).
2. Find a pair of socks for the shaft of the boot. If you are making narrow boots for one-time use, tights would be a great choice.
Because I was making wider removable boots, I used a pair of my husband’s old socks for my son’s boots.
3. For narrow boots, put the shoes on, then put the tights OVER the shoes to protect them. You will now be covering the tights with duct tape.
Wrap the duct tape over your shoes and up your legs, covering all areas of the tights/socks. You can even wrap your feet completely, covering the bottoms, to help hold the tape in place.
If using this method, keep in mind that you will have to cut these boots off when you are finished wearing them!
4. For wider boots, place the socks inside the shoes. Then place a wide cardboard tube inside the sock to stretch it out width-wise.
I should now have the shape of a boot.
4. Cover the shoes and socks with duct tape. Crisscross the duct tape, completely covering the shoe and the sock. Continue upwards to the desired height of the boot.
5. Finish off the top of the boots: For regular boots, you can cut off the excess tape (and any excess sock material) at the top. Or you can just wrap tape over the top edge.
That’s all there is to it! Your superhero boots are done!
Making boots with a cuff
Captain America’s boots are a bit tricky in that they have a cuff on them. The cuff was actually harder to figure out than I thought it would be (but simple once you know how to do it).
I first tried to make the cuff out of a straight tube of thin fabric covered with duct tape. Because the cuff of Captain America’s boots flares out, my first attempt didn’t give me the look I wanted.
What you really need to do is to make a wide cone of either paper or cloth, cover it with duct tape, and then attach it to the top of the boots by wrapping the tape at the top over the edge and into the boots.
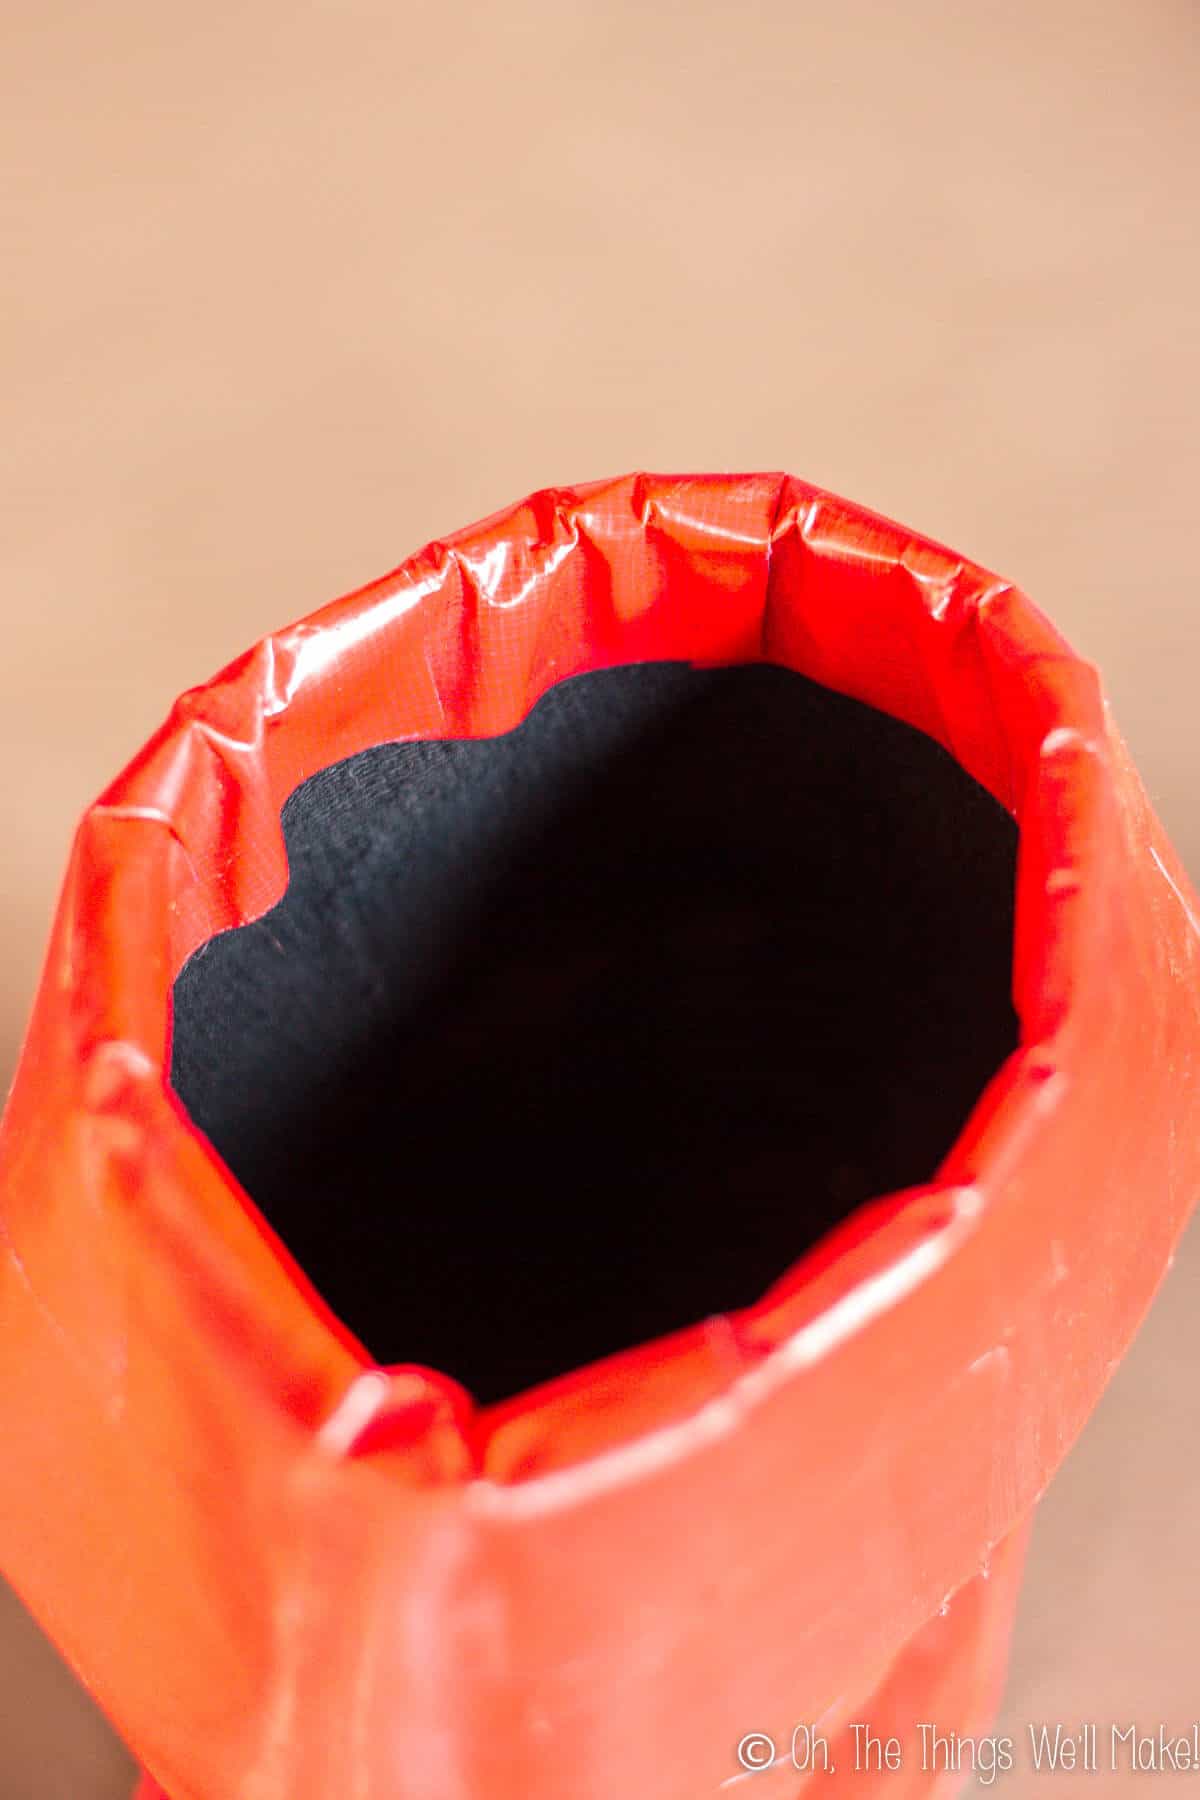
Finish off the bottom of the cuff by cutting off the excess in a straight line all the way around the boots or you can wrap the tape underneath to finish off the bottom edge.
That’s it! Enjoy your new superhero boots!

DIY Superhero Boots
You’ll Need:
For polar fleece boots
- 1 yard polar fleece
- thread or hot glue
- scissors
- 1 pair shoes for wearing underneath the polar fleece
For duct tape boots
- 1 roll duct tape (in the color you want your boots)
- 1 pair shoes (For the base- the type will depend on the type of boots wanted)
- 1 pair socks or tights
- 1 piece pliable cardboard
Instructions
For the polar fleece boots
- Place an athletic shoe (ideally the ones that will be work under the boots) on its side on the polar fleece, lining up the bottom of the shoe with the bottom edge of the fabric.
- Wrap the fabric up around the bottom edge of the shoe, marking the midpoint both in front of the shoe and behind it.
- Lay the cloth flat again and make a line from the point marked behind the shoe up to the height desired for the boots.
- In front of the shoe, trace around the silhouette of the shoe, stopping before reaching the opening. You want to leave an allowance that is the same distance as the distance between the center point you marked and the front of the shoe. (Leave the same allowance all around the shape of the shoe.)Make a vertical line parallel to the line behind the shoe, making it the same height as the other line.
- Cut out the boot shape you just made.
- Use the boot shape you just cut out as a pattern to cut out 3 more pieces identical to that one.
- Each boot will use 2 pieces of fabric. Sew the front and back edges together, leaving the top and bottom edges unsewn. (You can glue the edges instead, if you prefer.)
- Turn the fabric right-side-out, and try the boot on over the shoes.
- Make any adjustments as needed.
- Repeat for the second shoe.
For the duct tape boots
- Decide on the type of boots you'll be making. Thinner boots will need to be made as one-time use boots that you will later cut off your feet. (You'll be able to use the shoes as normal afterwards.) Thicker boots can be made to remove and reuse, but the shoes used will remain part of the boots. (I used Crocs-like shoes for my son's boots.)
For thin duct tape boots
- Put on the shoes you'll be wearing.
- Put on tights or long socks over the shoes.
- Wrap duct tape over the socks/tights, covering them completely.
- When finished with your boots, carefully cut down the back of them to remove them.
For wider, removable boots
- Place a sock inside a wide, easy to remove shoe.
- Make a tube out of cardboard, and place the tube of cardboard inside the sock to help hold it in place and open. It should form a boot-like structure.
- Wrap duct tape over the shoe and the sock, completely covering it.
- Repeat for the other boot.
For the cuff (optional)
- Make a cone of fabric or paper with the top width the same as the circumference of the boot and the height you want the cuff to be.
- Cover one side of the cone with duct tape.
- Tape the cuff to the boot with the duct tape side outwards.
Notes
- If using a polar fleece with a “right side,” you’ll want to make 2 identical pieces and 2 mirror image pieces instead of 4 identical pieces.
When sewing them together, you need to sew them with right sides facing each other. - For the polar fleece boots, you may want to consider taping them in place with double sided tape. If not, they may rise up off the shoe.
- You may be able to reuse thinner boots that have been cut off by taping them back up again for the next use.
- When making removable duct tape boots, make the cardboard tube wide enough so that it’s easy enough to remove the boots later on. Using wide shoes like Crocs also helps make removal easier.
*This post was originally published on October 27, 2015. It was updated and rewritten in October of 2019 with clearer instructions, new photos, and more information.
 Español
 Homemade Dulce de Membrillo (Sweet Quince Paste)
Rachel
These are such great ideas for all of the little superheroes in our lives. I saw a lot of kids with cloth boots on at ComicCon so I was wondering how they achieved the look, and I can imagine a lot of them took this route. Thanks for sharing the idea!
Tracy Ariza
Thanks, Rachel!
I may try making some out of vinyl next time, but this was a great solution for a quick fix when I didn’t have any vinyl on hand. It definitely turned out better than I thought it would. My son loved them, too, so that’s what really matters. He was really upset when he outgrew them.
We’ll see what Halloween bring this year. 😉