

Easy DIY Hair Conditioner (That Actually Works)
Make your own DIY hair conditioner with simple ingredients you can customize. This real conditioner leaves your hair soft, smooth, and easy to detangle and can even be used as a leave-in.

When I first wrote this post, I had just taken the Dressing Your Truth® course, and it changed how I was doing my hair.
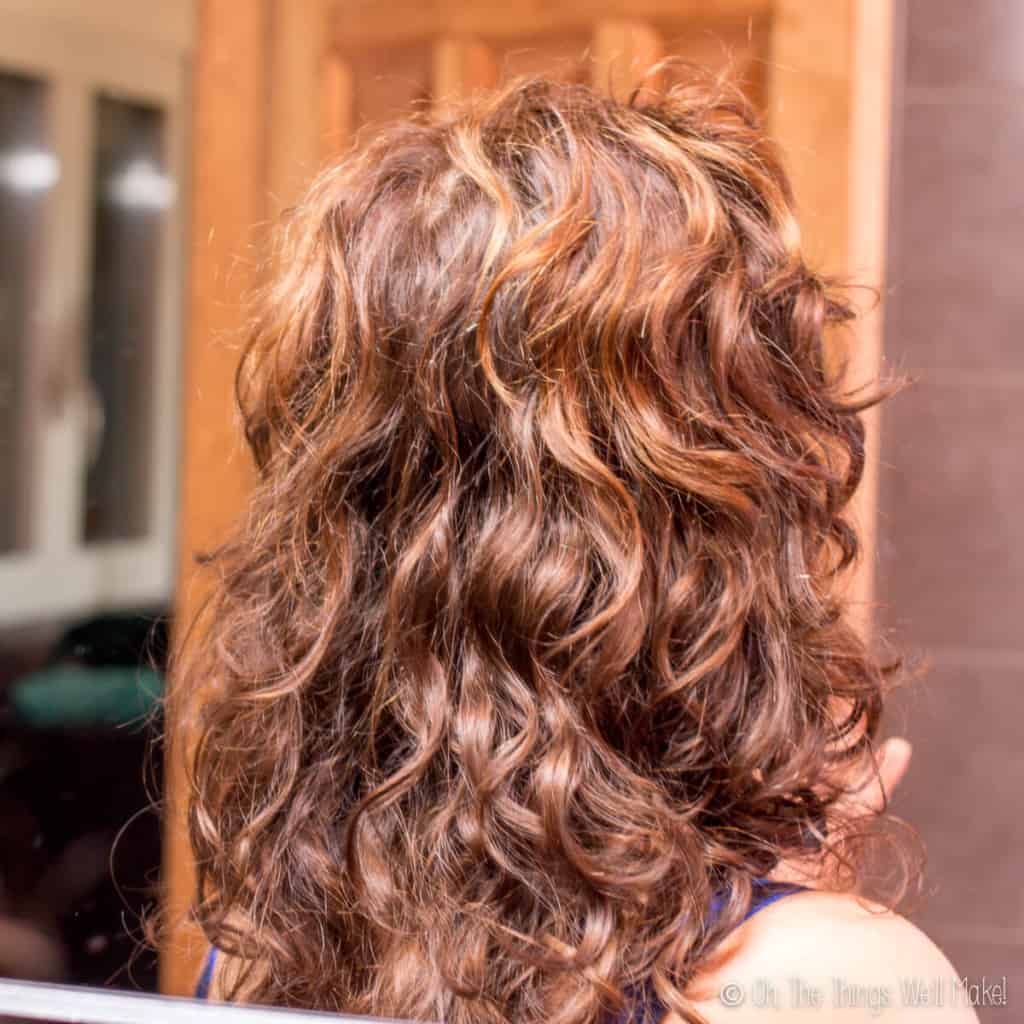
Up until then, I had been straightening it all the time. It helped me realize I didn’t need to fight my natural texture, so for the first time in over 20 years, I started letting my hair do its natural curly and wavy thing.
To help support my waves, I started washing my hair less often and using a homemade flaxseed hair gel. I used this conditioner as a co-wash during the week and my homemade clarifying shampoo about once a week. The difference was immediate. I started seeing waves and curls I didn’t even know I had, and now I can just let it do its thing and I love how it looks.
This isn’t just a mix of oils or a quick DIY shortcut. It’s a real conditioner, similar to what you’d buy in a store, but you get to control what goes into it and adjust it to suit your hair.
Watch the full tutorial
Here’s exactly how I make it step by step, along with ingredient tips, troubleshooting, and customization ideas.

Why make a homemade conditioner?
There are a lot of reasons to make your own conditioner.
When you realize that most conditioners are mostly water, it starts to make sense. You can make something very similar at home for much less, even when using high-quality ingredients.
A lot of products highlight a specific oil or “miracle” ingredient, but in reality, those are often only used in small amounts. The rest of the formula may include ingredients you may not love or may prefer to avoid.
When you make your own, you get to decide exactly what goes into it and what to leave out. That’s always been my main reason for making things myself. I like knowing what I’m using and being able to adjust things depending on what my hair needs.
It’s also surprisingly affordable, and you can reuse your containers to cut down on waste. If you’d rather skip bottles altogether, you can also try my homemade conditioner bar.

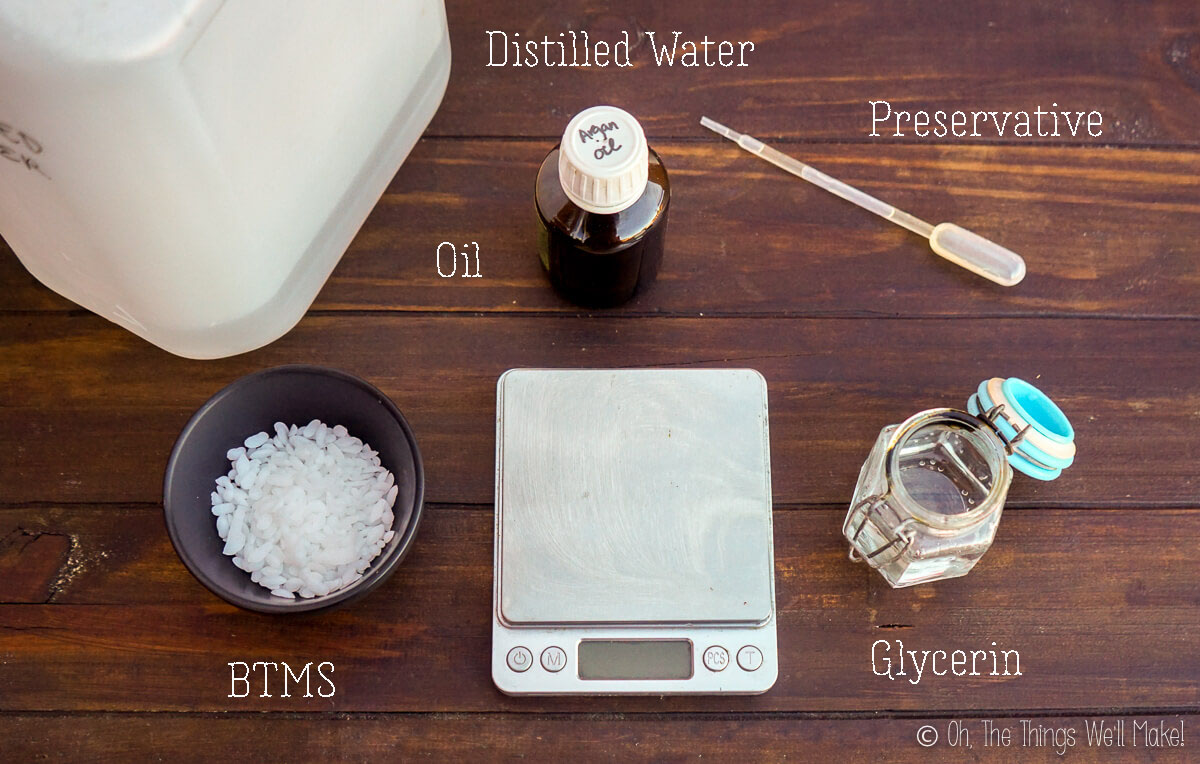
The ingredients
A basic conditioner only uses a few simple types of ingredients: water, oil, an emulsifier, and a preservative. From there, you can keep it simple or customize it with things like vitamins or essential oils.
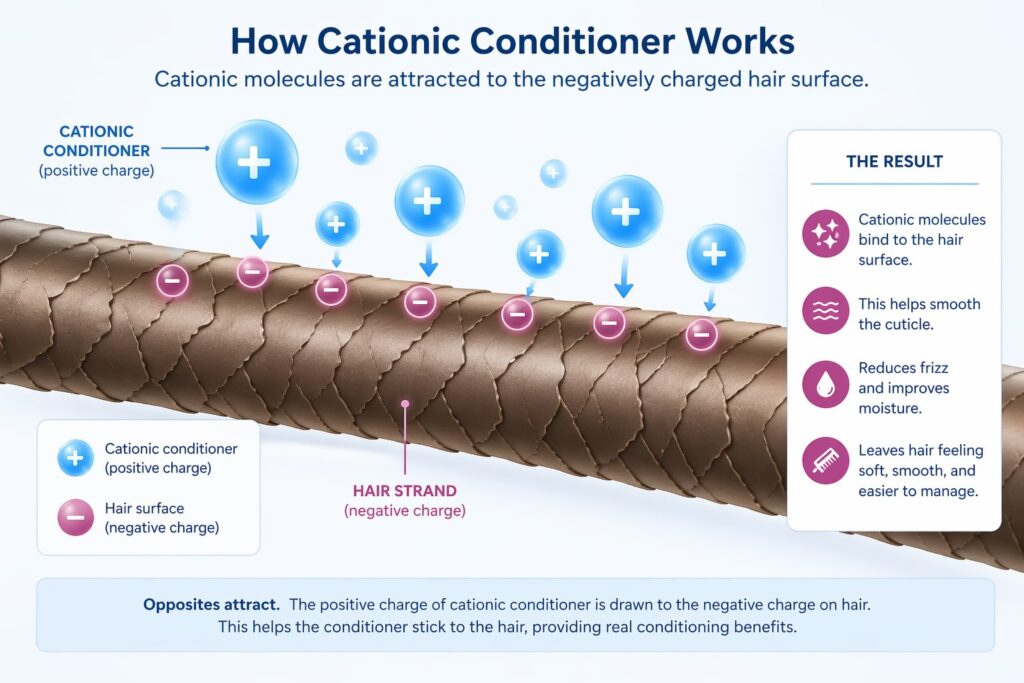
To make a conditioner, we’re making a simple emulsion. It’s just like making a simple lotion. The main difference is the type of emulsifier used. In this case, we’re using a cationic emulsifier, BTMS, which is what gives this conditioner its conditioning properties.
What is BTMS?
The main ingredient that makes this a true conditioner is BTMS (Behentrimonium Methosulfate).
This is what gives the conditioner its slip and makes it easier to detangle your hair. Without it, you’d end up with something more like a lotion, which won’t have the same feel or work nearly as well on hair.
BTMS is what’s called a cationic emulsifier, which just means it has a positive charge. Hair has a slight negative charge, so the BTMS is attracted to it. It lightly coats the hair and helps smooth it so the strands don’t catch on each other as much. That’s what gives you that soft, slippery feel and makes it easier to comb through.
When I first shared this recipe, I described it as a “natural” conditioner because I had taken a course that used BTMS in their formulas. Since then, I’ve learned that not everyone considers BTMS to be natural, especially when it comes to stricter certifications.
That said, this is still the version I reach for most often because it simply works better for my hair. I’ve tried other options, but they just don’t give the same slip or leave my hair feeling as soft.
Substituting BTMS
If you’d rather not use BTMS, there are other cationic emulsifiers that can be used to make a conditioner.
That said, they don’t all give the same results. In my experience, BTMS gives the best slip and leaves the hair feeling the softest.
I’ve experimented with a few alternatives, and I’ll be sharing more details about those options in a separate post.
BTMS-25 vs. BTMS-50
When I first wrote this post, I didn’t even realize that BTMS was sold in different versions. My supplier just called it “BTMS,” but after looking into it more, I realized I had been using BTMS-25.
BTMS-25 is a combination of Behentrimonium Methosulfate and cetearyl alcohol, which acts as a co-emulsifier. The amount of the active conditioning ingredient is lower, but it tends to give a thicker, creamier conditioner.
BTMS-50 has a higher percentage of Behentrimonium Methosulfate, along with cetyl alcohol and butylene glycol. Because of that, it usually makes a slightly lighter conditioner.
Some people prefer BTMS-25 because it has fewer ingredients, while others choose to avoid BTMS-50 due to the butylene glycol. While it’s generally considered safe, some people prefer to avoid glycols or more processed ingredients.
You can use either one in this recipe, just keep in mind that the final texture may be a little different.
The oil phase
In this recipe, I use a small amount of oil to help soften the hair and add a bit of shine. I often use argan oil, but you don’t have to use it.
You can swap it out for another oil or even use a combination of oils, depending on your hair type and what you have on hand. Just try to keep the total amount about the same so the consistency stays similar.
Some oils are lighter, like jojoba or argan oil, while others like coconut, olive oil, or avocado oil can feel heavier. Shea butter can also be used, especially for thicker or curlier hair, but it may be too much for finer hair.
The water phase
The main ingredient in most conditioners is water, and this recipe is no exception.
I like to use distilled water because it doesn’t contain minerals or impurities that can affect the final product. If you don’t have distilled water, you can use filtered water that has been recently boiled and cooled.
You can also replace part of the water with something like a hydrosol or aloe juice if you want to customize it a bit.
If you start adding a lot of things like aloe, hydrosols, or other botanicals, just keep in mind that they can make the conditioner a bit harder to preserve, so it’s best to keep things fairly simple.
About glycerin
Glycerin is a humectant, which means it helps draw moisture into the hair.
That said, it doesn’t work well for everyone. In very dry or very humid climates, it can sometimes make hair feel dry or sticky instead.
If you’d rather not use it, you can simply leave it out and replace it with more water.
Adding a preservative
Because this conditioner contains water, it needs a preservative. There’s really no safe way around this if you plan to store it at room temperature.
Without one, it can grow bacteria or mold, even if you can’t see it right away. So this is one step you don’t want to skip.
The good news is that there are several preservatives available for home use that work well in recipes like this. I’ve used options like Cosgard (Geogard 221), Sharomix, and others over the years.
If you want to learn more about the different preservative options, I have a post about natural preservatives that goes into more detail.
Beginner’s Guide to Natural Preservatives
Just make sure to use a broad-spectrum preservative and follow the recommended usage rate for the one you choose. Most are used at around 1% of the recipe, but always check your specific product.
It’s also important that the pH of your product works with your preservative, since some only work within certain ranges. I go into more detail about that in my post about pH in cosmetics.
Optional ingredients
You can also customize this conditioner with a few optional ingredients.
For scent, I usually add essential oils. I like lavender and rosemary, but you can use whatever you prefer. Keep the total amount low, usually around 0.5–1% of the recipe.
You can also add things like d-panthenol or proteins like rice or wheat protein to help support the hair.
If you’d like to see a full example of how this recipe can be customized, I’ve shared an example of a customized conditioner using aloe juice, different oils, and added ingredients like panthenol and protein.
How to make it
Making this conditioner is very similar to making a simple lotion. You’ll heat the water phase and oil phase separately, combine them, and then blend everything together until it forms a smooth, creamy emulsion.
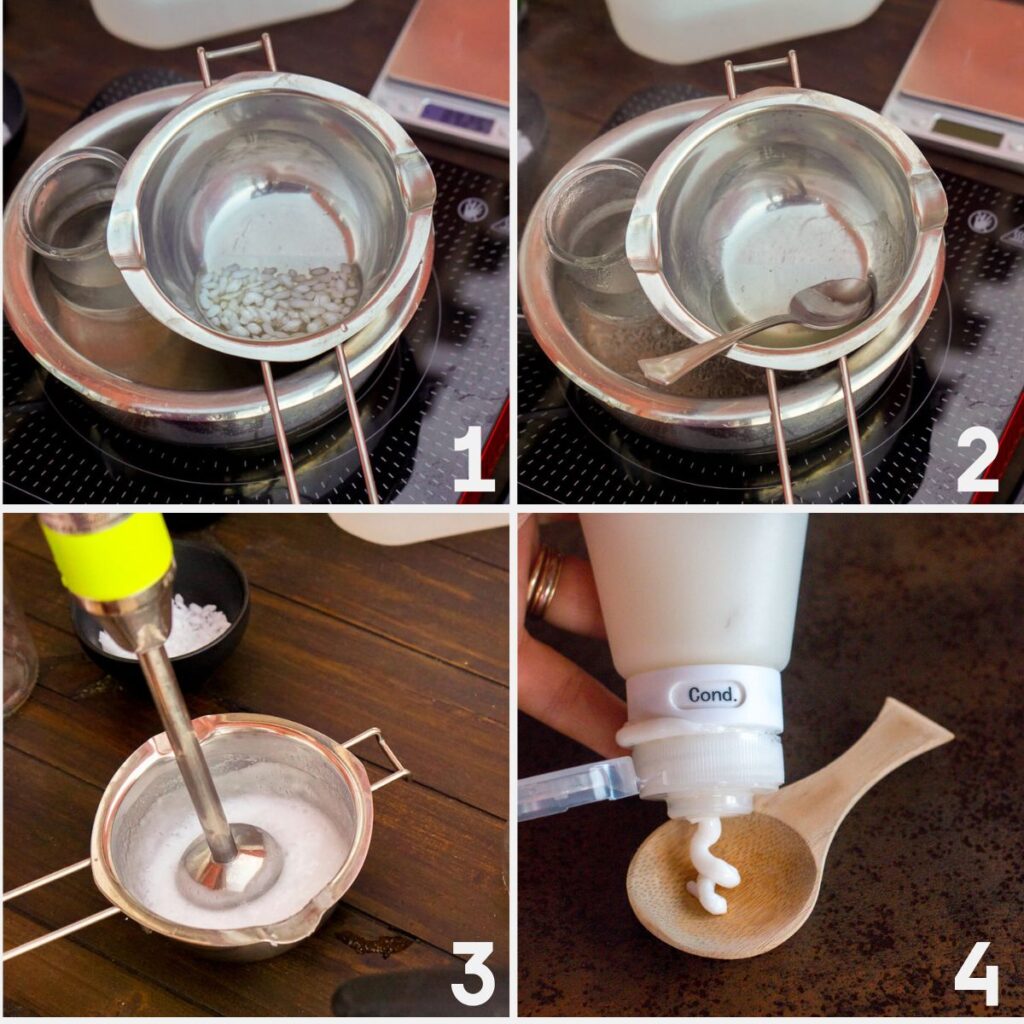
Start by heating the distilled water in a double boiler. (1) At the same time, in a separate heat-safe container, combine the oil and BTMS and heat them until the BTMS has fully melted. (2) Once both phases are hot and roughly the same temperature, slowly pour the water into the oil mixture while blending or stirring.
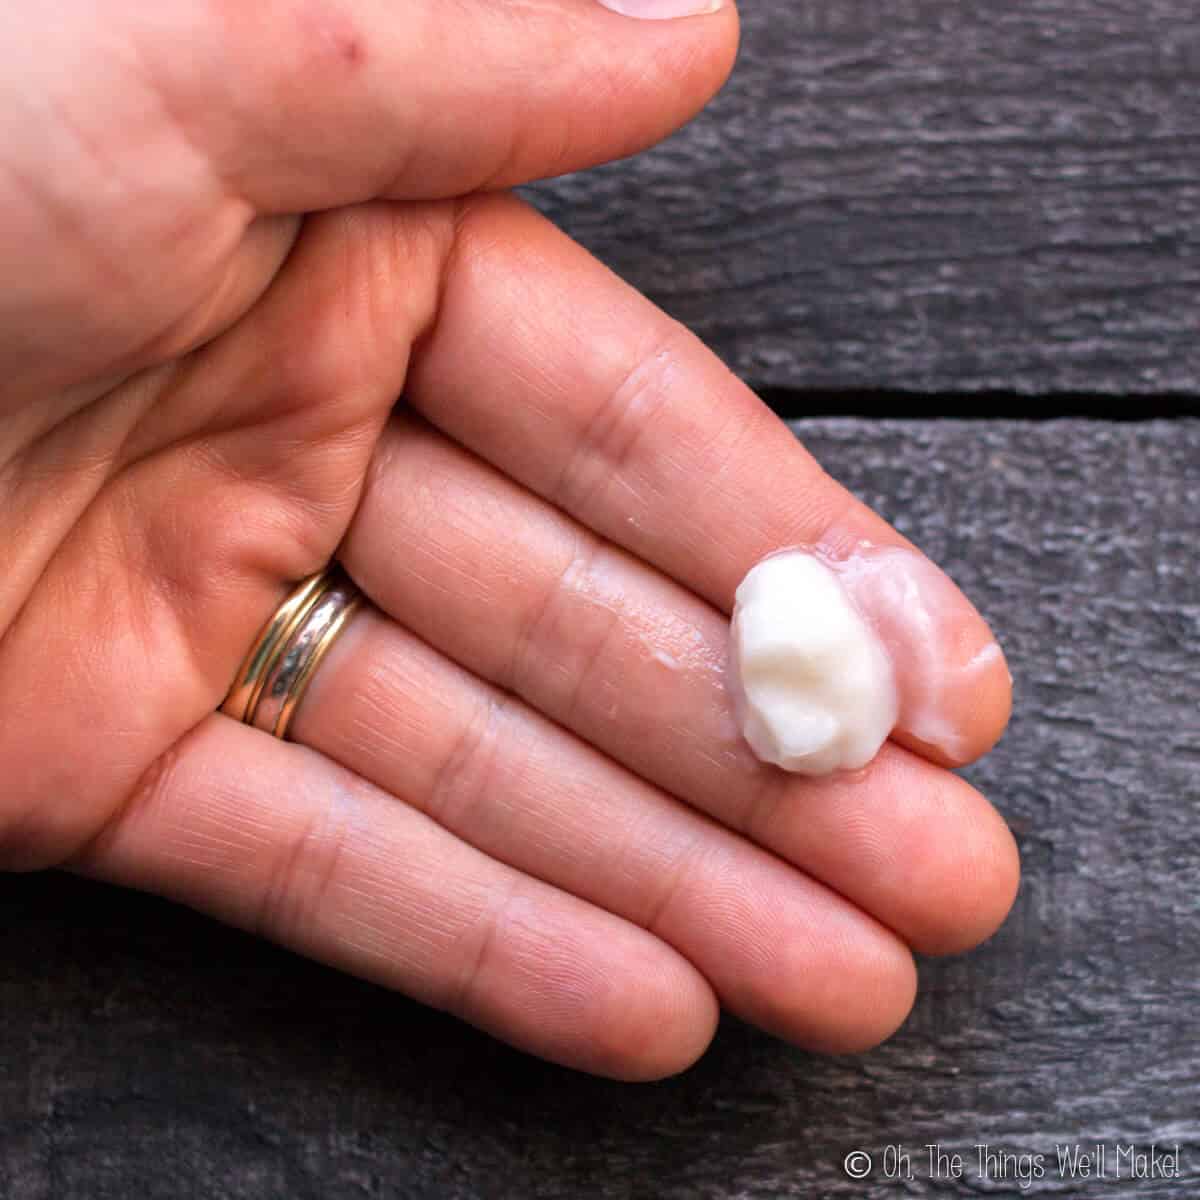
At first, the mixture will look thin, but as you continue blending, it will quickly turn creamy and opaque. It will continue to thicken as it cools. Once it has cooled down to around 30°C/90°F, you can add the preservative, essential oils, and any other heat-sensitive ingredients.
After that, check the pH and adjust if needed. Then transfer the finished conditioner to your container and let it cool completely before closing it.
How long does it keep?
With a preservative, this conditioner should last around 3 months when stored properly. It will probably keep longer than that, but since we’re not doing formal stability testing at home, I like to stay on the safe side.
I still prefer to make smaller batches so it’s always fresh, and I keep an eye on it and remake it if anything seems off.
If you choose not to use a preservative, you’ll need to treat it more like a food. Keep it in the refrigerator and use it within about a week.
How to use it
I usually use this as a rinse-out conditioner after washing my hair.
Apply a small amount to the ends of your hair, work it through, and comb it through to help detangle. Then rinse it out.
You can also use a small amount as a leave-in conditioner, especially on damp hair. Just be careful not to use too much, as a little goes a long way.
You can also use it as a co-wash if you’re trying to wash your hair less often. Just massage it into your scalp and rinse it out well.
I’ve also used it between washes to help refresh my curls. I lightly mist my hair with water, then mix a small amount of conditioner with a bit of homemade hair gel (or flaxseed hair gel) and scrunch it through to bring the curls back.
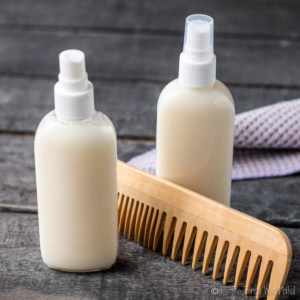
You can store this in a pump bottle or another reusable container. I also like using silicone travel tubes since they’re easy to squeeze and work well if you’re taking it with you.
If your hair is very fine, start with a very small amount and adjust as needed.
FAQs
You can, but it won’t really be the same. BTMS is what gives the conditioner its slip and detangling ability. Without it, you’ll end up with something more like a lotion, which doesn’t work nearly as well on hair.
Yes, but results will vary. Other cationic emulsifiers can work, but in my experience, they don’t give the same softness or slip. BTMS is still the one that consistently works best.
If you’re storing it at room temperature, no. Because this recipe contains water, it needs a preservative to prevent mold and bacteria growth.
If you really want to skip it, you’d need to keep it in the fridge and use it within about a week.
It’s best to use distilled water. Tap water can contain minerals or impurities that may affect the final product or reduce shelf life. If needed, you can use filtered water that’s been recently boiled and cooled.
This usually happens if:
The oil and water phases weren’t at a similar temperature
It wasn’t blended enough
The emulsifier wasn’t fully melted
Try blending a bit longer next time and make sure everything is fully heated before combining.
Small changes can affect the texture:
Too thick: reduce the BTMS slightly or increase the water
Too thin: increase the BTMS a bit
It will also thicken more as it cools, so don’t judge it too early.
Yes, but use a very small amount. A little goes a long way, especially for finer hair.
Absolutely. You can swap the oil for something else or use a blend. Just keep the total amount about the same so the consistency doesn’t change too much.
Yes, but keep it simple at first. Adding more ingredients can make the conditioner harder to preserve, so make sure your preservative can handle the final formula.
With a preservative, about 2–3 months is a safe estimate. Without one, about a week in the fridge.
Prefer a faster overview?
Easy DIY Hair Conditioner
Equipment
- pump bottle
Materials
- 83 g distilled water
- 5 g BTMS
- 5 g glycerin
- 5 g argan oil or other oil(s)
- 1 g preservative (or use your preservative at its recommended rate)
- 1 g lavender essential oil or other essential oils
- lactic acid (for pH adjustment, optional)
Instructions
- Clean your work surfaces, utensils, and packaging. (You can use alcohol to better sanitize surfaces.)
- Weigh out the distilled water.
- Heat the water over a double boiler while you measure out the oil(s) and emulsifier.
- Weigh out the oil (or oils) in a double boiler insert.
- Tare the scale and add the BTMS (or another cationic emulsifier) to the oil(s).
- Heat the oil and BTMS mixture over the double boiler until the BTMS has melted. Fully stir the ingredients together until well combined and remove from the heat.
- Slowly add the hot water to the hot oil mixture while stirring or blending, keeping both phases at a similar temperature (around 70–75°C / 160–170°F).Blend with an immersion blender (or stir vigorously) until the mixture comes together and begins to thicken.
- Allow the mixture to cool, stirring occasionally, until it reaches around 90ºF/30ºC. Then add the preservative, essential oils, and any other heat-sensitive ingredients. Mix well to fully incorporate.
- Test the pH of the conditioner. Ideally, you want the pH to be in a good range for both your hair (around 4.5–5) and for the effectiveness of your preservative. (It’s easiest to choose a preservative that works in that range rather than adjusting the whole recipe.) Adjust the pH down with a couple of drops of lactic acid (or, less likely, up with a solution of NaOH).
- Bottle your conditioner. Wait until fully cooled to cap the bottle to prevent condensation from forming above the conditioner. You can now use it as needed!
Notes
- Make small batches and use within about 3 months.
- You can substitute the argan oil with another oil or a blend of oils.
- Glycerin is optional and can be replaced with more water if preferred.
- If your conditioner feels too thick, you can reduce the BTMS slightly or increase the water a bit in your next batch.
- Use a broad-spectrum preservative suitable for water-based products and follow its recommended usage rate. Most are used at around 0.5–1%, but always check your specific product.
- Make sure your preservative works within the pH range of this recipe (around 4.5–5).
- For a full example of how to customize this recipe, see my example of a customized conditioner.
This post was originally published on March 9, 2017. It has been updated with new photos, clearer instructions, and a step-by-step video.


Hi…In my country they do not sell Btms in the form of pills, it is more like flakes. Can I use the btms in the form of flakes for the conditioner and instead of heating it I dissolve it with water? Thanks
Hi Maria,
I would think that you’d still need to heat all of your ingredients to get a good emulsion. Does it really just dissolve in water without heat?!?!?
I use wax flakes sometimes, rather than beads, but they still need heat to work.
hello Tracy,
thank you for sharing this recipe with us. I have a question regarding the emulsifier and the preservative you used in this recipe, I am not sure that I will find these specific types you mentioned in the market, so I was wondering if I can use other emulsifiers and preservatives ? I can get my hands on emulsifier such as : soy lecithin, potassium stearate, and mono propylene glycol, and for the preservatives I can get : potassium sorbate, sodium benzoate, and calcium propionate. all of them are food additives, please recommend. also I would like to ask you for a shampoo recipe that would be great. Thank you ! 🙂
Hi Roa,
I have to admit that I’ve never tried any of the emulsifiers that you have mentioned, and am not sure if they would be strong enough for emulsifying lotions and creams. I’ve always stuck with the different emulsifying waxes and natural emulsifiers meant for making these sorts of products.
In all honestly, the emulsifier itself influences the way the final product turns out, so even if they would make a decent type emulsification, I’m not sure what consistency you’d end up with, and if it would make for a decent hair conditioner.
As for the preservatives-
I’m not sure how effective the preservatives you mentioned would be either. I think most of them are used as co-preservatives and aren’t broad spectrum preservatives that can be used by themselves for things like lotions.
I found this site’s info about sodium benzoate– and they suggested using both potassium sorbate and sodium benzoate together to help make them more broad spectrum as preservatives. That said, I’m not sure how even that works as they both seem to be very pH dependant.
Sorry to not have better news for you. You’d have to ask the suppliers for each particular ingredient to see what they have to say about them.
I’m actually working on a shampoo recipe. I recently started taking a class in natural surfactants, and hope to get some recipes up on the blog as I learn more and am able to elaborate decent recipes. If you’re having a hard time find even basic emulsifiers and preservatives, though, I’m not sure how easy it will be for you to find the surfactants needed for most shampoos and similar products. I buy all of my ingredients online and have them sent to me. They aren’t the sorts of things I can find locally either.
Dear Tracy,
Thank you for your reply I understand what you’re trying to tell me. I wish you all the best in the upcoming recipes you will post 🙂 .
Great! Thanks you, Roaa! 🙂
Hey. Love the recipe can’t wait to try it. My question is how long will it last if I make a large amount and leave it for a while??
Hello!
Well, it really is going to depend on the preservative you use. I normally use either Leucidal or Rokonsal. They’re both natural preservatives that are said to allow you to keep a product for up to 3 months. That’s what the bottles I buy say. I’ve heard from people who make natural products that use Leucidal in their products, though, and they think that it preserves for between 12-18 months. I’ve honestly used homemade conditioner that was more than 3 months old without noticing any differences.
I don’t test for bacteria in my homemade products, though, so I can’t really be sure if they have been populated with something that shouldn’t be in there.
I guess my short answer is it depends on how worried you are about possible bacterial contamination. The product should last 3 months without any problems. It will likely last many months more without you being able to tell that anything is different. Whether or not it could harbor contaminants that could hurt you in some way is a whole other issue.
In any case, once you have the materials on hand, you can whip up a new batch in around 10-15 minutes, most of which is getting everything together and heating up the water for your double boiler. (Which is why I’m normally making lotion, conditioner, and deodorant all at the same time.) 🙂
Hey, I really feel great that I came across your article. This is really nice and enjoyed reading it. I appreciate your knowledge of making our own natural conditioner. must say this is a perfect article for hair care. Thank you so much for giving your thoughts about hair care. This conditioner is extremely useful and super shiny. Thanks a lot.
This recipe sounds so good i cant wait to try it. I see in your personal one you use wheat protein. My family is gluten free. Wheat protein makes me breakout and my son is celiac. What is another protein we can use and do we Substitute it with some of the water? Like milk or coconut milk? If we use reg milk do we need to boil it? Thank you so much for your help
Kari
Hi Kari,
There is no need to add anything in place of the wheat protein. I add things like wheat protein in the hopes of keeping breakage down and helping protect the hair from sun and dryer damage. It’s also said to help with combability (if that’s a word) 😉 , although I find that this recipe works fine without it in that sense. To be honest, I can’t be certain that it helps or not, but I keep it in mine just in case. I’m really happy with the final product, so I just go with it.
I’m not sure about adding milk to this. Any sort of organic addition can possibly cut down the shelf life. Even with the aloe juice, I find that the mix changes color soon after having made it. That said, I haven’t really found it to alter the way the final conditioner works. Even months past the 3 month post (Yes, I keep some around to check these things), I find that there is no strange odor or any other sorts of changes, and the product works the same. At the same time, I like to err on the side of caution and keep organics to a minimum and stay with a short shelf life, just in case.
All of that said…
I’ve been tempted to try adding in some goat milk powder myself for curiosity- but haven’t tried it yet. 🙂
There are other non-wheat additions your could try in your formulation.
Biotin in a nice addition that is said to help with brittle hair. I sometimes use a natural hair product from the place where I buy my supplies that has a mix of biotin, rice extract, some amino acids, and, unfortunately, wheat extract.
You can also try increasing the panthenol in the recipe. The B-vitamin combo (of Biotin and Panthenol) is probably a great combo to have working together.
I’ll give ti some more thought- if I come up with other good additives, I’ll try to remember to add them here.
Hello!! I loved your recipe and I have a question… Could I make with the same recipe a body conditioner? If I leave the same oils, or use almond oil, take advantage of the wheet protein for the body, glycerin etc can I use it for hydration? Thank you very much!!!
Hello,
Thanks!
Yes, definitely! There isn’t really much of a difference between conditioners and lotions. Lotions tend to use different emulsifiers that give a bit thicker of a texture. This really could be used as a light lotion, though, without any problems. My bag of BTMS actually says to use it for light lotions as well as conditioners.
Thank you very much! I loved the idea!
Perrrrrfect! The body lotion is hydrating and light! I used jojoba and almond oil, rosewater, vegetable glycerin, wheat protein, pomegranate extract and ylang ylang essential oil! I must admit I used a little more than 5gr by accident but it made the lotion silky!
Hi I just tried your recipe for the first time, I made two batches one using your measurements. The second I doubled up the ingredients because I needed a bigger batch but it did not come out good.
I have to admit when I made the larger batch I did so without the scale. I converted it to teaspoons not sure if that’s where I messed up. I find this recipe tricky to measure out but I am so excited to try it. Any suggestions or recommendations you can offer would be greatly appreciated!
Hi Christina,
Just to understand correctly, the first batch turned out correctly?
What exactly happened with the second batch? Did it not emulsify correctly?
I’m happy to try to help you fix it, but without knowing the problem it is a bit difficult.
The measurement is a big part of the recipe- too much water and not enough oils or emulsifier will cause problems with emulsification. The same problems could also be temperature related.
The last possibility- is I’ve since heard there are different types of BTMS and that some emulsify better than others. The type I buy here in Spain hasn’t specified which one it is which doesn’t really help. I’d love to be able to try out a bunch of different types to be able to help others with any issues they may have.
Hi I’ve made this in a small batch and it was great. When I try a larger batch I cannot get it to emulsify. I’ve heated it beyond 80 Celsius to make sure it is melted. It looks as though the BTMS is floating on the top. This is the second attempt and same result. I have added some different Emulsifying wax to see if that helped and it has a little but still separates. I haven’t wanted to add too much of the cetearyl alcohol emlsifyer in case it affected to performance of the conditioner. The measurement have been double checked. Do you think it needs more Oils/fats? Any suggestions?
Hi Kylie,
When I’ve had issues with something not emulsifying well, there are a few things that I try…
1) I reheat everything together, and keep the mixture over the double boiler for at least 5 minutes, making sure to stir well as it cools. If it’s an especially stubborn batch, I whip it with a blender as it cools to ensure it stays emulsified. If I’m making a new batch of a tricky recipe, I sometimes will heat and hold both the liquid and fat components for several minutes before mixing them together.
2) As it appears you tried by adding some cetearyl alcohol, I add a bit more emulsifier sometimes, and that can also help, but, yes, it can also affect the texture. If you are wanting a deeper conditioner, that probably wouldn’t be a problem, but if you want a light, leave-in conditioner, it may or may not be.
3) Yes, adding more oil can actually help a stubborn batch. I still haven’t posted my roll-on deodorant recipe because, while it worked out really well for me with one emulsifier, I was having issues with other, easier to find emulsifiers not emulsifying well in the recipe. I refuse to put up a recipe that only occasionally works well for me, so, between batch and batch, I’ve drawn out posting it on the blog. What finally seemed to fix things was to add more oil to my recipe. I’ll be making a new batch, to make sure I get repeatable results, in the next few days and will hopefully be (finally) posting that recipe soon.
What are you having issues in the first place?
If you had both parts (water and oils) of the formulation heated well, and have measured correctly, etc., perhaps it has to do with the emulsifier used…
It may have to do with the different BTMS formulations. When I wrote this post, I wasn’t aware that BTMS is sold in different formulations. Mine doesn’t have any number specifications, so I’m not even sure which BTMS I use. Most people have given me favorable feedback on the recipe as written, even when they have used different formulations of BTMS, so I’ve left things as is without making mention of it. I think this is the first time that I’ve heard about issues with the recipe, but if I hear of more problems, I may have to address the issue. Do you know which BTMS you are using?
Of course, it could just be that larger batches need a bit more mixing, etc., to ensure everything fully binds. I tend to make small batches of everything, so I rarely even need to use a blender. Most people who make large batches of creams and lotions, always use a blender, though. It could just be that your large batch needs a bit more help to ensure everything combines well.
HI! I am very eager to try this, but wondering if you know how Vitamin E oil or Rosemary Extract would work as a preservative? I’m asking because I already have those on hand. Thanks!
Hi Kate,
Neither Vitamin E oil or rosemary extract are true preservatives. Both vitamin E and rosemary extract are great antioxidants that help keep oils from going rancid. They may protect mixes from oxidation, but won’t protect against bacterial and fungal growth.
If you are making body butters and other mixes without water, they are great additions to keep things fresh longer, apart from their other benefits, but as soon as you add water to the mix to make an emulsion like a lotion or conditioner, you have created the perfect medium for bacteria and molds to form.
Without a true preservative, you’d need to keep the mixture in the fridge, and should probably use it within a week or so. There are lots of inexpensive natural preservatives like Leucidal, Rokonsal, etc.- which are great to have on hand for creating homemade products. Once you have one, you can make lotions and all sorts of other products yourself. I highly recommend it!
Hi,
Thank you for this wonderful recipe. I have curly hair and have been looking for a natural conditioner. So glad I found this. I live in a very humid area so I plan to skip the glycerin. Di I need to replace it with anything else ?
Thank you for the wonderful work you are doing.
Hi Khush,
Thank you! 🙂
You’re very welcome for the recipe! It’s worked well for me, and I now have much curlier hair than I knew! It’s definitely improved since I’ve been using this and using less shampoo!
It’s fine to skip the glycerin. You could replace it with more distilled water if you find that the conditioner is too thick. (You can either sub it out from the beginning, or add it in later if you find it too thick without it and want to thin it out.) If you choose to add more water later to thin out your conditioner, make sure to shake it well to incorporate all of the water with the other ingredients and preservatives. (You don’t want a layer of water floating on top of the conditioner because it could lead to bacteria/mold buildup).
I hope that helps!
I am so excited to try your conditioner recipe! Your hair looks a lot like mine and I have been searching for a Natural Conditioner recipe for several weeks. I just ran out of my store bought brand and am in desperate need! I hope to make this tomorrow. (I JUST finished my very first batch of your Castile Soap recipe – its cooling in glass jars now and it came together beautifully – THANKS!)
However, I have one question about the conditioner. I have a different Emulsifier. I have never used it before so I don’t know how it behaves. Its an organic wax emulsifier made from beeswax, lecithin, and carnauba wax. Also, I was planning on using Colloidal Silver (distilled) water instead of a preservative. Do you think the recipe would still work with these substitutions?
Hi Christa,
I’m so happy the soap worked out for you!
Yes, I’m loving the homemade conditioner so far. I’ll probably be working on making a thicker, more moisturizing hair mask soon for those who need something like that. For me, this is perfect, but when I was shampooing, I used to need to use thicker, more hydrating conditioners every once in awhile.
The main difference between a lotion and a conditioner is really the emulsifier used. The emulsifiers make a big difference in the texture, consistency, and overall conditioning of the final product. For that very reason, I can’t really recommend using a different emulsifier, especially without having it tried that specific emulsifier myself. I don’t know if it would leave a heavy feeling on your hair or not.
Some emulsifiers can be used for both lotions and conditioners. This one (BTMS) is one example; it is suggested for hair conditioners and “light” lotions. The other day, I shaved my legs in the shower and afterwards used this conditioner on my legs out of curiosity, and it was fine to use as a nice, light lotion.
I guess my point is that while I can’t promise it will be great for your hair, and it may not be (probably won’t be) suited as a leave in conditioner as this one, you could give it a try. Worst case scenario, if the emulsifier works, but it’s not great as a conditioner, you’ll still end up with a homemade lotion. I will say that I’ve heard that using lecithin as an emulsifier can be tricky (the beeswax and carnauba wax aren’t emulsifiers themselves and are used to help stabilize the final product.) I’ve never worked with it myself, so I have no idea what sort of product you’ll end up with. If I had to guess, though, my guess is that it will be heavier, and perhaps quite a bit heavier than this conditioner.
As for the colloidal silver…
I’ve read a little bit about it as a preservative, and while it does have antiseptic properties, I think most people who wrote on the topic didn’t think it was effective enough to use as the sole preservative. Even if it is, I’d have no idea to know how long a cream made with it would keep. It may be a good co-preservative with something else- like a product with alcohol or some other natural preservative. I, once again, haven’t used it, though, and don’t have a means of testing my products for bacteria and molds, which is why I like to stick to preservatives that have set guidelines for how long they are normally effective. That doesn’t mean you can’t try it, but be aware of the possible risks of using it as a preservative.
I wish I had better answers for you. Hopefully that helps somewhat, though.
Wonderful thanks for all the helpful information. I think you are completely correct about that emulsifier being better suited for Lotions – that is why I bought it in the first place! I forgot about that so thanks. I will pick up some BTMS instead. Also, the preservative you used is so affordable as well I don’t see any reason why I couldn’t use that instead of the CS. CS is much more expensive – I just happened to have some already on hand. SO – I will pick up my supplies from Amazon and get started! My hair can’t wait!
I wasn’t sure if you’d chosen those particular ingredients because they were further towards “natural” on the continuum, or if it was more for convenience because it’s what you had already on hand. I like to make things as natural as possible, but without compromising on the quality of my final products. I understand and totally sympathize with those that are stricter that I am and would prefer just using oils, or who are very picky about emulsifiers and preservatives, though. That’s why I was trying to be careful about not telling you not to do things a certain way, but I did want you to understand that there are risks involved when changing things up too. 😉
I’ve been using a lot of different emulsifiers and preservatives lately with the goal to narrow things down to just a couple of each that will allow me to make a large variety of products without needing 100 different ingredients, you know? Luckily, yes, they tend to be inexpensive and most last quite a long time, but my goal is to make things as inexpensive and convenient as possible for both me and my readers.
I explain a bit more about some of the preservatives and emulsifiers that I’ve been using in my post about how to make a basic lotion.
At first it seems like you’re spending a lot, when you have to buy a lot of ingredients, especially if you choose a lot of organic oils, etc., but, yes, in the end, you definitely save a lot of money. I’ve been making a great new face cream, and just that is a huge money saver. Facial creams are extremely overpriced in my opinion. 😉
Hi, Tracy!
I just found your blog and i’m so glad what i did what – this hair conditioner recipe is exactly what i need! But as know i have dry and damaged hair from bleaching i’ll try to make it with coconut and avocado oils.
You wrote what you want to work on some hair mask recipe – could we expect recipe in near future?
Thank you!
Hi Anna-
It’s funny- because I actually just made a batch yesterday of one that I’m liking so far. I want to try it out for a couple of weeks before posting it, but if I know you’re looking forward to it, I can get it up ASAP.
I used shea butter, argan oil, and aloe oil (which was just aloe macerated in coconut oil, but plain coconut oil would work fine). It uses the same emulsifier, but adds in another good emulsifier for conditioners called Tego Amid s 18. I’m not sure how readily available that will be in the US, so I’ll have to try giving an alternative recipe for those who can’t find it.
I do plan on focusing on more of these sorts of DIY posts in 2018, and am planning on taking a course that will help me formulate some good, natural recipes with surfactants.