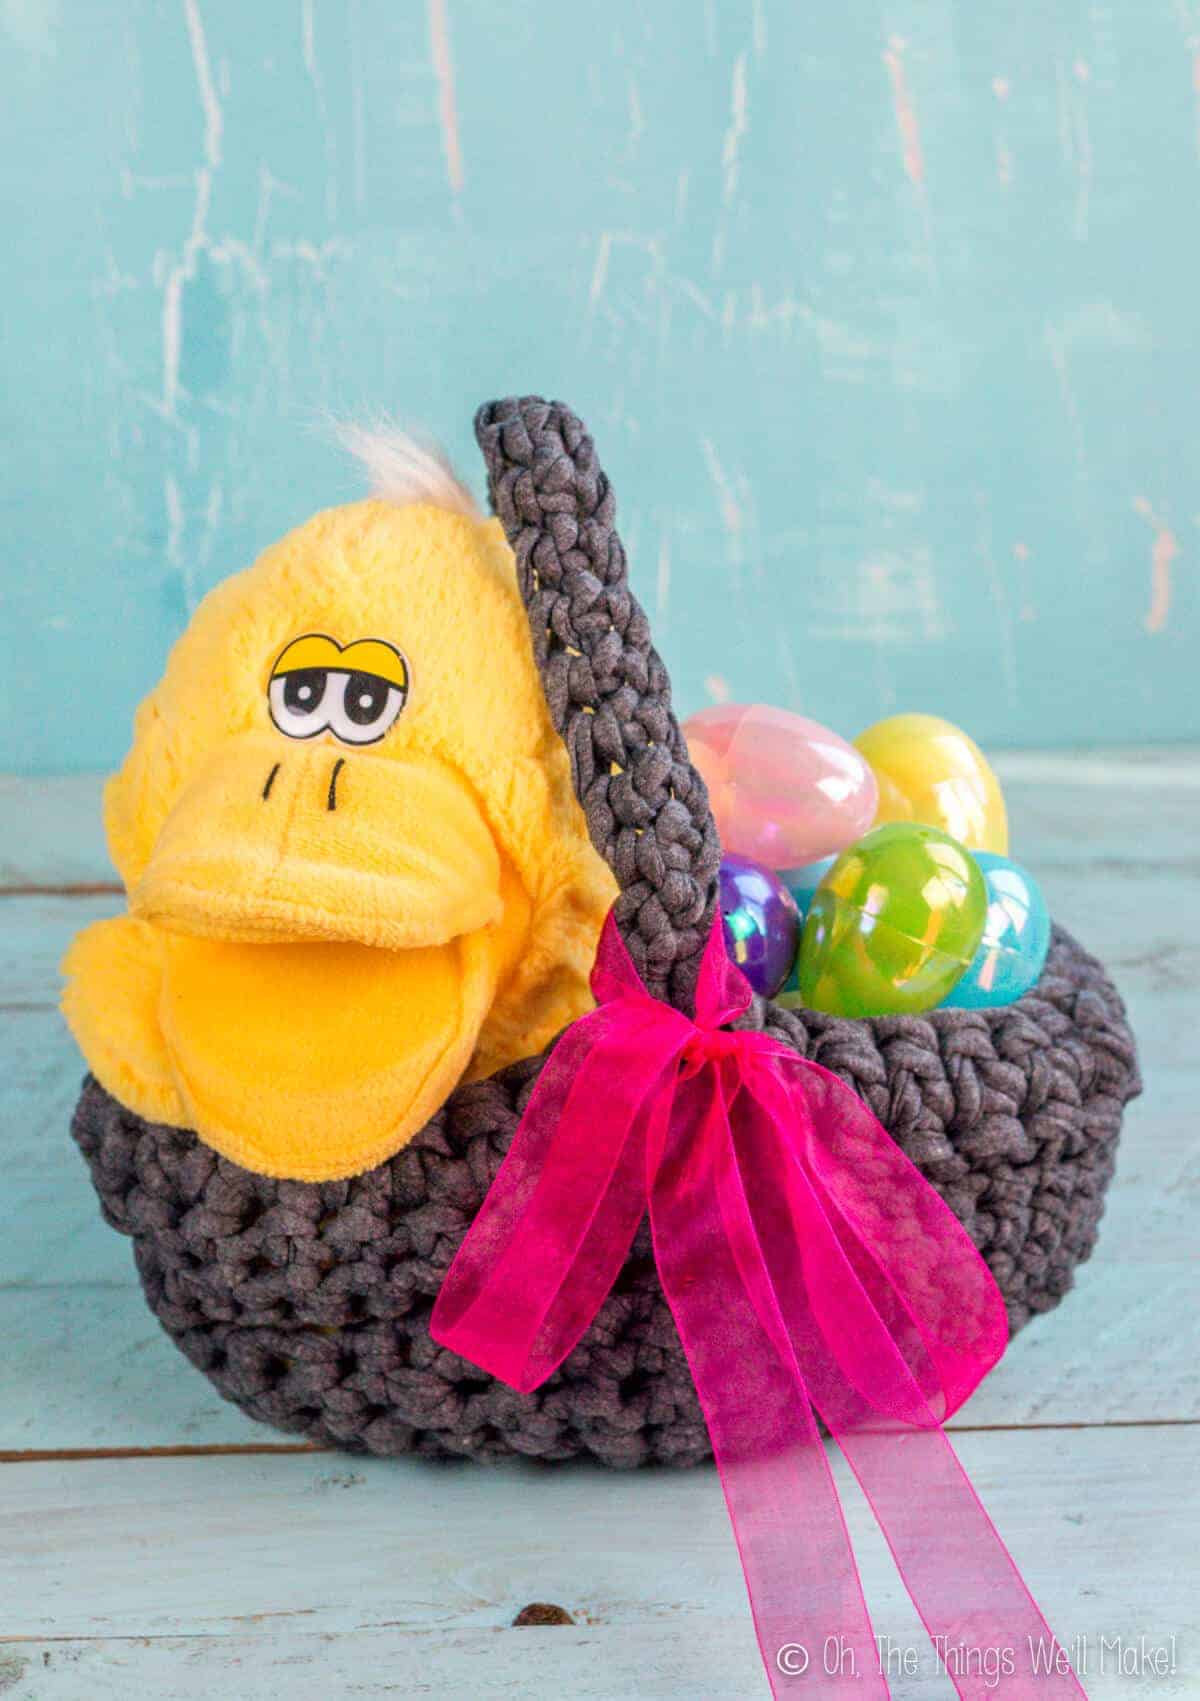
Easy Crochet Easter Basket (Using T-Shirt Yarn)
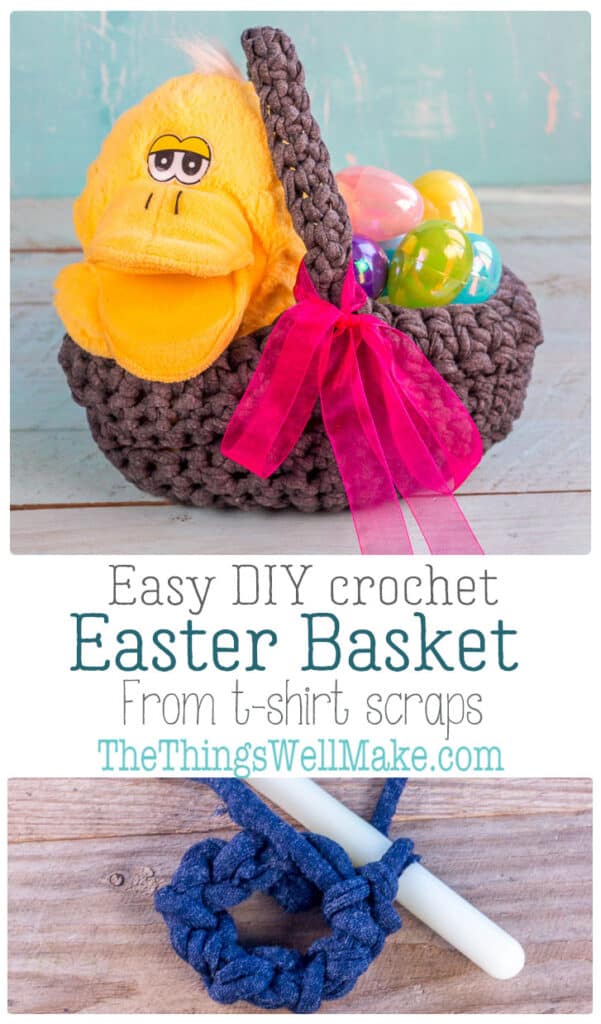
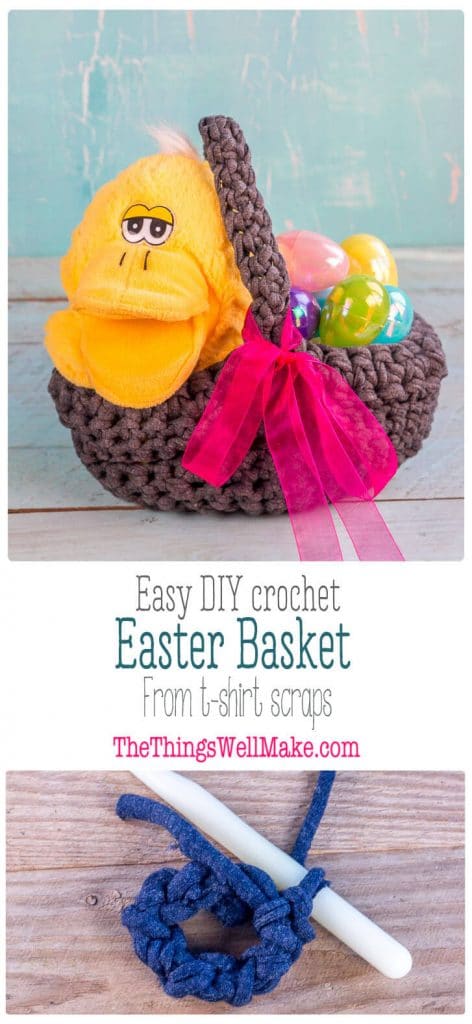
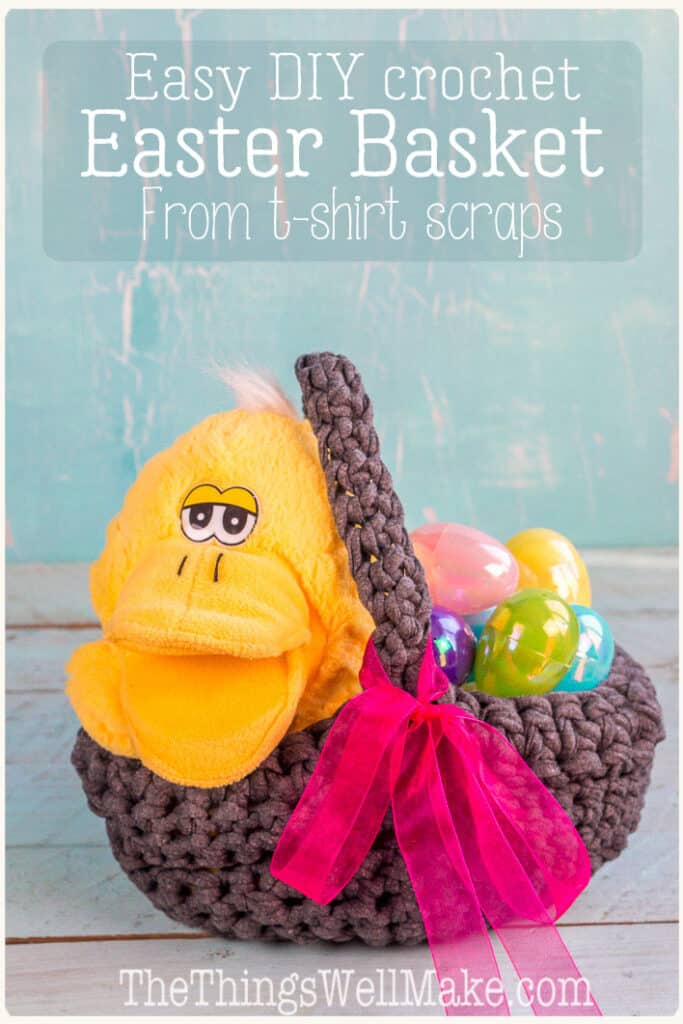
Upcycle those old t-shirts into a cute, easy DIY crochet Easter basket. Even a beginner can make this in only a couple of hours.
Easter baskets here in Spain are quite a bit different than the American ones that I received as a kid. They’re smaller and are normally meant for holding the traditional Easter breads like the “mona de Pascua”.
While I think the Spanish baskets are adorable, I wanted to make an American style basket for my American style Easter treats like our homemade marshmallow peeps!
Materials
I wasn’t sure how to go about it but finally decided on crocheting a basket. I’ve seen crocheted baskets made from Jersey material before and thought they were really cute. Plus, t-shirt “yarn” is nice and thick so making it into a project doesn’t take much time at all.
Fun, quick, and easy? That’s perfect for an impatient Dressing Your Truth® Type 1℠ like me. (If you aren’t familiar with that, check out my review in the link.)
Making or buying t-shirt yarn
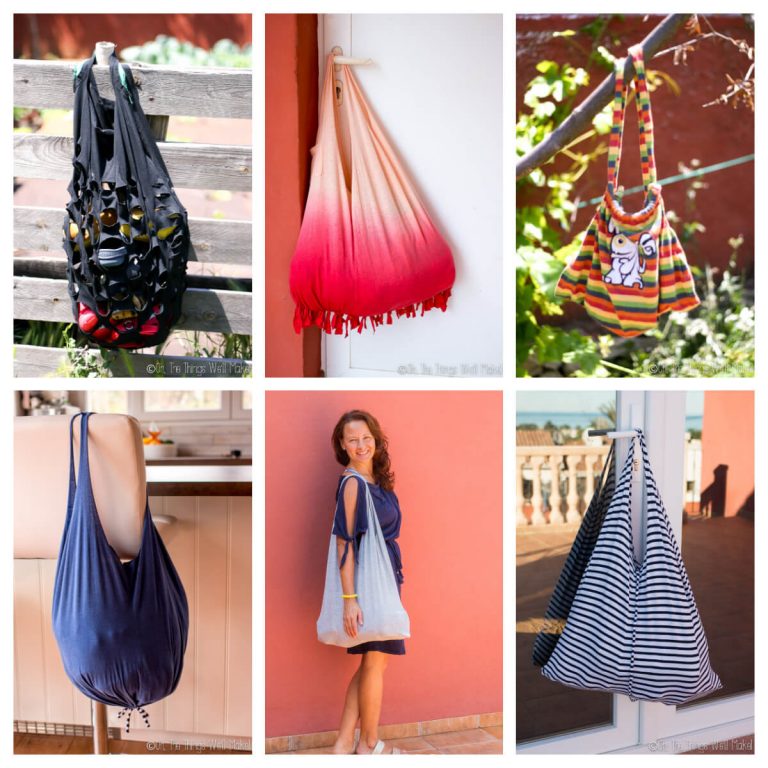
Being a DIY kind of girl, I love finding new uses for old things like old t-shirts. In the past, I’ve already shown you how to use t-shirts to make shopping bags, homemade wet wipes (aka. baby wipes), and cute little pouches that can even be used as eco-friendly reusable teabags!
I love jersey fabric because it’s relatively easy to work with. The edges don’t fray, so it’s a versatile fabric to use for all sorts of DIY projects.
While I have turned old t-shirts into “yarn” before, this time, I decided to just go out and buy some ready-made. I was afraid that I would need too much of it to be able to get it out of the scraps I had sitting around at home. If you do want to make your own, this is a good tutorial I found online.
Crochet hook
Because we are using a thick “yarn,” you’ll also need to use a big crochet needle. You can experiment to find which size you like best, but I’d suggest trying something that’s at least 12mm wide. I think mine was a 15mm or 16mm (Q) hook.
Instructions
It’s a bit surprising that I’m posting a crocheting tutorial because I haven’t done a lot of crocheting in the past. To be honest, I don’t know how to do much more than one main stitch, the single crochet stitch. I havnn’t let that scare me from trying to make my own projects and patterns, though.
Even without being a master crocheter, I was able to whip out this Easter basket for my son in only about 2 hours! (It may have even been less than that!) The secret, as I stated before, is using a large crochet hook and thick “yarn.”
It’s going to take me longer to explain it to you than it took me to make, but let’s get to it.
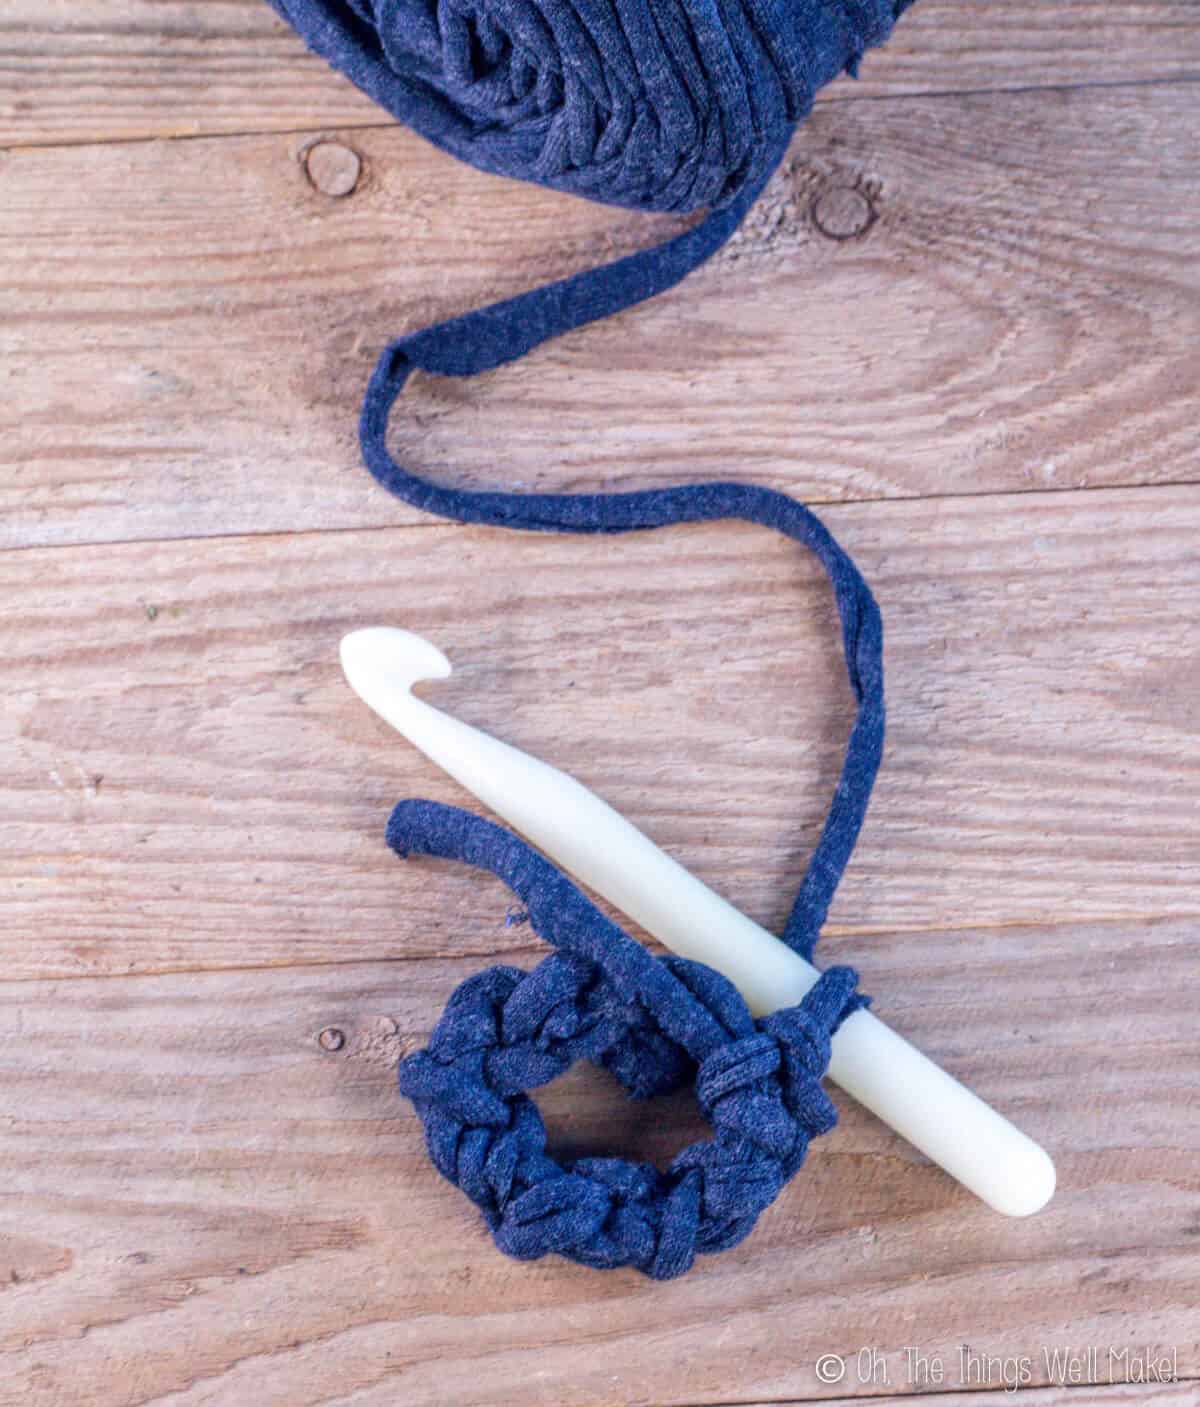
1. Row 1: Magic ring
Start out by making a magic ring with 6 stitches. I could explain to you how to do that, but it’s easier to link to someone who explains it better than I probably would. 😉
2. Row 2: Your second row will consist of making single crochet stitches into each stitch of the magic circle.
Rather than just doing one stitch, though, increase stitches every time. To do so, do 2 single crochet stitches into every stitch of your magic circle. (Follow the link to see how if you aren’t sure.)
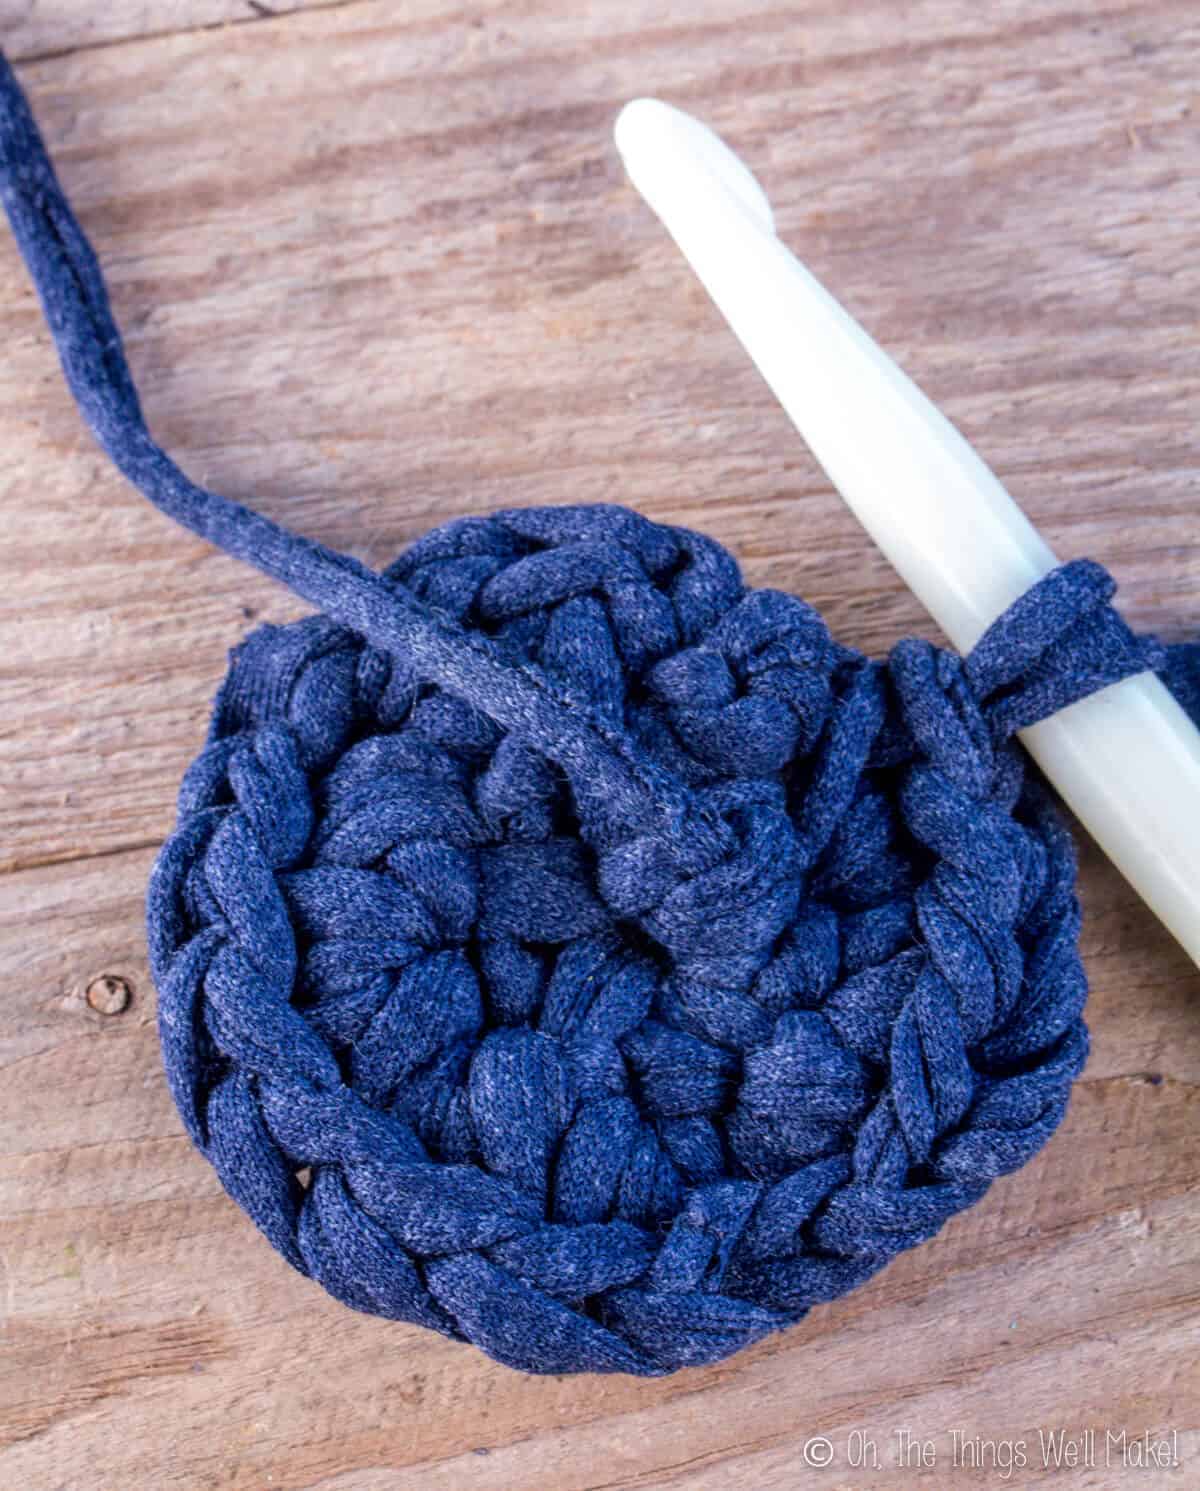
3. Row 3: single crochet stitches
We’ll be increasing again, but this time only every other stitch.
Let’s see if I can make that clearer…
Do 1 single crochet into the first stitch. Then do 2 single crochet stitches into the second stitch, one single crochet into the third stitch, two single crochet stitches into the fourth, etc… Continue in that way until you get to the end of the row.
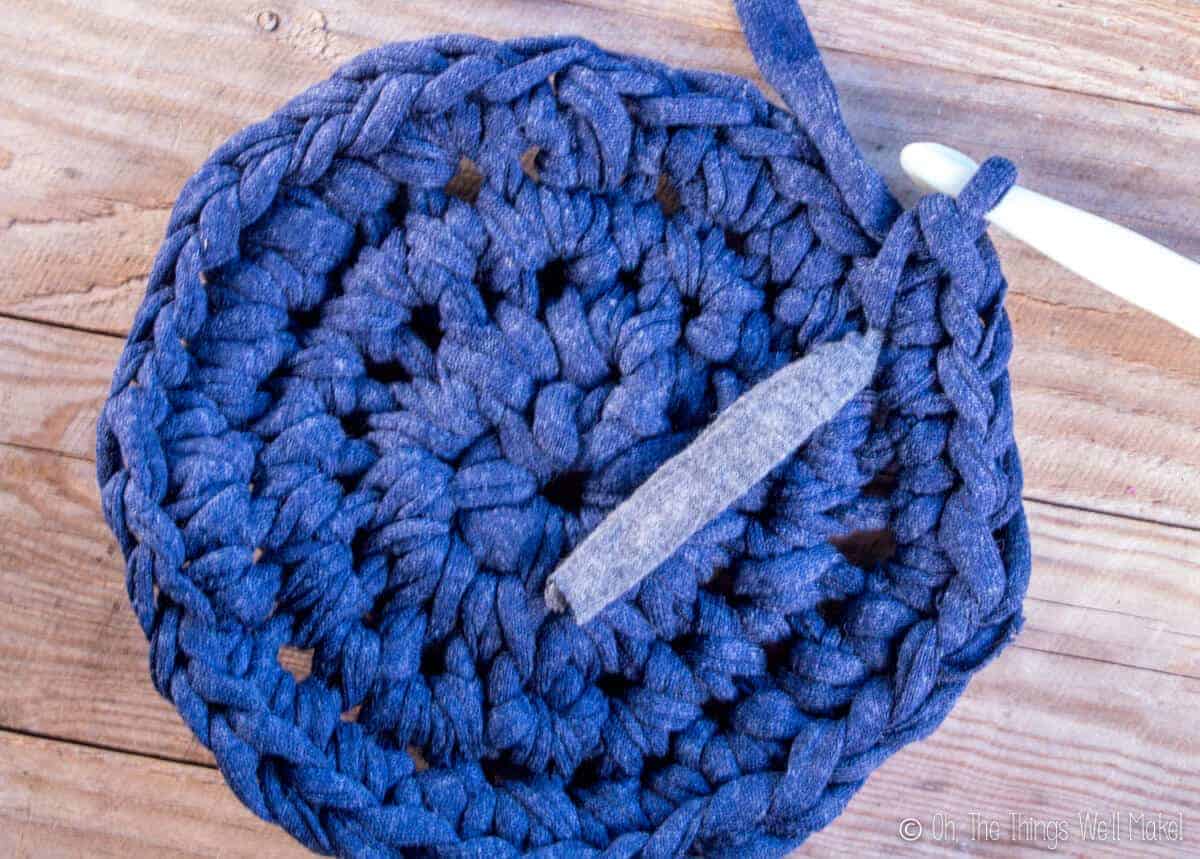
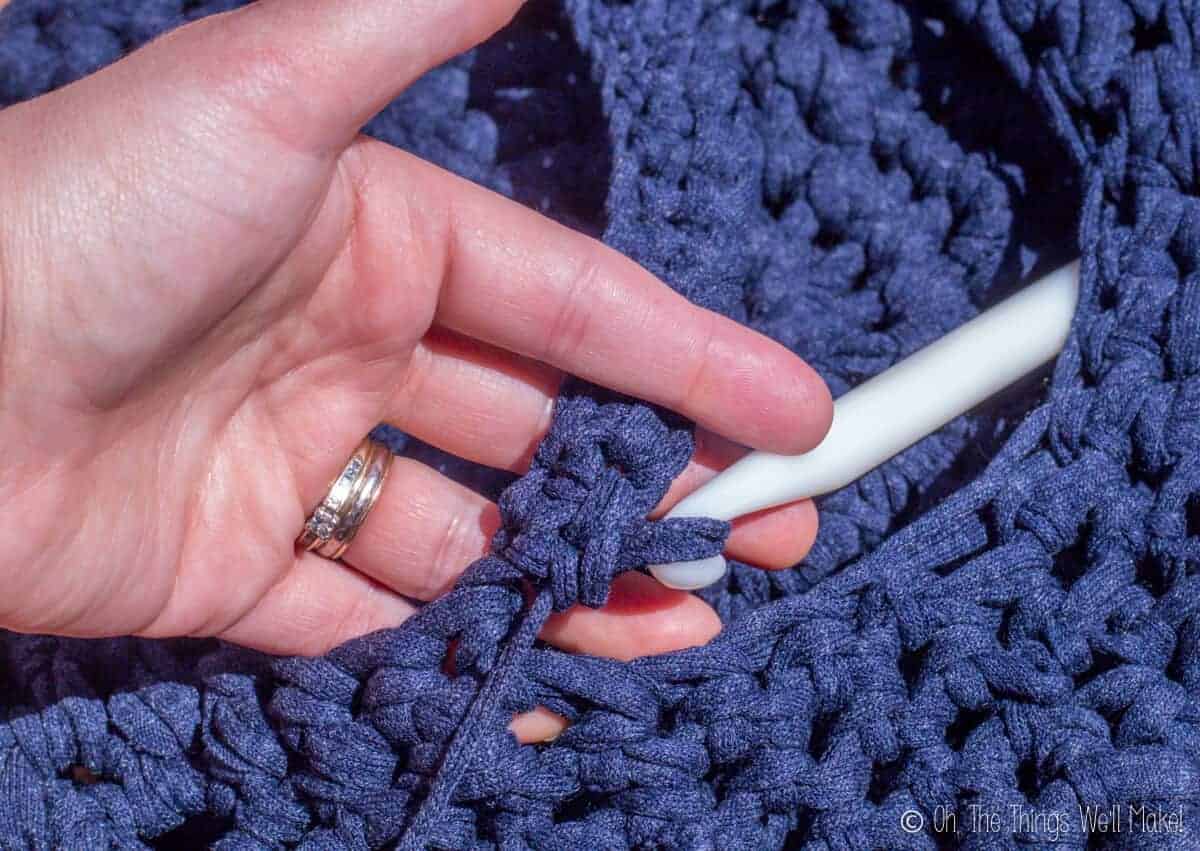
To make it easier to see where your rows begin and end, you can mark the beginning of your row by placing a scrap of contrasting yarn under your needle when making your first stitch. (See photo below.)
3. Row 4: We’ll continue using single crochet stitches to increase the size of the circle. This time add extra stitches on every third stitch.
Do 1 single crochet into the first stitch, 1 into the second stitch, and 2 single crochet stitches into the 3rd stitch. Continue that pattern until you’ve reached the end of the row.
4. Row 5: Continue as before, this time adding extra stitches for every fourth stitch.
5. Rows 6, 7, 8, 9, 10: Do 1 single crochet stitch into each stitch until you reach the end of each row. There is no need to increase or add any extra stitches in these rows.
6. Rows 12, 13, 14: Decrease stitches every fourth stitch. To decrease stitches, you basically stitch two stitches together. Again, follow the link if you aren’t sure how to do it.
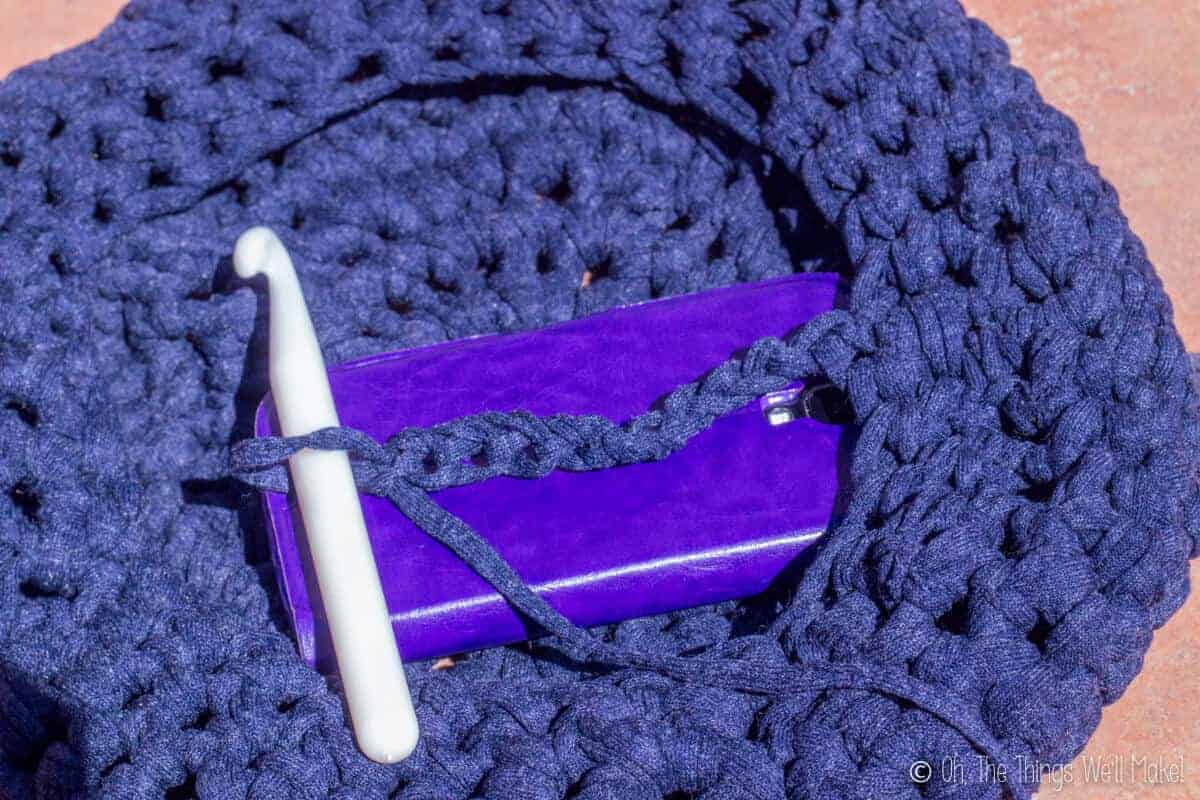
7. Row 15: Begin the row by doing one single crochet stitch into every stitch of your previous row, but STOP when you’ve gotten halfway around.
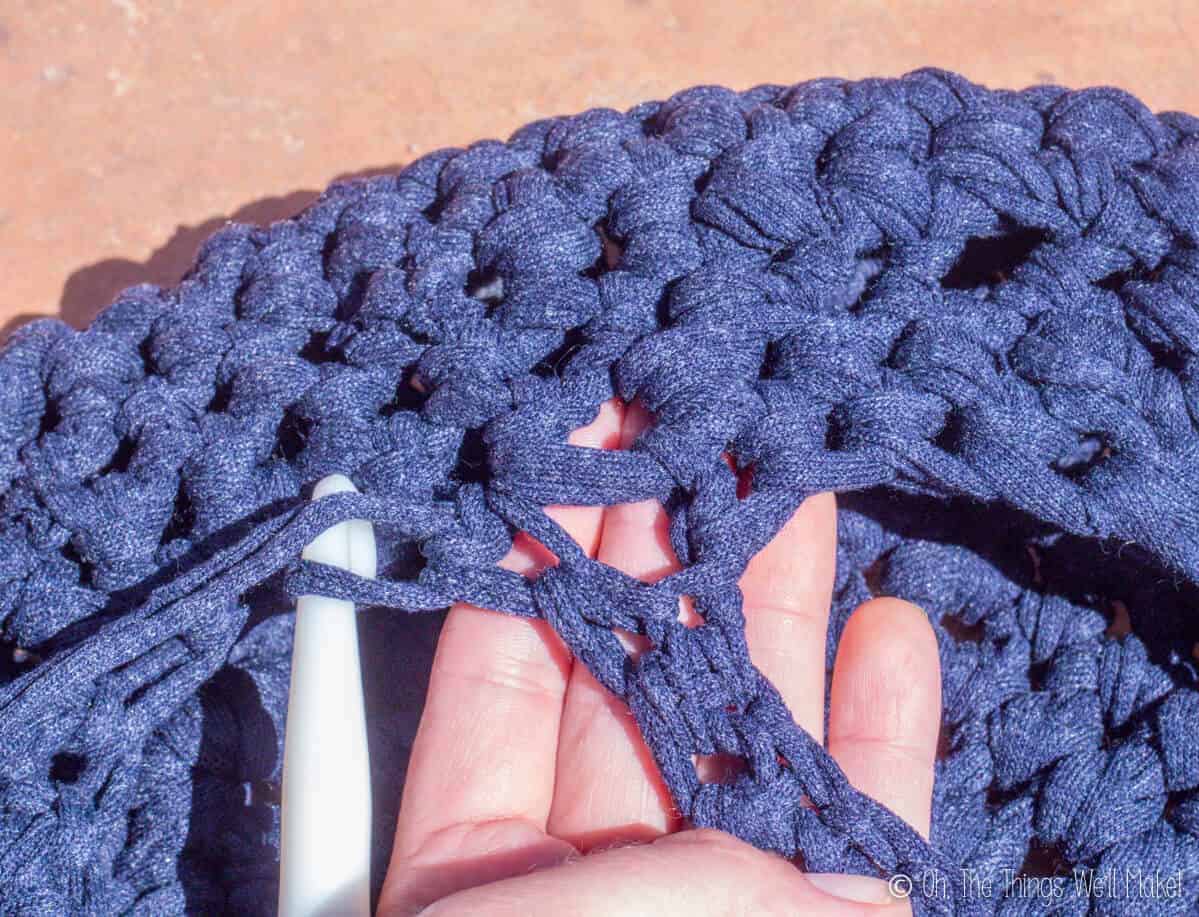
Making the handle
8. Begin doing chain stitches for the handle of your basket. Make enough of them to reach the other side at the height that you want your handle to be. This will depend on the particular t-shirt yarn you are using and your preference for the height of the handle. I did around 20 chain stitches.
9. Once you’ve made the chain long enough, bring the end of your chain to the opposing point on the other side of your basket (where you began row 15).
Attach the chain to the other side by doing a single crochet stitch into a stitch there. (Ideally, stitch into the last stitch of row 14, the one right next to the first stitch of row 15.) Make sure the chain isn’t twisted before attaching it.
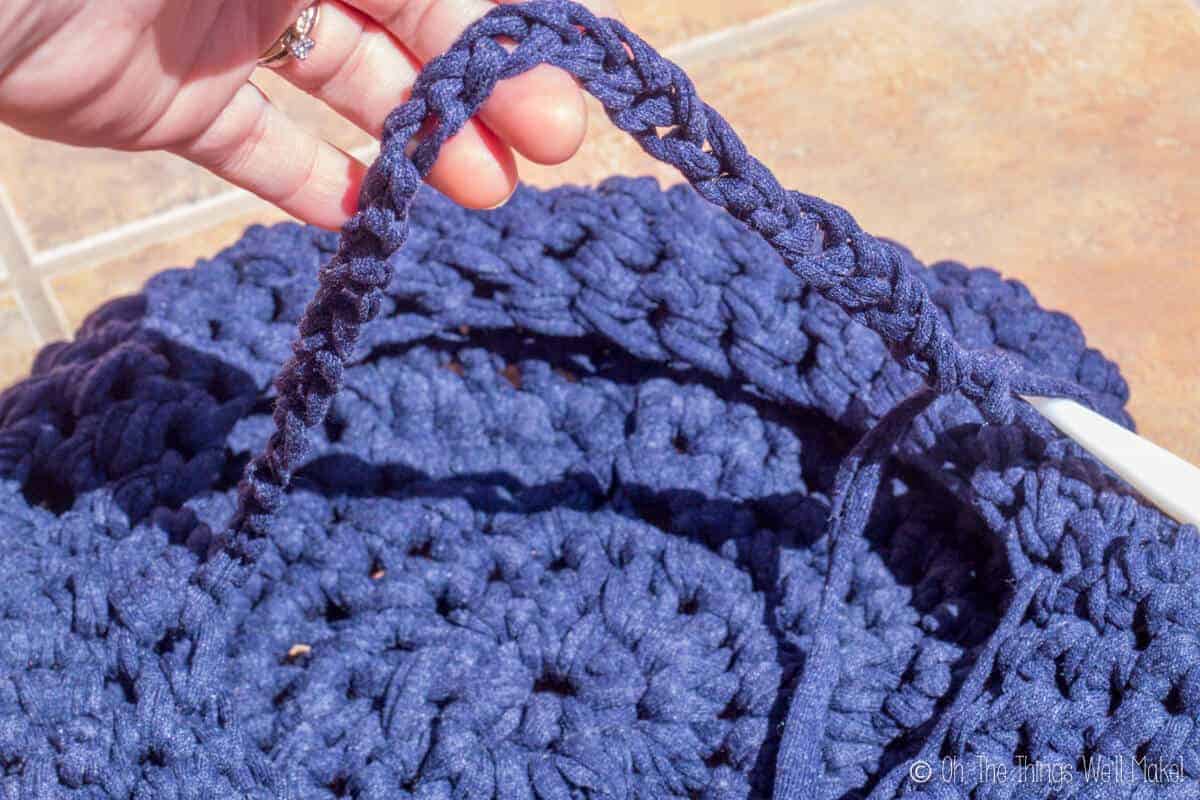
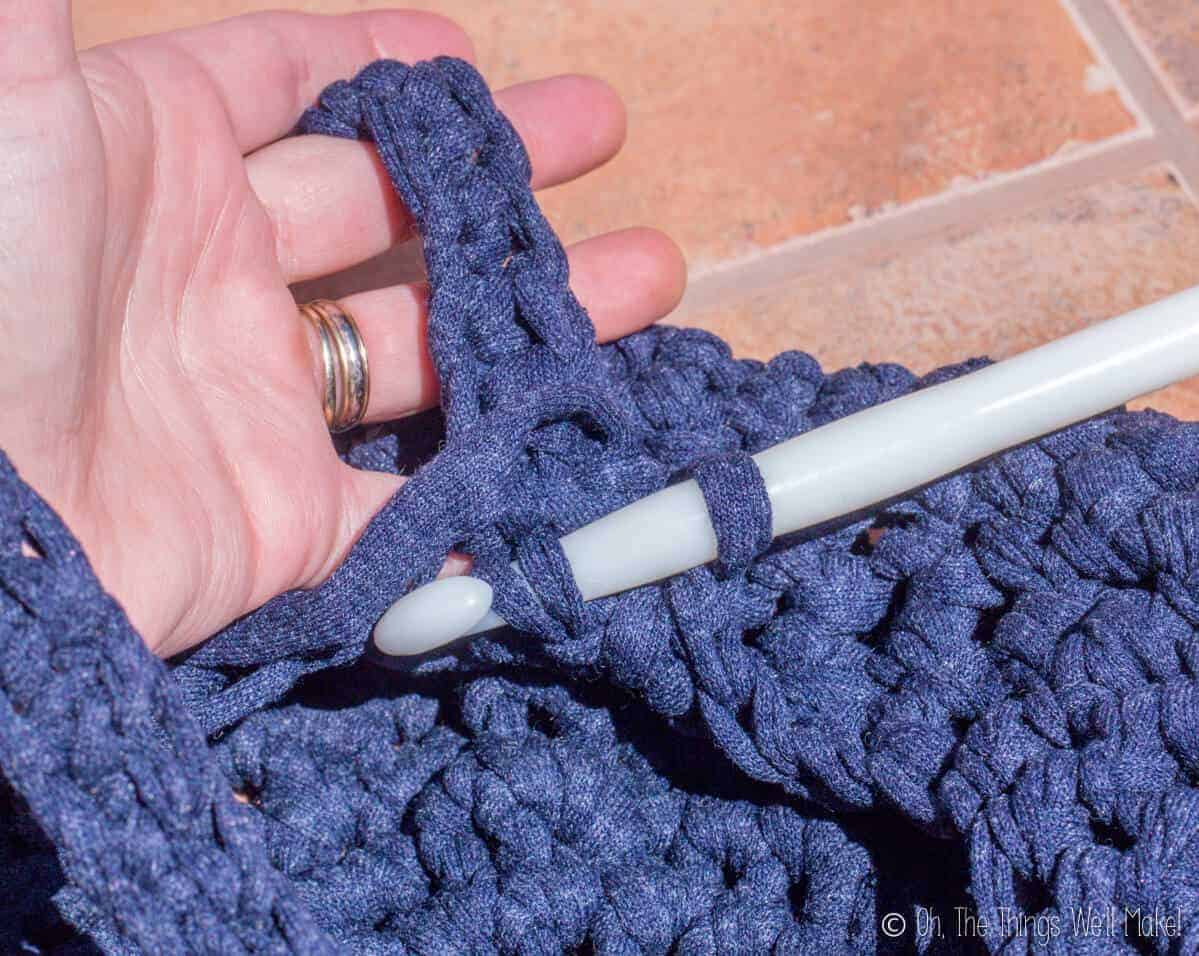
10. To thicken the handle, stitch back up it. To do so, do single crochet stitches into each stitch of the chain, making your way back to the other side.
11. Once you’ve reached the end of your chain, attach the end of the handle to the next stitch of the row (row 15) of your basket (following in the same direction as you were going before you stopped to make the handle).
12. Finish the row (row 15) by doing single crochet stitches into each stitch of row 14, until you reach the handle of your basket.
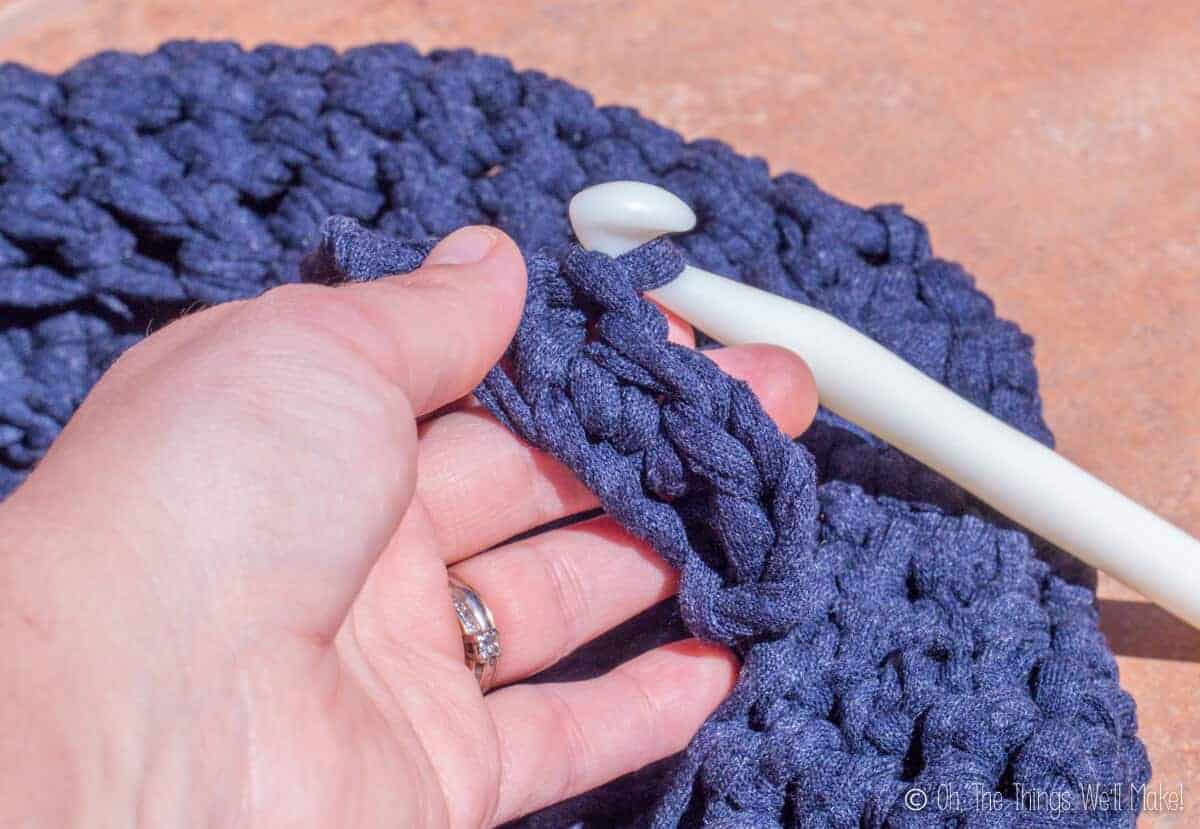
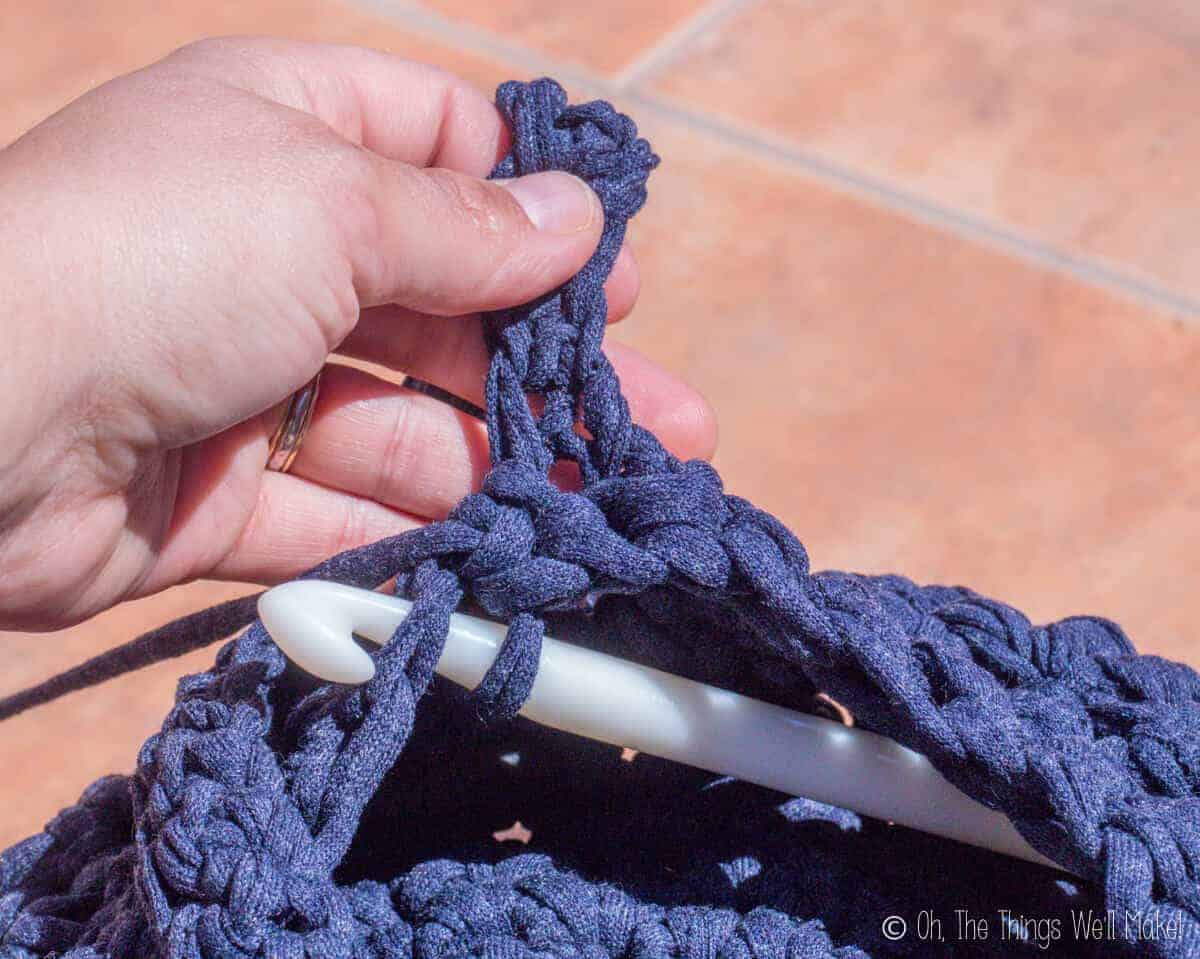
13. Once you’ve reached the other side, crochet a single stitch into the handle to help secure it in place. You can choose to leave your basket as is, weaving the loose end into the basket, or you can do a finishing stitch around the top of the basket. (In this case, I finished it with another row of single crochet stitches.)
Finishing the top edge
I chose to finish the basket with one last row around the top edgeto help reinforce the handle so it stands up better on its own.
When doing the final row, stitch into the back of the handles to go past them without seeing the stitches from the outside of the basket.
14. Finish off your yarn by working it into the stitches on the inside of your basket.
You’re done!
Depending on the yarn you used and how tightly you were able to crochet it, your basket may not hold its shape on its own. When you fill your basket, the items will help “stuff it,” allowing it to keep its shape. If you want to further help it keep its shape, consider stiffening your basket.
Stiffen the basket
To stiffen your basket, first shape the basket. This can be done by stuffing it with a plastic bag that has been filled with scraps of paper or fabric. Once it holds its shape, spray it with stiffening starch. You can also stiffen it with a mixture of glue and water.
Once the basket dries, it should be stiff enough to hold its shape on its own!
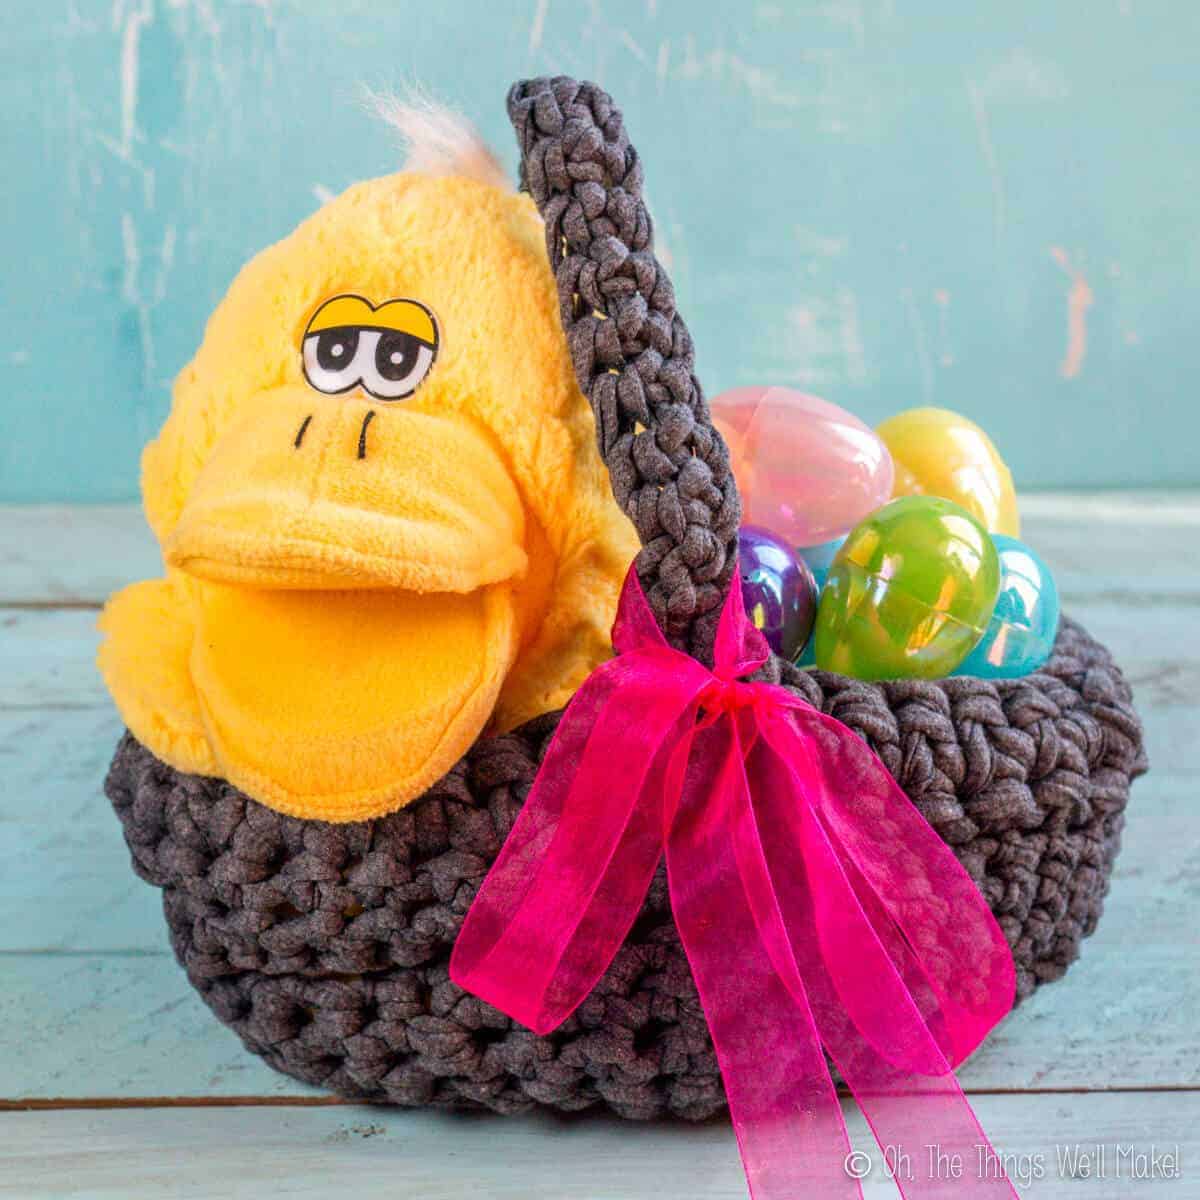
Now you can fill your basket with toys, eggs, chocolates, or other treats. (Or, leave it to the Easter Bunny to fill it for you!) 😉
Printable instructions

Crochet Easter Basket
Equipment
Materials
- t-shirt yarn (1 large skein)
Instructions
- Row 1: Make a magic ring with 6 stitches.
- Row 2: Make 2 single crochet stitches into each stitch of the magic ring to increase. (12 SC stitches)
- Row 3: single crochet stitches, increasing at every other stitch. (Do 1 single crochet into the first stitch. Then do 2 single crochet stitches into the second stitch, one single crochet into the third stitch, two single crochet stitches into the fourth, etc… ) (18 SC stitches).
- Row 4: Use single crochet stitches to increase the size of the circle again, but this time add extra stitches on every third stitch. (Do 1 single crochet into the first stitch, 1 into the second stitch, and 2 single crochet stitches into the 3rd stitch. Continue that pattern until you've reached the end of the row.) (24 SC stitches)
- Row 5: Continue as before, this time adding extra stitches for every fourth stitch. (30 SC stitches)
- Rows 6, 7, 8, 9, 10: Do 1 single crochet stitch into each stitch until you reach the end of each row. There is no need to increase or add any extra stitches in these rows. (30 SC stitches in each row)
- Rows 12, 13, 14: Decrease stitches every fourth stitch. To decrease stitches, you basically stitch two stitches together. (23, 18, 14 SC stitches)
Making the handle
- Row 15: Begin the row by doing one single crochet stitch into every stitch of your previous row, but STOP when you've gotten halfway around.
- Begin doing chain stitches for the handle of your basket. Make enough of them to reach the other side of the basket at the height that you want your handle to be. This will depend on the particular t-shirt yarn you are using and your preference for the height of the handle. I did around 20 chain stitches.
- Once you’ve made the chain long enough, bring the end of your chain to the opposing point on the other side of your basket (where you began row 15).
- Attach the chain to the other side by doing a single crochet stitch into a stitch there. (Ideally, stitch into the last stitch of row 14, the one right next to the first stitch of row 15.) Make sure the chain isn’t twisted before attaching it.
- To thicken the handle, stitch back up it. To do so, do single crochet stitches into each stitch of the previously made chain, making your way back to the other side.
- Once you’ve reached the end of your chain, attach the end of the handle to the next stitch of the row (row 15) of your basket (following in the same direction as you were going before you stopped to make the handle).
- Finish the row (row 15) by doing single crochet stitches into each stitch of row 14, until you reach the handle of your basket.
- Once you've reached the other side, crochet a single stitch into the handle to help secure it in place.
Finishing the top edge
- Finish the basket with one last row of single crochet stitches around the top edge. This will help reinforce the handle so it stands up better on its own.
- When doing the final row, stitch into the back of the handles to go past them without seeing the stitches from the outside of the basket.
- Finish off your yarn by working the free end into the stitches on the inside of your basket.
- You’re done!
Notes
Happy Easter!
This post was originally published on April 1, 2015. It was rewritten, adding clearer instructions and printable instructions, and was republished in April of 2020.