

Coconut Flan Recipe
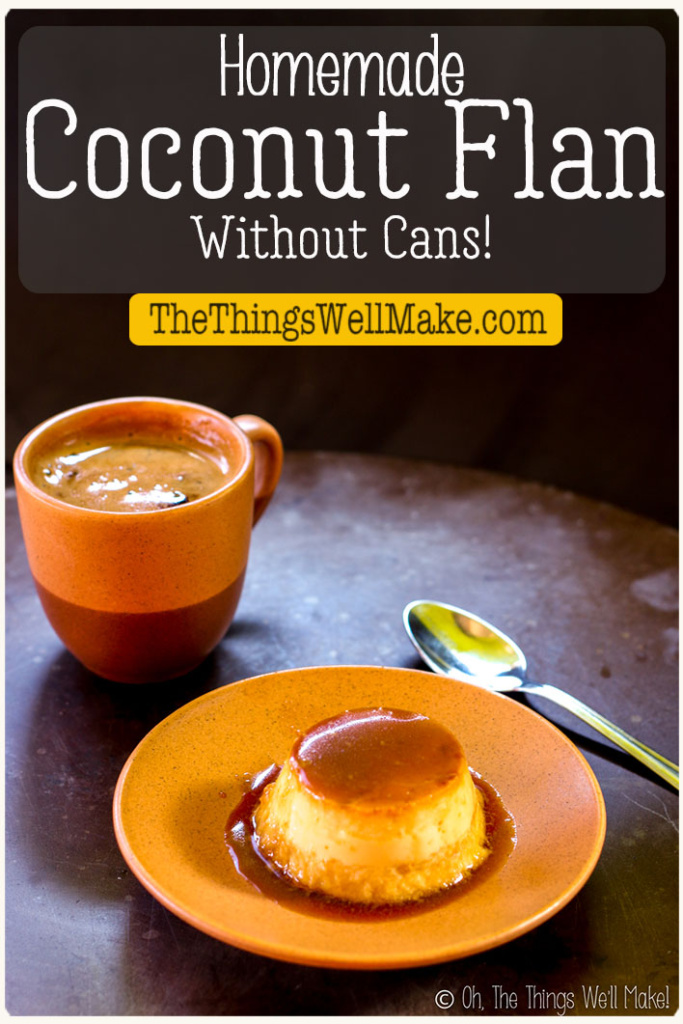
Skip the cans! This creamy coconut flan recipe skips condensed and evaporated milk and sticks to real ingredients for a delicious, rich coconut taste.
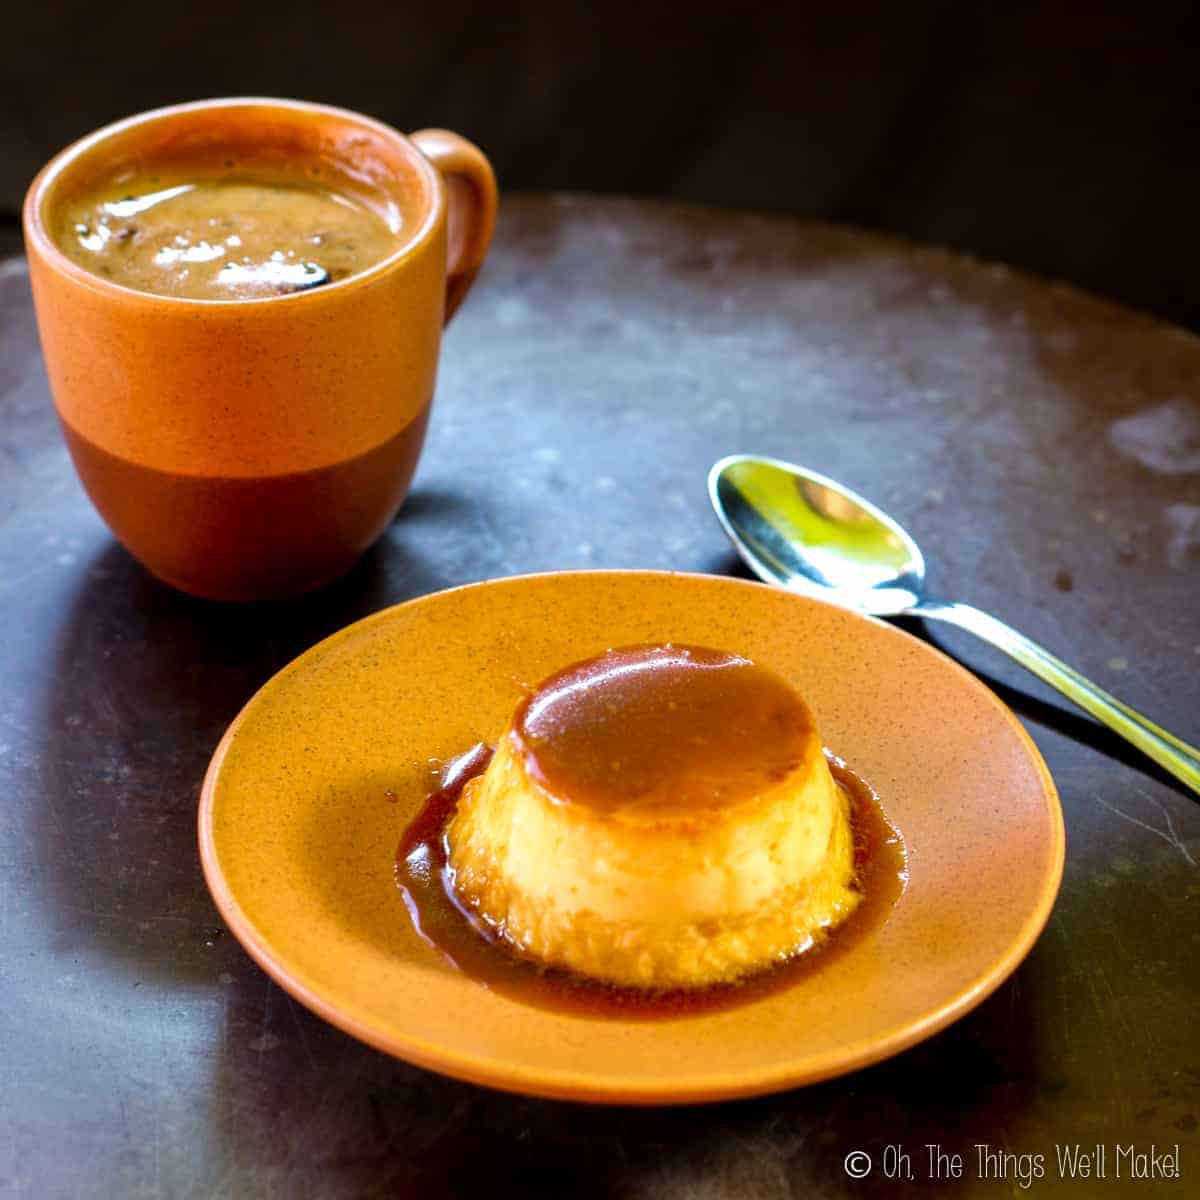
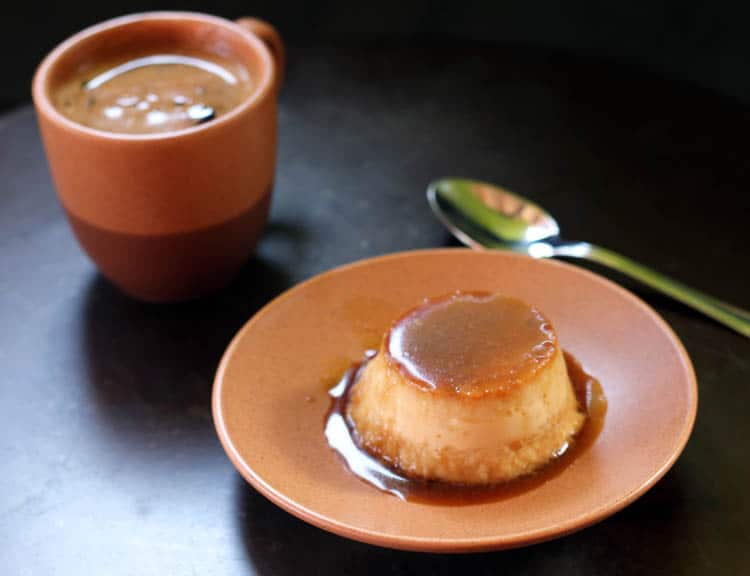
This dessert, called flan de coco here in Spain, is one of those creamy desserts that looks elegant but is surprisingly simple to make. It’s a baked custard dessert with a silky texture, a caramelized top, and a perfect blend of sweetness and coconut flavor. Whether you’re serving it after dinner or preparing it ahead for the holidays, it’s always a crowd-pleaser.
Why make this coconut flan?
Most coconut flan recipes rely on cans of sweetened condensed milk and evaporated milk. While convenient, they’re highly processed, overly sweet, and normally packaged in cans lined with plastics like BPA or BPS, which can disrupt hormones.
This version keeps things simple and real. By making it with fresh ingredients and no cans, you get a naturally rich and creamy texture without the heavy sweetness of condensed milk. It’s the kind of coconut custard that always impresses but couldn’t be easier to make at home. This flan is also naturally gluten-free and the perfect make-ahead dessert for holidays or special occasions.
Choosing ingredients
For the custard, I like to use a mix of coconut milk, whole milk, and heavy cream. The coconut milk adds a delicate tropical flavor, while the dairy keeps the texture creamy and rich. The balance of the three makes for a custard that sets beautifully but still has that soft, delicate jiggle.
To boost the coconut flavor, I also add coconut butter. I usually make my own, but store-bought works just as well. It blends smoothly into the custard and gives the flan a deeper coconut taste without changing the texture.
I also like to add a bit of vanilla for warmth and aroma. I make my own vanilla extract, but store-bought works fine too.
This recipe doesn’t call for cans of sweetened condensed milk or evaporated milk, which are common in flan recipes. I prefer to avoid them because they’re highly processed and often come in cans lined with plastics like BPA or BPS, which can affect our health. By using fresh milk, cream, and coconut milk, you can control the sweetness and quality of the custard without relying on processed, canned ingredients.
I also make my own coconut milk instead of using canned versions whenever possible. Even when labeled BPA free, many cans still use alternative linings that aren’t necessarily better. Using homemade coconut milk makes the recipe fresher and more natural, and lets me control the flavor. (That said, if you prefer, you can absolutely use store-bought coconut milk too.)
When it comes to sweeteners, I normally use honey for the flan itself because I try to stick with more natural sugars whenever possible. For the caramel, though, I haven’t been able to find a way to make it work with honey. It just doesn’t behave the same way. I use regular sugar (white or demerara) for that part. It melts evenly and gives you the glossy syrup needed for flan. If you’re okay with using refined sugar, you can use that in your custard. Or, you can get creative with other sweeteners, like erythritol, like I did in my keto custard recipe.
And finally, the eggs. I use six for three cups of liquid, which gives the custard enough structure to hold together while staying silky and smooth.
Materials
This recipe doesn’t require any fancy tools: just a flan pan or a few ramekins, and a baking dish to create a simple water bath. You’ll also need a small saucepan to cook the caramel, and a large mixing bowl for whisking the egg mixture.
For best results, let the flan cool on a wire cooling rack before transferring it to the refrigerator.
How to make it
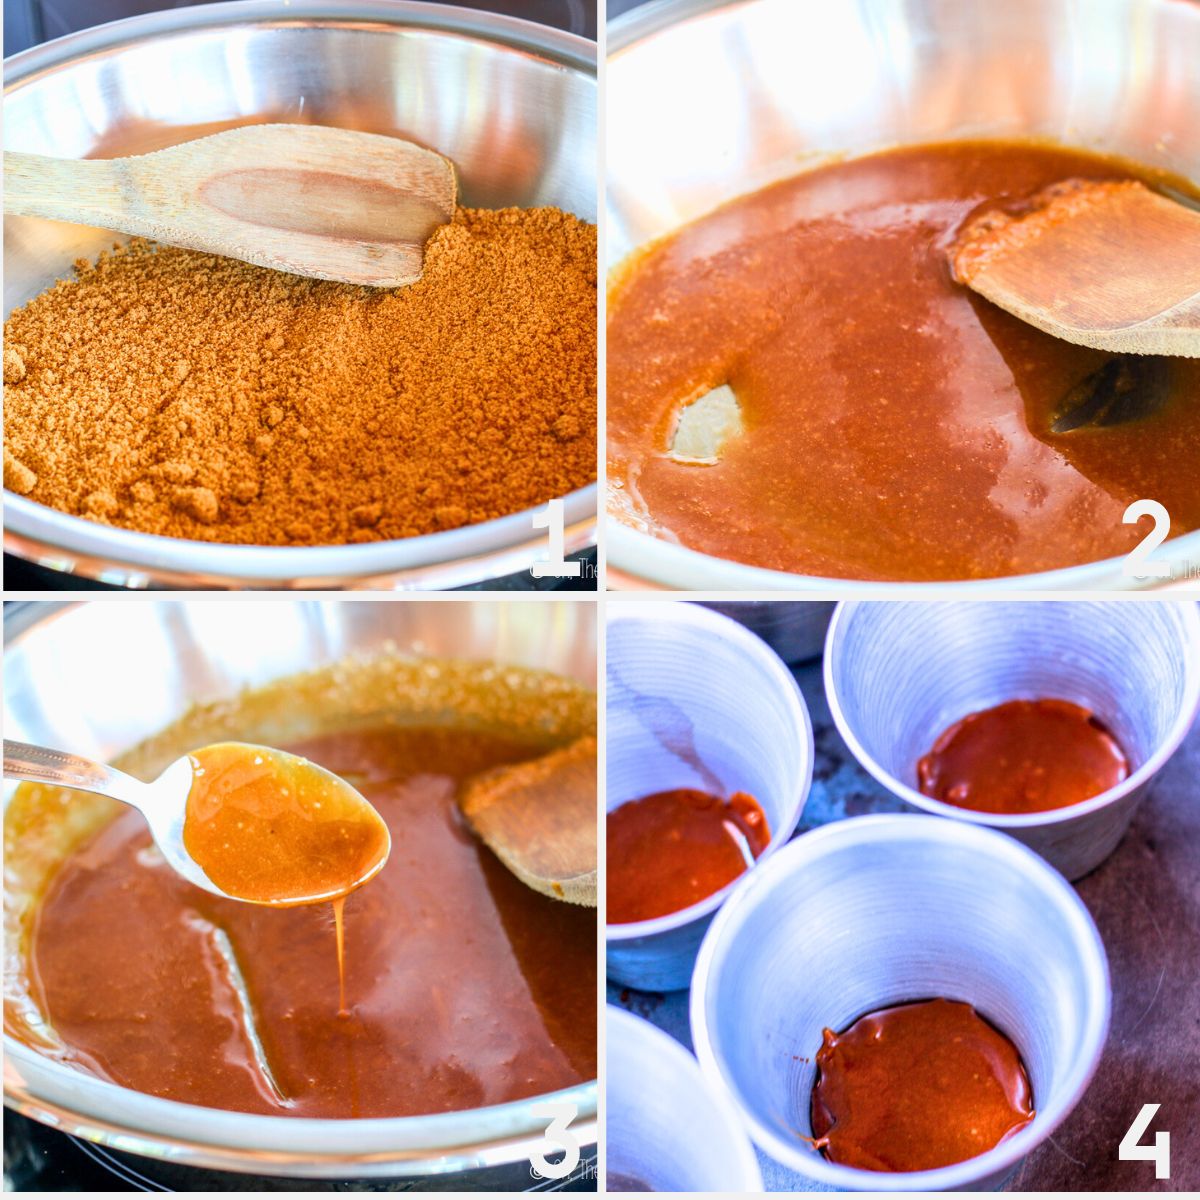
The first step is to make the caramel. Heat the sugar until it melts into a golden syrup. Then, pour it into the pan and swirl it to coat the bottom. Work quickly, as it hardens fast!
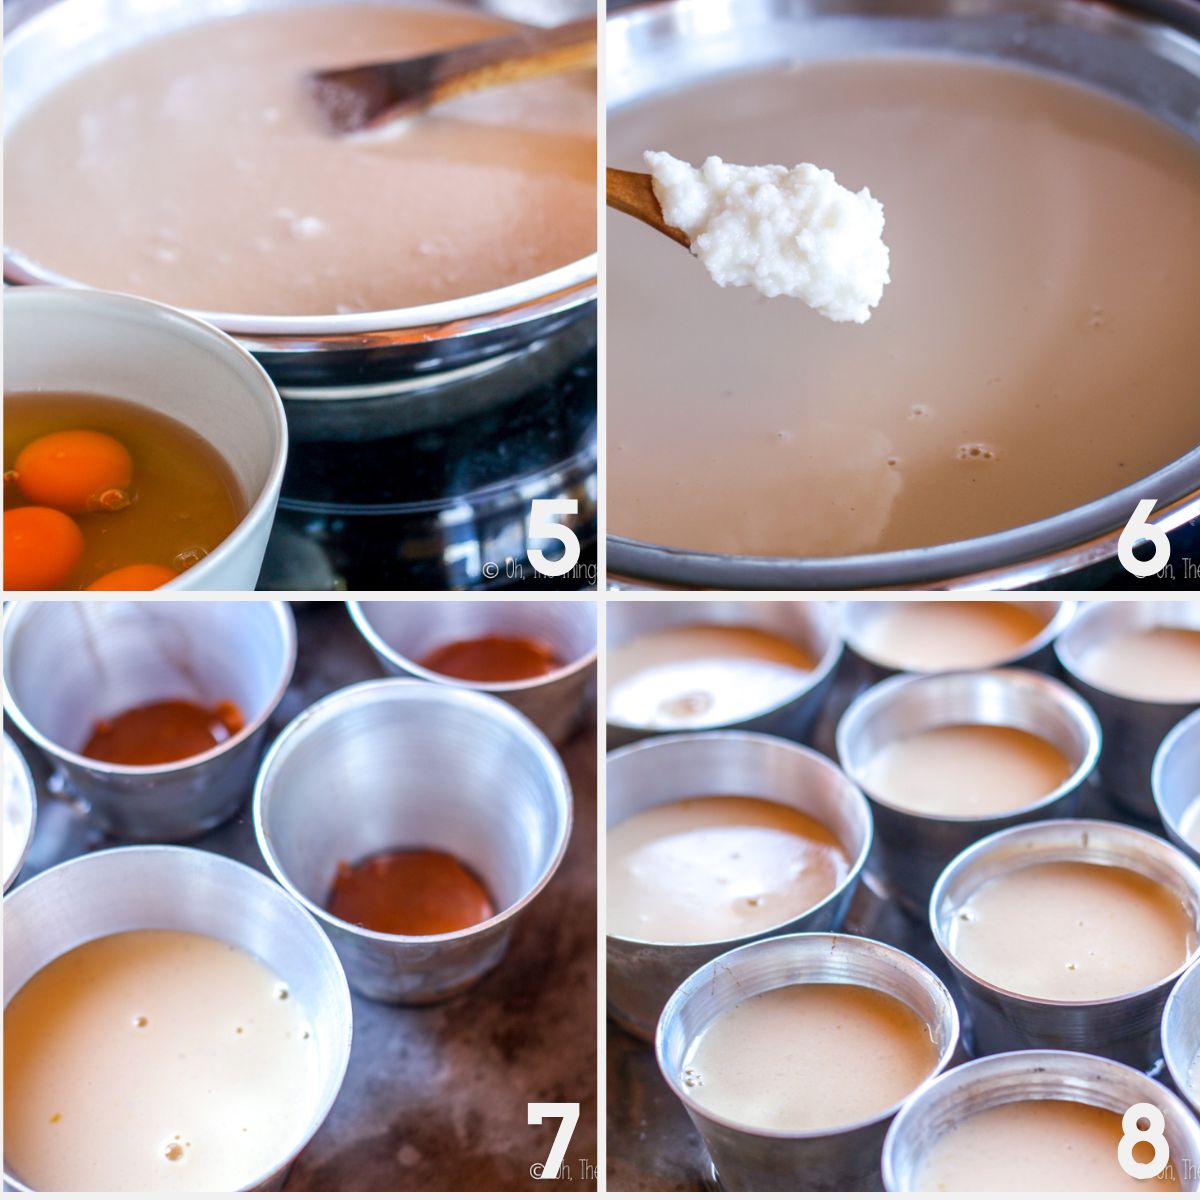
For the custard, whisk the eggs and honey (or sugar) gently, just until combined. The idea is to mix everything together without incorporating any air, because those tiny bubbles can make your custard spongy rather than smooth and creamy. Stir in the coconut milk, whole milk, cream, and vanilla until blended.
Pour the mixture over the hardened caramel. Then place the filled flan mold or ramekins in a larger baking dish to create a bain-marie. Carefully pour hot water into the larger dish until it reaches about halfway up the sides of your mold. This helps the custard bake slowly and evenly, so it stays creamy instead of curdling or forming bubbles.
If using a large pan, first place the baking pan with flan mold(s) on the oven rack. Then, pour in the hot water with a kettle or measuring cup. That way, you don’t have to lift a heavy pan filled with hot water and flan molds across the kitchen. For smaller ramekins in a smaller pan, you can add the water before placing them in the oven. Make sure to use hot water to keep the baking temperature steady.
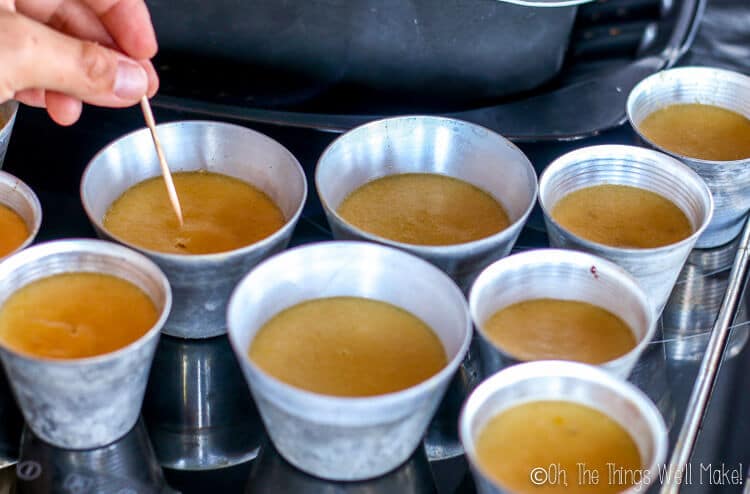
Bake the custard until the edges are set but the center still jiggles slightly when gently moved. You can also test it by inserting a toothpick or the tip of a knife into the center. It should come out mostly clean, with just a thin layer of creamy custard clinging to it. If it’s still very liquid, give it a few more minutes and check again. The flan will continue to firm up as it cools. So, it’s better to take it out a little early than to overbake it.
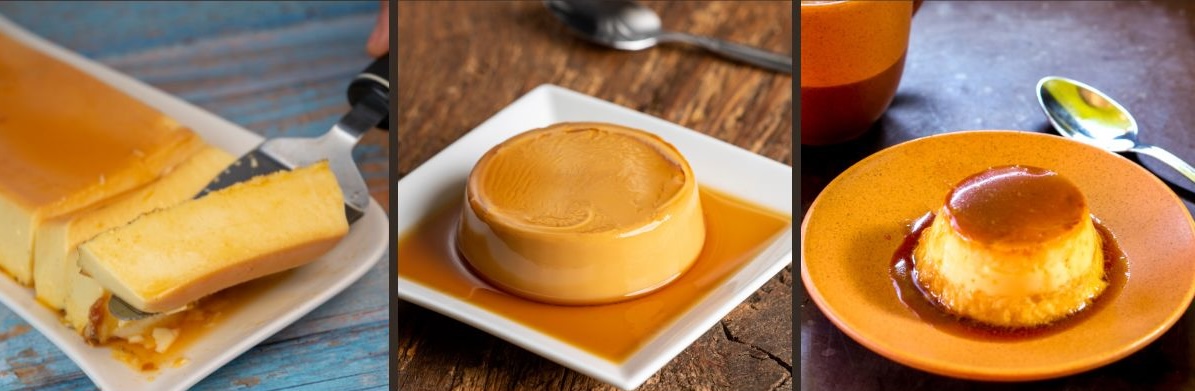
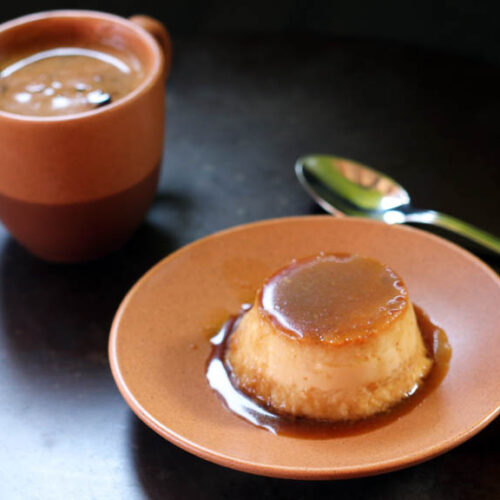
Cool the flan completely, then refrigerate for at least four hours (or overnight). To serve, invert the flan onto a plate so the caramel sauce flows over the top. Optionally, give it a sprinkling of toasted coconut flakes or cinnamon.
Expert tips
Choosing a pan
You can use almost any oven-safe pan for flan: round, loaf, or individual custard cups (ramekins). For everyday baking, I often use a round pan, which makes a thinner flan with more caramel per bite. My husband actually prefers it that way because it gives him more syrup to soak into each spoonful.
A loaf pan makes thicker slices and looks nice when cut, but because the caramel is more concentrated on the bottom, it may not all dissolve right away. The first day or two, you might notice a layer of hardened sugar that slowly melts as the flan sits in the fridge. If you find yourself with that problem, you can add a few drops of water to the pan before refrigerating to help it dissolve evenly.
If you want to unmold your flan and serve it whole, use just enough caramel to lightly coat the bottom and sides of the pan. A thick layer of hardened caramel can make unmolding tricky. To make it easier to serve, use less sugar syrup or serve the flan straight from the pan.
For a dinner party, individual custard cups are also a beautiful option. They bake a little faster and make serving simpler.
Caramel notes
White sugar or demerara sugar both work well for the caramel coating. They melt evenly and give that golden, glossy syrup that makes flan irresistible. I’ve tried using darker unrefined sugars like panela, but they tend to burn before melting smoothly enough to pour.
If you prefer less sweetness overall, you can reduce the amount of caramel you make. Keep in mind that the caramel syrup continues to sweeten the custard over time. I don’t sweeten the custard much because the flan gets sweeter over the next days as it sits in the caramel syrup.
Avoiding bubbles
A smooth, creamy flan comes down to two things: gentle mixing and gentle baking. When you whisk the eggs and liquids, stir just until blended instead of whipping air into the mixture. Tiny bubbles can lead to a grainy or spongy texture once baked.
Baking in a bain-marie (a hot-water bath) is also important. The steam and even heat prevent the edges from overcooking and help the custard set without boiling or forming bubbles. You’ll know your flan is ready when the center still has a soft wobble. It will firm up as it cools.
FAQs
The flan is ready when the edges are set but the center still jiggles when you move the pan. If you insert a toothpick or knife, it should come out mostly clean, with just a bit of creamy custard clinging to it. It will continue to cook slightly from residual heat and firm up as it cools. Overbaking it can give it a rubbery or bubbly texture. So, it’s better to take it out a bit early than too late.
I haven’t personally tried it without dairy, so I can’t say for sure how it would turn out. Non-dairy milks vary a lot in texture and ingredients, so results can differ depending on which one you use. If you experiment, start with full-fat coconut milk. It will give you the richest result and closest texture to the original.
If you used a thin layer of caramel, unmolding should be easy. Run a knife gently around the edges of the flan. Then, place a plate over the mold and flip quickly but carefully. Let it rest for a few seconds so the caramel can drip down the sides. If the flan resists, you can briefly dip the bottom of the pan in warm water to loosen the caramel before trying again.
It keeps well in the fridge for three to four days, covered to prevent it from drying out. I actually find that it tastes even better the next day once the caramel has had more time to soak in and sweeten the custard.
That’s completely normal. The heat and moisture from the custard help dissolve it as it bakes and chills. If you’re planning to unmold, though, don’t go too heavy on the caramel to avoid having stubborn hard patches.
Coconut Flan
Ingredients
For the caramel
- ½ cup sugar white or demerara
For the custard
- 1 cup heavy cream
- 1 cup whole milk
- 1 cup coconut milk you can make your own
- 6 eggs
- ½ cup coconut butter can be substituted with some shredded coconut
- 3 Tbsp. honey Or use ½ cup of sugar, either to taste
- 1 tsp. vanilla extract (optional, but recommended)
Instructions
- Preheat the oven to 350 degrees (around 180ºC).
Make the caramel
- Add the sugar to a small saucepan and heat over medium heat. Stir occasionally until the sugar melts and turns a rich golden brown. You can add a splash of water if desired, but it isn’t necessary. (I find it only slows the process.)
- When the caramel turns medium brown, carefully pour it into your pan or custard cups, tilting to coat the bottom and sides. Set aside and allow the caramel coating to harden.
Make the custard
- In a medium saucepan, combine the milk, cream, coconut milk, and honey. Warm gently over low to medium heat, stirring until the honey is fully dissolved. Stir in the coconut butter until melted and smooth, then mix in the vanilla extract.
- Remove the mixture from the heat. Whisk the eggs in a separate bowl, then slowly pour in the warm milk mixture while stirring gently to combine. Avoid whisking too vigorously. (You don’t want to create bubbles.)
Make the bain-marie (water bath)
- Pour the custard mixture into the prepared caramel-coated mold (or ramekins). Place the mold inside a larger baking dish and carefully pour hot water into the outer dish until it reaches about halfway up the sides of the mold. This water bath helps the custard cook evenly and stay creamy.
Bake the flan
- Bake for about 40 minutes. Then, begin checking for doneness. The edges should be set while the center still jiggles slightly. To test, insert a toothpick or knife into the center; it should come out mostly clean with a bit of creamy custard on it.
Cool and refrigerate
- Carefully remove the flan from the water bath right after baking so it doesn’t continue cooking. Let it cool on a cooling rack, then refrigerate for at least 4 hours or overnight. The flavor and texture improve after chilling.
Unmold and serve
- Run a knife around the edges of the flan to loosen it. Place a plate over the mold, flip carefully, and let the caramel sauce flow over the top.
- Slice and enjoy!
Notes
- Pan choices: You can bake this flan in a round pan, loaf pan, or individual custard cups. A round pan gives a thinner flan with more caramel per bite, while a loaf pan makes thicker slices. Individual ramekins look elegant and bake faster.
- Caramel tips: If the caramel forms a thick layer, it may not fully dissolve right away but will soften after refrigeration. To unmold easily, use a thinner caramel layer.
- Sweetness: The caramel continues to sweeten the flan as it rests, so it’s best to keep the custard itself only lightly sweetened.
- Avoiding bubbles: Stir gently when mixing and always bake in a water bath to prevent the custard from curdling or forming bubbles.
- Cooling tip: Remove the flan from the water bath right away so it stops cooking. Leaving it in the hot water can make the edges overcooked or slightly grainy.
- Make ahead: Flan keeps well in the fridge for up to 3–4 days and often tastes even better the next day once the caramel soaks in.
This post was first shared on June 24, 2013, and completely updated on October 6, 2025, with new photos, clearer step-by-step instructions, and plenty of extra tips.


I made this and it was DELICIOUS thank you so much for the recipe!
Would it work with all coconut milk? I don’t have heavy cream or milk on hand right now.
Hi Tiffany,
To be honest, I haven’t tried it with only coconut milk even though I have been considering trying it for quite some time now.
I usually use my homemade coconut milk, but I’m guessing that if you were to use only coconut milk, it would probably work out better with the store bought varieties.
I’d love to hear if it works out if you do try it!
Absolutely making this again! Thank you for sharing this recipe. Husband loves it!
I used coconut milk in a can instead. 2 cups coconut milk and 1 cup milk….no heavy cream and i used only 4 eggs.
Awesome! Thanks!
OMG! look so delicious!