

Carnivore keto custard
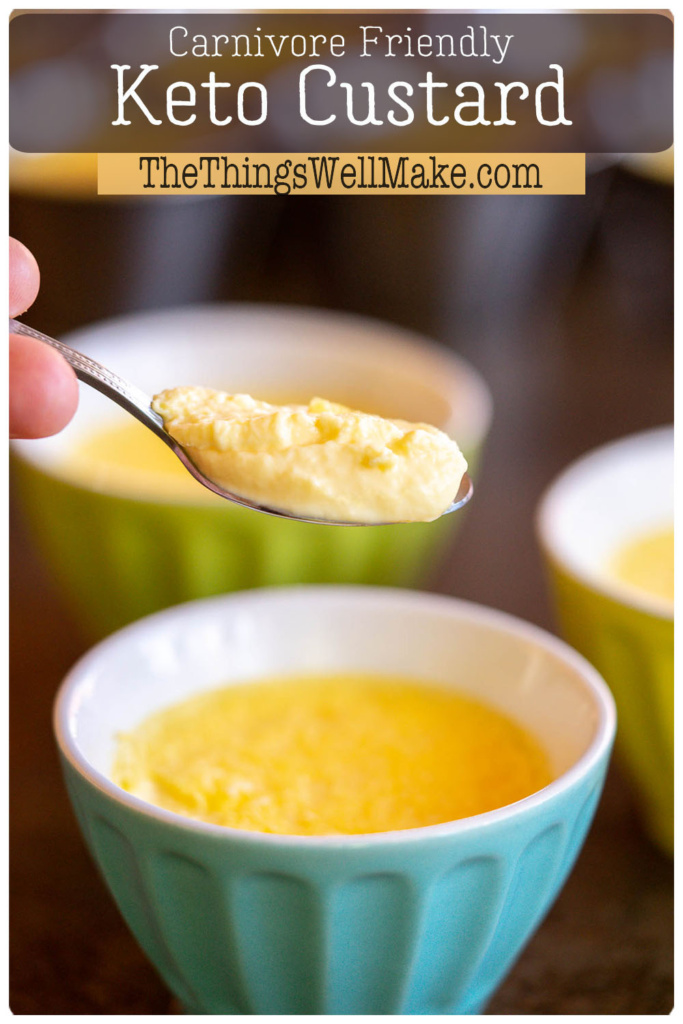
Smooth, creamy, and delicious, this low-carb, high-fat, keto custard is a carnivore diet-safe dessert that’s easy to make and sure to please.

Being of Spanish descent, I’ve always loved flan. I love its smooth and creamy texture and subtle flavor and have always seen it as one of the healthier dessert options. That’s why I shared how I make coconut flan as one of the first recipes on my blog!
I got used to making my own flan at home because the ones sold at the local supermarket were way too sweet and didn’t have the right texture to suit my taste. What sets flan apart from other custards is its caramelized sugar syrup. By ditching the caramelized sugar, you can make a delicious keto dessert that is healthier, easier to make, and just as satisfying.
Why make it?
Before diving into the process of making carnivore keto custard, let’s focus on “why” you should make this recipe. This dish is perfect for those on a keto diet as it’s high in fats, low in carbohydrates, and moderately high in protein. Plus, it’s quick and easy to make. If you don’t add in sweeteners or flavorings, it’s a truly sugar-free low-carb dessert that’s perfect for those following a carnivore lifestyle.
Making custard from scratch gives you the power to avoid added sugars, preservatives, and artificial flavors present in store-bought options. You can also control the sweetness and the texture. Cook it longer for a more solid custard, or less time for a creamier, softer dessert.
This easy keto egg custard can serve as a satisfying and nutrient-dense snack, breakfast, or dessert option. Even though it’s not sweet, it’s great for satisfying your cravings. I think you’ll really love this recipe.
Ingredients
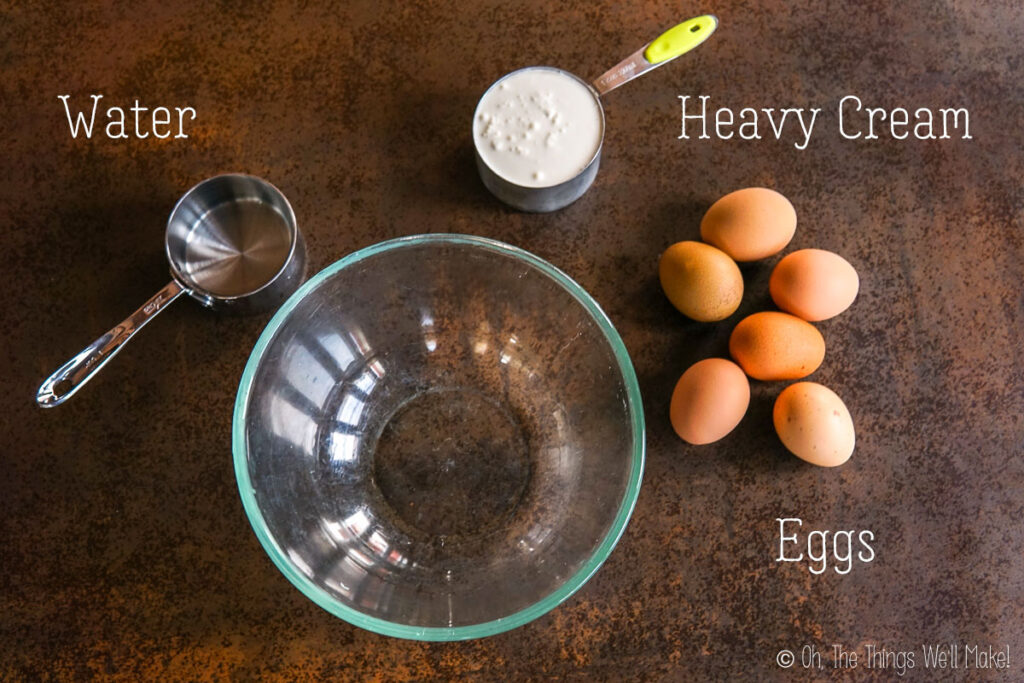
This simple recipe only needs eggs, heavy cream (also called whipping cream, double cream, or thickened cream), and water, ingredients you probably already have. For an optimal outcome, use ingredients at room temperature. If pressed for time, you can use cold ingredients and consider keeping the custard in the oven for a few more minutes.
I add some water to the heavy cream to make the finished dessert lighter. If you prefer, you could substitute the heavy cream and water mixture for a lighter cream like half-and-half. The water can also be replaced with milk or, for a richer, fattier custard, replace the water with more cream. Whatever you choose, you’ll want a ratio of about half a cup of liquid for every egg used.
Optional ingredients and flavorings
While I keep my custard unsweetened to follow a more strict carnivore diet, if you want a sweeter dessert, use whatever sweetener you prefer. You can use sugar, honey, maple syrup, or more ketogenic-friendly sweeteners like stevia, monk fruit sweetener, or erythritol. You may need to experiment to find the desired level of sweetness to suit your taste.
To add flavor, optionally add some vanilla extract and/or salt. You could also simmer the cream with lemon or orange peels before using it in your recipe. (Allow it to cool before incorporating the eggs!)
Some people also like to add some cinnamon or other spices. Here in Spain, many people add cocoa powder or instant coffee to make chocolate or coffee flan. Feel free to experiment and have fun with it!
Instructions
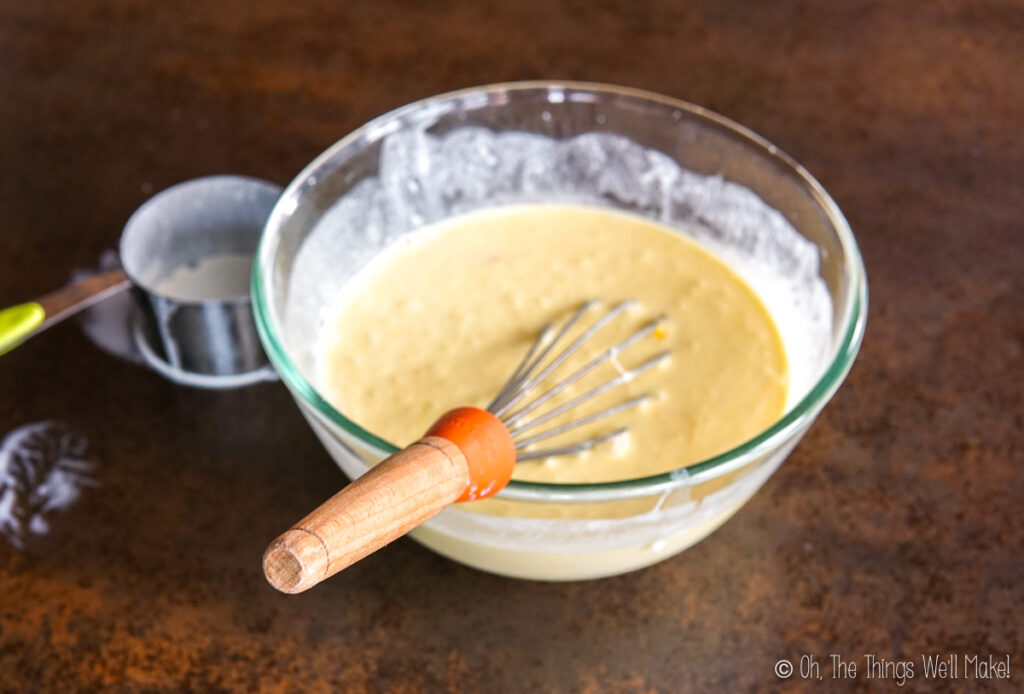
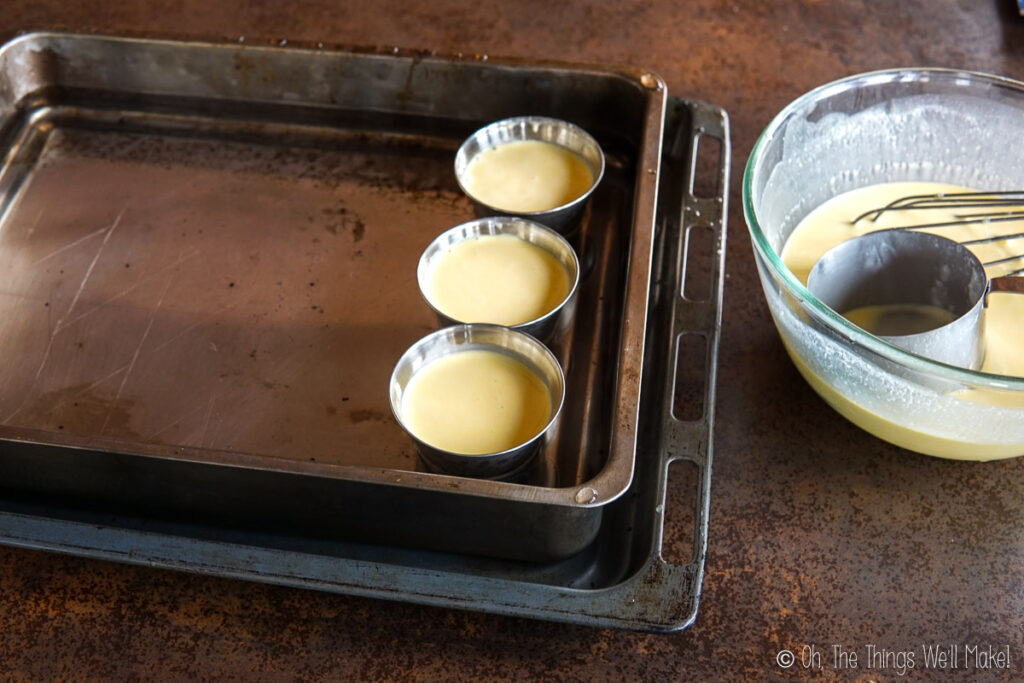
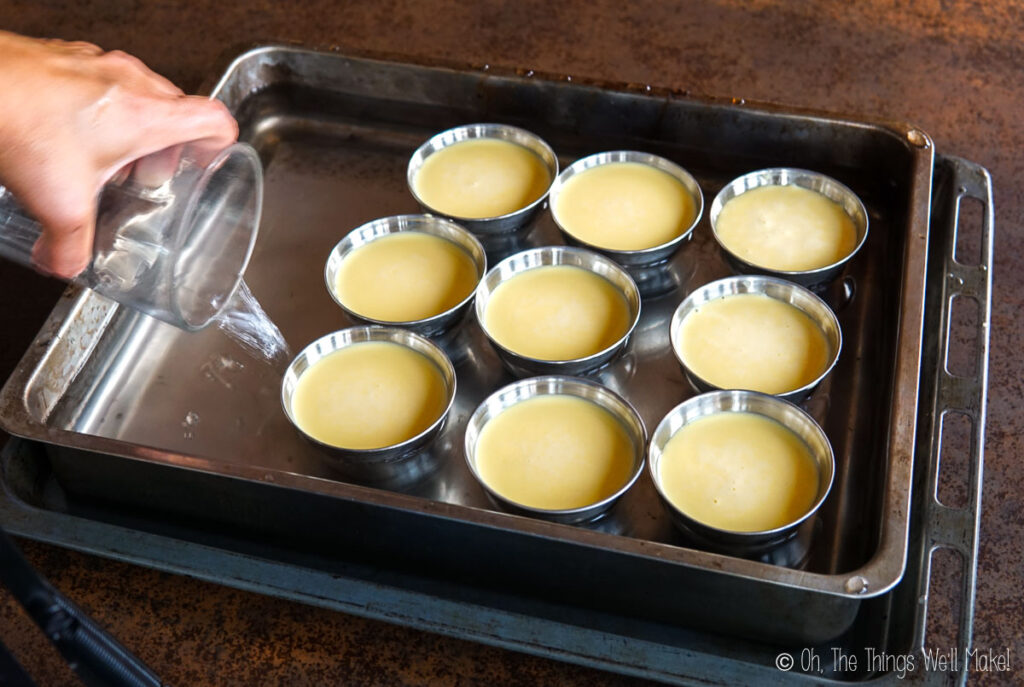
Begin by whisking together the eggs, the heavy cream, and the water. To make the process quick and easy, use a blender or food processor. Otherwise, whisk everything in a large bowl until well combined. Once you have prepared your custard mixture, pour it into custard molds or small ramekins.
Place the custard cups in a deep pan filled with boiling or near-boiling water, making sure the water reaches at least halfway up the sides of the cups. This method of cooking is called a Bain-Marie or double boiler method. It helps to gently cook the custard and prevent it from curdling or overcooking. Place the pan in the preheated oven and bake for around 40 minutes.
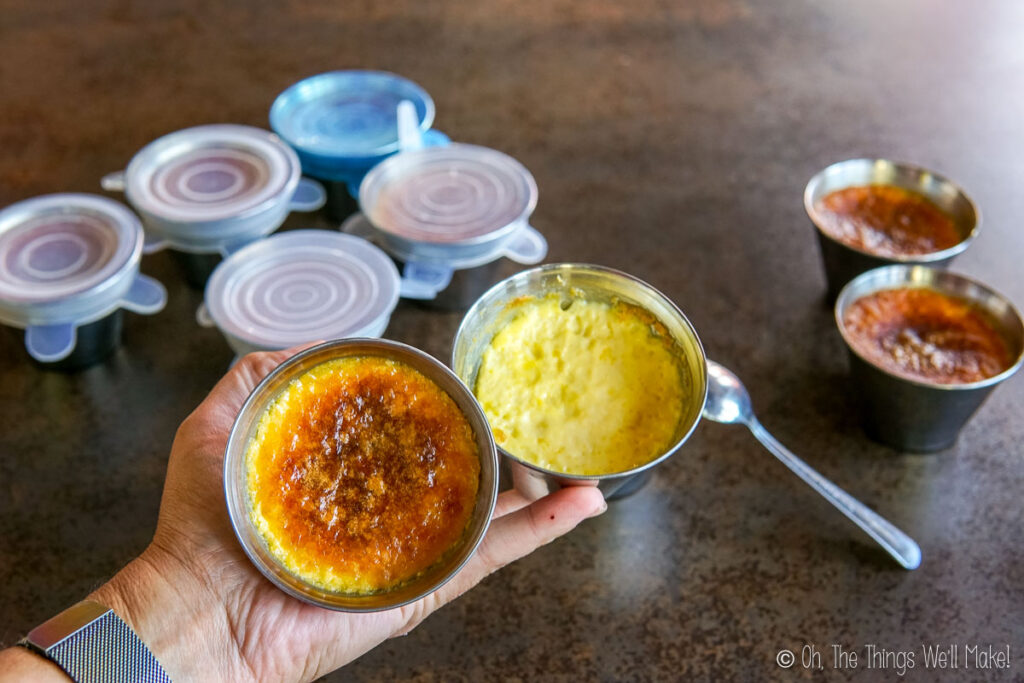
Once cooked, carefully remove the custard cups from the water bath and let them cool before serving or refrigerating.
Troubleshooting
Even if you followed the recipe properly, you may find that it doesn’t always come out exactly to your liking. This could be due to differences in our ovens, other environmental factors, or just a difference in taste. Don’t worry! Read on to find possible solutions to either fix your batch or make the next one absolutely perfect!
- If the keto custard isn’t fully set or too soft for your taste, you didn’t cook it long enough. You can remedy the problem by cooking the custard for a bit longer.
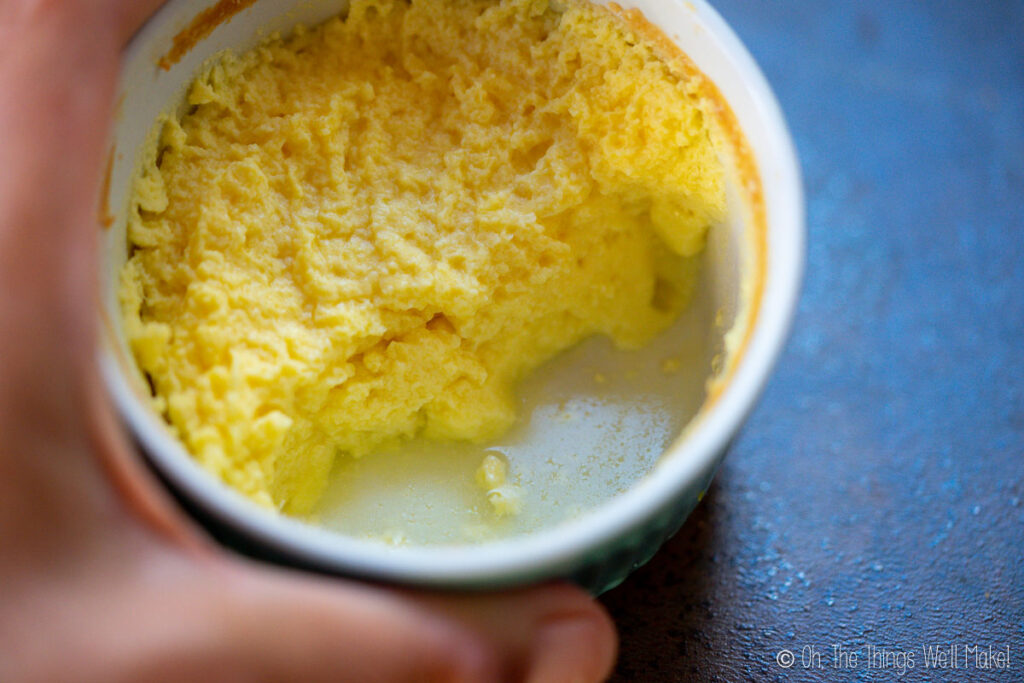
- If your custard has many bubbles, or it separates and gets watery, it’s likely because you cooked it at too high a temperature. Custard will curdle at temperatures above 185ºC/365ºF. Using a water bath around the custard cups ensures a consistent baking temperature and prevents curdling or separation of the custard. The water acts as an insulator and helps the custard cook gently and evenly. If you did use a water bath and still got separation, try lowering the baking temperature for your next batch.
- If you don’t want a skin to form on top of the custard, consider covering the custard cups during the cooking process. Another option is to cover the pan with a lid and use the steam generated from the water bath to keep the custard surface from drying out.
Storage
Once cooled, you can refrigerate your custard.
Refrigerating custard
When refrigerating custard, store it in an airtight container to avoid absorbing odors or flavors from other foods in the fridge. (Silcone covers like these work perfectly for ramekins and custard cups.) While it will store well for around a week, for optimal flavor and texture, consume your refrigerated custard within 3-4 days.
Freezing custard
To freeze your custard, leave half an inch of space at the top of a freezer-safe container to allow for expansion during freezing. Cover the container with a lid, plastic wrap, or a beeswax wrap and place it in the freezer. Custard can be frozen for up to 2 months.
To thaw frozen custard, transfer it to the fridge and let it defrost overnight. If you are in a hurry, you can also thaw it by placing the container in a bowl of lukewarm water until it is defrosted. Avoid thawing custard in the microwave as it can cause it to separate or curdle.
Video tutorial

Carnivore Keto Custard
Ingredients
- 1½ cups heavy whipping cream
- 1½ cups water
- 6 eggs
Instructions
- Preheat the oven to 340ºF/170º- 350ºF/175ºC.
- Crack the eggs into the mixing bowl and whisk them together until they are well-beaten and frothy.
- Pour the heavy whipping cream and water into the mixing bowl with the eggs, and continue whisking until the mixture is well combined.
- Pour the custard mixture into custard cups or small ramekins.
- Place the ramekins into a larger pan and fill the pan with near boiling water. Make sure the boiling water reaches halfway up the sides of the ramekins.
- Bake for approximately 40-45 minutes in the center of the oven.
- Check the custard. It should be slightly jiggly still, but not at all runny. If it appears too runny, cook a bit longer.
- When you are happy with the consistency, remove the pan from the oven. Remove the ramekins from the water bath and allow the custard to cool.
- Once cool, chill and store the custard in the refrigerator until ready to serve.
Notes
Troubleshooting
- If the keto custard isn’t fully set or too soft for your taste, you didn’t cook it long enough. You can remedy the problem by cooking the custard for a bit longer.
- If your custard has many bubbles, or it separates and gets watery, it’s likely because you cooked it at too high a temperature. Custard will curdle at temperatures above 185ºC/365ºF. Using a water bath around the custard cups ensures a consistent baking temperature and prevents curdling or separation of the custard. The water acts as an insulator and helps the custard cook gently and evenly. If you did use a water bath and still got separation, try lowering the baking temperature for your next batch
- If you don’t want a skin to form on top of the custard, consider covering the custard cups during the cooking process. Another option is to cover the pan with a lid and use the steam generated from the water bath to keep the custard surface from drying out.
Storage
- When refrigerating custard, store it in an airtight container to avoid absorbing odors or flavors from other foods in the fridge. (Silcone covers like these work perfectly for ramekins and custard cups.) While it will store well for around a week, for optimal flavor and texture, consume your refrigerated custard within 3-4 days.
- To freeze your custard, leave half an inch of space at the top of a freezer-safe container to allow for expansion during freezing. Cover the container with a lid, plastic wrap, or a beeswax wrap and place it in the freezer. Custard can be frozen for up to 2 months.
- To thaw frozen custard, transfer it to the fridge and let it defrost overnight. If you are in a hurry, you can also thaw it by placing the container in a bowl of lukewarm water until it is defrosted. Avoid thawing custard in the microwave as it can cause it to separate or curdle.

Can I use a muffin pan instead if i don’t have ramekins? Not sure what i’d put the muffin pan in to cover half way with water.
Hi Philip,
Yes, you can use a muffin pan instead of ramekins. Just place the muffin pan inside a larger baking dish or roasting pan, then pour hot water into the outer pan until it reaches about halfway up the sides of the muffin cups. That creates the water bath (bain-marie) that helps the custard cook gently and evenly.
Because muffin cups are usually smaller than ramekins, the custards may cook a bit faster, so keep an eye on them and start checking a little earlier. They’re ready when the centers are mostly set but still have a slight jiggle.
I don’t have ramekins or small cups to bake in. Is there a way that I can bake it in one larger pan such as a 8×8 glass casserole dish?
Hi Connie,
Yes, I’ve done this in the past. Just do it in the same way as you would with the ramekins. You may have to adjust the cooking time slightly. (You want to make sure it sets in the middle without overcooking.)
I wanted to link to my coconut flan recipe because I used to have a picture of the larger flan in the post. I just looked, though, and I see that I removed it when I updated the post. (Smaller desserts photograph much more nicely. hahahaha)
If you ever buy yogurt in small glass jars, that can be another option. I’ve used those for multiple desserts in the past. (Maybe test out the glass with boiling water first to make sure it’s heat-safe. Most small jars from things like tomato paste, and even the yogurt ones are. I’ve had issues with decorative jars in the past, though.)
loved this!
Thank you! I’m so happy you enjoyed it!
Can I freeze this and put it in the creami machine?
Hi Michelle,
I think that should work, but I haven’t actually tried it myself. I’ve also never used a Creami machine (they don’t seem to be very common here in Spain), so I can’t say for sure from personal experience.
That said, since the custard is similar to many ice cream bases, it should freeze and spin fairly well. You may just need to run an extra spin or two if it comes out a bit firm at first.
I made this with 4 eggs, 1 cup heavy cream, 1 cup water and it turned out perfect! I baked it at 345 Fahrenheit for 40 mins. I added some sugar free whipped cream and 3 raspberries. Thank you!
I’m so happy you enjoyed it, Heather! 🙂
Hi …I am wondering what kind of food processor you have there and also where are you from ( so I know it is something I could get) I have cusinart 14 cup but I would really like the stainless steel option. I live in Ontario Canada
Hi Kim,
In that video I was using my Thermomix. I live in Spain, where they’re pretty common. The bowl is stainless steel, but it’s a bit different from a regular food processor because the machine also heats and cooks food while mixing.
For this recipe, though, a regular food processor like your Cuisinart should work just fine.