• Skip to main content
  • Skip to header left navigation
  • Skip to header right navigation
  • Skip to site footer
es_ES Español
  • About
    • Meet Tracy!
    • Contact Me
    • Disclaimers & Disclosures
    • Terms and Conditions
    • Cookie Policy
    • Privacy Policy
  • Holidays
    • New Years Eve
    • Valentine’s Day
    • St. Patrick’s Day
    • Easter
    • Fourth of July
    • Halloween
    • Thanksgiving
    • Christmas
  • es_ES
Oh, The Things We'll Make!

Oh, The Things We'll Make!

Make it yourself so that you control the ingredients!

  • Recipes
    • Appetizers & Snacks
    • Soups & Salads
    • Breakfast
    • Lunch & Dinner
    • Desserts & Sweets
      • frozen treats
    • Breads & Wraps
    • MIY Pantry Basics
    • Condiments & Sauces
    • Beverages & Smoothies
    • Story Archives
  • Make it Yourself
    • Arts & Crafts
    • Face & Body
      • Cleansers, Soaps, & Gels
      • Deodorants
      • Hair
      • Skin Care
      • Oral Care
      • Baby & Toddler Care
    • Home & Garden
      • Cleaning & Laundry
      • Garden & Hens
    • Soap Making
    • Upcycling
  • About
    • Meet Tracy!
      • More About Me
    • Contact Me
    • Disclaimers & Disclosures
    • Cookie Policy
    • Privacy Policy
  • Recipes
    • Appetizers & Snacks
    • Soups & Salads
    • Beverages & Smoothies
    • Breakfast
    • Lunch & Dinner
    • Desserts & Sweets
      • frozen treats
    • Breads & Wraps
    • Condiments & Sauces
    • MIY Pantry Basics
    • Story Archives
  • Make it Yourself
    • Arts & Crafts
    • Natural Face & Body
      • Cleansers, Soaps, & Gels
      • Natural Skin Care
      • Natural Hair care
      • Oral Care
      • Deodorants
      • Baby & Toddler Care
    • Soap Making
    • Home & Garden
      • Cleaning & Laundry
      • Garden & Hens
    • Photography
    • Upcycling
  • Holidays
    • New Years Eve
    • Valentine’s Day
    • St. Patrick’s Day
    • Easter
    • Fourth of July
    • Halloween
    • Thanksgiving
    • Christmas
es_ES Español
A Thanksgiving centerpiece shaped like a turkey that holds appetizer skewers.

Thanksgiving Appetizer Skewers

Last Modified: December 16, 2019 // by Tracy Ariza, DDS // November 20, 2019 I may receive a commission if you purchase through links in this post. Learn more here.

es_ES Español

Jump to Tutorial Print Tutorial
How to make a turkey display for Thanksgiving appetizer skewers. Kids will love this project, and it may even help them eat their veggies. #thanksgiving #thansgivingcrafts #thanksgivingrecipes #thanksgivingfood #thanksgivingappetizers #turkey #turkeycrafts #thethingswellmake #miy

How to make a turkey display for Thanksgiving appetizer skewers. Kids will love this project, and it may even help them eat their veggies.

Closeup of a wooden skewer holder shaped like a turkey for Thanksgiving
Pin this post for later!

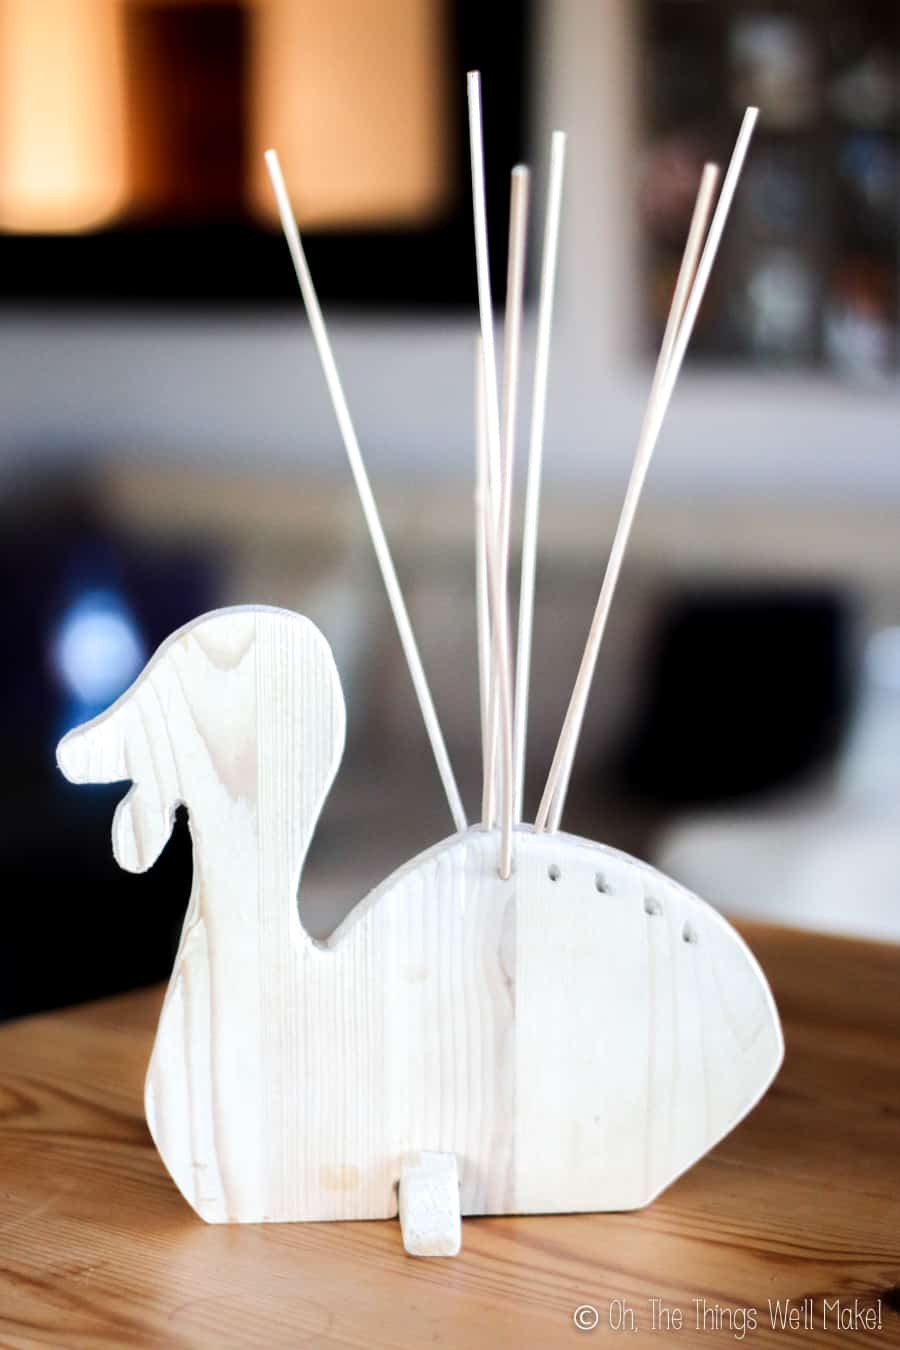
One day, when my son and I were hanging out at mall, we came across a cute appetizer skewer display. It was basically a wooden board shaped like a hedgehog with holes in the back to hold the skewers. The skewers stuck out in various directions, looking like the hedgehog’s spines.

My son thought it was cute, and so did I.

Thanksgiving was nearing. So, it occurred to me that I could make something similar in the shape of a turkey. My idea was that the skewers would become the turkey’s colorful tail.

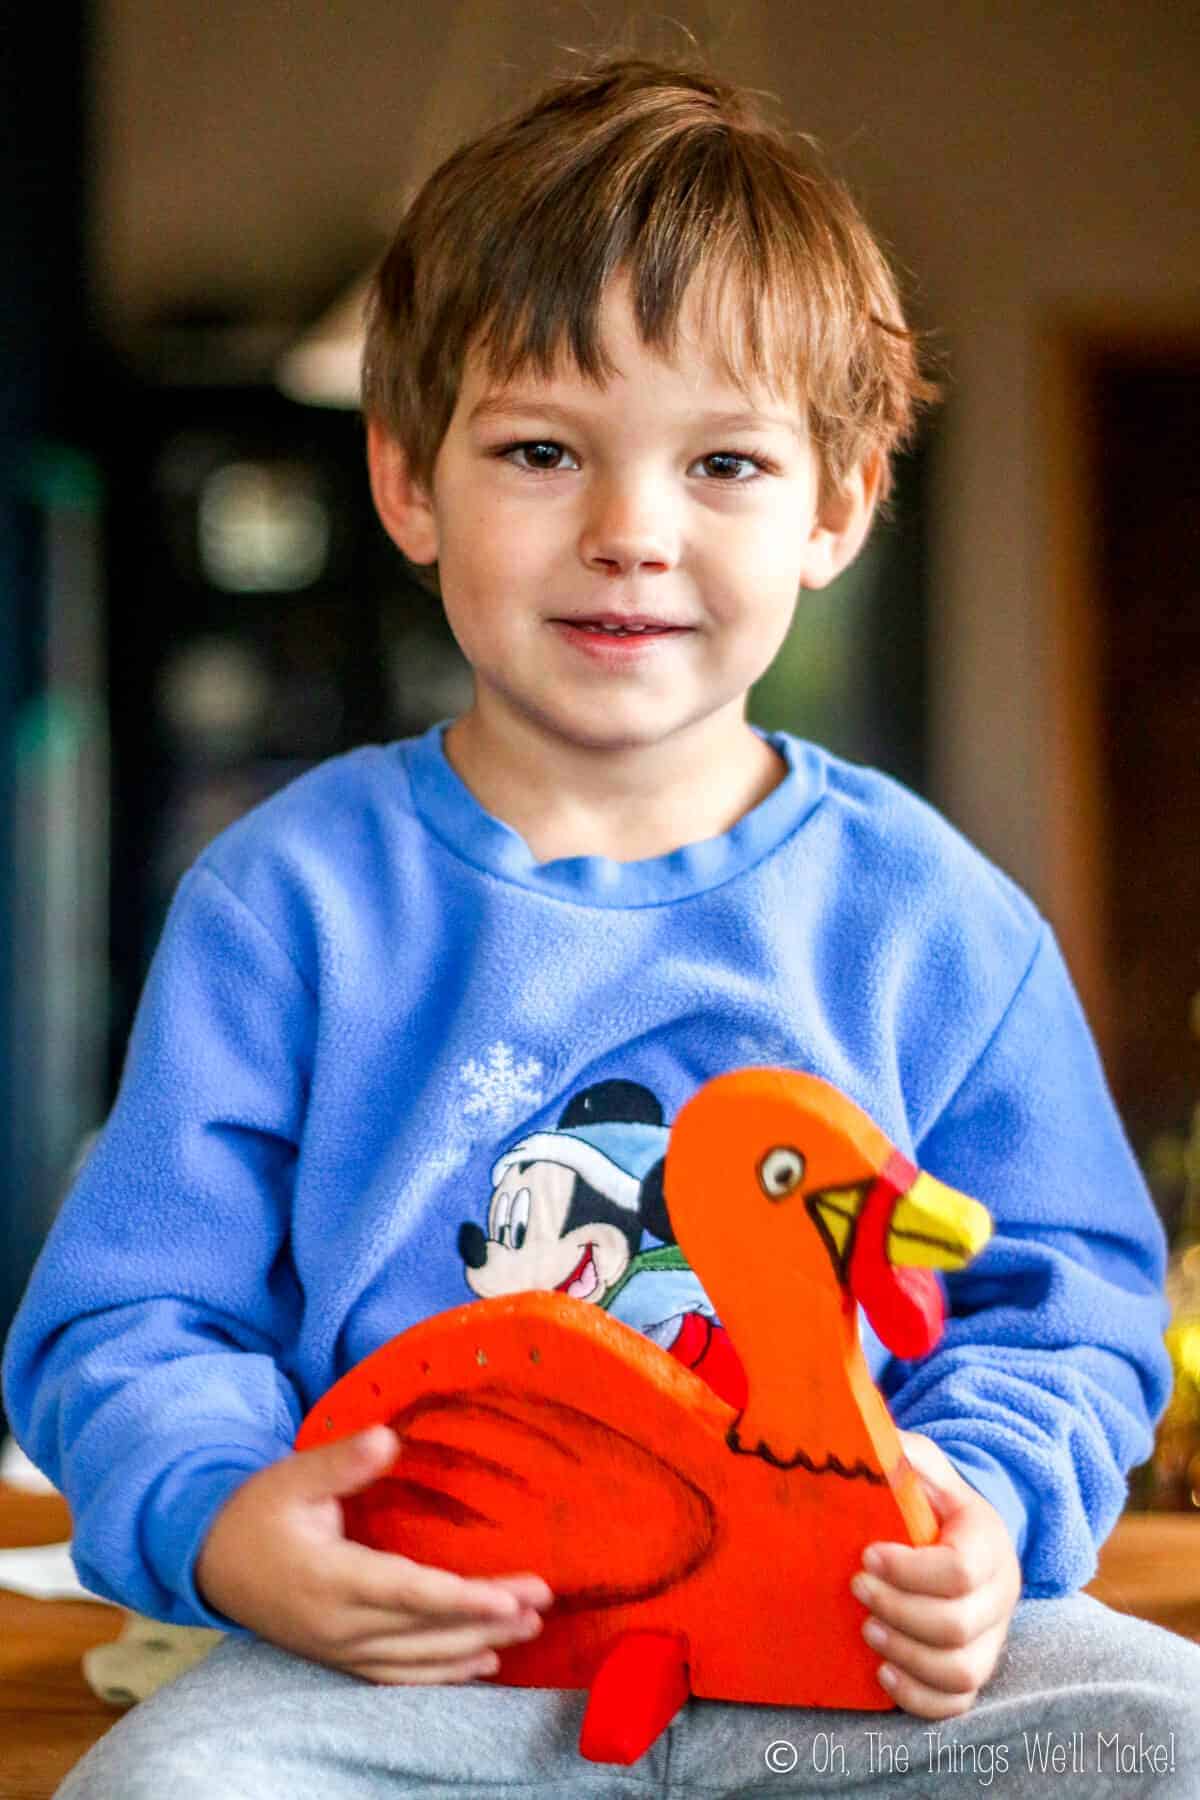
This might be a silly project, but my son liked it. He was excited to eat the turkey’s tail.

A toddler excited to eat some fruit and veggie skewers?
I’d say that’s a win-win!

A young boy holding a skewer holder shaped like a turkey
My son in 2014 with our first display

How to make the Turkey Skewer Holder

The first time I tried making a Thanksgiving appetizer display, I have to admit that I wasn’t completely happy with the final result. I knew my young son liked it, but was otherwise a bit embarrassed about how childish it was.

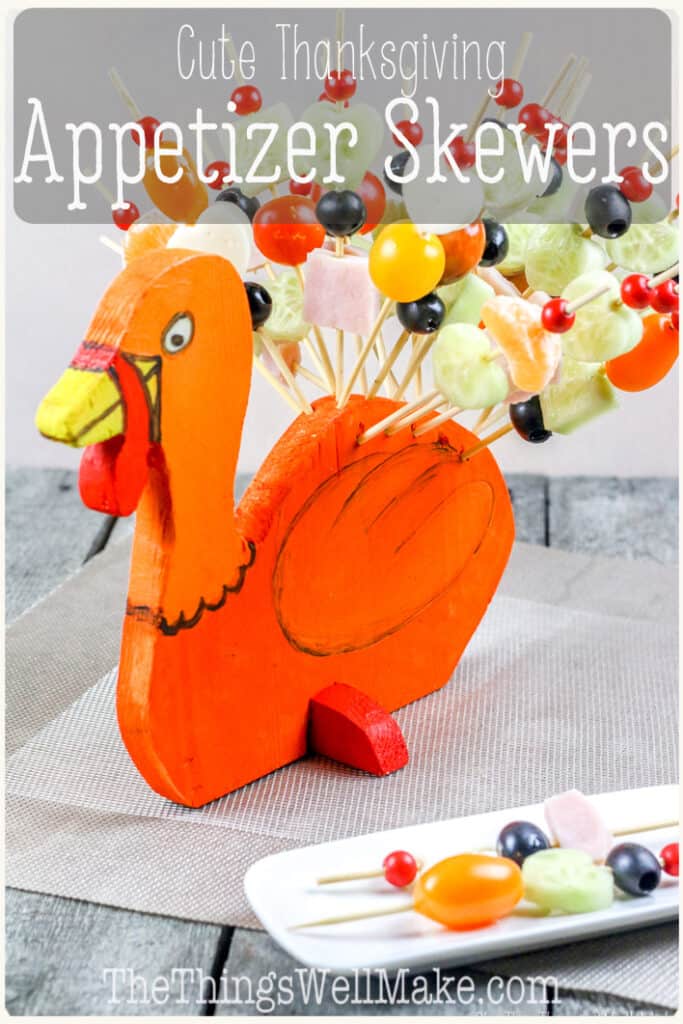
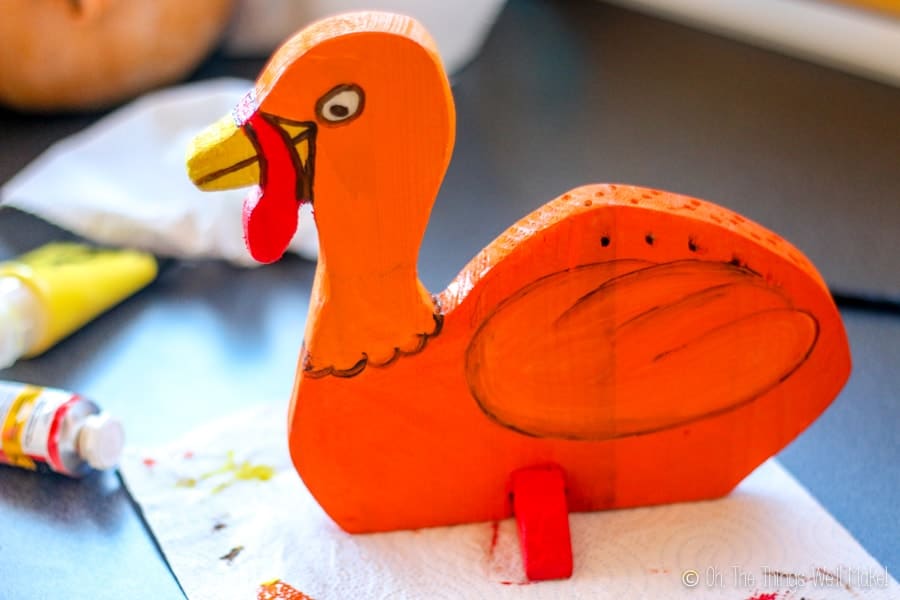
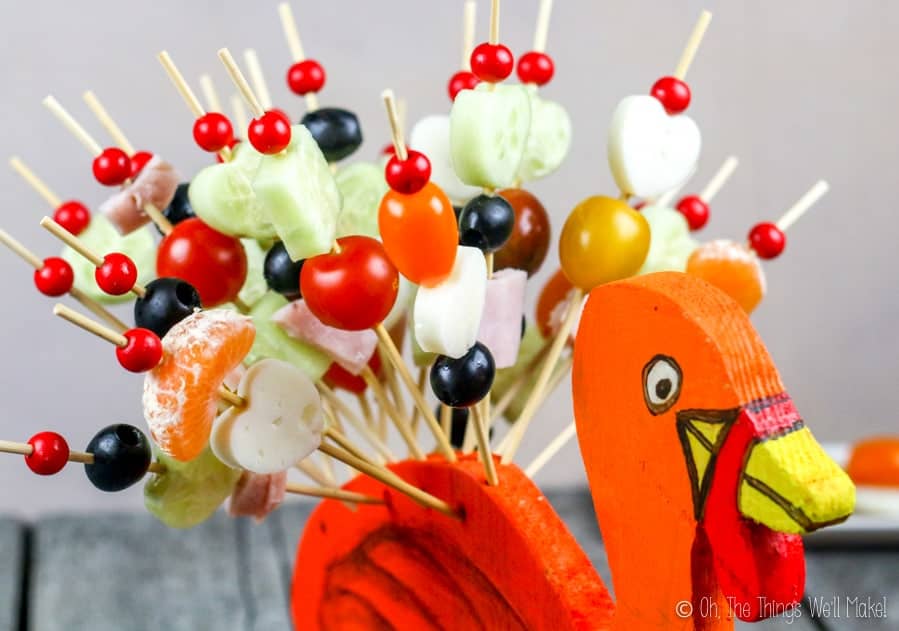
At first, I thought it was because I had painted the turkey in bright colors and it looked too much like a cartoon.

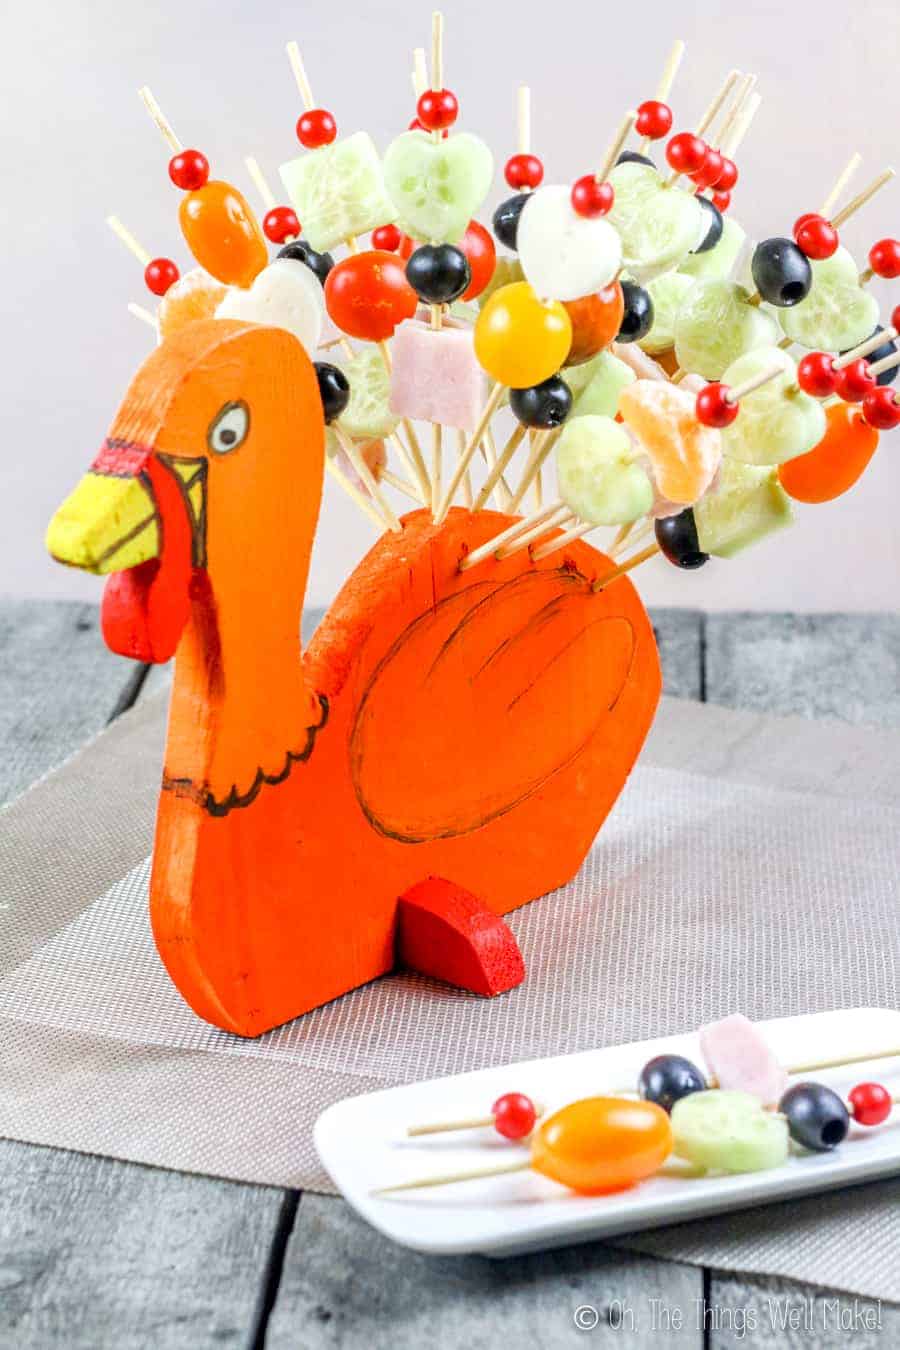
Later, though, I realized that it was because I couldn’t fan out the tail enough on the turkey display I had made. The focus was on the display itself more than on the food. It also needs the addition of many appetizer skewers to actually look like a turkey and not like a duck.

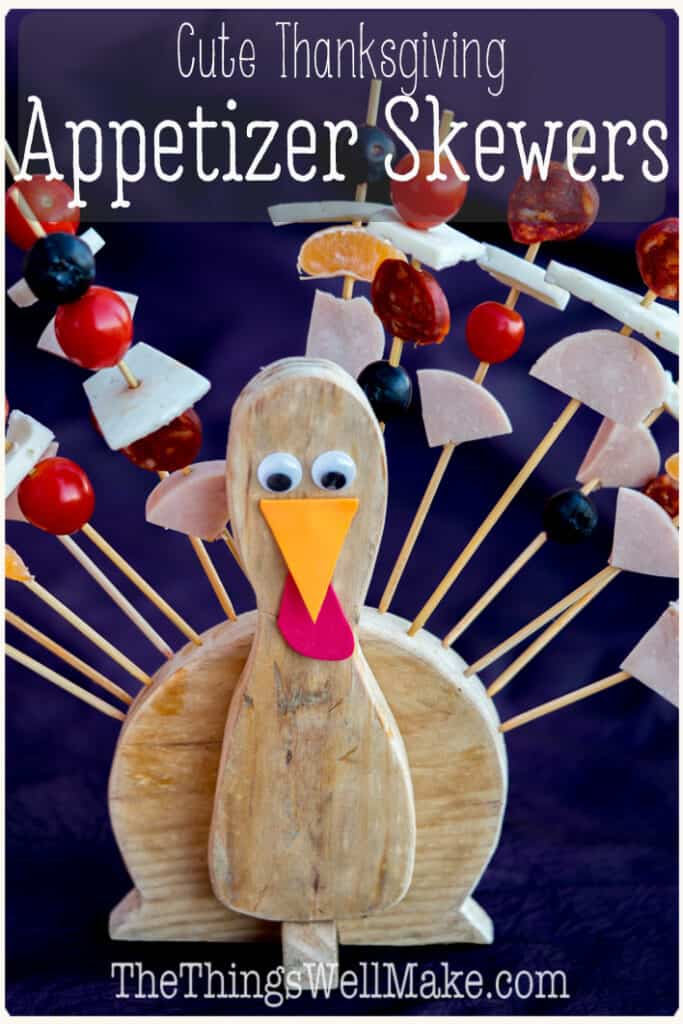
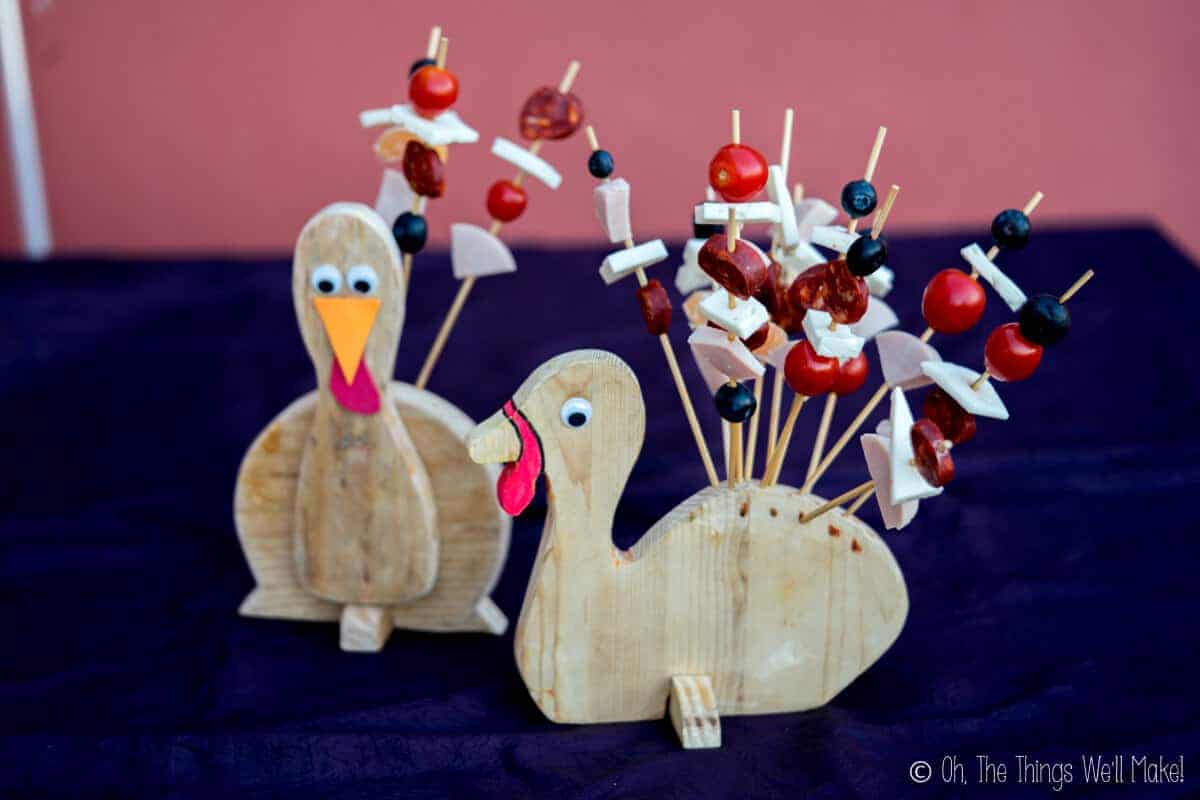
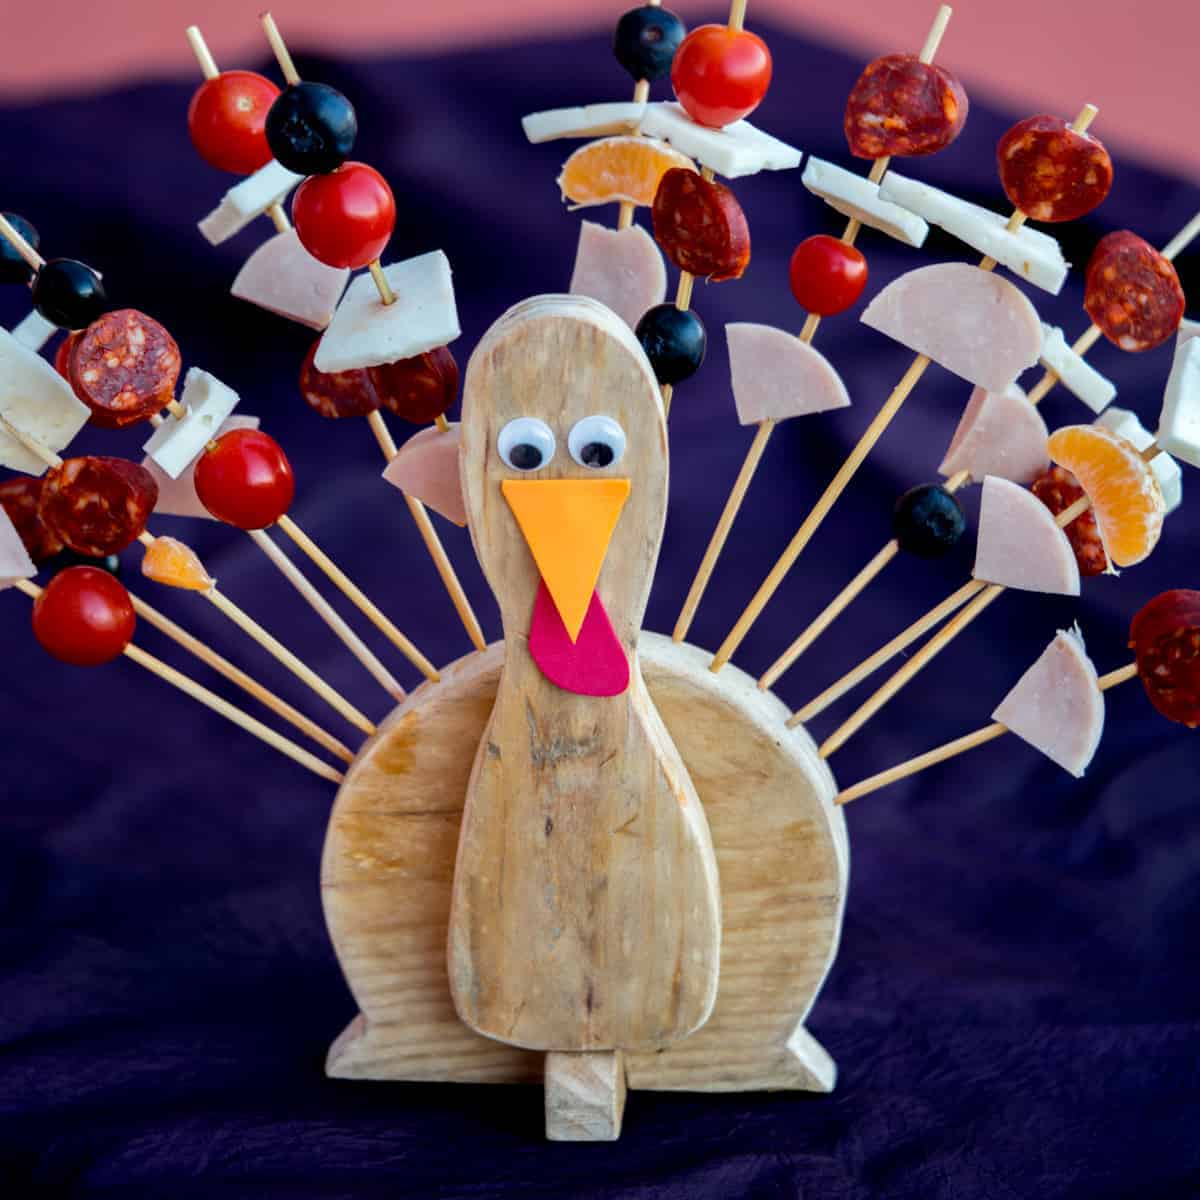
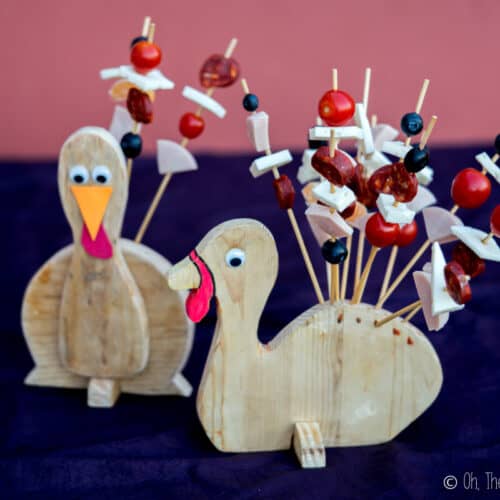
I decided to give my silly craft another shot, and this time made the display differently. By switching the perspective (looking at the turkey face on rather than from the side), I was able to fan out the turkey’s tail much further.

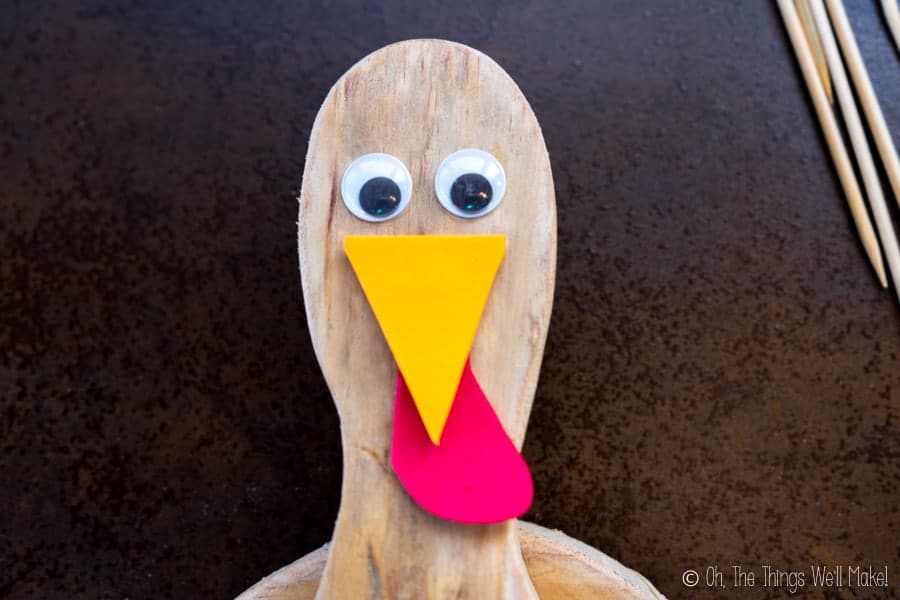
In the end, I have to admit that I really like the second version of my Thanksgiving skewer holder. It doesn’t need as many skewers in place to actually look like a turkey, and I also quite like his cute face.

two different skewer holders shaped like turkeys
Both appetizer skewer holders on display together: Newest version on the left, first version on the right.

You will need:

  • Wooden board scraps (At least 1.8mm thick)
  • Jigsaw
  • Sander/sandpaper
  • Drill with small drill bit ( around 3mm)
  • Bamboo skewers
  • Wood glue
  • Optional: paint and googly eyes

Instructions:

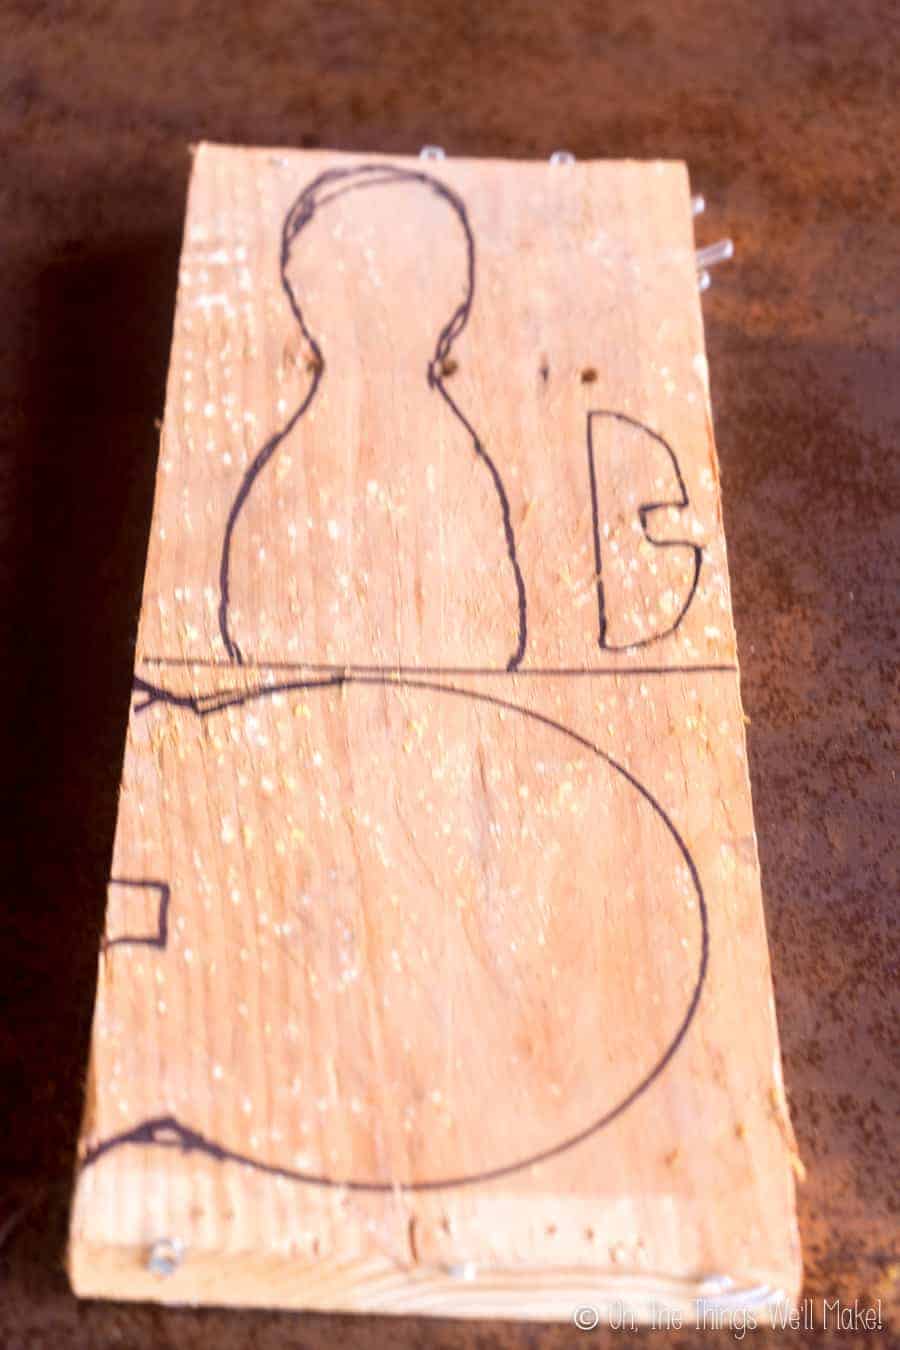
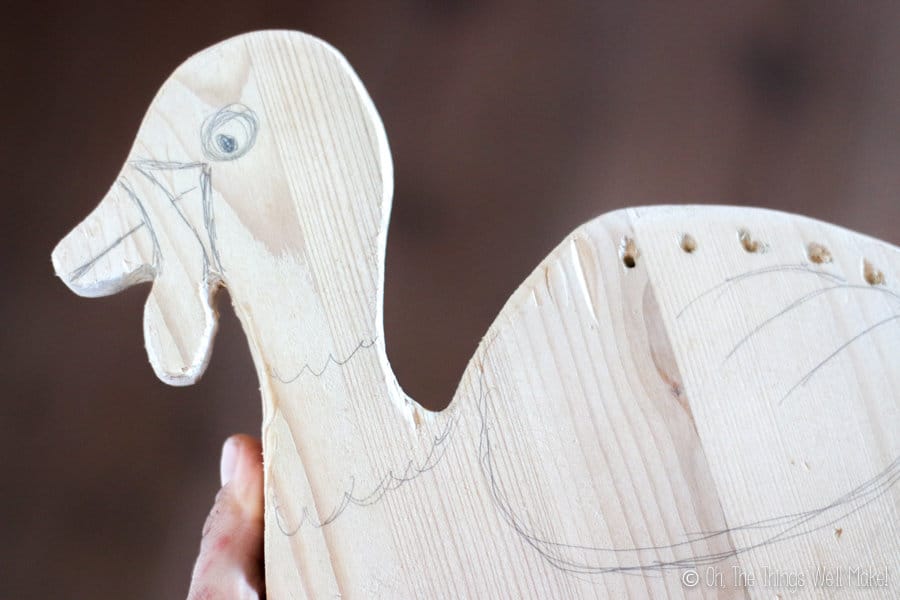
1. Trace out the body shape of a turkey onto a wooden board.

For the first version, draw the turkey’s silhouette from the side.

A turkey-shaped display holder with skewers filled with fruits, vegetables, ham, and cheese

For the turkey as seen from the front, you’ll need to cut 2 different shapes: one circular-shaped piece with a flat bottom for the body and one shaped like a bowling pin for the head and neck. (See photo below) (I traced a bowl to help draw the circular shape of the body.)

A wooden board with 3 turkey pieces drawn out on the board with black marker.
For the 2nd version holder, the turkey as seen from the front, cut out these 3 shapes.

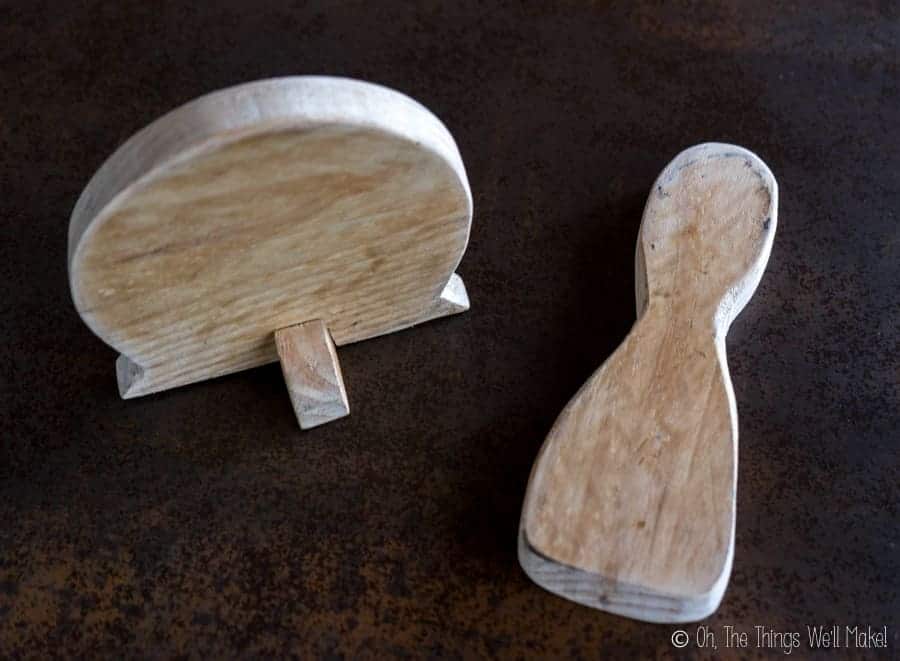
For either model, you’ll also need to cut a separate piece that will serve as a stand that will hold your turkey up. Make a rounded piece with a flat base (3-4 inches long and around 1 inch in height) with a slit in the center of the rounded part.

You’ll also want to make a slit in the bottom of the turkey that will fit with the slit in the stand. Each slit should have a width of the size of the thickness of the boards you are using. That will ensure that you can fit one piece inside the other snugly. Both slits should be around 1cm (1/2 inch) in length.

2. Using a jigsaw, cut the drawn pieces from the board. Sand the pieces, and check to see if the stand piece fits into the bottom of the turkey piece. (Place the slit of the stand piece into the slit of the turkey piece as shown below.) Make any needed adjustments until it fits.

3 wooden pieces. The body of the turkey and the feet are stuck together. the head piece is next to the other wooden pieces.
Testing out the stand to make sure the bottom piece fits.

3. Drill the holes for the skewers. I used a 3mm drill bit meant for wood. Use a size that will snugly hold the size of the skewers that you plan on using.

Make holes around 1cm deep into the turkey display along its back where the tail should be. Have some of the holes go straight down the back of the turkey down the center of the board. Slightly angle some holes along the edges. You can also add a row of more skewers along the sides that angle down even further. Be careful when doing the angled drilling not to drill your holes all the way through to the other side!

A wooden turkey display holding some bamboo skewers

4. Test out your holes with the skewers and adjust them as needed.

drawing a face and wings on a wooden turkey display for bamboo skewers

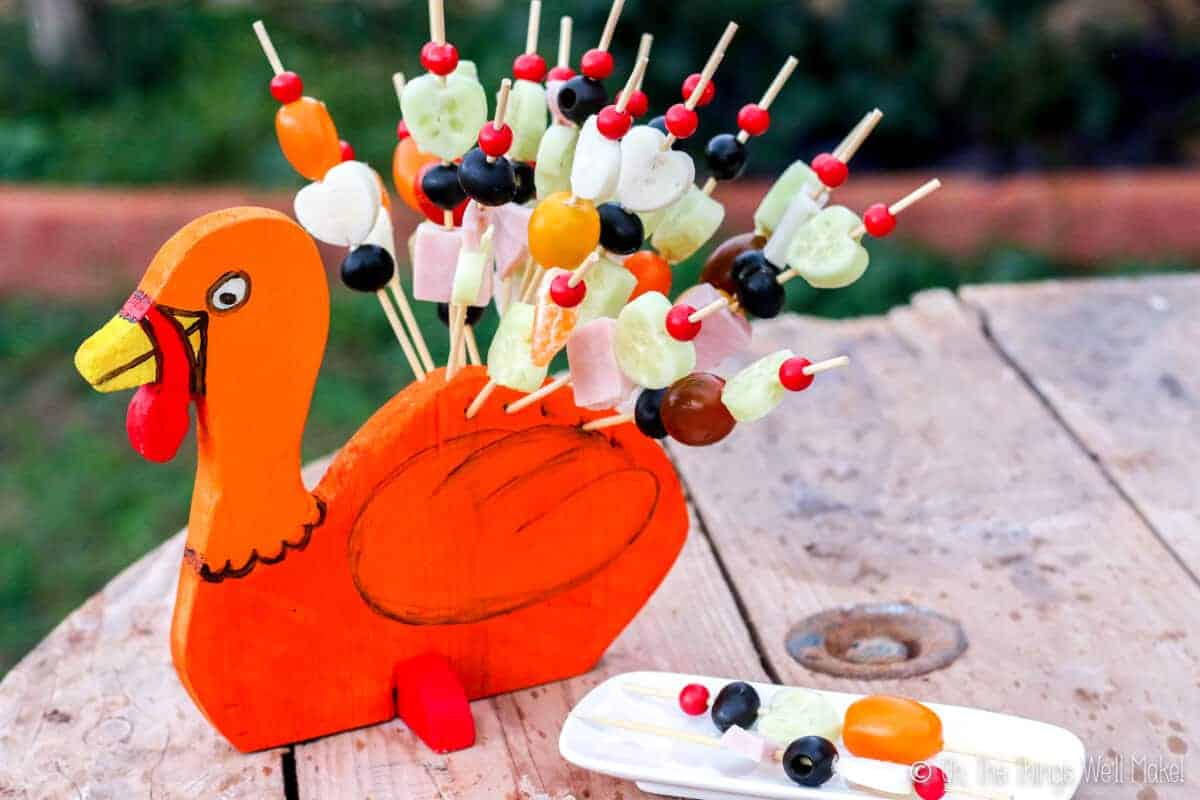
5. You can optionally paint your turkey. For a more formal get together, perhaps leaving it as a silhouette would look a bit classier. I wanted my son to have fun with it, though, so he helped me decide on the colors to paint my turkey.

Painting the turkey display

6. You can optionally glue on some googly eyes. I also glued on a craft foam waddle and beak for my second turkey display.

Closeup of turkey head on the skewer display, with googly eyes and a craft foam waddle and beak.

6. If you have made the second model type turkey, you’ll need to glue the head-and-neck piece to the body piece. Do this step with the stand in place to make sure that you don’t interfere with where the stand needs to go.

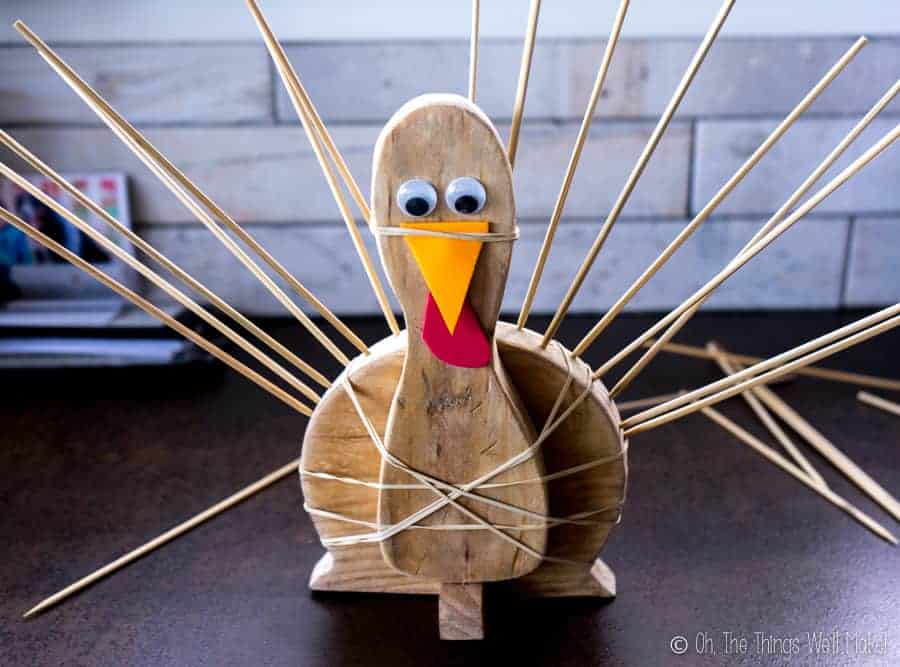
I used rubber bands to help hold the turkey together while the glue dried.

7. Once the glue has dried, your turkey display is done. All you need to do now is fill it with some appetizer skewers!

Making the Appetizer Skewers

Ingredient ideas

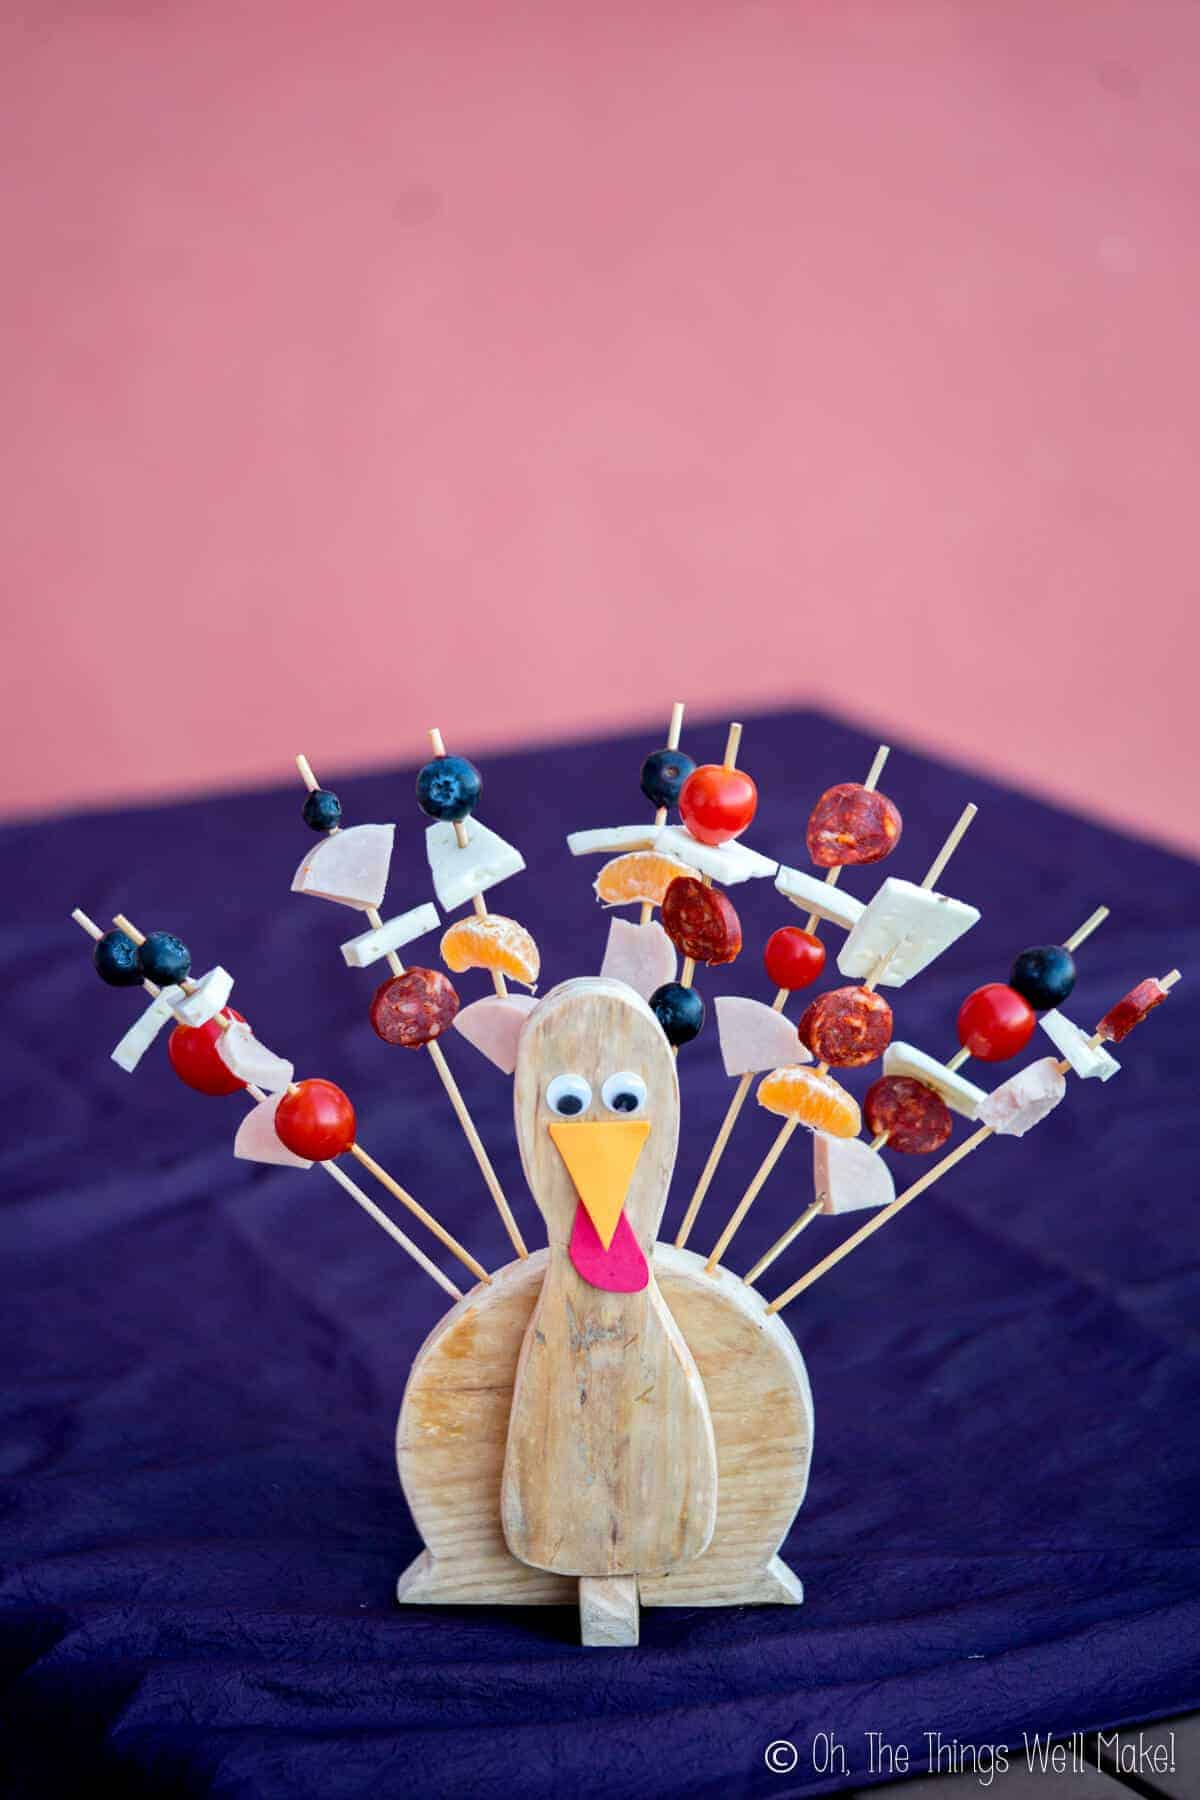
For the appetizer skewers, you can use any combination of fruits, vegetables, meats, and cheeses. I found that round ingredients like olives, grapes, blueberries, and cherry tomatoes were the easiest to use and made a cute addition to the skewers.

These are some of the foods I’ve used on skewers.

  • Thick slices of ham, or even more fitting, turkey ham. ?
  • Thickly sliced cheese.
  • Thick slices of fruits like apples, pears, or persimmons.
  • Grapes
  • Blueberries
  • Olives
  • Slices of cucumbers
  • Pieces of bell peppers
  • Sliced cured sausage slices like chorizo

Decorating ideas

If cutting slices of foods, like cucumber, persimmon, ham, and/or cheese, make the slices thick so that it’s easy to skewer them without the food breaking. It looks especially good if you cut them out with small cookie cutters. I used hearts and squares for mine.

Closeup of skewers filled with fruits, vegetables, ham and cheese on a stand shaped like a turkey
Notice the square and heart-shaped cucumber, ham, and cheese pieces.

While you want to make the slices thick enough to easily skewer, don’t make the pieces too big or you may overload your turkey!

Load up your turkey on a smooth and stable surface, and enjoy your Thanksgiving appetizer skewers in your cute turkey display!

Happy Thanksgiving, everybody!

Advice

When Thanksgiving rolls around, you can save time by roasting your turkey in pieces.
Also, remember not to throw away the skin, bones, and carcass of your turkey! You can make a delicious turkey rice soup with all of your leftovers! It’s by far my favorite way to enjoy them!

A turkey-shaped display holder with skewers filled with fruits, vegetables, ham, and cheese
Looking to make more?Subscribe to my newsletter for the latest projects (and recipes)!
two different skewer holders shaped like turkeys

Thanksgiving skewer holders

Make these cute turkey-shaped display holders for holding appetizer skewers this Thanksgiving.
No ratings yet
Print Rate
Prep time: 10 minutes
Active time: 1 hour
Author: Tracy Ariza, DDS

Equiment

  • Drill
  • 3mm drill bit
  • Jigsaw

Materials

  • 1 wooden board
  • wood glue
  • bamboo skewers
  • paint optional
  • googly eyes optional

Instructions

  • Trace out turkey shape and stand piece shape onto the wooden boards. (See notes below.)
  • Cut out the pieces using a jigsaw.
  • Sand the pieces.
  • Drill holes for the appetizer skewers. One row of holes should go down the back of the turkey in the center of the board. Make holes coming in from the sides at angles along the edges of the board, between the holes you just made. You can also make holes on the sides of the board, but angle them inwards and be careful not to drill all the way through the wood.
  • Optionally paint the turkey and glue on googly eyes.
  • Fit the stand piece into the slit cut into the bottom of the turkey display. Make sure it fits properly, and adjust, as needed, until the turkey display properly stands.
  • If you made the turkey display in which the turkey is seen from the front, glue the head-and-neck piece to the body piece with wood glue. You can also decorate the face with googly eyes and a craft foam beak and waddle.
  • Once the glue has dried, you can use the display!
  • Add skewers to the holes you made in the display. Adjust, as needed, to fit them properly and so that they angle out in a way that looks good.

Notes

Ingredient ideas for the appetizer skewers include blueberries, grapes, cherry tomatoes, and tangerine slices. Sliced fruits like persimmon, apples, and pears also work well, as do thick slices of ham, cheese, and cured sausages.
To make slices of ham and cheese (or cucumbers and persimmons) more decorative, use small cookie cutters to cut out decorative shapes.
For the first holder type, draw a turkey silhouette as seen from the side.
For the second holder type, you’ll need to draw two shapes to form the shape of the turkey, one round shape with a flat bottom (for the body) and another shaped like a bowling pin (for the head and neck).
In either case, you’ll need to cut a slit in the wood around 1cm high and with the same width as the wooden board you’re using in the center of the bottom. Make a slit with the same characteristics in the top of the stand piece too. The stand piece should be rounded at the top and flat on the bottom and should measure around 3-4 inches long.
Tried making this? Tag me today!Mention @thethingswellmake or tag #thethingswellmake!
Category: Arts & Crafts, Thanksgiving

About Tracy Ariza, DDS

Tracy Ariza, B.A., D.D.S., left dentistry and the United States to found Oh, The Things We’ll Make!, writing to you from the Spanish Riviera. She loves making things herself in order to keep control of what goes in them. While far from perfect, she strives each day to live a healthier, more sustainable lifestyle.

Previous Post: « Overhead view of 9 handmade Christmas cards using photos Christmas Card Photo Ideas
Next Post: How to Cook Salmon in the Dishwasher Overhead view of salmon that has been cooked in a jar filled with vegetables in the dishwasher »

Reader Interactions

Leave a Reply Cancel reply

Your email address will not be published. Required fields are marked *

Recipe Rating


Sidebar

Search

  • Email
  • Facebook
  • Instagram
  • Pinterest
  • Twitter
  • YouTube

Hello, I’m Tracy!

I love making my own natural products like soaps and lotions and my own pantry items like yogurt and salad dressings.
Why do I do it? Sometimes to save money, sometimes because it's healthier, but I always love having control of the ingredients!​
Oh, the things we'll make!...

More about Tracy

I am a participant in the Amazon Services LLC Associates Program, an affiliate advertising program designed to provide a means for us to earn fees by linking to Amazon.com and affiliated sites.

Featured on Buzzfeed, Lifehacker, Fitness, Shape, Country Living, Healthline, Redbook, Redfin

Closeup of 4 bars of homemade soap. Two of them have been wrapped in brown paper and wrapped with ribbons. One soap is wrapped with red ribbon and the other with white ribbon.

Making an Easy, Basic Beginner Soap, and Then Making it Fun!!

Homemade prawn crackers on a plate in front of uncooked homemade prawn crackers and a roll of prawn crackers dough.

Prawn Crackers from Scratch

Impress your friends and save money by making your own soy sauce from scratch. Today we'll learn how to make a homemade shoyu, a fermented Japanese soy sauce made from soybeans and wheat berries. #shoyu #soysauce

How to Make Soy Sauce (Homemade Shoyu)

Two bottles of a homemade conditioner next to a wooden comb and a washcloth.

Easy DIY Hair Conditioner for Natural Hair

A small glass jar filled with an emulsified sugar scrub with a wooden spoon in it.

Easy Emulsified Sugar Scrub

Over head view of a spoon full of tomato paste over a jar full of it. A couple of fresh tomatoes lay next to the jar.

Easy Homemade Tomato Paste Recipe

Featured on Buzzfeed, Lifehacker, Fitness, Shape, Country Living, Healthline, Redbook, Redfin

White logo for Oh, The Things Well Make! website

Copyright © 2023 Tracy Ariza · Disclaimers and Disclosures · Privacy Policy · Cookie Policy