Snowman Cheese Ball

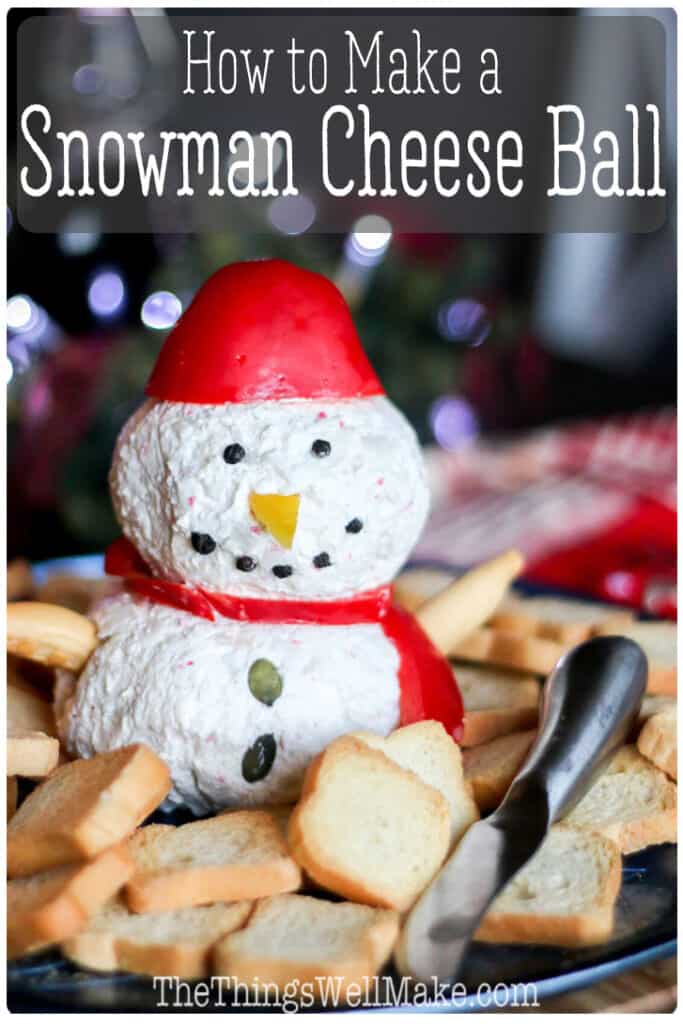
Festive and delicious, this cute snowman cheese ball can be made ahead of time and is the perfect addition to your holiday spread when entertaining.

The first year I made a snowman cheese ball was the only year I didn’t put up a Christmas tree. My son was an overly active toddler, so a tree seemed like an unnecessary danger that year. (Or maybe I was just an exhausted mommy and used that as an excuse.) 😉
We were hosting Christmas Eve dinner, though, so I did put up some lights and tinsel and tried to make my food a little more festive.
What could be more festive than a snowman cheese ball? Right?
Choosing a recipe
While I am providing a basic cheese ball recipe for you, you can really use just about any recipe. If you have a tried and true cheese ball recipe, feel free to use that instead!
I have to admit that my standby cheese ball has always been one made with cream cheese and shred up surimi. While it’s tasty, I have been trying to eliminate processed and imitation foods from our diet. So, I’ve provided you with another recipe that uses a variety of shredded cheeses and harbs instead.
The ingredients
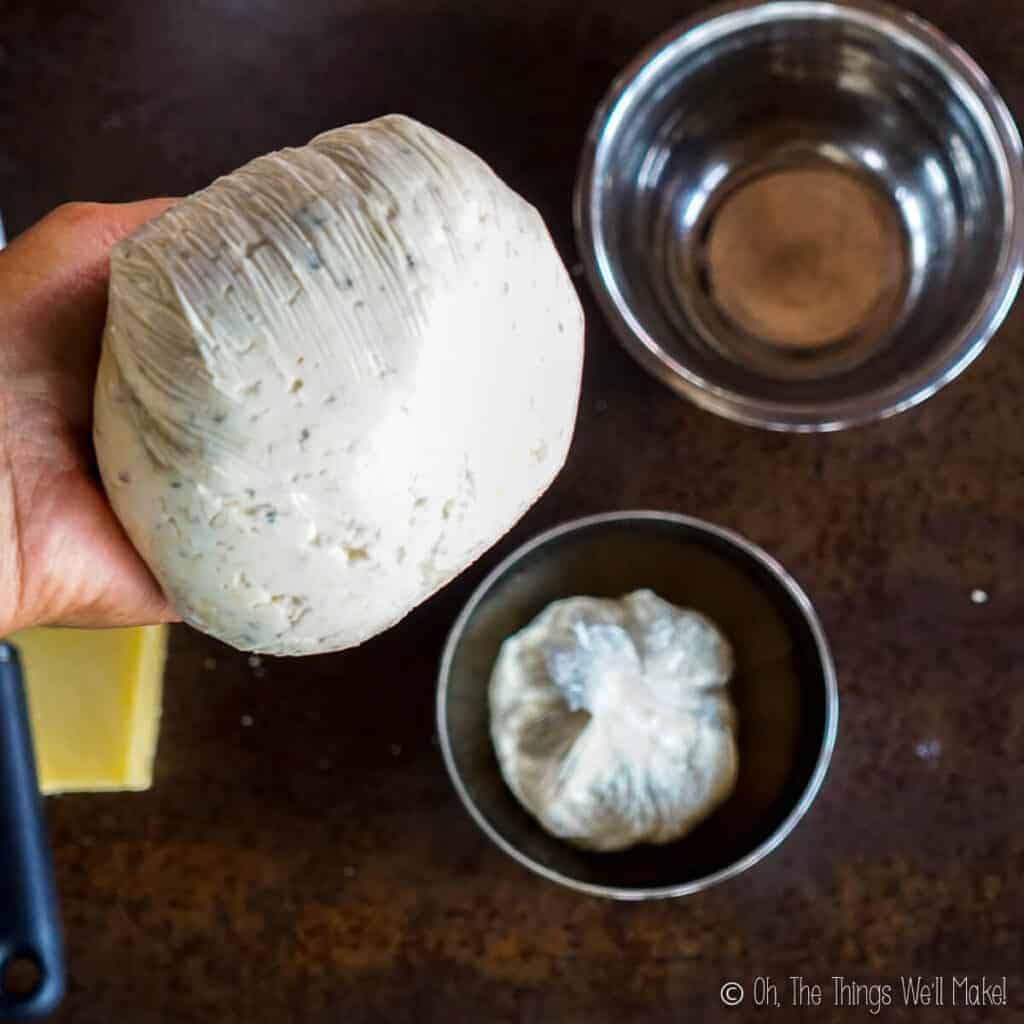
While you can use most cheese ball recipes, it is important to choose a recipe that gives a relatively firm ball that holds its shape well. The lower ball needs to be able to support the weight of the upper ball. Ideally, you’ll also want the ingredients to be light in color. That said, you can camouflage a darker cheese ball with a light color colored coating.
One year, I tried making a softer cheese ball with only herbs and cream cheeses, and the snowman didn’t really hold its shape well. It looked like Frosty was melting away.
Having some solid ingredients really helps the balls keep their shape. This year, I used shredded cheeses, but the surimi also had the same effect. Next year I want to try using some salted cod and other fresh fish and seafood. If it works well, I’ll try to remember to update this post. 😉
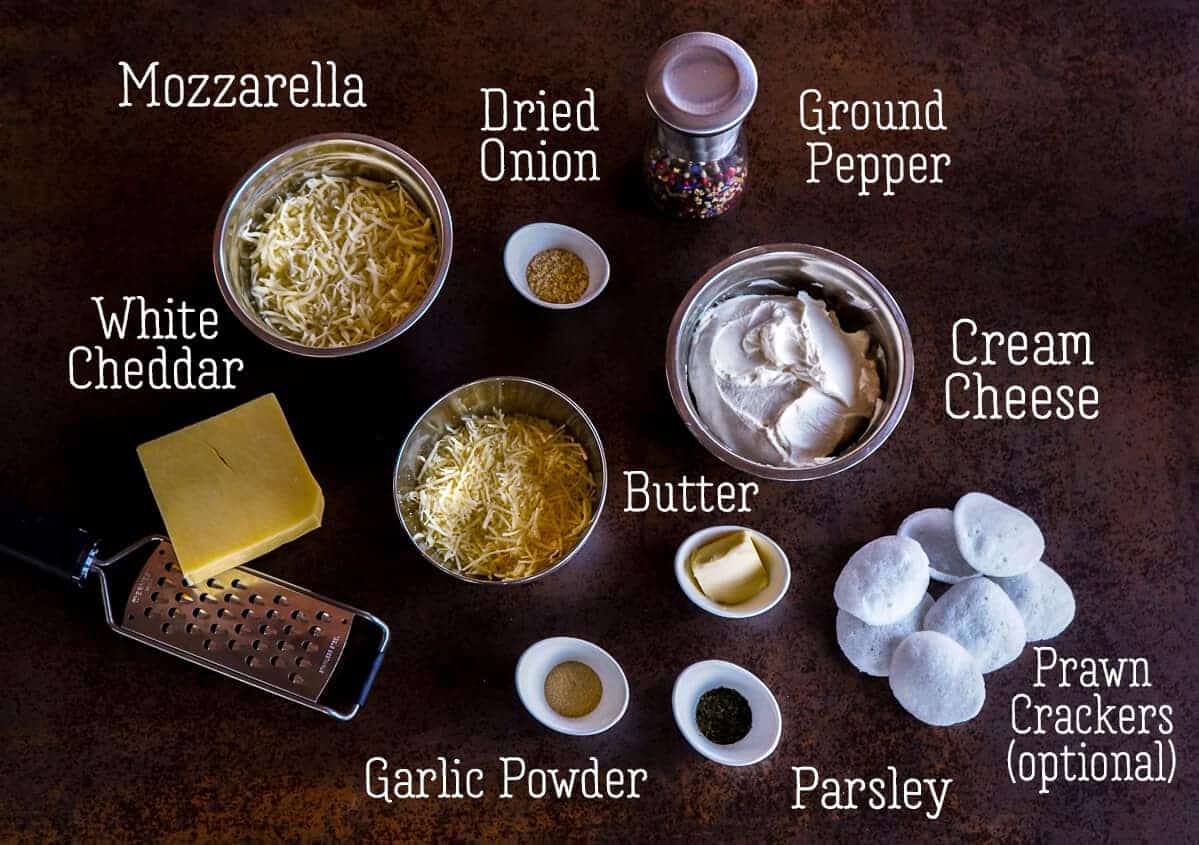
The cheeses
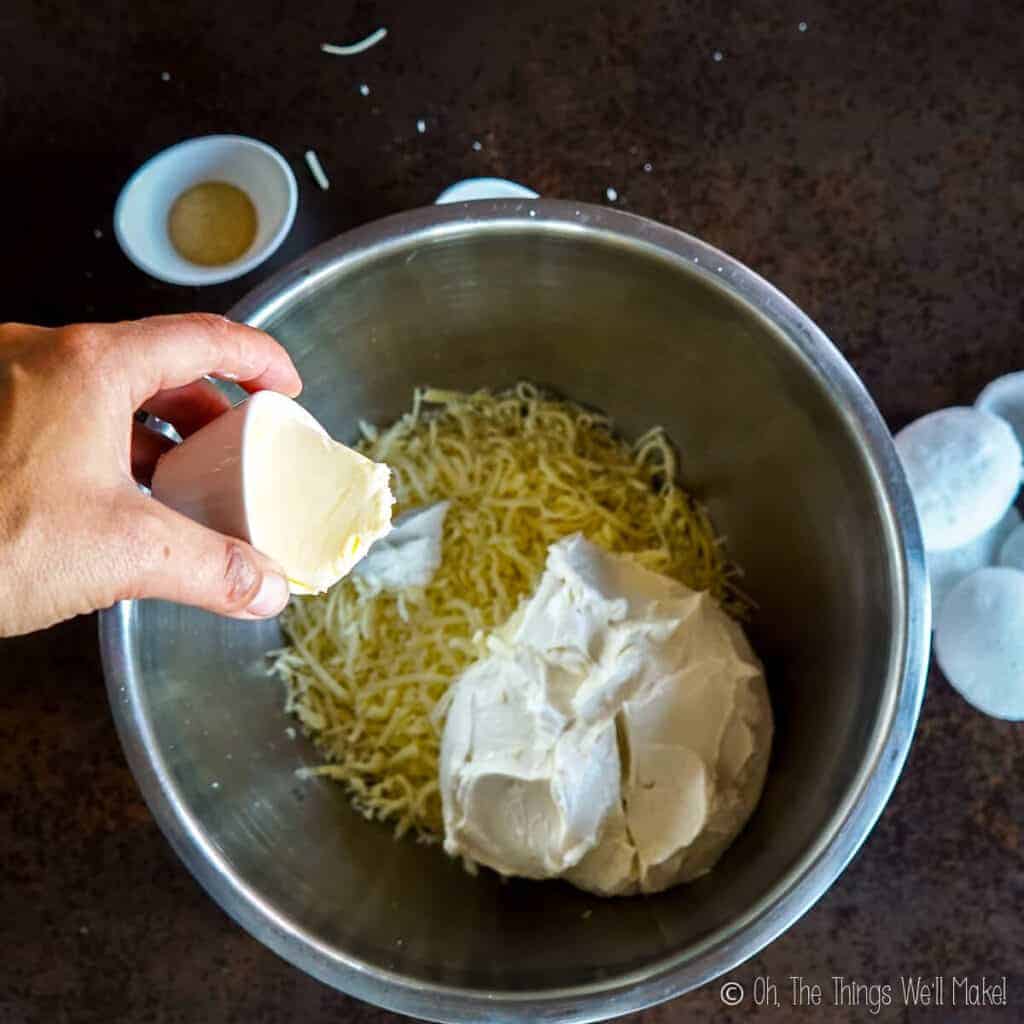
The base of the cheese ball is obviously a cream cheese. Just as with the cheese stuffed dates, you can use a variety of cream cheeses for the cheese ball. In most cases, classic cream cheese or goat cream cheese will work best. For sweet cheese balls, mascarpone would be a good option, though.
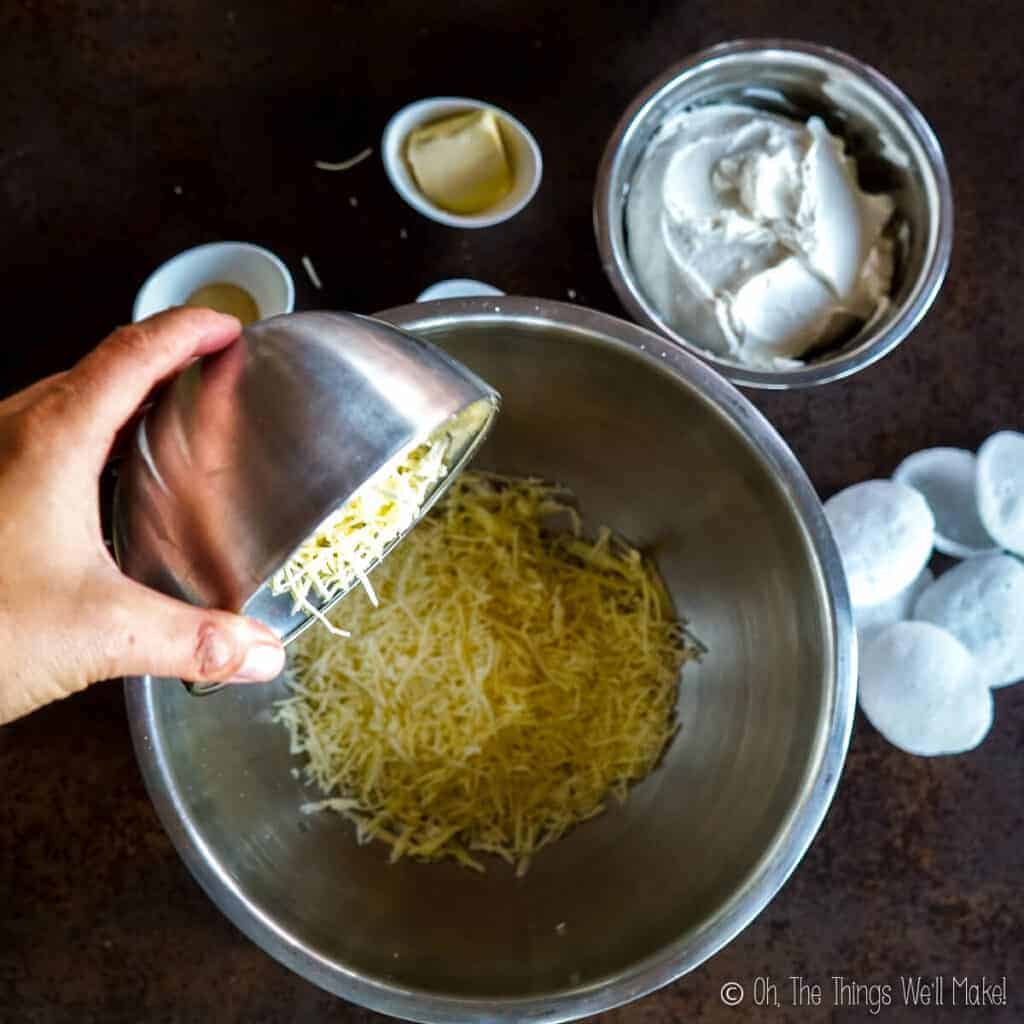
As for the shredded cheeses, you can also use whatever cheeses you enjoy or that are easiest to find in your area. I chose to use shredded mozzarella and a white aged cheddar. (Using white cheddar vs. orange cheddar helps keep the ball on the lighter side.) I also used some shredded pasta cheeses (which is likely a mixture of cheeses like parmesan, romano, and/or pecorino.
The seasonings
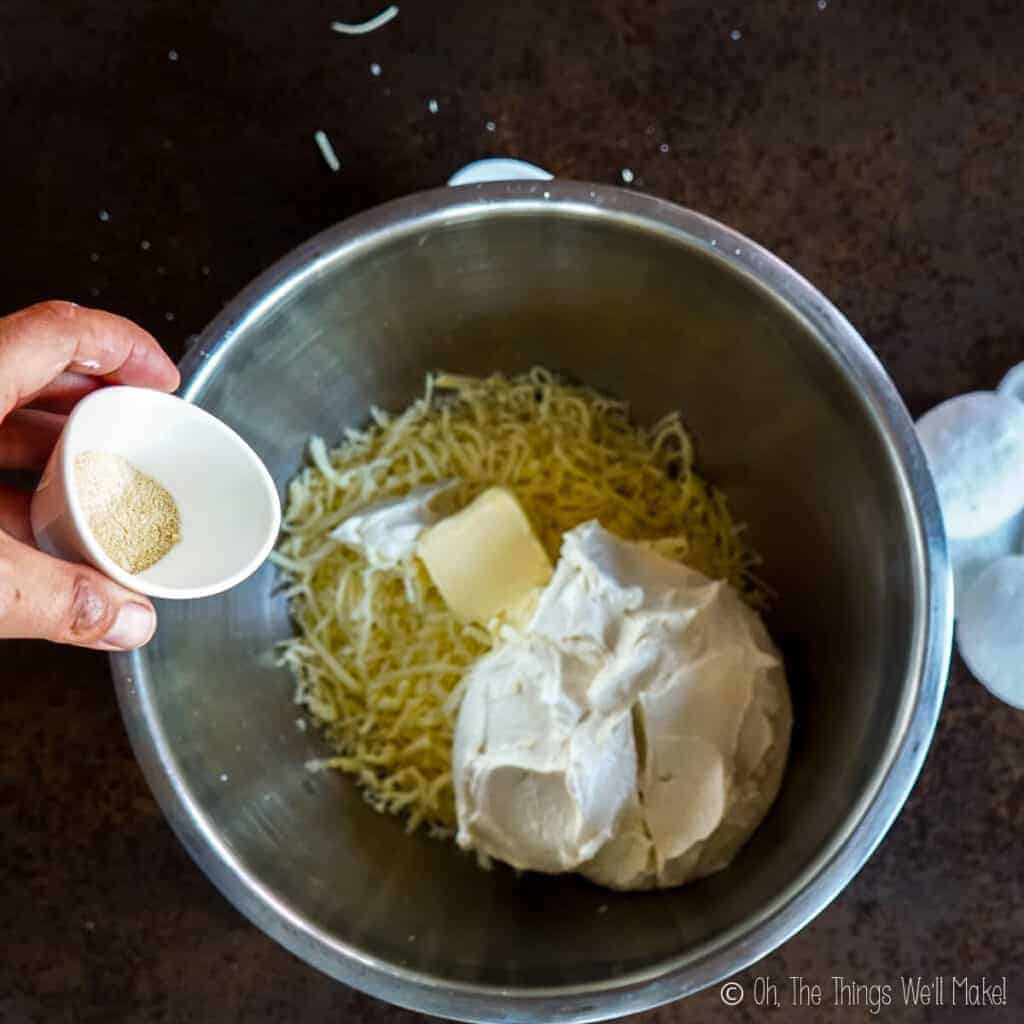
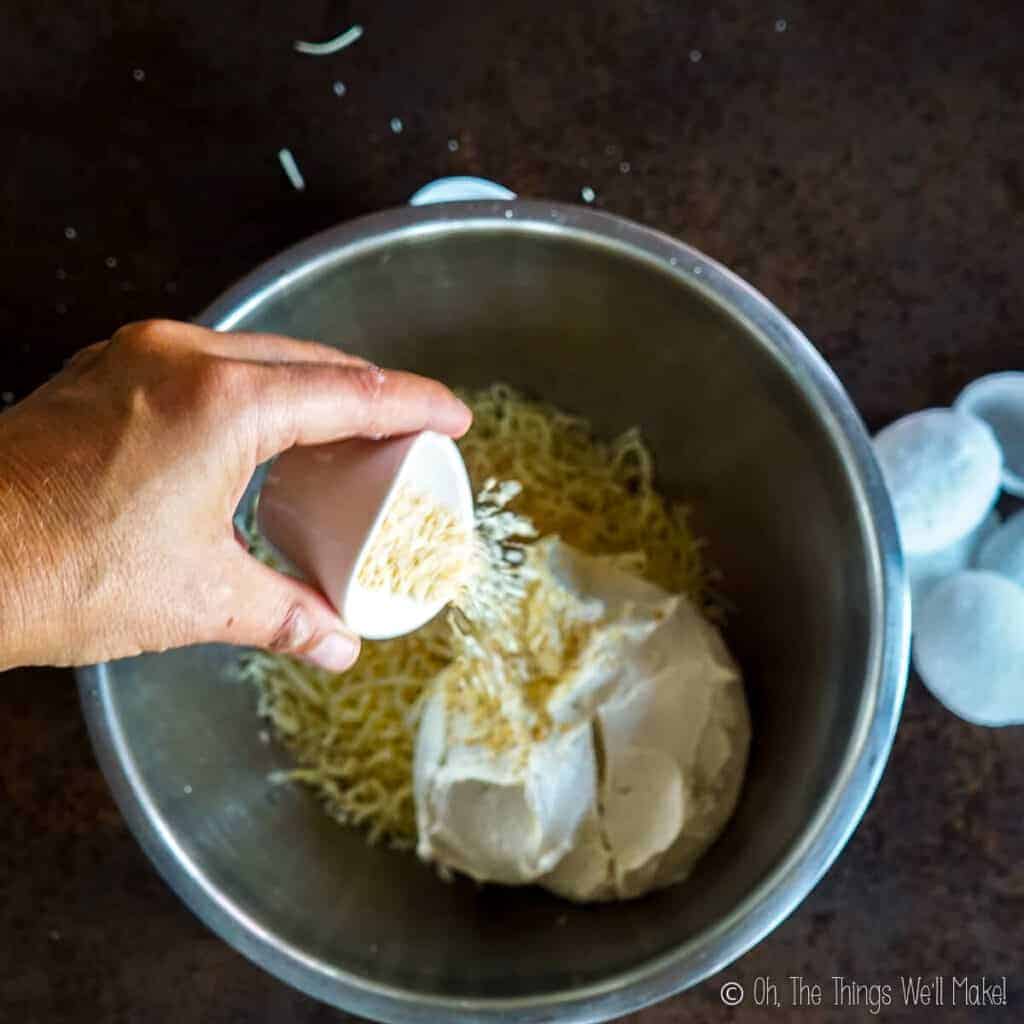
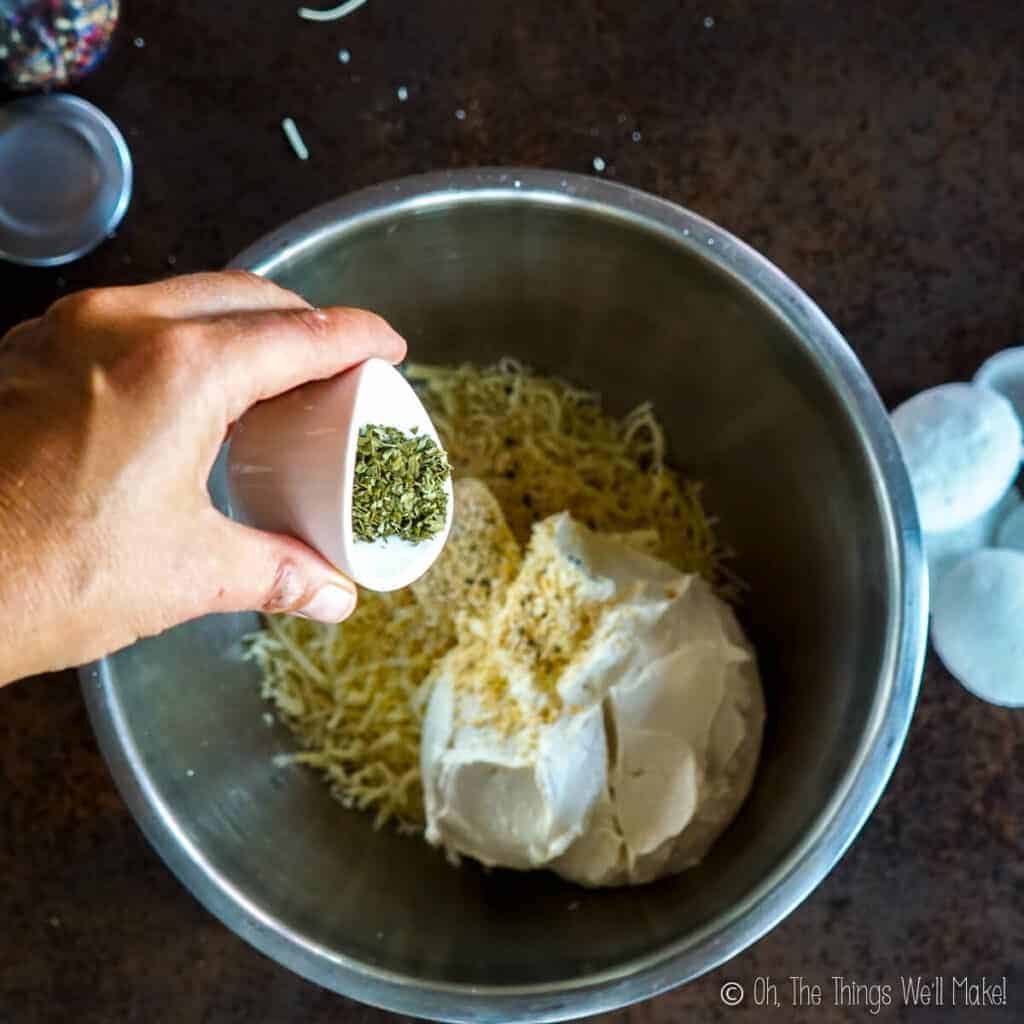
I kept the seasonings simple, to allow the various cheeses to stand out. My favorite light colored seasonings are garlic powder and dried onion. They both give a great flavor to the cheese ball.
You can also use a variety of herbs. I kept it simple this year, only adding parsley, but I often add herbs like thyme. Again, I didn’t want to go overboard on the herbs to keep the snowman cheese ball light in color.
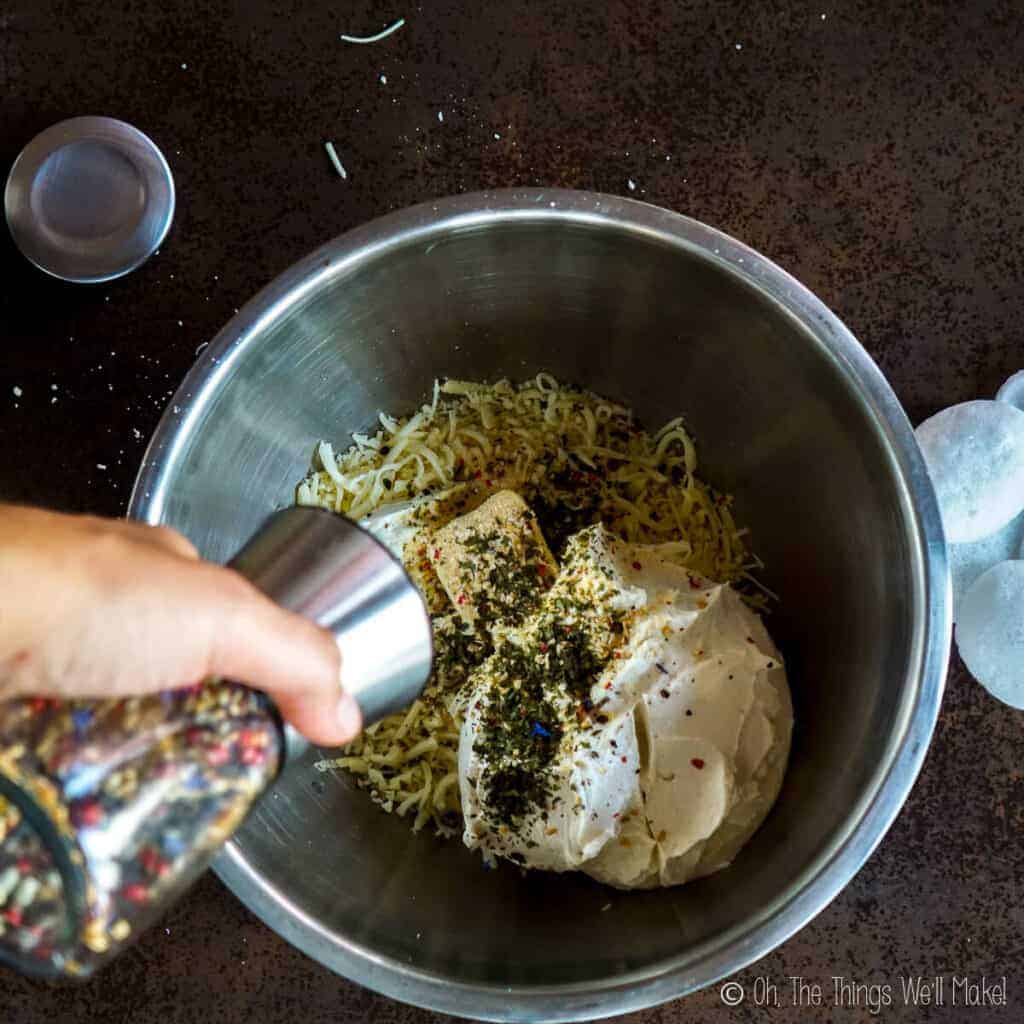
Freshly ground pepper is another delicious addition to the cheese ball. Because this cheese ball uses a lot of different salty cheeses, I didn’t add any salt. Taste yours though, and add salt if you feel it’s necessary.
You can further customize the ingredients to suit your taste. Experiment using some of your favorite seasonings. If you like it spicy, feel free to try adding some cayenne pepper or even some chopped up fresh peppers.
You can even try making a sweet cheese ball with fruits or jams and honey.
I used the same cheese for both, but, again, you could take advantage of the fact that it is comprised of 2 balls, and try out 2 different recipes.
How to make a snowman cheese ball
Regardless of the recipe you choose, the basic way to make a snowman cheese ball is mostly always the same.
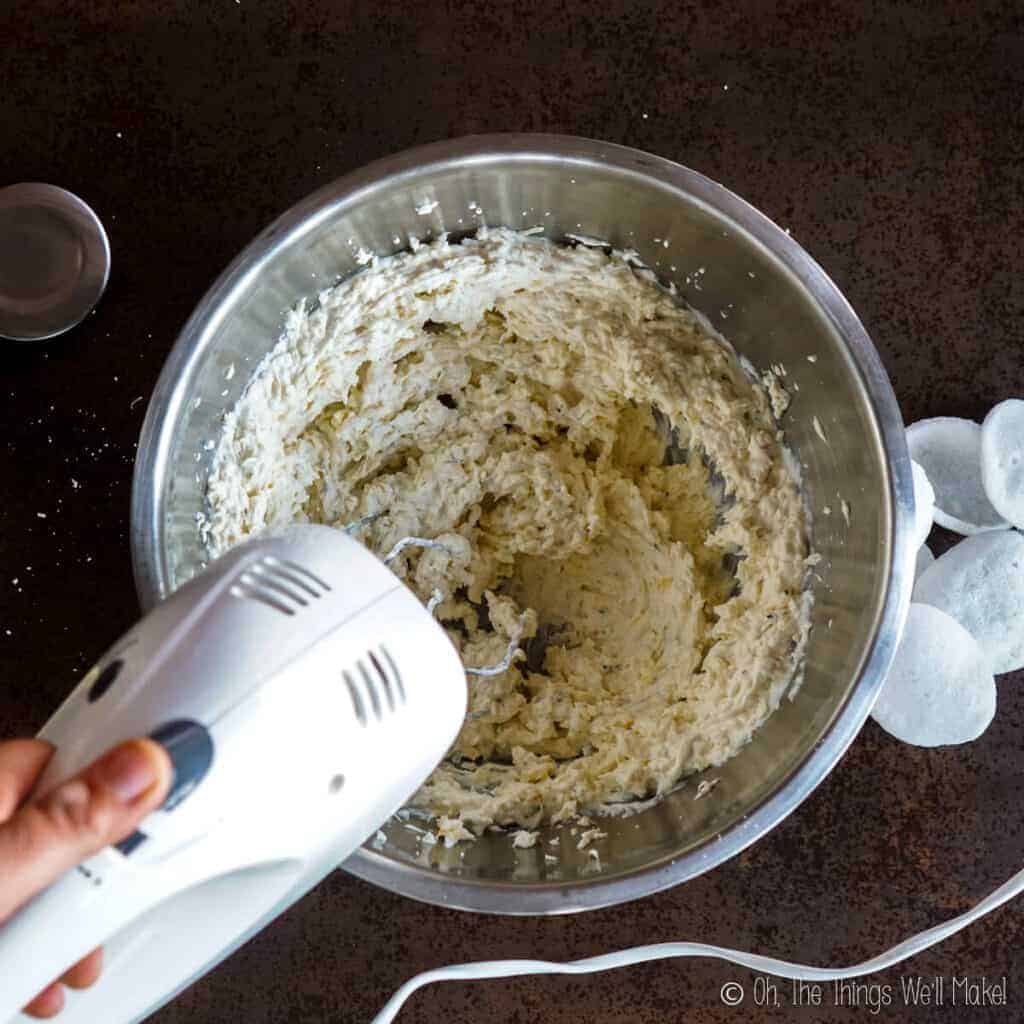
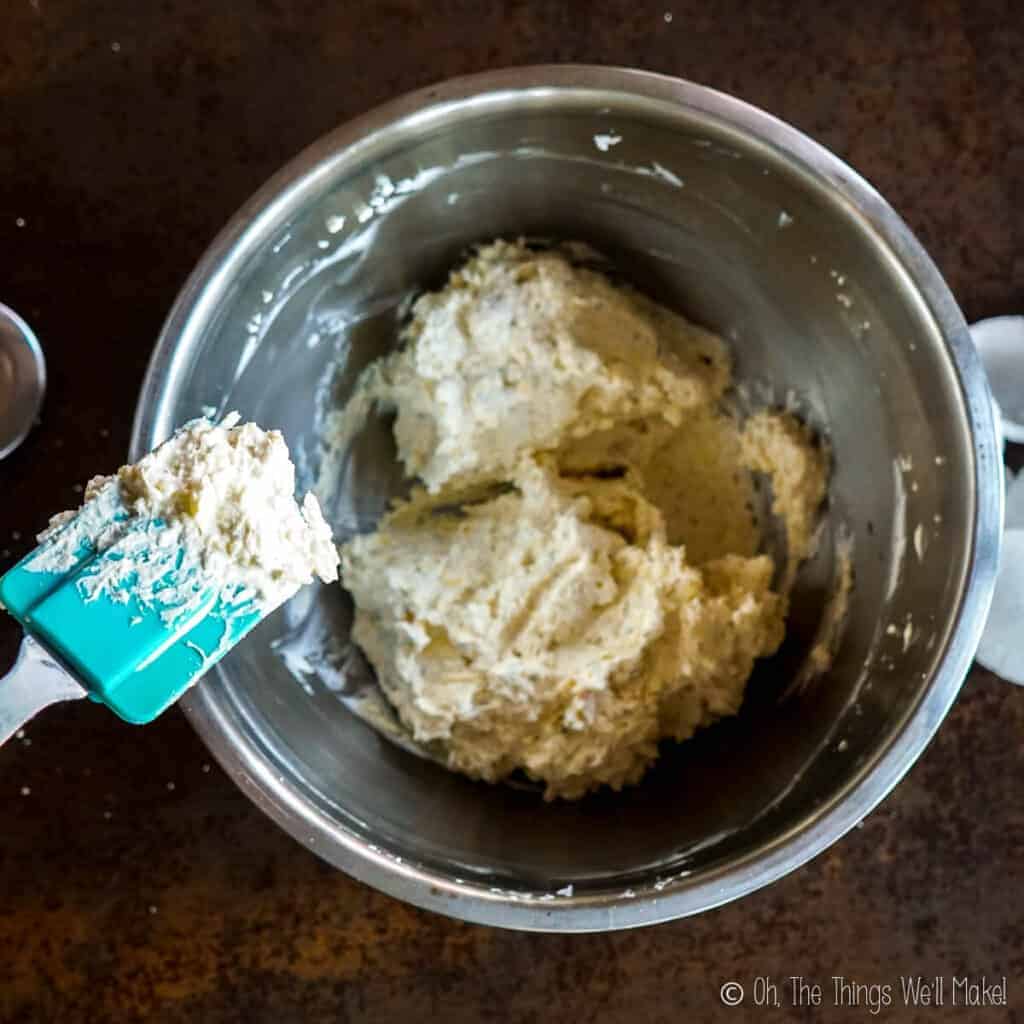
Mix the cream cheese with the other ingredients. An electric beater can really help incorporate the ingredients and break up any larger bits of harder cheeses or other hard ingredients.

How to form the cheese balls
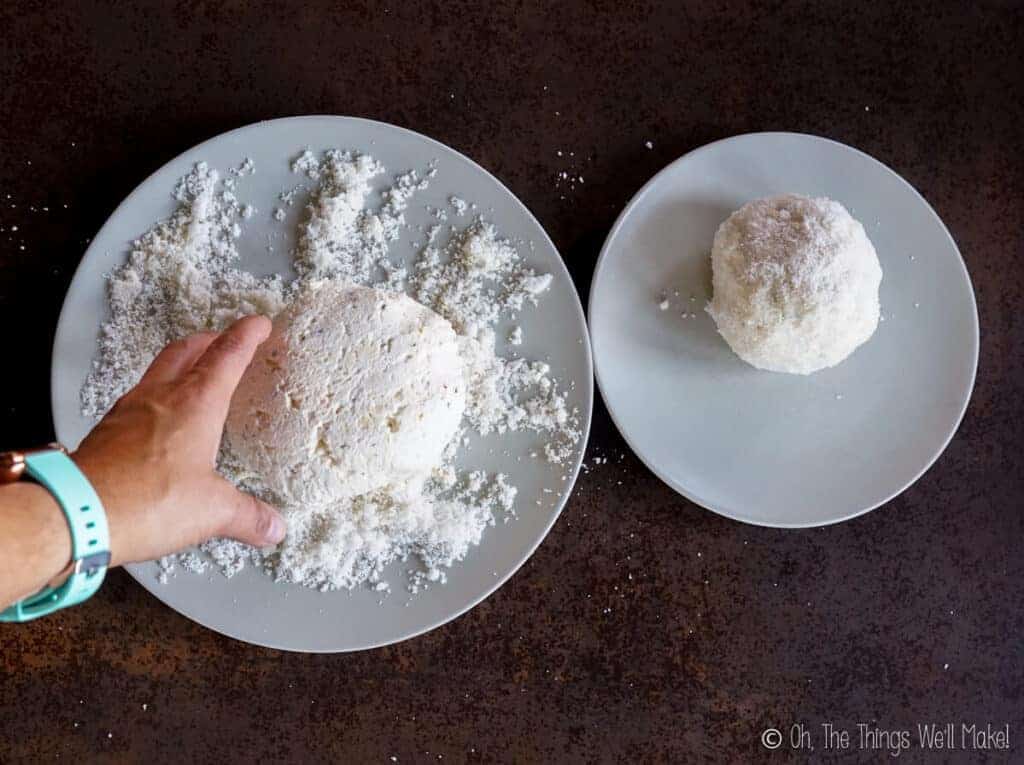
To form the balls, line two small bowls with plastic wrap. Divide the cream cheese mixture into 2 unequal parts. (The larger part will form the body of the snowman, while the smaller one will form its head.)
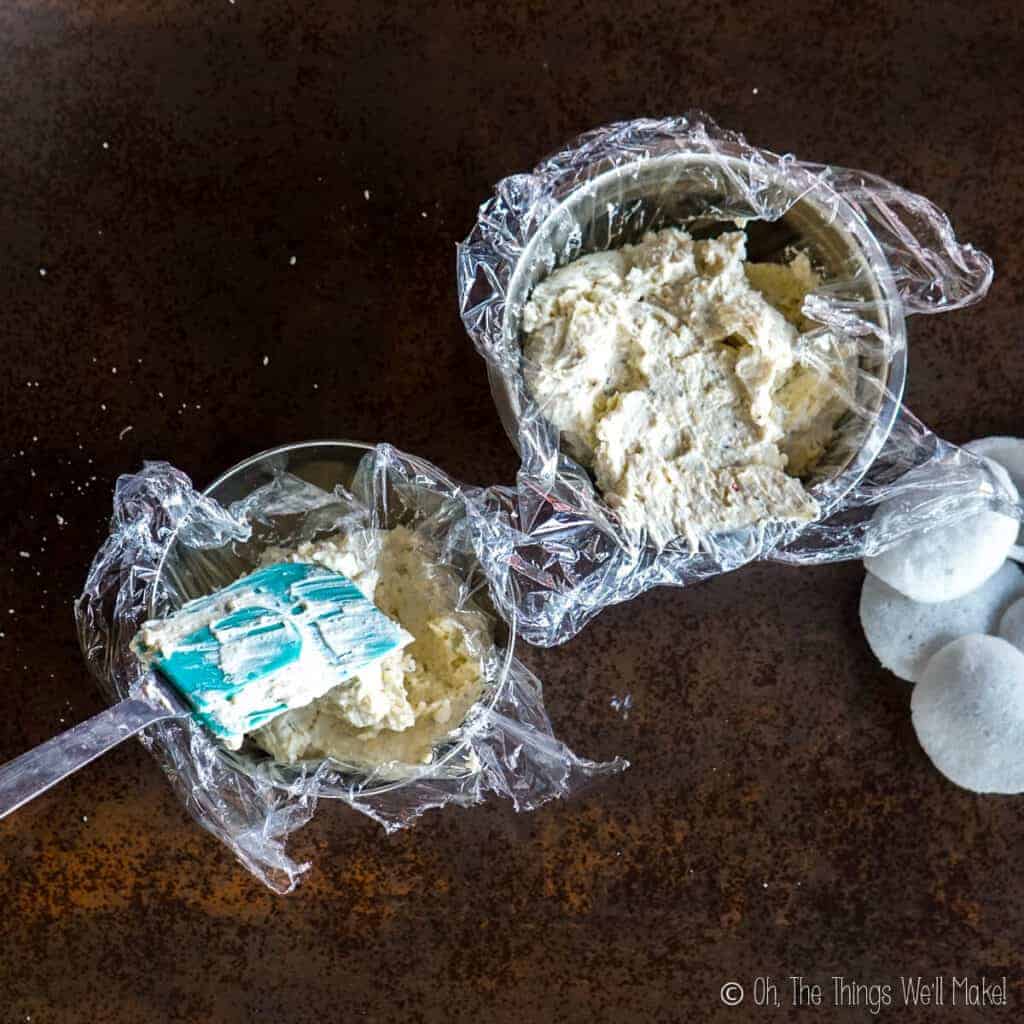
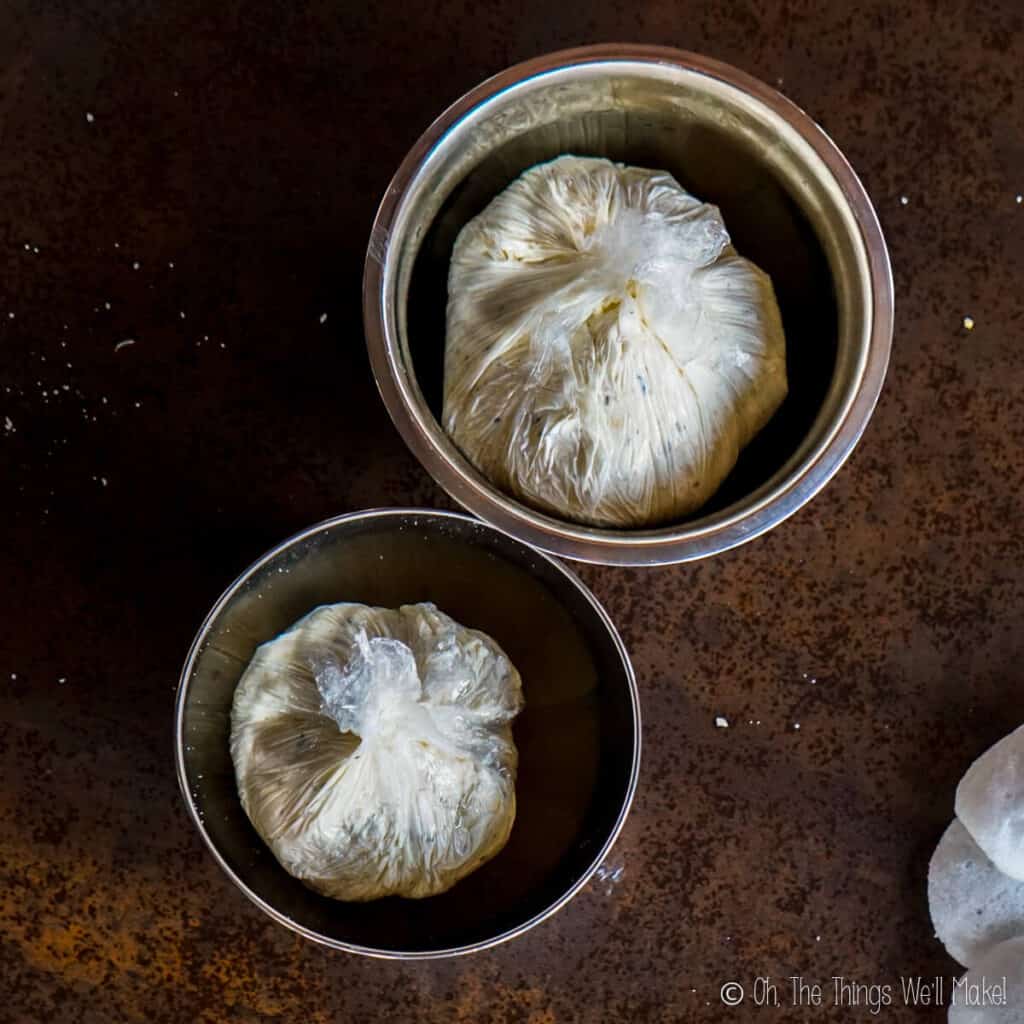
Scoop one of the parts of the cream cheese mixture into one of the lined bowls and add the other part to the other bowl. Wrap the plastic film around the cream cheese mixture, and use the film to help form the cheese into rounder balls. Once formed, place the bowls in the fridge while you work on preparing the decorations. This will help firm up the cheese so that the snowman holds its shape better.
Making the snowman
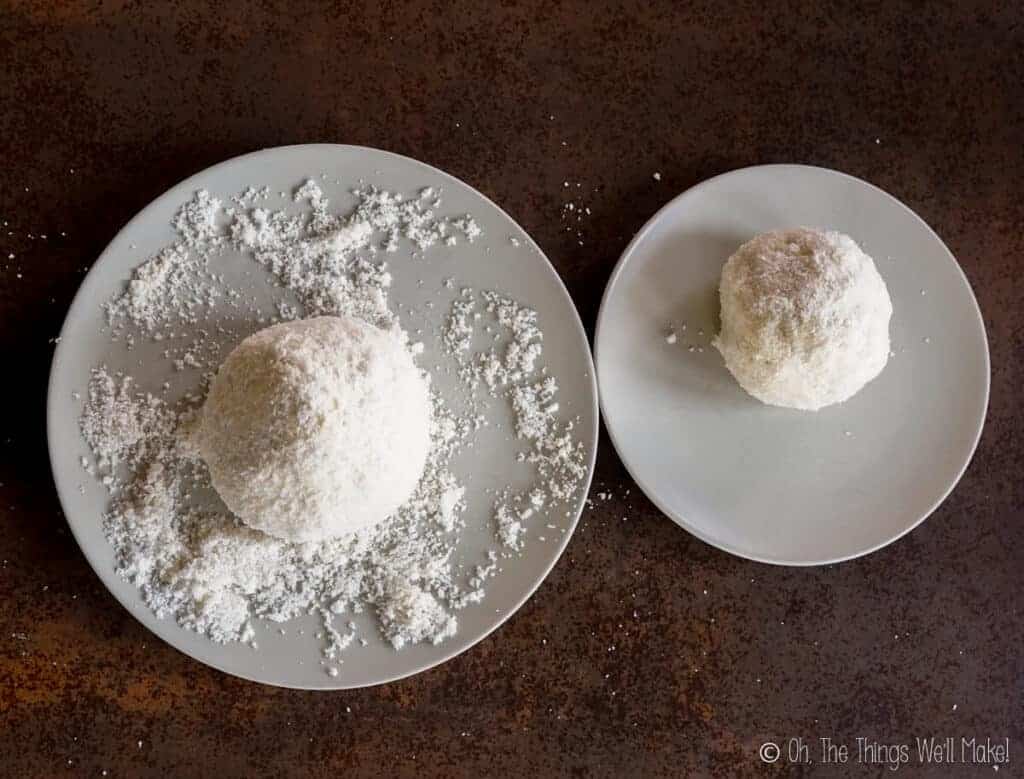
Once the cheese has hardened up again and can hold up its shape, you call roll the balls in a coating to help them keep their form and give the cheese balls some texture and flavor. The coating can also cover up darker ingredients inside the cheese ball and keep it from drying out so easily.
Possible coating ingredients
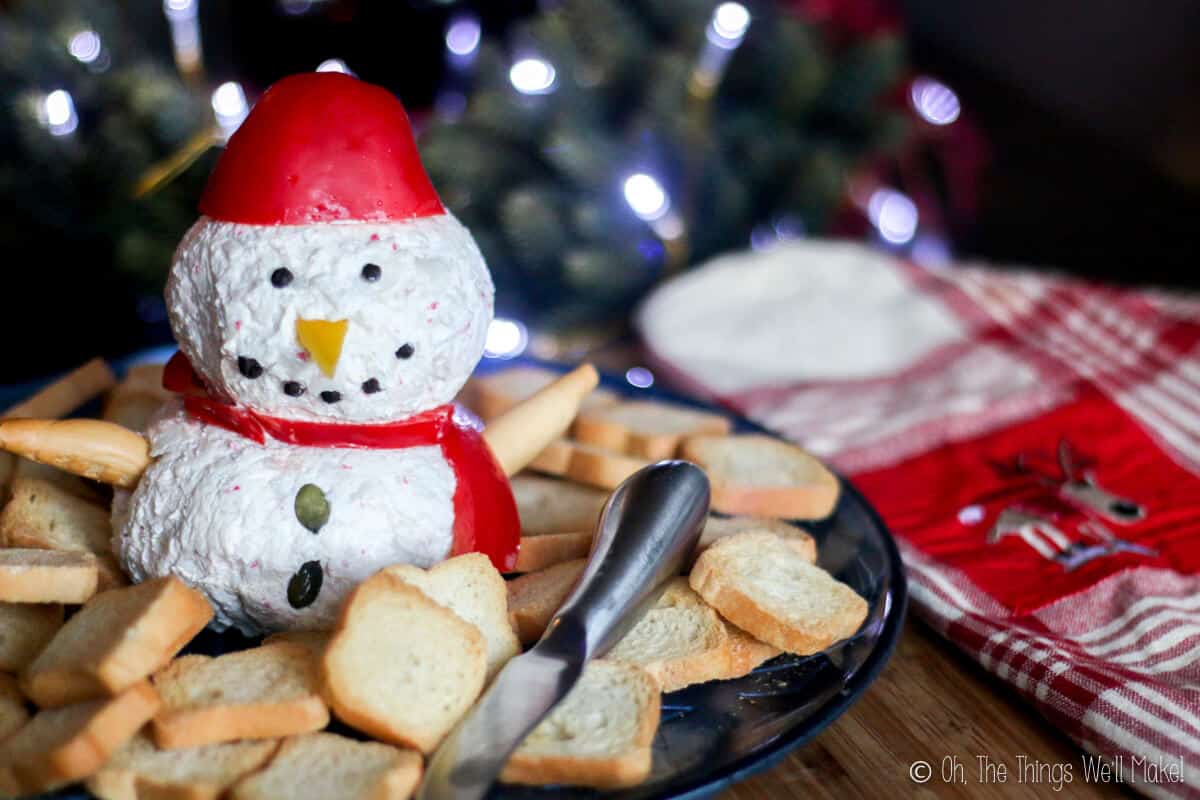
Because we’re making a snowman, I suggest using a white-colored coating. One option is to use grated white cheeses like Parmesan or mozzarella.
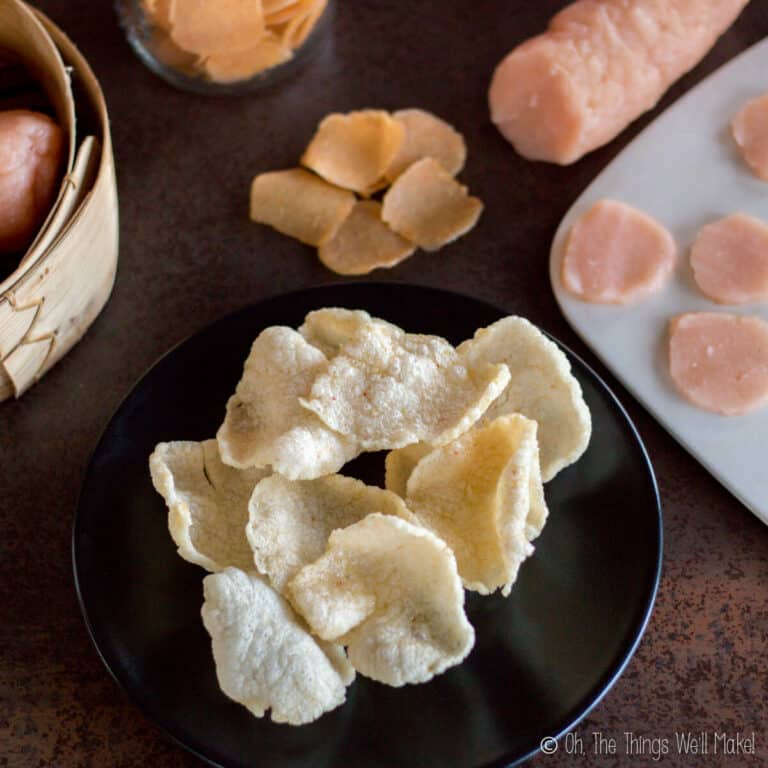
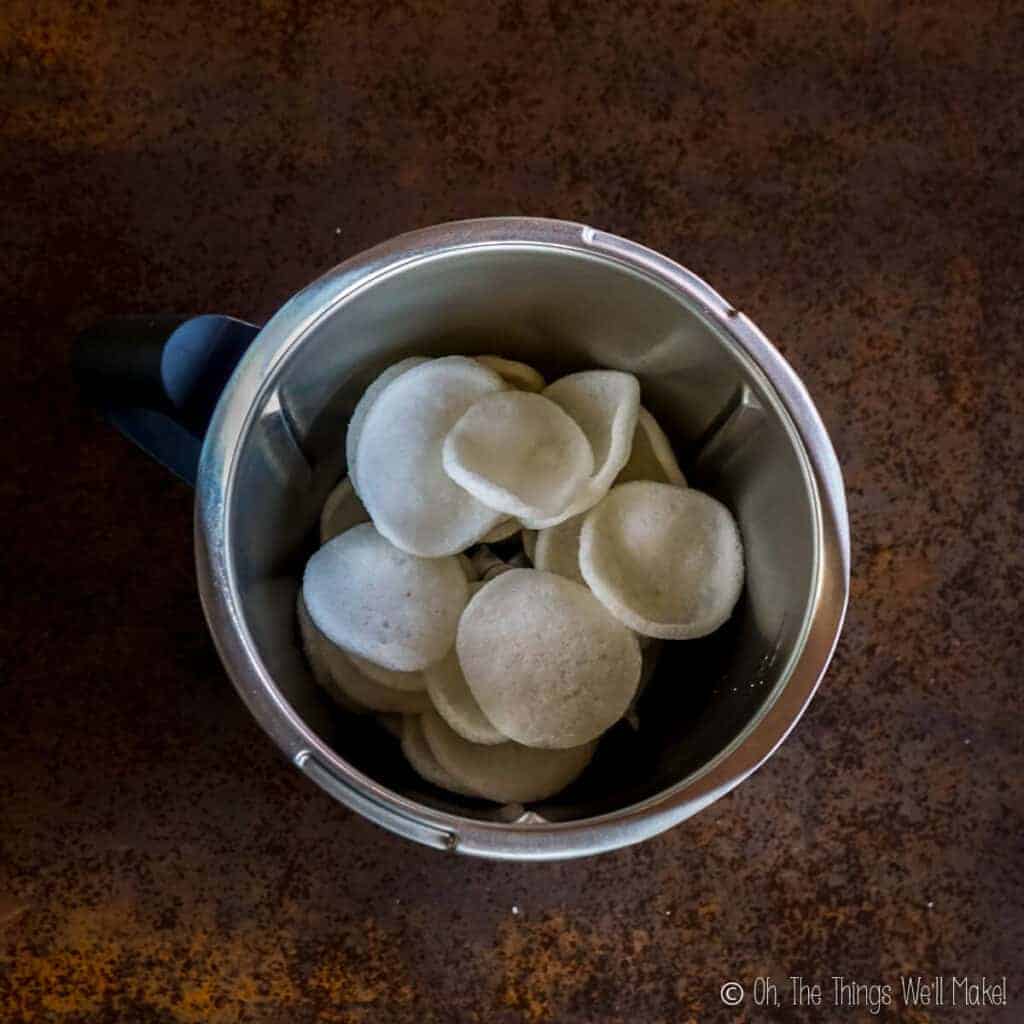
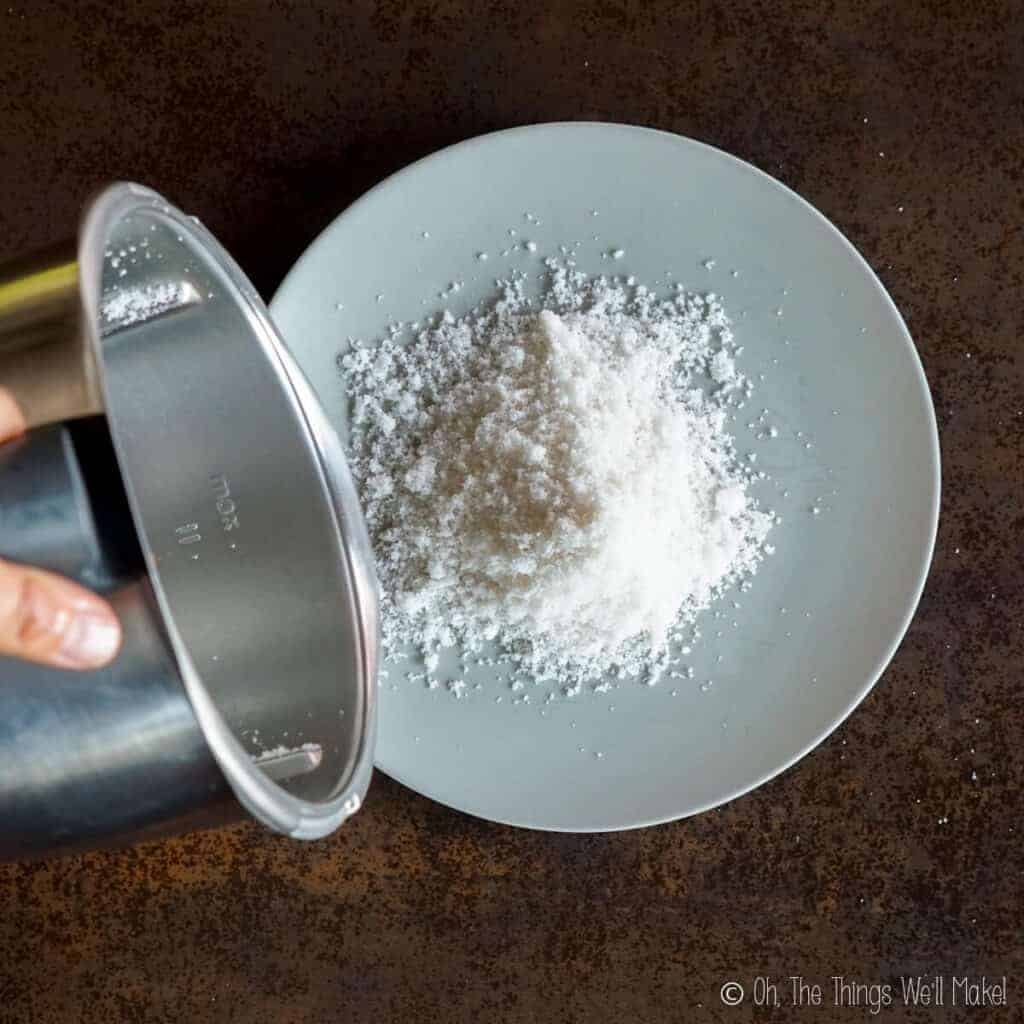
Another option is to use ground blanched almonds, or another light-colored nut. You can also use crushed crackers or light-colored bread crumbs. This year, I tried making a mixture of crushed prawn crackers and almond flour.While I normally make my own prawn crackers, this year I went the easy route and used store-bought for saving time. (I also wanted bright white crackers.)
For a sweet snowman cheese ball, you could try using grated coconut or even smashed up cookies for covering the balls.


Decorating the snowman
To decorate the cheese ball, use your imagination!
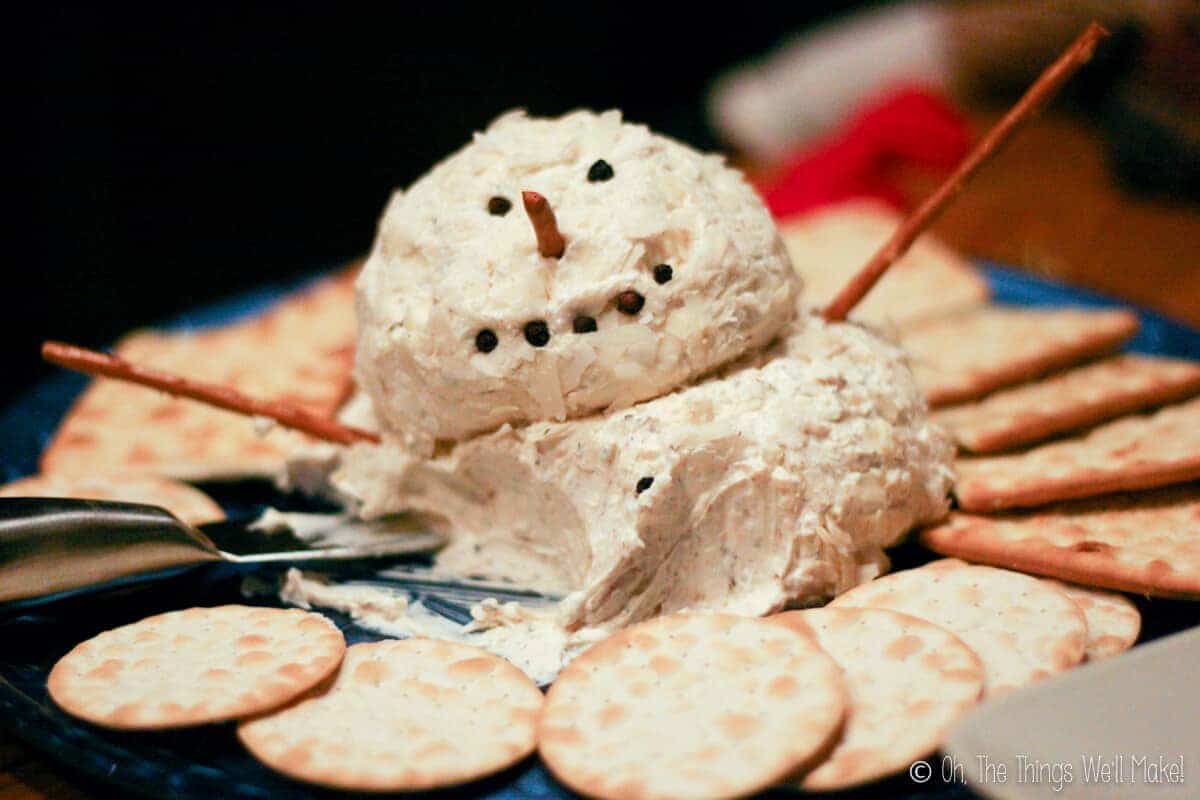
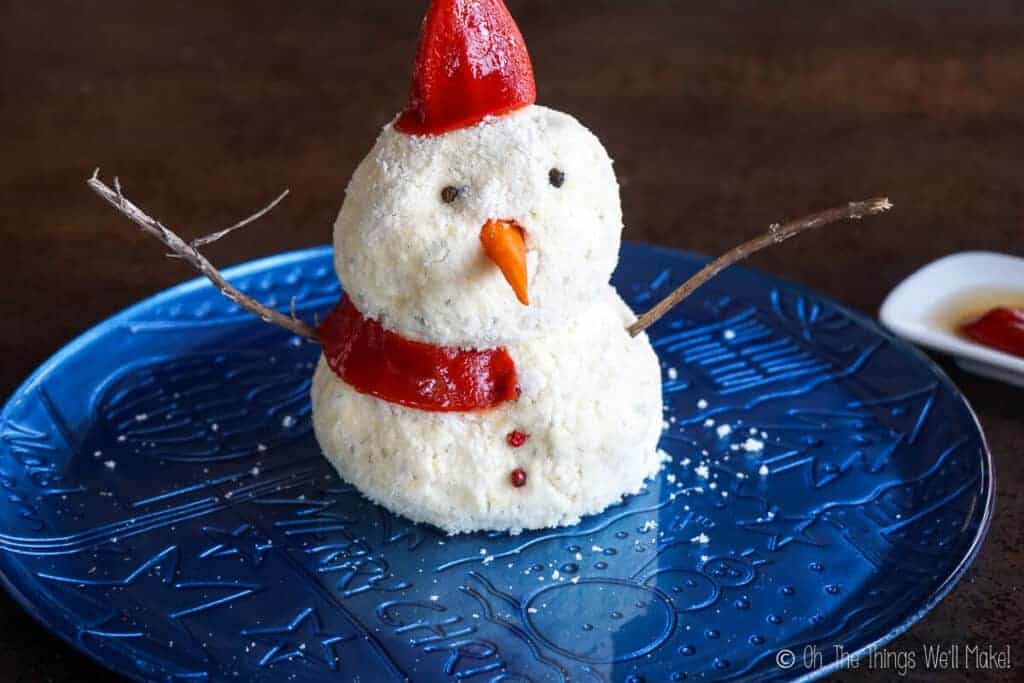
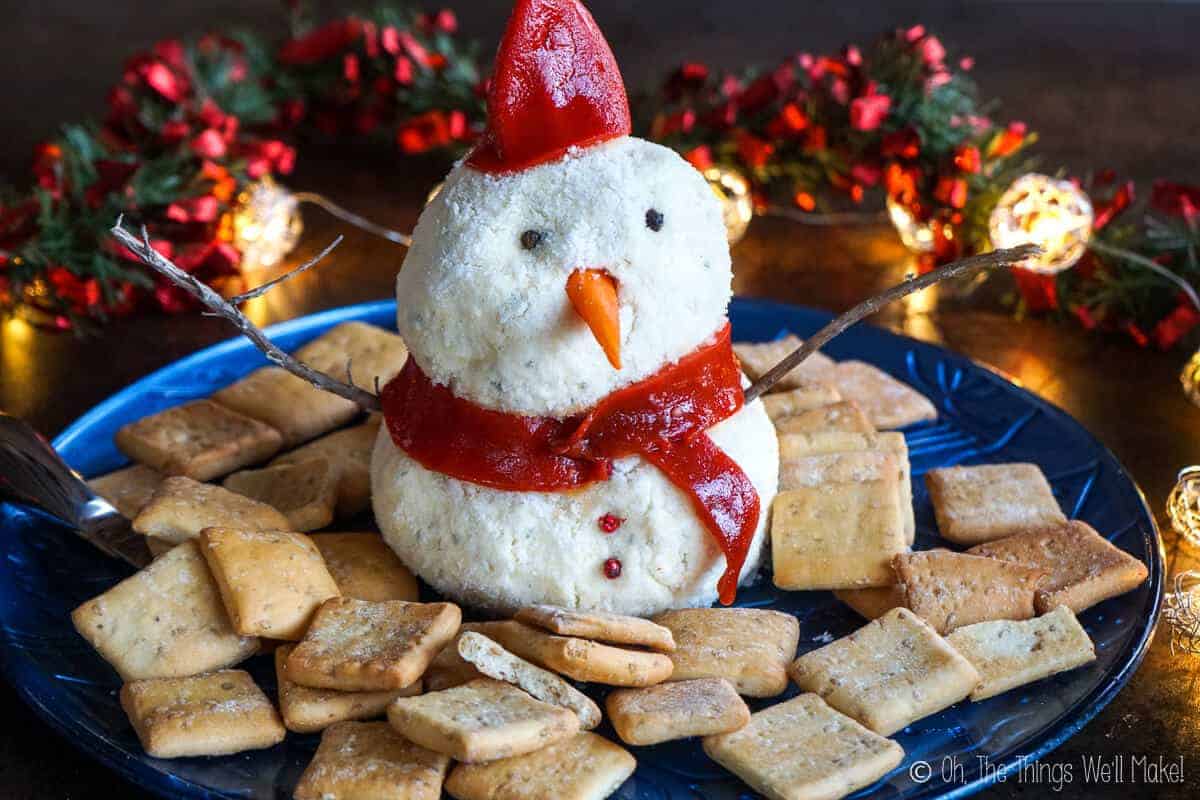
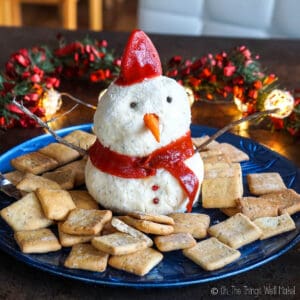
The eyes, mouth, and buttons
Black peppercorns make great “coal” for buttons, eyes, and a coal mouth. You can also use other seeds like pumpkin seeds or other seeds.
Tiny chocolate chips would be perfect for a sweet snowman cheese ball.
The nose
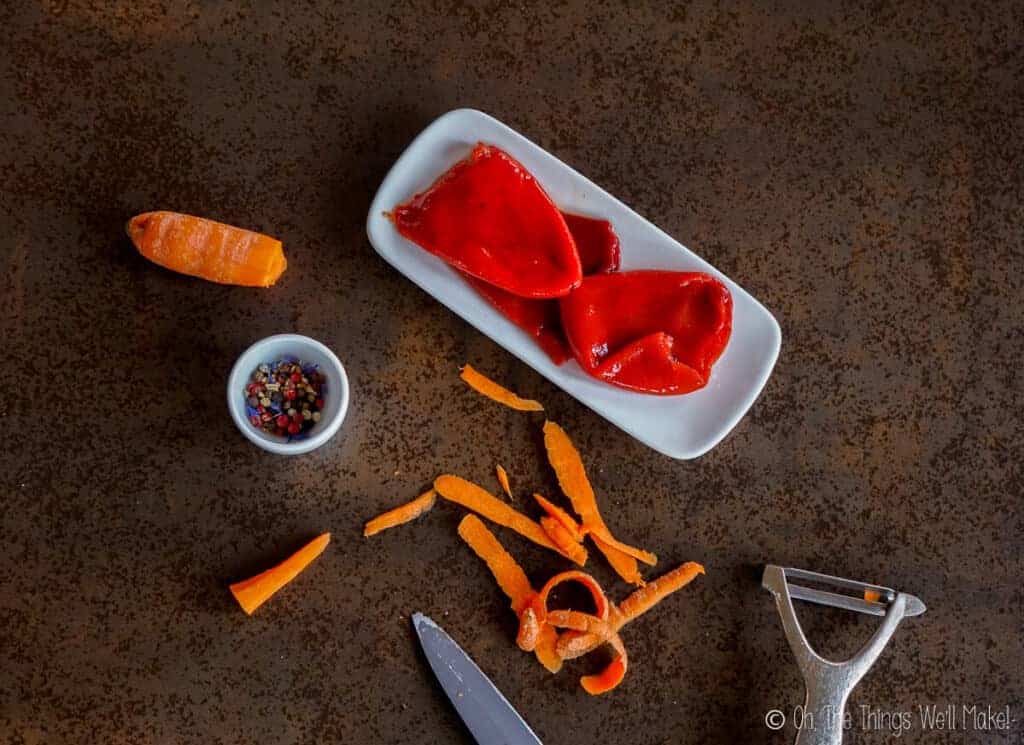
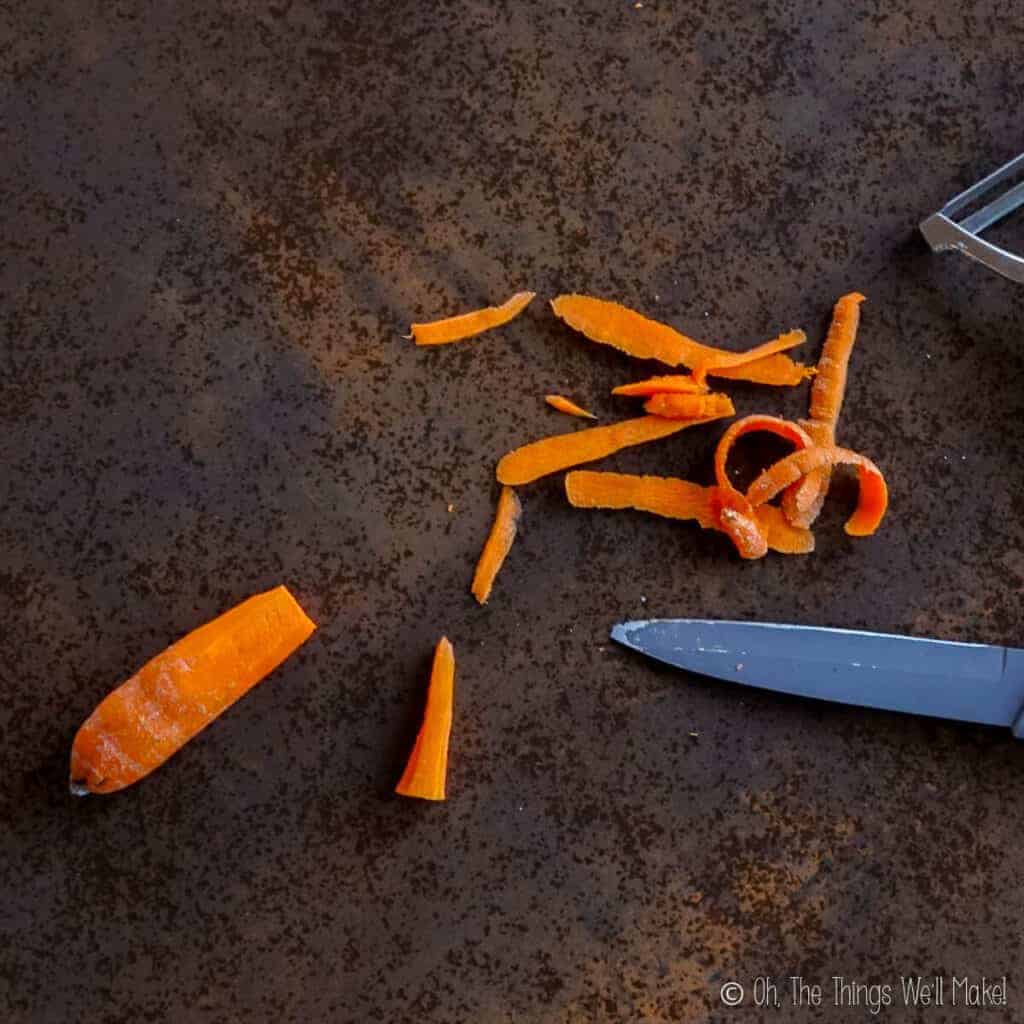
Snowmen usually have a carrot nose. Obviously, the carrot nose can be made with the tip of a small carrot, but you can also use yellow or orange bell peppers or something similar in color.
For a sweet snowman cheese ball, try using a piece of cantaloupe or persimmon.
The hat and scarf
I usually make the scarf and hat out of red peppers. The red color gives a festive addition to the snowman. One year, I used raw red peppers, but I’ve since found that using roasted red peppers is even easier because roasted red peppers are easily wrapped around the cheese balls.
For a sweet cheese ball, try using fruit leathers or even jelly type candy strips.
The arms
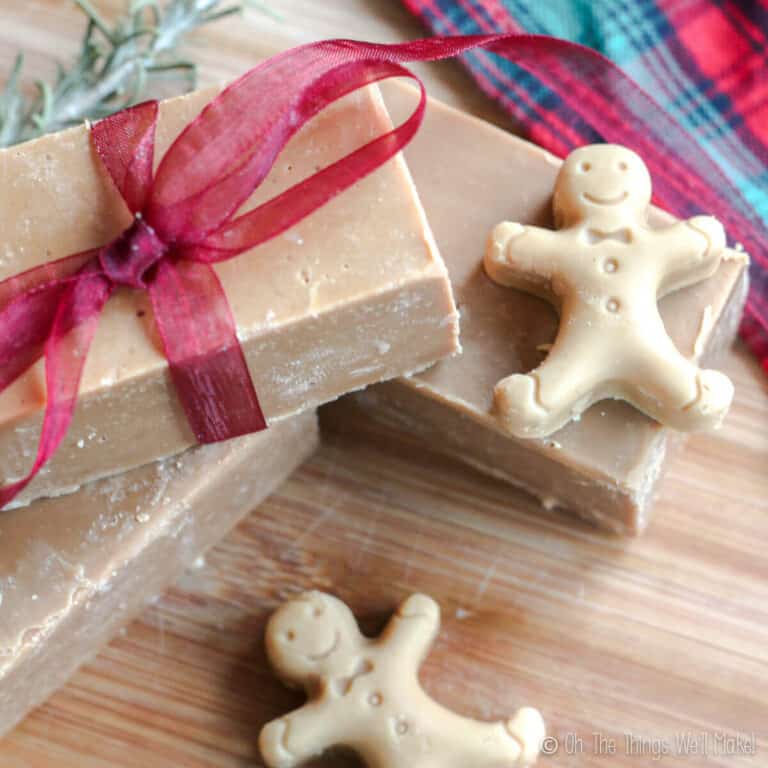
The arms can be made from thin pretzels or bread sticks. This year, I forgot to buy something that could be used for the arms, and headed to my herb garden to look for something I could use.
I ended up using a branch from one of my rosemary plants after removing the green leaves from it. In the end, I think it looks even better than the other options.
Making the cheese ball ahead of time
One of the great things about making a cheese ball is that it can be made ahead of time. Making the cheese balls days in advance allows for the flavors of the different ingredients to meld together.
While you can make the cheese balls up to a week ahead of time, I’d suggest waiting until the day you want to serve them to coat the cheese balls and further decorate them.
Can you freeze cheese balls?
I was a little bit skeptical, but one year I made several cheese balls, and had one that I forgot to serve so I froze it. A month or tow later, we had people over and I took the cheese ball out to give it a try. It was delicious!
Again, ideally, I’d freeze the uncoated cheese ball well wrapped in plastic wrap to protect it from freezer burn. Thaw it slowly in the refrigerator. Once thawed, coat and decorate the cheese ball as desired.
Serving suggestions
Serve the cheese ball with crackers or small toasts. It can also be served with fresh vegetables like carrot and celery sticks.
Sweet cheese balls can be served with cookies or fruits.
Video
Snowman Cheese Ball
Ingredients
For cheese ball
- 500 g cream cheese
- 80 g shredded pasta cheese mix Parmesano, Pecorino, Romano
- 100 g shredded mozzarella cheese
- 100 g shredded cheddar cheese
- 1 Tablespoon butter
- 1 Tablespoon dried onion flakes
- 1 teaspoon garlic powder
- 1 teaspoon dried parsley
- freshly ground pepper
For decorations
- 1 roasted red pepper
- 1 small carrot
- peppercorns
- rosemary branches or fine pretzles
- 1/4 cup almond flour
- 40 g prawn crackers
Instructions
Make the cheese balls
- Combine the cream cheese with the other shredded cheeses and all of the herbs and seasonings. Use a beater to fully combine the ingredients together.
- Divide the mixture into two parts. Leave on part bigger than the other part. (The bigger part will be the lower ball.)
- Line two small bowls with plastic wrap and place one of each of the parts of cheese in each of the bowls.
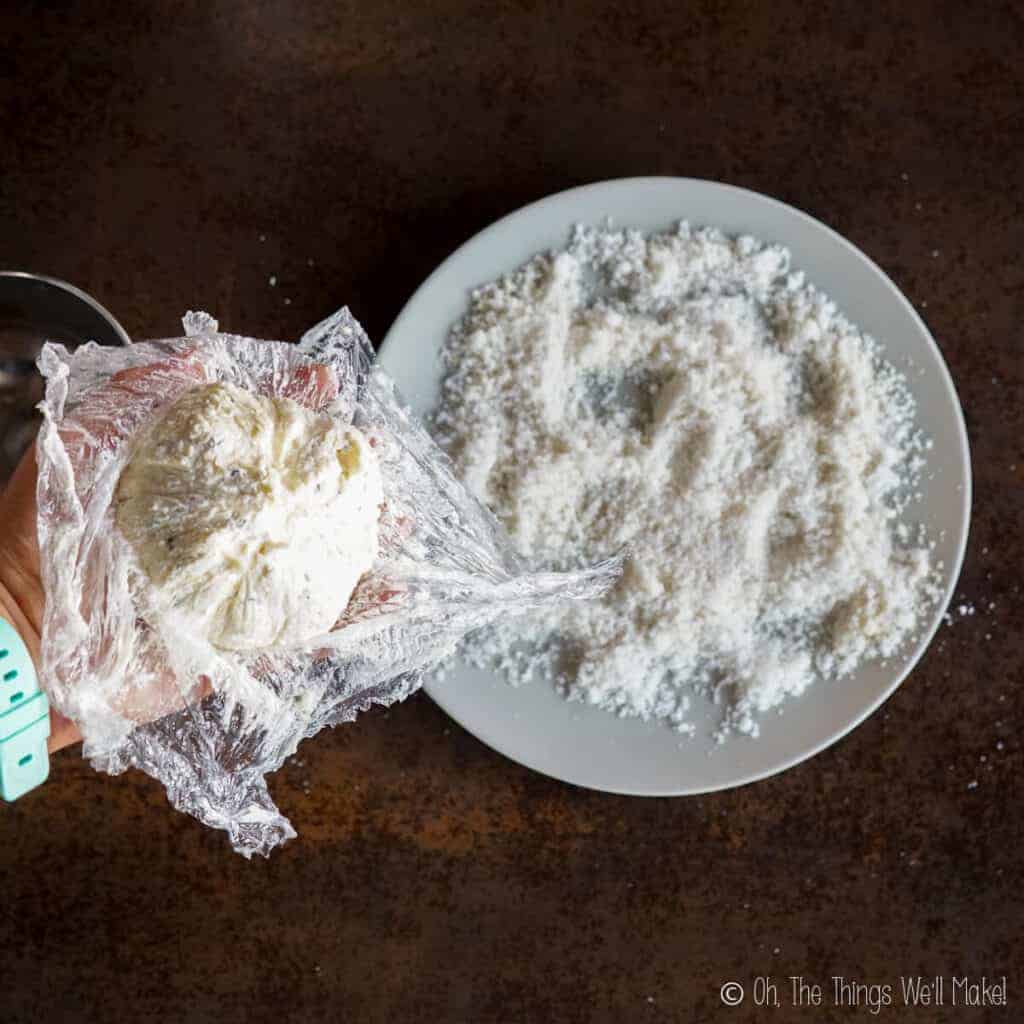
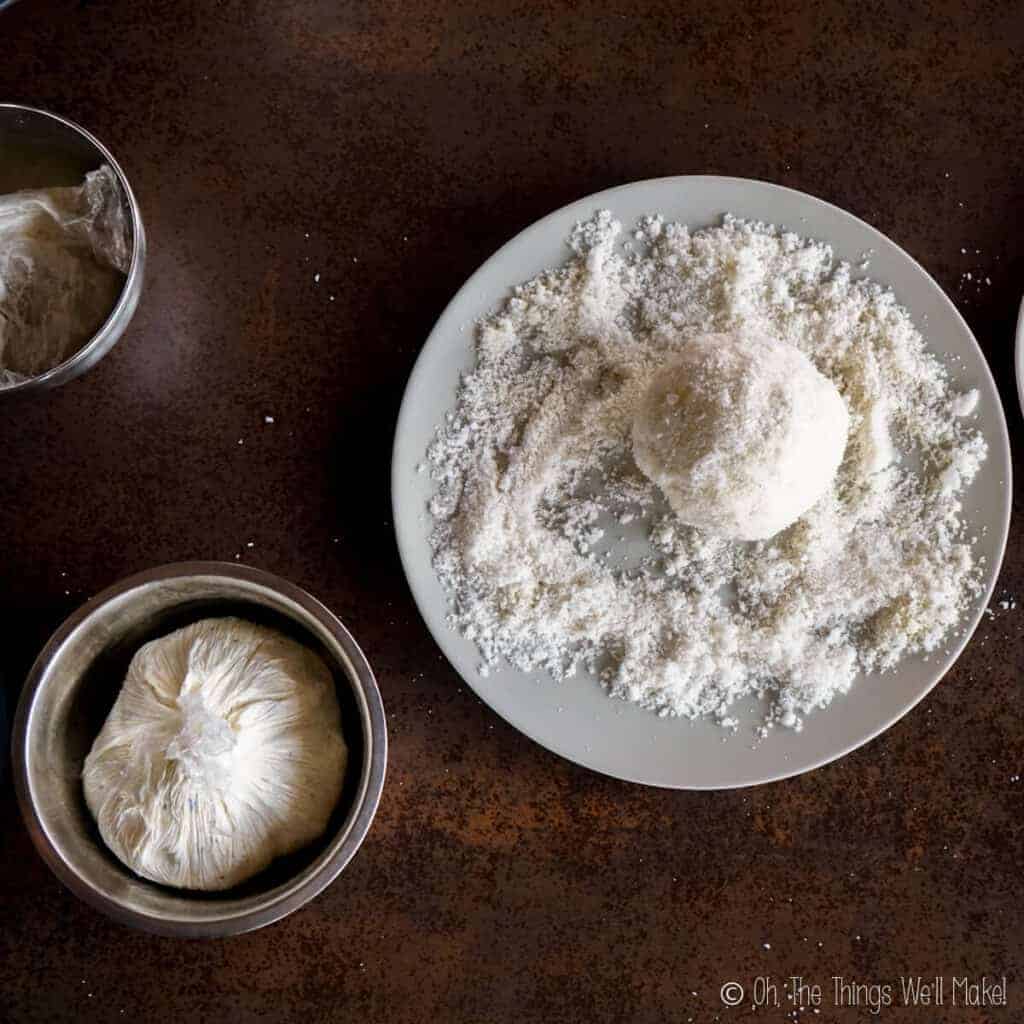
- Pull the plastic wrap up over the cheese mixture and use the plastic wrap to help you form the mixture into a ball. Place the balls in the bowls and place in the fridge to firm up while you prepare the other ingredients.
Prepare the decorations
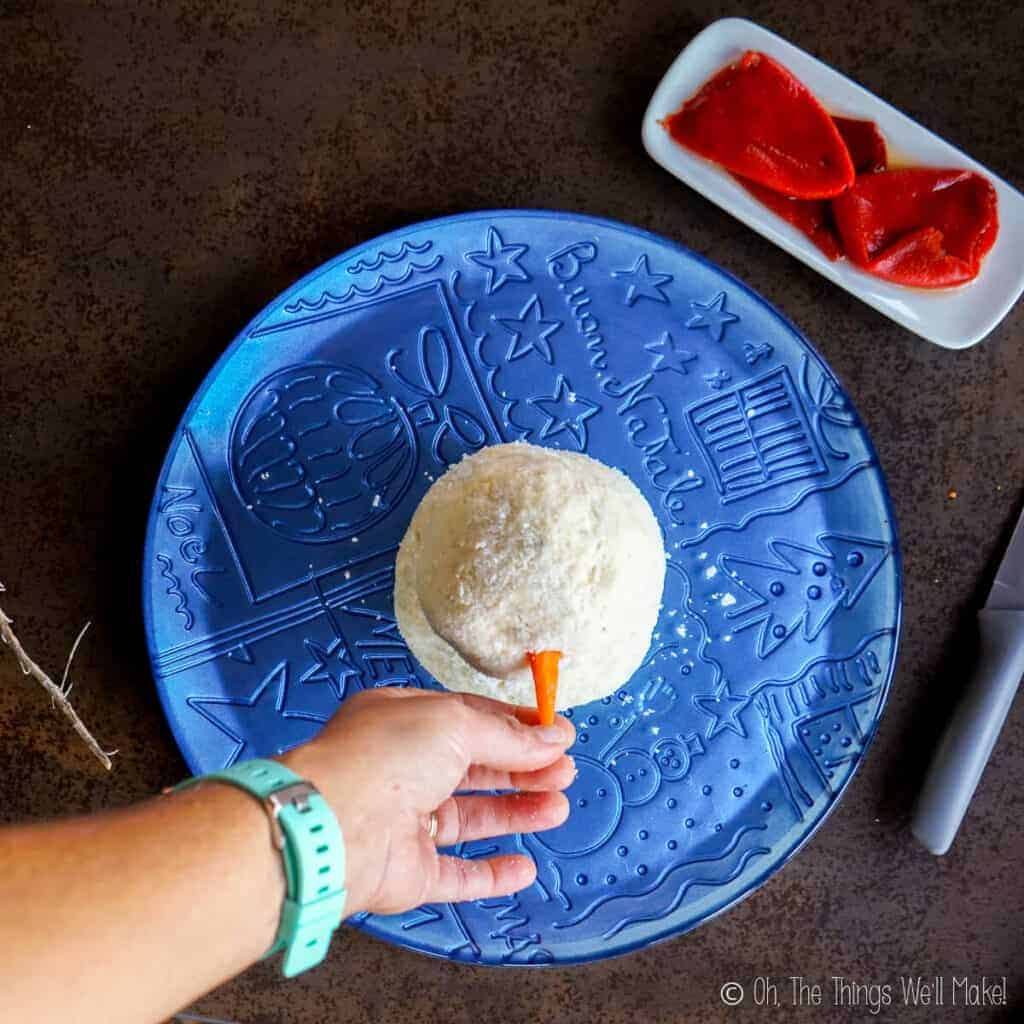
- Peel the tip of the carrot and cut off around one inch. (Cut it into a cone shape, if not already.)
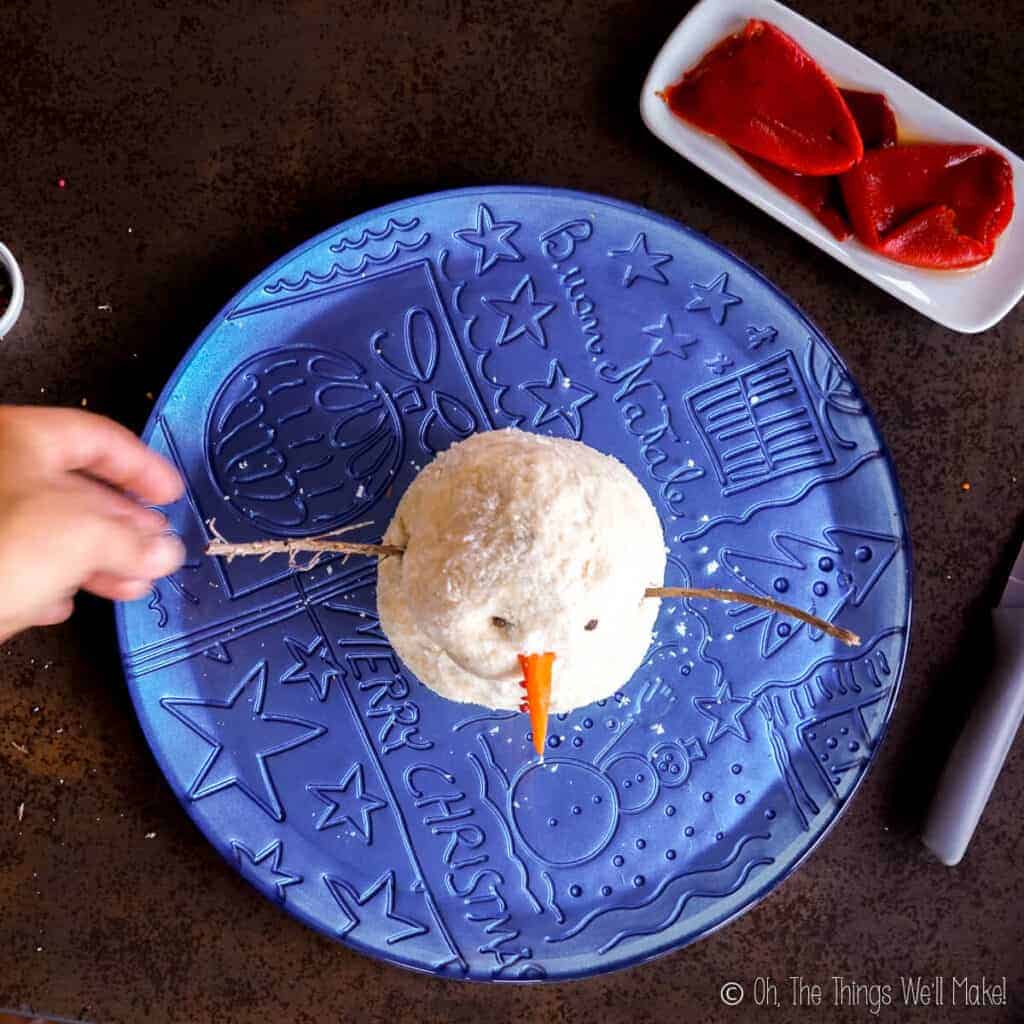
- Get together some peppercorns for the eyes, mouth, and buttons of the snowman. Slice the bottom part of the roasted red pepper to use as a cap. Slice the rest of the pepper in strips that are around 1cm wide for the scarf. Cut 2 small pieces (around 4 inches or 10cm) of branches from an herb like rosemary or thyme. (You can also use 2 thin pretzels instead.)
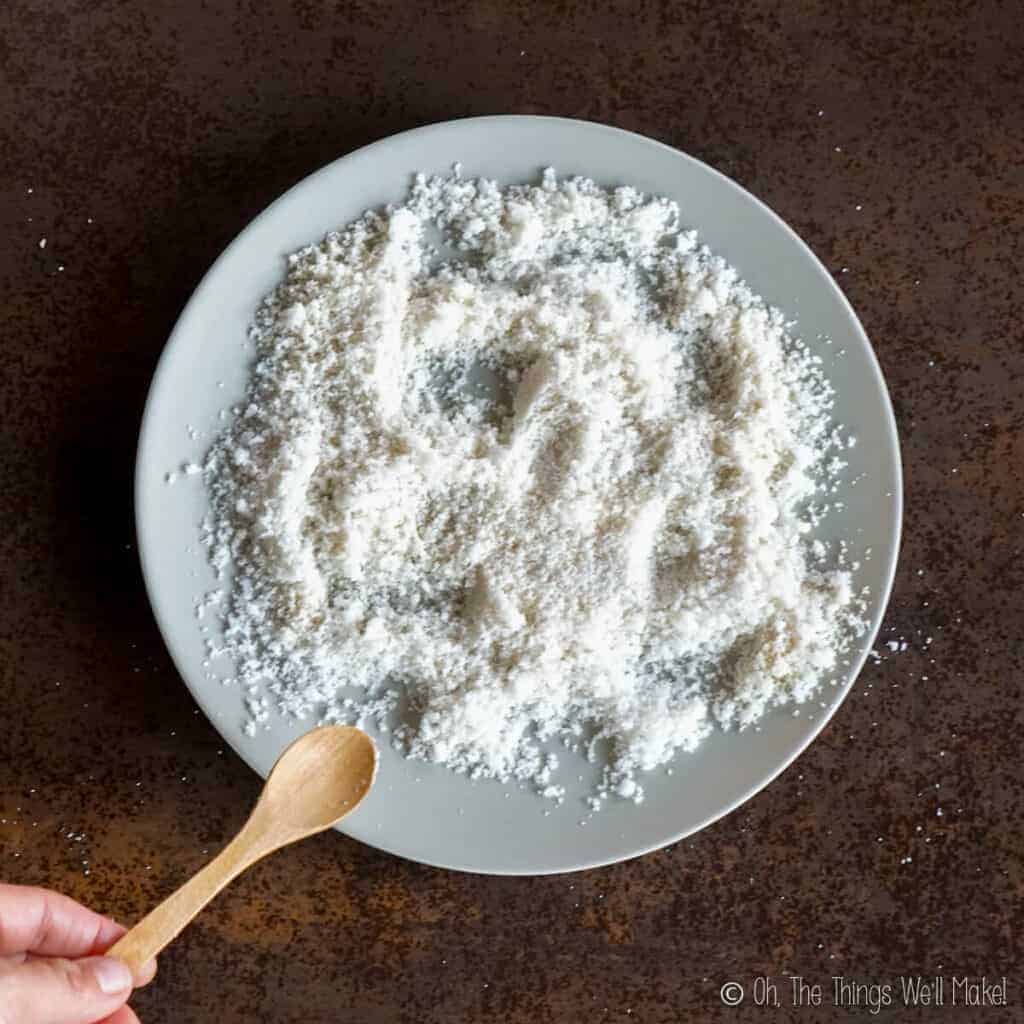
- Grind some prawn crackers or other white crackers for coating the snowman. I mixed mine with some almond flour. You could also use ground up white cheeses for coating the cheese ball instead.
Form and decorate the snowman
- Take the cheese balls out of the fridge and roll them in the ground crackers or cheese (or whatever you have chosen to coat your snowman).
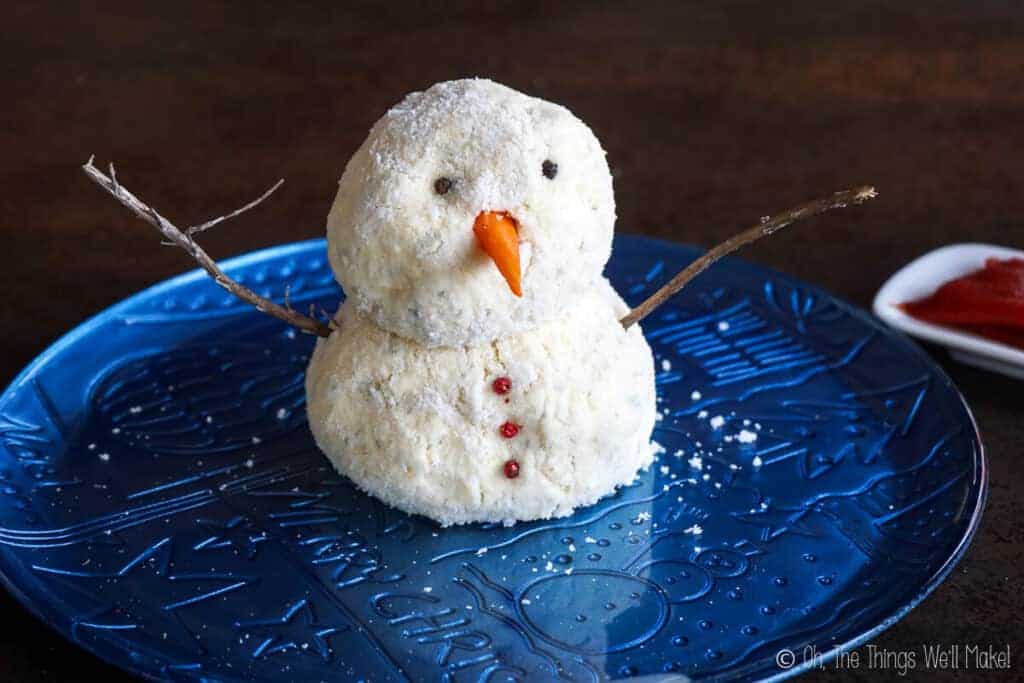
- Place the largest cheese ball on the serving platter and stack the smaller cheese ball directly on top of the larger one.
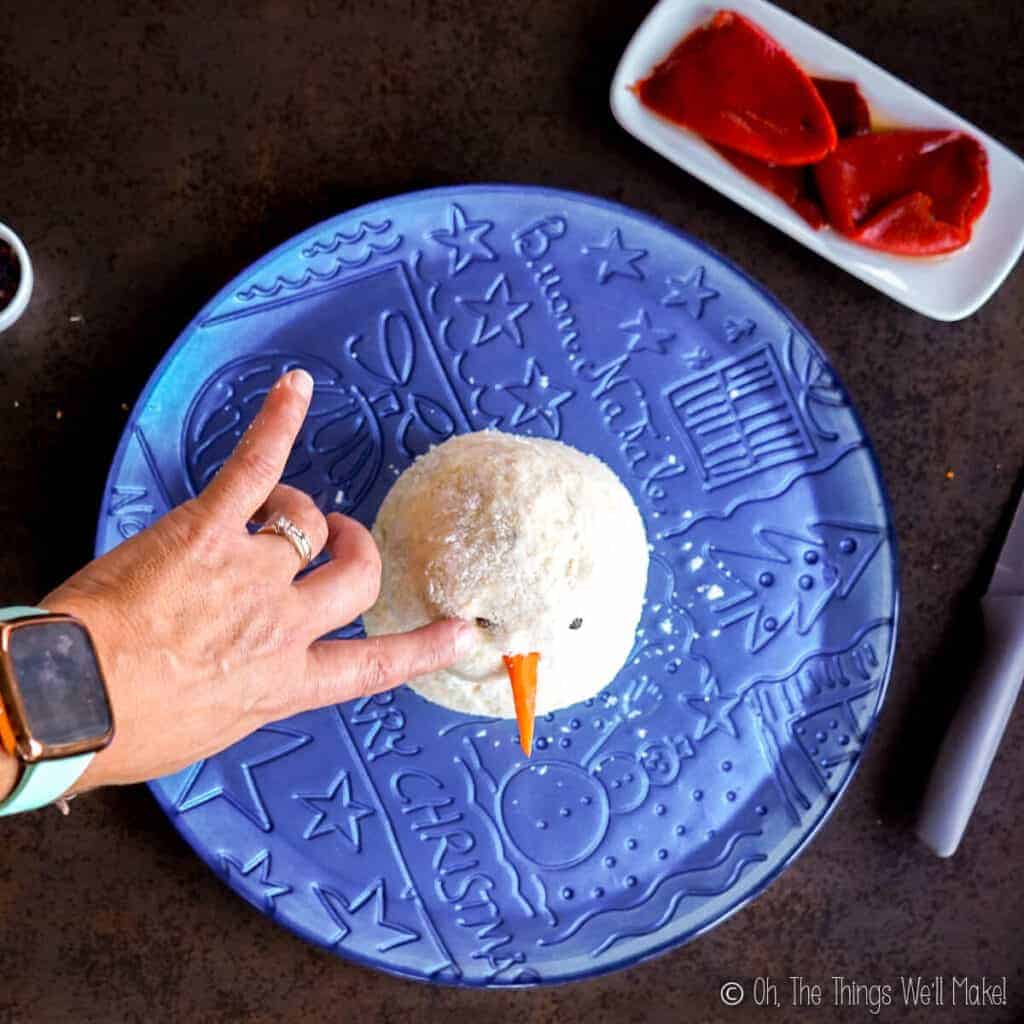
- Poke the carrot tip in the front center of the top cheese ball. This will be the "nose" of the snowman.
- Press two peppercorns above the carrot nose, one on either side of the "nose," for the eyes.
- Press 3 peppercorns down the center of the lower cheeseball. These are the "buttons" that go down the body of the snowman.
- Stick one of the herb twigs on either side of the lower cheese ball for the "arms." (You can also use thin pretzels or breadsticks instead.)
- If you want your snowman to wear a "cap," place the tip of the roasted red pepper on top of the top cheese ball.
- For the scarf, wrap the strips of roasted red pepper around the "neck" of the snowman, between the two balls.
Serving the cheese ball
- Surround the cheeseball with crackers or cut up vegetables, for serving with the cheese. Place a small knife or cheese spatula next to the snowman.
Notes
Customizing the recipe
Feel free to use any cheese ball recipe for the snowman cheese ball. It’s best to use recipes that result in a firmer cheese ball. Choose a mixture of cheeses that you like and that are easy to find in your region. It’s best to use white cheeses to keep the snowman light in color. The coating can be made with white shredded cheese, breadcrumbs, ground crackers, almond flour, or a combination of several of the above.Decorating the snowman
- Black peppercorns make great “coal” for buttons, eyes, and a coal mouth. Tiny chocolate chips would be perfect for a sweet snowman.
- The carrot nose can be made with the tip of a small carrot. You can also use yellow or orange bell peppers. For a sweet cheese ball, try using cantaloupe or persimmon.
- The hat and scarf can be made out of raw red pepper or roasted red peppers. (Roasted are easier to cut and press into place.) For a sweet cheese ball, try using fruit leather.
This post was originally published on December 27, 2013.
It was completely rewritten in December of 2020 adding a recipe, video, new photos, and new tips.