

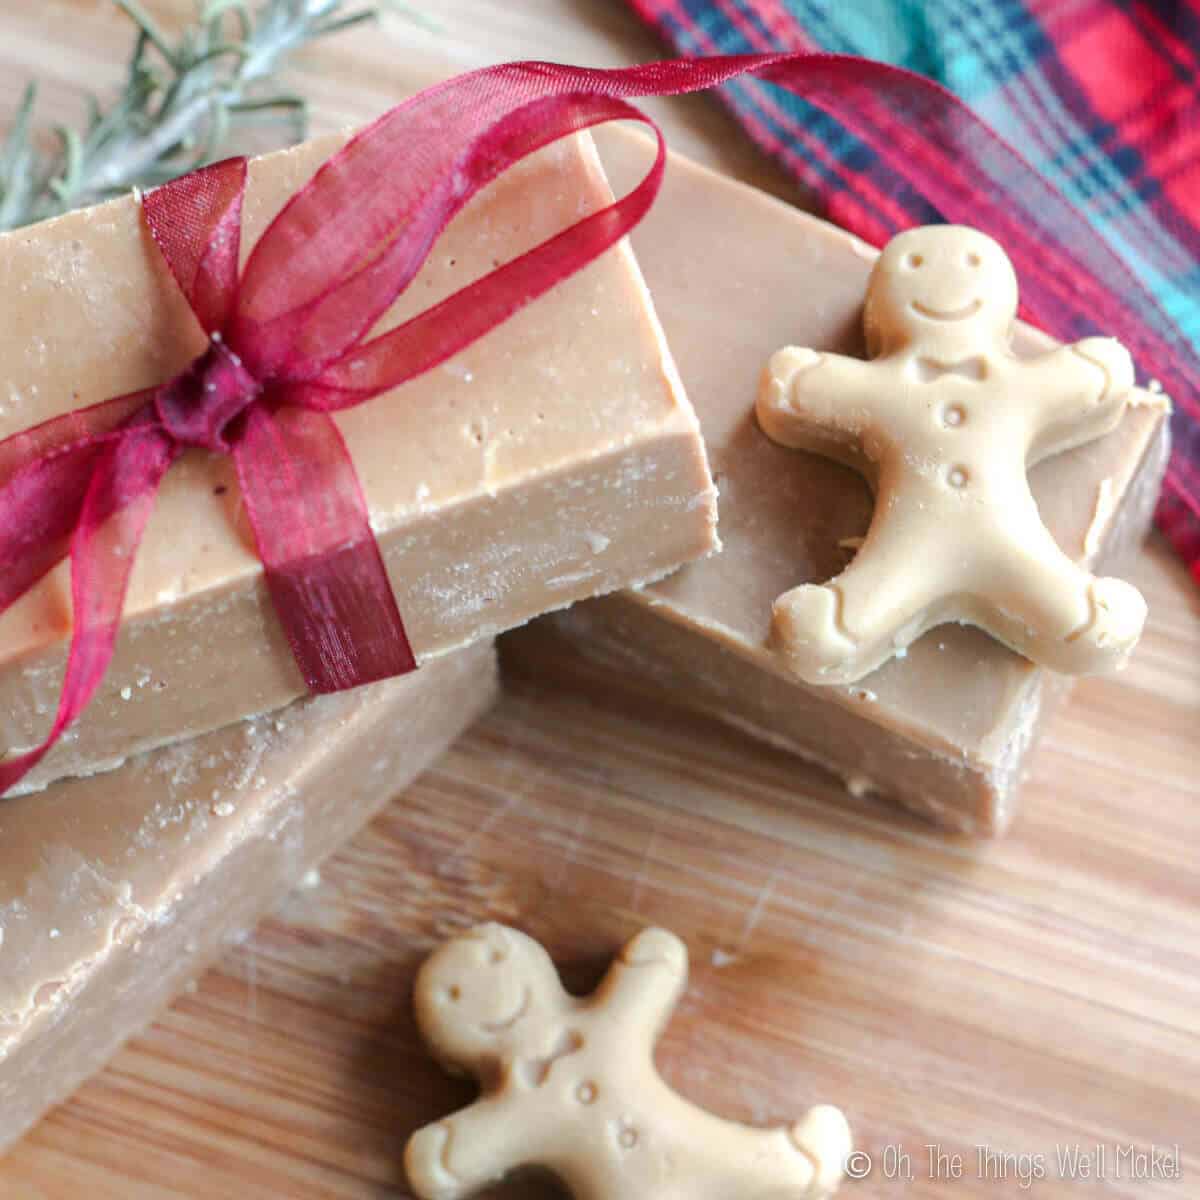
Easy Gingerbread Soap Recipe
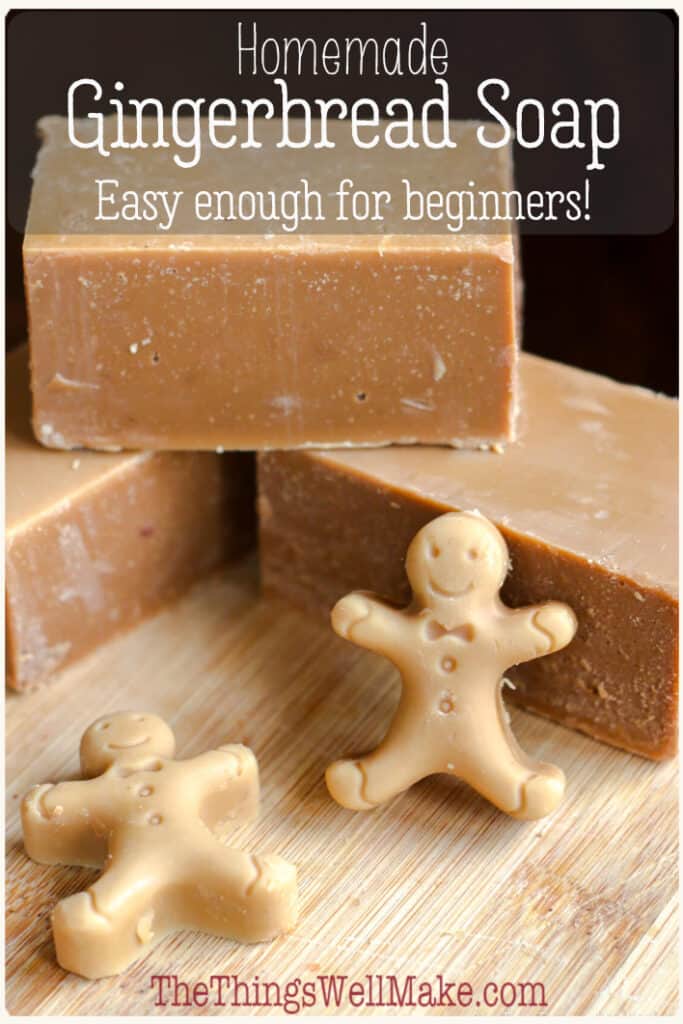
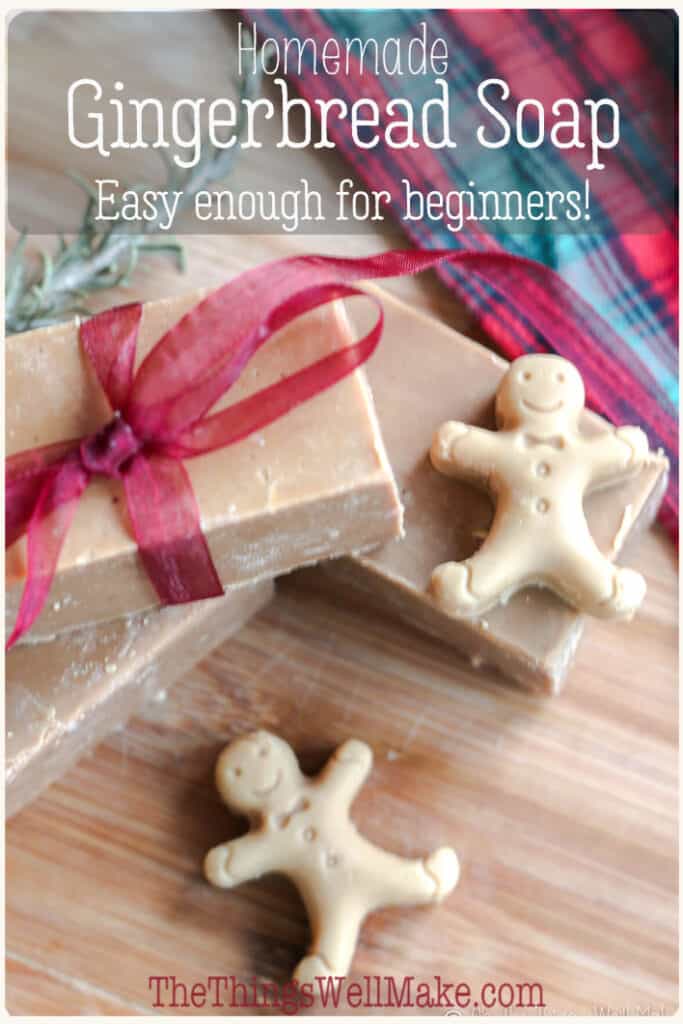
The perfect stocking stuffer, this homemade gingerbread soap is easy enough for beginners to make. It has a lovely fragrance that reminds you of the holidays.
Lately, I have been having a lot of fun making new holiday soap recipes.
Christmas is the perfect time for making soap because it makes such a practical, impressive DIY gift.
Adapting the beginner soap recipe
This year, I decided to stick with something simple. I decided to adapt my easy beginner soap recipe so that you can see some of the many ways that you can adapt a recipe to suit your needs without changing out oils or needing to use a lye calculator.
You can find the basic recipe with tips for beginner soapmakers here…
Easy Basic Beginner Soap
Why and How to add Molasses
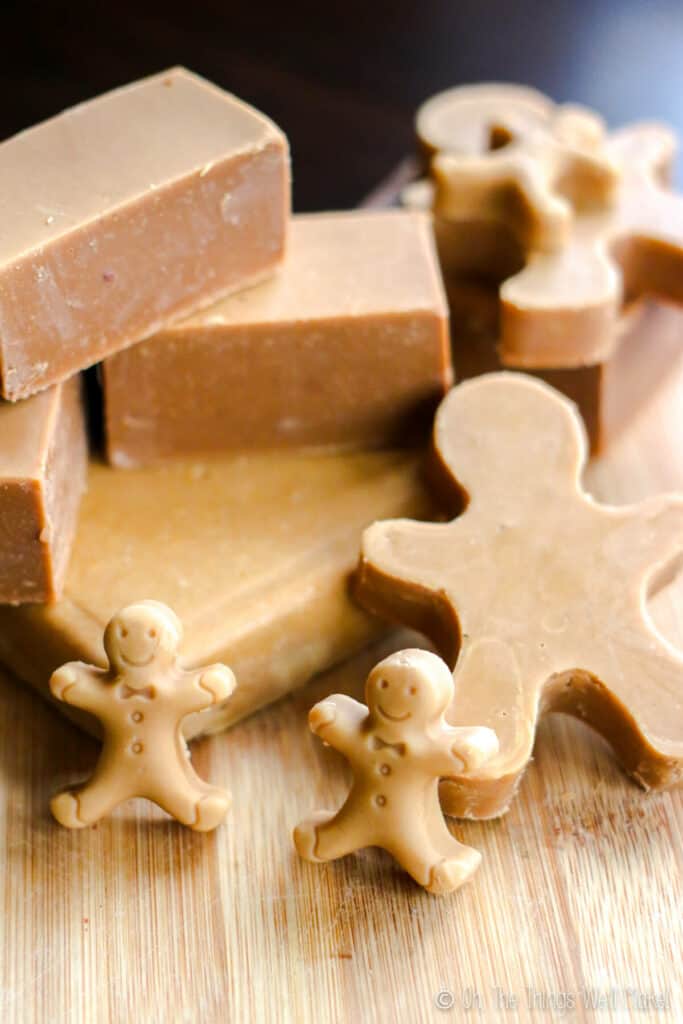
Molasses is a great addition to soap. It helps give gingerbread its characteristic taste and color, so I knew it would be important to add it to the soap. Not only did the molasses naturally give the soap a beautiful gingerbread color, but it also contributes minerals that help nourish the skin. Plus, the sugar in it helps make more lather.
At first, my easy soap wasn’t as easy as I thought. I made this when I still didn’t know a lot about the best way to add in sugars like molasses and decided to add it directly into the lye solution. The lye reacted strongly with the sugar making for a slightly explosive reaction.
The next time I chose to add the molasses during trace and it worked out much better.
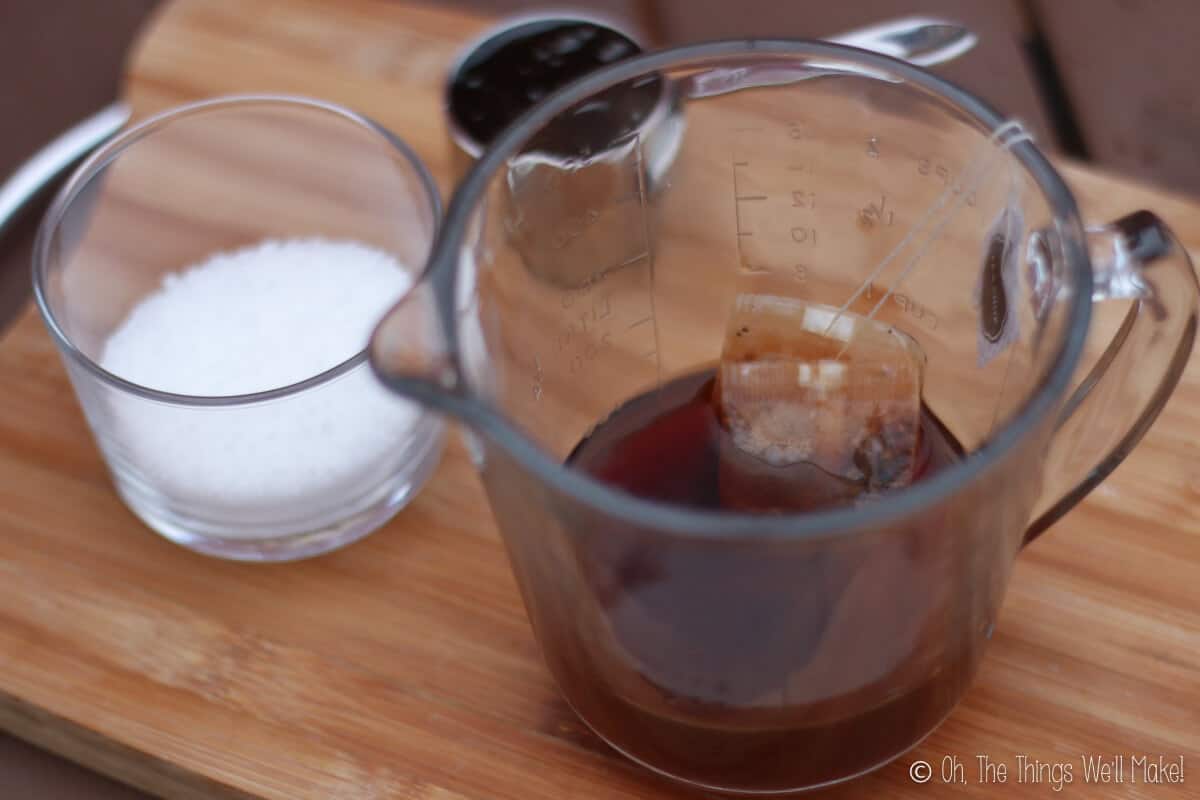
Using chai tea for the lye solution
Rather than use plain distilled water, I decided to make the lye solution with chai tea instead. It’s not something that you need to do if you don’t want to. I’m not really sure how much of a difference it makes, but I wanted to show you that using teas or infusions is yet another way to customize a soap recipe.
For the gingerbread soap, I figured that using a chai tea would add a bit more color to the soap and would also add more of a spiced scent.
If using a tea, let it cool before adding the lye to it to avoid any sort of explosive reaction with the lye. (For more information about lye, check out my post about lye in soap making.)
For those looking how to make chai tea from scratch, I have a recipe up on the blog.
Bulk Chai Tea Recipe
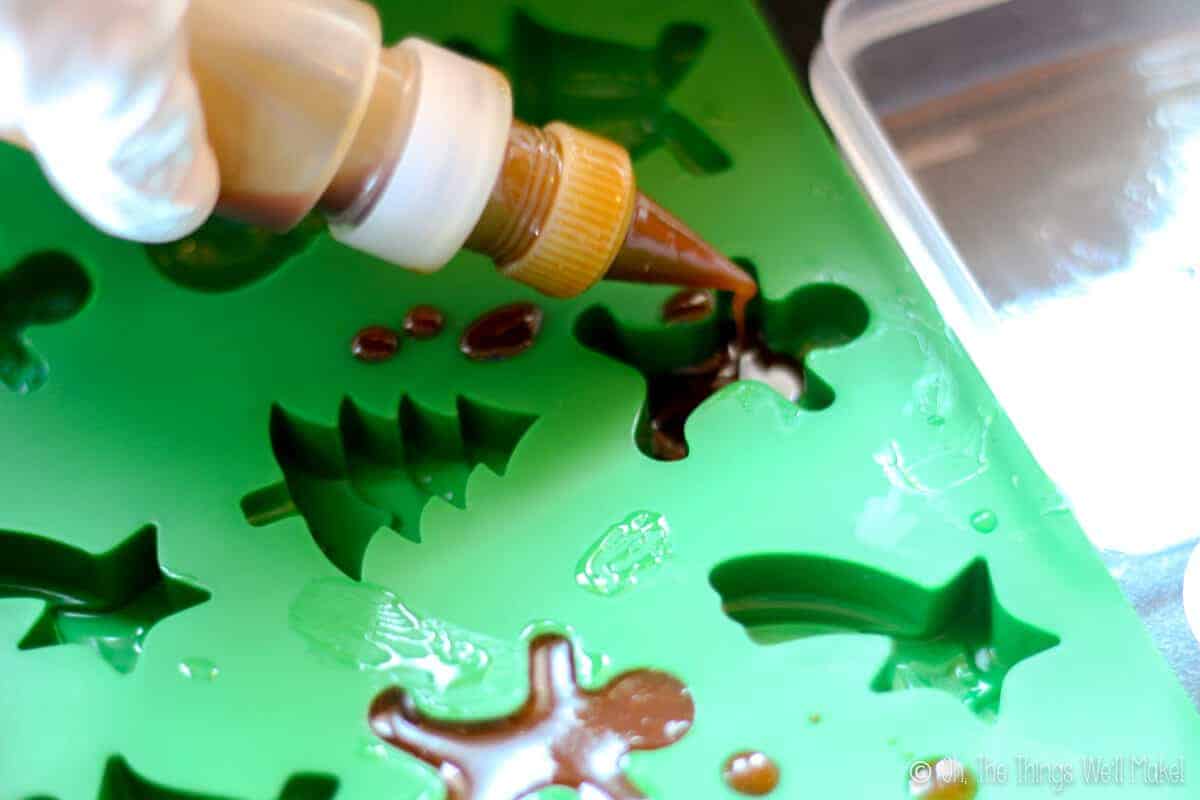
Choosing your molds
I love using silicone molds more soap making. The soaps don’t stick to the silicone, and the flexibility of the molds makes it easier for the removal of the soaps when set. That said, plastic Tupperware-type containers also work well for the same reasons.
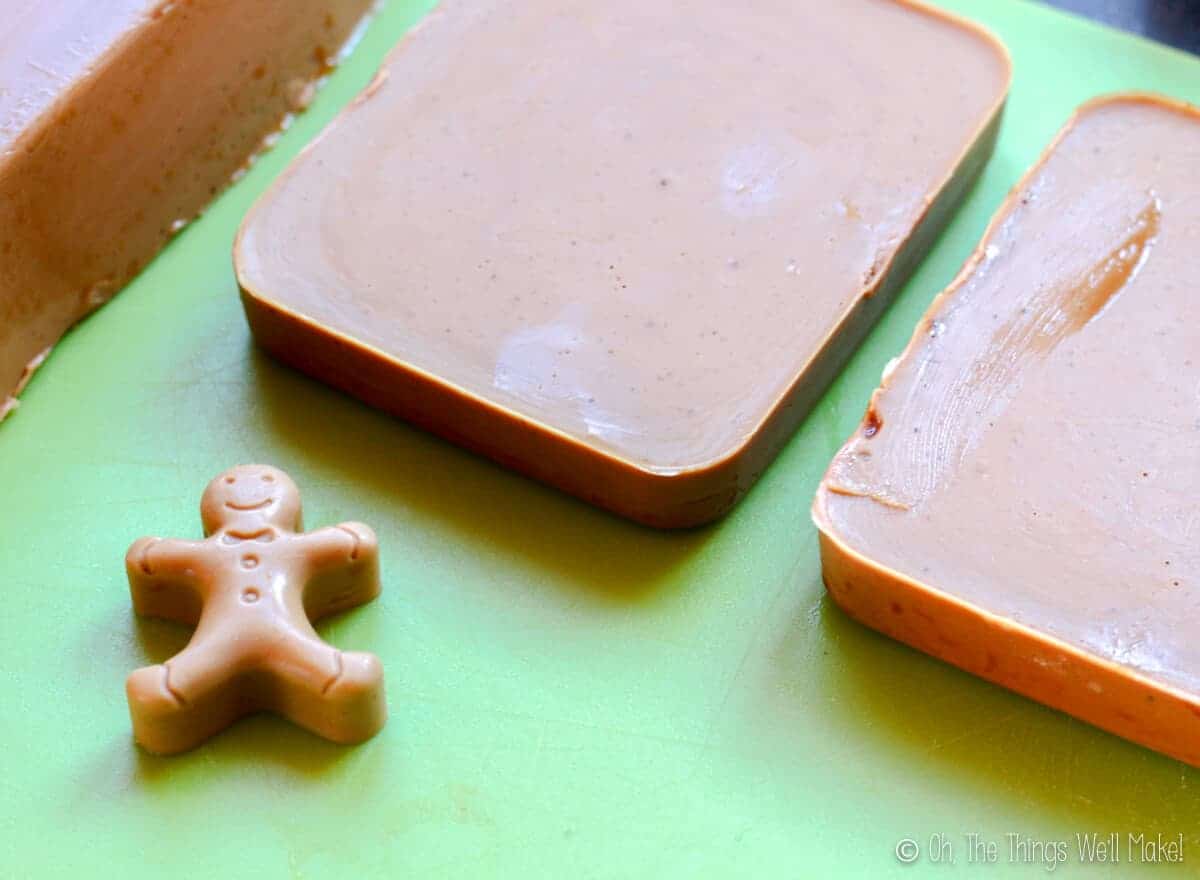
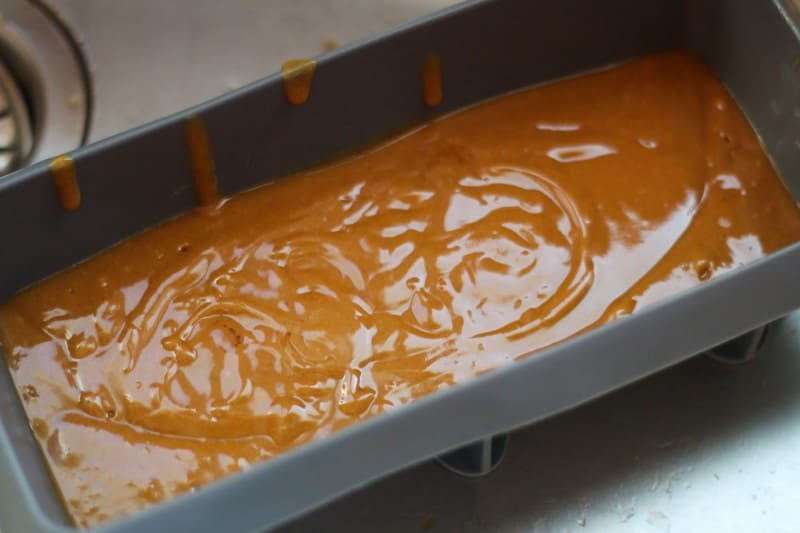
For this project, I made a variety of soaps. I used a silicone loaf pan for making the bars of soap.
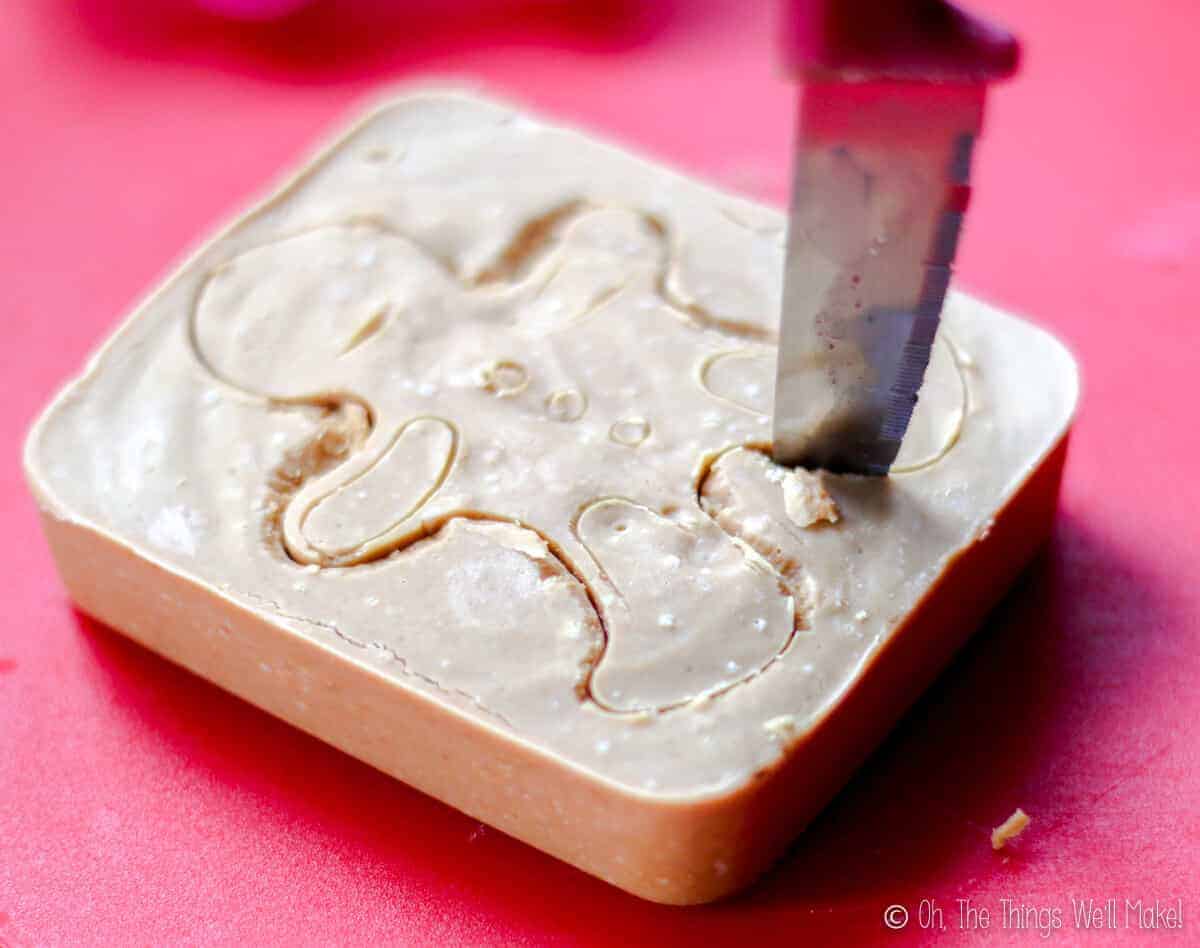
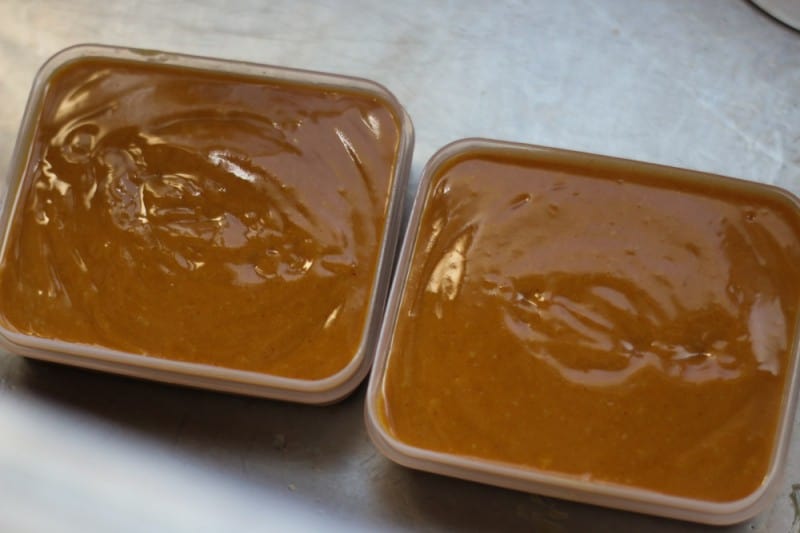
I also filled some smaller plastic containers to around 2 cm depth to cut out some gingerbread man soaps with cookie cutters. While I think it makes a cute gift that way, I must admit that I like the practicality of a bar of soap much better. (Note that my cutter was too shallow for cutting the soap so I had to finish the cut with a knife.)
I also used some holiday silicone candy molds to make some cute, tiny soaps shaped like gingerbread men.

Gingerbread Soap Recipe

Easy Gingerbread Soap
Materials
- 500 grams olive oil
- 100 grams coconut oil
- 80 grams lye
- 150 milliliters water or tea I made a chai tea for my liquid component
- 1/4 cup molasses
- essential oils (I used ginger, cinnamon, and clove)
Instructions
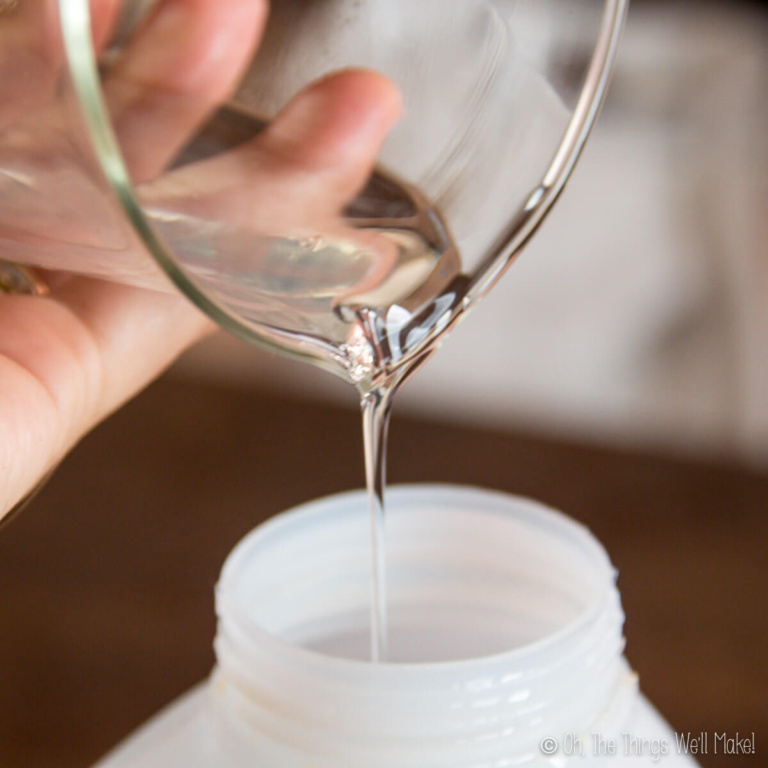
- Make the lye solution by pouring the lye into the chai tea or water (your choice) and stirring until the lye has completely dissolved. The solution will get very hot and will slowly cool down. As always, add your lye to your water and not the other way around!
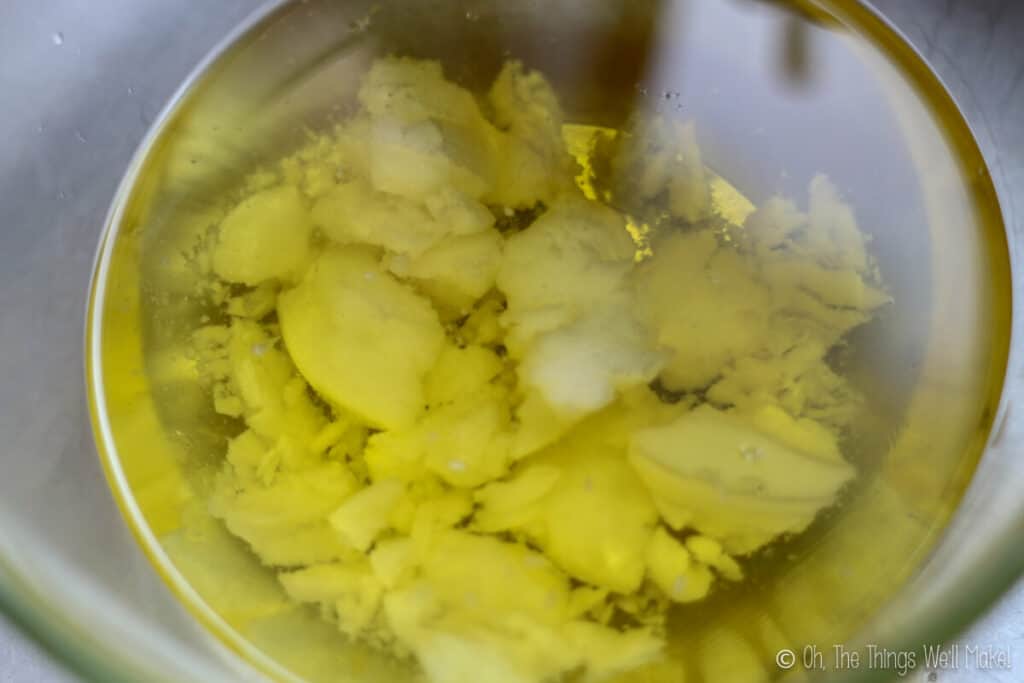
- Let the solution slightly cool in an area where it won't be touched or knocked over by other people or pets. Meanwhile, mix together the olive oil and coconut oil.If making this soap in cold temperatures, when coconut oil is in its solid state, I recommend melting it before continuing. Some people prefer to heat their oils, but I don't find it necessary. The remaining heat from the lye solution will slightly warm up the oils. You can also now take the time to prepare your molds as needed. If using a wooden mold, line your mold with parchment paper or a silicone liner.
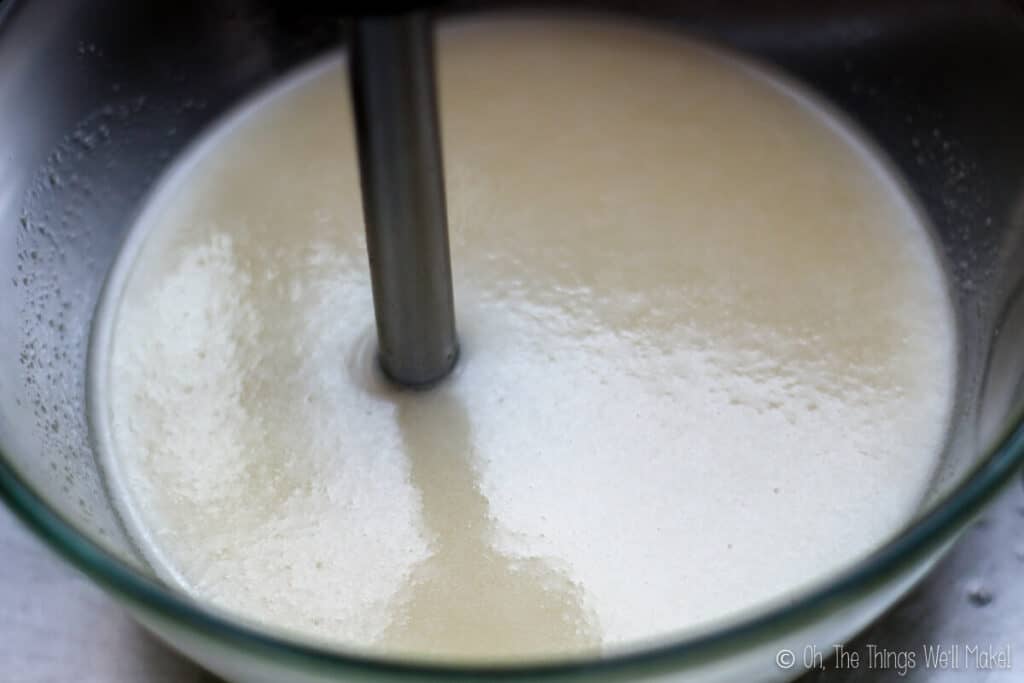
- When the lye solution has cleared up and isn't too hot to work with anymore, pour the lye mixture into the oil mixture and carefully stir them together. Once you have incorporated the lye solution into the oils you can begin to mix them together with a hand blender.
- When you start to reach trace, the point in the soap making process in which your mixture gets opaque and begins to look like a thin mayonnaise, add in the molasses and essential oils.
- For the essential oils, I used mostly ginger essential oil, some cinnamon, and a few drops of clove oil. I have to admit that I don't normally measure out the essential oils that I use in soaps because I prefer to use small amounts. I let my nose guide me. (I'd estimate I use around 5ml of EOs overall).
- Fully incorporate all of the ingredients, and pour them into your prepared molds.
- Set the soap aside for at least 24 hours. After 24 hours have passed, or when you can unmold the soap without it deforming, carefully unmold your soap. If you used a large mold, you can cut your soap into bars at this stage (or cut the soap with gingerbread man cookie cutters).
- Leave your soap to fully harden and cure for about a month. To help the process, leave space between each bar, and turn them over every couple of days during the first week or so.
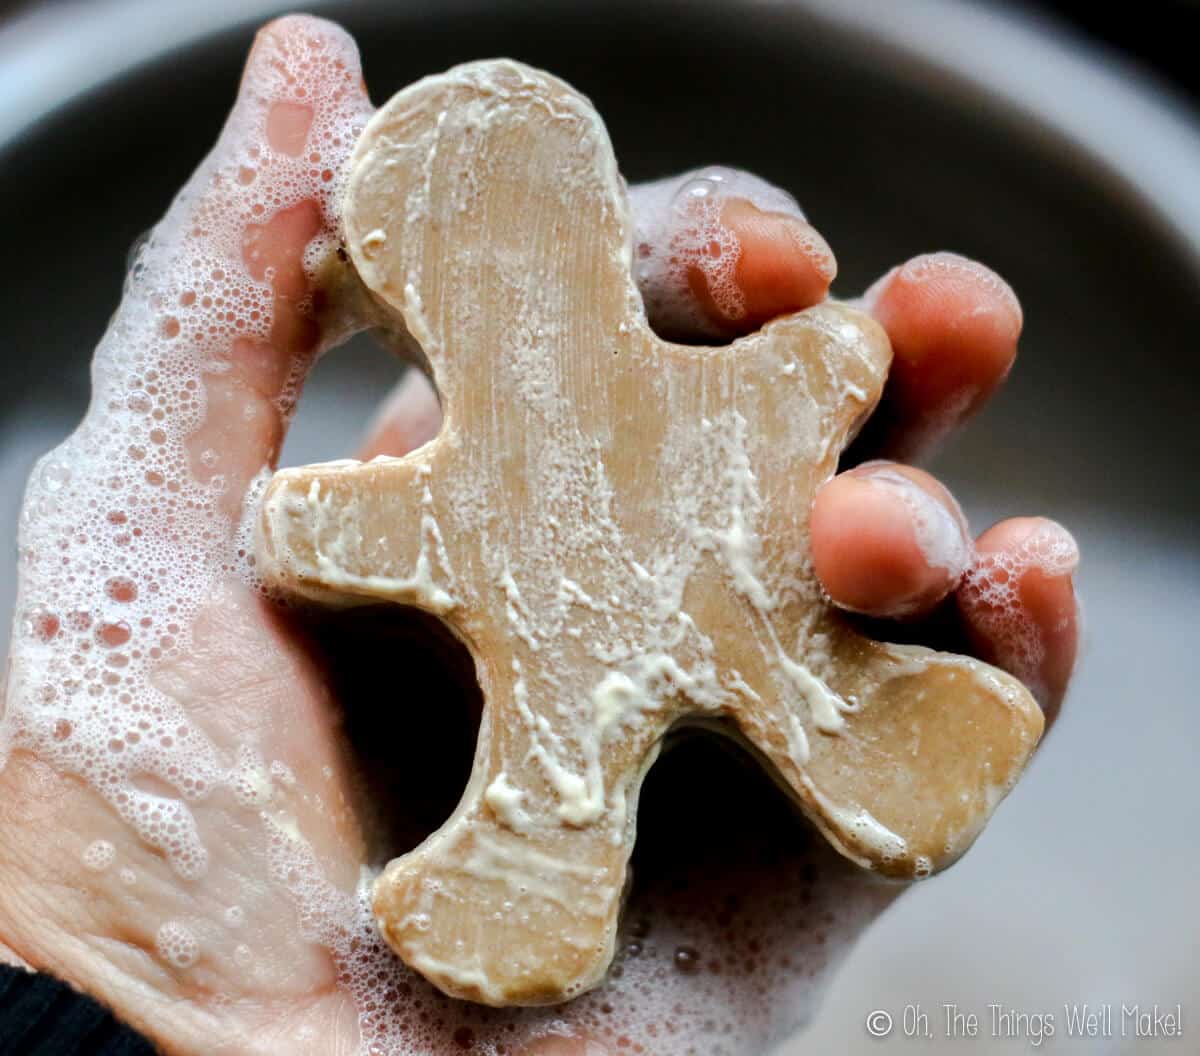
- Enjoy your soap!
Notes

Holiday Gift Giving Tips
If you want to present this soap as a gift, consider making these easy snowflake gift pouches. They’re a simple, beautiful craft, and soaps fit in them perfectly.
Painted snowflake pouches

Looking for another holiday-themed soap you can make? Why not try your hand at making these cute peppermint soaps…
Peppermint Soap
This post was originally published on December 6, 2014. It was rewritten in December of 2019, adding clearer instructions and new ideas for gift giving.


Hello!
Firstly, thank you for sharing the recipe for gingerbread soap. I am prepping for a craft fair in November and thought this one would be a good addition. My experience is begging me to differ : (
I used chai tea for the water portion. My scale is new and I’ve used it to make about 8 other recipes with out issue. This one didn’t give me any problems with making it. Or unmolding it. However, cutting it has been disastrous. The knife keeps making drag marks. Quite honestly, it looks like a slice of gingerbread : )
My husband tried a coping saw and that wasn’t any better. Then he decided maybe warming up the knife I use would help. Nope. When he lifted the knife and moved the bar, a large portion broke off the bottom. I’ve cut off a slice a day thinking waiting and letting the loaf dry a bit will help with the next slice. So far, that’s not working.
I’ve made soap for over ten years but have only recently ventured into “specialty/fun” soaps. I’m at a loss as to what I may have done wrong. Any help would be appreciated.
Thank you : )
Hi Carolyn,
I guess I’m having a hard time understanding what you’re seeing. This recipe is based on my beginner soap recipe. Because there is a higher level of olive oil, it can take a bit longer to harden than a soap with a higher level of something like coconut oil. So, if you try to cut it too quickly, it can leave marks in it. To try to understand your issue, I tried to look it up on a soap forum (here and here) and they seem to say something similar…
That said, when you say that you were cutting it with a saw and that pieces broke off- that sounds like the opposite issue- cutting it when it has gotten too hard already. Soaps with a lot of coconut oil can harden and get brittle quickly. That makes them more difficult to cut. I haven’t had that issue with the soaps based on this recipe (with a high concentration of olive oil), but have had that with my coconut oil laundry soap. (You have to cut it soon or it gets very hard and very brittle.)
To me, it sounds more like an issue of trying to find the right timing for cutting each soap.
I wonder if heating the soap would help as it’s probably hardened too much now for simple, smooth cutting? (Again, I haven’t tried it- maybe I should heat an old soap up in the microwave to see how it cuts!)
I’d look at the soap forums to see if someone has pictures of the exact issue you’re having to see if you can find a solution.
Hi, am probably making this too hard, but olive oil is listed as 17.64g. Is this correct? That’s not even a full ounce
Just want to make sure before I make. Intend this foe Christmas gifts. Thank you for sharing.
Hi Shari,
It appears that you clicked on the “convert units” button. The original recipe is in grams and it shows 500 grams.
For some reason, when you converted, the rest were written as ounces, but that one stayed as grams (even though it should be ounces like the rest.)
Anyway, I went in and manually fixed it. (I think.)
It should say ounces like the rest now when you convert the recipe!
Love this recipe. I am a beginner. This was my 2nd batch of soap ever and it turned out PERFECT! EASY INSTRUCTIONS. I added white sparkly mica on top to emulate frosting. Smells wonderful. Thank you for the recipe!
Sounds beautiful! I’m so happy it worked out for you! 🙂
First, I want to thank you. I made this soap recipe yesterday, it turned out beautifully. The smell in my house was absolutely amazing. I did change up the oils a bit and doubled the recipe. I’m only two months into making soap and I thought this was my best batch yet. I love the easy directions and simple ingredients. LOVE it.
Hi Deb,
I’m so happy to hear it! Thanks so much! 🙂
You are perfect in your timing for holiday gifts! Way to not procrastinate like me. hahaha