

Making an Easy, Basic Beginner Soap, and Then Making it Fun!!
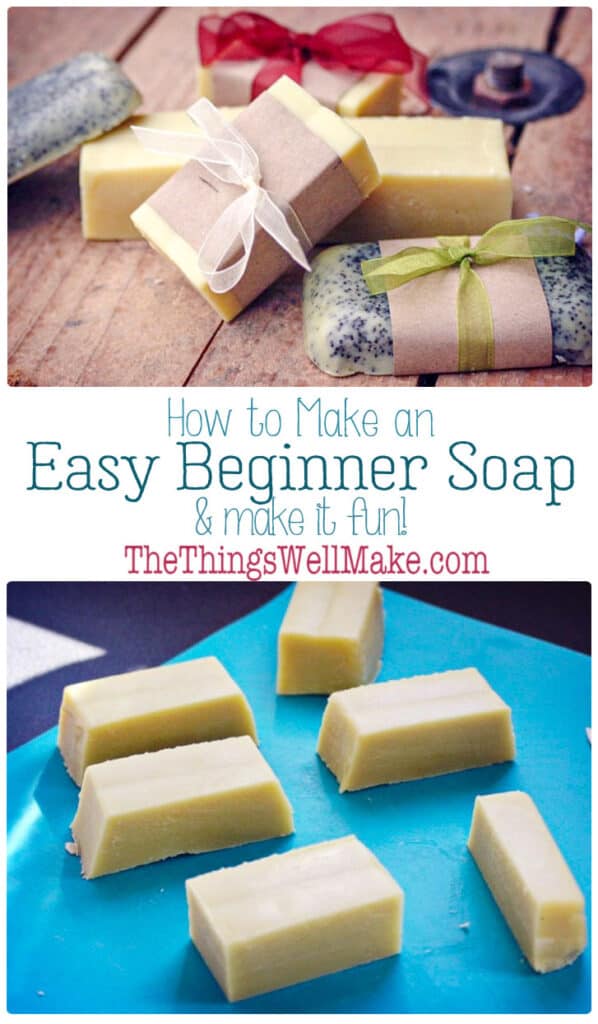
Making soap for the first time may be intimidating, but isn’t difficult. This quick and easy beginner soap recipe comes with fun ideas for personalizing it by adding exfoliants, essential oils, etc.

You know when you get really excited about making something…
Then it flops?
That was me making soap for the first time.
Growing up, I was always interested in making things. I loved being outside in the garden, and growing herbs in every little spare area of the garden. My mom didn’t appreciate my spearmint overtaking the rest of her garden quite as much as I did, but she still allowed me to explore my creativity.
One of the books at home that I loved was a book about making your own soaps and perfumes. I followed a few of the recipes, but didn’t really have much luck with them. I tried making a rose petal perfume, but it made a brown liquid that went bad right away.
Looking back, that book probably wasn’t as great as I remember it being. 😉
My first attempt at making homemade soap
The worst disaster, though, was when I tried to make soap.
The book shared ways to be frugal. It explained how to clean used cooking oil for making soap. For some reason, I decided that I would recycle oil that very first time I made soap. I mean, reuse, recycle, right?!?!?
Refining the oil was a horrible, messy process, and I don’t know what sort of quality fat I ended up with. I proceeded, though, and continued to make my soap, excited, hopeful, and optimistic. It looked like soap, so I must have reached success, right?
But, no! It stung every time I used it!
Years later, I think I know what the problem was…
I probably refined an unknown mixture of vegetable oils. Unless you know which oil you are using, you can’t just use the same amount of lye for all oils and expect the soap to turn out the same. Plus, the typical light vegetable oils like corn oil or canola oil, just don’t make very good soaps on their own. (You can use them in smaller percentages in soaps with other oils like olive oil and coconut oil.)
I thought that maybe it was because I didn’t let it sit or “cure”. In fact, years later, I don’t even remember the book mentioning that you should let your soap cure; it probably did; I probably had. Either way, though, had I made the soap right, it shouldn’t have stung days later.
By that point, the saponification process, the chemical reaction which turns lye and oil into soap, would have finished. More likely, my soap used too much lye for the amount of (low quality) oil I was using. I ended up throwing most of my soap away, only to find a bar, years later. It was covered with brown spots (aka. “dreaded orange spots” in soapmaking). While it lathered up and no longer stung my skin, it still wasn’t a great soap. So, I (sadly) threw it away.
Part of me had been wanting to try making soap again, but part of me was held back by my not-so-stellar first experience with soap making.
Trying to make homemade soap. Again.
When I first wrote this post in 2013, I had bought lye with the intention of making soap again. The bottle of lye sat in my kitchen, unused, for weeks (months?). When I finally sat down to find a good recipe for it, I became overwhelmed!
I couldn’t find any easy, straight recipes for making soap. Instead, I was led to various lye calculators that would help me formulate my own soap recipe.
Normally I love this sort of experimentation, but being a newbie with soap making, I just wanted somebody to tell me exactly what to do; just this once!
To be honest, seeing that most of the calculations and recipes were calculated in ounces really intimidated me too. Although, after being in Spain for many years now, I still weigh myself in pounds and not kilos, I much prefer seeing these sorts of things in grams than ounces.
Are they weight ounces? Fluid ounces?!?!?!?
I searched the web in Spanish, hoping to find some good soap recipes in grams, and I did!
I made my second soap from a recipe on a Spanish blog, and I have been playing with the concentrations ever since.
Ar first I was going to make a pure Castile soap.
What is Castile soap?
In the eyes of a purist, Castile soap uses olive oil as the only oil in the recipe. After much experimentation, I now have several Castile soap recipes up on the blog. If you prefer, you can make my pure Castile bar soap or my homemade liquid Castile soap. The problem with a pure Castile bar soap, though, is that some people find it slimy and wish it had more lather.
The term “Castile soap” has, over the years, expanded to include other soaps made with only vegetable oils. Coconut oil is often added to improve lather, and other oils may also be added to give the soap other properties. (Soaps made with only coconut oil are very cleansing and provide a great, bubbly lather, but they can be drying on the skin.)
Soaps made with only olive oil tend to be very conditioning soaps. Olive oil is great for making soaps for face and body for that very reason. The problem with olive oil in soap is that it isn’t considered to be as “cleansing,” nor does it make a bubbly lather. They lack that squeaky-clean feeling given by coconut oil soaps.
I had bought a liter of olive oil to make soap earlier that morning, but I decided that my husband wasn’t going to be impressed with a soap that wouldn’t lather much…
So, I decided to make a modified Castile soap, a soap that not only uses olive oil, but that also uses coconut oil.
For more information about how different oils work in soap making, check out my post about the best oils in soap making.
Why this combination for an easy, beginner soap?
Why did I formulate this soap the way I did to make it a great, customizable basic beginner soap?
A mild, conditioning soap
This soap is a conditioning soap that is perfect for the face and body!
There are lye calculators online that will help you to formulate a recipe for a balanced bar of soap. They will give you an idea about how cleansing vs. conditioning a soap will be, what type of lather it will give, etc. This soap falls on the conditioning end of the spectrum.
For more information about how and why to use a lye calculator, check out my post about how to adjust and formulate soaps with one.
If you based this recipe just on the prediction of one of those calculators, you’d say that this soap could be improved by increasing its cleansing qualities, and it could use more bubbles.
In practice, though, I find this soap to be great! I don’t have a problem with this soap leaving a greasy residue, and it feels perfectly cleansing to me. It also gives me lather from the beginning. (Some soaps, like the pure Castile soap, need to cure for longer first.)
I’m not the only one who likes using a conditioning soap for face and body. A lot of people prefer using a pure Castile soap, made with only olive oil. Pure Castile soap falls further down the conditioning/less lather/less cleansing end of the spectrum, though, and many people don’t like it because they find it “slimy” or not cleansing enough.
It’s simple to make
Not only are the ingredients simple to find, but there aren’t a lot of them. I purposely didn’t want to use a lot of different oils in this soap because seeing too many ingredients is enough to scare off beginner soap makers!
Olive oil and coconut oil are both oils that should be relatively simple for anybody to find. Plus they are some of the more economical oils that are good for making soaps.
This soap also has a long working time once you’ve reached trace. “Trace” refers to the stage in soap making when the oils and the lye have begun to emulsify and the chemical process of saponification (becoming soap) begins.
Some soaps, like my coconut oil laundry soap, move from thickening to solidifying very quickly, leaving little time for personalizing your soap with essential oils, colorants, or exfoliants. This soap recipe has a longer working time that will allow people to have fun adding ingredients to their soaps.
I had considered adding more coconut oil to this soap. That would make for a quicker soap to make. It would also give more lather and a really squeaky clean feeling afterward! The problem with that is that coconut oil greatly reduces the working time. I was afraid that first-time soap makers would stress if their soap hardened too quickly.
For those who want more lather and more cleansing, check out my modified beginner soap recipe in the notes section of the recipe card below.
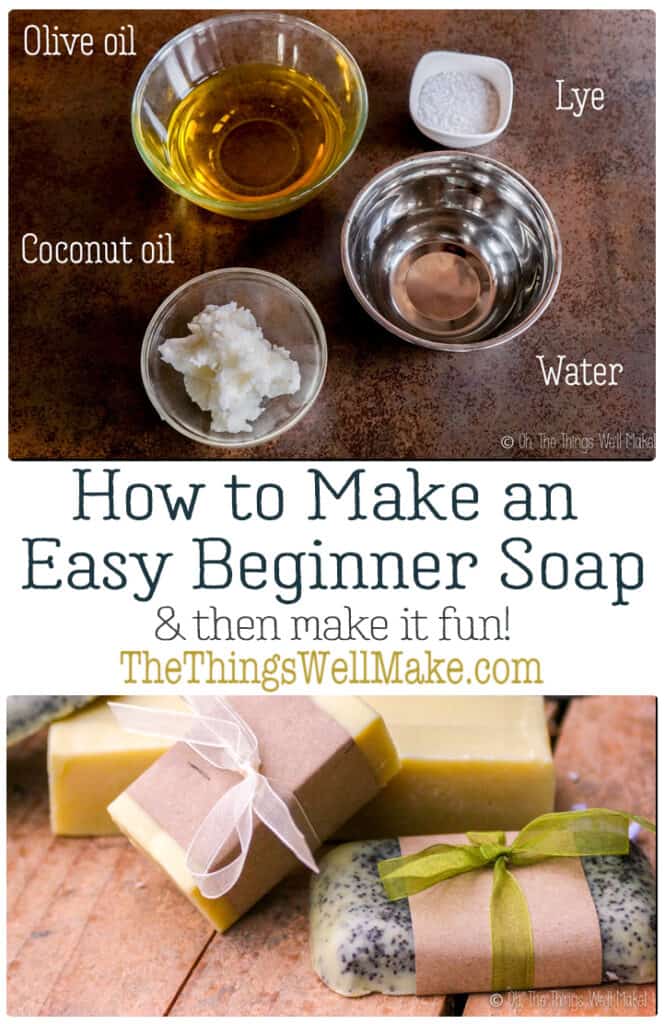
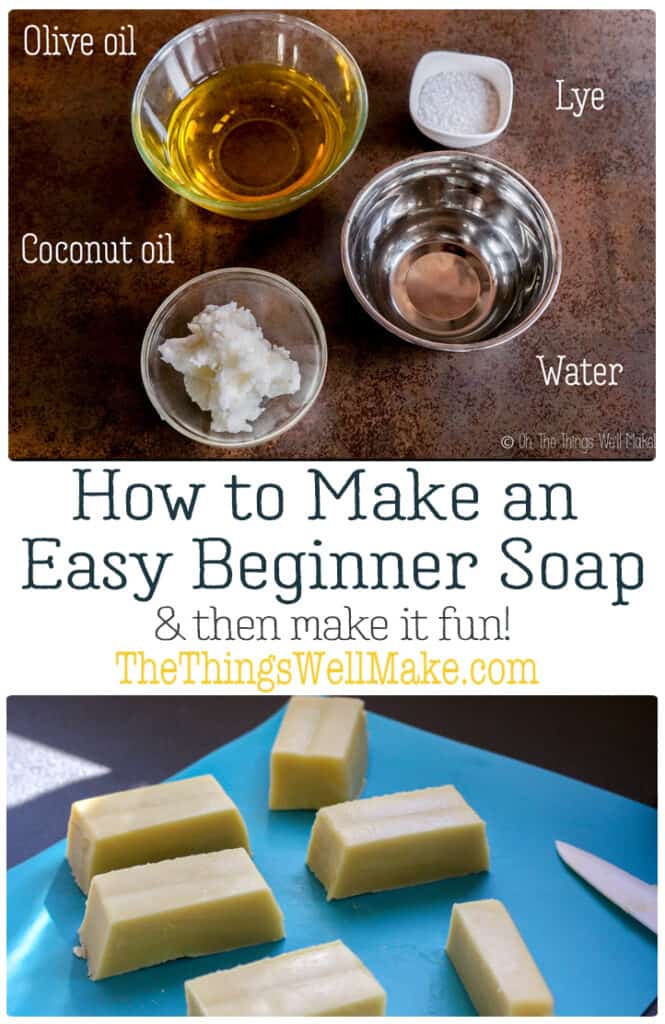
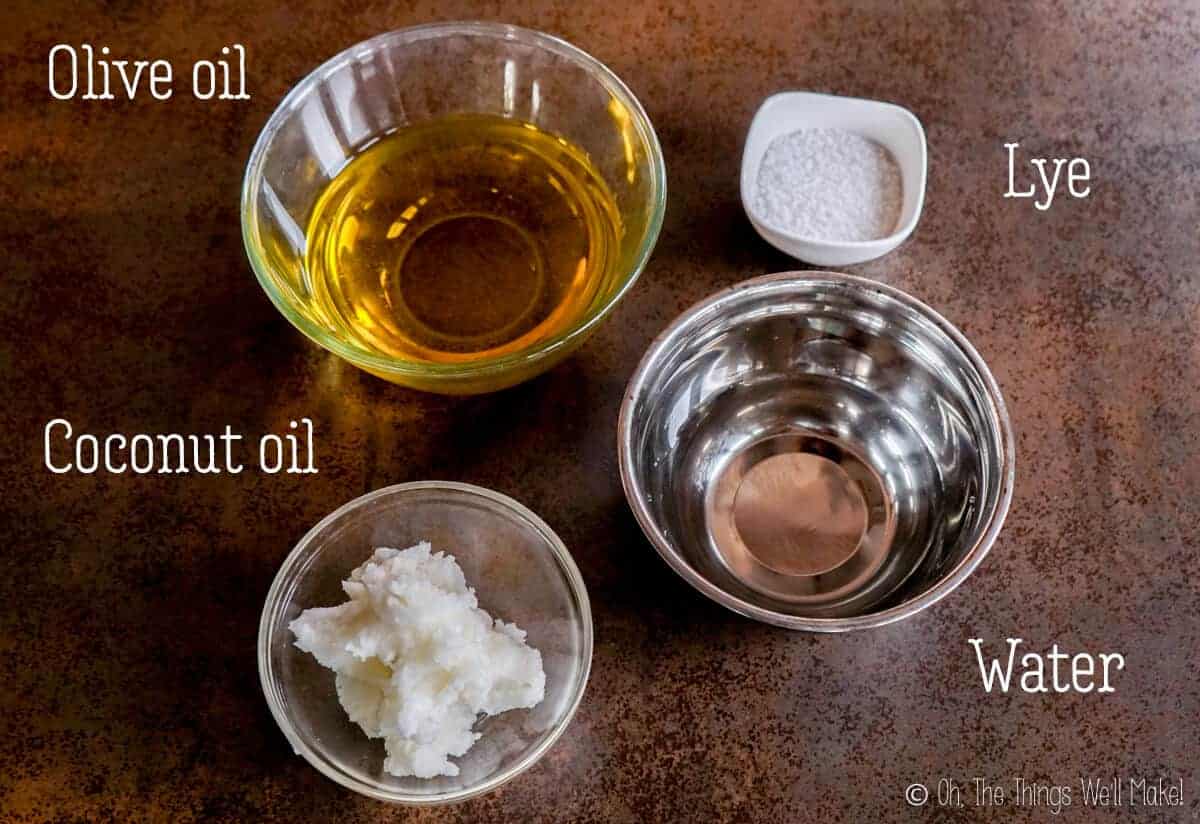
Ingredients
As I just mentioned, the ingredients for this soap are very simple. It uses only two oils: olive oil and coconut oil. Other than that, you only really need a lye solution that is made by combining lye with water.
I suggest you use distilled water to make the lye solution. That helps avoid having issues with any impurities that you may have in the water you’re using. If you did have problems later on, knowing you’ve used distilled water helps rule out any possible issues with the water.
That said, in most cases filtered water should be fine to use.
Other than that, all other ingredients are purely optional. To add a scent to the soap, consider adding essential oils or fragrance oils. Essential oils are more natural, but their scent is more subtle and doesn’t last as long.
For coloring the soap, you can use iron oxides and/or micas. There are also special colorants sold specifically for soap. You can experiment with adding clays or spices for color too. In my easy pumpkin spice soap, I have used paprika or achiote to add an orange color to the soap. I then add a swirl effect with brown spices like cinnamon and clove. (They also add some fragrance.)
You can also add exfoliants or other ingredients to really personalize the recipe. Check out some ideas below.
Procedure
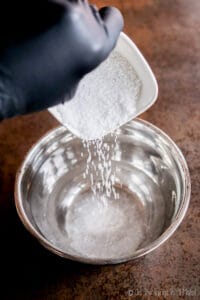
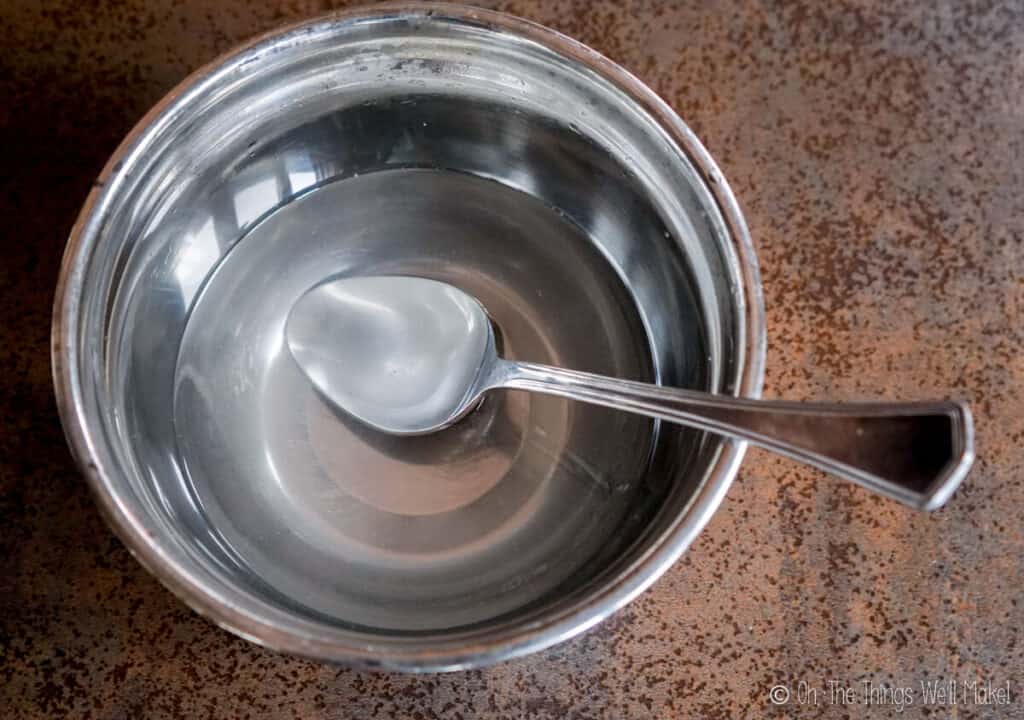
Making soap is really very easy. All you have to do is to mix a lye solution by mixing the lye with water. (Pour the lye into the water and not the other way around. See the safety warnings below for more information!)
Mixing the lye solution
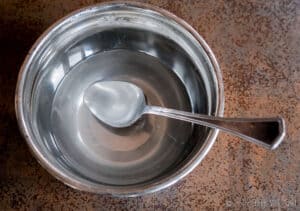
The lye mixture will get cloudy and warm at first and then it will clear up and start to cool.

Pouring the lye into the water 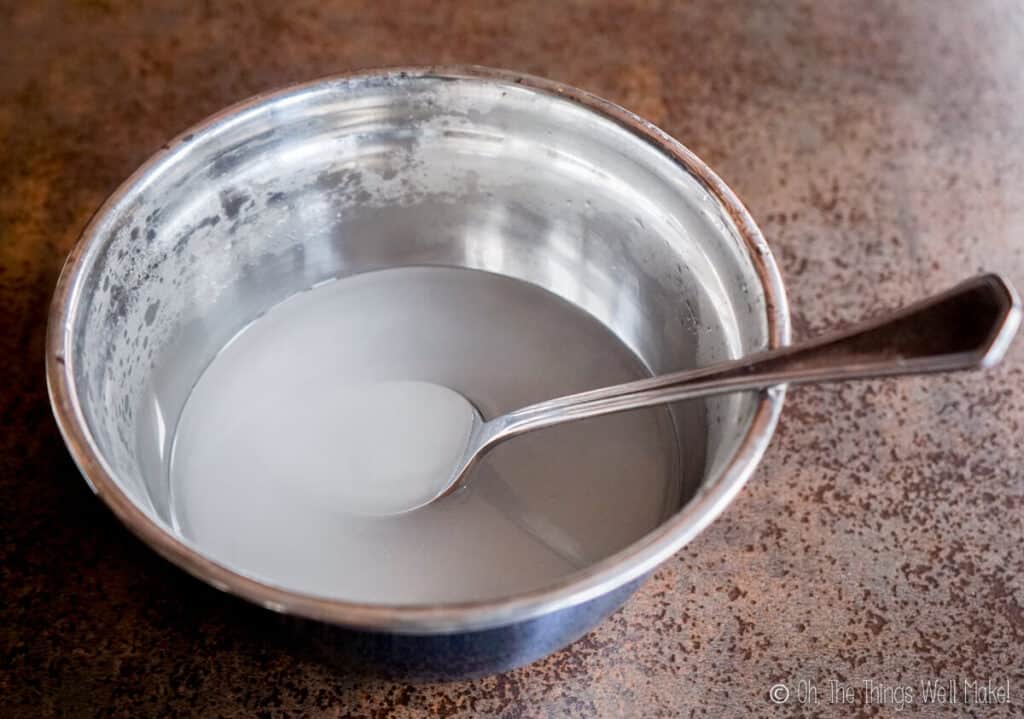
The lye mixture is cloudy at first 
The lye solution after clearing up
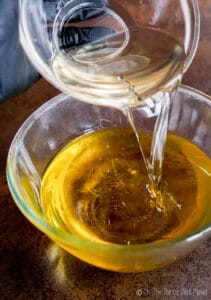
Preparing the oils
Once the lye solution is ready, prepare the oils. Weigh out the oils and melt the coconut oil if it’s in a solid state.
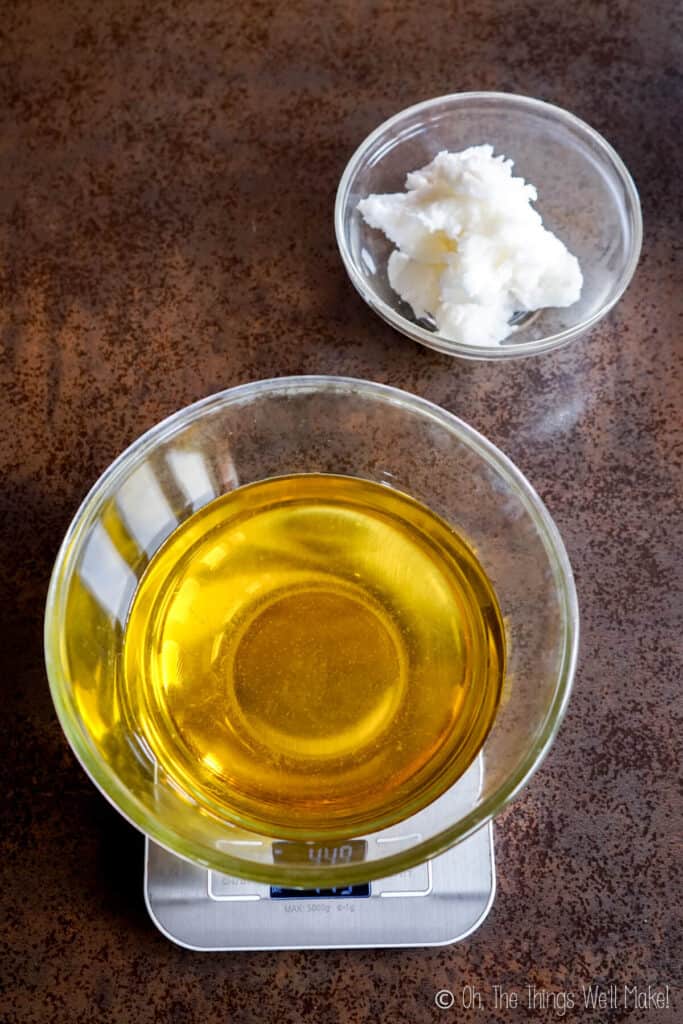
Weigh out the oils 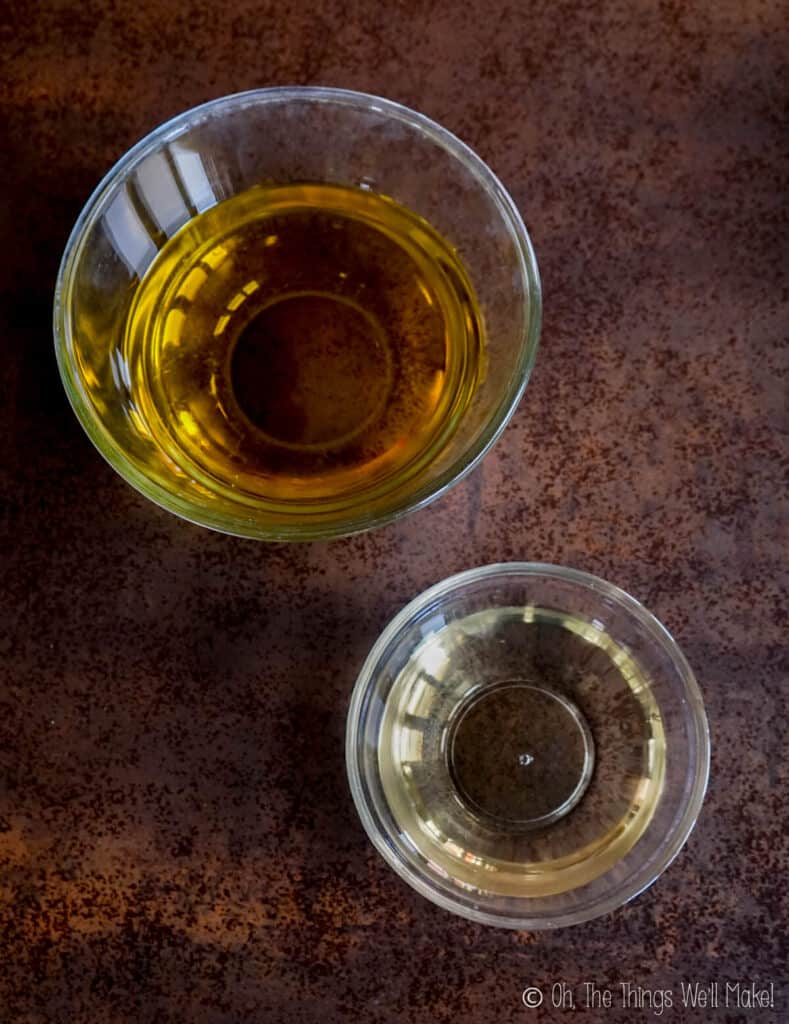
Melt the coconut oil. 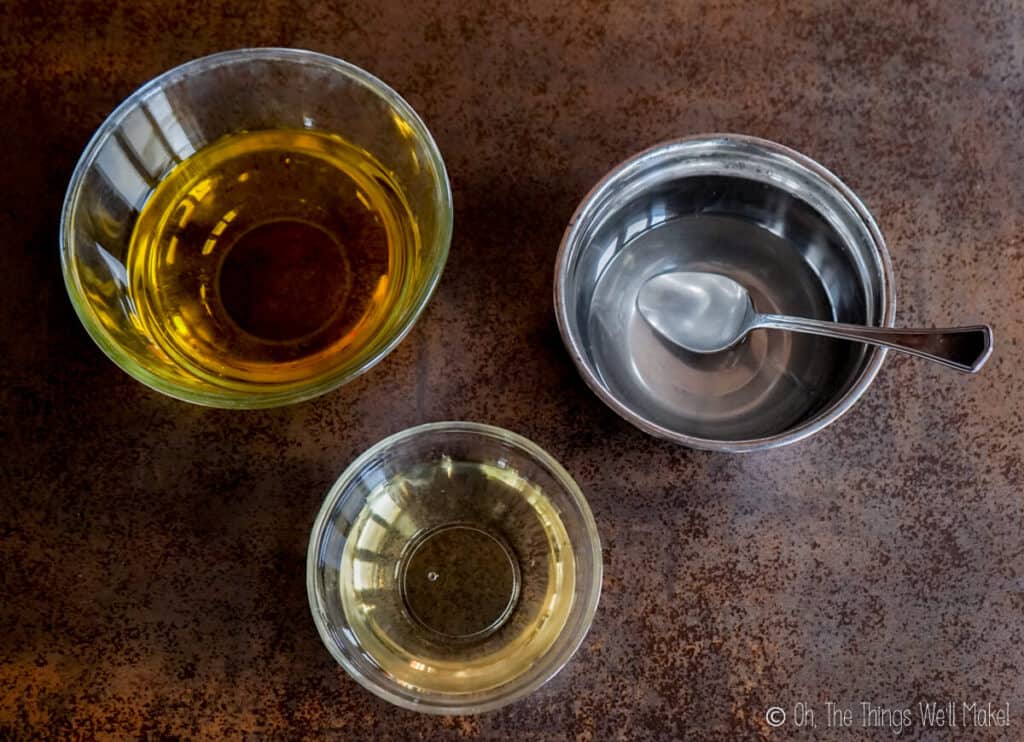
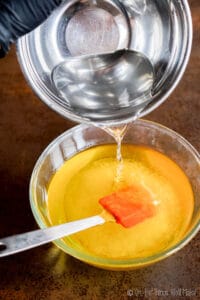
The oils and lye solution
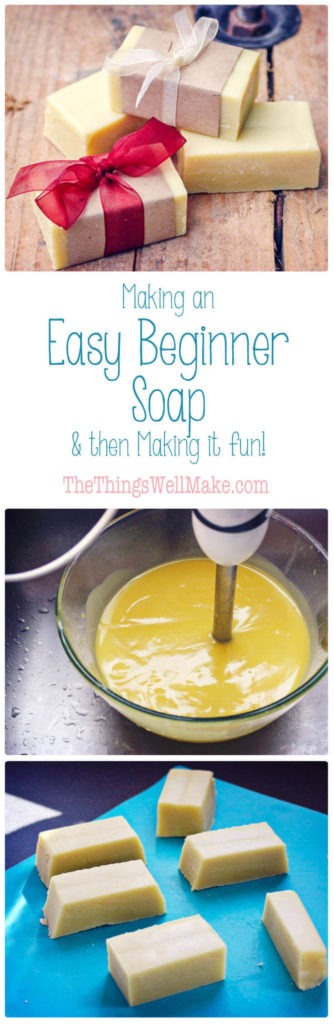
Blending everything to “trace”
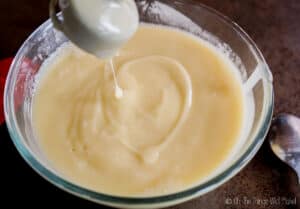
After combining the oils, pour the lye solution into the oil mixture. Then, blend them with an immersion blender until they become emulsified. It will first look like a thin, creamy sauce. It will then get thicker, more like a thin mayonnaise.

Mix the oils together 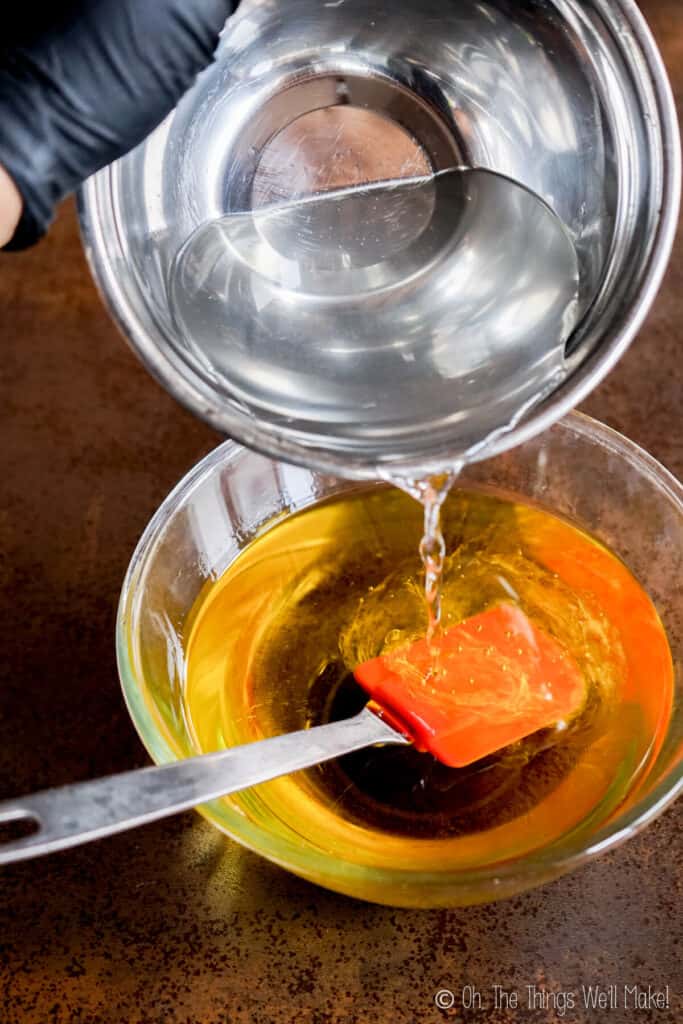
Pour the lye solution into the oils 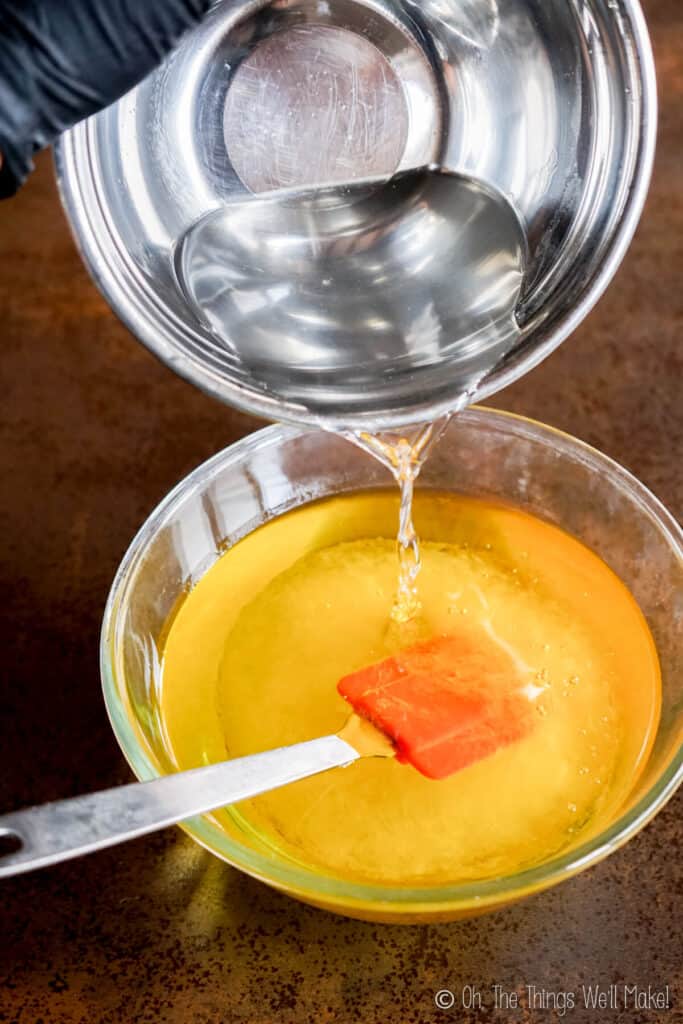

The point when the ingredients have emulsified enough to no longer separate is called “trace” in soapmaking. Once you’ve reached that point, the chemical reaction will continue to completion of the soap even if you stop mixing.
It’s called trace because you can usually leave a mark on the surface when you drizzle a small amount of the mixture over the surface.

Adding other ingredients
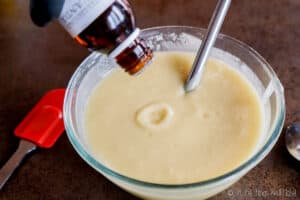
Once you’ve reached trace, you can add scents, colorings, exfoliants, and other ingredients to personalize your soap. After you’ve blended everything together, you can pour the mixture into a soap mold.

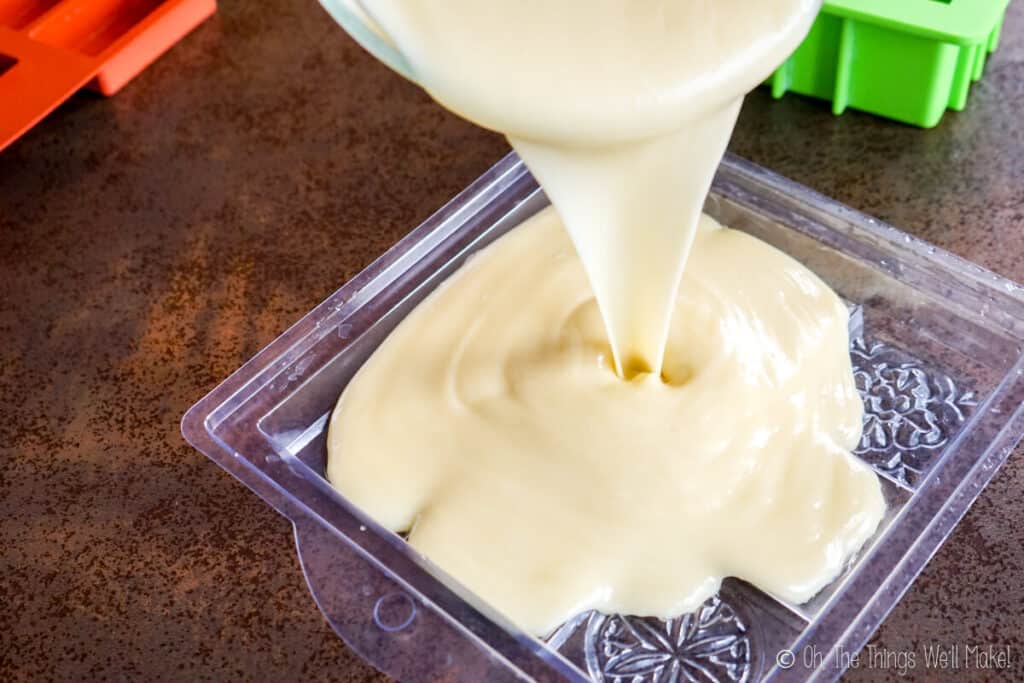
Soap molds
While you can buy special soap molds, you can also use other materials that you likely already have at home. My favorite molds for making soap are silicone molds. Silicone loaf pans are great for making a block of soap that can later be cut into bars.


Plastic food storage containers also work well. You can also repurpose certain types of food packaging like milk cartons.
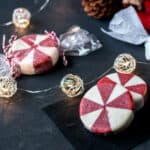
For round soaps, you can even use PVC tubing. I show how to do it in my post about how to make a peppermint candy soap.
Peppermint Soap
Avoid using metal molds as the metal may react with any lye that may remain in the soap during the first hours/days. If you really want to use a metal mold, make sure to line it.
Wooden molds will also need to be lined with parchment or wax paper or with plastic wrap. Some wooden molds are sold with a silicone lining for easy use and cleanup.
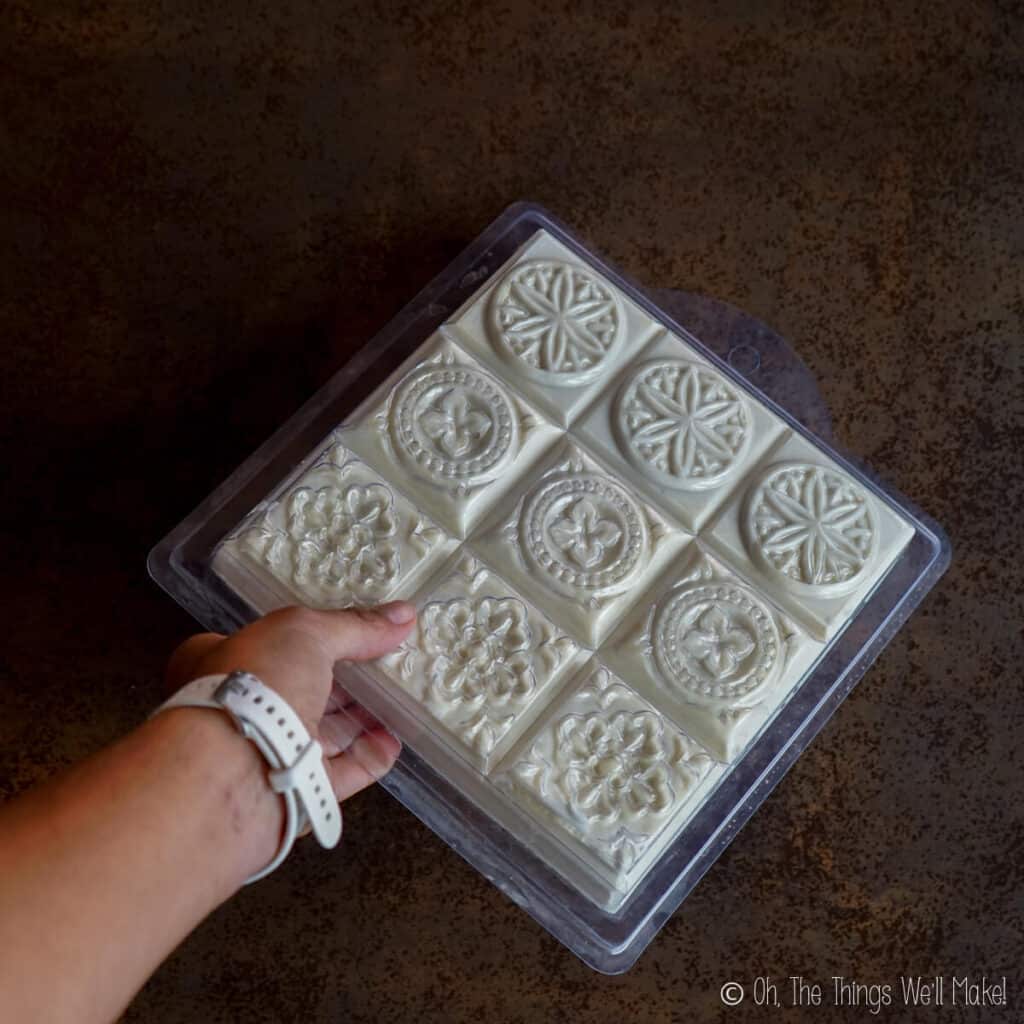
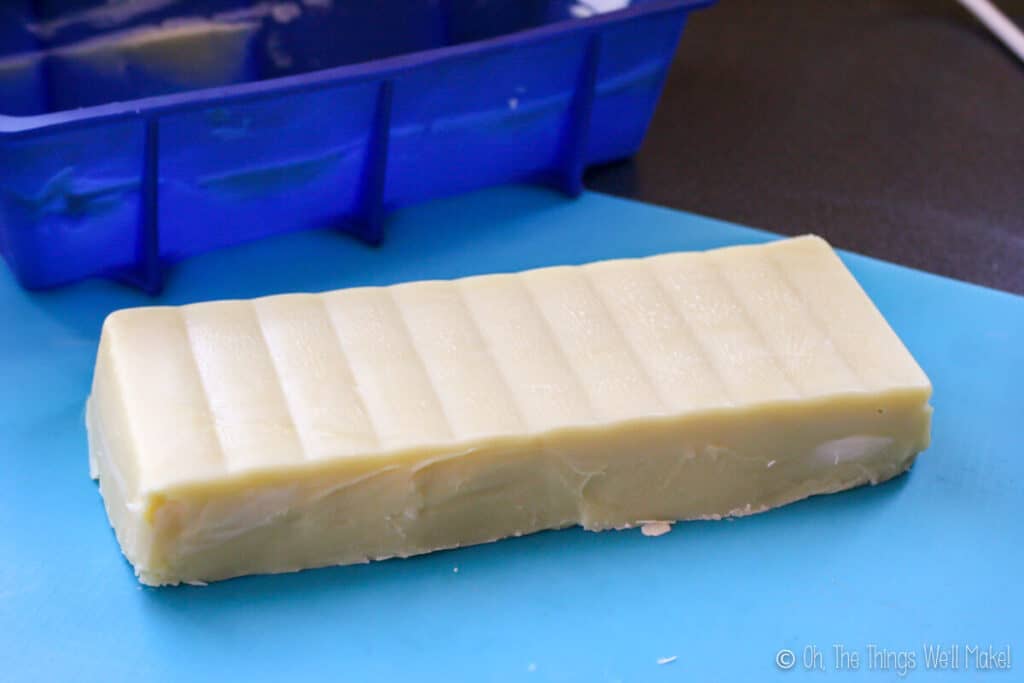
Allow to set
Once the soap mixture has been poured into the mold, place it in an area where it will be left untouched overnight.
This soap has a lot of olive oil in it, so it takes a bit longer to harden than a soap with 100% coconut oil would. I suggest waiting until at least the next day to try to unmold the soap.
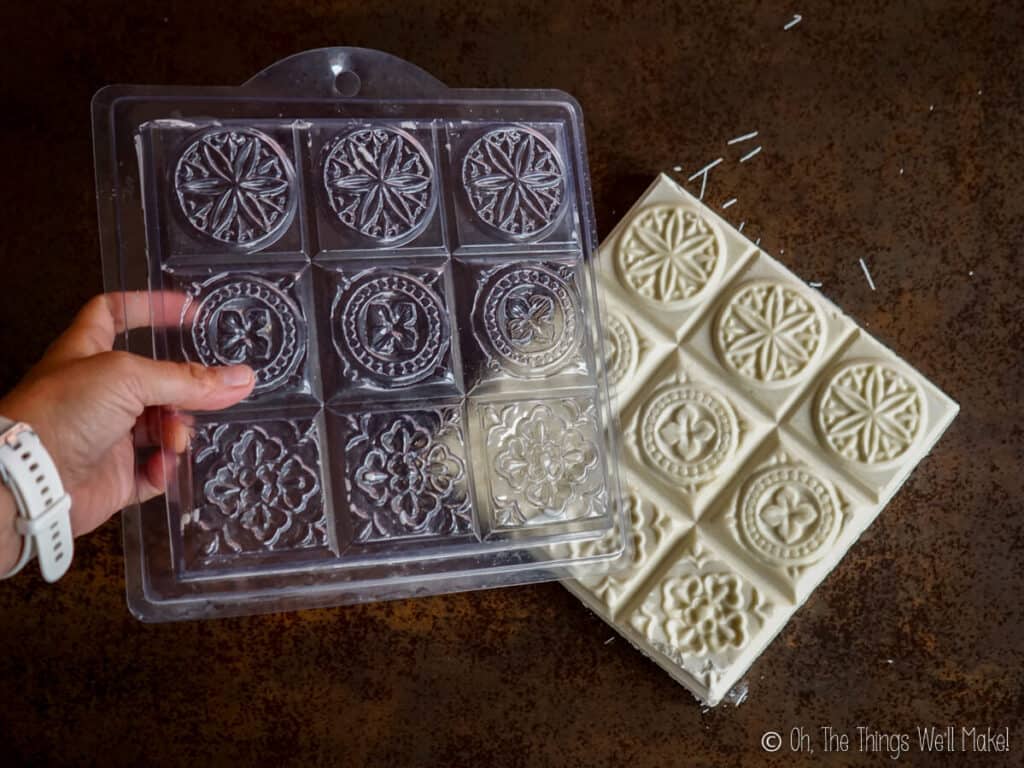
When ready to unmold it, press on it and check for firmness. Pull apart the sides of the mold from the soap (is using a flexible mold). If using a rigid mold, consider freezing the soap in the mold to make the removal easier. Freezing will slightly shrink the soap as well as harden in slightly.
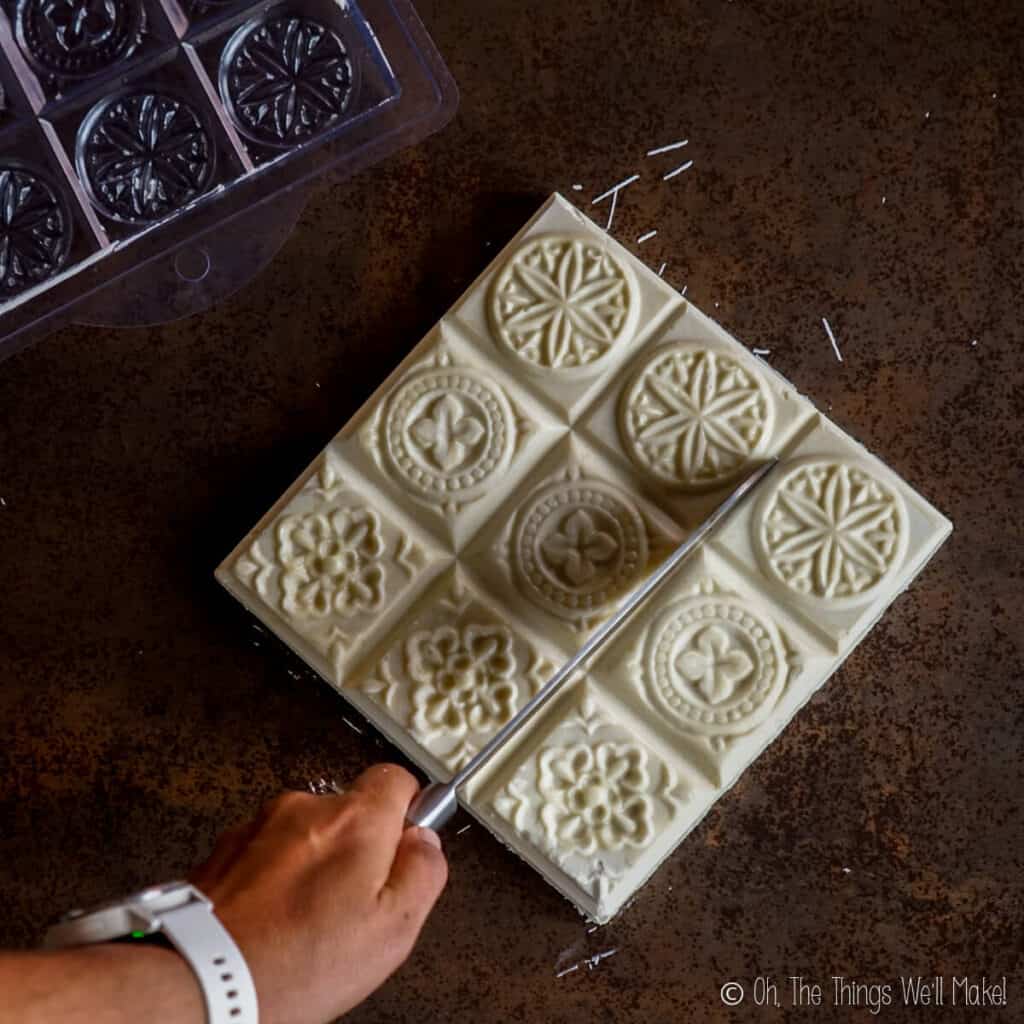
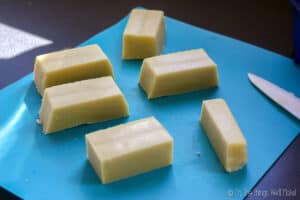
Cut into bars
If you used a loaf pan or other large mold, now is the time to cut the soap into bars, as needed.
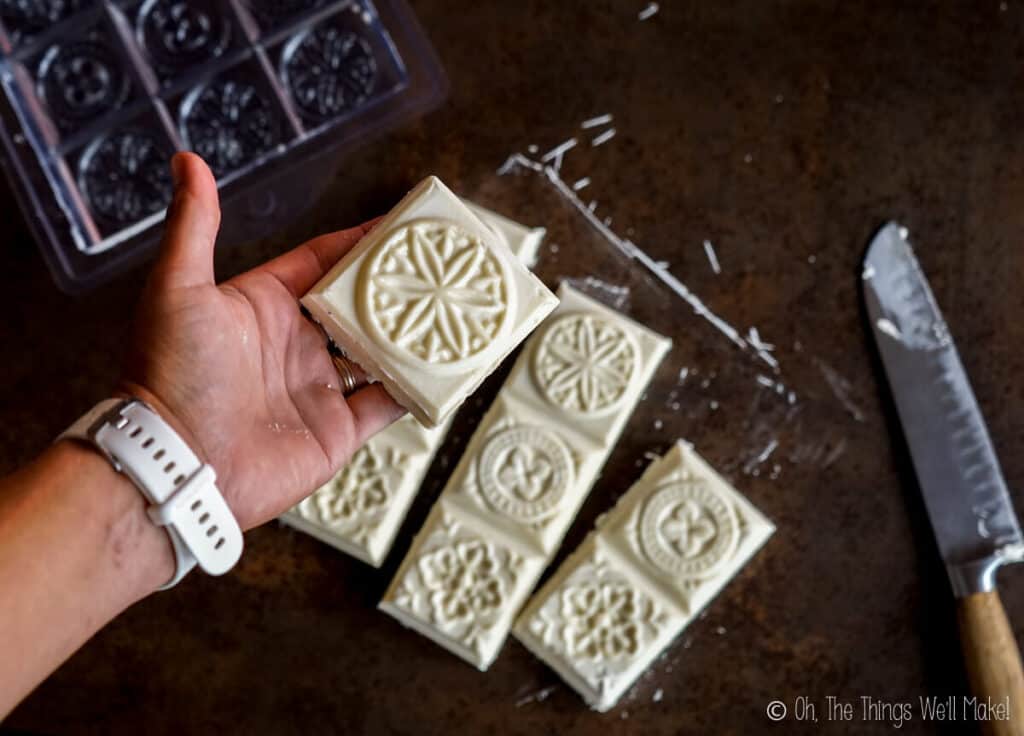
Once the soap has been cut into bars, set them aside for several weeks to dry and “cure”. (For more information about curing soap, check out my post about Why, When, and How to Cure Soap!)
While you probably won’t want to invest in soap making supplies on your first try, there are inexpensive sets available for those who enjoy making soap.
For a small investment, you can get a soap making set that includes a silicone-lined wooden soap mold, and a wooden cutting set for easy, straight cutting!
Soap making safety warnings
Keep in mind when making soap that you have to be very careful with the lye. I don’t think the book I had read when making soap for the first time was quite as emphatic about that as most places I have read since. I don’t remember mixing the lye into the water outside or wearing protective gloves or glasses. Luckily, nothing bad happened.
I don’t want to scare you, but I do want you to be careful. Lye is a strong base that is very caustic and can cause chemical burns just like any strong acid would. Keeping that in mind, protect yourself when making soap!
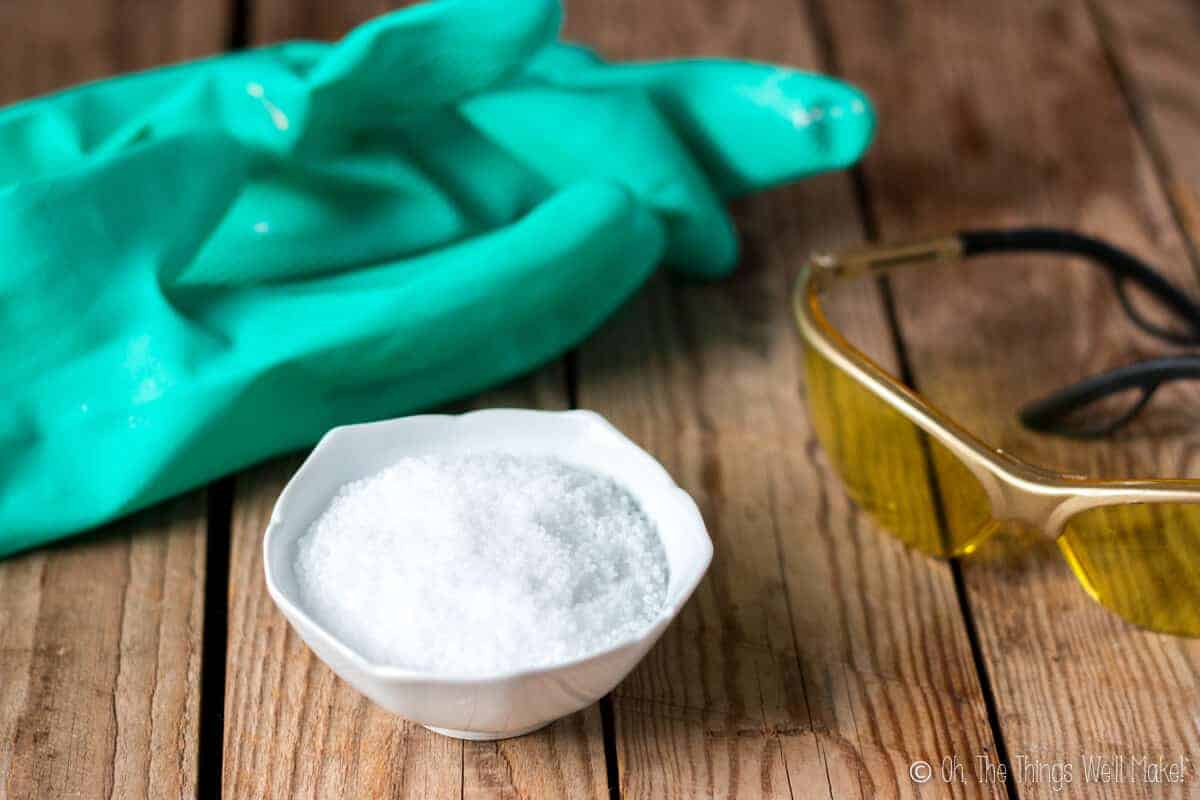
Safety tips
- Wear glasses and gloves throughout the process!
- Mix the lye solution and soap outside or in a well-ventilated area.
- When mixing the lye solution, pour the lye into the water and not the water into the container with the lye. (It sounds like it shouldn’t make a difference, but it pouring the water into the lye can result in a somewhat explosive reaction.)
- I suggest mixing the lye solution in a stainless steel bowl (or plastic). I used to mix the lye solution in heavy glass bowls. While I never had a problem, I have heard accounts of people who have had them crack from the heat given off by the chemical reaction.
- If you should happen to get some lye on your skin, rinse it off with plenty of clean, cool water- not vinegar!
- You can later neutralize leftover lye wherever you have spilled it with a bit of vinegar if you feel it is necessary but always rinse everything well with water first.
I had read in the past that lye on the skin should be quickly neutralized with vinegar. The idea was that it would neutralize the lye as quickly as possible. You should, however, NOT do that! After further investigation, I learned that you could inadvertently be setting off a chemical reaction that gives off enough heat to burn you further. (Makes sense, right?)
Should you use separate equipment for making your soap? Is lye toxic? Read more about lye in my post about using lye in soapmaking.
Is temperature important?
I have been told many times that it is very important to have the oils and the lye solution at certain temperatures in order to successfully make soap. That said, I haven’t found that to be the case.
I’ve experimented over the years with using everything from a cold lye solution with cold, solid coconut oil (Yes, the tricky part was combining it well, but I was stubborn in wanting to prove my point. 😉 ) to using very warm ingredients.
What did I find?
Effects of temperature
The process moves much more quickly with warm ingredients. It also is quite helpful to use the lye solution while still warm. (When you mix the lye with the water, a chemical reaction occurs that gives off heat.) The residual heat from the chemical reaction is enough to warm the oils and move things along.
What I would suggest, though, is that you at least melt the coconut oil before using it if it’s solid when you are going to make soap. (Coconut oil is normally liquid at temperatures above 76ºF/24.4ºC, but solidifies when it’s colder than that.)
While I didn’t have a problem making soap with the cold lye solution and solid coconut oil, the process was confusing. Using solid oils means that your mixture is already thicker than usual when you begin. That makes it much harder to know when you have reached “trace,” the point where you’ve really made your soap. (Once you reach trace, the reaction will continue on its own, even if you stop mixing.)
The risk is that you may reach a “false trace” and stop mixing your soap before it’s actually ready.
Once I reached trace, I decided I couldn’t resist trying out adding things to my soap…
Customizing the basic soap recipe to make it fun!
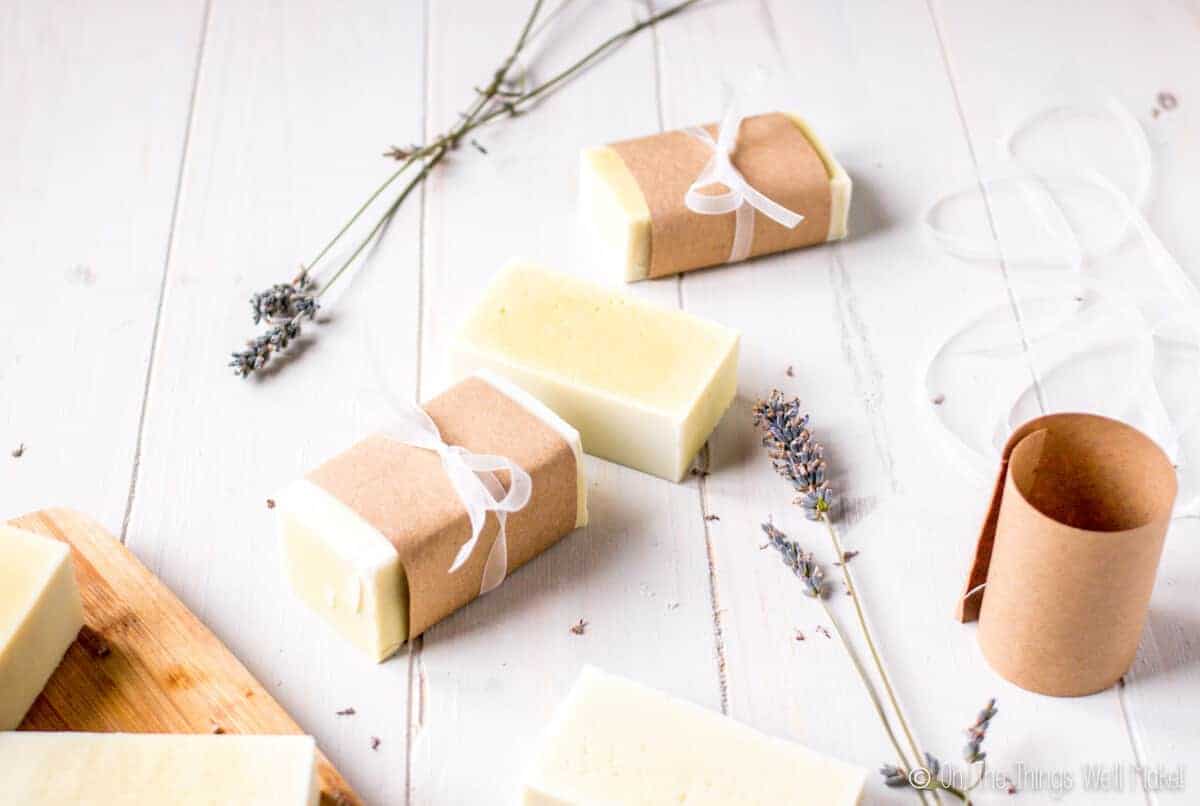
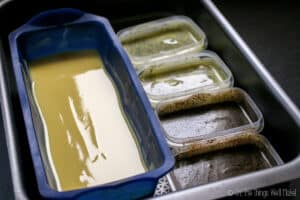
I made the majority of the soap in a silicone bread pan using lavender essential oil. Before adding in the essential oil, though, I set some of the soap mixture aside. I divided the unscented soap mixture and added coffee grounds to one part and tangerine essential oil and poppy seeds to the rest.
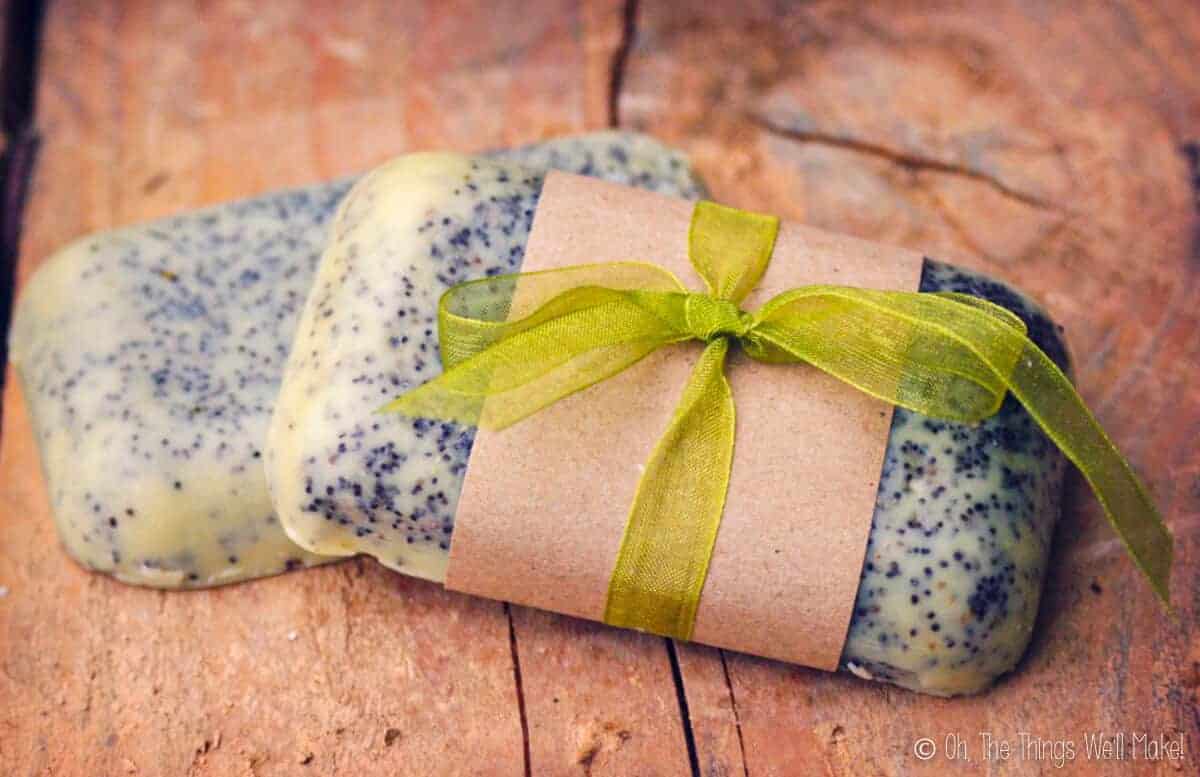
Exfoliants
The coffee grounds and poppy seeds can help with exfoliation when using the soap. Exfoliants are great for garden soaps or soaps meant for cleaning greasy hands. They can also help remove dead layers of the skin.
Other possible exfoliants to use are colloidal oatmeal, sugar, and salt. You can also find exfoliating powders and beads like jojoba beads or bamboo powder. Add any exfoliants when the soap is thick enough to be able to suspend them within the soap. (You don’t want them falling to the bottom.)
If you want to make a true coffee soap, you could try substituting coffee for part of the water in the recipe. Who knows, maybe the caffeine in coffee can help with circulation and combatting cellulite. A lot of cellulite creams do add caffeine! Coffee is also known to help remove odors, so it might be a good soap for cleaning up in the kitchen too.
As for the tangerine poppy seed soap, it just sounded like a fun combination to me. I love citrus scents and use them a lot in my homemade products.
Now that I have gotten over the hurdle that has kept me from making soap again all of these years, I foresee myself experimenting with it quite a bit.
Lye calculators no longer intimidate me either. If you are ready to start adapting recipes or formulating your own, check out my post about how and why to use a lye calculator!
What is the curing time?
Once you have finished making your soap and cutting it into bars, I told you to leave it alone for several weeks.
The resting period in soap making is referred to as the “curing period.”
Reacting all of the lye
Many people think that the curing time is important because it allows the saponification (aka. Soap making process) to complete. They think it is “unsafe” to use your soap before the curing time passes.
Well, while it’s true that the saponification process is normally finishing up in the first few days after making your soap, it is pretty much finished in a few days time. After the first few days, the soap is “safe” to use.
In a recipe like this one, with an excess of oils, you shouldn’t have to worry about any residual lye being harsh on the skin.
Some people mistakenly choose to make “hot-process soap” vs. this “cold-process soap” thinking that they can immediately use their soap rather than needing to wait out of lye safety concerns.
Why is the curing time important?
If the soap is safe after a few days, why should you let it cure for several weeks?
During the curing time, the quality of the soap improves.
Bar soaps have a crystalline structure that keeps them hard and gives them their shape. (Liquid soaps don’t have this same crystalline structure, which is why you don’t need to cure them before using them.) Over time, that structure is changing and improving.
The moisture in the soap is evaporating, too, so the soap is getting harder. A hard bar of soap will last much longer!
Basically, over the weeks of curing, the soap should have better lather and improve in quality. It will also be harder and last longer. It’s not that you can’t use your soap before then. It’s just better to wait.
Some soaps, like a pure Castile soap, are often given much longer curing periods before use! Because they have much less lather and feel “slimier” than soaps made with only coconut oil, long curing times can help overcome those shortcomings. Some people refuse to use pure Castile soap without having cured it for a full year!
More soap recipes:
Since I originally wrote this post, I’ve shared more soap recipes.
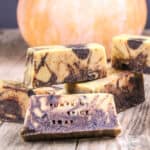
The first two soap recipes I shared after this one, my Pumpkin Spice Soap and Gingerbread Soap were both soaps based on this very recipe. I wanted to show you how to work with other ingredients without complicating things too much.
The pumpkin spice soap tutorial shows you how to work with added sugars like goat milk and fresh pumpkin puree.
Easy Pumpkin Spice Soap
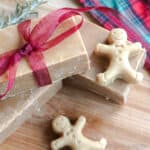
The gingerbread soap is just a fun recipe for Christmas time.
Easy Gingerbread Soap
Afraid to make my activated charcoal face soap? Consider adding around a tablespoon of activated charcoal to this recipe at trace for an easy version. 😉
I also have a whole soap making section up on the blog with all sorts of soaps like glycerin soap, liquid soaps, and shave soap.
My favorites are the liquid soaps, specifically the liquid coconut oil soap, and the glycerine bar soaps. (I also have a vegan glycerin soap recipe available.)
Those recipes may look a bit more complicated because you need to add heat to the ingredients to make them (or hot process them. Hopefully, though, once you’ve successfully made your first bar of soap, you’ll have developed the confidence to give one of those other recipes a try!
Video

Easy Basic Beginner Soap
Equipment
- Soap mold
- Soap cutter
Materials
The Oils
- 500 g olive oil (Can use regular or extra virgin)
- 100 g coconut oil (Regular coconut oil that melts around 76ºF)
For the lye solution
- 195 g water (Ideally fiiltered or distilled)
- 80 g lye NaOH (Sodium hydroxide)
Optional ingredients
- 10 g lavender essential oil (Optional, for fragrance)
- exfoliants (Colloidal oatmeal, coffee grinds, poppy seeds, etc.)
- colorants (iron oxides, micas, soap colorants)
Instructions
Mix the lye solution
- Mix the lye into the water (Not the other way around!) in a recipient that can handle heat. (See safety tips below!) The mixture will heat up and become cloudy.
- Once the lye has dissolved, leave the mix to cool in an area where no kids or pets have access to it while you go measure out your oils! It will clear up as it cools down.
Mix the oils
- Meanwhile, weigh out the olive oil and coconut oil and mix them together in a large bowl. (Make sure it's large enough to add the other ingredients and safely mix them together.)If the coconut oil is in a solid state (in cooler room temperatures), melt the coconut oil. Otherwise, there is no need to heat your oils.
Combine the oils and lye solution
- After the lye mixture has cooled enough to easily handle the container, pour the warm lye solution into the oil mixture. Mix them together gently at first.Note: You do not need to wait very long. The residual heat of the lye solution reaction can help speed the process along. I normally just have it cooling while I measure out the oils and then immediately proceed to mix everything together.
- Once the lye solution has been incorporated into the oils, you can start to blend them with an immersion blender. Be careful not to spray the mixture all over! You can do this step by hand, but it supposedly will take a very long time. (I'm not patient enough to have ever tried myself.)

- When the mixture starts to thicken and look like a thin mayonnaise (after a few minutes), you are at the stage that is called "trace." That is what you want!
Customize the soap
- Now is the time to customize your soap and make it fun! You can add fragrances, colorants, exfoliants, etc. I use essential oils to naturally add a fragrance, but the scent doesn't last as long as synthetic fragrances.
- Pour into soap molds. Silicone loaf pans work great as a soap mold. I also have successfully used plastic kitchen containers. Some people even recycle tetra briks and other food packaging. (Avoid using metals as they may react with the lye in the soap.)
- Set aside for at least 24 hours. It will probably get warm. If it will be in a cold environment, consider covering the soap with a towel.
Unmold the soap
- After 24 hours, uncover and gently press on it to determine if you can easily unmold it. If it is too soft, wait a few more hours/days and unmold. If you are having a hard time unmolding the soap, you can freeze it for a short time to help shrink it a little and slightly harden. If you have used a loaf pan, don't wait too long to unmold the soap or it will be too hard to easily cut it into bars.
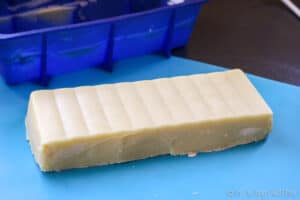
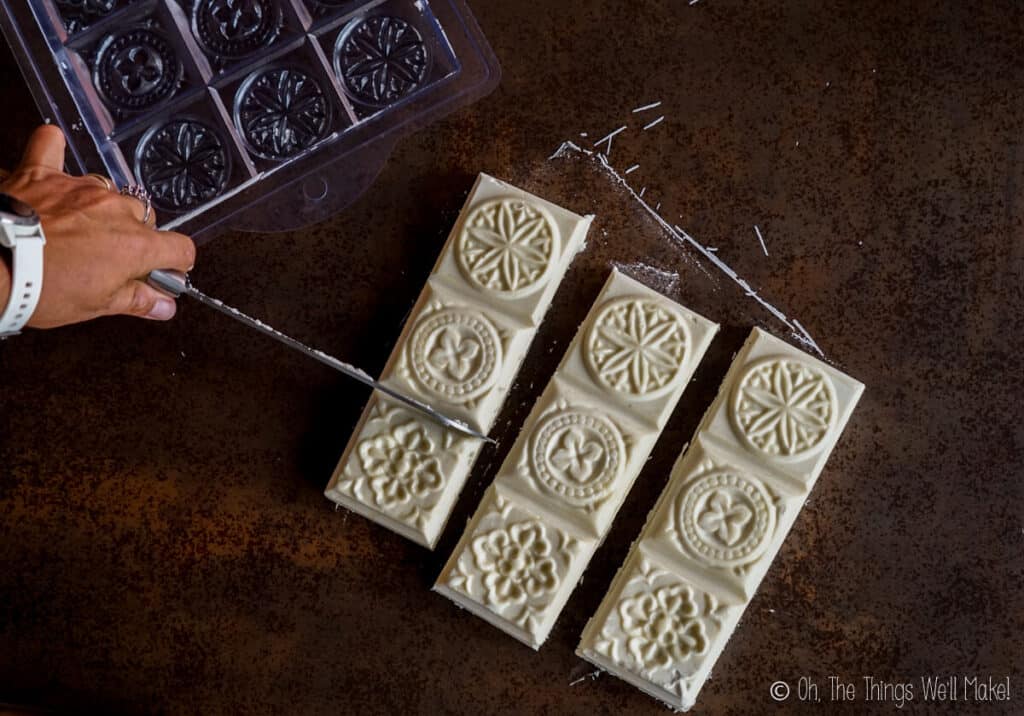
- If you've used a loaf pan, cut the soap into bars. I like the look of big, chunky square-ish bars. The nice thing about making your own, is that you can decide how you want to cut them.

Cure the soap
- Let the soap cure/set for around a month. Separate the soaps so that each one has air circulating around it. At first, turn the soap every couple of days. This helps the soap dry out and harden evenly.
- Enjoy your soap!!
Notes
Safety instructions:
- Wear gloves and safety glasses when working with the lye.
- It’s best to mix the lye solution outside or in a well-ventilated area. Try not to breathe in the fumes released.
- Mix the lye solution in a recipient that can handle heat, preferably stainless steel or plastic. (Glass may break with the heat from the chemical reaction. Other metals may react with the lye.)
Oil information:
- You can use regular olive oil or extra virgin olive oil. If using pomace, you may need to adjust the recipe using a lye calculator.
- While you can use refined coconut oil or virgin coconut oil, don’t use special coconut oils with higher melting points like fractionated coconut oil. (To use them, you’d also need to adjust the recipe with a lye calculator.)
Water Information
- It’s best to use distilled water, or at least filtered water, to avoid issues with any impurities in the water reacting with the lye.
- You can experiment with using other liquids, but some, especially those with sugars in them like milk, may cause a more violent reaction. For learning how to work with milk, check out my pumpkin spice soap recipe or my goat milk with honey.
Lye information
- For bar soaps, use NaOH, or sodium hydroxide. It can often be found in the cleaning section of supermarkets with the drain cleaners. Most suitable lyes will mention that they can be used for soap making on the container.
Customizing the recipe
- Once you’ve reached trace, you can add other ingredients to customize your soap. Add the ingredients and mix them into the soap well before pouring the mixture into your molds.
- Fragrance: Add essential oils or fragrance oils. (When using fragrance oils, choose those meant for soaps and cosmetics.)
- Colorants: You can use soap colorants, iron oxides, and/or micas. You can also experiment with using clays and/or spices to add natural color.
- Exfoliants: Add sugar, salt, coffee grounds, poppy seeds and/or other exfoliants to your soap, as desired.
Soap molds
- You can use special soap molds or use plastic or silicone containers that you already have at home.
- Plastic food storage containers
- Silicone loaf pans, muffin tins, or candy molds
- Recycle some food packaging like milk cartons.
- Avoid using metal molds as the metal may react with any remaining lye in the solution.
- If using metal or wooden molds, line them first with plastic wrap and/or parchment or wax paper.
Curing period
- All bar soaps benefit from a curing time of around a month. During the curing time, the crystalline structure of the soap continues to form. As it dries, the soap hardens which allows it to last longer. It also generally improves other properties like its ability to lather.
More lather/Cleansing – Alternate soap recipe
For those who want a soap that provides more lather and cleansing, consider adding more coconut oil and less olive oil.Keep in mind that the working time will be slightly shorter and the soap will set a bit more quickly.
Try using:
- 450g olive oil
- 150g coconut oil
- 81g lye
- 195g water
This post was originally published on October 5, 2013.
It was rewritten in November 2020 to add new information, more links to other posts, and new photos.


Hi, Tina and Keri!
Thanks for your comments!
I found them quite interesting because I learned how to make soap from Spanish TV shows, followed by looking at Spanish websites. The methods for many things here are a bit more lax than in the US. Most Americans would cringe if they saw how canning is commonly performed here, and I’m guessing that soap making is similar.
To be honest, I didn’t until now even realize that people looked at the temperature of their ingredients when making soap. Here, most people just let the remaining heat of the lightly cooled lye solution slightly heat the oils, which is what I have always done without any problems. After a bit of research, I see that there is a “Room temperature method” that is talked about online, and that seems to be a very similar idea to what I do and what I see done here.
I have made numerous batches of soap over the years, and have never had any problems with that method. Interestingly enough, even when I have cooled the lye solution down, like when making lye solutions with milk, it hasn’t caused me any issues with achieving trace.
You have made me want to read more about the subject, though, and do some experimentation with temperatures myself. I’ll try to do it soon and update the post with my findings as soon as I can.
I really do appreciate your feedback!
the reason it didnt trace is because the lye and oil need to be the same temperature when added together, roughly between 50-90°…using jam thermometers should help!
I don’t see any mention at all of melting the oils to a temperature compatible with the lye temperature. Wondering if I missed that part here. But oils and lye have to be close in temp readings before you mix them together. Too hot and it won’t trace. Too cold and you get a gloppy mess.
Help….please help….
I followed this recipe to a “T” in terms of ingredients. I doubled the batch to make a larger mold and I used a regular hand mixer not a stick. I also mixed the lye outside. It was cold when I brought it in, not warm at all. 🙁 I mixed the lye in with the oils and instantly it turned a nice milky yet yellowish color. I kept mixing as it wasn’t thick like pudding. I mixed for the better part of 30 mins and it didn’t change so I thought maybe I’d already reached trace. I put in my EO’s and poured it into my mold. 36 hours and it was still liquid…grainy at best. I didn’t want to throw it out so I had read about crockpot cooking it…..so I put it all in a crockpot. It’s the nice milky color again and has foam on top but won’t harden at all……
Have I ruined this batch??? Ugh!!! I’m so mad at myself and I’m not sure what I did wrong 🙁
Please help…..
Hi Felicia,
I’m sorry this isn’t working for you. Sometimes when it is cold, it takes a much longer time to reach trace.
That said, I’ve had mine reach a light trace before, and, impatient, have put it in the molds a bit too soon, but even then, it usually has become a soft solid by a day later and is ready to cut 2-3 days after having poured it.
I wish I knew what the problem might be to better help you.
Are you sure the measurements were right? I’m wondering if there were issues with the lye somehow or something?!?
I have to be honest and say that I really don’t know because I haven’t had that problem yet, especially not with this recipe. (Sometimes when I start mixing in crazy, new ingredients, it doesn’t solidify as quickly.)
I really wish I had better answers for you.
It seems to me that for some reason the reaction didn’t take place, and that makes me wonder about the lye- either the quality/age/type of it, the measurement of it or something. I really wish there were more that I could say to help you out.
I would like to add that when doubling everything, it will take longer to get things to go to trace.
Did you try blending it again after heating it in the crock pot? Heating it should help it reach trace more quickly if everything else is OK.
I’m also wondering what type of blender you used? I’m not sure I’m understanding the difference between a hand blender and a stick blender because I’m not really up on the terminology for these things after living in Spain for so many years. 😉
I do know that they say that it can take the upwards of an hour for soap to reach trace when being blended by hand. So, perhaps, if your blender isn’t very high speed, and you have a lot of ingredients to mix, and you’re ingredients were cold, perhaps all is OK still, and you just didn’t blend it long enough to reach trace?
I wish I could say it with more certainty, but it is a possibility. A lot of things can factor in with how long it takes you to get to trace, and sometimes it takes me a lot longer than others. Temperature is a huge factor.
I really do wish you the best of luck, and hope you can save your batch!!
You can’t just double a soap recipe. Run the amounts through a soap calculator. Lye is the one ingredient that may have a major impact. Think of soap as a formula instead of a recipe. There’s a chemical reaction going on. A hand mixer like one you use for mixing a cake is not what is needed here. You need a handheld immersion blender for the job. Btw, Tools used to make soap should be set aside and only used for soapmaking. Don’t mix the two ever. There are lots of videos on YouTube about soapmaking. Look for “Homemade Soap at Marsha’s” on YouTube, by Misty Prepper. Sorry I can’t give you a direct link, I’m on my Kindle.
im really interested in making your recipe. I was wondering if you have tried substituting the olive oil with other oils like almond or jojoba? if so, good or bad results?
Hi Deanna,
Yes, I’m constantly playing around with different mixes of oils. To be honest, I use olive oil a lot because it is so plentiful and cheap here in Spain, so I know I’m getting a good quality oil without spending a fortune. I also like using oils that I think will be relatively easy to find for most of my readers.
That said, there are also a lot of almonds here, and almond oil is also pretty inexpensive and easy to find here. In fact, I happen to have a couple of wild almond trees in my yard.
You can see that I did use some almond oil in my pumpkin spice soap. Different oils have different properties, so it’s a good idea to look up what other people say about them. Some are great for moisturizing, others for lather, others to get a harder bar of soap, etc.
If you are going to substitute oils, it’s a good idea to run it through a lye calculator, just in case. You may need a bit more or less oil of one type vs. another to go with the same amount of lye.
I’d love to hear how your experiments go if you try something new!
Hey!! loved your post. I’m looking to make soap in the shape of a honeycomb bee using a soap mold. Can I make your soap in bulk and then melt it at a later time then pour it into the mold? If so, do I have to keep turning the soaps back and forth for them to harden over time? Thanks!
I actually haven’t tried remelting the soap afterwards, but it is something I could try.
The flipping it just helps it to dry evenly more quickly, and isn’t completely necessary. Eventually the soap will completely harden on its own.
I have some extra bars, and am planning on working on some new soaps for Christmas anyway- so if I do try it, and it works, I’ll let you know.
I actually forgot to come back here after trying to remelt homemade soaps.
Here’s the deal: Yes, you can do it, and yes, it does work.
The problem? It’s a lot harder to work with than freshly made soap, and the resulting bars aren’t as smooth and uniform. If you don’t mind “rustic” looking soap, though, you can play with it.
Great thank you!
How do you measure the ingredients? They are all in grams or an odd number of oz. can you approximate the measurements?
I wouldn’t suggest approximating too much because if the ratio is off by much, the lye may not all react with the oils, and some may remain and can hurt your skin. I just noticed that my digital scale lets you switch from grams to ounces, so I guess I can really use either.
If you mean by approximating using 3.5 ounces when I wrote 3.53oz., then that probably wouldn’t be a big deal because the difference there is very minimal. The essential oils can also be approximated, of course.
Does your scale allow for measuring out one place after the decimal- 17.6 oz, 3.5 oz….?
I guess I wasn’t thinking a digital scale. Can you recommend one , and where I can purchase it?
Thanks
I live in Spain, so my options are a bit different. That said, I have a wall mounted type like this one: http://amzn.to/1bxobeD . It allows for grams and ounces. You pull down the glass table to weight things, and then fold it back up afterwards. I love it!
If you don’t use a scale often, or don’t have the wall space, though, just a simple scale like this would be nice: http://amzn.to/1kzwZ5K . (Inexpensive & pretty & allows for grams and ounces!!)
Hope that helps! 🙂
Why not just use the coconut oil to bathe. I mean lye is caustic no matter how long it sits it is still not better than straight coconut oil which is a natural antifungal and antibacterial. So throw some shredded coconut in a food processor and that’s it, coconut butter. Faster, easier and much better for the skin.
Veronia,
You are incorrect.
After the soap sopanifies, there is no lye left.
You MUST let your CP soap sit for a minimum of 4 weeks. During that time the soap continues to cure and the pH level will drop to 7.
Thanks for your comment.
In any case, even if people choose to not use soap on their bodies, I’m assuming that soap is used elsewhere around the house, like for washing dishes and clothes. (Although I guess there are other alternatives like soap nuts which are said to work quite well.)
I’m a bit on the crunchy side myself, but I still prefer to use soap in the shower. I think it’s a great alternative to shower gels. I also prefer soap to chemical detergents, when possible, around the house.
Hi Tracy!!
So for a long time I wanted to start a little hobby making home made soaps. I’ve finally made it to a point in my life where I can put time aside to do so! I was wondering with this be a particular area of expertise for you, would be so kind as to help me by maybe providing a list of everything needed as well as suggested for a soap maker apprentice ?
Ps: This blog is absolutely phenomenal! Every time a question pops up in my mind about how to do this and that or how to fix a possible problem I just read farther down and the answer is there?
Hi Timmy!
Thanks so much for your very kind comment! I try my best to add as much information as I can to each post, and I’m very happy to hear that it is helpful and appreciated. 🙂
So, you want to know what sort of materials you need to make a hobby of homemade soaps?
Honestly, when you first begin, you don’t really need much. As I showed here, you don’t even need special molds when you first begin. You can just use silicone molds and plastic containers that you already have at home.
I would just start out with the essentials: I think a hand held blender is essential. Some people make soaps without them, but I’ve heard it can take a very long time. There are inexpensive immersion blenders on the market, so I’d definitely invest in one. You obviously need some lye, and as you get more comfortable making soaps, you can buy a variety of oils and waxes, but as a beginner olive oil and coconut oil are perfect to start with.
You’ll need safety glasses and gloves, to be safe. A stainless steel pan is helpful to help melt any solid oils/waxes, and you’ll also need a couple of bowls for mixing. (I prefer glass, but if you use metal, make sure it’s stainless steel.) I also use stainless steel spoons and forks for mixing, and silicone spatulas for clearing out the bowls.
For molds, you can use what I mentioned above, or you can even reuse materials you have on hand. I’ve read of people using Pringles containers, milk cartons, lined cardboard boxes, etc.
As time goes by, you may want to look into being an inexpensive slow cooker for making liquid soaps (in which case you’ll also need KOH instead of regular lye), glycerin soaps (I’ll try to post one here soon), or if you’d like to rematch problematic soap or try the hot process method.
Other than that, off the top of my head, I can’t think of a lot more. You can consider buying some essential oils or fragrance oils, and can also look into colorants if you like. I’m hoping to write up a post soon about naturally coloring soaps, but there is a huge variety of colorants, natural and synthetic, available, depending upon your final goals.
Once you make your first batch, you’ll have a better idea of what you want to do next, and what you’ll need. So I recommend starting out simple, and getting right into your first batch, if you haven’t yet. 😉
I hope that helps!
If you have more specific questions about any of the materials, just let me know.
I would like to start this soap manufacturing business can you guide me
Hello,
I focus on making soap for friends and family, so I really don’t know much about soap manufacturing as a business. That sort of question also really depends on the laws of wherever you live. Sorry I can’t be of more help.
Well I m here Pakistan,here not any legal ristrction for home made manufacturing business so if you add me I’ll able to ask any queries during making time
I’m happy to answer any questions that you have about making the soap while you are making it. Just ask them here, and I’ll get back to you as soon as I see them. I don’t have a lot of knowledge on the business of soap making/selling/marketing, etc., though.
Love this post!! I’m so wanting to make my own, but totally intimidated!
I was too, but it is so easy and so worthwhile!! Do it and let me know when you do!!
Made my first batch today, the instructions were great. Lets hope in 24 hours I have soap.
Thanks for your comment, Sharon!
I hope you love your soap!!
I am a little confused on heating the lye and water outside on a flame. Will the glass not break?
Hi Debra,
You don’t heat the lye and water with a flame at any point in the recipe.
You mix the lye and the water outside or in a well ventilated area.
It does heat up on its own a bit because of the chemical reaction, but you don’t want to heat it, and I definitely wouldn’t put a flame to it!
You have to let the soap sit for 4 weeks before use! This is so the PH levels neutralize and will not cause a chemical burn. Very important.
After a couple of days, the saponification process will have completed and there isn’t really a risk of burns.
That said, the soap will continue to improve and harden over the course of the next weeks. That’s why all soaps should go through a curing process. Not only will the water evaporate, leaving a harder, longer lasting bar, but other chemical reactions will continue to take place that make the soap milder and better overall.
to be safe on skin it needs to be tested for PH. somewhere around 7-10 is good…. just a FYI .
ok officially the most helpful site so far,thank you
Thanks, Jeremiha!
I’m glad it’s helped you. 🙂
hi, i wonder why the soap i made was brittle. When I cut them into pieces it turns into pieces. won’t work. Please give me some tips..
Hi Myrna,
I’m sorry to hear you had problems with the soap.
Perhaps you waited too long to try to cut them? As the soap hardens it will get less soft and more brittle.
Another reason soap can be brittle is if it has too much lye. Soap recipes are done by weight because the ratio of oil to lye needs to be fairly exact. Measuring by volume can easily throw a recipe off. Is there any way that you could have used slightly too much lye?
Assuming that you measured everything correctly, there are things you can do to try to save the batch. Either way, there are ways you can use a brittle soap that isn’t pretty enough to gift…
1. You can melt the soap down and remold it and try to cut it again. While it usually works, you’ll end up with a more “rustic” appearance to your soap because it doesn’t end up as smooth as when you first make it. (I have been meaning to make a post about it- perhaps this is the push I needed to work on it. 🙂 )
The only problem with this is if you accidentally used too much lye, then it probably wouldn’t be fixed by re-batching unless you were to add in more oil during the process. Without knowing what your issue is, it’s hard to know exactly what you’d need to do to fix it (how much oil to add in, etc.).
2. You could always grate it down and use it in homemade laundry detergents or dissolve in water for a sort of liquid soap.
I hope that helps a little.
Hello, I tried this recipe and love it! Everything about it, except I’m am sensitive to it in my private area but have used coconut oil and olive oil before to moisture.
What could it possibly be. I have tried many natural soaps before and never had a problem.
Hi Terri,
Well, I’m not really sure.
How long after making the soap did you use it?
Soap in general has a high pH and can be drying. That said, this soap uses mild oils and has more oils than what are needed to use up all of the lye during the saponification process. So, it should be quite mild.
When it comes to private areas, there is a lot of discussion about whether or not soaps should be used, and I’ve seen doctors say to only clean those area with warm water. That said, I also normally use some soap (normally my liquid castile soap). I just use a very small amount and try to stay external. 😉
The only reason I can think of for it being more irritating than another soap would be that either the soap was used right away and the saponification process hadn’t fully completed, or somehow something went wrong with the measurements (which can actually happen if one of the ingredients is off- it’s not necessarily your fault! I actually am trying to figure out how I’m going to use a batch of this soap that I made with a different “light” olive oil as an experiment. The soap never fully hardened, and it’s very soft. The change in oil used definitely completely changed the way the recipe turned out. Not all oils are equal either!)
I’m not sure what else it could be. I haven’t had a problem with this soap being at all harsh. It’s actually milder than the liquid soap, I think.