

How, Why, and When to Cure Soap?
It’s often said that soaps should be left to cure for several weeks before using them. Why is it important, though, and how should it be done?
Over the years, I’ve gotten a lot of questions about curing soap. I’ve also seen a lot of misinformation about why it is done. I figured it was time to write a post dedicated to the subject to help you understand the concept better.
This will hopefully clear things up enough that you will know if you need to cure your soap, how to do it, and why.
Why cure soap?
There are several reasons that you should cure homemade bar soaps before using them.
Finishing the saponification process
Most people think that the main reason to cure a soap is to make it “safe” to use. Basically, they are waiting for the saponification process to complete so that no lye remains.
Saponification is the chemical reaction between the lye and the oils converting into soap.
Saponification Process (Bar soap)
Oil + NaOH => Glycerol + Soap
When finished, the resulting soap should have no remaining lye.
Lye is a highly caustic substance with a very high pH. Just like an acid would, highly alkaline products like lye can burn your skin. It makes sense, then, that you wouldn’t want residual lye in your finished soap.
When you blend together the oils and lye and reach trace, the saponification process has begun. By the time you’ve poured your homemade soap into the mold, a lot of (most of) that process has already finished. By the time the soap is hard enough to remove from the mold, it may already be complete. If not, it’s likely very near completion.
Depending on the soap, in most cases, the soap will be “safe” to use almost immediately. The saponification process should be finished within the first 2-3 days.
If it hasn’t finished, what can happen if you use the soap?
For the first few days, in some cases, the saponification process may have not completed. It is possible that there is a tiny bit of unreacted lye left in the soap. If you use the soap in that state, it is possible that you feel a bit of a sting or burn, especially if you have open cuts. This shouldn’t occur with a fully saponified soap (as long as you’re using a decent recipe and have made it correctly).
Allow the soap to dry and harden
One of the main reasons to cure homemade bar soaps is that when they are first made, they tend to be on the softer side. A soft soap will dissolve away more quickly as it’s used, meaning that your uncured soap won’t last as long as one that has been allowed to dry and harden.
During the drying period, some of the residual moisture in the bar will evaporate away. Other changes in the crystalline structure of the soap will also change how hard it is and how quickly it’s used.
Restructuring of the crystalline structure
Soap, when in bar form, is made up of a crystalline structure. When it’s first made, the soap is more of a gel. As it solidifies and dries, the inner structure of the soap continues to change.
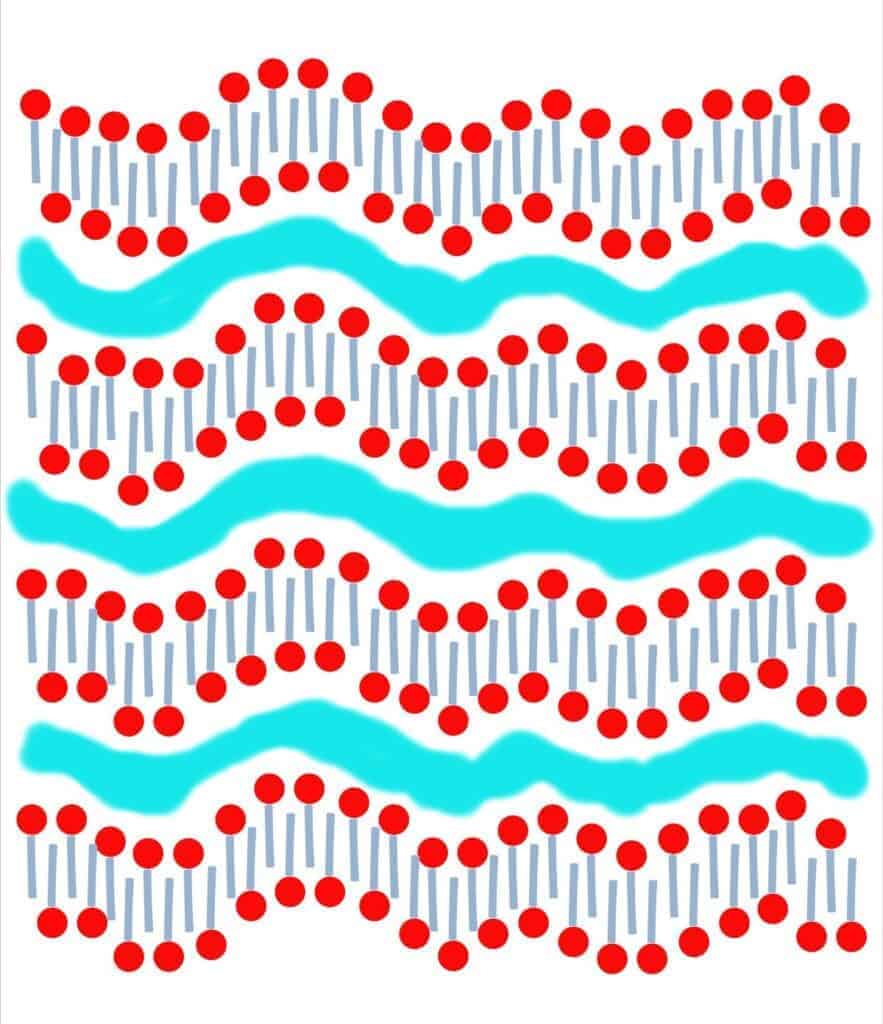
The crystalline structure of soap has layers to it. These layers are formed by a structuring of the surfactants with time. Surfactants have a hydrophilic (water-loving) head and a hydrophobic tail (one that is not attracted to water, which appears to be repelled by it). These surfactants come together into structures called micelles. Depending upon the amount of water, the micelles have different shapes/structures.
When you make soap, you are normally blending liquids (oils and lye). After some blending and a chemical reaction, you end up with a gel-like solid structure. After all of that blending and with all of those changes, the soap’s solid structure is a bit random. As the water evaporates, the surfactants line up better and the soap’s structure crystallizes into a lamellar micelle form. (It forms sheets of surfactants that are separated by layers of water.)
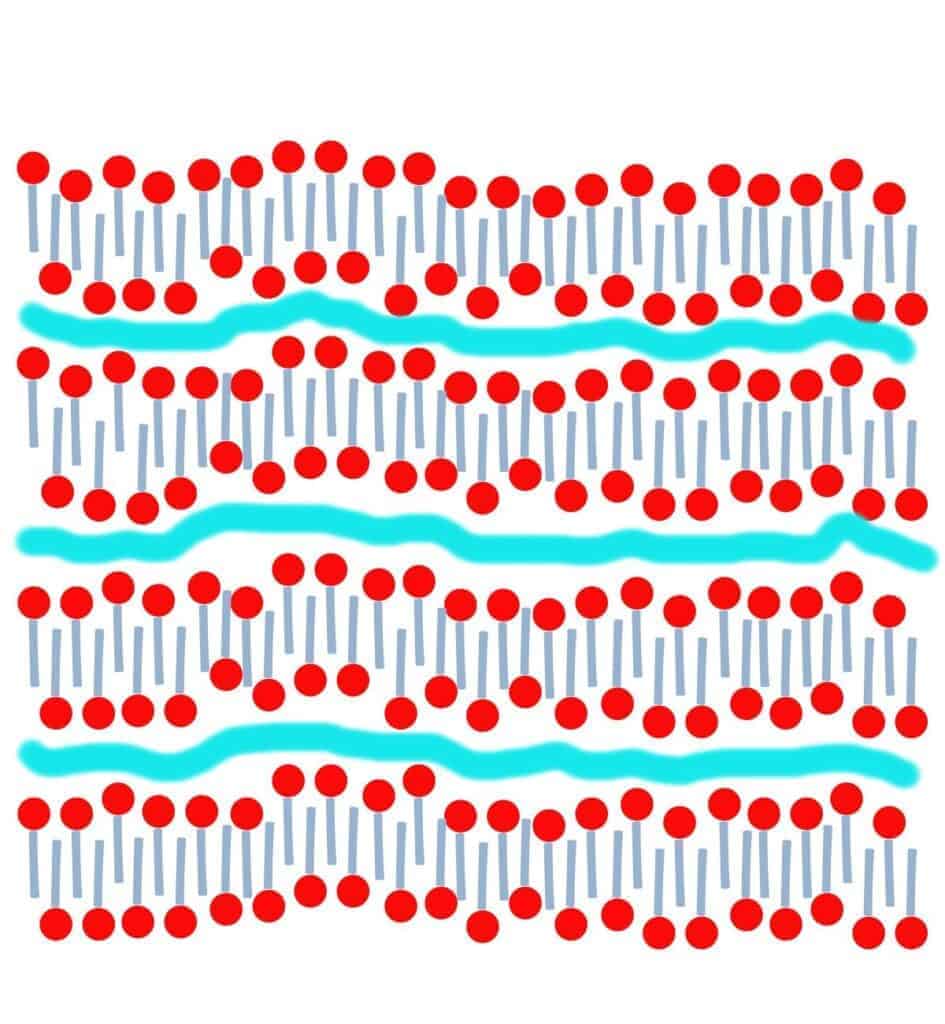
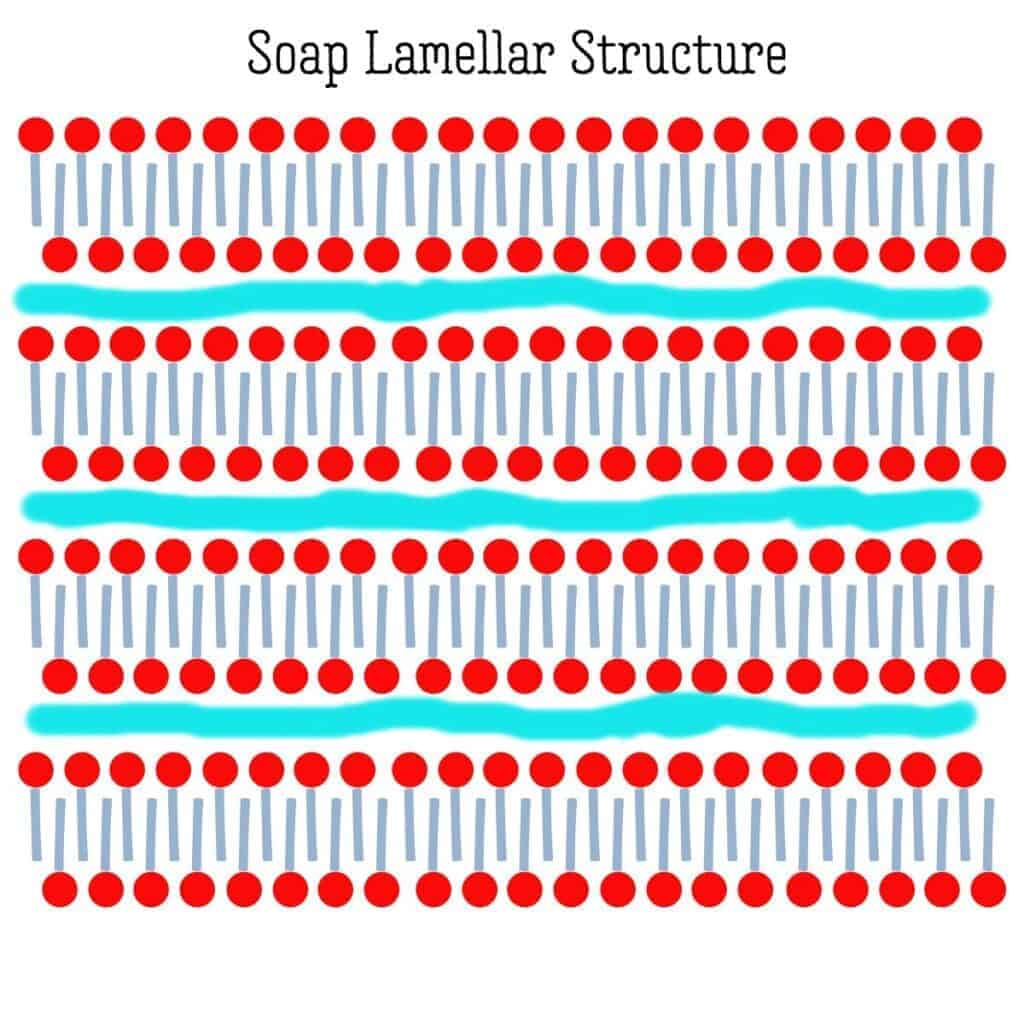
As time goes by, and more water evaporates, the structure lines up better, forming more level sheets with thinner layers of water between them.
Beginner’s Guide to Natural Surfactants
Do hot-process soaps need curing?
One of the biggest soap myths I see over and over again is that hot-process soaps don’t need curing.
People specifically go through the messier process of hot-processing because they think that it allows them to use their soap immediately vs. a cold-process soap that “needs” a cure time of around a month.
In reality, both hot-process and cold-process soaps benefit from curing.
Yes, it’s true that hot-processing a soap will speed up saponification. By the time you pour the hot-processed soap into molds, the saponification process has already completed. (That’s one of the reasons that hot-process soap usually looks more “rustic” vs. the smooth look of cold-processed soap.)
When cooking the soap, excess water will also tend to evaporate away more quickly. So, it’s also likely that hot processed soaps will be harder and drier more quickly.
Still, both types of soaps will continue to change over the weeks/months after having made them. These changes will affect the quality of the soap. Cured soap generally lathers better and may have other improvements with time.
In most cases, you can safely use both hot-process and cold-process soap a few days after having made them. Both should improve with time, though, so it’s best to wait to use either one. (This is especially true if you plan on gifting or selling your soap.)
Do liquid soaps need curing?
Liquid soaps don’t need curing in the same way as bar soaps for several reasons.
First, liquid soaps are pretty much always made by hot-processing. The finished soap paste will normally have already completed the saponification process. Unless you’ve made your soap with a lye excess and need to neutralize your liquid soap, your soap paste will be safe to use immediately.
What about the other processes that occur during the curing time?
Unlike bar soaps that need drying time, liquid soap paste needs to be diluted to be used properly. So, not only do liquid soaps not need time for saponification, but they don’t need time for drying either.
What about the crystalline structure?
You can probably imagine that liquid soap doesn’t form the same type of crystalline structure seen in bar soap. Because of the increased amount of water, the surfactants don’t come together in the same way. Rather than form a layered lamellar micelle structure like in bar soaps, the surfactants are more likely to come together into sphere-shaped micelles.
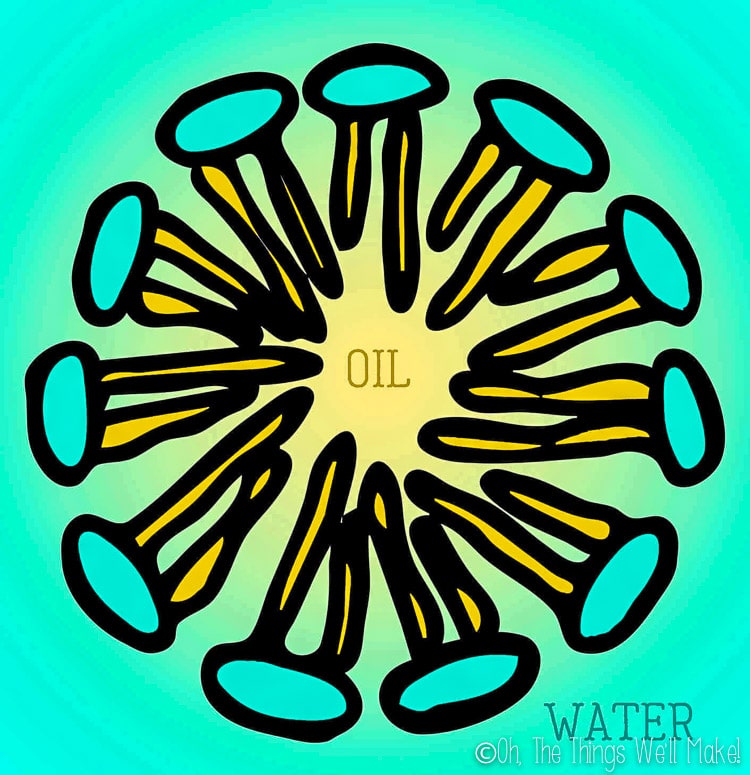
Micelles are spheres that form when the hydrophobic tails of the surfactants come together in the center and the water-soluble ionic heads stay on the outside of the sphere where they contact the water. (I talk more about micelles in my post about how to make micellar water.)
Do melt-and-pour soaps need curing?
Melt-and-pour soaps do not generally need to be cured.
It’s difficult to talk about melt-and-pour soaps as a group because there is actually quite a difference between the different types. Normal cold processed soaps (and even most hot processed soaps) aren’t easily melted to make a smooth mixture like melt-and-pour soaps. So, soap needs to be altered for easy, smooth melting.
Some melt-and-pour soaps aren’t actually even true “soaps” at all. They are syndet bars, or bars made from “synthetic detergents.”
Other melt-and-pour soaps are true soaps that have been made with lye, but that have propylene glycol, glycerin, or other substances added to make them meltable.
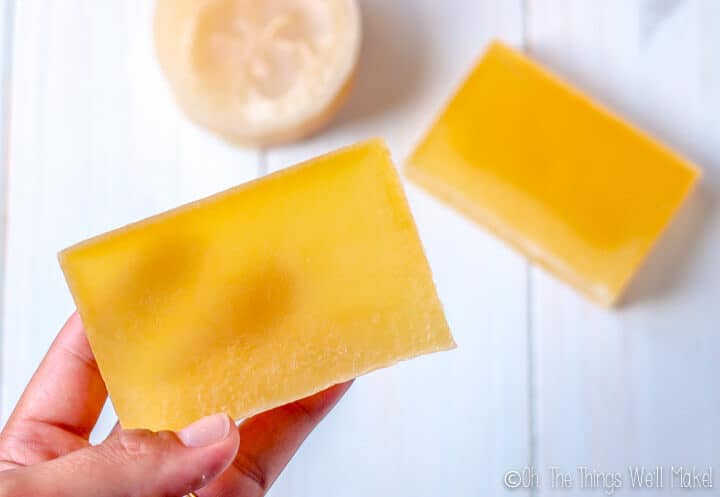
Some people ask me about my homemade glycerin soap. (I also have a vegan glycerin soap recipe.) They want to know if it can be used as a melt-and-pour soap. Both use a combination of solvents like alcohol, glycerin, and sugar water to dissolve away part of the crystalline structure, making the soap more translucent.
With the use of these solvents, the soap becomes much more smooth when you remelt it. So, yes, in a way, it can be used as a melt-and-pour soap.
In theory, melt-and-pour soaps don’t need to be cured because of the additives added. For example, the excess glycerin in the soap is a humectant that can attract water. That can cause water and glycerin to bead up on the outside of the soap.
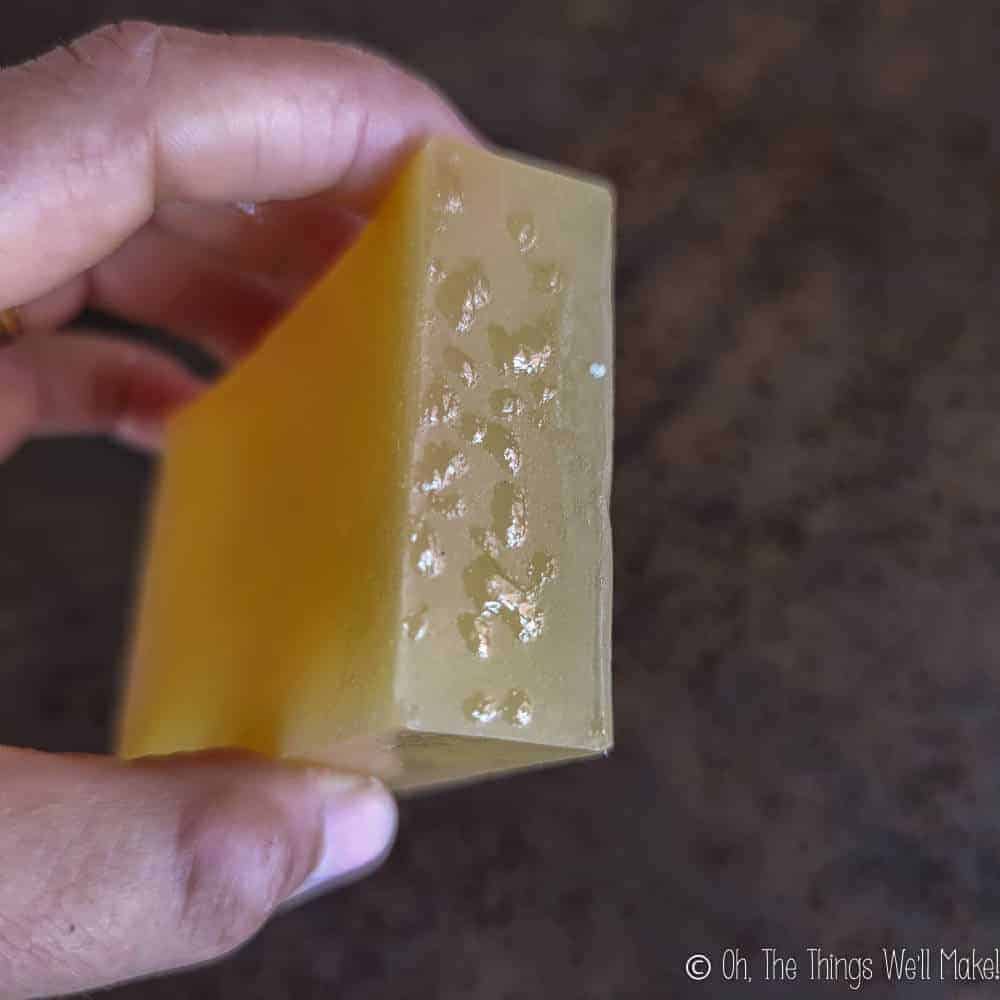
I still choose to cure my homemade glycerin soaps, just in case, but I have found that sometimes I do get either a beading up of glycerin or a pool of glycerin underneath the soap. Rinsing and wiping down the glycerin beads solves the problem, though. (I also have had that happen with some other types of soap. Some release more glycerin during the saponification process than others.)
I’d assume that true soaps that are sold as melt-and-cure soaps will have already passed a cure time, if necessary. To melt them, you aren’t normally adding more water. So, you shouldn’t need to dry them further or complete the saponification process.
Whether or not the crystalline structure would change with time is debatable. There is the possibility that they could improve slightly with time, I guess, if the crystalline structure does, indeed, change with time. Generally, though, melt-and-pour soaps aren’t said to need a cure time.
Are commercial soaps cured?
Normally, to save time, commercial soaps are milled rather than cured.
Milling consists of grinding up the soaps by running them through machines with rollers that basically make a paste of the soap. The soap paste is then pressed through fine meshes that filter out impurities and larger pieces of soap.
During the milling process, other ingredients, like fragrances, are often added. The soap paste is then pressed into molds with lots of pressure.
Milled soaps tend to last longer because the high pressure presses out excess air and moisture, resulting in hard bars of soap.
Because high pressure is needed, you can’t really truly mill soaps at home, unless you have specialized equipment. Some people grind down soap and either melt it or dissolve it and pour it into molds. That isn’t really considered true milling. It’s really just rebatching soap.
How long should you cure soap?
Generally, it’s recommended that soaps be cured for around a month. That said, some soaps benefit from a longer cure time. Other soaps may not show obvious changes after only a few weeks.
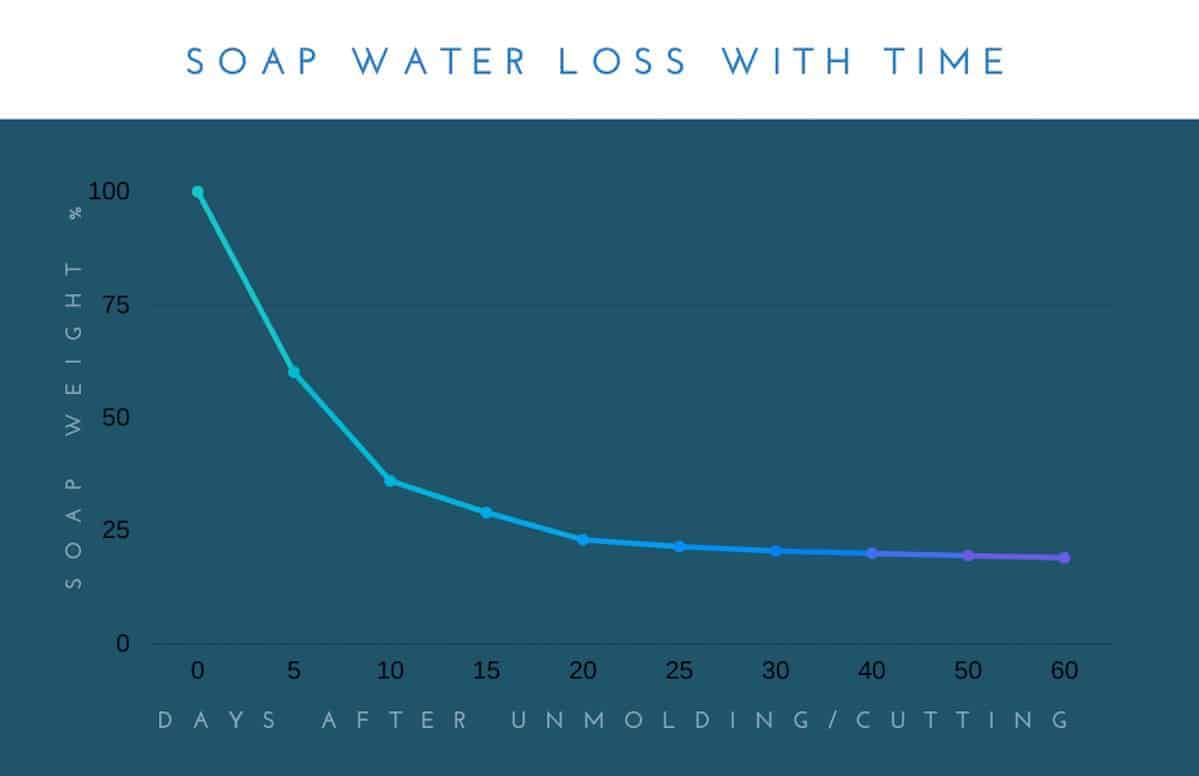
One of the reasons that one month is probably said to be a good goal as a general curing time is that most soaps will dry the most during the first 30 days. After those first few weeks, the soap will continue to dry, but it will be at a much, much slower pace.
Normally, soaps that harden almost immediately also need less curing time. Some examples are soaps made with only coconut oil (like my coconut oil-based laundry soap), or those made with solid oils like animal fats.
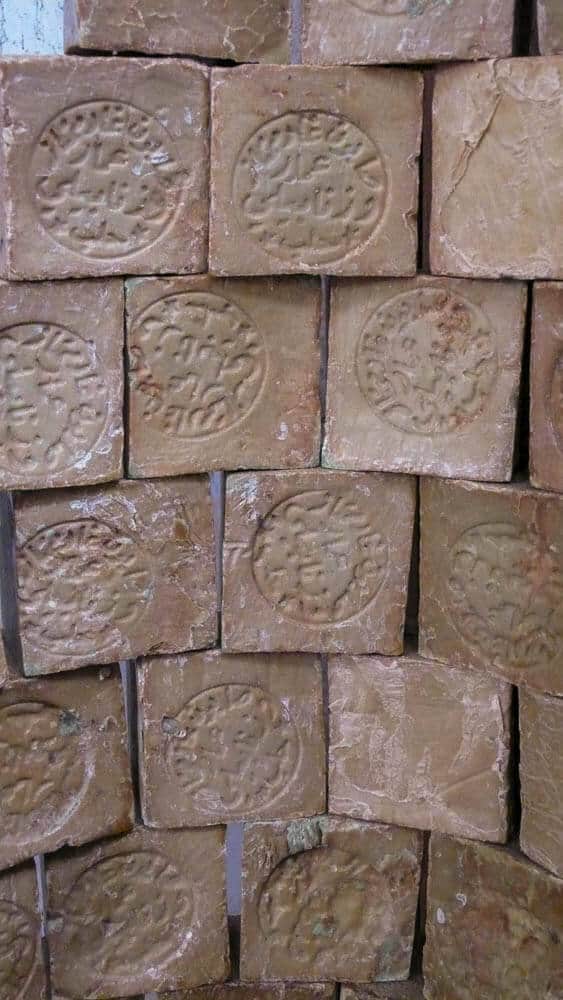
On the other hand, soaps that take longer to harden, also tend to benefit from longer curing times. Pure Castile soap, soap made with only olive oil, is a great example. Castile soap is a soap that doesn’t provide a lot of lather, but that can improve with a longer cure time. Some people prefer to cure pure Castile soap for a full year before using it!
How to cure soap
Having the patience to cure soaps is the hardest part of the process. Once you’ve been making soaps for a while, it gets easier to wait. When you’ve just made your first bars of soap, though, it’s much more difficult.
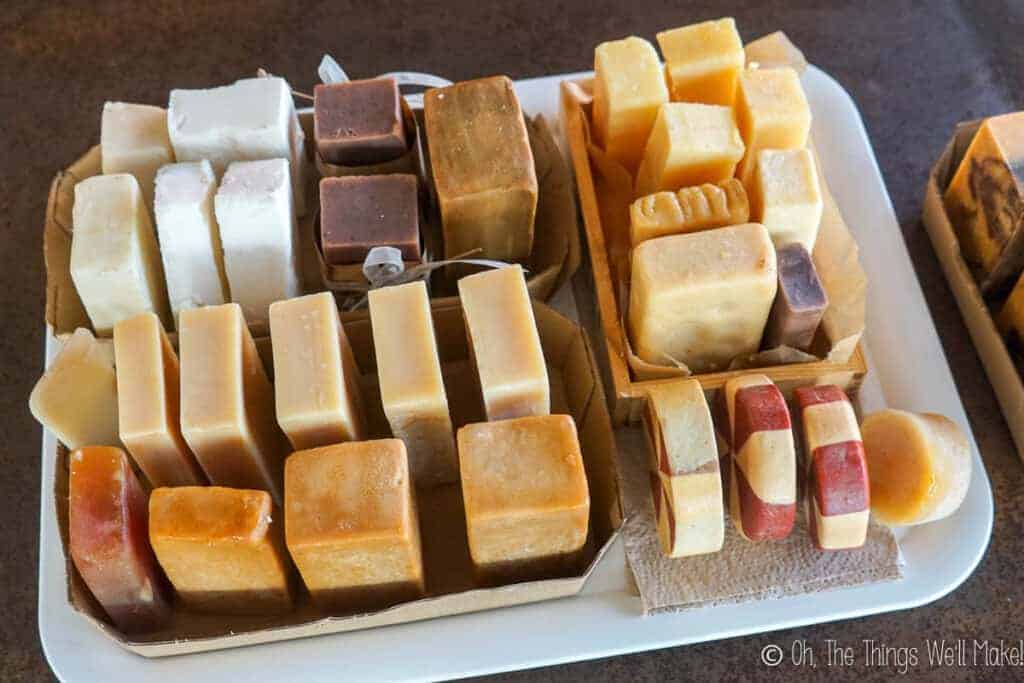
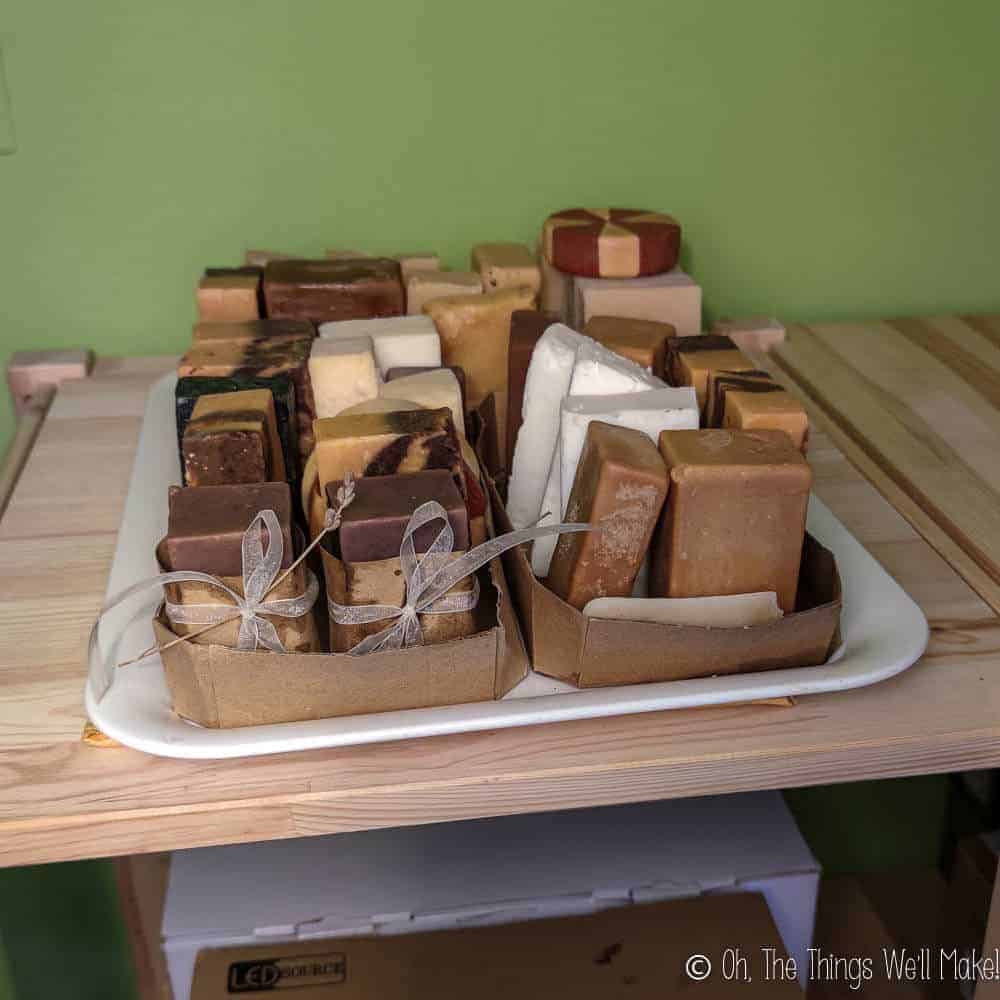
While it may sound like something mysterious or even intimidating, curing soap is really just allowing it to dry in a cool, dry environment. Ideally, it should rest in a well-ventilated area.
The soap bars should be separated to allow airflow all around each bar of soap. If possible, I like to stand the bars of soap on their smallest side to allow for as much contact with air as possible.
Not having a lot of free space at home, I tend to place my soaps in shallow cardboard boxes (the ones that come with our organic veggies), and put them on the top of bookcases. I use the high shelves that are hard to reach, the ones that I normally don’t use otherwise.
Some people who make lots of batches of soap for selling have special wire shelving units for curing their soaps. If using wire shelving, make sure that the metal is coated. Soap can react with metals, so direct contact with metal, especially aluminum, should be avoided while the soap is curing. (Contact with metals can lead to the soap developing orange spots.)
During the curing process, it’s also a good idea to flip the soap every couple of days to help ensure that all sides dry equally.
Storing cured soap
Some people prefer to keep their soap drying in the air until it’s time to use their soaps. That’s completely fine.
On the other hand, others prefer to wrap their soaps in plastic once they consider the cure time complete. Wrapping soap in plastic before it’s fully cured can lead to moisture building up inside the plastic. This can cause the soap to develop unsightly spots (generally referred to as DOS, or dreaded orange spots, in the soap making communities). Wrapped, uncured soaps can also go rancid and smell bad.
Once most of the moisture has evaporated away, though, it’s generally safe to wrap soaps in plastic, if you choose to do so. Soaps with a high concentration of glycerin can actually be protected from developing beads of glycerin on them by wrapping them. Glycerin is a humectant that can draw moisture from the air to the soap, causing the soap to develop beads of glycerin on the surface.
I generally prefer to either leave my soaps out until I want to use them or to wrap some of my soaps in thin paper like tissue paper. Some of the soaps will continue to give off some moisture or glycerin which can stain the paper, though, so if I’m giving away the soap as a gift, I usually wrap at the last minute.
Can you shorten a soap’s cure time?
This is really a matter of opinion… 😉
Some people suggest cooking the soap, or hot-processing it, to shorten the cure time. I’ve already discussed why hot-processing isn’t really the answer to avoiding a cure time. That said, a lot of the water is evaporated away while cooking, so, yes, theoretically, a hot processed soap could improve its qualities more quickly than a cold processed soap.
Other people suggest using a “water discount” to shorten the cure time. I talked about water discounting briefly in my post about how to use a lye calculator. All it really means, though, is to make your soap with a stronger lye solution, or with slightly less water. The idea is that your soap won’t need to dry as long because it has less water to evaporate away in the first place.
(Keep in mind that water discounting can shorten the time to reach trace, and can also change the soap making process somewhat. This can be confusing, especially for beginner soap makers.)
While it’s true that the soap may be harder and drier more quickly, the other processes probably aren’t sped up that much by using a water discount. So, yes, it could theoretically make a better bar of soap more quickly. I think it’s safe to assume, though, that even water-discounted soaps will benefit from a longer cure time.
The only other way you could reduce the drying time would be to ensure that they dry in a proper environment. Make sure to cure your soaps in a well-ventilated area without a lot of moisture in the air. Good air circulation will also help.
How do you know when they are fully cured?
I have to admit, that I don’t stress too much about determining if a soap is fully cured or not. If I want to use a soap, after a few weeks, I use it. If it seems to lack lather or just seems too soft, I allow it to cure further.
That said, many who sell their soaps do try to determine when their soaps have fully cured because they don’t want to wrap or sell their soap before that time.
A good way to check to see if a soap is cured is to weigh the soap. As I showed in the graph above, soaps will generally lose the majority of their weight in the first 30 days. After that point, they don’t generally lose much weight.
If you weigh the soap every five days or so, when you begin to see that the soap no longer changes in weight between weighings (or the change is negligible), you can predict that the soap should hold up well when used. It can generally be considered “cured.” (That doesn’t mean that some soaps won’t benefit from a longer cure time, though.)
I hope this post has been helpful in understanding how and why to cure soaps! Good luck in your soap making endeavors.


I love this! Very educational!
So happy to hear that! Thanks for your kind words, Riana!
I grew up on a farm & my Mom made homemade soap from our own rendered lard. She used it specifically as an additive to her regular laundry soap when washing the men’s tractor greasy, manurey work jeans. It was really effective at getting all the grease, stains and barn odor out. No fancy molds or ingredients for her, just a basic recipe. So, I’m familiar with the benefits of homemade soap. A friend who raises pigs, recently gave we 2 gallons of locker processed lard. I didn’t quite know what do with all of it. Let’s make soap! I decided to try a mini batch of Mom’s old recipe. After 45 minuets it still wasn’t quite the proper trace consistency. I poured it anyway thinking if it works fine, if not fine. I my surprise, it setup & is curing now. Can you give me any insight on 1) if my soap will be good anyway & 2) why didn’t reach that pudding consistency that I read about.
Hi Donna,
That’s great that you’re putting the lard to good use! Soap can still turn out fine even if it never reaches a thick “pudding” trace. Trace can take longer depending on the recipe, the temperature of the oils, and even the type of lard used.
If the soap set up in the mold and is now curing normally, it likely saponified just fine. Some batches simply stay thinner longer and then firm up later.
If you’re ever unsure, you can always wait a few weeks and test a small piece once it’s cured. If it feels normal and doesn’t sting your skin, it should be good to use.
Hello,
I recently made a batch of soap with Tallow, olive oil, and coconut oil. We are 5wks out and the soap has a firm outer area with a softer circular center. Could it just need more time to cure? Would it be safe to use?
Thank you!
Hi Cassie,
If the soap is firm on the outside but softer in the center, it may just need a bit more time to finish drying. Sometimes thicker bars or certain recipes take longer for the moisture to even out throughout the bar.
As long as the soap isn’t oily or separating and seems otherwise normal, it’s usually fine and should continue to harden as it cures. You could try cutting one bar in half to see if the center firms up with more exposure to air.
After five weeks it’s generally safe to use, but giving it a little more time may improve the hardness and how long the bar lasts.
I am so happy I find your blog/ website , so many amazing information, just can’t stop reading …haha… I’m just starting out making cold pressed soaps , so thank you for all the amazing information and recipes. I am definitely starting with you beginner soap recipe . thanks again! Helga
Thank you!
I love this information. It’s not enough for me to read the soap should be cured. I NEED to why why, what’s going on at the molecular level to make a difference. Your article was wonderful. Thank you so much.
Wow this was a fantastic read! I was under the incorrect impression about soap curing and saponification. I loved your graphics too. SUPER BIG THANK YOU!
Well detailed ❤❤
What if the soap as a small pool of oil above it?
What is the cause,
I used 1.5g of PKO to 700g of lye,I also added sodium sulphate 100ml, glycerine, sulphonic acid 100ml and fragrance 1 table
spoon.
I had to wipe with a tissue paper then leave it to cure..
Hi Jennifer,
Are you sure it’s oil and not some glycerin that has separated out? It’s not uncommon for some glycerin to separate out and you can wipe it away as you did.
I’m not sure what you mean by PKO.
Hi, maybe I can help to answer this.
PKO is palm kernel oil, isn’t it?
The oil floating on top of your soap can caused by false trace or maybe the humidity is too high
You can also add sodium lactate to your lye – Sodium lactate hardens cold process soap so you can unmold and enjoy it more quickly. You can also use it in lotion to draw moisture to the skin, or in hot process soap to make it more fluid and smooth. It’s a liquid salt derived from the fermentation of sugars found in corn and beets. Quoted from brambleberry .com. I use it every batch.
Hi Wendy,
Yes, that’s also a common practice to harden soap so it lasts longer. 🙂
This post is everything Tracy! So thorough and well written. Thank you for your work 👏🏾
Thanks, Krystal! I’m so glad you liked it!
Hi Tracey
Thanks for the clear and well researched information, as always, great article.
I had something unusual happen to my batch of goat milk and honey soap, which I have done several times using your recipe without any issue. This time I melted the coconut oil and to do so I warmed up all the oils carefully using the defrost function of the microwave. The oils were warm when the coconut oil was melted, but not hot. I mixed everything with the lye using the hand blender and the soap got thick quite quickly. To be on the safe side and avoid false trace I kept blending a while longer and as it was getting too tick to work, I stopped and started spooning the mix into my moulds. Less than half way through, the middle parts of the mix got really dark and heated up – the stainless steel bowl became scolding to the touch. I noticed that the middle of what I had already poured in the moulds was also getting dark brown. (Having subsequently read your article I think I may have reached gel phase, at least for some of the mix?) Concerned I put everything back in the bowl and mixed it up again with a spoon, but the consistency changed, became a bit like an olive oil liquid soap paste. After further mixing it seemed a bit better but was as thick as play-dough. I put it in the moulds by hand, pressing it together a bit at a time and placed the moulds in the fridge for a couple of days. When I got them out, the bars were not holding the pieces together, with bits coming off of the shape – they look a mess and this was meant to be my Christmas presents batch (I used ginger man shapes) 🙁
Would it be worth me trying to melt the soap and re-pour or would I just waste my time / make it even worse? I have never tried melting soap. If melting is possible would be interested to know how it may be done. Crockpot? Should I add anything to help with emulsifying?
Apologies for the long message and if not useful for your wider readership would be very grateful for just a quick email.
By the way, congratulations on getting your website so much further and with so much recognition in the last 4 years or so – after learning so much about soaps, surfactants and other cosmetics from your posts back in 2018/19, I went off experimenting on my own and had no occasion to visit again. Feeling slightly better about my failed batch as it got me back to your blog in search of answers and I am again learning something new! Thank you!
Valentina
Hi Valentina,
It does sound like the soap started to enter gel phase and heated up quite a bit, especially with the milk and honey in the recipe. Those ingredients can cause the soap to heat and darken more than usual.
If the soap became very thick and crumbly, it likely started to seize or overheat. The good news is that it usually isn’t ruined. You can often salvage batches like this by rebatching them.
You can grate or chop the soap and gently heat it in a slow cooker or double boiler with a small amount of water until it softens into a thick paste. Then press it into molds again. It won’t look as smooth as the original batch, but it should still work perfectly well.
Don’t feel too bad about it either. Milk and honey soaps are notorious for doing this unexpectedly!
And thank you for the kind words about the blog. I’m really glad it’s still been helpful to you after all these years.