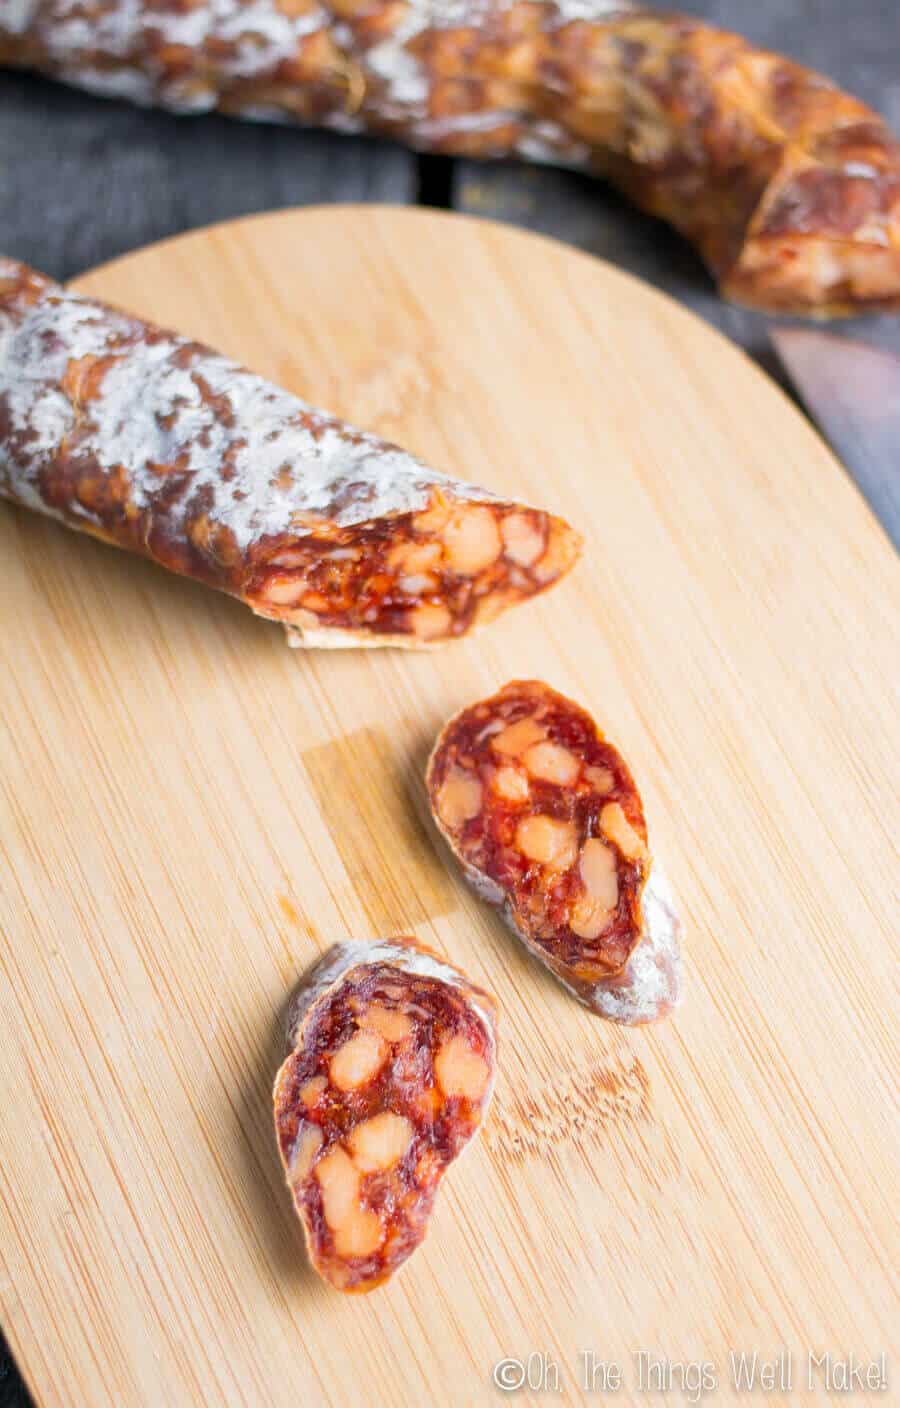
Enjoy Spain’s signature sausage no matter where you live when you learn how to make Spanish chorizo at home. You can cook it fresh, as the Spanish would at a BBQ, or dry cure it and eat it sliced with other sliced meats and cheeses.
By now you know I like a good challenge.
When I look at something in the store, be it yogurt or papadums, soap or lotion, I think to myself, “I wonder if I can make this myself.”
Most of the time, I end up figuring out how, and then end up making everything from scratch.
Here in Spain, though, it’s super easy to find a good Spanish chorizo for a decent price. I can find it fresh in the refrigerator section for serving at our BBQ’s, and can find many versions of the dry cured variety. It didn’t really make a lot of sense to me to try to make it myself, but the thought kept entering my mind.
Then, I thought back to the times that I was living in Michigan, craving a good, dried, Spanish chorizo. While I could buy prosciutto at the local Italian supermarket, and that helped me curb my cravings for jamón serrano, I couldn’t find a good substitute for chorizo.
The difference between Spanish chorizo and Mexican chorizo
At first I was really excited to find chorizo at a Mexican supermarket one day, until I got it home and realized it was nothing like what I was craving. I wanted a dried, cured Spanish chorizo to slice and serve along with some cured ham and cheese. Unfortunately, all of the Mexican chorizo I found was fresh, and was meant to be taken apart and crumbled and cooked as if it was ground beef. (And sometimes it actually was! Unlike Spanish chorizo which only uses pork, or at least I’ve only seen pork chorizo here, Mexican chorizo seems to use either beef or pork or a combination of both.)
Also quite different is the overall flavor of the chorizo.
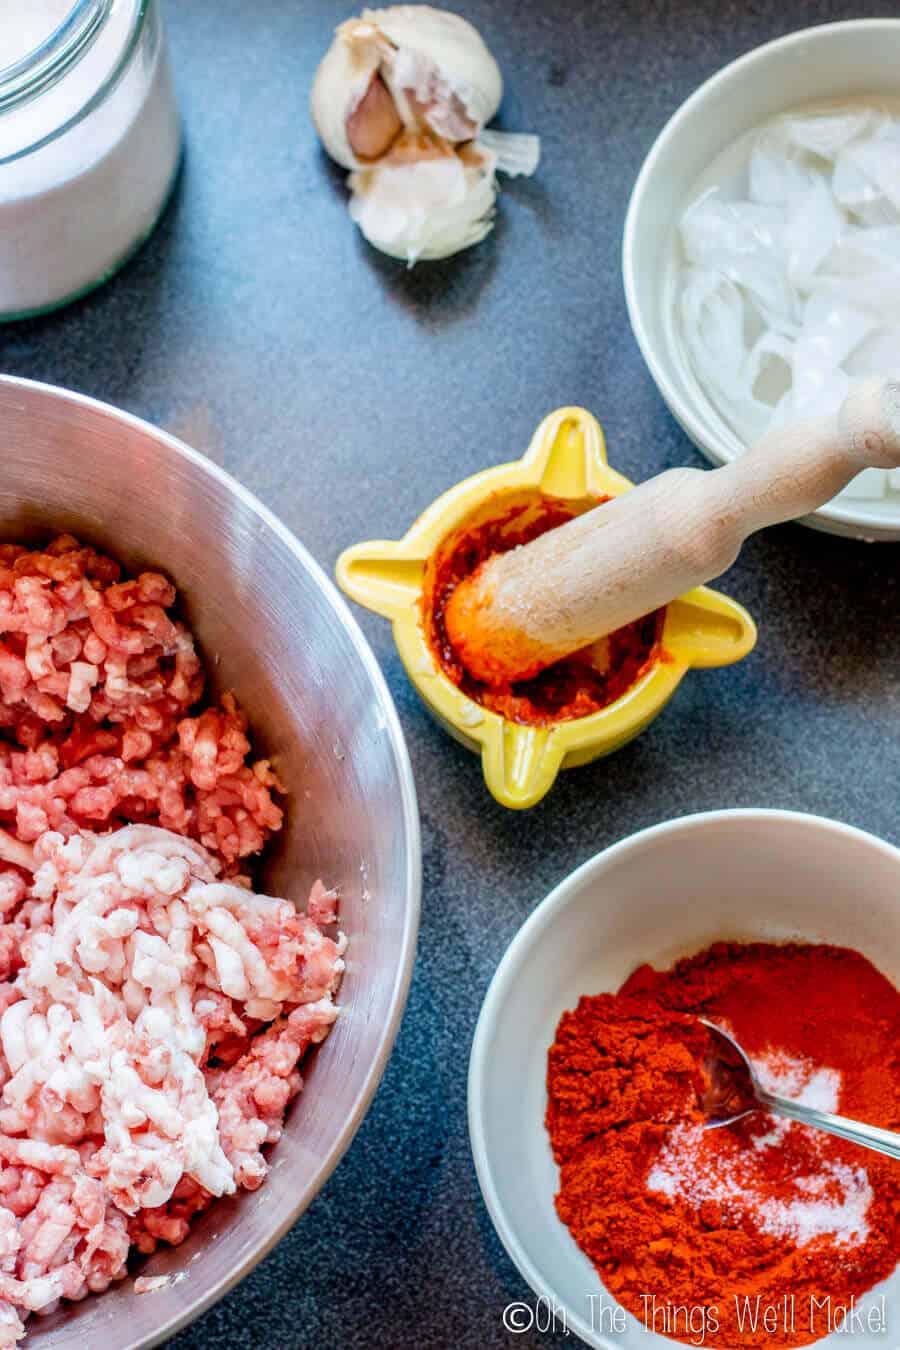
Spanish chorizo uses pimentón de la Vera.
Spanish chorizo can be either “sweet” or “spicy,” but either way it has a characteristic smoky flavor that comes from using “pimentón de la Vera.” Pimentón de la Vera (a city in the province of Cáceres) is a type of paprika that is made in that region of Spain by smoking the red peppers while drying them before grinding them up into a beautiful bright red colored powder. It can be found in sweet or spicy varieties, and usually a combination of both is used when making Spanish chorizo. (More spicy paprika is used in the spicy chorizo, of course.)
Here in Spain, one can also find Pimentón de Murcia, which is more like the paprika that I used to buy back home. The red peppers used for pimentón de Murcía are air dried in the sun or large dehydrators before being ground into paprika. While you can make chorizo with this type of paprika, it won’t have the characteristic smoky flavor of most Spanish chorizos.
Dry curing Spanish chorizo at home
The difference between a fresh chorizo and a dry cured chorizo is, well, the dry curing process. While that sounds obvious to most, not everybody knows what that really means.
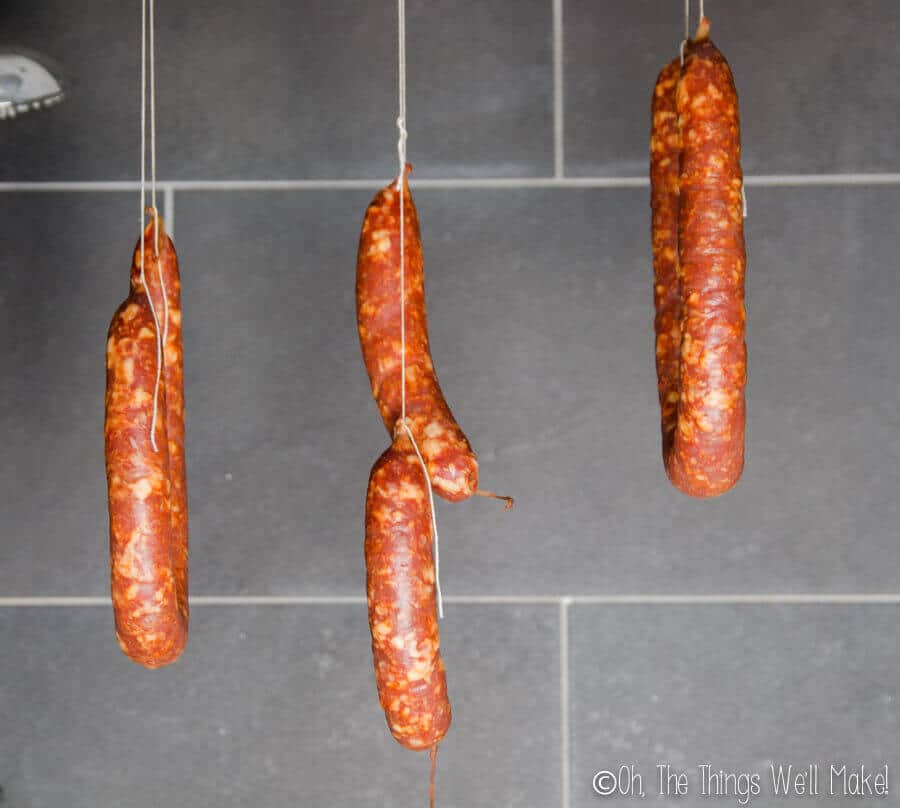
It may sound like some long, complicated process, but it’s really as easy as hanging the chorizo to dry for several weeks until it hardens up into an easily sliceable sausage.
I know, the thought of letting meat hang out at room temperature for weeks before you actually go eat it can sound crazy, but by using a mixture of salts and spices, we are able to safely cure meats just as they have been doing for years and years.
Should you use Potassium nitrate (saltpeter) or curing salt?
Whether or not to use a special curing salt is probably the biggest controversy when it comes to curing meats at home.
There are special salts that are often added to cured meats to help prevent botulism, but the downside to them is that they may, when consumed in large amounts, cause cancer.
Here in Spain, it was easy for me to find pure potassium nitrate (saltpeter) which you are supposed to use “in moderation,” which means that the maximum amount should be at 2% of your final recipe. I ended up using o.5 g per kg of meat, which works out to be around 0.05%. Interestingly enough, the place that sold me the potassium nitrate had their own recipe for chorizo, and it didn’t call for potassium nitrate at all, despite their insistence on its importance in cured meats. It seems that most local recipes for chorizo here in Spain don’t use it. Even the chorizo I buy at the store often shows the only ingredients as pork, garlic, paprika, and salt. I’m not sure if they just don’t list it because it’s used in such small quantities with chorizo, or if they really don’t use it at all and have other methods for ensuring safe meats.
One of the reasons that salpeter is added to many cured meats is to give meats like salami and corned beef their characteristic red color, something that isn’t needed for chorizo. You see, chorizo gets its red color from the amount of paprika that is added to it.
You probably know by now that I like to live as toxin free as possible, and like to keep things natural if I can. That said, in this case, I preferred to err on the side of caution and added the smallest amount of potassium nitrate said to help keep the meat botulism and lysteria free. (That ended up being less than 1/4 of a teaspoon for my entire batch of chorizo.) Because I’m relatively new to the process of curing meats, I was already a bit skeptical about the whole process, and wasn’t ready to take any chances. While the chances of getting infected with botulism and lysteria are quite low, there is still a small chance of having infected sausages, and I just wasn’t really to take the chance quite yet.
It appears that in the US, it’s harder to find potassium nitrate by itself, and instead, pink curing salts like this one are sold instead which have a combination of both regular salt and potasium nitrate. That particular curing salt claims to be 6.25% sodium nitrite and should be used at a ratio of 1 ounce for every 25 lbs. of meat. That means you’d need 28.3g for every 11.3kg of meat, or 2.5g of this curing salt for every kg of meat. So, if you make my recipe as is, using that pink curing salt, you’d need to use 2.5g of the curing salt, which is just under 1/2 tsp.
From what I can tell, it’s actually quite controversial whether the nitrates in cured meats are really as harmful as many think they are. It’s said that we get most of our ingested nitrates from vegetables grown in the ground, and I’ve even seen the claim that they may actually be good for us.
Either way, let’s be honest, I don’t think that cured meats should be a huge part of any diet. If eating cured meats in moderation, as you should, I don’t think the tiny amount of potassium nitrate really is going to pose much risk to you. I’d rather take my chances with the tiny amount from an occasional slice of chorizo, to an instant botulism poisoning, but I guess everybody is free to choose whether or not to take either risk. I just want you to be informed when you make your choice.
Obviously, if you are making fresh chorizo to be cooked on the grill within a few days of being made, there is no need for you to add any curing salt at all. This only comes into question if you want to dry cure your meats.
It appears that in the US it is difficult to find straight potassium nitrate for curing meats, and special “pink salts” are sold instead which are a mixture of regular salt and potassium nitrate.
Watch me make Spanish chorizo at home:
How to dry cure the homemade chorizo?
All of the recipes for homemade chorizo and other sausages simply tell you to hang your meats in a cool, dry place to let them dry out on their own over time.
Being somebody who likes to spend a lot of time studying things before I go about making them, I did some investigating in meat curing forums and threads online. There seems to be a lot more general fear and precautions in the English speaking forums than the European counterparts.
In the English speaking forums, a lot of people caution about making sure that the sausages have enough humidity to avoid getting “case hardening” (more about that in a sec…). The idea is that if the outer casings and outer portions of the meat dry out too quickly, that it will prevent the center part of the meat to dry completely, making the center part unsafe to eat.
So, for my first batch of cured chorizos, I decided to follow the advice of many. I had originally hung my chorizo in the shower stall of a dark, cool bathroom than no longer gets used, but decided to switch it to an unused wine fridge instead. The nice thing about the wine fridge was that I could make sure the temperature was low enough if needed, and the idea was that there would be enough humidity inside to avoid the case hardening problem. (Most seemed to think that by opening the fridge once or twice a day to check on the curing sausages, that they would get enough airflow to keep everything working well.)
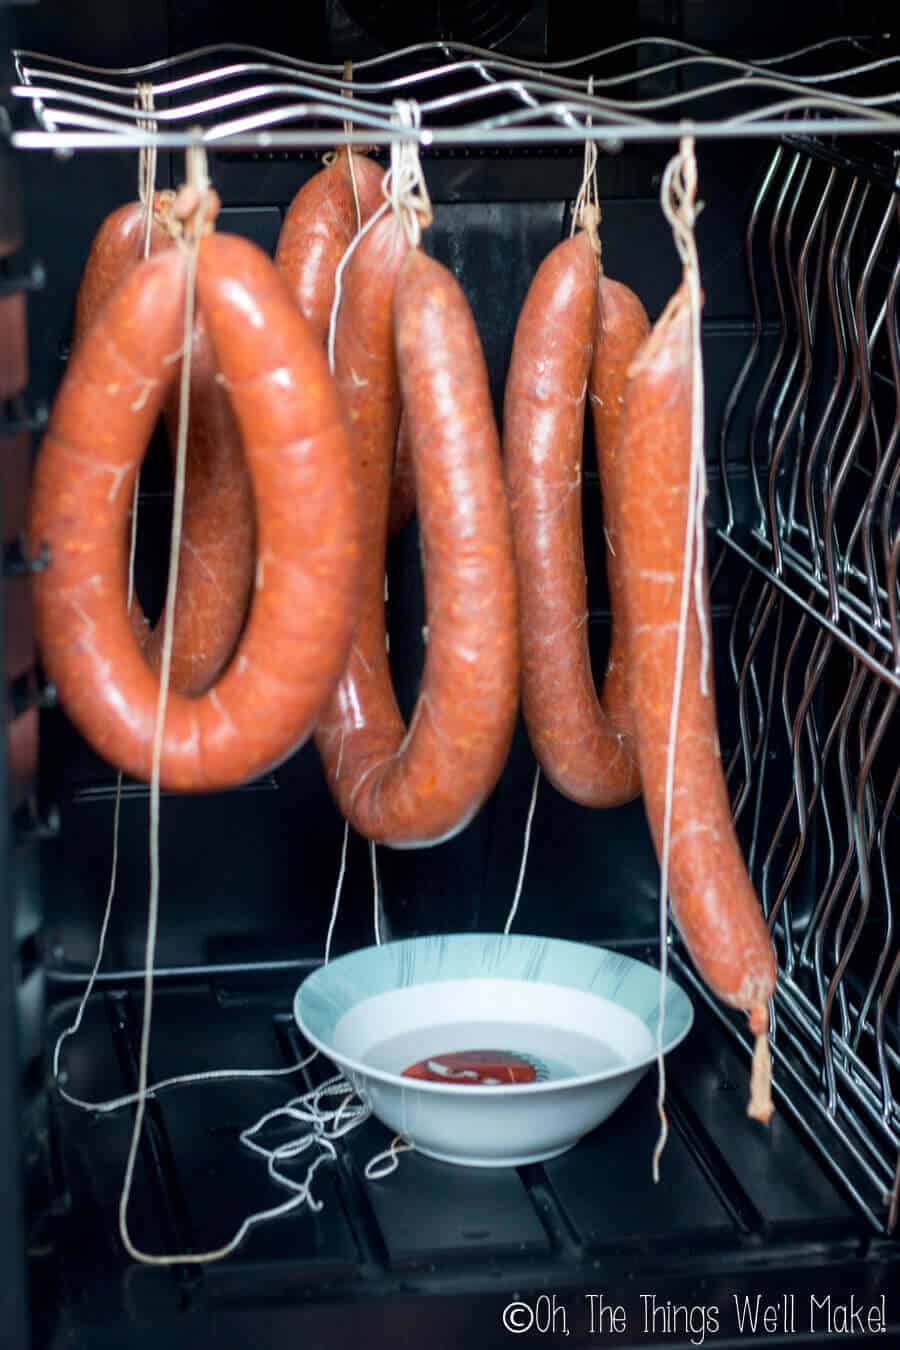
In the end, after weeks upon weeks of slowly drying my homemade chorizo in the wine fridge, I’d accumulated thick layers of white molds. My chorizo, while safe to eat, tasted musty from all of the outer mold layers. Plus, the entire drying time took way too long.
I decided to try again, using the much more lax Spanish was of doing things, and dried my next batch in the shower stall where I had originally wanted to hang the first batch.
Guess what? The batch of chorizo that I just left doing its thing turned out perfectly, and I’d definitely make it again. I actually liked my homemade chorizo better than what I usually buy in the stores, and love that I can choose the exact amount of spiciness and the quality of the meats being used.
So, yes, I do think it’s worthwhile making your own chorizo, even here in Spain where you can find many varieties inexpensively!
What about mold?
The mold in my first batch of chorizo ended up forming a white casing around some of the chorizo, not unlike the rind of a Brie or Camembert cheese. I didn’t remove any of the white mold because it appeared to be a safe culture of mold, and I had been reading that safe molds can help keep bad molds from taking over.
The problem with the safe white mold had nothing to do with whether the chorizo was safe to eat or not, but that it totally changed the flavor of the meat inside.
Chorizo, unike salami, salchichón, or fuet, doesn’t normally come incrusted in a white mold culture. Normally, the outside layer of the chorizo is the same color as the meat inside.
Some people choose to ward off bad mold formation by using a mold culture to actually cover the sausages with a good mold. In the case of chorizo, I decided against doing that after my prior mold-covered batch tasted quite different from the chorizo I’m used to.
Instead, when a light, white mold did start to form on my homemade chorizo, a couple of weeks into the drying process, I wiped it off with a vinegar solution. (I added a little bit of water to some apple cider vinegar, and used a clean cloth dipped in the solution to rub off the mold from the skin.) I ended up repeating the process a few weeks later when the mold began to form again.
What about mold? Is it safe?
White molds
The formation of a white, powdery mold (penicillin species) on the outside of the chorizo is completely harmless and can be expected.
White, hairy molds, on the other hand, are “bad molds” that can push their “hairs” through to the meat below. If the hairy mold is white, and not green, usually wiping it down right away with a vinegar solution should be enough to save your batch.
Green and Blue molds
The formation of powdery green and blue molds is a lot more contraversial. Some people say that it’s fine, others worry about it. It is often said to indicate an airflow/humidity problem.
Most seemed to think that if you had green/blue mold forming, that as long as your wiped it off and didn’t let it accumulate in large quantities, that you would be fine. Let’s be honest, most people who have been on a visit to a place that cures sausages in a cellar here in Europe will attest to the fact that many of the ready to be eaten meats will have a bit of powdery green/blue mold that will be wiped off before serving the sausages.
There is a lot more fear when it comes to hairy green and blue molds. Some are brave enough to wipe them off as soon as they form and hope for the best. Others, are more cautious, and throw the affected sausages away. My chorizo was never affected with hairy green mold, so I never had to make the call myself. 😉
Black Mold
The general consensus is that black mold is bad! I wouldn’t mess around with this one, and would personally throw any sausage affected with black mold away.
Black mold is said to form in sausages that are curing in areas with too much humidity and not enough air flow.
Humidity and Case Hardening
The general consensus is that the best environment for curing meats is to have temperatures in the range of 50-60ºF/10-15ºC and humidity in the 65-80% range. Too much humidity can lead to possibly toxic molds, but too little humidity can also be bad.
As I hinted earlier, “case hardening” is one of the problems you can have when curing meats in too dry of an environment. If they cure too quickly on the outside, the inner meat won’t have a chance to cure properly.
In my area, the humidity is quite high, and I didn’t have that problem. I also suspect that with thinner sausages like chorizo, which usually use a thinner diameter casing, that you are less likely to have this problem than when curing thicker meats and sausages.
In any case, if you were to end up with a chorizo that was very dry on the outside, and quite a bit softer on the inside, you can normally fix the problem by wrapping the sausages in wax paper or plastic, and leaving in the refrigerator for a few days. While I haven’t had the problem, so I haven’t tried this solution, it’s said that the humidity left in the sausages will even out, leaving a much more balanced sausage.
When is my dry cured homemade Spanish chorizo ready?
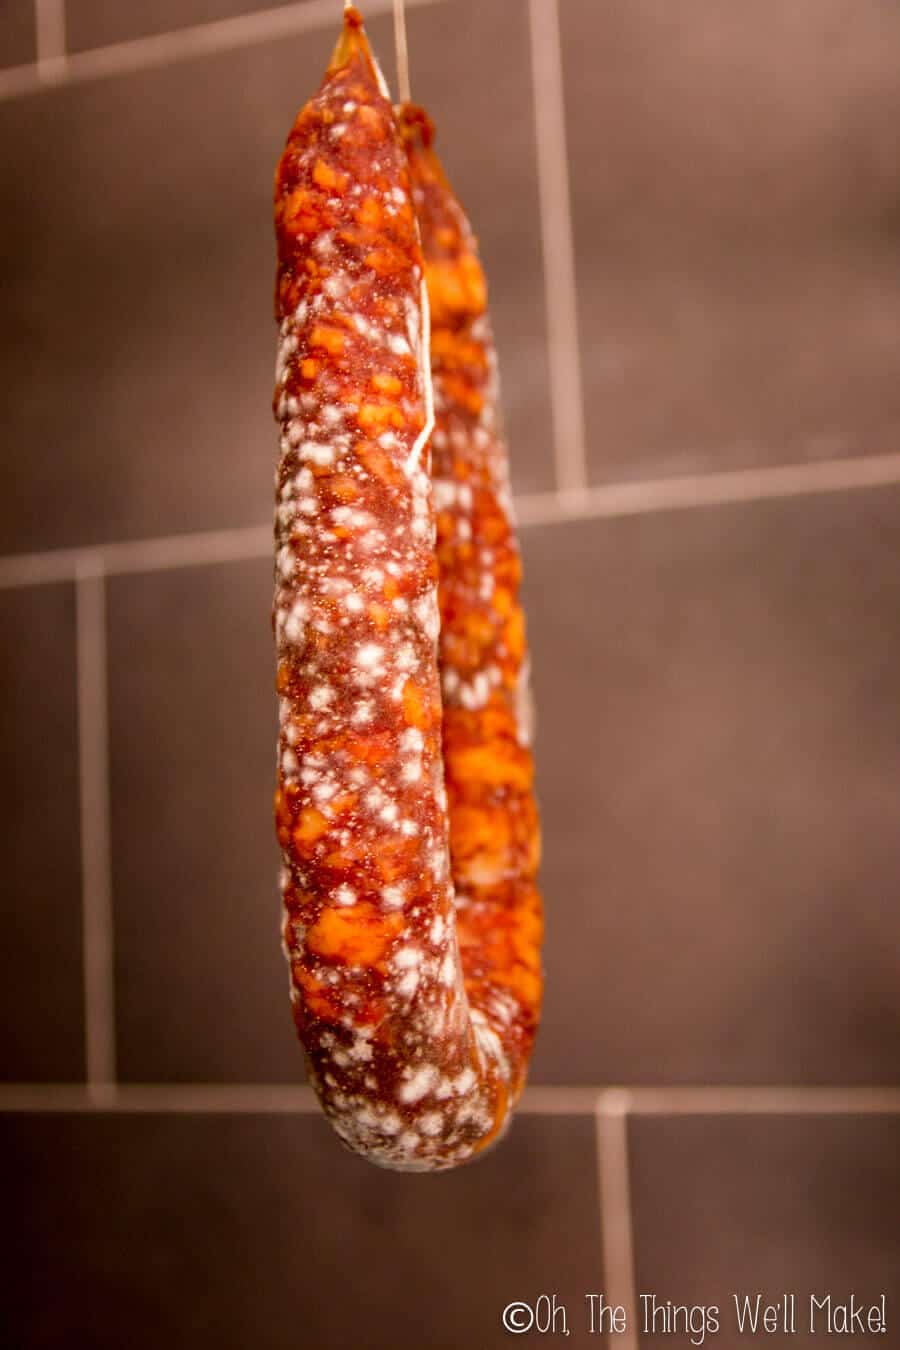
After it has lost around 35% of its initial weight, it should be safe to eat. That’s why it’s a good idea to weight your chorizo before hanging it up to dry. I like mine in the later, dryer stages, so I rarely weigh it anymore. I check on the chorizo by squeezing it, waiting for it to feel firm to the touch before cutting into it.

In this first picture, you can see my chorizo at an earlier curing stage. It’s a brighter red, and slight softer to cut. It still should feel firm when you press on it and cut into it.
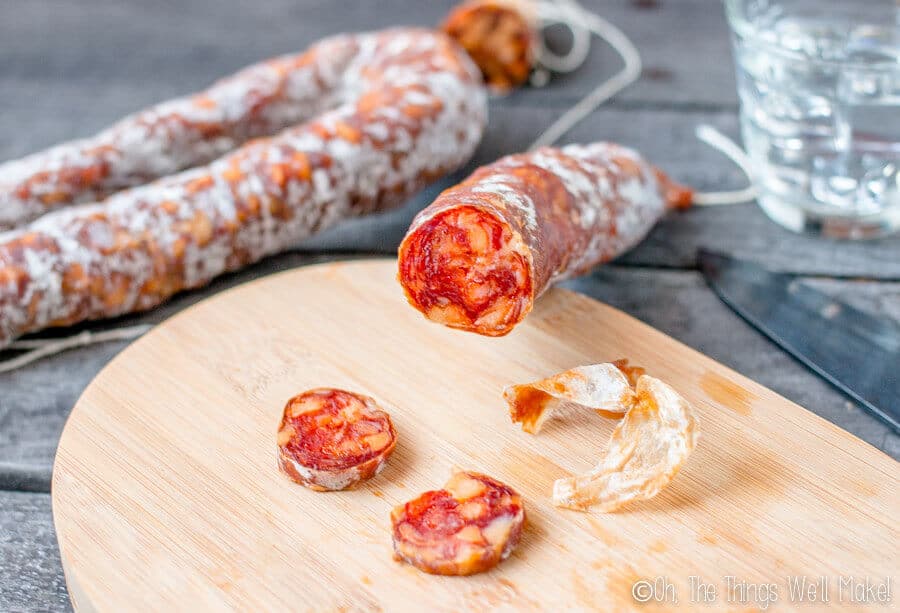
A week or two later, it has hardened more, and is a bit darker in color.
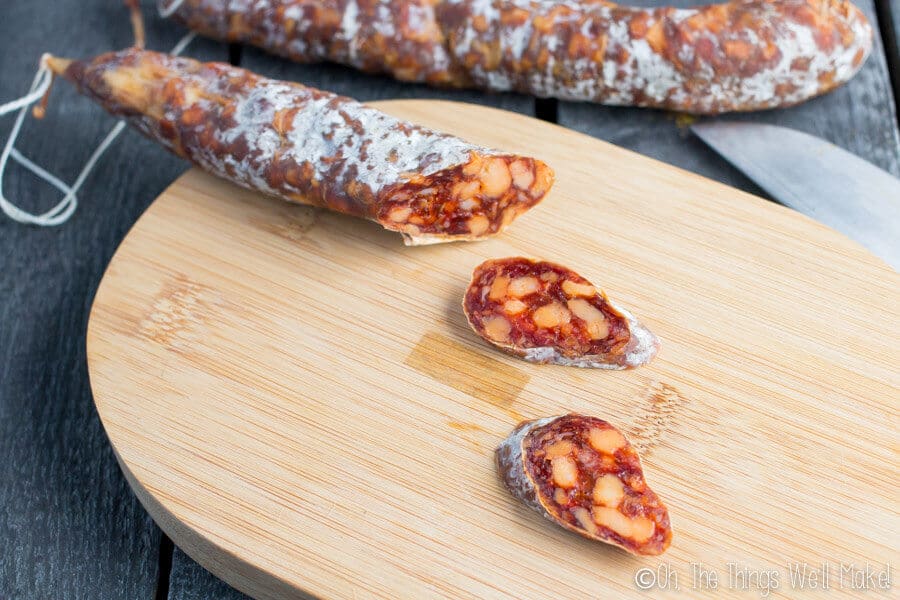
After another week or two, it’s the way we really like to eat it. All three of these pictures were taken of chorizo in the same batch over a matter of weeks, just to show how the curing time affect the final sausages.
Making a cured Spanish chorizo isn’t as scary as it sounds! (But fresh chorizo is super easy to make!)
Hopefully I haven’t scared you off by now, because it really is rewarding to make your own Spanish chorizo at home, especially if it isn’t readily available where you live.
That said, if I’ve intimidated you with all of the things that could go wrong, why not try making the fresh Spanish chorizo first. You don’t need any special curing salts, and you can cook them in a frying pan or on a grill. You could always hang an extra leftover chorizo or two just to see how the curing process goes. You may surprise yourself! 🙂
How to make Spanish Chorizo

How to make Spanish Chorizo: Dry Cured and Fresh Varieties
Ingredients
- 800 g pork eg. pork shoulder
- 200 g Pork fat eg. fatback, skin removed
- 7 g pimentón de la Vera – spicy
- 14 g pimentón de la Vera – sweet
- 2 cloves garlic
- 17 g salt
- 2.5 g curing salt optional, for dry cured variety
- 1 dash white wine optional
- 2.5 m pork casings
Instructions
- Grind the meat and fat with a meat grinder. I have found that freezing the fat for a little while before running it through the grinder helps keep it in tact while mixing it together with the rest of the pork. While I like to use the best quality meat I can find, especially for this sort of project, you can use scraps of meats that aren’t normally chosen for roasting as a way to save money. (You may be able to find unpopular cuts of a quality, organic pork for the same price as the more popular cuts of a conventional one.)
- Add the pimentón de la Vera, salt, garlic, and optionally .5g of potassium nitrate or 2.5g pink curing salt to the meat, and gently mix the ingredients together. You want the spice and the fat to be evenly dispersed throughout the meat, but don’t want it to get mashed together into a paste.
- Cover the mixture with plastic wrap, and leave in the fridge overnight for the flavors to meld together.
- If using salted pork casings, let them soak in water for around an hour, or however long specified by the packaging. Fully rinse the casings both inside and out.
- Pull the casings over the nozzle of a sausage stuffer. I have tried several methods of stuffing the sausages. The sausage attachments on both my meat grinder and my pasta maker were pretty much useless in getting a nice sausage with the fat pieces evenly dispersed throughout the meat. Instead, they mashed everything together in such a way that you couldn’t tell what was meat and what was fat. In the picture you can see that I also tried a gelatin casing one of the times. It broke easily, and was a lot more difficult to work with, so I probably would never use it again. 🙂

- This was fresh homemade chorizo made with the sausage attachment on my meat grinder and then pan cooked. You can see that while it tasted good, the inner part was basically all mashed together and you can’t distinguish between the fat and the meat.

- I had a lightbulb moment when I decided to use my electric cookie press (Something like this one) to push the meat into the casings. I was excited to find that the size of my sausage attachment fit my cookie press perfectly. That said, if you plan on making a lot of sausages in the future, I’d definitely recommend buying a decent sausage stuffer. I’m looking into buying one myself.
- Pull a small amount of the casing off the nozzle and tie the end with a small knot.
- Slowly and carefully press the meat through to the casing, easing off the casing, as needed, while you fill it.
- Stop when you have reached the desired size sausage, and tie off the end, cutting off any excess casing. Chorizo can be found both as shorter, straight pieces or as a longer piece with the ends brought together for easier hanging. (See my pictures above for both types.)
- Continue with the process until you have used up all of the meat filling.
- Check your sausages for any large air gaps, and prick the casing in those areas with a sterilized needle. Ease any air out of the sausage through the pinhole.
- If you want to eat the chorizo fresh, you are finished, and can either pan fry the chorizo until fully cooked, or cook it on the grill.
- To dry cure the chorizo, tie a cotton cord around the ends and hang it in a cool, dry place for several weeks.
- Ideally, you should weigh each chorizo before you hang it so you can monitor your progress. Technically, it should be safe to eat when it has lost 35% of its initial weight. I find that the chorizo gets better as it dries out more, and let it dry for much longer.
- Slice your homemade Spanish chorizo, and enjoy it! You can either eat it with the casing on, or peel them off before eating.
 Español


 How to Make Homemade Limoncello, Limecello, and Mandarinecello (2 Ways)
Murray Dewar
We have added cheap red wine to give a little moisture to the meat. We also wash the outer casing with red wine before we hang them, and then again after three weeks to remove the white mould.
Tracy Ariza, DDS
Sounds good!
It’s funny because I just had someone say that I had no idea what I was talking about because nobody in Spain adds wine to their chorizo. (It was someone here who told me they add it. They add white wine, but I could see how either would be great!)
I only mentioned it as an optional added ingredient, but some people get really hung up on the idea that there is only one way to make things.
Albert L J Hall
Using 2% SALTPETER is way above the US Deparment oif Agriculure of internationally agreed amounts -ONE PERCENT at most in fact most recipes call for around 0.8 % but 1% is sufficient. Food Grade Saltpeter99.9% pure is easily available on the internet in controlled quatities -most sellers are reluctant to sell more the 1/2Kilo at a time to Home Curers but at 1% half goes a long long way for the Home Curers.
Usual pactice is to use SODIUMNITRATE/NITRITE [sometimes called CHILEAN SALTPETER’ for product that is to n be cooked and POTASSIUM NITRATE for DRIED FERMENTED product.
But perhaps for the casualuser it’s probablty best to use easily available pre-mixed cures usally known as either PRAGUE POWEDRS or INSTACURE POWDERS. They both contain around 0.8 to1% actu ive ingredient and canbe usee for either a DRY or BRINE cure You can get info on the net about both and they may be more breadily available that pure Sodium or Porassium compounds and
Albert L J Hall
Never remove that white mold it what gives the sausage the Character and is much appreciated, even encouraged, all over Europe. In fat there are MATURATION outfits that specialise in giving Salami that white mold [PENICILLIUM for you. And you can buy the mold spores yourself.
John the flowerboy
I presume you can get those nice big chunks of fat by using a big enough cutting disc on your mincer but would appreciate any detail please.
Tracy Ariza, DDS
Hi John,
A good trick is to freeze the fat first. If it’s frozen, it stays in much bigger pieces.
Frank Canonica
I make a whole lot of sausage but have yet to make dried ones. For my fresh ones I find that keeping the mixture and all equipment very cold keeps the meat and fat from melding into a compact, dense form. As well on sausages where I want the fat to hold up in larger pieces, I grind the meat with my regular plate which is I believe 8mm and the fat separately with a larger grinding plate. I can not wait to try your formulation!
Tracy Ariza, DDS
Great tips!
Thanks so much, Frank!
Jean-Luc, North of England
Thank you for this clear and informative exposé. I also make chorizo albeit in the north of England. I hang them in my attic which is ideally drafty and pray for the temperature and humidity to remain within reasonable limits, normally between 8 and 15 degrees and humidity over 70% and not below 65%. At night at this time of year the temperature is likely to slide below 8 degrees though but as long as it does not go down to 0 degree or below the curing and drying processes do seem to go on. This is the hardest trick to achieve. Using the attic to dry cure my chorizo I have to do it from autumn till spring as an attic can get really hot as soon as the sun shines onto it. I am thinking of putting together a meat curing fridge to avoid. I use sea salt only, no other additives which bring me to my only question. The amount of salt you use seems to be on the low side. Per kilo adding the salt and curing it comes to 19.5g of salt. With cured charcuterie as, for instance, the French saucisson sec and dried sausages like the italian soppressata and many others is that 30g of salt per kilo of meat is the golden rule to achieve safe meat curing. How did you come to this 19.5g of salt ? This is by no means a criticism as your chorizo does look really good. I’m just curious.
Tracy Ariza, DDS
Hi Jean-Luc,
That’s an interesting observation.
Chorizo isn’t generally very salty in taste in comparison to a lot of the other cured meats. I checked online to compare my recipe to others and it actually has more salt than a lot of the others.
Many just call for a spoonful of salt for every 2pounds or kilogram of meat and fat.
I guess it’s just a regional thing and how chorizo is generally made. I doubt it would make a huge difference to add slightly more, though, Also the curing salt is salty itself. If you don’t use that, you should probably sub it out for more salt.
Ex lab Rat
You should be aware that there are two types of salts here. Prague #1 is salt and Sodium nitrite whereas Prague is salt and Sodium Nitrate. BTW the studies about nitrates causing have been found to be false, because of the way the experiments were carried out. Sodium nitrate breaks down to Sodiun nitrite which in turn breaks down to NO2
Velimatti Ollilainen
Dear ElR
In Europe we are normally using “nitrite salt” which is sodium chloride containg 0.6% sodium nitrite (NaNO2). So you cannot use too much nitrite as it would then result too salty product.
Nitrate (NaNO3) is forming nitrite which is turned into a nitrosoniun ion. It prevents the growth of botulinum forming bacteria (Clostridium botulinum) and fatty oxidation and alaso preserves red colour with myoglubin.
On the other hand nitrosoniun is forming N-nitrosoamines which are maybe in high concentration related cancer. Therefore the safety level of nitrite is considered as 0.015% (150ppm = mg/kg)
Tracy Ariza, DDS
Thanks for the great explanation, Velimatti!
M.A.J.
For DRIED chorizo, you need to use Prague #2 (curing salt #2) not #1 as shown.
Other than that the flavor is what you find in Spain (I lived there 7 years) and I use this recipe for both fresh and dried chorizos. I do use three cloves of garlic and slightly less salt (15 grams) than called for as I find the mixture salty. I also use a dash of red wine
Tracy Ariza, DDS
Thanks, M.A.J. 🙂
Pete
I was also using Prague #2 for my dried sausage as I thought Prague #1 was for smoked meats only. I was corrected on this and told that Prague #1 should be used when smoking / curing is less than 30 days. Any dry curing over 30 days requires the use of Prague #2. My dried sausage usually takes about 15-17 days to dry, so I will be using Prague #1.
Nick
You lived in Michigan. Do you think I can dry cure in my basement just hanging the sausage? It’s cool and humid.
Thanks.
Tracy Ariza, DDS
Hi Nick,
I don’t see why not. Just check the temperature, etc.
I need to try this again this fall/winter. I took a break from it the last few years with everything going on, but I’m starting to get motivated again. 😉
Albert L J Hall
I think you should check the active ingedients of PRAGUE 1 and PRAGUE 2 – or as they are sometimes calle her inthe UK ‘[and the USA INSTACURE 1and 2 . The difference in the UK is that Instacure may be not coloured pink ,
ashok
My Family Loved it. I am definitely sharing Guys, Thanks For sharing this Great Recipe. this recipe and this website with my friend. Hope they also love it. Thank you again for sharing such a great recipe.
Tracy Ariza, DDS
Thanks, Ashok!
Will Proops
Hi Tracy,
Really good article and I am agreement with many of your points regards nitrates and moulds. I’ve been hunting for a better balanced chorizo – some I have tried call for loads of garlic and cumin. I’ll be trying your recipe this weekend for my own charcuterie blogging website 😉
Thanks again, really enjoyed your article as is repeats much of what I write and agree about!
june
thanks for your kind recipe!
i tried once, but not satisfied because mine was not salty enough..
let me try your ratio this time!
from South Korea.
Tracy Ariza, DDS
Good luck with it!
Michael Brookshaw
Hi Tracy,
You say that you managed to find the saltpeter easily in Spain. I’m in the Canary Islands and haven’t seen it (yet). Where did you get it? (Farmacia, herbolario, garden centre…?)
That chorizo look lovely by the way.
Tracy Ariza, DDS
Hi Michael,
I bought from cocinista.es
They have a lot of specialized ingredients for the kitchen.
Tobybul
i have tried this using pork shoulder. after hanging for a week in my basement the sausage is extremely dry to almost jerky level. should it be dried for shorter time? Also, the end product seems to be very lean.
Tracy Ariza, DDS
If the pork shoulder didn’t have a lot of fat, you could add more to it.
If it dried too quickly, you should look for a drying place with a higher humidity level. It may take a bit of experimentation to find what works for you.
Albert L J Hall
Got mine from the internet>! on AMAZON What ever anybody tell you the traditional cure is SALTPETRE NITRITE was originally used to speed up the process and SODIUM NITRATE was a I believe used when POTASSIUM NITRATE was restrictd to WAR USE to make Gunpowder and other explosives.
Scott
A good tip to start your white mold is to go to a local store that dry cures their own meat. Make sure it has white mold on it and then peel of the skin and soak it in distilled water overnight covered. Just rub some all over the meat before you ferment or put in drying chamber.
Tracy Ariza, DDS
Great tip, Scott! Thanks!
Yes, I considered using some of the mold on our fuet. (It’s my son’s favorite type of sausage here). 😉