How to Make Chili Pepper Oil
Discover how to make homemade chili pepper oil for food, massage, and DIY balms, along with its health benefits and safety tips.
Chili pepper oil is a spicy oil made by infusing a carrier oil with dried chili peppers. It’s easy to make at home and can add flavor to meals or soothe sore muscles.
When I first ordered chili peppers to make this oil, I had its pain-relieving powers in mind. I made a homemade massage oil to help my husband’s sore muscles, and through my research, I learned that chili pepper oil can help relieve pain!
We already have a bottle of super spicy extra virgin olive oil from a local producer. He makes a variety of infused oils, and he calls that particular one “lagrimas de dragón” aka. “dragon tears.” Just a drop or two of that oil adds a ton of heat to dishes, and my husband and son use it a lot.
Why make it?
This project is so versatile and easy, and it’s a lot of fun! You can use it to spice up your dishes or add it to pain-relieving lotions, balms, or oils.
Sure, you could buy pepper oil, but you wouldn’t have the control over what ingredients were used. Plus, where’s the fun in that?
If you need another reason, the bottle of dragon tears we bought was pretty pricey! While I love supporting local businesses, I also wanted to give it a shot myself!
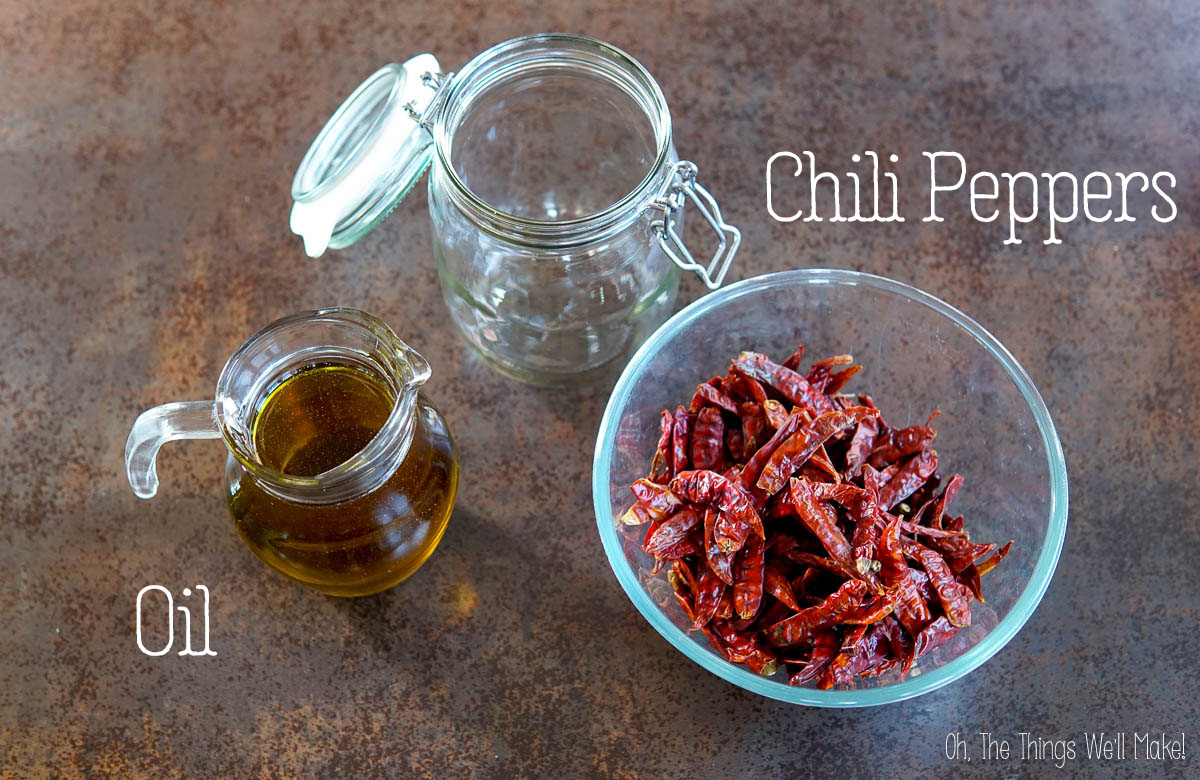
Ingredients
You only need two ingredients to make homemade chili oil: oil and chili peppers. By making it yourself, you can choose which oils and peppers to use.
If you plan on using it for food or cooking, use an oil that fits your dietary needs.
For health reasons, I avoid seed oils and prefer oils like avocado oil, coconut oil, or olive oil. For infusing oils, I usually suggest using a neutral or lightly flavored carrier oil that can handle gentle heat. In this recipe, though, you can use extra virgin olive oil since the peppers are bold in color and flavor. (My bottle of “dragon tears” was, in fact, EVOO-based.) Even the dark color and strong flavor of the EVOO won’t overwhelm them.
Oils with a longer shelf life will result in a chili pepper oil that will also keep longer. For making cosmetics, coconut oil and jojoba oil are great options. Sunflower oil is non-comedogenic and can also be used, but it doesn’t generally keep as well as the other two.
As for the peppers, you can customize the heat level and flavor depending on what peppers you choose. Dried red chili flakes are convenient, but whole dried chilies like Arbol, Thai, or Kashmiri would probably give a spicier, richer flavor. The more peppers you use, the hotter the variety, and the longer you infuse your oil, the spicier it will be.
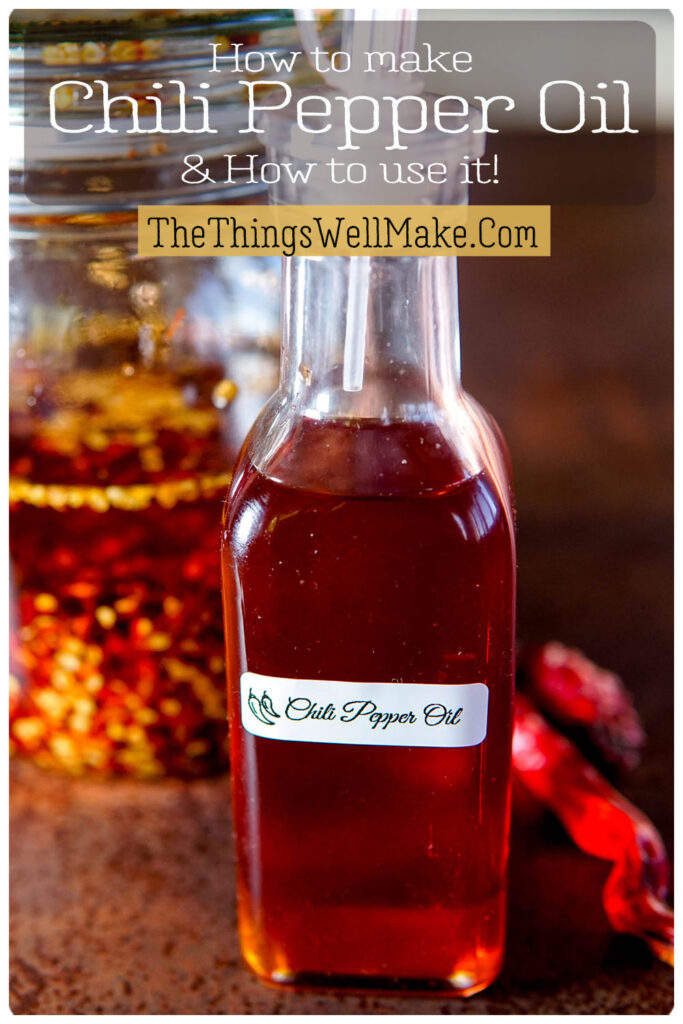
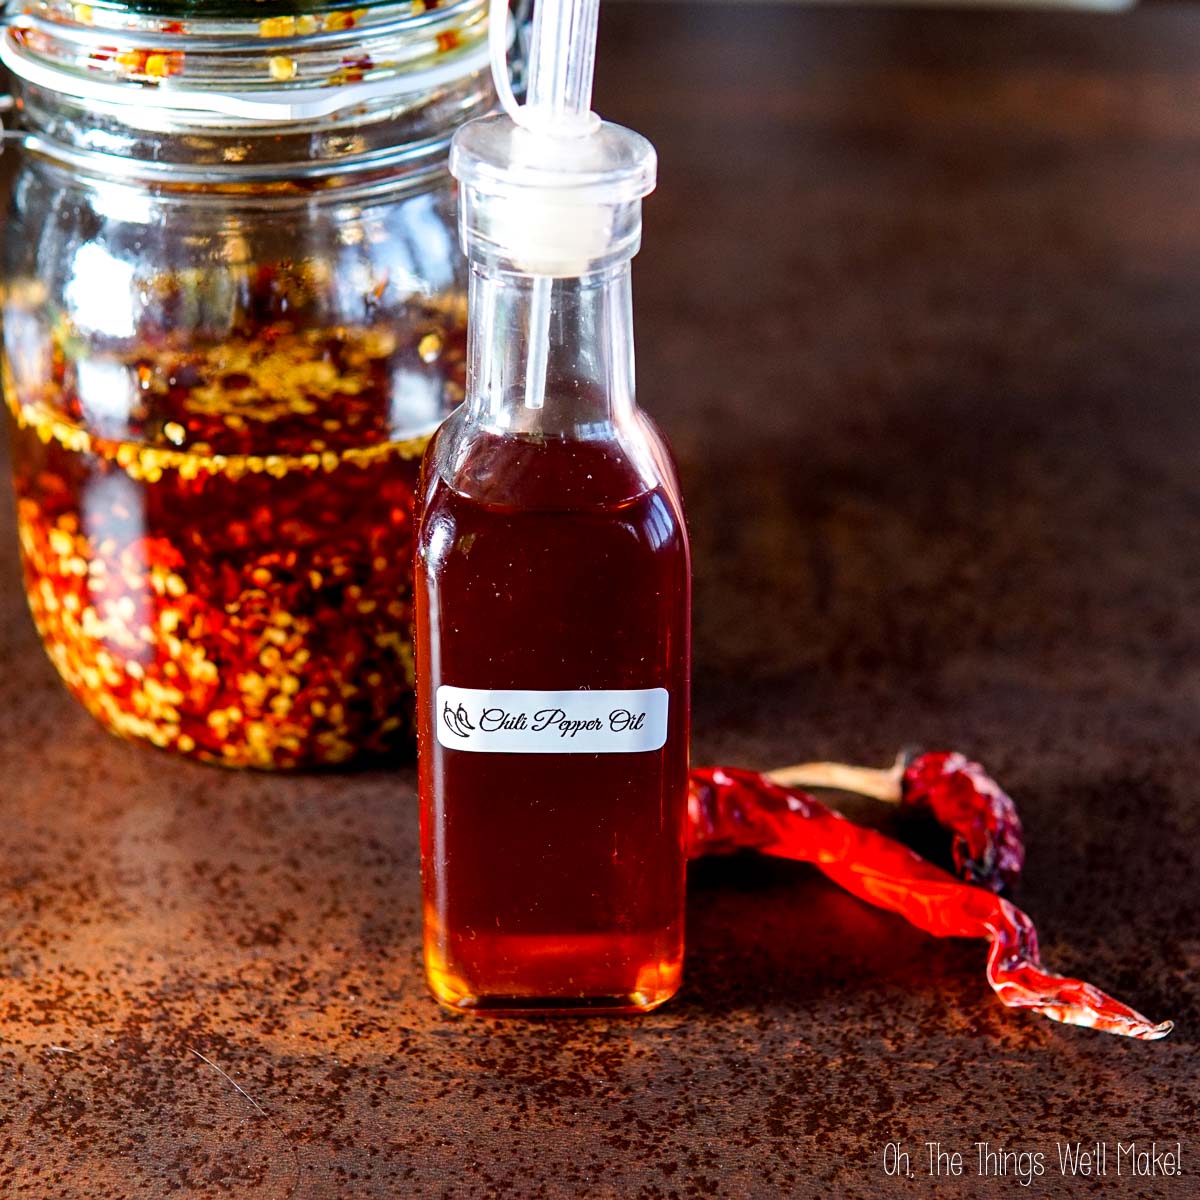
I infused extra virgin olive oil with dried Arbol peppers, resulting in a super spicy, beautiful red oil!
Preparation
If you’re using fresh peppers, you’ll want to fully dry them before adding them to the oil. Any residual moisture makes it more prone to microbial growth, meaning you may end up with bacteria or mold.
To fully dry the peppers, you can hang them to dry in the sun or use a low setting on a food dehydrator. You can also use your oven on the lowest setting. The peppers will harden up and lose flexibility when dry.
To save yourself time, buy dried chili peppers.
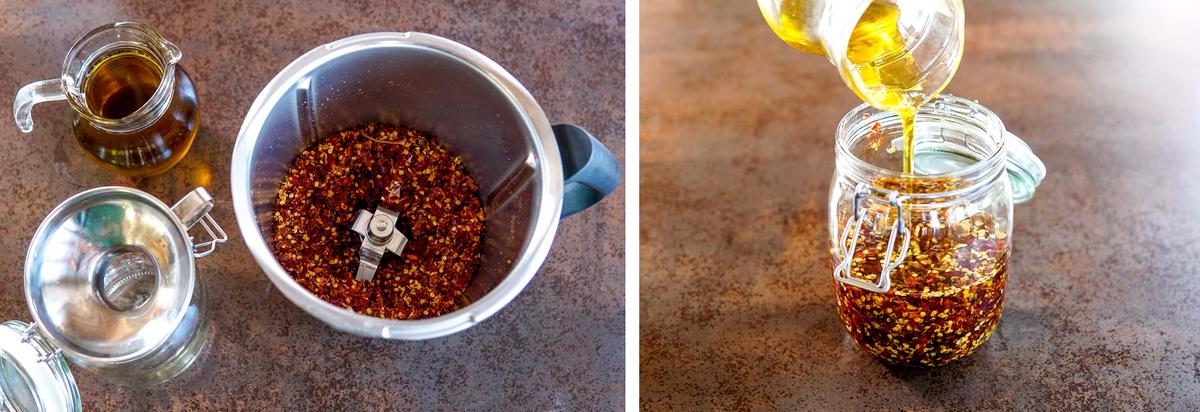
Once you have dry peppers, remove any stems or stalks, and chop up the peppers in a food processor. (You could also use a mortar and pestle, but it would take a lot more effort.) For a milder oil, remove the seeds from the peppers before grinding them into small bits. I wanted spice, so I left them in!
Add the ground peppers to a glass jar or another temperature-resistant, food-safe container and cover them with oil. I used 100g of dried chili peppers and just under 2 cups of extra virgin olive oil. You can add more oil above the level of peppers, but the more oil you use, the less concentrated the finished oil will be.
Infusing the oil
Once your peppers are covered with oil, you have already done most of the work. Now, you just need to be patient!
For the next few days, stir the oil and peppers at least once a day. While you could just keep the oil on your counter and let it infuse on its own, there are several ways to speed up the process and get a more concentrated oil more quickly.
To speed up the process, gently heat the oil and peppers. Because it is finally spring and the sun has been out this week, I brought my oil outside into the sun to gently heat it. I covered the jar with a black cloth to help it absorb more heat and protect the oil from sunlight, which can damage oils over time. (Dark colors absorb heat rather than reflect it.)
If you want to speed up the process even more, you can place your jar on a heating mat or in a slow cooker overnight.
When you stir the oil each day, take a look and see how the color is developing. You can also taste it, but beware: it may be extremely spicy! (On the third day, I gently touched the residual oil in the spoon with my fingertip and just barely touched it to my tongue. I was shocked by how spicy it already was!)
Once you’re happy with the color and flavor, you’ll want to strain the oil.
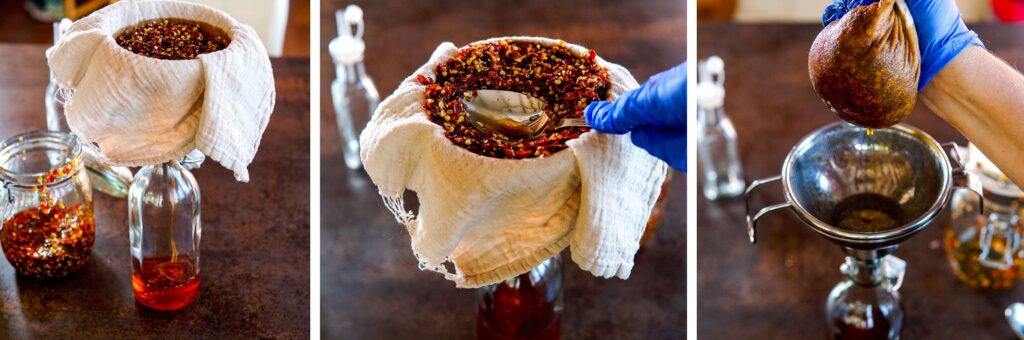
Straining the oil
Once you are happy with the color and flavor of your oil, it’s time to strain it. Place a fine-mesh sieve over a clean jar or bottle and line it with a clean cotton cloth or cheesecloth to filter out small particles. Place a funnel in the bottle to help guide the oil without spilling.
Slowly pour the oil through the cloth-lined sieve and funnel, letting it drain naturally. To extract more oil, press down on the mixture with a spoon or lift the cloth and twist to squeeze the oil from the chili peppers.
Benefits of chili pepper oil
Chili oil isn’t just for spicing up your food; it actually has some health benefits, too! Thanks to capsaicin (that fiery compound in hot peppers), chili oil can be helpful for both your body and your meals. You can rub it on sore muscles or use it to add a kick to dinner.
When used topically
Chili oil may help with pain relief. For years, it has been used in creams and massage oils to help soothe muscle aches, joint pain, and nerve discomfort. Capsaicin reduces substance P, a chemical that transmits pain signals in the body. Less substance P leads to reduced pain, which is why capsaicin is often used for arthritis and nerve pain.
It also boosts circulation. Ever feel your skin warm up after applying something spicy? That’s capsaicin at work. It helps increase blood flow to the area, which is why chili oil could be a great addition to massage oil blends for tired muscles or cold hands and feet. One study from 2015 even suggests it may support heart and blood vessel health.
Capsaicin may also help protect your skin or scalp from germs due to its mild antibacterial and antifungal properties. A recent study shows that chili extracts can combat some bacteria and fungi, but more research is needed to see how effective it is as an antimicrobial.
When Eaten
A little heat in your food can wake up your digestive system and get it moving. Capsaicin helps stimulate saliva and digestive juices, which can make it easier for your body to break down meals. It may also encourage healthy gut movement.
Along the same line, capsaicin can give your metabolism a boost. It may help your body burn slightly more calories and fat, and may even curb appetite. A 2022 study linked chili consumption to better blood lipid levels (lower cholesterol).
Chilies are full of antioxidants like vitamin C and carotenoids, which help protect your cells from damage. A 2023 review found that adding chili to your diet may reduce inflammation and improve health over time.
How to use it
Chili oil isn’t just a kitchen staple; it can also be part of your wellness routine.
In the kitchen
Use chili oil as a finishing touch to add flavor and heat to your meals. Drizzle it over noodles, pizza, roasted veggies, or even soup for a spicy kick. Stir it into another oil first for a milder touch. You can also stir it into dressings, sauces, or marinades.
Start with just a few drops before adding more. Just a little goes a long way!
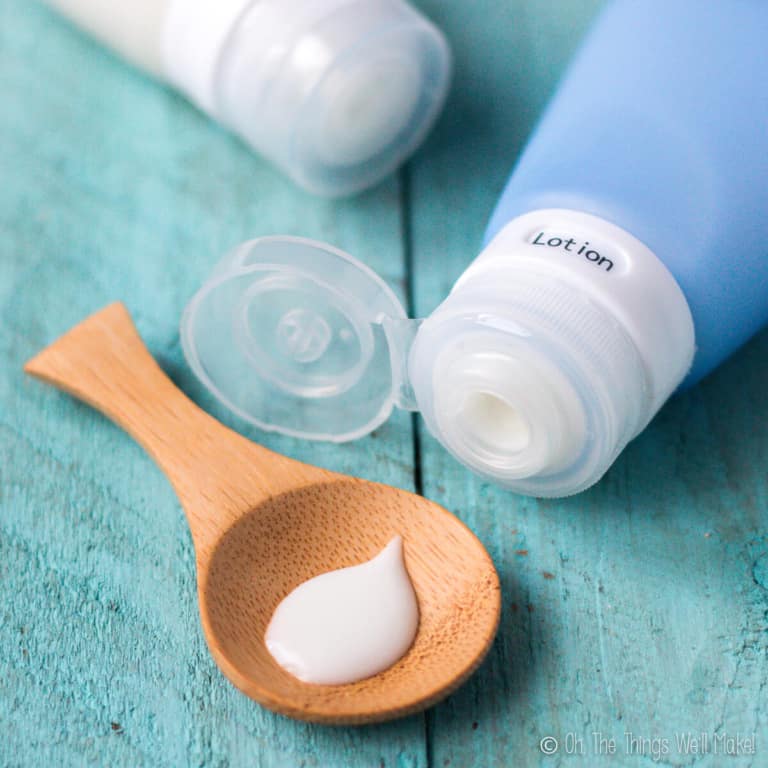
For muscle relief
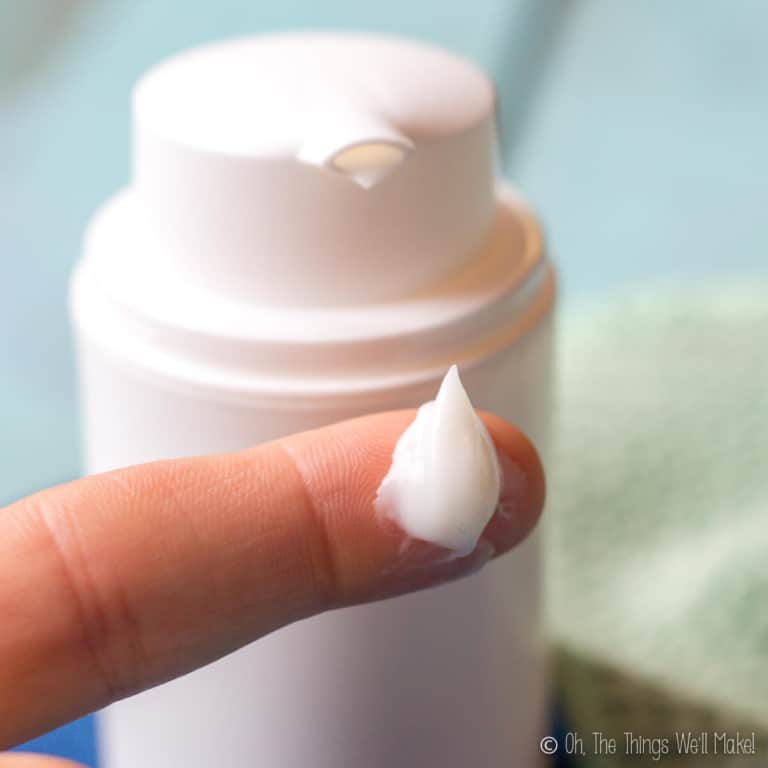
Chili oil can be a great addition to your post-workout recovery routine. Mix a small amount with a carrier oil like coconut, almond, or olive oil, then gently massage into sore muscles. You can use it as one of the oils in your homemade massage oil.
The capsaicin helps increase blood flow and can provide a warming sensation that eases tension.
As a scalp oil
While I haven’t tried this yet myself, I’m curious to give it a try. Apply a tiny amount of diluted chili oil to your scalp to help stimulate your scalp and boost circulation. This may help maintain a healthy scalp.
Do a patch test first before using pepper oil topically, and avoid contact with your eyes!
In homemade balms
You can also make your own warming balm by combining chili oil with beeswax or shea butter. It can be used as a spot treatment for stiff joints or tight shoulders. Some people even use a similar salve as a chest rub during cold season!
Expert tips
- Use it little by little! A little chili oil goes a long way.
- Pair it with soothing ingredients. If making a balm or massage oil, ingredients like shea butter, calendula, or arnica can help balance out the heat.
- Do a patch test before first-time use. (Apply a small amount on your inner forearm and wait 24 hours to see if you have a reaction.)
- Use it as a finisher. Add a few drops of chili oil to food after cooking rather than during.
Warnings
While chili oil has lots of potential benefits, it’s very potent and should be used with care.
- If you have sensitive skin, it can cause burning or irritation.
- Don’t apply it to broken skin, and keep it away from your eyes, lips, and other sensitive areas.
- Always dilute it with another oil before applying it topically. Also, do a patch test on a small skin area first.
- Handling fresh peppers can cause contact dermatitis on the hands, aka. “Hunan hands”, so be careful when handling fresh chilies and don’t go overboard with the oil.
- Wash hands thoroughly after use, especially before touching your face or eyes.
FAQs
Yes, but it’s best to use it diluted. Mix it with other oils like coconut or almond oil before applying it to your skin. If you have sensitive skin, test it on a small area before applying to larger zones.
The spiciness depends on the chilies you use and how long you infuse the oil with them. For milder heat, go with jalapeño, ancho, or guajillo peppers. For a spicier oil, try Thai chilies or habaneros.
As long as you use only food-safe ingredients, yes! If you’ve added essential oils or infused oils you wouldn’t normally eat, don’t eat it!
This depends on the oil you chose for making your chili oil. If the peppers were fully dried before being infused and the oil wasn’t overheated, the finished oil should last as long as the original carrier oil. (Check the best-before date to get an idea of the shelf life.)
Stop using it! Wash the area with mild soap and cool water, avoiding scrubbing. Applying a little milk or yogurt can help neutralize the capsaicin. If the irritation doesn’t go away, have it checked out by a healthcare provider.
Video

Chili Pepper Oil
Ingredients
- 2 cups Oil
- 100 g Chili peppers dried
Optional Add-ins:
- 2 cloves garlic for flavor
- 1 pinch Smoked paprika
- peppercorns
Instructions
- Make sure the chili peppers are fully dried. If using fresh peppers, dry them in a dehydrator until fully dried.
- Grind the peppers in a food processor.
- Combine the ground peppers and oil in a clean, dry jar and mix until throroughly combined.