

How to Make a Clutch Handbag (Leather)
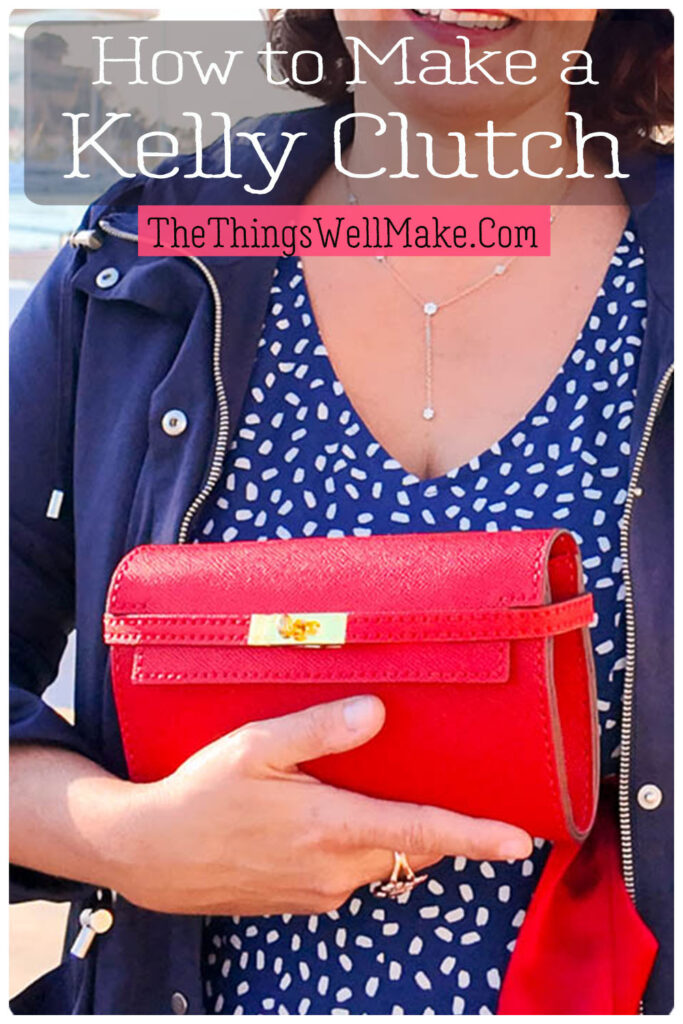
Learn how to make a clutch handbag with this easy-to-follow DIY kit! This stylish, compact purse includes a coin pouch, credit card slots, and an optional strap for crossbody wear. Don’t have experience? Don’t worry! It’s perfect for beginners and experienced leather crafters!
If you’re looking for a stylish, compact purse that you can make yourself, the Kelly Clutch DIY Kit from Babylon Leather a great choice!
I’ve been working with Babylon Leather for a while now, and have really enjoyed making their projects. When looking for my next project, I chose the Kelly clutch because I needed a small, convenient bag that fits my essentials without taking up much space. The design is very practical, with a center coin pouch for loose change, many credit card slots, and enough space for everything I need without being bulky. Plus, it’s super cute!
One of the best things about this clutch is its versatility. You can buy the kit with or without the strap, so you can use it as a sleek clutch for nights out or as a crossbody purse for hands-free convenience.
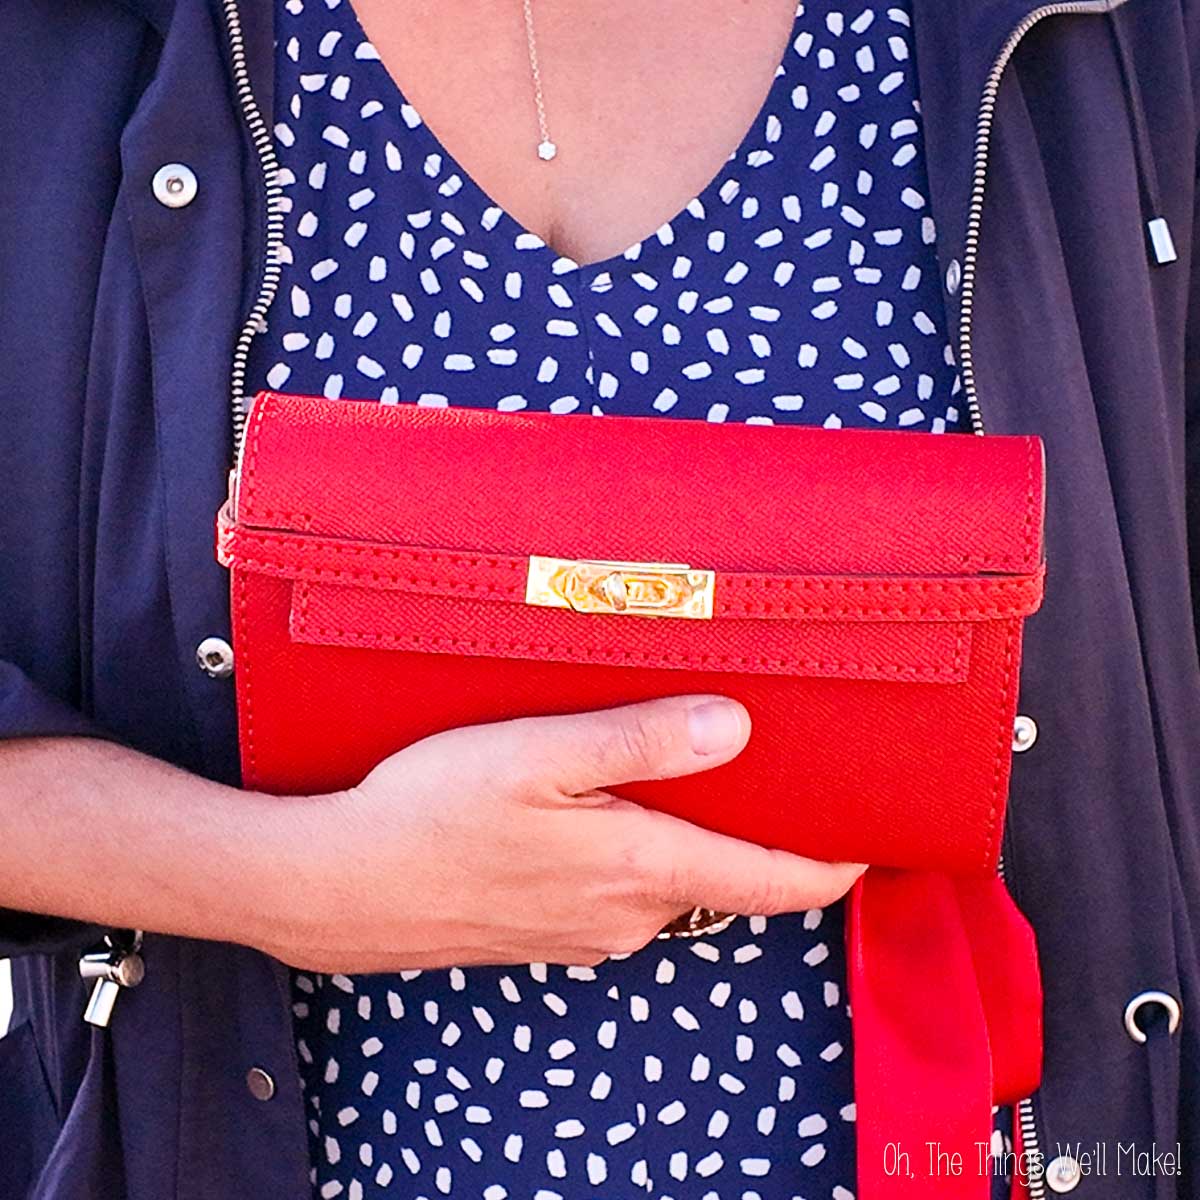
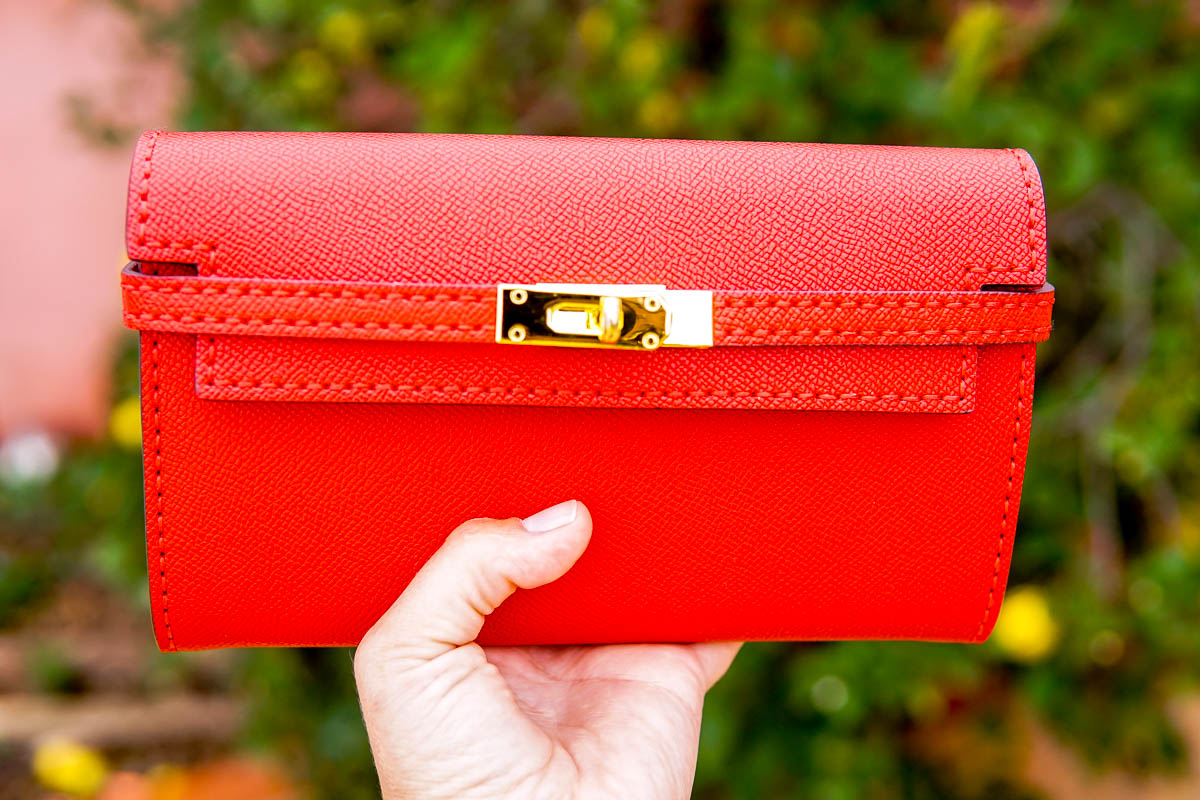
I made mine in red, and love how elegant and functional it is! Whether you’ve been crafting leather goods for ages or you’re just starting out, this kit is a game-changer. The kit and instructional videos help you whip up a professional-quality purse even if you’ve never sewn before.
Materials
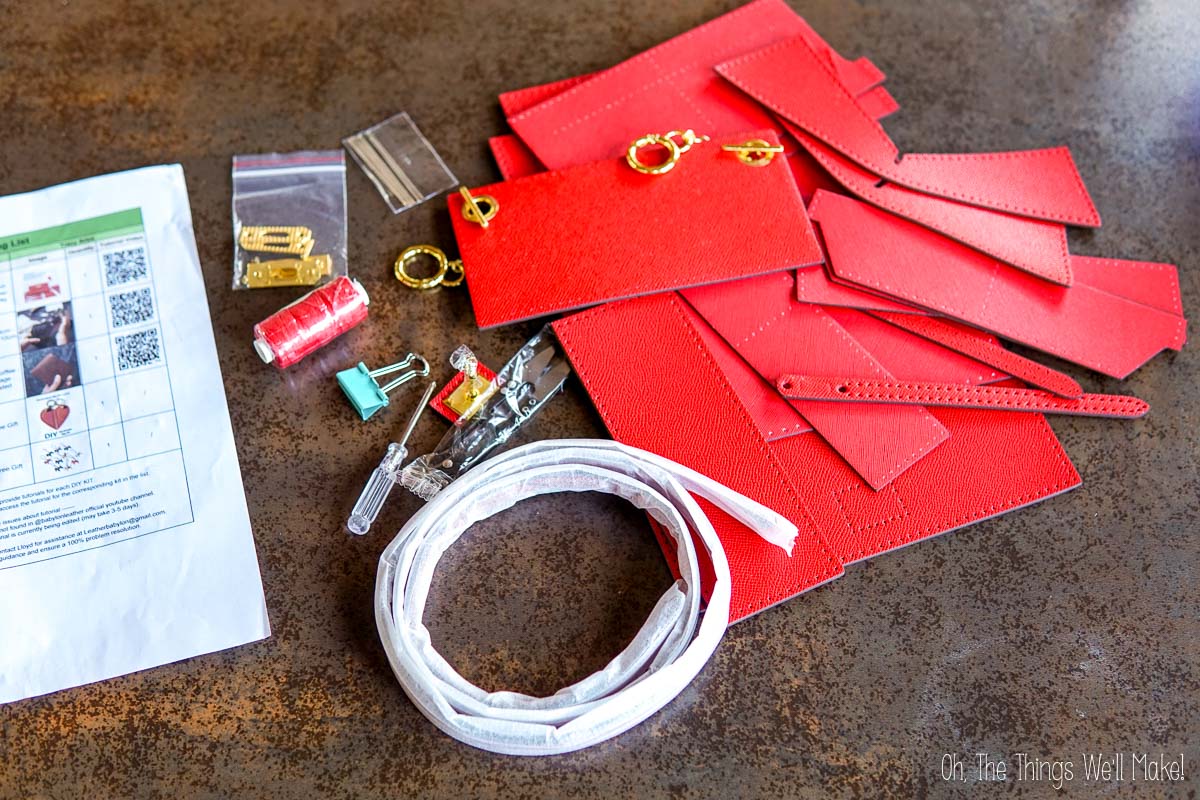
The DIY Clutch Kit includes everything you need to make your handmade purse. (Yes! Everything!)

Inside the kit, you’ll find pre-cut leather pieces, waxed thread, and several sewing needles. The kit also comes with all the necessary hardware, including the zipper and clasps. You can also buy the optional strap attachment if you want to add a crossbody strap. (I definitely recommend it!) They even throw in a small set of scissors, a mini screwdriver, and a few clips to help you hold the pieces of leather together as you sew.
The leather for this kit is made with top-grain leather. Some of the leather pieces are coated with PU (polyurethane) on the side that faces the interior of the purse. This helps protect the surface when you throw your keys and other belongings in the purse.

Note: If you order the optional strap, it will come with two rectangular pieces. One has metal grommets onto which you can clip the straps. The other piece becomes a pocket when sewn to the larger rectangular piece. (I mention this so you aren’t confused by the extra rectangular piece of leather when looking at the materials!)
How to sew the clutch
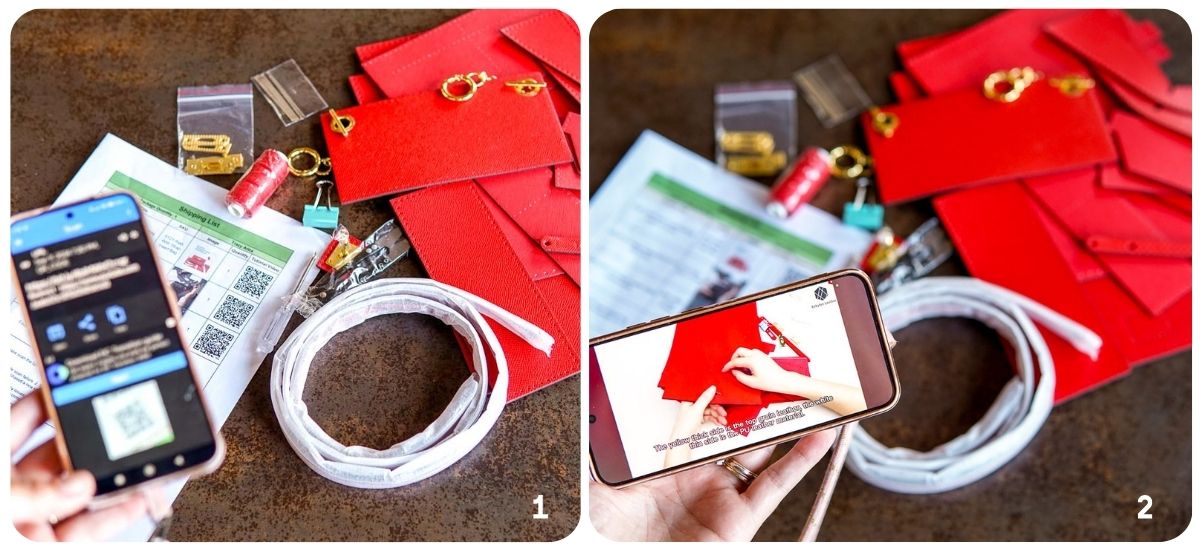
When your kit arrives, you’ll get a link to a detailed video tutorial that shows you how to sew the purse step by step.
Step 1: Gather your materials.
Before you begin sewing, lay out all the pre-cut leather pieces in front of you. This helps you make sure that you have everything you need. I’ve completed several of these kits without problems, but it’s smart to check your materials before starting any new project.
The video will explain how to distinguish the PU-coated side of the purse’s interior from the uncoated genuine leather on the exterior.
The waxed thread is easy to work with and gives your stitches extra durability.
Many of the leather pieces of this kit have a PU coating to help protect the leather.
Step 2: Thread the needle and begin stitching.
The videos show a handy way to thread your needles so they don’t come unthreaded. You’ll be threading the waxed thread through needles on each end of the thread to do the saddle stitch. (Two needles for each portion of thread)
The video will teach you how to do the saddle stitch, which you’ll use throughout the whole process. Using the pre-punched holes in the leather, it’s easy to follow along.
Step 3: Sew the card slots
You’ll begin by sewing the inner card slots. Since you begin with interior parts, you can practice on pieces not seen when wearing the purse. You’ll be sewing the bottom of the slots and the center. (The sides will be sewn into the purse later!)
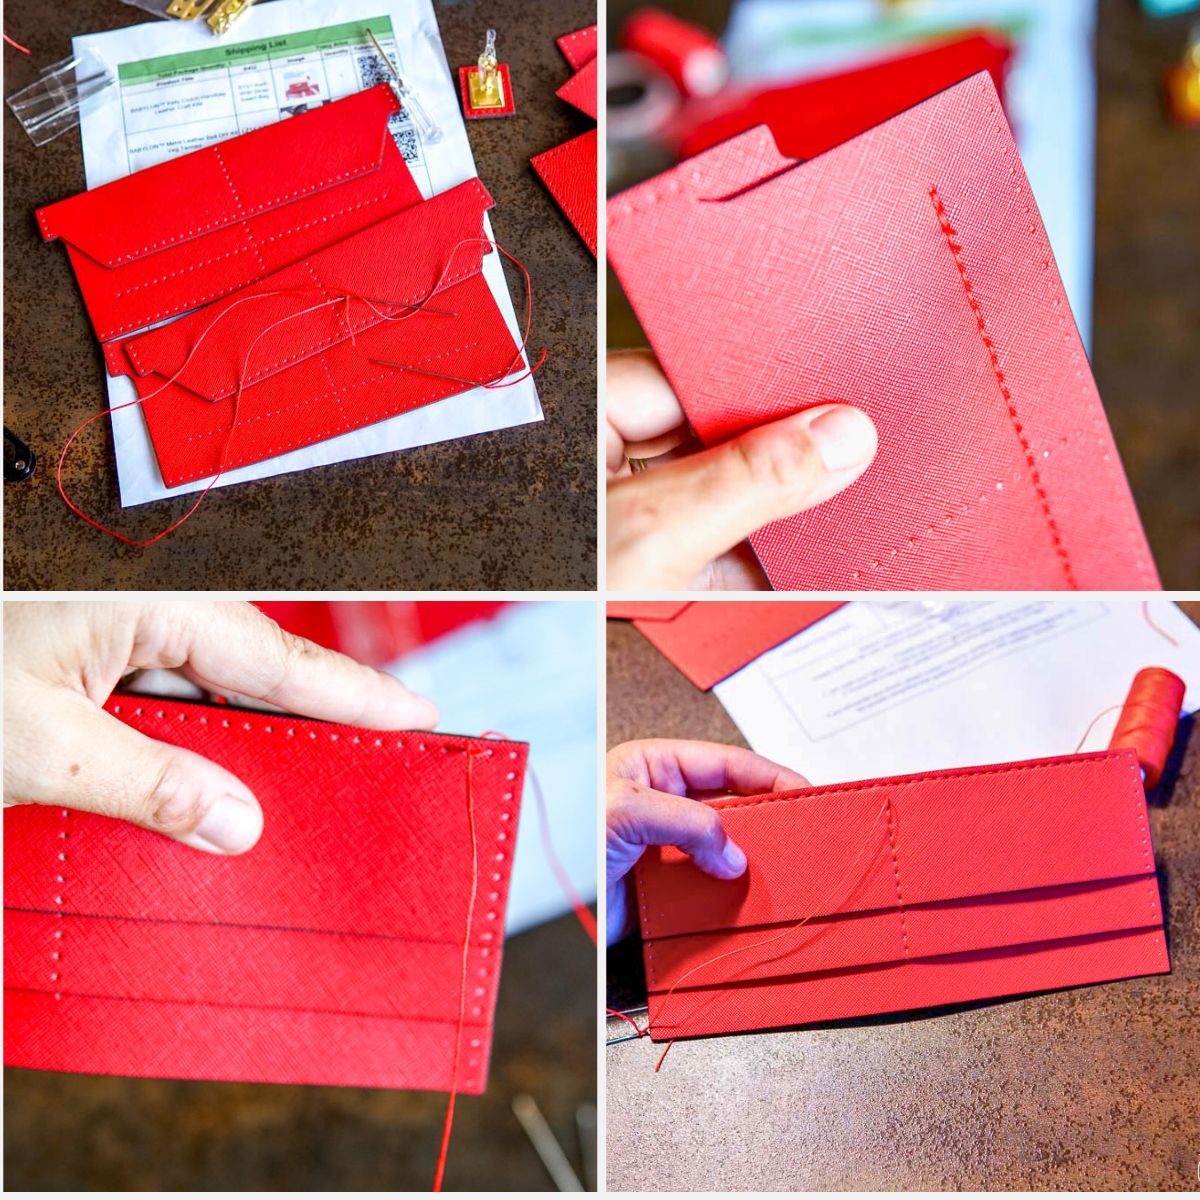
This clutch has card slots on both sides of the purse, so you’ll be repeating the process twice!
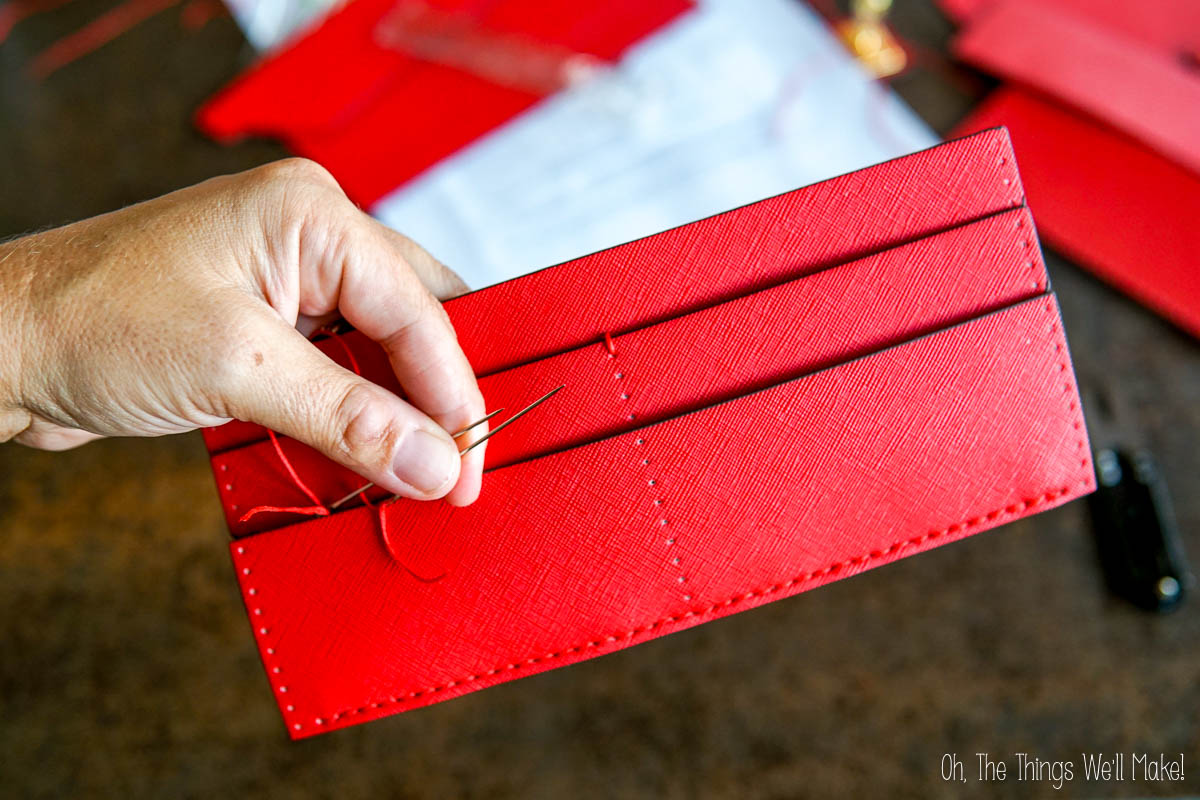
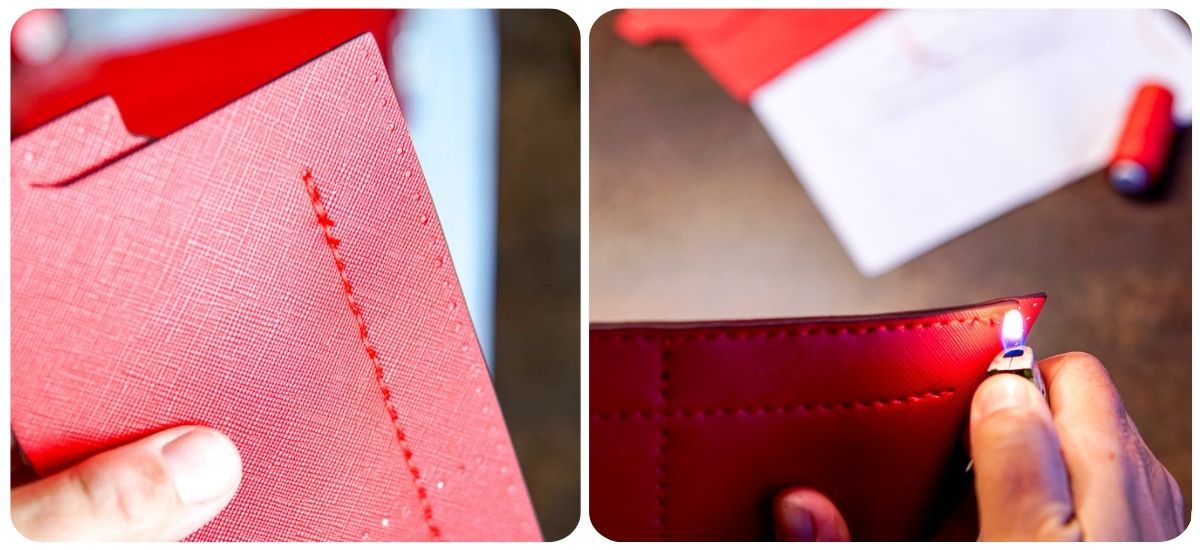
The only part I found mildly confusing in the video was the first stitch down the center. You want to catch the top of the leather in the stitch as seen here.
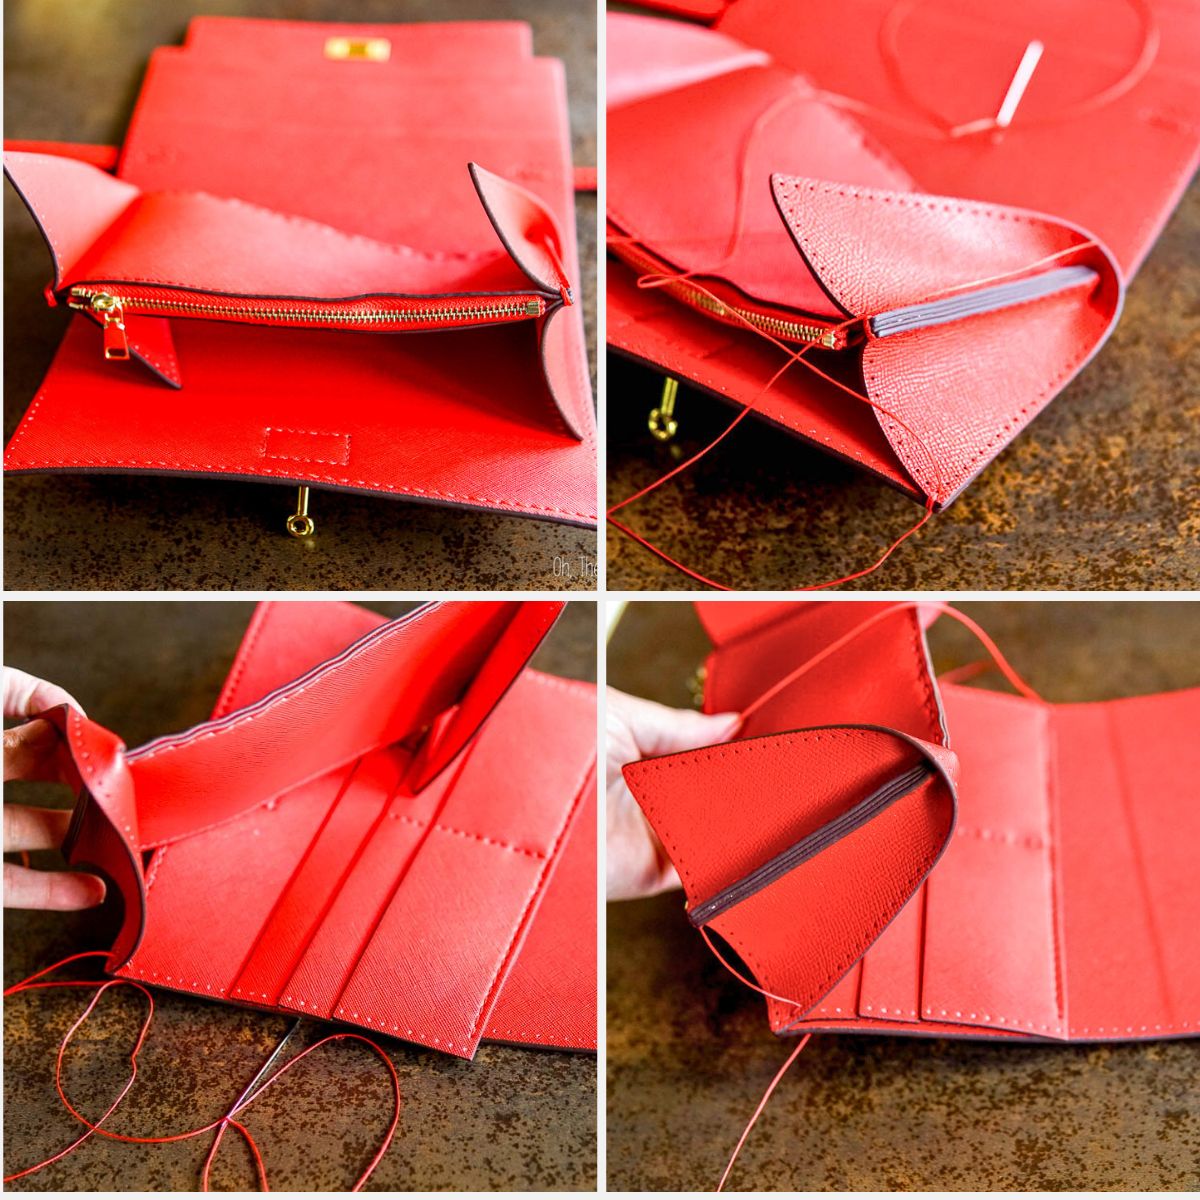
Step 4: Sew the coin purse section.
After burning off or gluing down the loose ends of the thread (note on that below), we’ll focus on the center coin purse section. For this part, the zipper is already sewn in place. You only need to sew down the bottom.
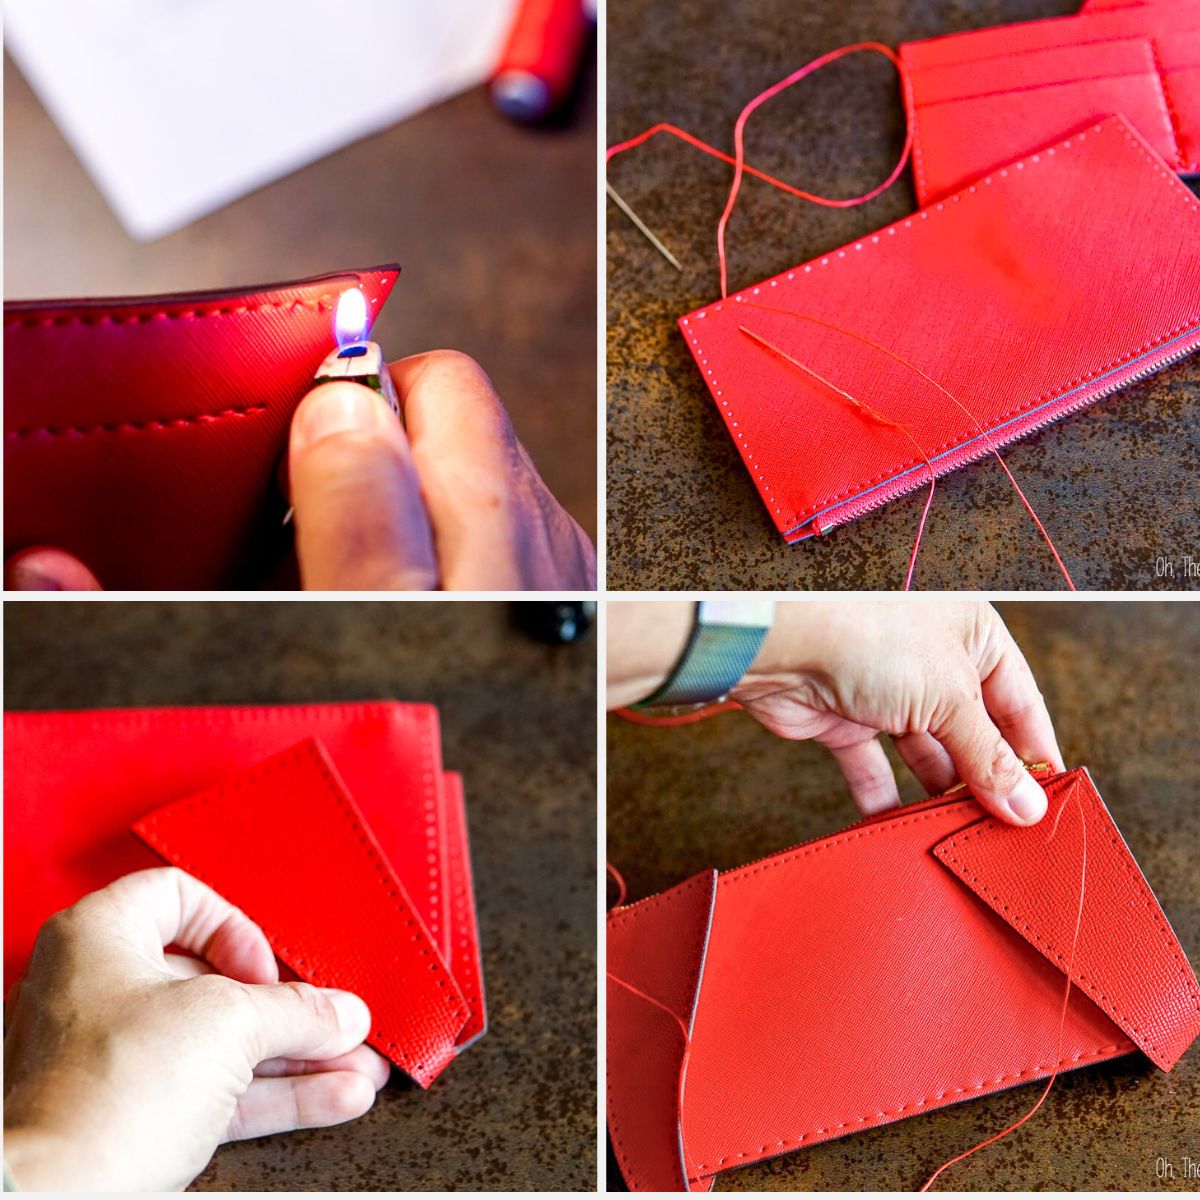
After finishing that, you’ll be sewing the side pieces on either side of the center section. Be careful to keep the PU lining on the interior of the purse and the genuine leather on the exterior. (The video explains how to distinguish them.)
Step 5: Sew on the straps and hardware.
We can now begin to work on the main part of the purse. First, sew the straps in place, making sure not to sew them into the line of holes going around the purse. In the picture, you can see how I lift up the strap to avoid sewing it there.
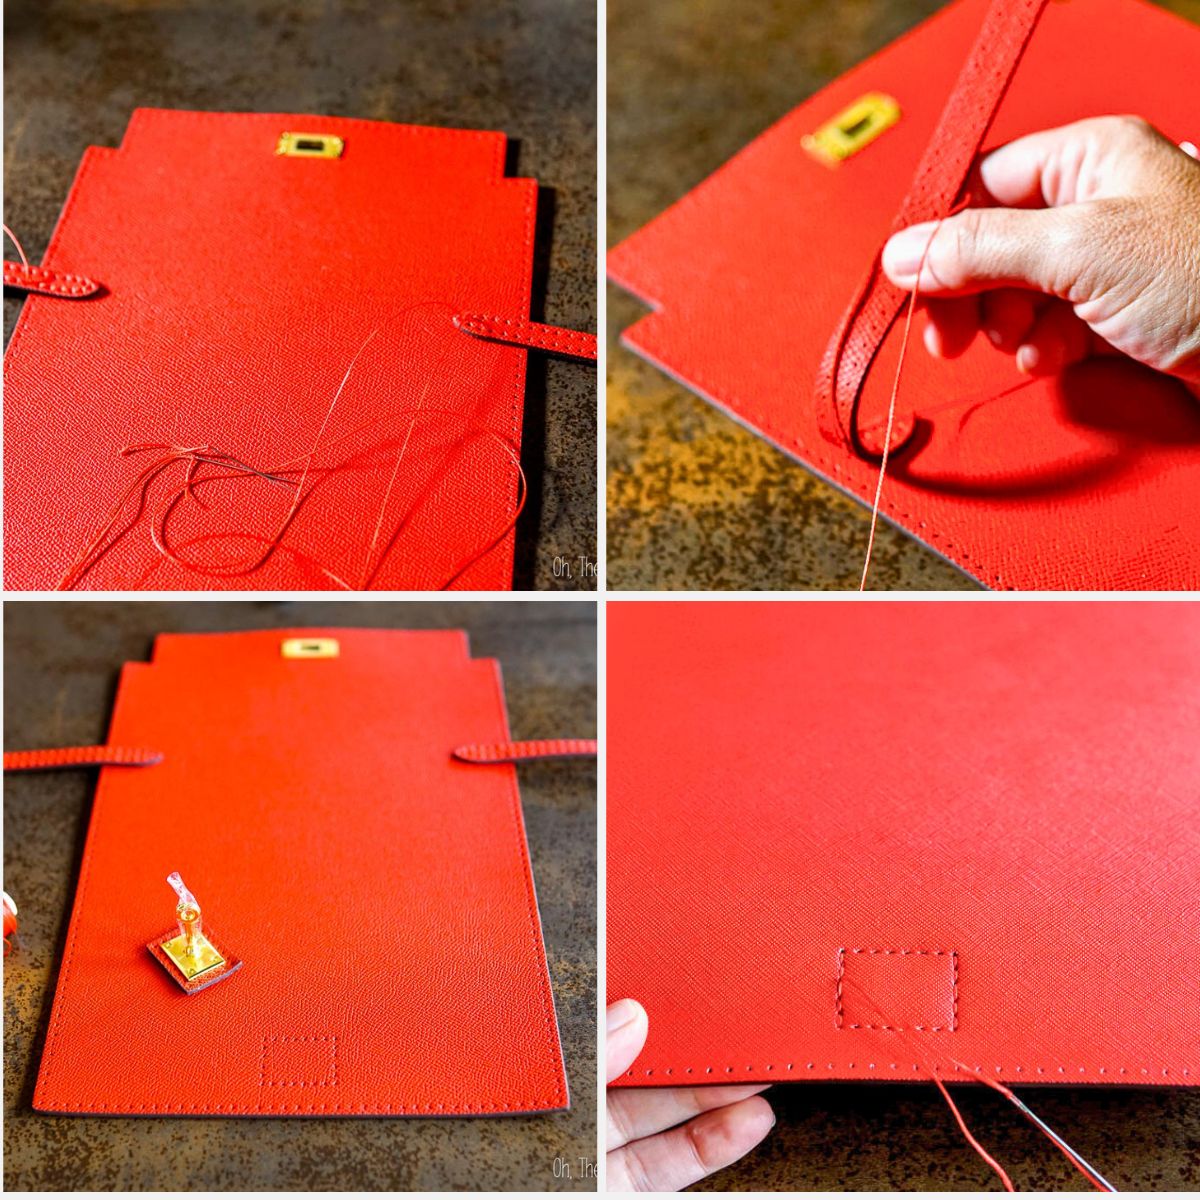
Once the straps are in place, sew the small, rectangular piece with a post on it in place. This is where you will place the straps to fasten the clutch closed. In the last photo above, you can see the stitching from the back side.
Step 6: Sew the pieces together.
It’s finally time to put the main pieces together!
First, place the center section in place, making sure that the zipper closes on the left side. This is most convenient for right-handers, but you can sew it in however it’s most convenient for you!
Sew it in place, beginning with a few reinforcement stitches that go over the top edge. On the third stitch, place one of the card slot sections in place and sew it into the seam.
Step 7: Repeat on other side.
After sewing the first card slot section, sew eight stitches around the bottom and then add the next card slot section at the ninth stitch.
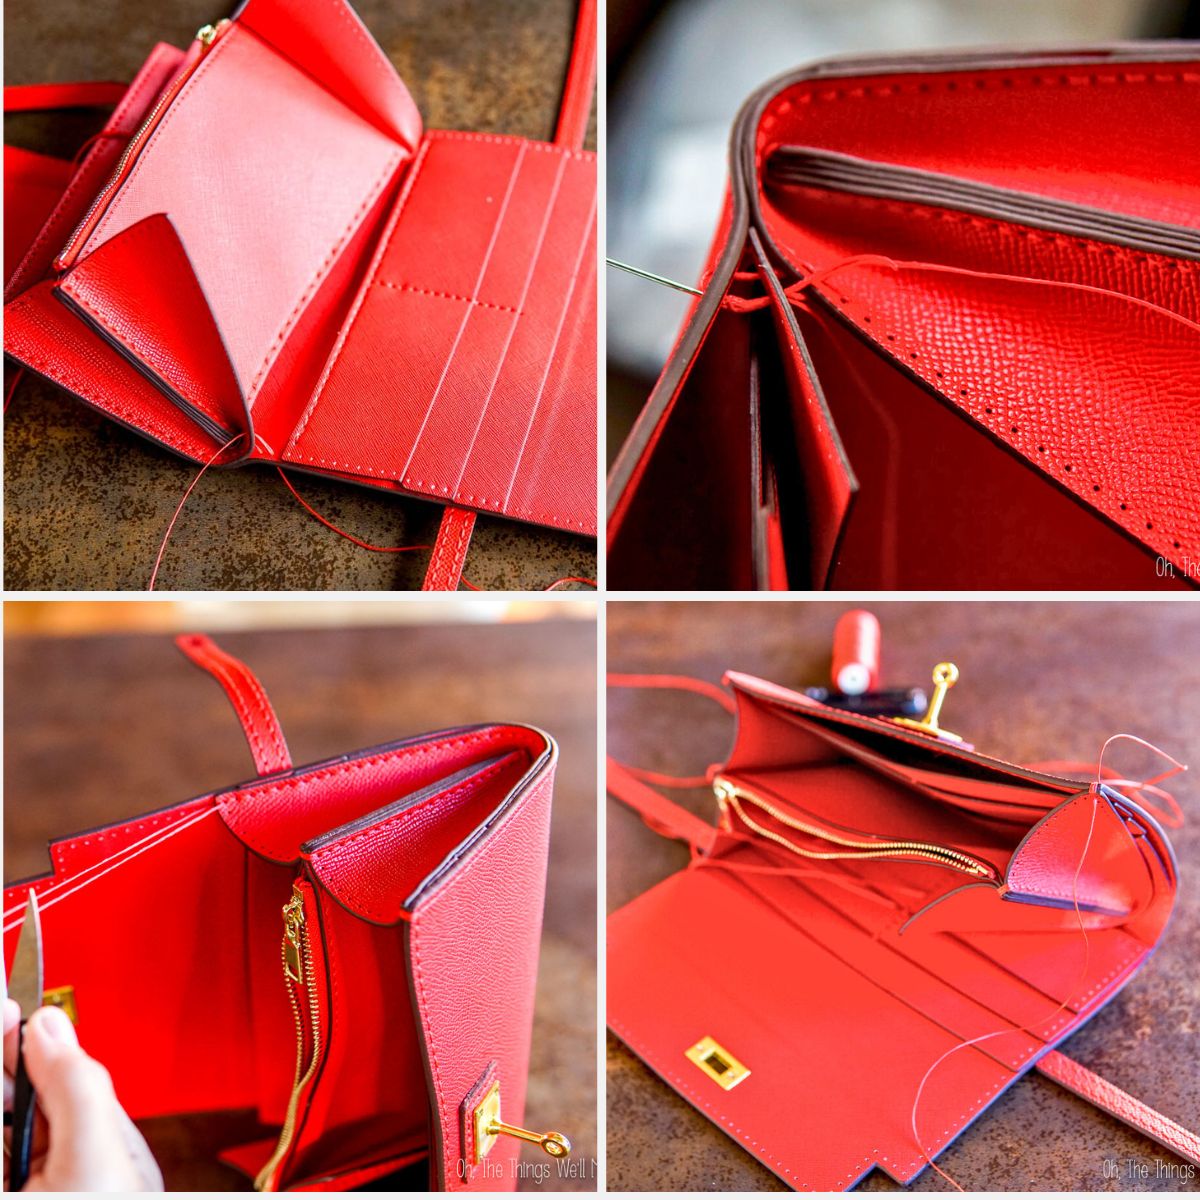
After sewing the second card section in place and finishing the first side, cut the thread, leaving it longer this time (3rd photo above). Then, repeat the process on the other side. This time, though, you’ll also sew around the flap on the clutch until you reach the other side.
Step 8: Sew across the top of the side sections.
The purse is mostly finished at this point. All that is left to do is to sew across the top of each side section. You’ll sew reinforcing stitches over the center part, then stitch through the inside before continuing along the top. Make sure not to pierce the leather with the needle when pushing it through.
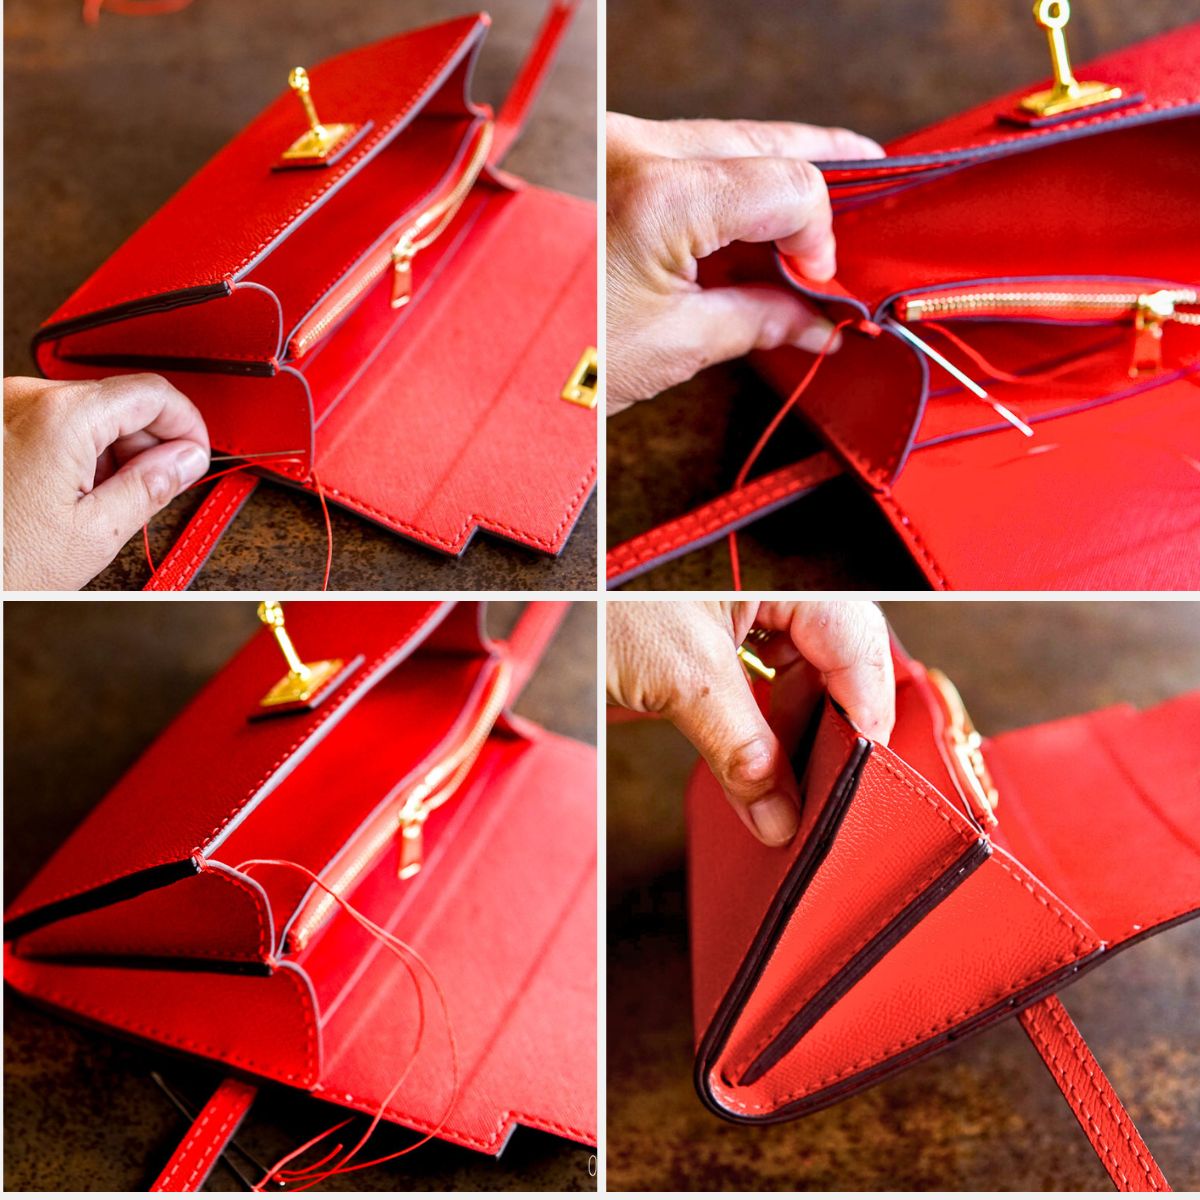
Step 9: Attach the hardware.
Once the body of the clutch is stitched together, attach the hardware with the enclosed screwdriver. The clasps come covered with plastic to protect the metal from getting scratched.

Step 10: Making the optional strap
This was the only confusing part for me when making this purse. Making the strap piece is very simple, but the instructions provided didn’t tell me how to make this part. (That’s probably because the main kit doesn’t automatically come with the strap.)
I wrote to the company, and they sent me written instructions for that part. I had guessed correctly how to sew it together, but was happy to have the confirmation.
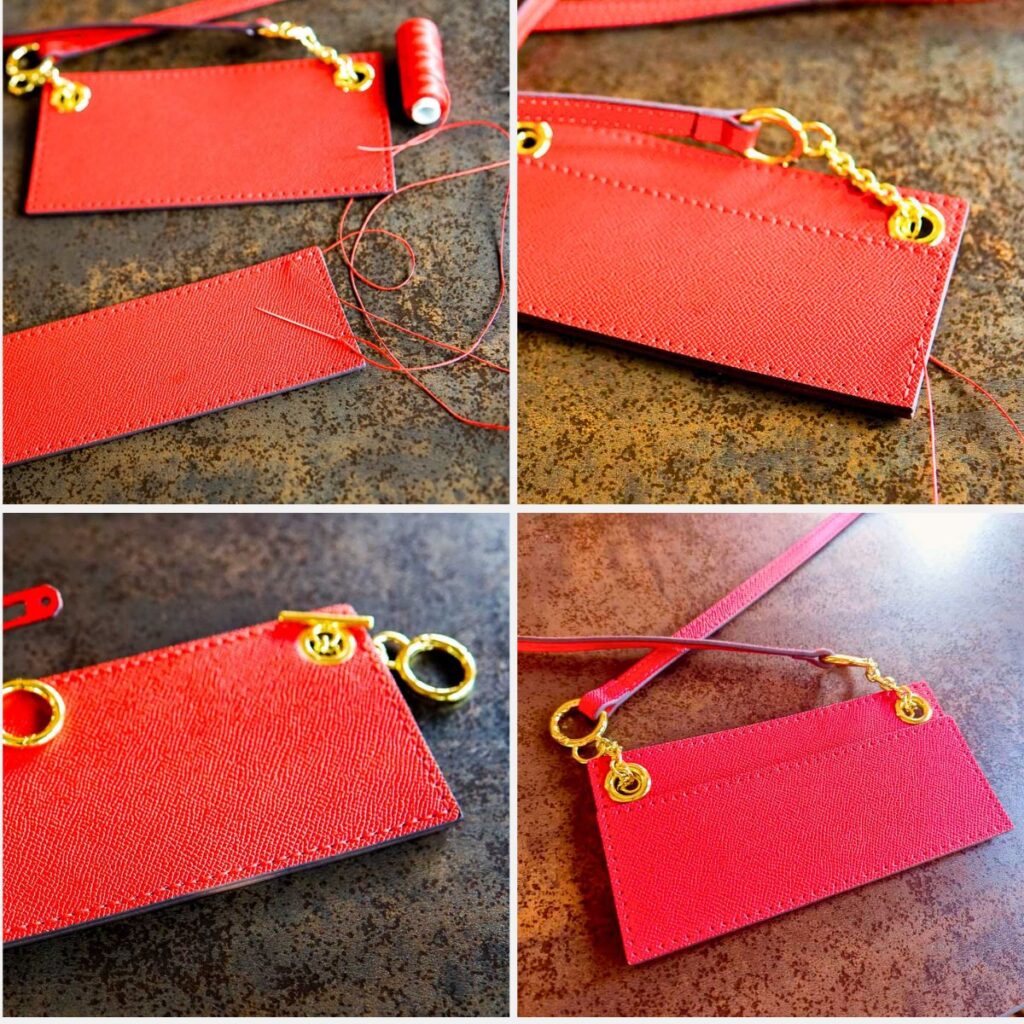
To complete this part, first, you need to stitch across the top (one of the longer edges) of the smaller rectangle. This will become the top of the pocket. After completing that line of decorative stitching, attach the smaller rectangle to the larger rectangular piece by sewing around all four sides. Attach the straps, and you’re finished!
Step 6: Final touches
Trim off any excess threads, and gently shape your clutch.
The instructional video explains how to glue the ends of the thread after cutting, but I chose to burn them off like I did with the other kits. Keep in mind that the PU coating will burn more easily than the leather. So, if you decide to burn the ends, be careful not to burn the leather. (Also, keep in mind that burned ends are less visible on darker color leathers than lighter and brighter colors.)
FAQs
The purse is made of genuine top grain leather, but the interior is coated with PU.
The PU coating is to enhance the structure, durability, and practicality of the bag. Using a PU coating on the interior lining makes the bag more water- and dirt-resistant. This makes the interior easier to maintain than the genuine leather exterior, which needs more care. The PU backing also stabilizes the shape of the bag, ensuring it maintains its form over time. Using genuine leather throughout would waste material, as it would need to be overly thinned for the interior. Using genuine leather for the exterior and PU for the interior provides a good mix of quality, affordability, and practicality.
I love mine. I figured I could even use the clutch as a large “wallet” in larger purses, so I love how the strap can be removed. Sometimes, though, I want the strap as it’s more comfortable to carry the purse with the strap. I love how versatile the purse is.
Expert tips
1. Go slow and enjoy the process.
Leatherwork is all about precision, not speed. Take your time with each stitch and enjoy seeing the clutch come together step-by-step. Hurrying can result in inconsistent tension or a twisted thread.
2. Watch out for piercing your thread.
When saddle stitching, make sure your second needle isn’t going through the thread already in the hole—it’s easy to do without noticing! Piercing your thread can make it impossible to pull everything tight. You can pull the first thread against the leather to make room for the second needle to go through.
3. Keep your tension even.
As you stitch, pull both sides of the thread snugly before continuing. You want the stitches to lie flat against the leather without puckering to give your clutch a beautiful, even finish.
4. Keep your thread untangled.
It sounds simple, but twisted or knotted thread can really slow you down. Let your thread dangle every few stitches to release any twists and keep things smooth.
5. Finish with pride.
Once you tie off your final stitch, take a moment to admire your work. You’ve made something by hand that’s both beautiful and functional. Celebrate your accomplishment and wear it with pride!
Video

Kelly Clutch
Equipment
- Pre-cut leather pieces
- Waxed thread
- Sewing needle
- Hardware (buttons, clasps, or optional strap attachments)
- Clasps
- Screwdriver
Instructions
- Order the Kelly Clutch kit and wait for it to arrive.
- Lay out all the pre-cut leather pieces in front of you. Make sure you aren't missing any pieces or equipment.
- Scan the QR code that leads to the instructional video that will show you how to sew the clutch.
- Take the provided waxed thread and thread it through the sewing needles. You'll have one needle on either side for the saddle stitch that will be used throughout the project. The video will show how long to cut each length of thread.
- Start sewing the leather pieces together with a saddle stitch using the pre-punched holes, following the video instructions.
- Begin at one corner and follow the pre-punched holes. Pull the stitches tight for durability.
- After stitching the clutch body, attach the clasps with the included screwdriver. The gold hardware is protected by plastic to avoid scratches; you can remove it before using the clutch.
- If you opted for the additional strap, stitch the two rectangles included with it together. This pocket is perfect for storing business cards or similar items.
- Check that all stitches are secure, trim any excess thread, and gently shape your clutch.

This clutch is super cute I am inspired to make one for myself!
Hi Riana,
Thank you! I’m so happy to hear that—it’s such a fun project, and even more satisfying when you can say, “I made this myself!” I’d love to hear how yours turns out if you decide to make one. Feel free to tag me if you share it!