

How to Make Olive Oil From Scratch

Naturally extracted from olives, olive oil is one of the healthiest oils you can use. Learn how to make your own olive oil at home without any specialized equipment.
This year, when I was salt curing and lye-curing some green olives, a large percentage of them were infested with larvae from the olive fruit fly. Most people would throw the affected olives away. Believe me, I considered it too. I don’t like wasting anything though, especially food. So, I decided to try making some olive oil from them!
I didn’t expect to get a lot of oil but was actually pleasantly surprised. Expecting the process to be difficult, I imagined myself having to remove the pits from each of the olives. In the end, I found it wasn’t necessary.
While making olive oil at home isn’t for everybody (it’s somewhat labor-intensive), it’s not as difficult as you might imagine.
I wouldn’t recommend trying to make all of your own olive oil without buying specialized equipment. For occasionally making olive oil from olives that would otherwise go to waste, though, this is a worthwhile project. It’s a great way to make the most of the entire harvest of your olive trees.
How olive oil is normally made
Olive oil, on a mass scale, is normally made with specialized equipment. Large machines are used to grind and make a pulp from the olives. Then, other machines are used to help extract the oil and olive juice from the resultant olive paste.
On a smaller scale, presses may be used with wicker-type mats that filter out the olive solids from the olive water and oil. On a larger scale, machines centrifuge the paste to help separate the solids (which are thrown to the outside) from the liquids (which stay in the center).
Once the solids are separated from the liquids, further centrifugation or decantation can be done to separate the vegetable water, or olive juice, from the oil.
We’ll use the same methods on a much smaller scale with equipment already (likely) in our kitchens.
Health Benefits
Olive oil is a staple of the Mediterranean diet. It’s a great source of healthy monounsaturated fats with antioxidant and anti-inflammatory properties. This may be the reason that it has been shown to reduce the risk of strokes and other cardiovascular events. By reducing the propensity of LDL cholesterol to oxidation, it is less likely to damage blood vessel linings and lead to clotting.
It has been shown to have other benefits and to possibly be preventative for a number of other diseases (including cancer).
Ingredients
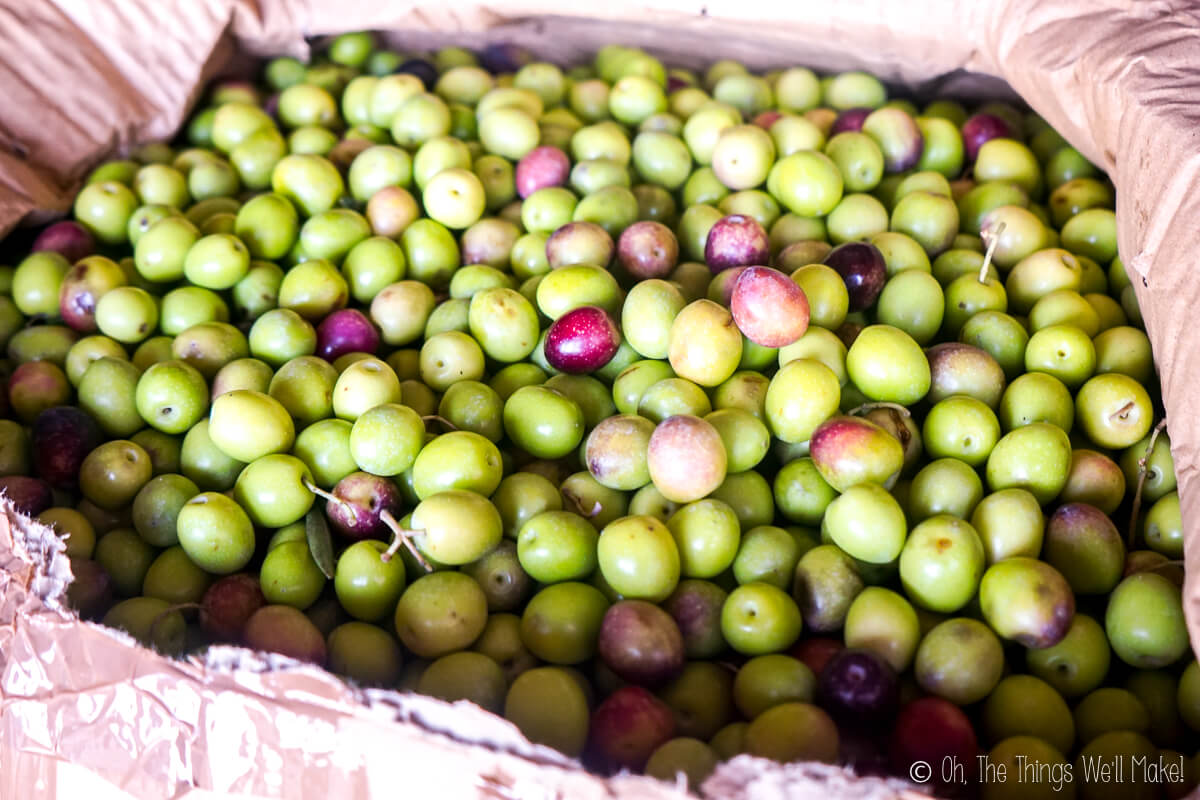
Not surprisingly, the only ingredient you really need to make olive oil is fresh olives. You can find fresh olives locally in many countries such as Spain, Italy, and Greece. (They can also be found in California.) If you can’t find fresh olives locally in your area, try looking to see if you can order them online.
Having some filtered water is helpful for some of the steps but isn’t even really necessary.
Equipment
To make olive oil at home in a semi-practical way, you’ll need some sort of blender or food processor. I used a heavy-duty food processor, but you can use any sort of blender you have.
If you’re using a heavy-duty food processor as I did, you won’t need to remove the pits from your olives. If you’re using an immersion blender or a blender with a narrow base, you may need to remove the pits to blend the olives efficiently without damaging the blades.
Other than a food processor, you don’t really need other equipment. To strain out the olive pulp and pits, you’ll need a clean cotton cloth or a strainer of some sort. A cotton cloth also comes in handy for further filtering the oil.
While not necessary, a straw is also helpful for separating the oil from the other liquids obtained from the olives.
Procedure
Begin by cleaning the olives. Rinse them well and remove any dirt, leaves, twigs, and other debris.
Extraction process
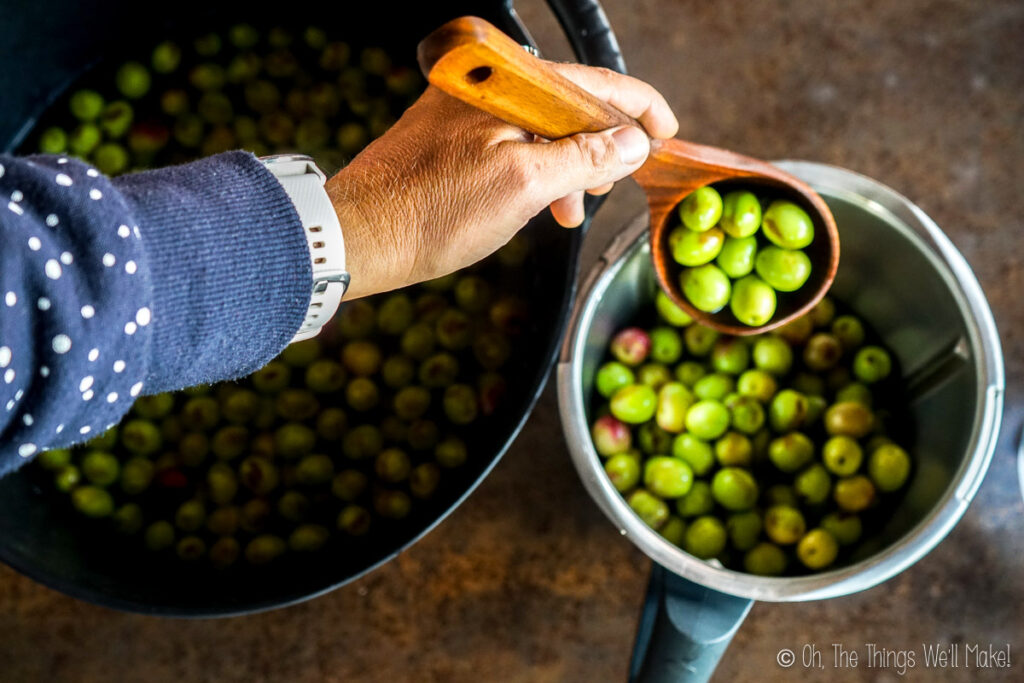
Add the olives to a food processor or blender and process them at a very low speed. The idea is to blend the pulp of the olives without breaking up the pits.
Blending at too high of a speed could damage your blender.
If using an immersion blender or a blender with a narrow base, the pits may get stuck between the blades. In that case, you may need to remove the olive pits to blend the pulp well without damaging your blender.
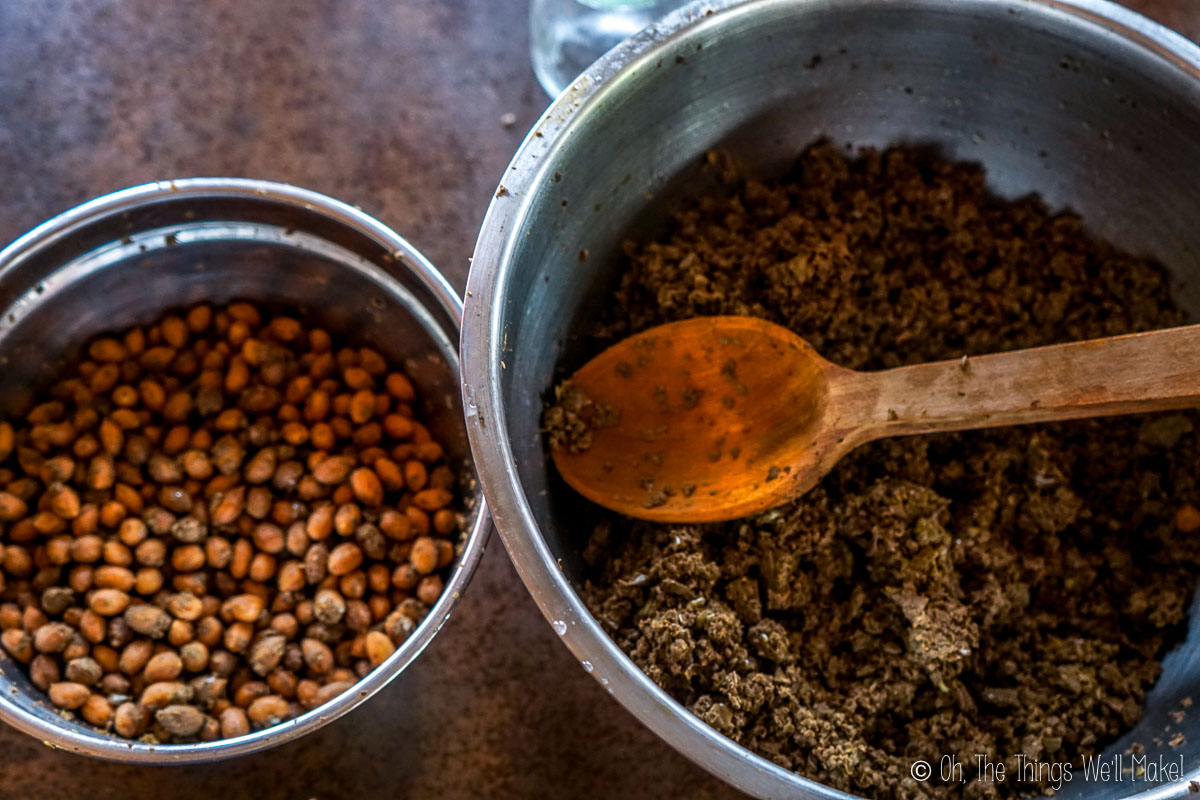
(Once you have blended the olives, the pits should be easy to remove from the olive mush.)
Blend the olives at low speed for several minutes. This will blend the pulp more thoroughly and will also give off heat which will help the olives release their oil.
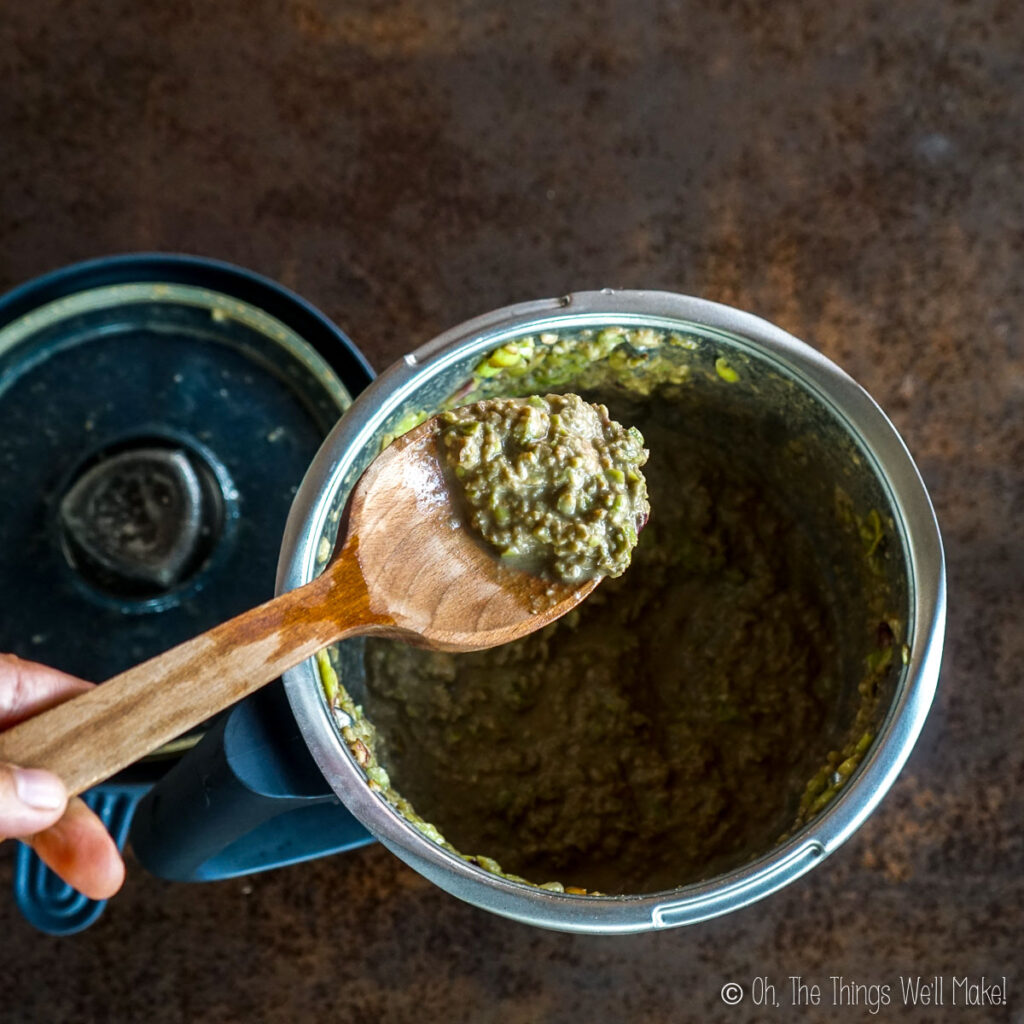
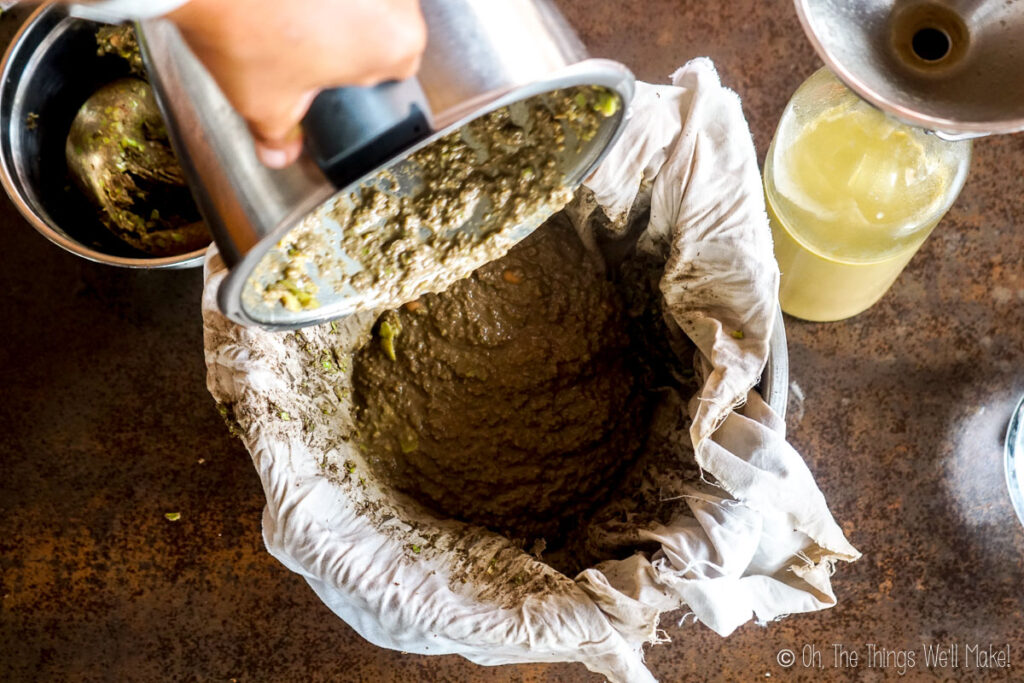
After blending for a while, strain the liquids from the mixture using either a strainer or a cotton cloth. The resulting liquid will be a mixture of olive oil and water-soluble olive juice.
Getting a higher yield
There are several things that you can try doing to obtain a higher yield from your olives.
Heat
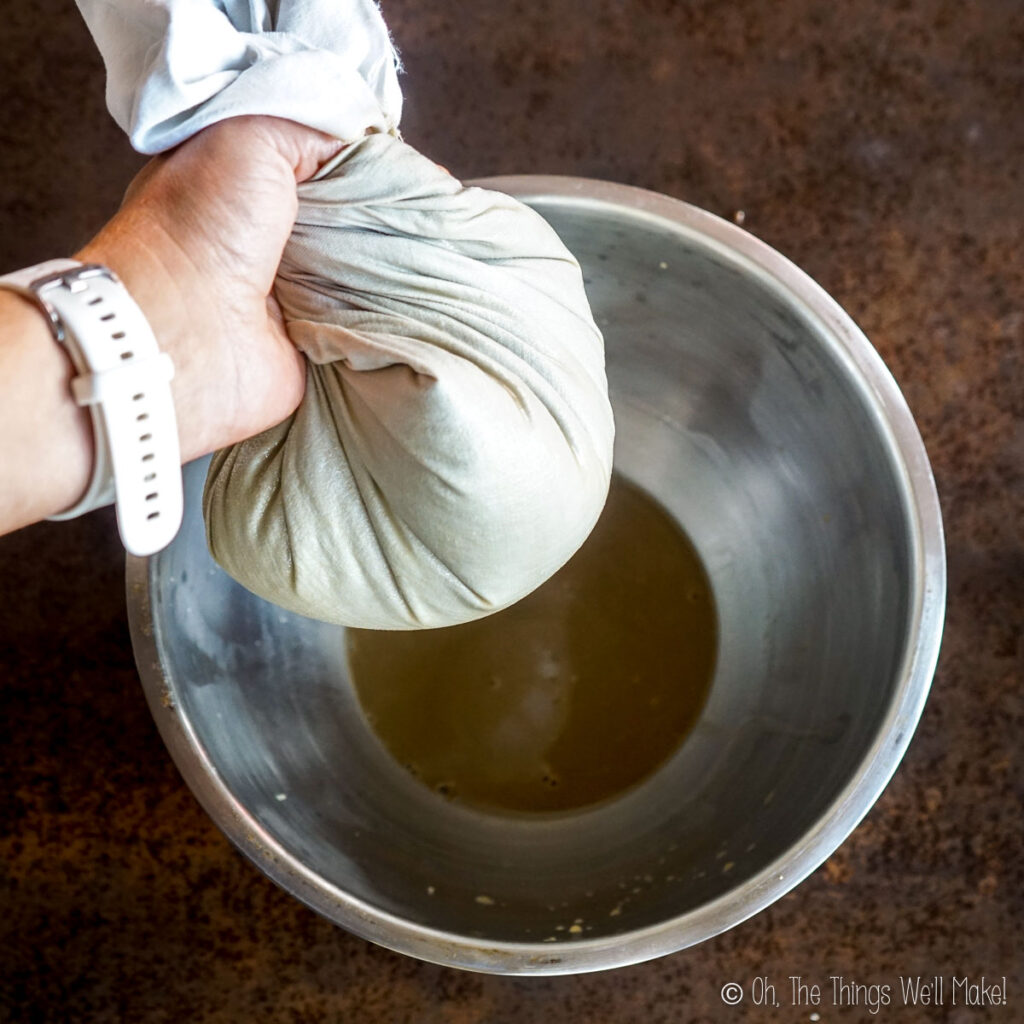
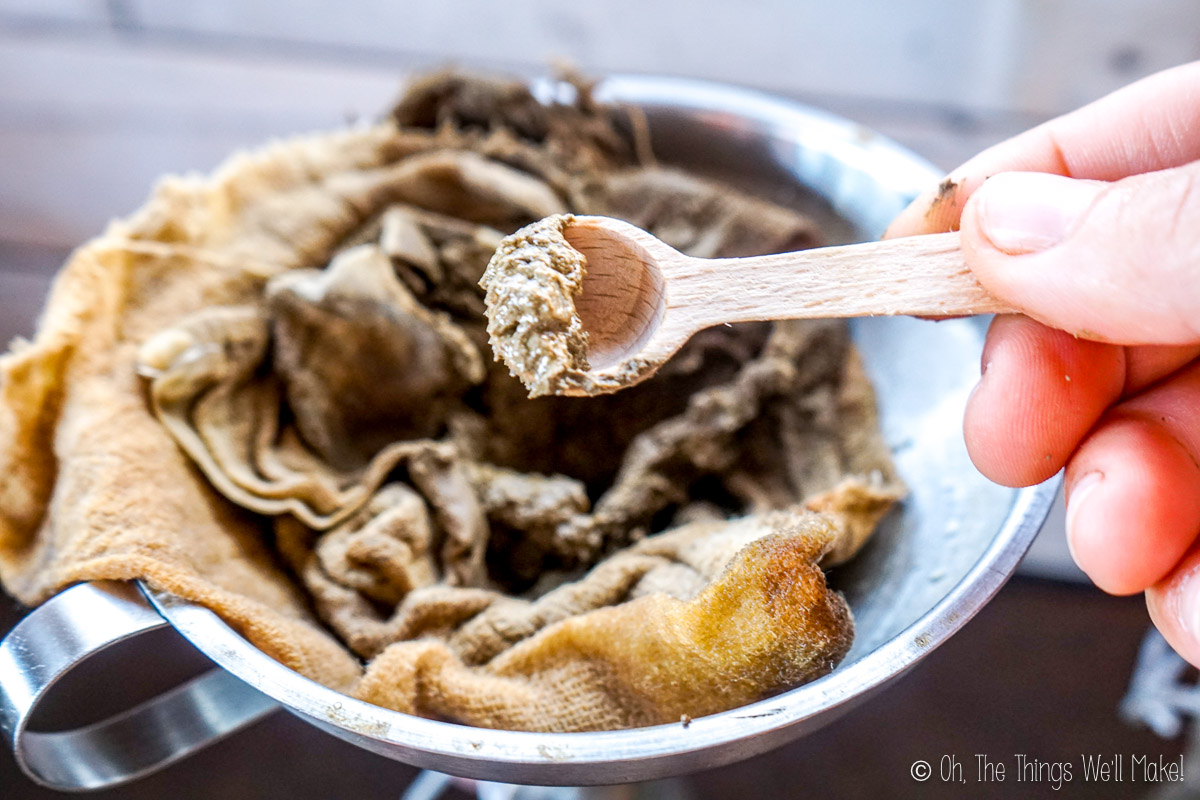
Heat can be used to extract more oils from the olive paste. Cook the olive paste in a pan on the stovetop over low heat. After several minutes, place the warm olive paste in a cloth-lined bowl. Wring it to extract more liquids from the olives.
Further blending without the pits
Generally, the more you can blend the olives, the more oils you can extract from them. To make the job easier, remove the pits from the olive mush. Then, blend the mixture for several minutes. Once you’ve done that, you should be able to obtain more liquids from the mixture.
Adding hot water
After removing most of the liquid, you can try to extract a bit more oil by blending the strained pulp with hot water. When you strain out the water, you will likely find more oil floating on top of it. (You’ll have to remove the excess water afterward just as you remove the unwanted olive juices.)
Separating the olive oil from the olive juice
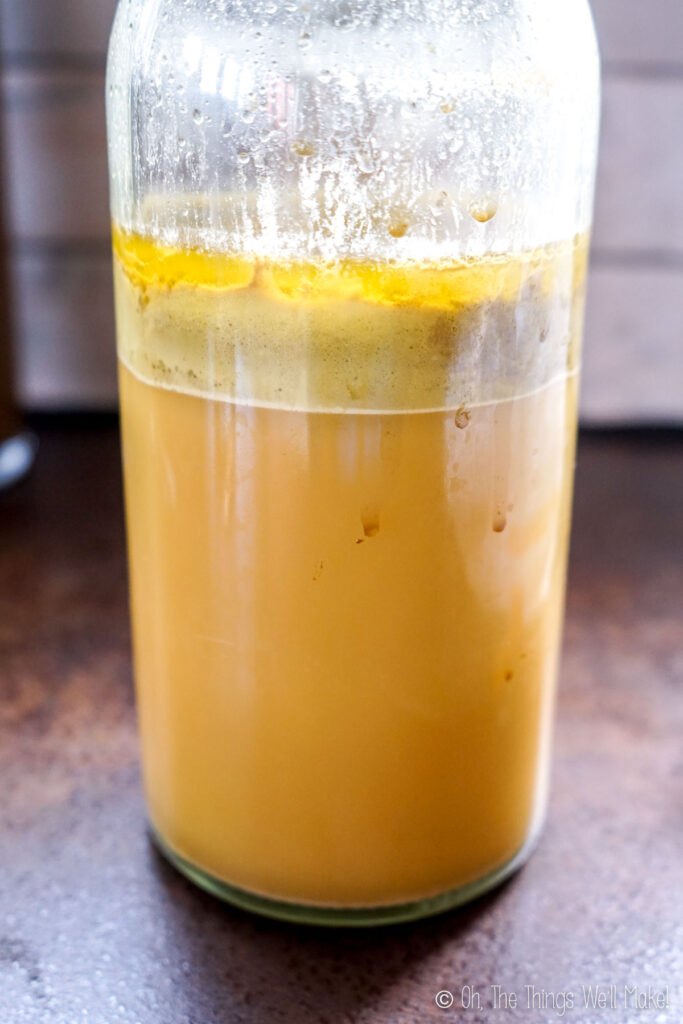
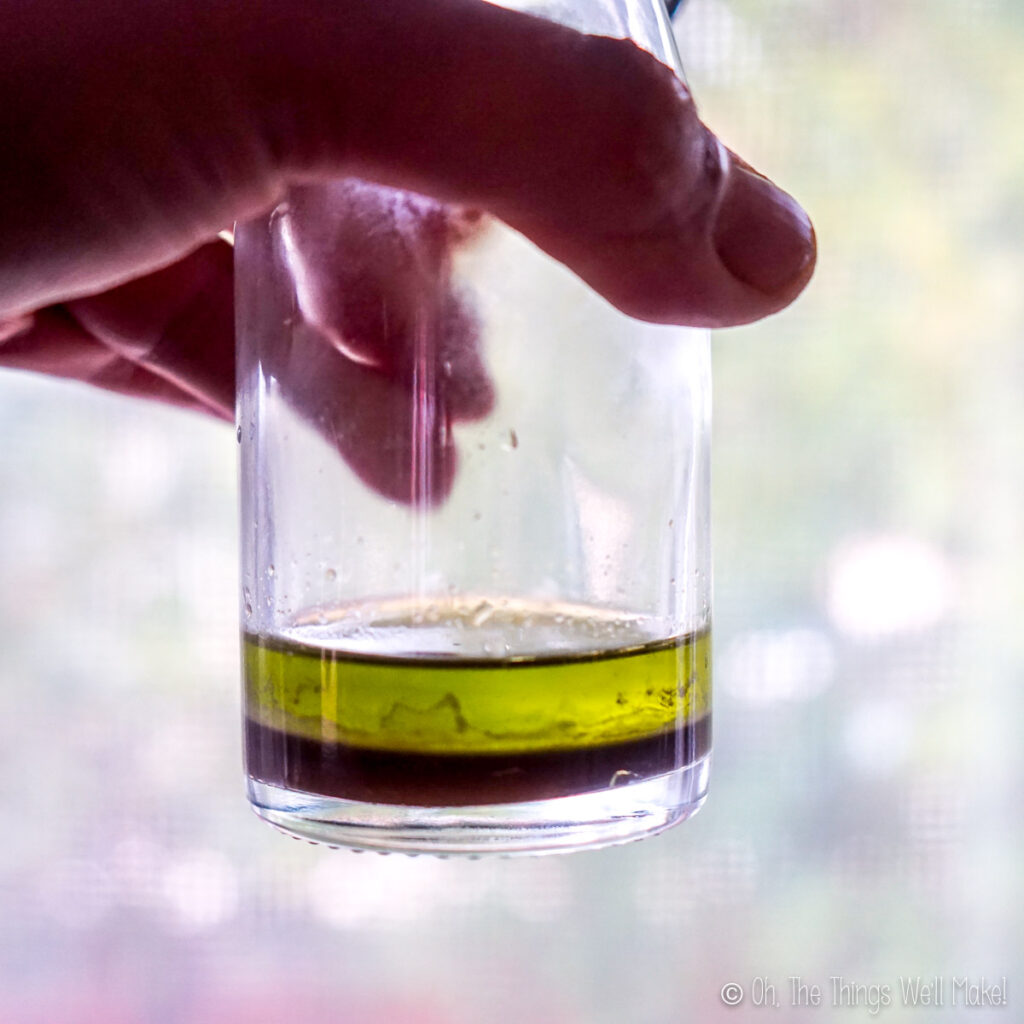
When you first strain out the olive solids, you will probably end up with a greyish-brown liquid. If you’ve done a good job of wringing out all of the liquid, the remaining olive solids should be relatively dry.
At first, the liquid will look pretty uniform. If you let it settle, though, you will notice that the liquid should separate into at least 2 layers. This is because of the different densities of water and oil. Oil is less dense than water and is insoluble in water, so the oil layer will float on top of the juice (the water-soluble layer).
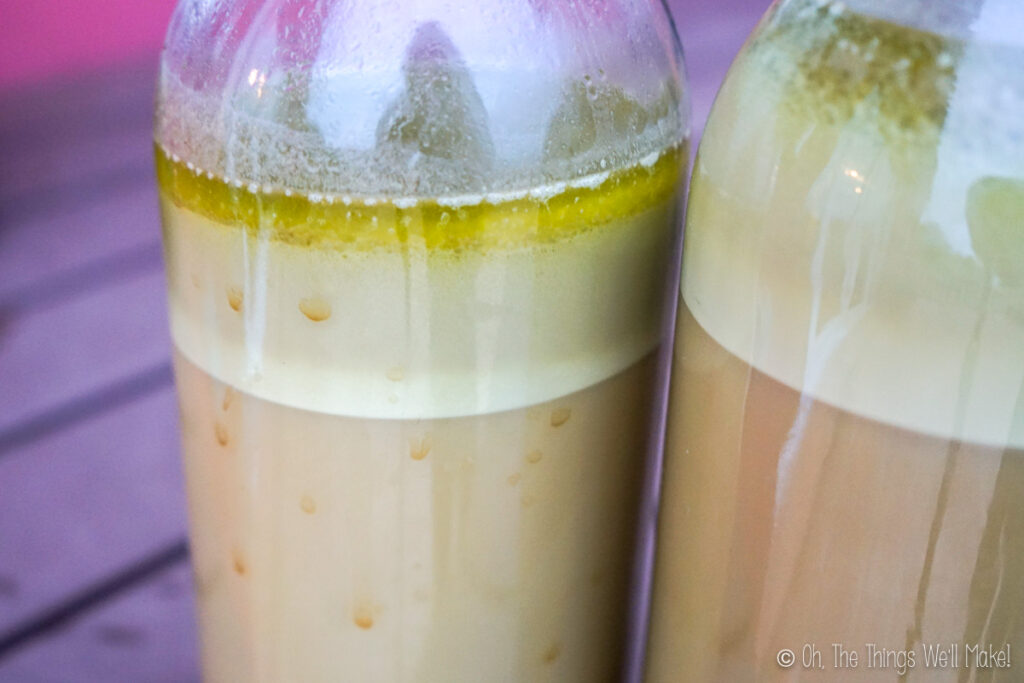
I say “at least” 2 layers because some of the smaller solid particles will be extracted with the liquids. They may be in both the oil and water-soluble layers, giving the illusion of having more layers.
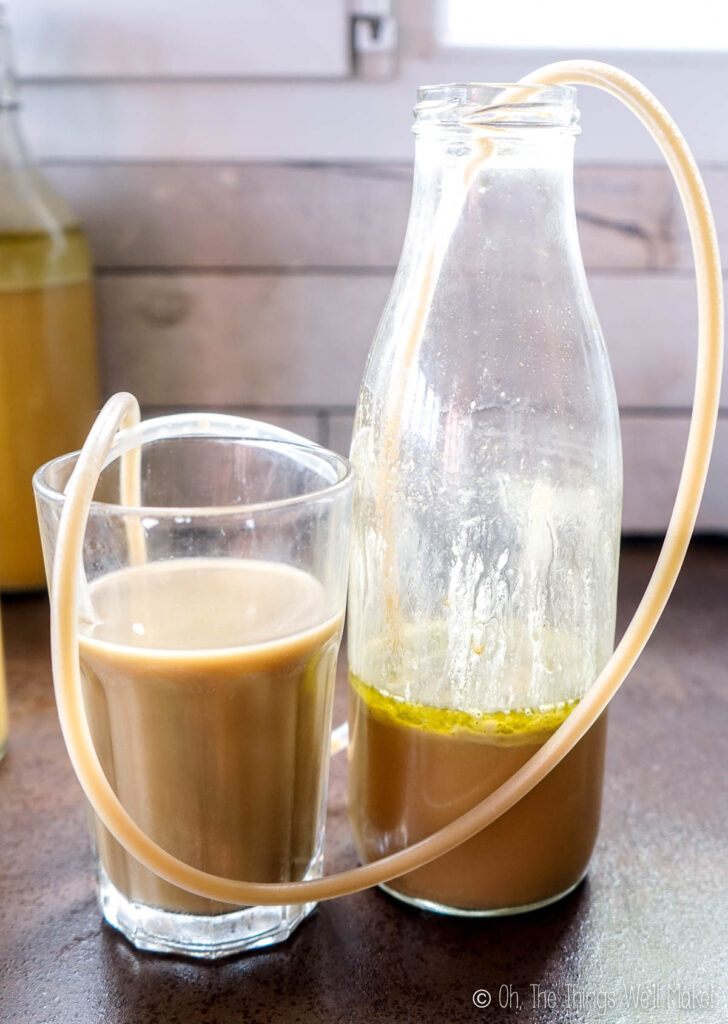
If you leave the layers to separate for several hours, or overnight, it should be relatively easy to remove the lower liquid layer. I siphoned out the lower layer of liquid using some food-grade tubing I had at home. You could also just use a straw, though, and remove as much of the lower liquid as possible, discarding it.
The olive juice is usually pretty bitter, otherwise, I would have looked for some use for it. If anybody has any ideas of what can be done with the excess liquid, I’d love to hear it!
Filtering the oil
Once you’ve removed most of the water-soluble olive juice, the rest of the liquid should be mostly olive oil. You may find that it’s quite cloudy, though, and it still may be mixed with some juice.
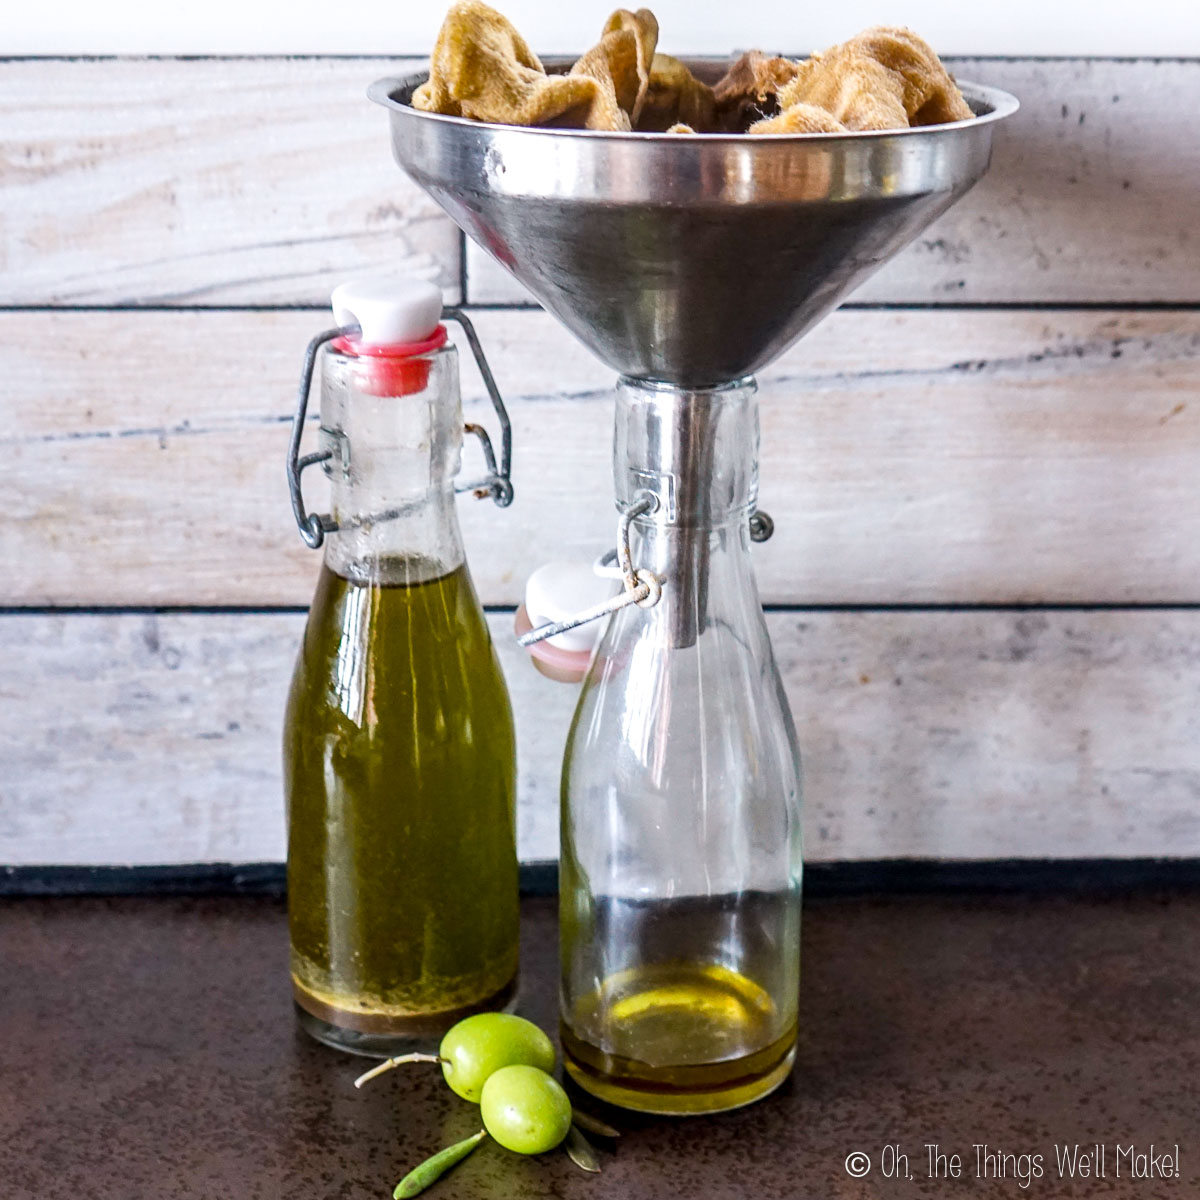
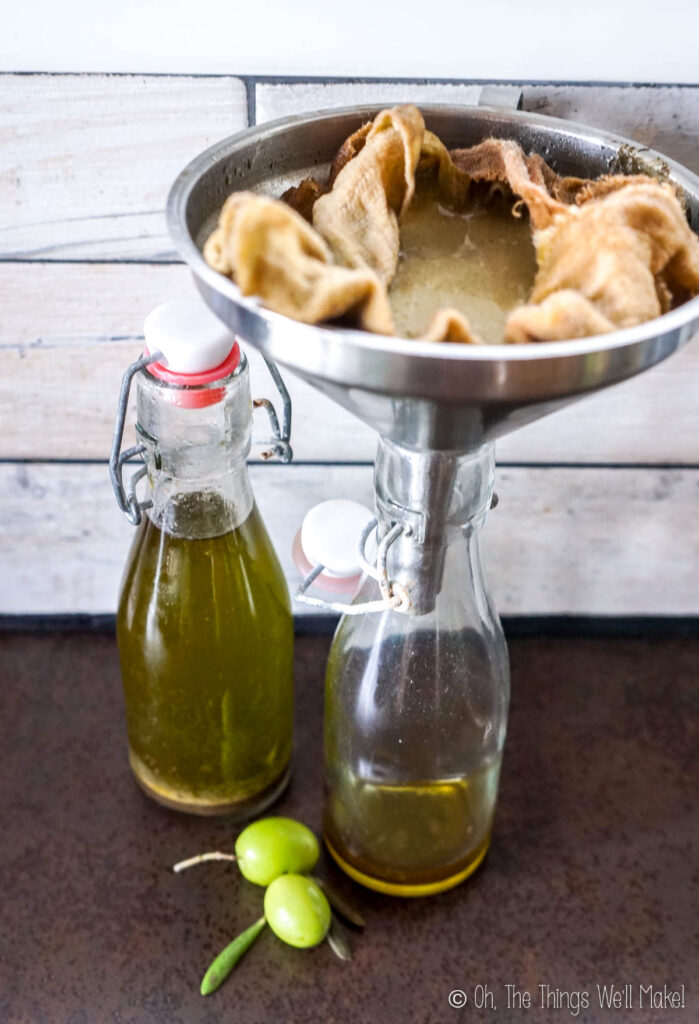
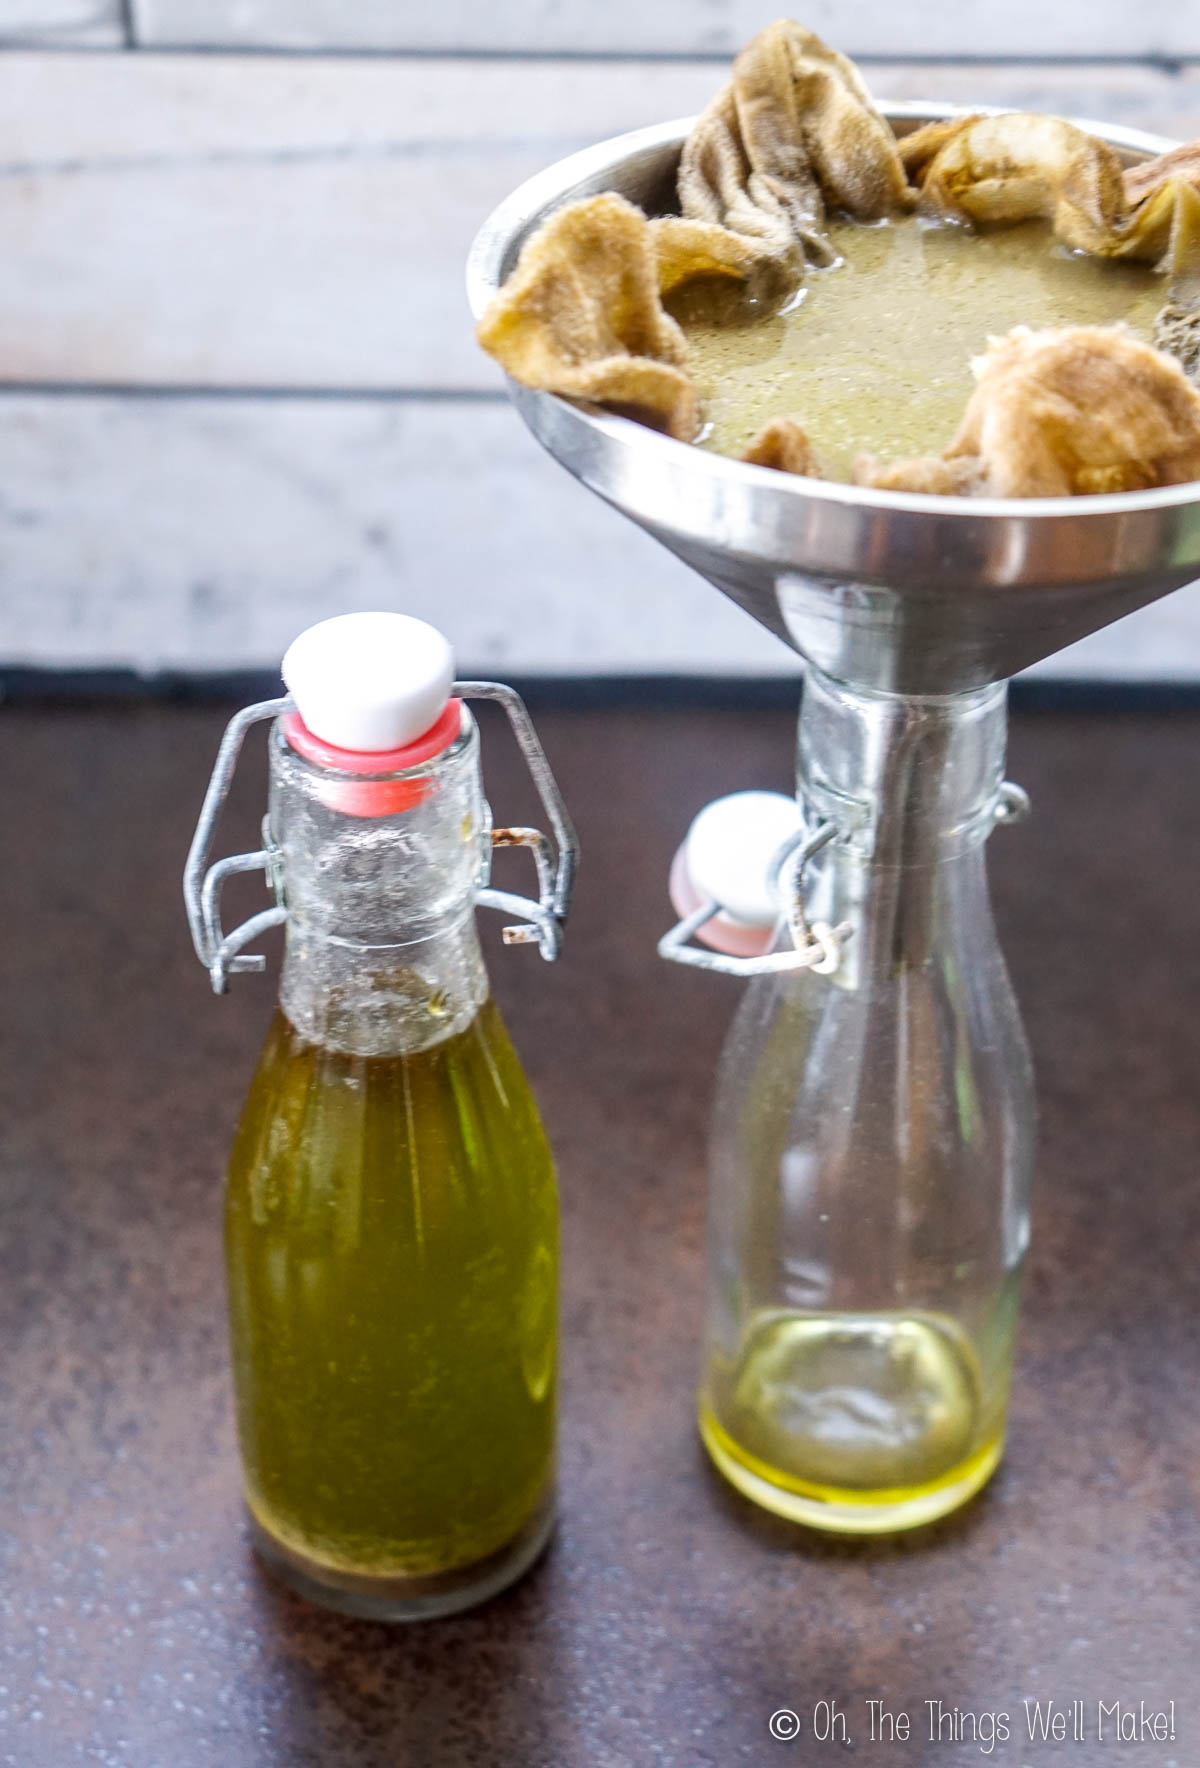
To help clear the oil, you can filter it by straining it through several layers of cotton cloth or cheesecloth. To filter it, I lined a funnel over a bottle with the cloth and poured the mixture into the funnel. (You can also line a colander over a bowl to strain more oil at once.) Little by little, the oil filtered through to the bottle below leaving the olive solids in the cloth above.
I first tried using a coffee filter but found that it took too long to filter out the oil. Plus, it ended up breaking on me after several hours of filtering.
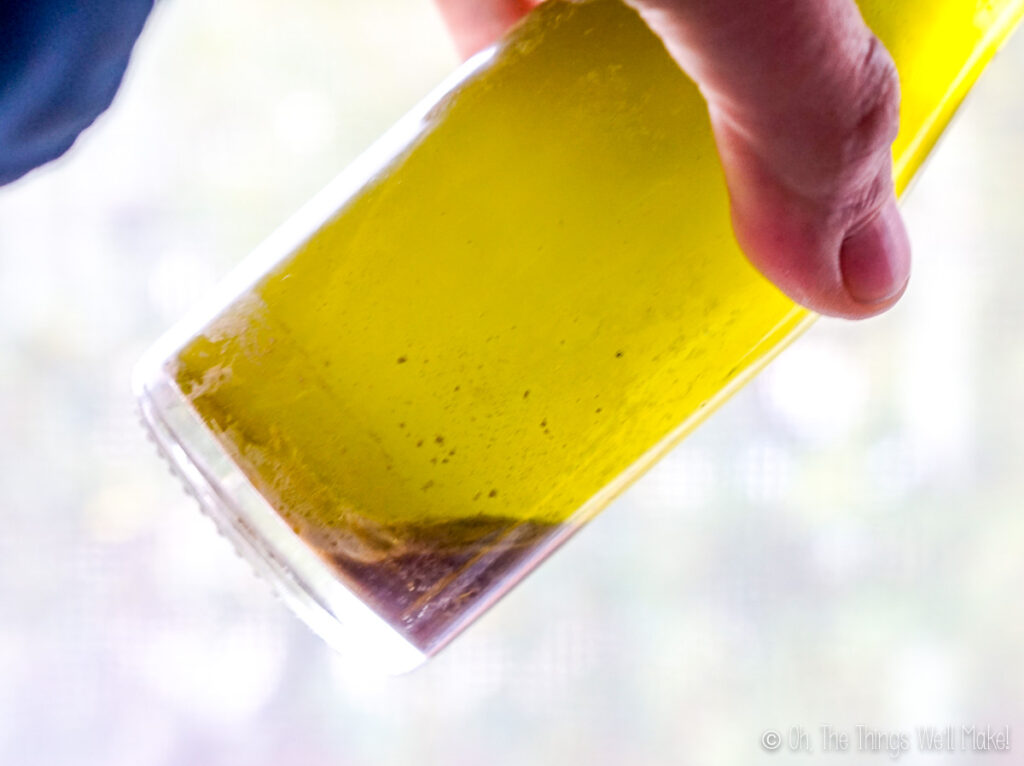
In the end, filtering with several layers of cotton cloth worked quite well. It still took quite a while to fully filter all of my oil, but I was really happy with the result.
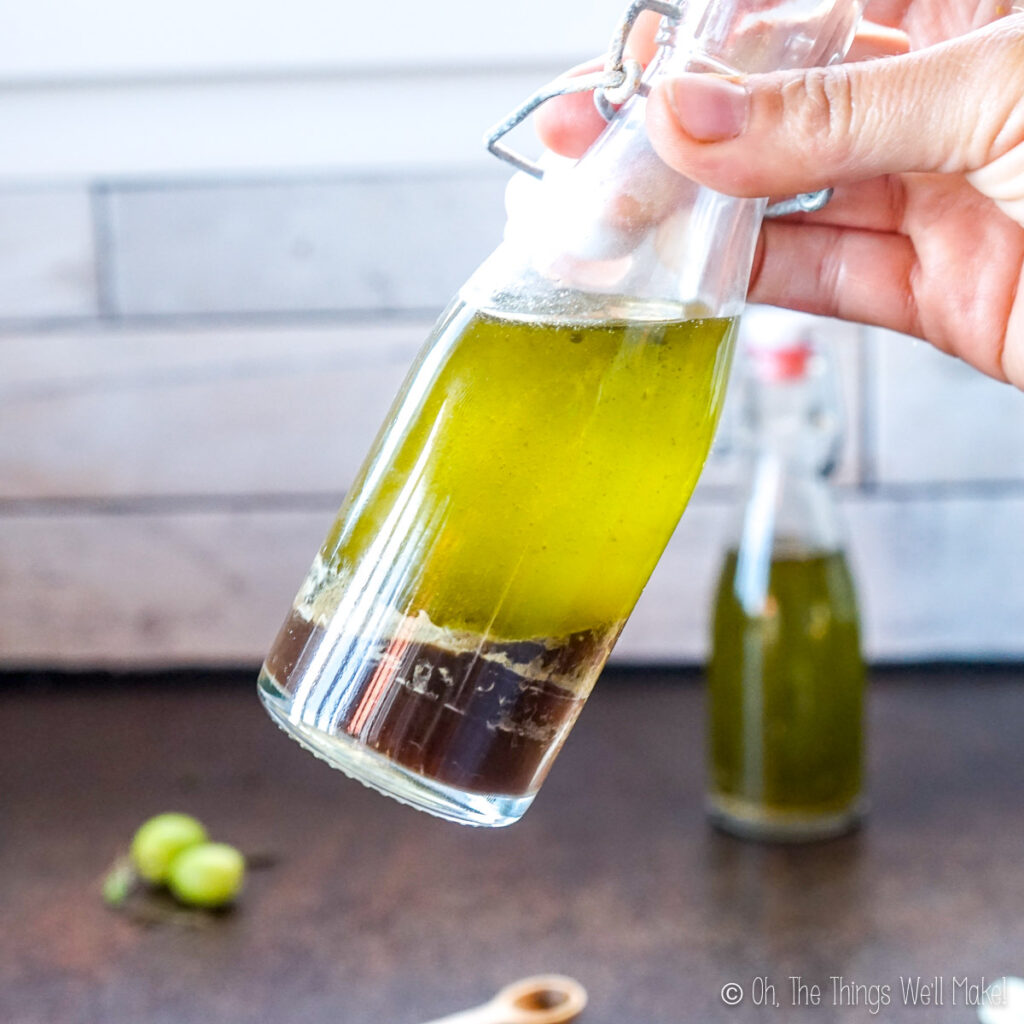
Once I filtered out most of the fine particles, I could better see the 2 layers that were left. Most of the bottle was filled with olive oil, but there was a bit of olive juice at the bottom of the bottle.
To remove the unwanted olive juice, I tipped the bottle on an angle and used a thin straw to remove the liquid from the bottom of the bottle.
Do you need to filter the oil?
While it’s not necessary 100% necessary, filtering the oil results in a clear olive oil with a longer shelf life. The olive solids likely retain moisture (which could make your oil susceptible to microbial growth- aka. mold and bacterial growth).
I liked the taste of the olive paste that I filtered from my oil. You can use it to spread on bread or eat it as-is. If you want to use the filtered-out olive solids, make sure to do so right away. Unlike the oil, which keeps well, the solids will retain some water. That makes them susceptible to mold growth.
Serving
Use your homemade olive oil just as you would any store-bought olive oil. I like to save this special oil for serving cold on salads, bread, or pasta to fully appreciate its fresh flavor. (Why not try serving it over homemade pasta?)
Storage
I filled two small glass bottles with my oil and stored them in the fridge to keep the oil fresher longer. (II wouldn’t normally store olive oil in the fridge, but after all the work, I figured this oil deserved it.)
As long as you keep the oil in a cool, dark place, though, it should keep relatively well (as long as you’ve removed all of the water).
How long will it keep?
Olive oil is a relatively stable oil that generally keeps well. It’s said to be shelf-stable for up to two years. That said, the shelf life of your oil depends a lot on how well you filter it and if you remove the olive juices well.
Ideally, you should only have oil in your bottle, free of olive solids and other liquids.
Video

Olive Oil (From Scratch)
Ingredients
- 2 kilograms fresh olives
Instructions
- Begin by cleaning the olives. Rinse them well and remove any dirt, leaves, twigs, and other debris.
Extraction process
- Add the olives to a food processor or blender and process them at a very low speed to blend the pulp of the olives without breaking up the pits. (Blending at too high of a speed could damage your blender.)
- If using an immersion blender or a blender with a narrow base, the pits may end up getting stuck between the blades. In that case, remove the olive pits in order to blend the pulp well without damaging your blender. (Once you have blended the olives a bit, the pits should be easy to remove from the rest of the olive mush.)
- Blend the olives at low speed for several minutes. This will not only blend the pulp more thoroughly but will also give off heat, which will help the olives release their oil.
- After blending, strain out the olive pulp and pits from the liquids using either a strainer or a cotton cloth. The resulting liquid will be a mixture of olive oil and water-soluble olive juice.
Separating the olive oil from the olive juice
- At first, the liquid will look pretty uniform. Allow it to settle and separate. After some time, the liquid should separate into at least 2 layers with the oil layer floating on top of the juice (water-soluble layer).
- Siphoned out the lower layer of liquid using food-grade tubing. If you don't have food grade tubing, you can also use straw to help remove the olive juice. (Discard the bitter juice.)
Filtering the oil
- Filter the oil by straining it through several layers of cotton cloth or cheesecloth. This can be done by lining a colander with the cloth and letting the oil filter through, leaving the olive solids in the cloth above.
- The oil should be clear now, but you may be left with some juice below it. (The two layers should now be more obvious and easy to distinguish.) Tilt the bottle of olive oil on an angle and use a thin straw to remove the liquid from the bottom of the bottle.


I noticed in the
Pictures that you were using a Thermomix for milling of the olives. Please can you tell me the speed, time and volume/weight of the olives.
I have tried with my own Thermomix, not getting it right.
Thank you in advance.
Hi Donna,
Sorry for the delayed reply! I don’t remember the exact speed or timing I used, but I deliberately kept the Thermomix on a low speed because I didn’t want to pulverize the olive pits or put unnecessary strain on the blades.
I also worked in relatively small batches and processed the olives just until they formed a coarse paste before continuing with the process. I hope that helps, and I hope you were able to get it working in the end!
This worked exactly as written, thanks!
So glad to hear it worked for you, Gg! Thanks for letting me know.
Hi,
I noticed you were using a thermomix. I’m curious about the speed/temp settings you might have used…are you able to share that?
Hi Craig,
Great question! When I used the Thermomix, I set it to a low speed — around speed 4 — and kept the temperature just warm, around 37–40°C (about 100–104°F). The idea is to gently mix without cooking the olives, just enough to help the oil release. I hope that helps, and let me know if you have any other questions!