

Why and How to Make Aloe Oil
With numerous benefits for skin and hair, aloe oil is perfect for use in many homemade cosmetics. Learn why and how to make it and how to use it.
What is aloe oil?
When I saw it for the first time, I was confused by the term aloe oil because I didn’t know how oil could be obtained from the Aloe vera plant. I wasn’t sure if it was made by pressing the plant, like olive oil is pressed from olives, or if it was distilled out, like essential oils.
In the end, it isn’t either of those. Aloe oil is obtained through a macerating process in which aloe vera is infused into a carrier oil, normally for several weeks.
Aloe oil will have different properties than aloe gel as it will contain the oil-based components of the aloe plant vs. the water-based components of the gel.
Ingredients
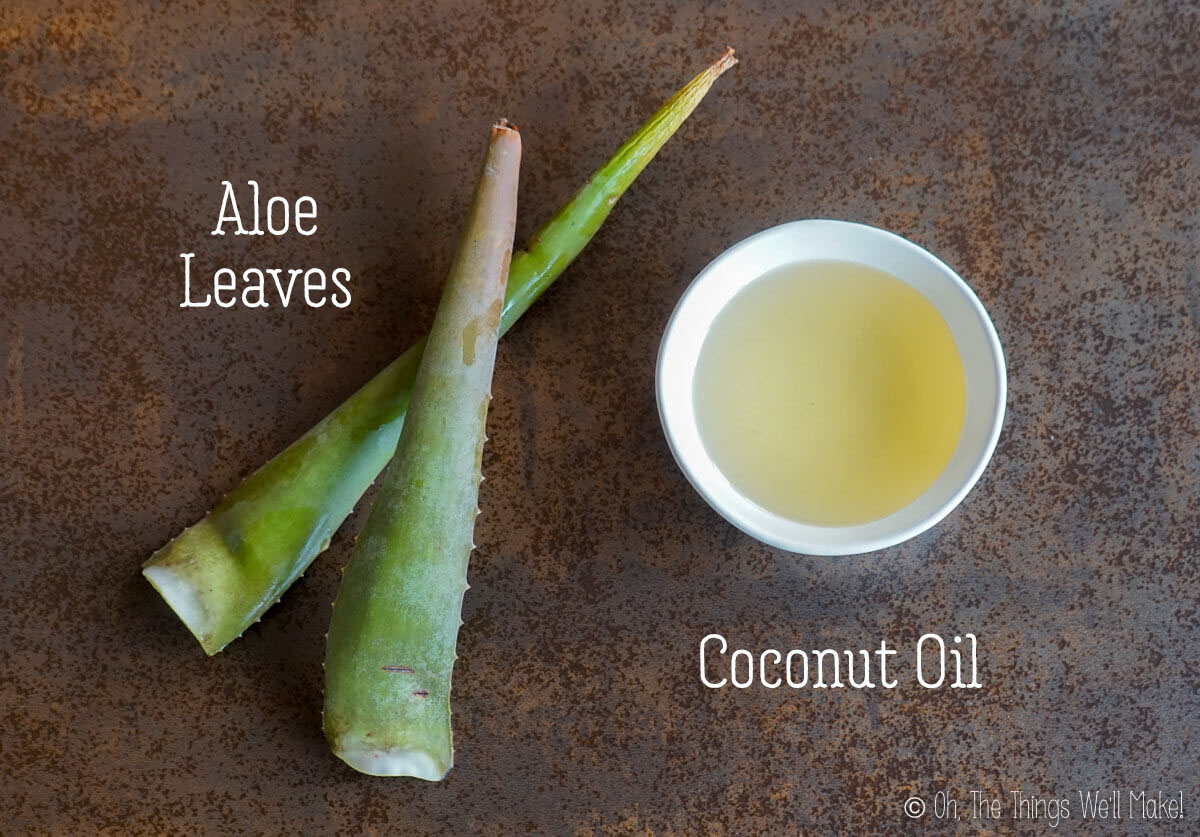
As you can probably guess, the 2 ingredients needed are aloe vera leaves and a carrier oil. You can optionally add some vitamin E, an antioxidant, to the oil to further extend the shelf life of your oil.
Which carrier oil?
Depending on how you want to use your aloe oil, you can make it with different carrier oils. I usually use coconut oil because it’s a very stable oil with a long shelf life. It’s also very versatile for a variety of different products. That’s probably why most aloe oil I’ve seen sold commercially uses coconut oil as the carrier oil.
If you have a reaction to coconut oil or it causes you to break out, though, feel free to use a different oil.
Coconut oil tends to be quite heavy for facial products (and isn’t non-comedogenic). So, it may be a good idea to choose a different oil if wanting to use the oil for facial skin care.
- Jojoba oil is a versatile oil that also has a long shelf life (because it’s actually a wax)!
- Sunflower oil is an inexpensive non-comedogenic oil that you could also use instead.
Properties of the Aloe Vera plant
Aloe vera is a very therapeutic plant, making it useful in so many ways. When we infuse the aloe vera plant into the oil, we can take advantage of some of its beneficial properties in a new way!
- Anti-Inflammatory – Aloe can help reduce inflammation which is the body’s reaction to infections, irritation, and other injuries.
- Anti-Irritant – It can help reduce many types of skin irritation.
- Antioxidant – Aloe vera may protect your skin from free radical damage.
- Anti-Bacterial – It can inhibit the growth of certain types of bacteria. It has even been shown to prevent plaque buildup when used as a mouth rinse.
- Anti-Viral – Aloe has been shown to have antiviral properties, making it useful for cold sores and shingles, or other viral caused skin conditions.
- Anti-Fungal – It may also be a good ally when battling athlete’s foot, ringworm, and other fungal or yeast infections.
- Moisturizer – Aloe gel can help hydrate the skin, but may feel drying to some people because it doesn’t have a lipid component to help the skin retain that moisture. Aloe oil, on the other hand, provides some of its beneficial properties with fats that help the skin retain hydration.
- Cicatrizant– Aloe has been shown to help cuts and scrapes recover faster.
- Sun Protection – Both coconut oil and aloe can help protect your skin from harmful UV rays. (They each block about 20% of the sun’s rays. While that isn’t a lot of protection, it does help.)
Aloe vera’s nutritional profile
Most people use aloe oil topically, but if you infuse organic aloe leaves into a food-safe carrier oil, you can also take it internally. I actually really like the slightly tangy flavor that the aloe gives your oil.
It could make a great addition to salads, giving you some of its beneficial nutrients. Keep in mind that the anthraquinones in the latex of the aloe plant (in the yellow liquid that drips from the leaves) cause it to have a laxative effect, so ease your way into using it, and don’t go overboard!
- Amino Acids – Aloe vera gel, the inner portion of the leaf, has over 20 amino acids in it.
- Minerals – Aloe is rich in calcium, iron, magnesium, sodium, potassium, and other beneficial minerals.
- Vitamins – Aloe contains Vitamin A, C, E, Folic Acid, Vitamin B1, B2, and B6 and more. These help contribute to its antioxidant properties, and also help with cell growth and protection.
- Salicylic acid in the aloe gel helps reduce acne and other skin inflammation.
- Bradykinase and anthraquinones found in the plant both help reduce inflammation.
How NOT to make it
I’ve seen tutorials on the internet that tell you to make aloe oil by macerating fresh aloe leaves without dehydrating them first. Because aloe vera has such a high water percentage, using fresh aloe makes an oil that is a potential breeding ground for bacteria. (Aloe is notorious for being very difficult to preserve.)
Other recipes call for mixing aloe vera gel, be it fresh gel from the plant or commercial gels, with oil. This causes several problems. First, the gel is water-based and won’t stay mixed in the oil unless you add an emulsifier. Plus, once you have added a water component to your oil, you have to add a preservative to your mixture.
For more information, read my beginner’s guide to natural preservatives and my guide to emulsifiers.
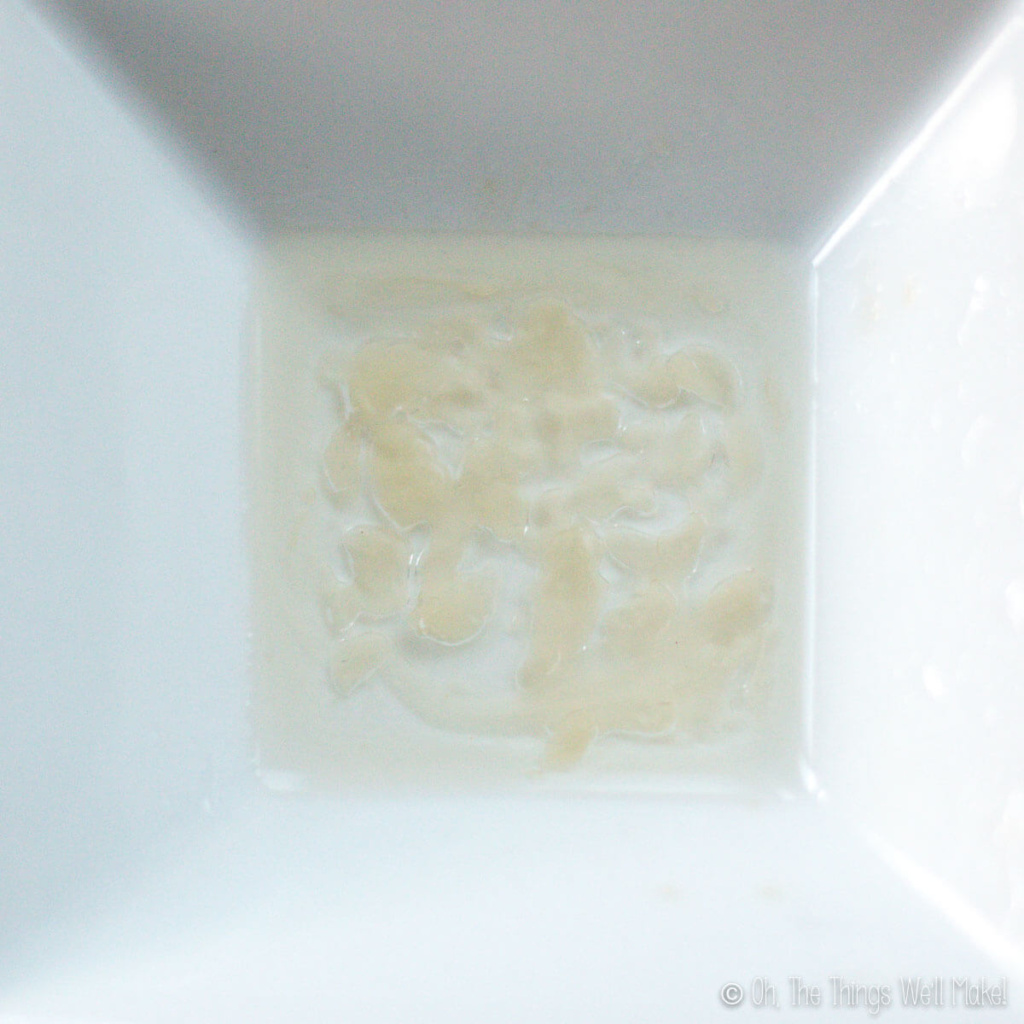
Despite thinking it was a horrible idea, I decided to try making “aloe oil” like that anyway. As suspected, I ended up with a non-mixing “mixture” of gel and oil. It definitely didn’t make an oil. Instead it made a messy mix of separated gel and oil.
I received. a suggestion from a reader that may actually work (but I haven’t tried it to see the results). It might be possible to mix the aloe gel with oil and then gently cook off all of the water of the gel.
Procedure
Making aloe oil is pretty simple.
First, we’ll prepare and dry the aloe leaves, then we’ll infuse them into a carrier oil. The resulting oil is very aromatic and perfect for using alone or in your homemade cosmetics.
Prepare the aloe
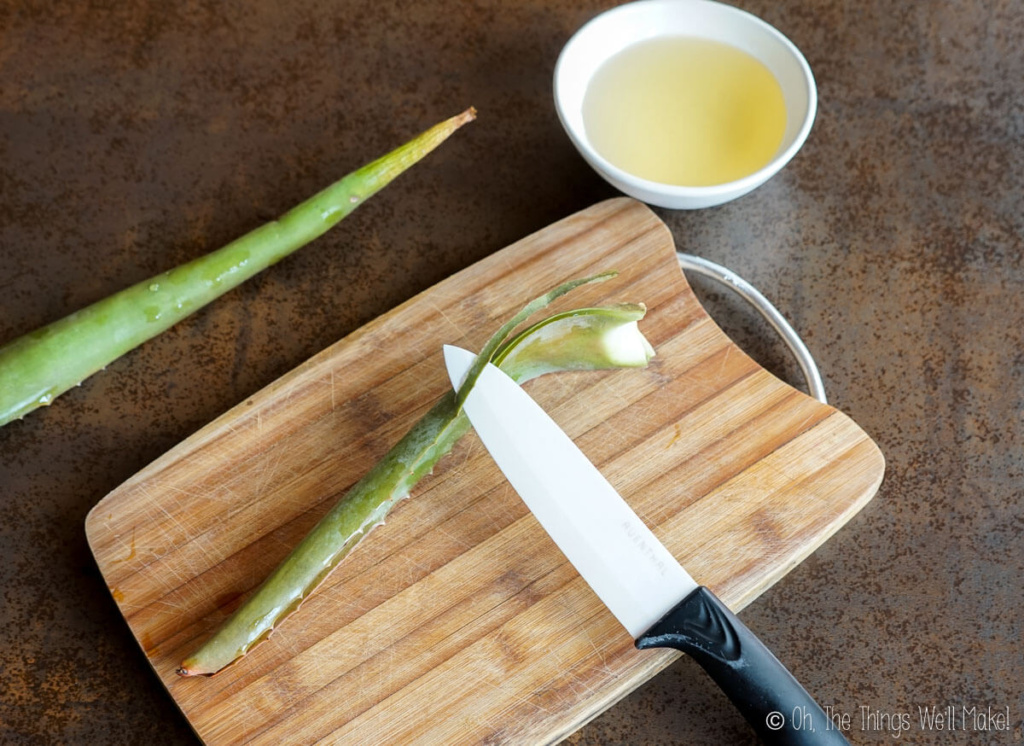
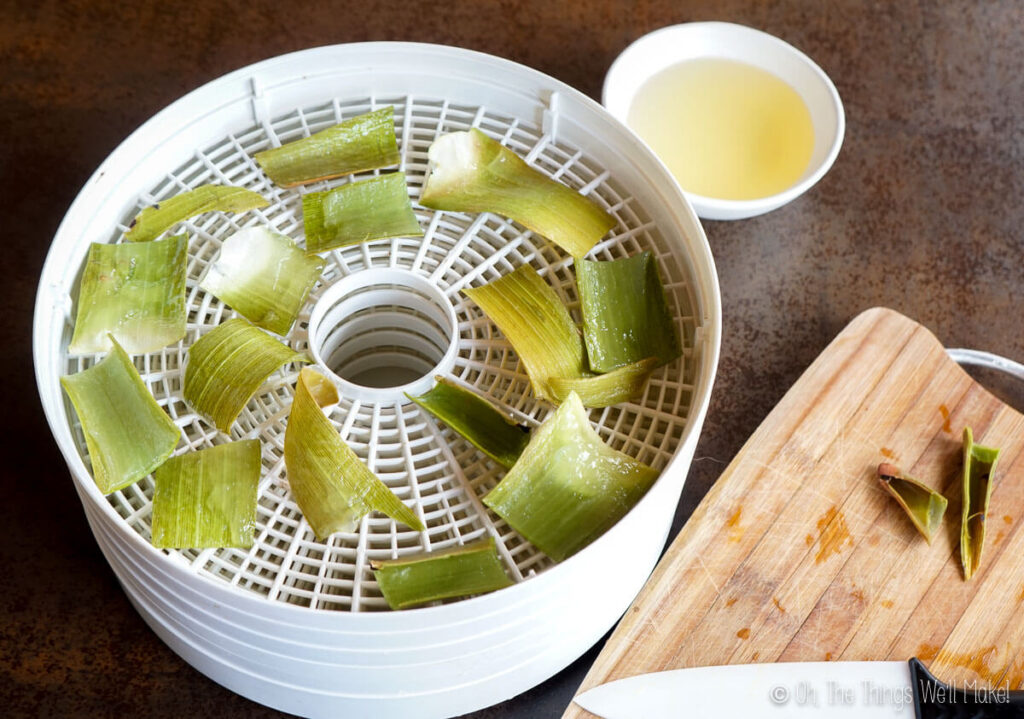
To prepare the aloe, wash the leaves and dry them off. Then cut off the spiky edges.
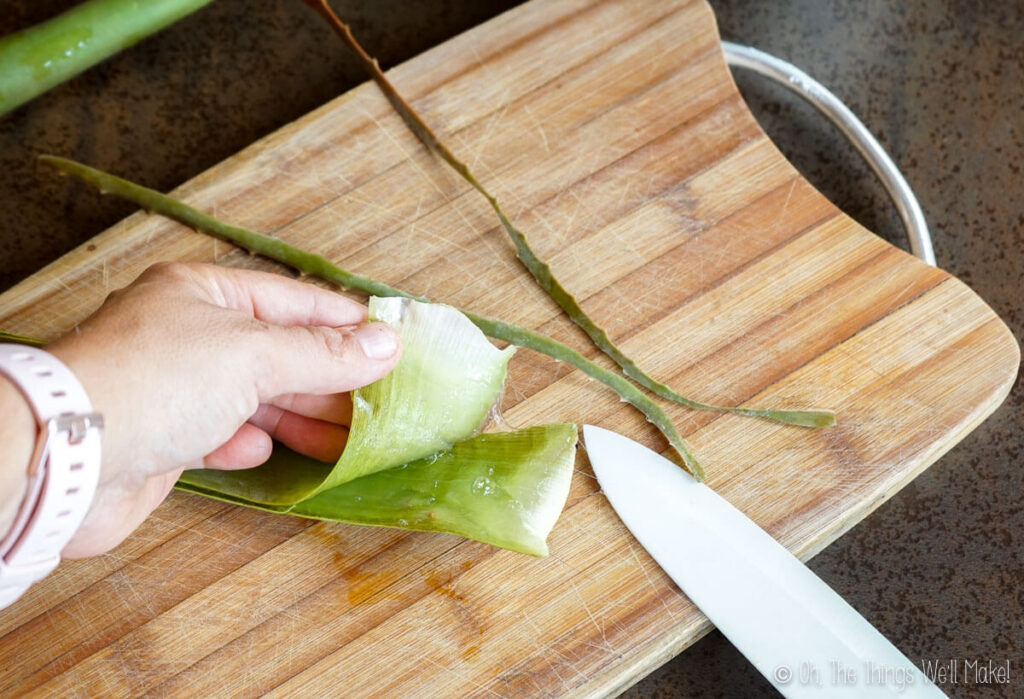
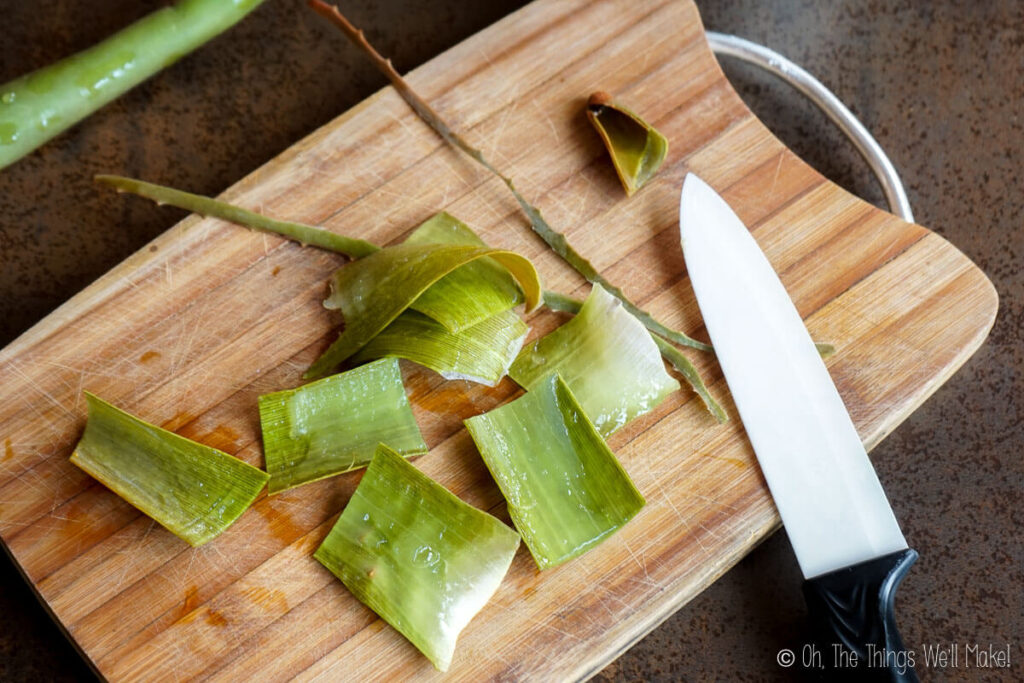
Once the edges have been removed, slice through the center of the aloe leaves, separating the top from the bottom. This will expose the gel inside. Once the leaves have been separated, cut the leaves into smaller pieces.
Dehydrating the aloe
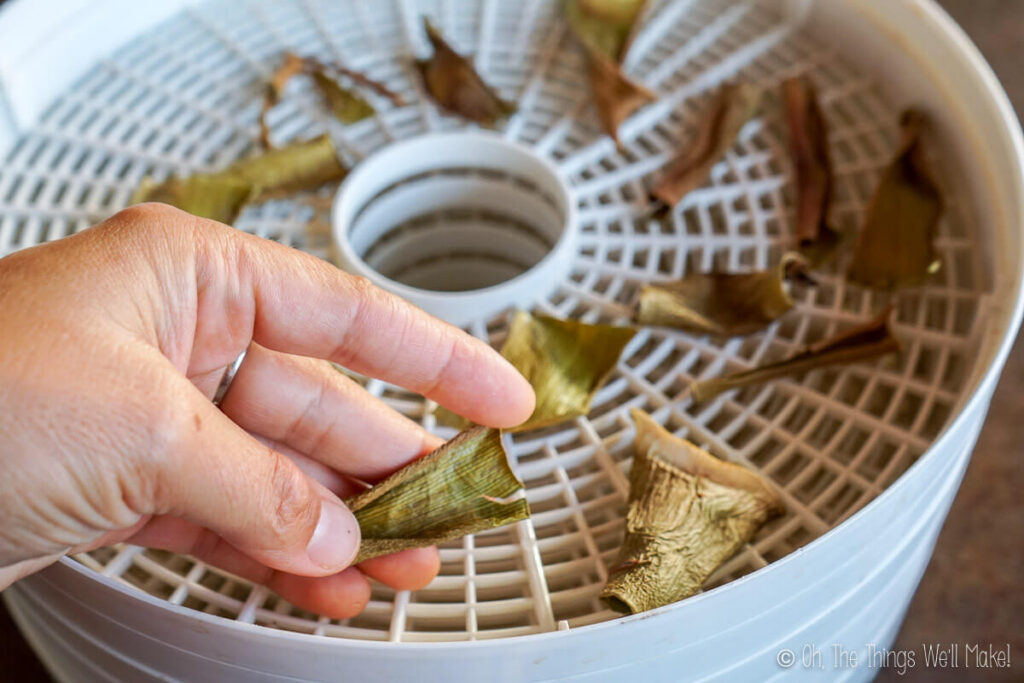
Spread out the aloe leaf pieces over the dehydrator trays and follow the instructions for your dehydrator to dry the pieces until they are dry and crisp. At first, the aloe leaf pieces will feel dry to the touch while still being flexible. I like to continue to dry them until they are crisp to ensure that all water has been removed.
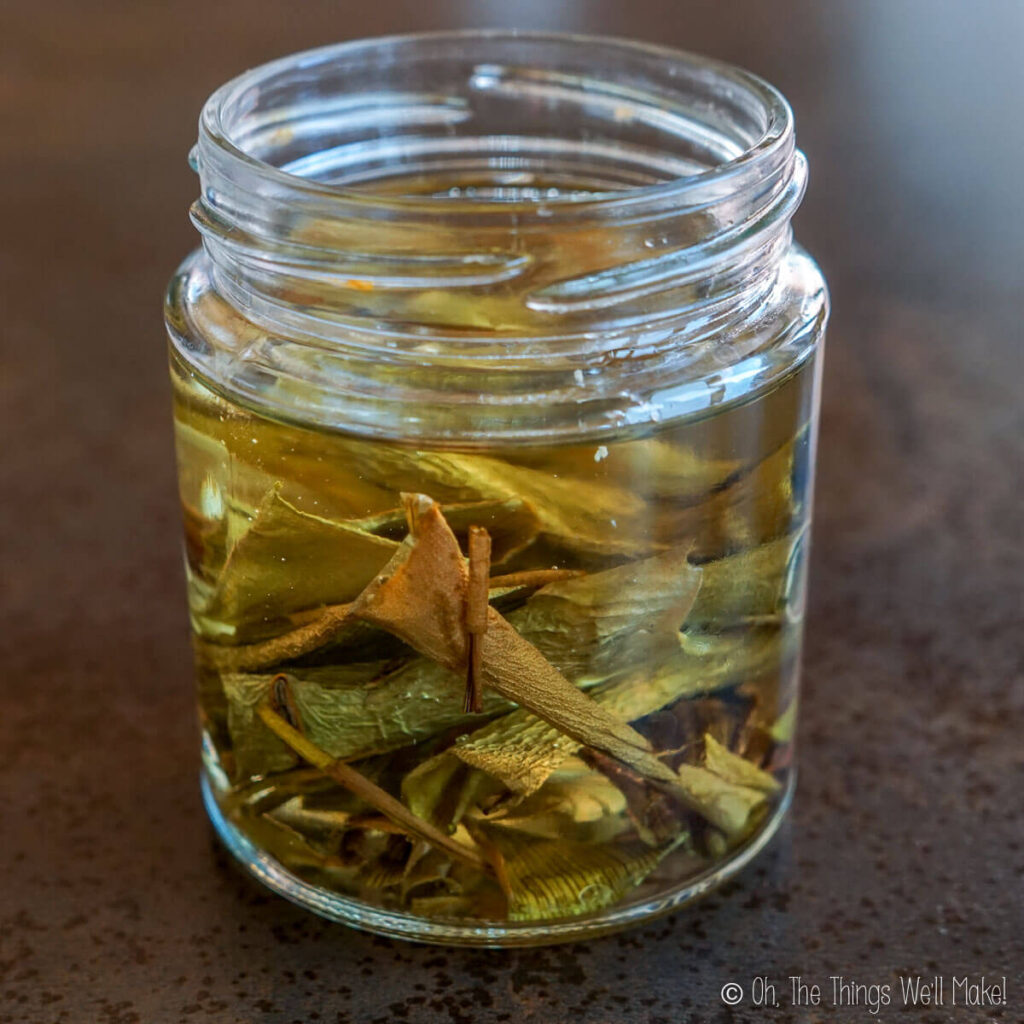
Once the pieces are completely dry, they can be transferred to a clean glass jar.
Cover the aloe with coconut oil (or another carrier oil). While you could just leave the aloe pieces in the oil for several weeks or months, there are a few things that you can do to help infuse aloe’s beneficial properties into the oil more quickly.
Speeding up the process
You can speed up the infusion process by gently heating the oil with the aloe leaves. This can be done by placing the oil directly in the sun or heating it in a slow cooker. Be careful not to use too much heat so you don’t cook the leaves which may lead to a bitter oil.
Using a slow cooker can reduce the infusing time to 8-12 hours.
When using heat directly from the sun, the process still generally takes several days/weeks. Keep in mind that some oils are more stable and can withstand the heat and sunlight better than others.
Uses
Aloe oil is perfect for a wide variety of skincare and haircare products. It can also be taken internally if made with an edible oil.
Skin care uses
It may help remedy some of the following issues.
Soothing burns
Aloe vera is probably most often associated with after-sun products because a lot of people use aloe vera gel after being out in the sun to help soothe sunburns. Not only is it soothing, but there is some evidence that aloe vera can help speed up burn healing. (I’m not just talking about sunburns here.)
My homemade after-sun lotion used both aloe oil and aloe juice to reap all of the benefits of both components of aloe. It’s great for soothing skin after a day out in the sun!
Healing Cuts
It isn’t just for burns! Aloe vera may help wound healing by speeding up the reepithelialization of the skin. (The mechanisms by which it works aren’t known.)
You can apply aloe gel to healing wounds to help speed up the healing process. While I wouldn’t apply it directly to open wounds, it would be great for scrapes and bruises, or cuts that have already begun to heal, to help them heal faster. Aloe oil would probably help in the same way, making it a great addition to any homemade skin healing preparations.
It may even help reduce the appearance of scarring by strengthening the collagen structure within the scar tissue.
When my husband was recovering from a major burn accident on his fishing boat, aloe gel was one of the main products we were told to use on his scars. Aloe, rosehip oil, stretching, and massages were all supposed to help soften the scarring and help him keep mobility in his arms and hands.
Fighting acne
Not only can aloe’s antibacterial properties help prevent acne, but its anti-inflammatory properties can also help reduce the swelling and redness caused by acne. When using to help fight acne, it’s best to infuse the aloe in a non-comedogenic oil like sunflower oil.
Eczema and psoriasis
If you struggle with one or both of these conditions, try aloe oil for relief. It can help add nutrients to the skin and clear up spots and rashes on your skin over time! Just apply once or twice daily on the areas that are flaring up.
Insect bites
Because of its anti-inflammatory properties, aloe oil may help relieve the itch and swelling from bug bites like bees, wasps, mosquitoes, and other bugs.
Pain Relief
Many people swear by aloe vera for relieving pain and inflammation caused by arthritis, but it may also help with other inflammatory pain.
Massage onto sore areas to help alleviate the pain. To make it even more effective combine aloe oil with a peppermint or eucalyptus essential oil for a nice cooling effect. This works much in the same way as my homemade anti-stress and headache relief lotion.
Aging skin
Not only is it a good addition to facial creams to keep your skin looking young, but taken internally, aloe vera has been shown to significantly reduce the appearance of facial wrinkles.
How to use it on skin
Aloe oil can be applied directly to your skin. Some people like to use it as a facial oil alone or mixed with other oils to make an oil-based serum.
I chose aloe oil as the carrier oil when making my body shimmer oil.
You can also add it to your homemade lotions or moisturizers. That’s my favorite way to use it!
Aloe oil would be great in homemade moisturizers. If you have acne-prone skin, try macerating the aloe leaves into a non-comedogenic oil like sunflower oil or jojoba oil instead of coconut oil. (Coconut oil causes breakouts in some people.)
You could then use the infused oil in a recipe like my homemade moisturizer for acne-prone skin.
Haircare uses
Aloe oil can help nourish hair, making it healthier and improving its texture. This, in turn, can help prevent splitting and breakage of your hair, improving its appearance over time.
Aloe’s antiviral properties may help prevent and reduce dandruff while its proteolytic enzymes may help remove dead skin cells on the scalp. This helps stimulate dormant follicles and frees up the follicles for more efficient growth.
It may also help clean excess oils from the hair and scalp, removing sebum which could be blocking hair follicles. This helps hair look better and grow more efficiently.
How to use on hair
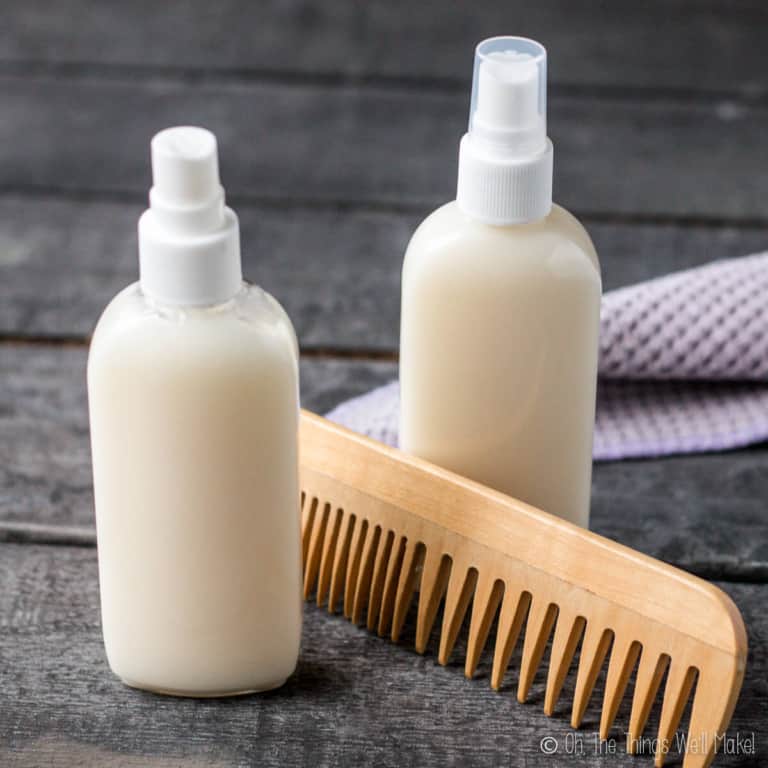
Try using aloe oil as one of the oils in your own homemade hair conditioner!
If you prefer to use it on its own, massage it into your scalp before applying your conditioner. Let it stand for a few minutes before rinsing it.
Storage
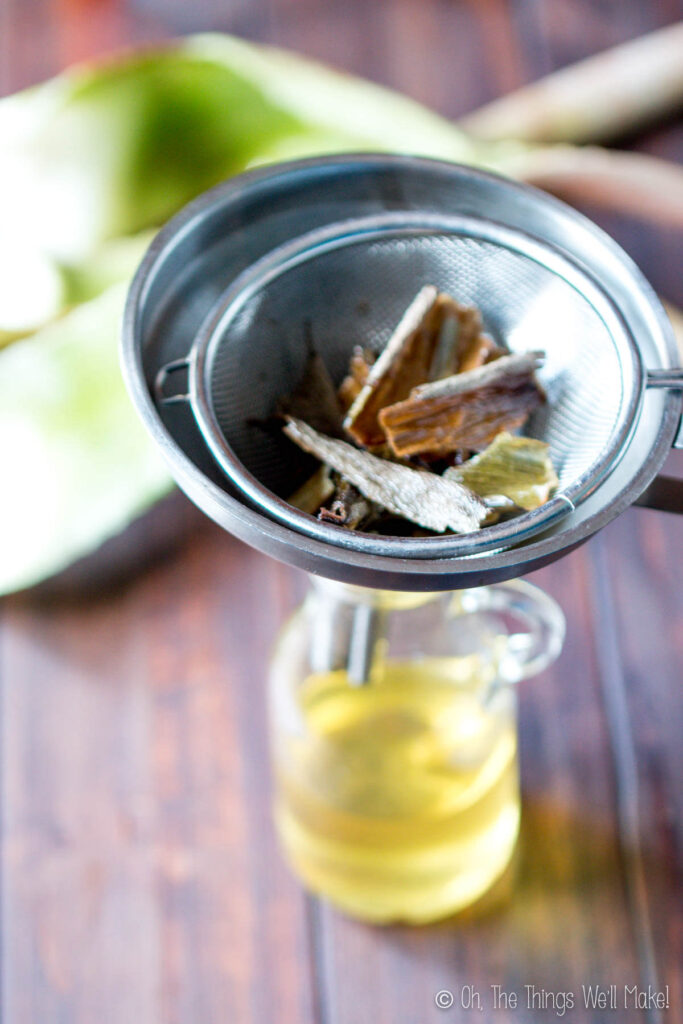
Once you’ve strained your oil, store it in a sealed container in a cool, dry place. The finished oil’s shelf life will depend on the carrier oil chosen and the method used to heat the oil. With time, the oil will eventually go rancid.
To help prolong the shelf life of the oil, consider adding some vitamin E (tocopherol). Vitamin E is an antioxidant that can help prevent the oil from going rancid as quickly.
Add vitamins E at a dosage of 0.5% by weight. (So, for every 95.5g of oil, use 0.5g of vitamin E.)
Video
Homemade Aloe Oil
Materials
- 3 aloe vera leaves
- 500 ml coconut oil or other carrier oil
Instructions
Prepare the aloe
- Rinse aloe vera leaves well, and cut of the serrated edges on either side, leaving as much of the leaf intact as possible.
- Slide your knife down the leaves from the base of the leaf to the point, exposing the aloe gel inside.
- Cut the leaf into pieces that will fit into your dehydrator. You can also dry this on the lowest heat setting of your oven, using the fan setting if you have one.
- Dry the aloe leaf pieces until completely dry and brittle. At first, they will appear dry, but will still be flexible. Continue to dry until brittle to ensure no moisture is left over. (Moisture is a breeding ground for microbial growth.)
Infuse the oil
- Once the aloe is fully dry, fill a glass jar with the dried aloe vera leaf pieces. Completely cover the aloe with coconut oil (or another carrier oil). Leave the aloe and oil in a warm spot for several weeks.
- After several weeks in a warm spot, the oil should have a nice, clean aloe scent. It will also have taken up some of the color of the aloe leaves.
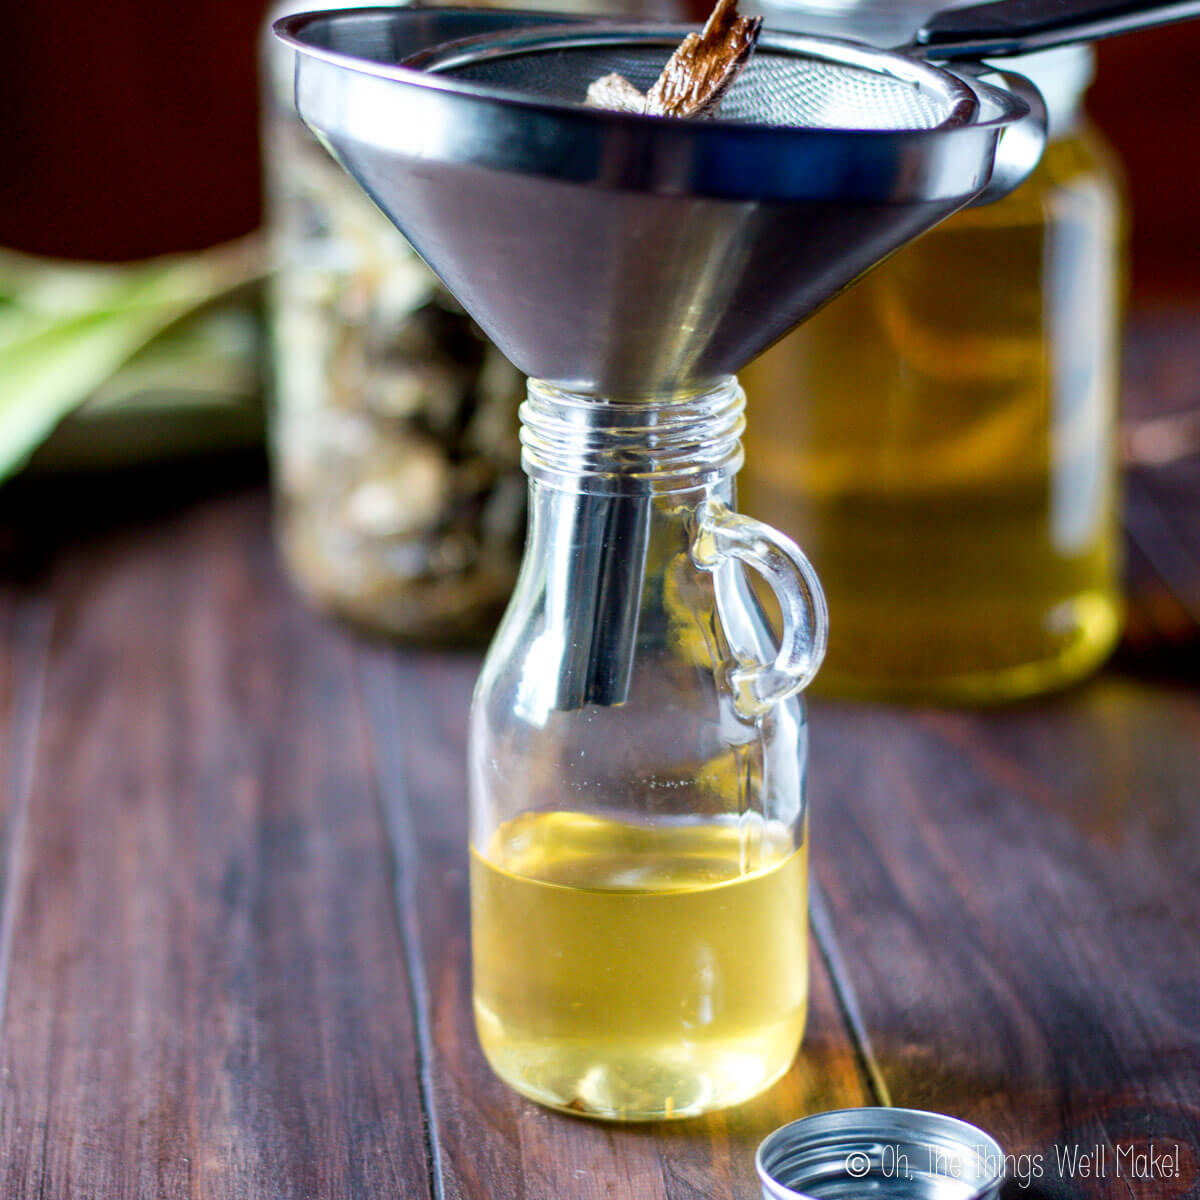
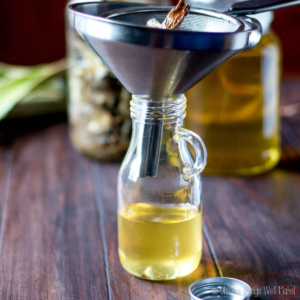
- Strain the leaf pieces out of your oil. I use a strainer in a funnel, pouring the oil through the strainer into a storage bottle.
- You are now ready to use your aloe oil!
Notes
Speeding things up
You can speed up the infusion process by heating the oil with the aloe leaves. This can be done by placing the oil in the sun or heating it in a slow cooker. Be careful not to use too much heat so you don’t cook the leaves which may lead to a bitter oil. Using a slow cooker can reduce the infusing time to several hours. When using heat directly from the sun, the process still generally takes several days/weeks. Some oils are more stable and can withstand the heat and sunlight better than others.Stable carrier oils
The best choices for carrier oils are those that don’t have strong scents or flavors of their own. It’s also best to choose stable oils with a long shelf life. They tend to withstand the heat better and make for a longer-lasting aloe oil.- Jojoba oil is a stable oil that is perfect for both haircare and skincare.
- Coconut oil is very stable but can cause acne for some people.
- Sunflower oil is a mild oil that is non-comedogenic, but it doesn’t keep as long as the other two.
Storage
Once filtered, store the finished oil in a cool, dry place. How long it keeps will depend on the carrier oil chosen and the method used to heat the oil. With time, the oil will eventually go rancid. To help prolong the shelf life of the oil, consider adding some vitamin E. Vitamin E is an antioxidant that can help prevent the oil from going rancid as quickly. Add at a dosage of 0.5%. (So, for every 95.5g of oil, use 0.5g of vitamin E.)This post was originally published on September 8, 2017. It was rewritten, adding new photos and video in July of 2021.
I make aloe Vera oil from frozen aloe, using coconut oil as carrier, using stove top method. My oil separated into cloudy yellow and red liquid. Is this normal?
Hi Annette,
I have no idea what happened there, to be honest. (Where could the red have come from?)
I live on the Olympic peninsula. Fall has come thus no Sunny warm spot for the mixture to sit. Anything I can do? I’d love to make this before winter hits. Thank you!
Hi Koda,
Yes!
The heat just helps move the process along quicker, so it’s not really needed.
You really have 2 options. You can either just leave it for more days infusing (in the cold) or you can make it more quickly by gently heating it over the stove or in the oven or a slow cooker.
Whatever you choose, keep the heat very low so as not to cook it. Some people choose a slow cooker for several hours or overnight. Others choose a stovetop and cook for a shorter period and then strain out the plant material.
Hi Tracy! I’ve been reading a lot of your posts lately and I love how informative and detailed they are. I often make my own simple beauty products (toners, deodorant, laundry soap, etc.), but I’m going to make even more complex products now that I’m more confident and armed with the right information.
I don’t have a dehydrator, my oven is not a convection/fan oven, and the lowest temperature it goes is 200ºF. Can I dehydrate my aloe leaves in my oven? If so, is there a specific place in the oven you would recommend (lowest rack, highest rack, middle)?
Is it necessary to strain the leaves out of the oil? Does leaving them in increase the risk of bacteria growth, mold, etc.?
I also saw in the comments that you said the gel part of the leaf seems to dissolve into almost nothing, implying that the gel isn’t really being put to use and the outer part of the leaf is really what’s infusing in the oil. If that’s the case, can I remove the gel, save it for other things, and just dehydrate the outer part and use that in the oil?
Thank you!
Hi Jodie,
I’m sorry I overlooked your comment when you first made it!
For dehydrating, yes, I use my oven for it a lot! I actually use all racks and then use the very lowest heat setting. I also set the fan, but if you don’t have a fan in your oven that’s OK. You can occasionally open the oven to let out any water vapor that may rise, but it’s not essential. My lowest temperature is 50ºC (120ªF), so it’s lower than yours. You may want to keep a closer eye on yours and open to vent more often than me- checking to make sure you aren’t cooking rather than dehydrating.
While not essential, I find it easier to use the oil if you strain the leaves out. You don’t want any leaves above the oil level at least to decrease the risk of microbial growth.
I don’t have a good answer about the what part of the gel is going into the oil.
I think the comment you were referring to was in response to a commercially bought aloe powder, which is normally meant to be dissolved with water to make an aloe juice of sorts. I don’t know, exactly, how those are made and if they are just dehydrated and pulverized aloe gel or not.
I like to think that the gel part of the aloe is imparting some benefit to the oil, but, again, I can’t be positive it is.
In any case, if you remove some of it, some of it will be on the outer part, so I suppose you’d still be getting some benefit from it?
I was tempted to do just the opposite- and try to make oil with only the gel part to see what would happen. The problem is, dehydrating aloe gel leaves you with just about nothing.
I dehydrate in My Gas Oven a lot … to Keep it from “Steam Cooking” whatever your dehydrating. I use a wooden spoon to prop the door open Slightly, (Spoon end in the oven handle sticking out the top pinched between the door and the oven ). This helps lower the temp even more then the Dial setting and release additional moisture,
Hi Mark,
That’s a great tip!
Yes, the ovens here seem to go a lot lower in temp than other ovens, I think. Mine has a low temp. of 50ºC, but I hear that a lot of people have ovens that have a much higher low temperature.
My low temp. seems to be a great temperature for dehydrating, but some other ovens get a bit too high and steam things as you said. I’ve considered opening the door in mine, but I think it ends up cooling too much because it isn’t that hot, to begin with.
useful information, thanks
You’re welcome!
Hi, I’m hesitant to leave the oil out in the sun as light seems to degrade most oils. I would put it in a dehydrator with low temps under 118 degrees to not kill any beneficial enzymes. How longed you think it would take in the dehydrator under that situation?
Hi Leila,
That’s fine. A lot of people also use a slow cooker.
It’s really hard to give a specific amount of time as we can’t really tell for sure how much has infused into the oils.
After several hours to a day, you’d probably at least have infused in a lot of its benefits, scent, color, etc.
I guess you’d have to experiment with it and see how it works.
Hi Tracy!
Can we dehydrate aloe vera under the sun?
Thanks for the article!
Can we dehydrate aloe leaves under sun because I don’t have a dehydrator.
Yes, that’s fine!
Just make sure it’s fully dried before placing in the oil or you may end up with a moldy product. 😉
Hi..
I follow this ancient Ayurvedic Aloe Vera hair oil recipe. It works 100%…an ancient secret for long thick beautiful Indian hair.
https://m.youtube.com/watch?v=tZIpB-maNEI
This video demonstrates mixing equal amounts of aloe Vera gel and unrefined pure coconut oil and cooking on a very slow flame till all the moisture evaporates and the gel disappears leaving golden oil.Strain and store in a glass jar.Apply this hair oil a night before taking head bath for gorgeous hair.
Hi V,
I haven’t watched the video, but…
I think that as long as you cook for long enough to evaporate all moisture, as you say, that could be another good way to make it.
The only problem I see is that it may be more difficult to know when that takes place, so it may not keep as well.
I’ve made aloe oil two ways now – the way that you describe (dehydrating the aloe leaf in my dehydrator and then packing into a jar of coconut oil) and also by blending puréed gel from aloe leaves with coconut oil and then ‘cooking’ in coconut oil in a pan on the stove top; in the second method, you have to keep stirring until the aloe turns brown and sort of shrivels (the water content evaporates) and you start to see the clear oil separated from the oil and the aloe material clumps together. You then strain the aloe material from the oil using a fine strainer and all you are left with is a golden tinted oil with a strong aloe scent. The aloe oil made using the second method seems stronger and more potent….try it, but it does take a while. I used equal parts blended gel and oil.
Hi Jacqui,
That’s so interesting! And it makes a lot of sense. Thanks so much for the tip!
I’m slowly making my way through all of my posts from the very beginning and re-making them, adding new tips, etc.
I’ll definitely keep this in mind for trying next time and will update the post with my findings. I really appreciate you taking the time to share your findings. It really helps other people too!
Can I use extra virgin olive oil to try the second method
Hi Ash,
Yes, of course!
EVOO will contribute its own scent and color, so the result will be slightly different, of course, but it should still make a wonderful oil!
I have read numerous articles saying aloe loses nutrients as soon as it is in contact with oxygen… have you tested your aloe oil to see if it still has any nutritional value?
I would love to try this if it does!
Hi Missy,
I’m not really sure how one would test something like that. I’ve also seen it said that most of aloe’s good properties are water and not fat soluble, but aloe oil is really a very common ingredient sold at cosmetic suppliers.
What I will say is that at the very least, the aloe imparts a wonderful fragrance and color to the oil. I really love it.
It’s hard to say how therapeutic the aloe effects are, but I still enjoy using this oil.
Hello Tracy, I will like to add some probiotics with aloe vera for topic ., is it possible ?
Thanks
Elior
Hi Elior,
I’m not sure I’m understanding the question fully. You want to add probiotics for topical use? I’ve never tried it personally, but I did just look it up online and did see that it can help with acne and rosacea. I don’t really know enough about it right now, though, to be able to answer you more fully without studying it further.