

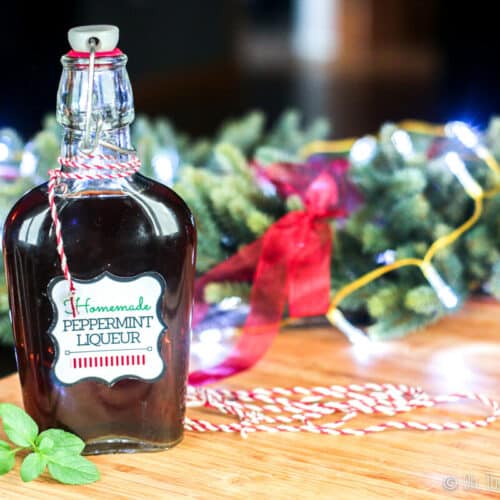
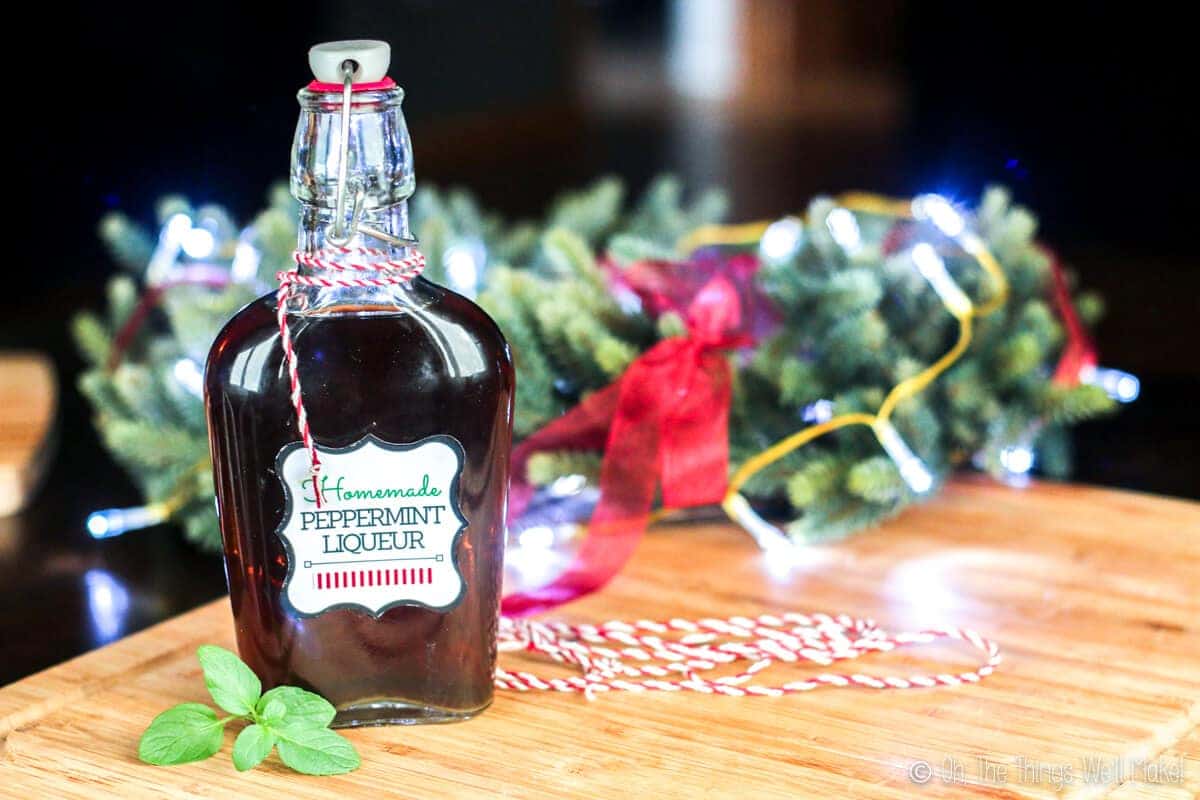
Homemade Peppermint Liqueur
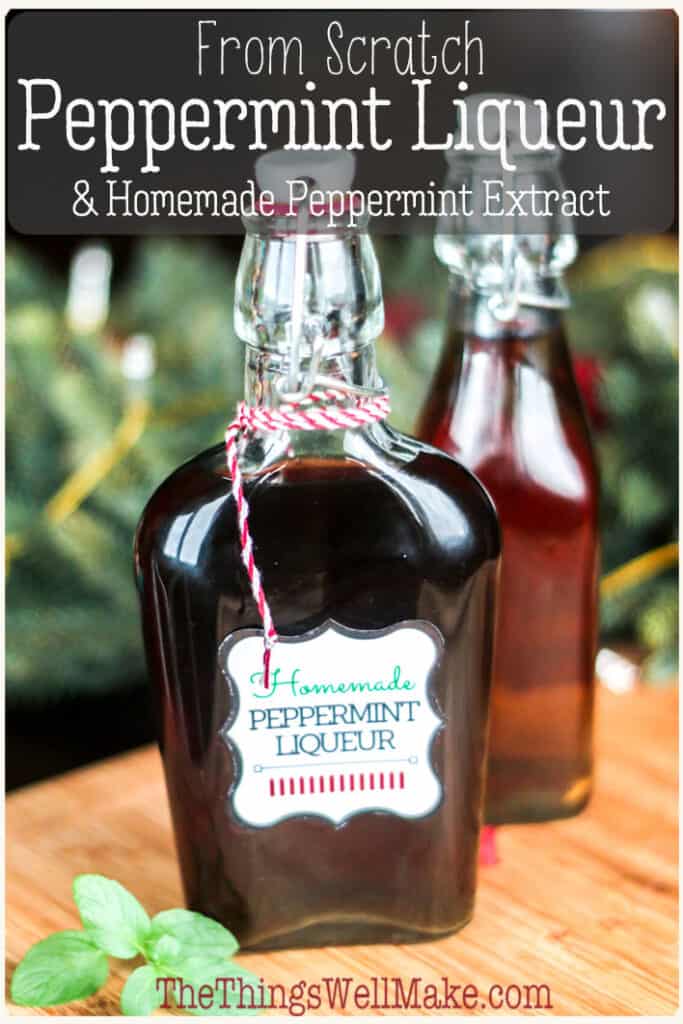

Naturally made without artificial colors or flavors, this homemade peppermint liqueur is a wonderful alternative to store-bought peppermint schnapps. It’s the perfect addition to holiday-inspired cocktails and also makes a great gift. (I’ve even included a free printable label for you to use!)
Despite the fact that we have a pretty well-stocked bar in our kitchen for entertaining guests, we actually rarely drink alcohol. Don’t get me wrong, we do enjoy a glass or two of red wine when dining on the weekends. Other than that, most alcohol doesn’t appeal that much to us anymore.
The holidays, though, are a bit of an exception.
Making Homemade Liqueurs
It all began a few years back when I found a pretty holiday book about how to make your own liqueurs.
I was amazed by how easily I could transform a generic vodka into whatever type of liqueur that appealed to me. The book showed how to make basic liqueurs like homemade coffee liqueur and orange liqueur, mimicking Kahlúa and Cointreau.
Why Make Your Own Liqueurs?
What’s great about making your own is that you can make just about anything you can imagine.
Making your own liqueurs can also save you money. Save the more expensive vodka for mixed drinks or cocktails where you’ll better appreciate the difference. For homemade liqueurs, the flavor will be changed and diluted so that it’s not as important to choose brand names. That said, even when choosing more expensive vodka, once you’ve added the sweetener, in most cases you’ll still save money over brand name liqueurs.
Add to all of that the fact that you can choose the quality of the ingredients. I chose to use organic coffee beans when making my homemade Tía María/Kahlúa. I also used organic lemons from my own tree for my homemade limoncello. When making this peppermint liqueur, I used organic mint leaves from my own garden. You may prefer using something different. That’s the beauty of it. You get to choose.
Other homemade liqueurs
I began experimenting and first made my own coffee liqueur. Later, I tried making orange liqueur and a homemade limoncello. Using the same idea, I also made limecello and mandarincello and found the best way to make them. (I wrote about my experiments in the post on making limoncello.)
One of our favorites was praline liqueur. When I first wrote this post, I was brewing up a new batch and promised to show you how to make it yourself. Somehow life happened, and I never got to it. (Now that I’ve been reminded, I may make it a priority again.)
I also made a nice holiday liqueur by infusing dried cranberries in vodka and made cream liqueurs by adding sweetened condensed milk. See? The sky is the limit to what you can make!
Homemade Tía María: Coffee Liqueur Recipe
How to Make Homemade Limoncello, Limecello, and Mandarinecello
Homemade liqueurs as gifts
I’ve always loved to make things myself. Even as a kid, I began making all of my Christmas gifts.
One year I hand-painted ceramics. My grandmother proudly displayed the reindeer statues I gave her each Christmas. Another year, I painted some not-so-successful oil paintings that ended up in people’s basements. (I guess all of those weekend mornings watching Bob Ross didn’t really pay off as well as I thought.) ?
As I got older, I also became more practical. I branched out into foodie gifts and one year I made liqueurs.
My praline liqueur became the most-wanted repeat gift each year for a special someone (my grandmother’s husband).
All in the presentation
Success in gift-giving encouraged me to keep on. Each year I would find a new pretty bottle for gifting that year’s liqueur. If I didn’t find a bottle that I especially loved, I put more effort into making beautiful hand-painted labels or in decorating the bottles with something special.
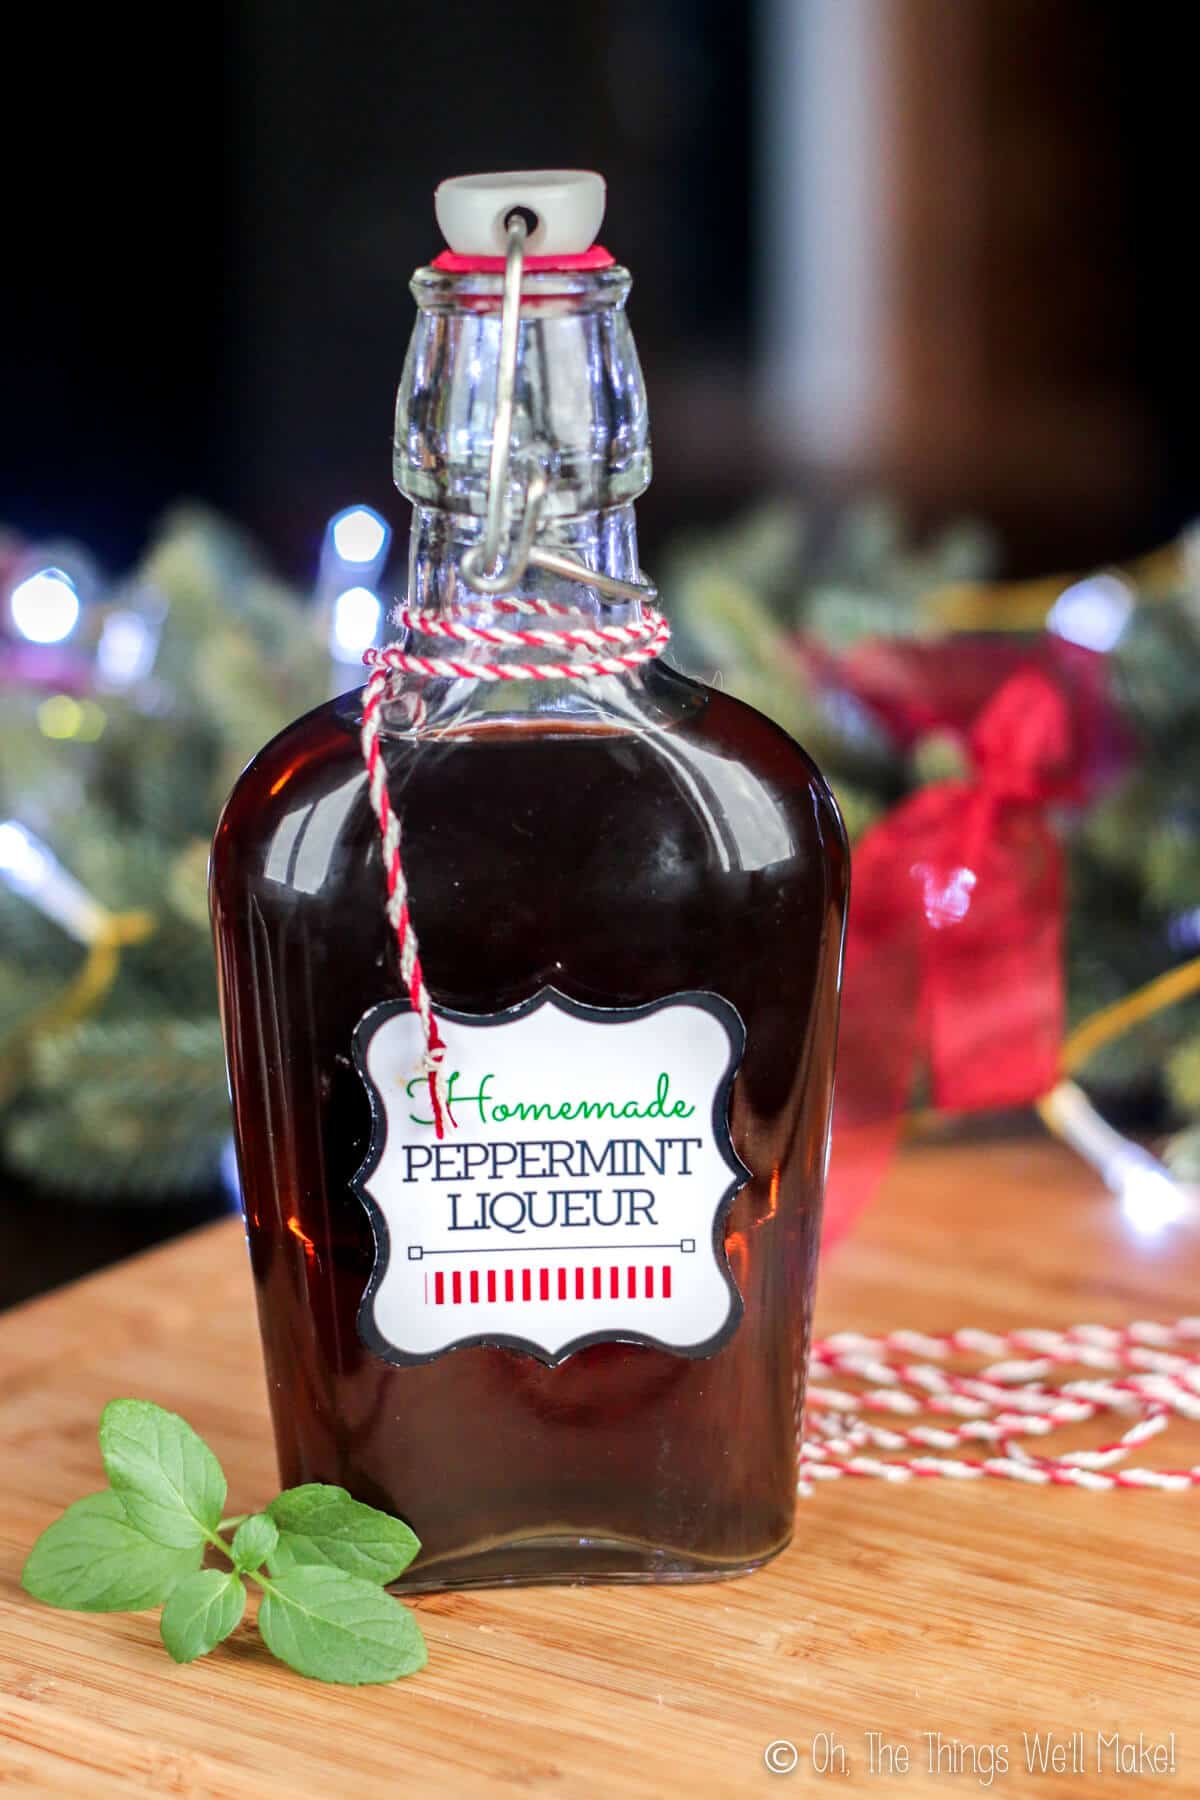
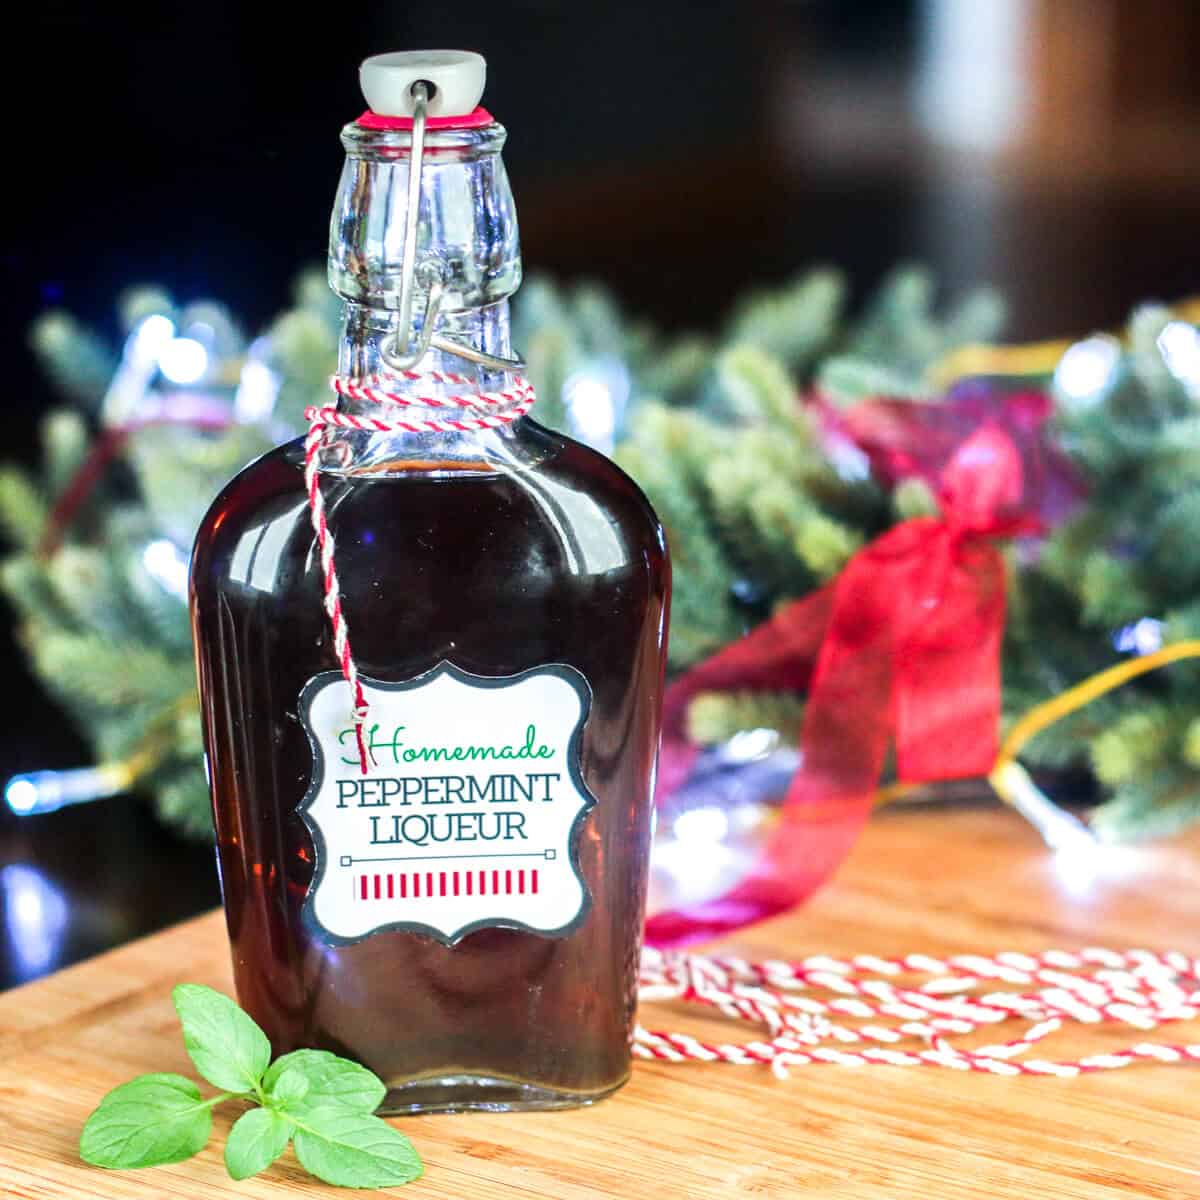
I think it’s fun to decorate the bottles you give away to further personalize the gift and make it special. For these bottles, I made labels and also wrapped the bottle with a homemade baker’s twine. Baker’s twine works perfectly for this liqueur because the red and white stripes are reminiscent of peppermint candy.
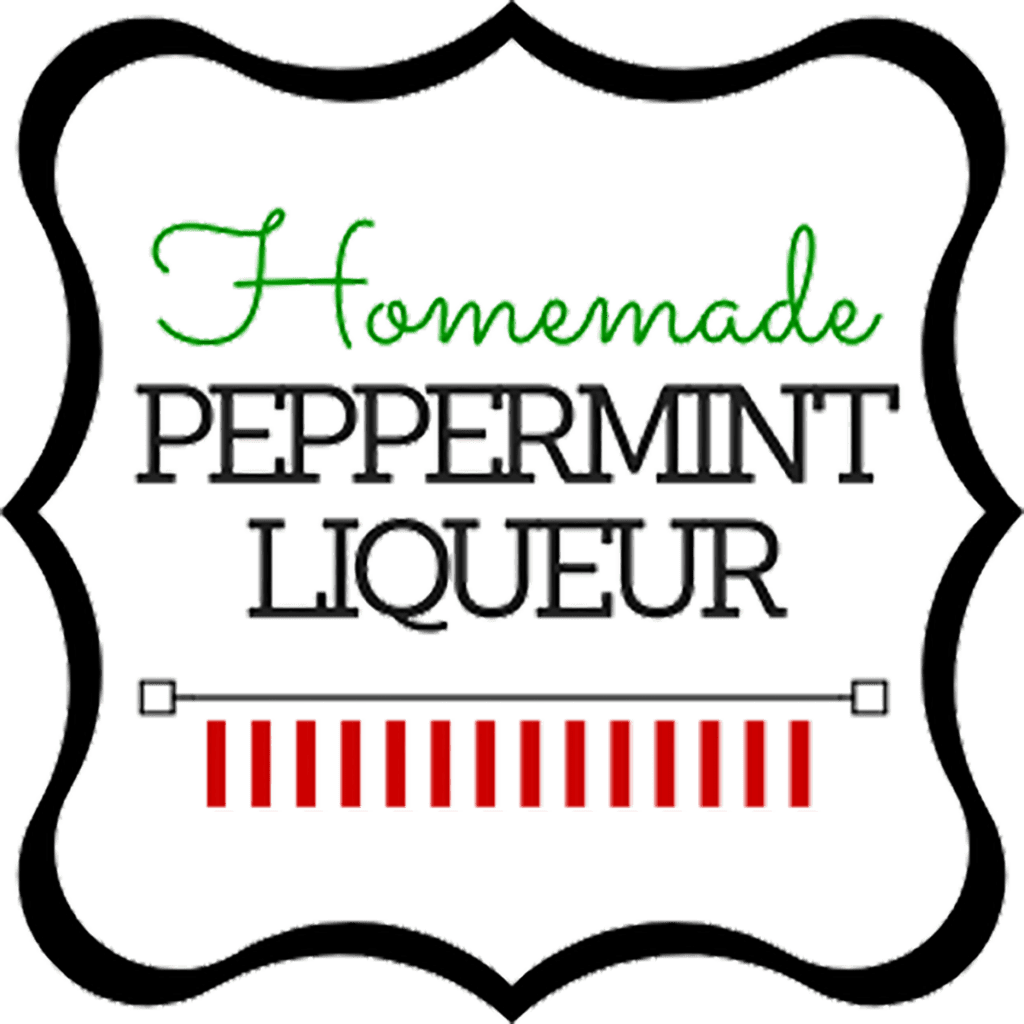
Printable Label
I also designed a label for my liqueur and printed it out onto a thin waterproof photo paper. I then cut it out and glued it into place.
Here is the label I used. It’s a transparent png file, so you can even print it onto transparent labels if you prefer. Feel free to print it out and use it! Just right click on the image and save it. Resize it to fit your particular bottle and then print at that size.
Making a natural peppermint liqueur
Making a homemade peppermint liqueur from fresh mint leaves is actually quite simple.
You will need:
- Fresh mint leaves (or peppermint extract and/or essential oil)
- Vodka (or other unflavored alcohol)
- Filtered water
- Sugar
Part 1: Make a Peppermint extract
The first step to making a homemade peppermint liqueur is to make the peppermint extract. This is done by infusing the mint leaves into a strong alcohol over the course of several days to weeks. Ideally, you’ll want to choose a non-flavored vodka of around 40% (80 proof), but can also try using other strong liquors like rum.
Once the first step is finished, you can use the peppermint extract as-is or can sweeten it to make the liqueur.
Using extracts or essential oils
Over the years, I’ve seen several ways suggested for making peppermint liqueur. Some people use strong peppermint extracts (and often also add green food coloring). Other people use essential oils to flavor the vodka. Either felt a bit like cheating to me.
I do have to admit, though, that either of those options will give you a nice, clear, colorless peppermint liqueur that is is very quick and simple to make! So, if you’re looking for a last-minute DIY liqueur, then I guess you may want to consider adding extracts or essential oils for the first part of flavoring the alcohol.
I haven’t personally made peppermint liqueur using either, so I’m not sure how much you really need to add. My best guess is that you’ll need to add quite a bit of extract. On the other hand, essential oils are a lot more concentrated so I doubt you’d need to add much to strongly flavor the alcohol.
If I were going to make a liqueur this way, I’d experiment by adding a little bit, taste-testing it, and adding more, in small increments, as needed.
Using Fresh mint leaves
If, on the other hand, you are more hardcore like me, you may prefer making peppermint liqueur completely from scratch. To do so, you’ll want to get your hands on a bunch of fresh mint leaves.
Homemade peppermint liqueur made from fresh mint leaves isn’t clear or green, but more of an amber color. If you use an unrefined demerara sugar like I did, it will become an even darker brown.
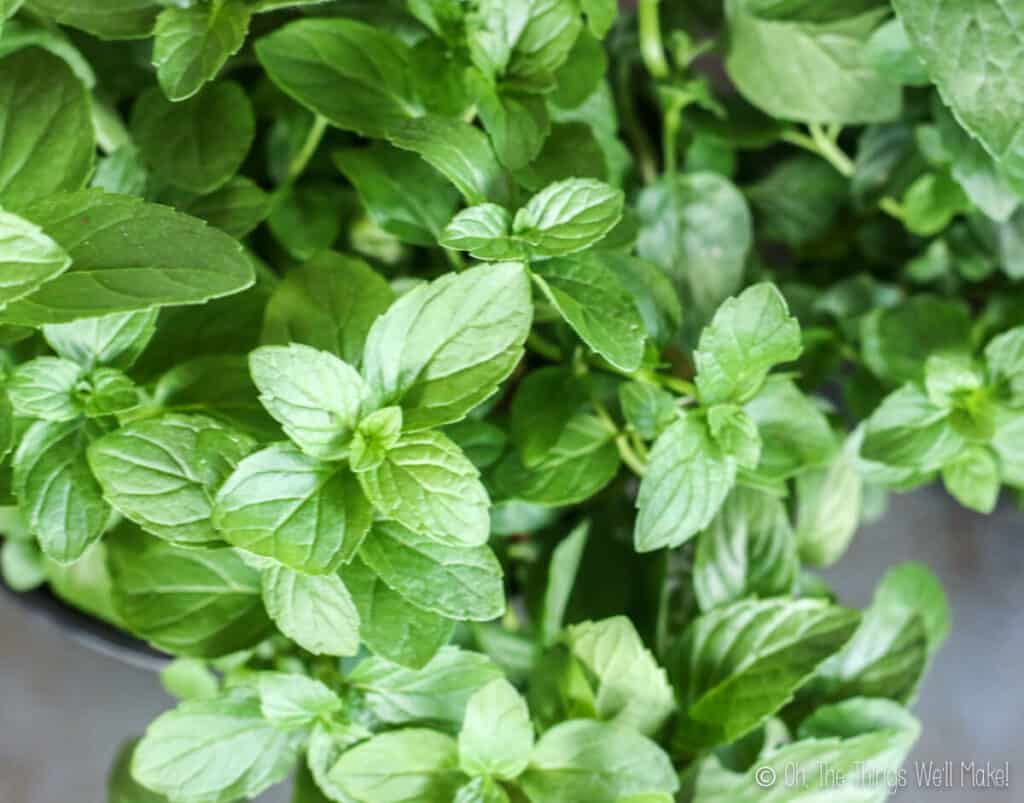
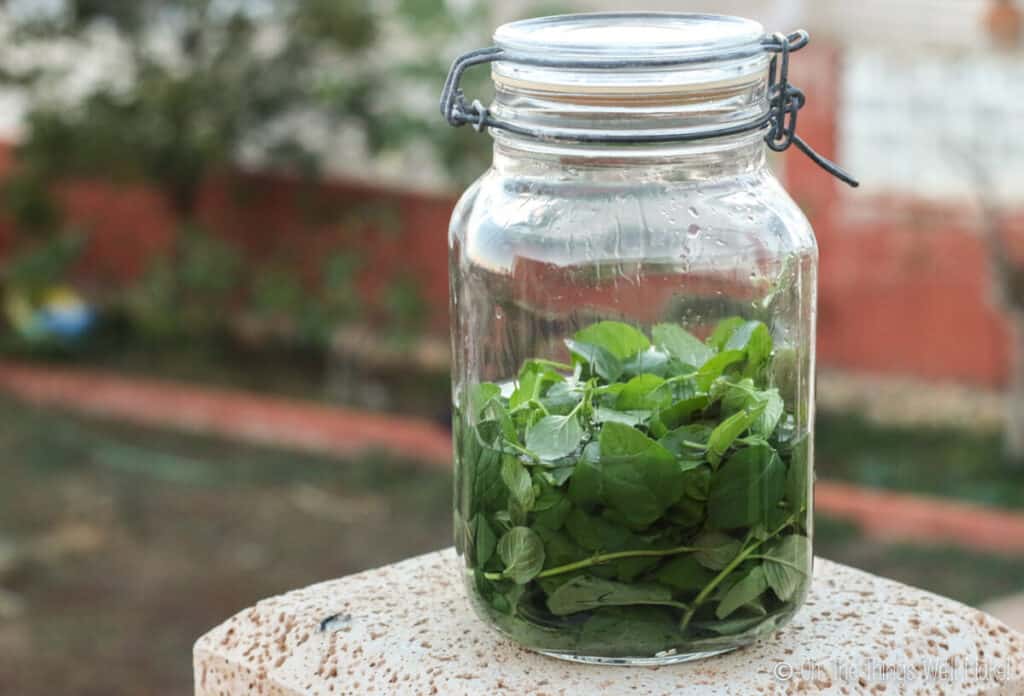
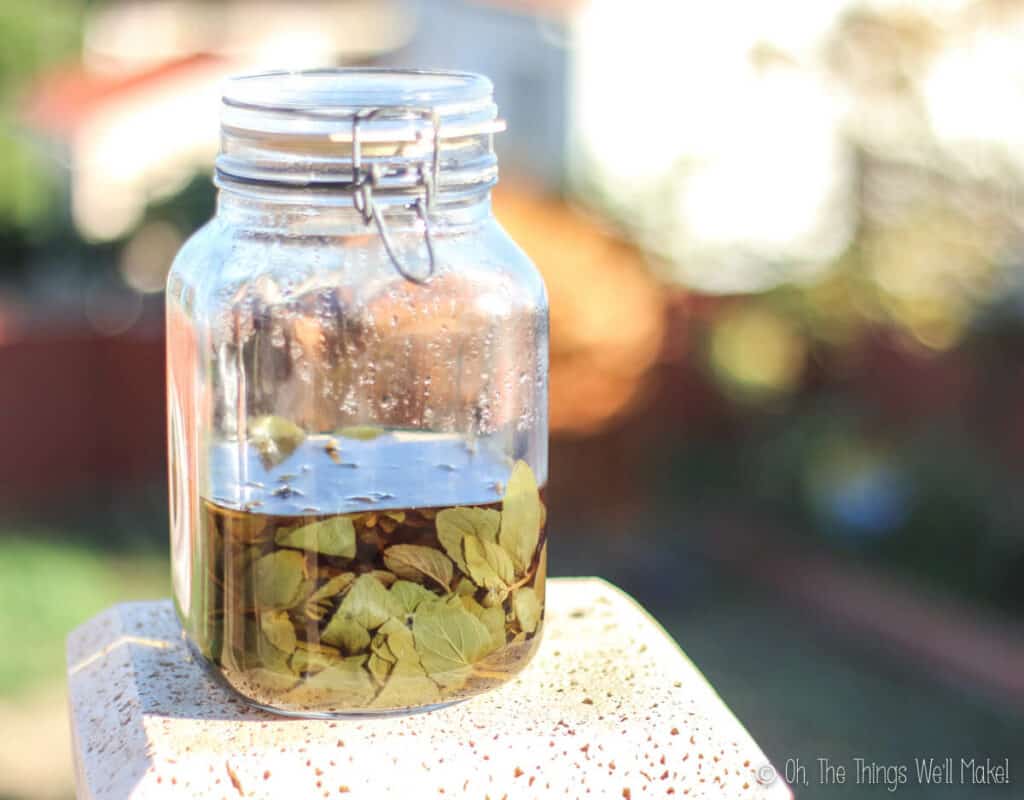
- Rinse your mint leaves and place them in a large glass jar. (To make around 1 liter of liqueur, I used around 3 cups of fresh mint leaves.)
- Cover them with vodka until completely, or almost completely, covered. (I used around 3.5 cups.)
- Let them steep for several weeks. For the first few days, stir the mixture or dunk any exposed leaves under the surface of the alcohol. This prevents mold from forming on the leaves. After several days the leaves will reduce in volume and will sink to the bottom of the jar more easily.
- Once the mint leaves stay under the surface on their own, you can occasionally shake them or stir them if you remember, but it isn’t a necessary step. I left the leaves steeping for just over a month, but you really don’t need to leave them that long!
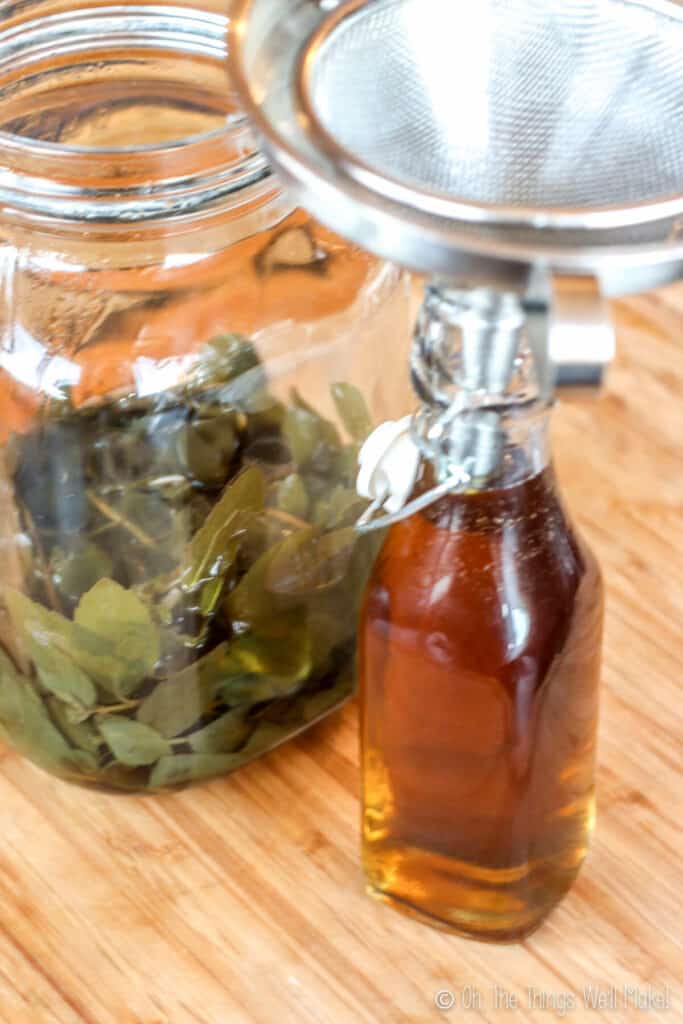
- Strain out the leaves from your vodka. I usually use a stainless steel strainer placed into a funnel.
- The strained liquid is your homemade peppermint extract! Save a little bit of it in a separate bottle for recipes, if you like.
Part 2: Sweetening the liqueur
To convert the extract into liqueur, we need to sweeten it. Normally, a simple sugar syrup is used. It helps sweeten and dilute the alcohol while slightly increasing its viscosity.
Making a simple sugar syrup
- To make the syrup, dissolve 1 part sugar to 1 part water over medium heat, stirring until the sugar has completely dissolved. (I used 1 cup of demerara sugar and 1 cup of water.)
- Remove the sugar mixture from the heat and let it cool.
Part 3: Putting it all together
To finish making your liqueur, we need to add the sugar syrup to the homemade peppermint extract. This part can be done to taste.
I used around 3 parts vodka (just over 3 cups) to 1 part sugar syrup (the 1 cup homemade syrup), but you can make it more or less sweet to suit your taste buds.
If you prefer using a different alternative sweetener like honey, maple syrup, or stevia, you may want to also add water to dilute the alcohol content somewhat.
Homemade Peppermint Liqueur
Ingredients
- 3 cups packed mint leaves
- 3.5 cups vodka or enough to cover them
Simple Sugar Syrup
- 1 cup sugar
- 1 cup water
Instructions
Making a Peppermint Extract
- Rinse the fresh mint leaves and place them in a large glass jar.
- Cover the leaves with vodka until completely, or almost completely, covered.
- Let the leaves infuse into the vodka for several weeks.
- Strain out the leaves from your vodka. The strained liquid is a homemade peppermint extract! Save a little bit of it in a separate bottle for recipes, if you like.
Making a simple sugar syrup
- Dissolve the sugar in the water in a saucepan over medium heat, stirring until the sugar has completely dissolved.
- Remove the sugar solution from the heat source and let it cool.
Making the peppermint liqueur
- To finish making your liqueur, combine the sugar syrup with the homemade peppermint extract. This part can be done to taste. I used 3 parts vodka to 1 part sugar syrup and was happy with that concentration, but you can adjust that ratio to make your liqueur more or less sweet.
Notes
This post was originally published on December 19, 2014. It was rewritten with clearer instructions, added nutritional information, and more tips in December 2019.


When you steep the leaves do you put them in the fridge or just leave them on the counter?
Hi Michelle,
I leave it on the counter. The alcohol keeps microbes from taking over and spoiling the batch. 😉
Try to make sure everything is below the level of alcohol, though!
Ok. Does it smell weird? Mine just smells bad.
Hi Michelle,
Sorry for the delay in answering!
For some reason posts from people who have written before aren’t showing up as new comments- so I’m just now realizing that I’ve missed quite a few comments over the summer and am trying to get caught up now!
hmmmm- I actually just went to find an old bottle I had stored away to check on it. Even though it’s really old, it smells like a minty alcohol. That’s all.
I wonder if somehow some of your mint got moldy either before or while you were infusing it into the alcohol?
If it’s not completely covered and some mint is above the level of alcohol, it can get moldy. Also, if it isn’t freshly used, that might cause a problem?
Hi! I have a question that doesn’t seem to be answered on any home made liquor recipe Q and A. What do you think about using cheaper alcohol to make the extracts or liquor? Something like Everclear or base grain alcohol? My husband is allergic to vodka and if I will dilute with sugar syrup for liquor or add in very small amounts for baking then would that be okay? Or would it have a bad taste?
Hi Debbie,
I wouldn’t see why you couldn’t do that.
We don’t really have access to anything like Everclear here in Spain so I’ve never personally tried it and don’t know about the flavor.
Anything like that is actually super expensive and almost impossible to find.
I do use inexpensive alcohols (all sorts mostly rum and vodka and whiskey) for this sort of thing all of the time, though. It doesn’t really make sense to use an expensive brand on something you’ll be changing up and adding a sugar syrup to. 😉
Hi Tracy. Love your recipes. You mentioned a prailine liqueur and I was wondering if you’ve posted it or if you will soon. Thanks
Hi Tom-
I can definitely put it on my to-do list. I’ve probably made it several times since I posted this- and likely have pictures of the whole process and everything. Sadly I’m one of those crazy people that has a lot of ideas, makes a lot of things, takes a lot of pictures, but doesn’t find the time to post all of them. (I think I have over 100 recipes photographed and ready to post on my computer.)
Seeing people ask for the recipes, though, does make me prioritize those recipes. It may be a good one for Christmas gifts. 🙂
I’m thinking of adapting this recipe to make a peppermint gin because we had one on holiday in Menorca many years ago now (they gave free samples in the shop) and I’ve been dying to have some ever since. I know it won’t be exactly the same since that was made at that specific distillery with their rather unique gin as a base. Well that and I have no idea how to pick a decent gin to use as a base as I tend not to drink it other than when out (in cocktails) but my experiments last year with making homemade liqueurs turned out really well so worth a go! Just have to hope that the supermarket has mint leaves in.
With my other infusions (fruit and one with cacao nibs) I added the sugar to the alcohol whilst it was infusing rather than adding a sugar syrup. Is there any reason why I couldn’t do that with this? Does it affect the leaves more or is it just a matter of adjusting for individual tastes at a later stage?
Hello Alexa Faie,
Hmmm that sounds wonderful. I haven’t seen a peppermint gin before. 🙂
I’m sure you could most certainly just add the sugar to the alcohol. Most recipes I’ve found/made in the past have made the sugar syrup and added that to the alcohol. I think it’s to make the alcohol milder as you sweeten it because you are lowering the alcohol percentage by adding the syrup.
If you just add sugar, you’ll end up with a stronger liqueur. I don’t imagine it would otherwise have any effect on the leaves.
Good luck! I’d love to hear how it goes!
Thanks!
I’ve since changed my mind about using gin after doing a bit of research and finding that coriander (cilantro) is a VERY common ingredient in gin and since my Mum has become super allergic to coriander I decided that maybe just using a neutral vodka might be better after all since some will be a gift for her. I don’t know if she knows about it or not but it might explain why she sometimes gets ill after certain cocktails now but not others.
So yeah, I’ll just do the vodka! 🙂
Hi,
Oops, I spelled my name wrong (and I didn’t even have the liqueur yet) What is the shelf life with and without refrigeration?
Hahaha, Catherine.
I’m not really sure. I haven’t refrigerated mine, and the batch I made in the picture, made before I wrote up the post, still tastes good to me. I actually just got up and poured myself the tiniest bit in a shot glass to make sure. I’ve had that batch for over a year, so it should keep for a very long time.
That’s the nice thing about alcohol, it preserves things very well, and the sugar only helps with the preservation. 😉
OK- I couldn’t see the publish date on the post from the place I answer comments, and just realized that I still had a small bottle from that batch that was made in 2014! So, it’s really over 2 years old, and still tastes nice and minty.
I like to keep things like this to periodically check on how long they can be kept. I just finally threw out my first batch of paleo sprinkles, and most were fading, but the pink ones were still bright. They did start to smell stale, though. 🙂
Hi, I have so much mint and your recipe sounds delicious! Do you know the shelf life, with and without refrigeration?
Thanks
I’m trying to preserve my mint leaves now since they are flourishing and use them at Christmas time for gifts. Is there a way to preserve my mint leaves now or can I go ahead and make the peppermint liqueur? It’s early in the year but I’d hate for my peppermint leaves to go to waste.
Hi Kristin,
There’s no reason not to go ahead and start making the liqueur now! I still have a small bottle from when I made this batch and wrote this post, and last time I tried it, it was still good.
Oh my goodness, I thought I had answered you yesterday, and just came back to my computer screen to see I had only written what was above this sentence, and never hit enter! Why? I think I went to go check in the mint liqueur and ended up doing laundry and a bunch of stuff around the house instead. 🙂
I’ll hit reply now, just in case, and if I actually get to going to check on the liqueur, I’ll come back and comment again. Ha!
Have a great weekend.
Thank you! I was wondering if you could make your own peppermint liqueur from leaves, but as you mentioned there aren’t any recipes to make it from scratch. Except for this one! I’ll have to get some vodka tomorrow.
Hi Pat,
I’m so happy my recipe helped you. I think most people are looking to have an either colorless or green peppermint liqueur, something that you don’t really achieve with the leaves. In this case, though, I prefer to use the real deal than to have a “prettier” product.
That said, I’m sure one made with essential oils tastes lovely too.
Enjoy your cocktail! 🙂
Thank you for this simple and easy to make mint extract recipe.
You’re welcome, Elsje!
Happy to help. 🙂
We recently built an Apothecary Garden, I used to be acook, now I wish to make liquers, wines, chutneys and jams and marmalade.the recepie for mint liquer sounds fantastik. thank you.
Carlo
Hi Carlo,
All sound lovely. I love making homemade liqueurs.
I can’t believe I never got around to showing some of the others I made. My favorite is probably praline using pecans and vanilla beans!
If you ever want to share any great recipes, I’m all ears. 😉
I would love to get the recipe for your praline liqueur – is it published anywhere?
Hi Milton,
No. I guess I never got around to post that, but do have pictures.
Thanks for the reminder!
Perhaps I should try to find my recipe and post it in the next week or two for you. I’ll try to remember to let you know when it’s up.