
How to Sew a Structured Leather Handbag
Learn how to sew a structured leather handbag with this beginner-friendly DIY leather kit. This elegant purse kit includes pre-cut leather pieces, hardware, and step-by-step video instructions.
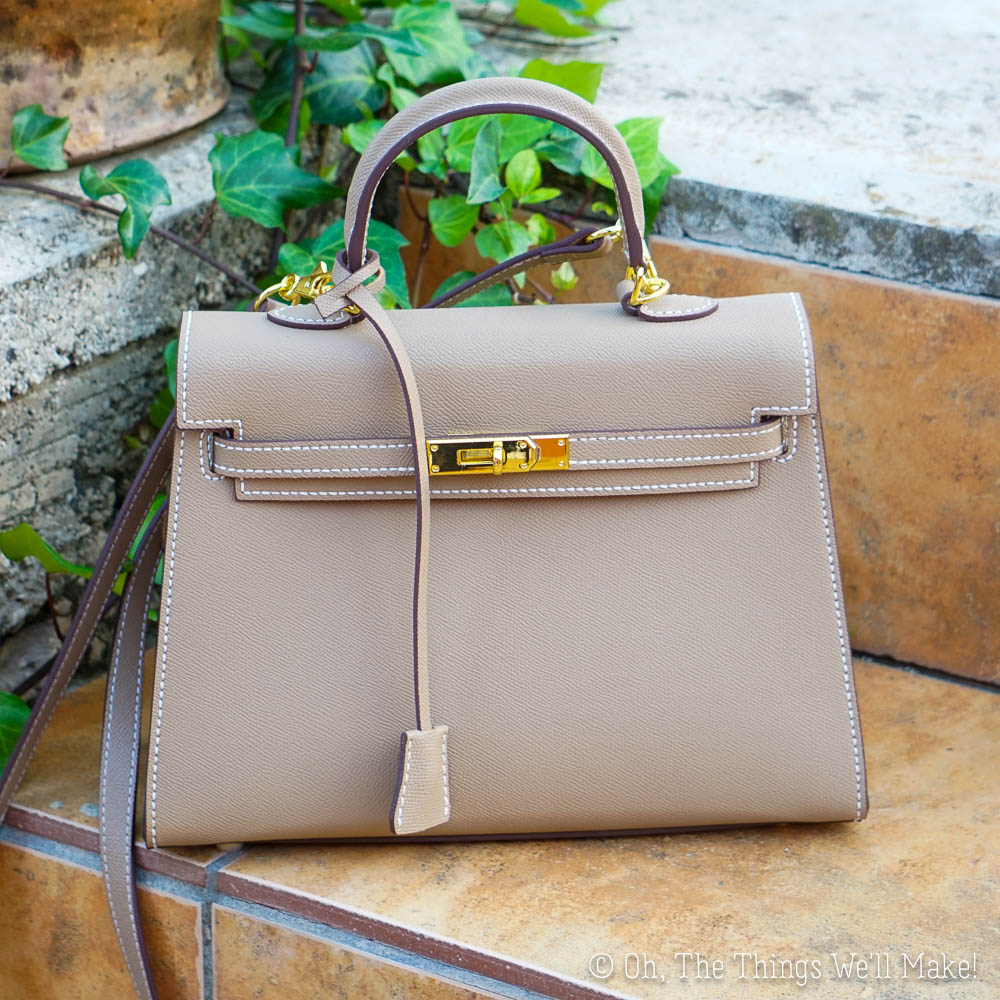
When this kit arrived, I had just gotten back from a trip and was feeling awful. I wasn’t really up for blogging, and I’d completely lost my voice, so recording videos or voiceovers wasn’t happening anytime soon.
What I could manage, though, was curling up under a blanket, putting on a K-drama, and working on something comfortably from my sofa. Sewing this purse ended up being kind of the perfect project for that.
I’ve really been enjoying these leather sewing kits lately. I love that I can make something beautiful without needing a workshop full of tools or a lot of leatherworking experience.
This handbag kit from Solace Leather is a little different from the softer leather bags I’ve made in the past. It’s a structured, Hermès-inspired purse with a classic design that I really liked.
Solace Leather sent me this kit to try, and I have a coupon code to share with you, too. If you’d like to make the same purse, you can use TRACY10SL at checkout for a discount. I also earn a commission if you purchase through my links, at no additional cost to you.
How difficult is it?
Even though the finished purse looks professionally made, it’s actually very beginner-friendly. You don’t need any previous leatherworking experience, and the instructions are easy to follow.
This isn’t a particularly quick project, though. I worked on it over the course of about three days, although I started late on the first day and finished before noon on the third. Between sewing, lunch breaks, getting distracted, fixing one major mistake, and occasionally stopping to do other things, I somehow made it through around ten episodes of May I Help You? while working on this purse. Of course, I wasn’t sewing continuously, so I’d consider this more of a weekend project than something you’d finish in an hour or two.
The biggest issue I ran into was completely my own fault. I was pretty sick while making this bag and apparently wasn’t paying close enough attention during one part of the assembly. I accidentally attached one of the handle pieces upside down and later had to remove the handles and redo that section of the purse. Once I went back and carefully rewatched that part of the tutorial video, though, the mistake was actually very obvious.
One funny coincidence was that May I Help You? actually had a storyline involving handmade leather bags, which seemed particularly fitting while I was working on this one.
What comes in the kit
The kit includes almost everything you need to make the purse, including the pre-cut leather pieces, waxed thread, sewing needles, hardware, and the tools needed to attach the metal pieces. The only thing I needed that wasn’t included was a lighter to melt and seal the ends of the thread after stitching.
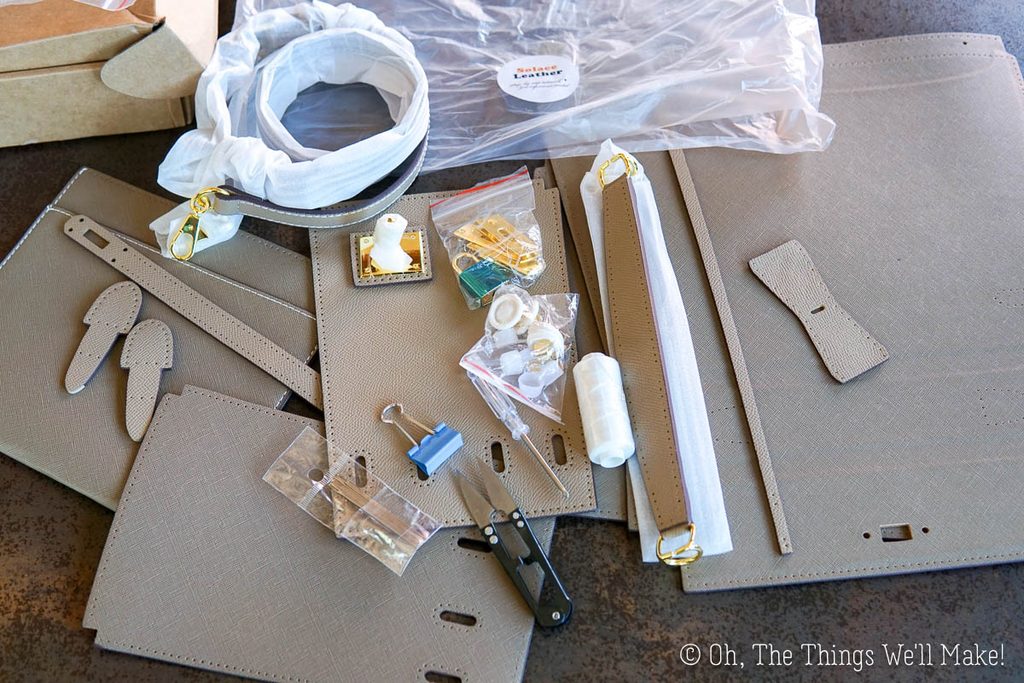
Like the other leather kits I’ve tried, the stitching holes are already punched for you. That makes the process much less intimidating for beginners because you can focus on learning the saddle stitch and assembling the purse rather than worrying about cutting and punching leather yourself.
The leather has a textured, pebbled finish, and the front and back have different textures, which is something you’ll notice while sewing the bag together.
According to Solace Leather, the kit uses cowhide leather, with different tanning and finishing techniques depending on the specific bag design.
The leather reminded me a bit of the Kelly clutch kit I made previously. Both have a similar textured surface and a more structured, classic handbag style.
Use code TRACY10SL at checkout for a discount.
How to sew the handbag
After your kit arrives, Solace Leather sends you a link to their detailed video tutorial. It walks you through the entire process. It shows you how to thread the needles, do the saddle stitching, and put the purse together.
I’ve also made my own video showing how I put the bag together, which you can watch below.

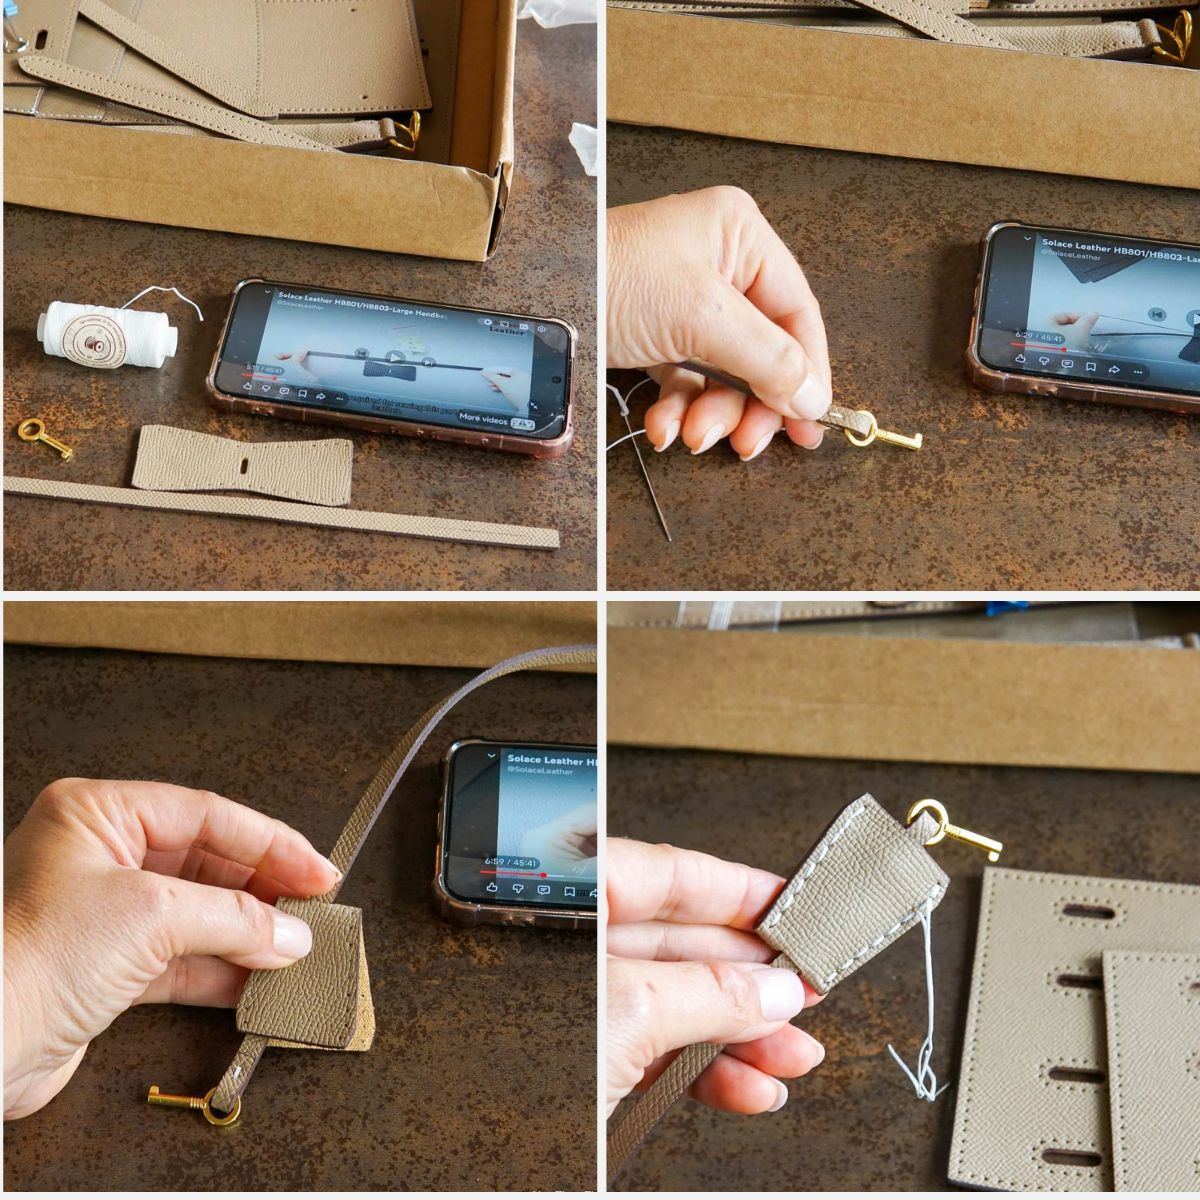
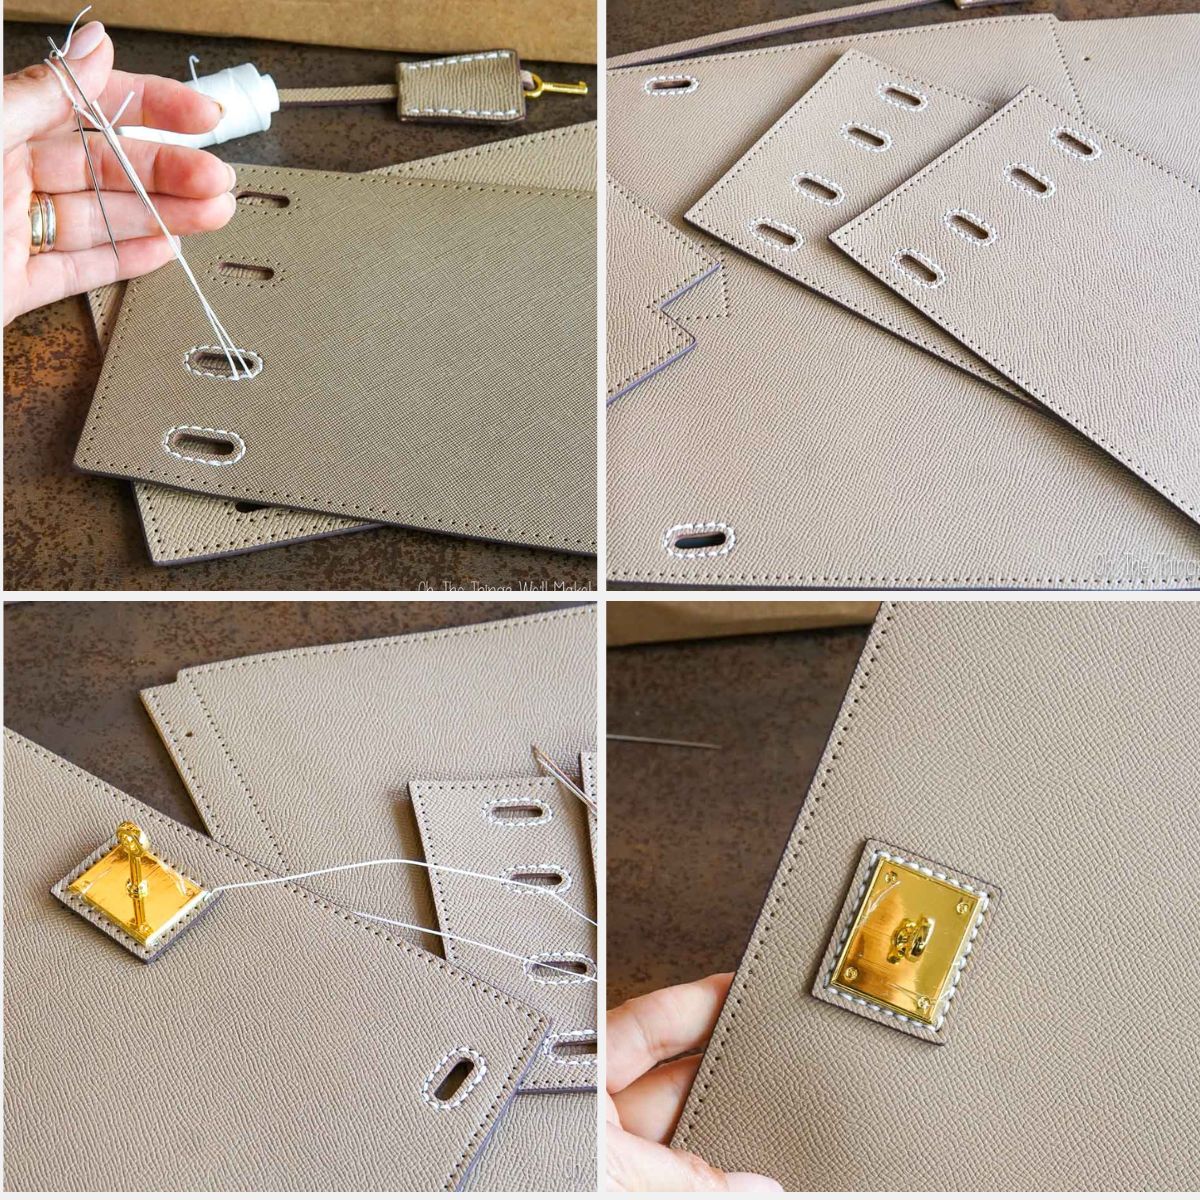
Step 1: Sew the key strap
I started with the little leather strap that holds the decorative key. First, I sewed the key onto the narrow strap, then folded the small bow tie-shaped piece of leather over it.
Step 2: Add the decorative stitching and front hardware
Next, I added the decorative stitching around the openings on the front, back, and side pieces. Then, I sewed the front clasp into place.
Most of the sewing uses a saddle stitch, with a needle on each end of the thread. Once you get going, it’s actually pretty relaxing.
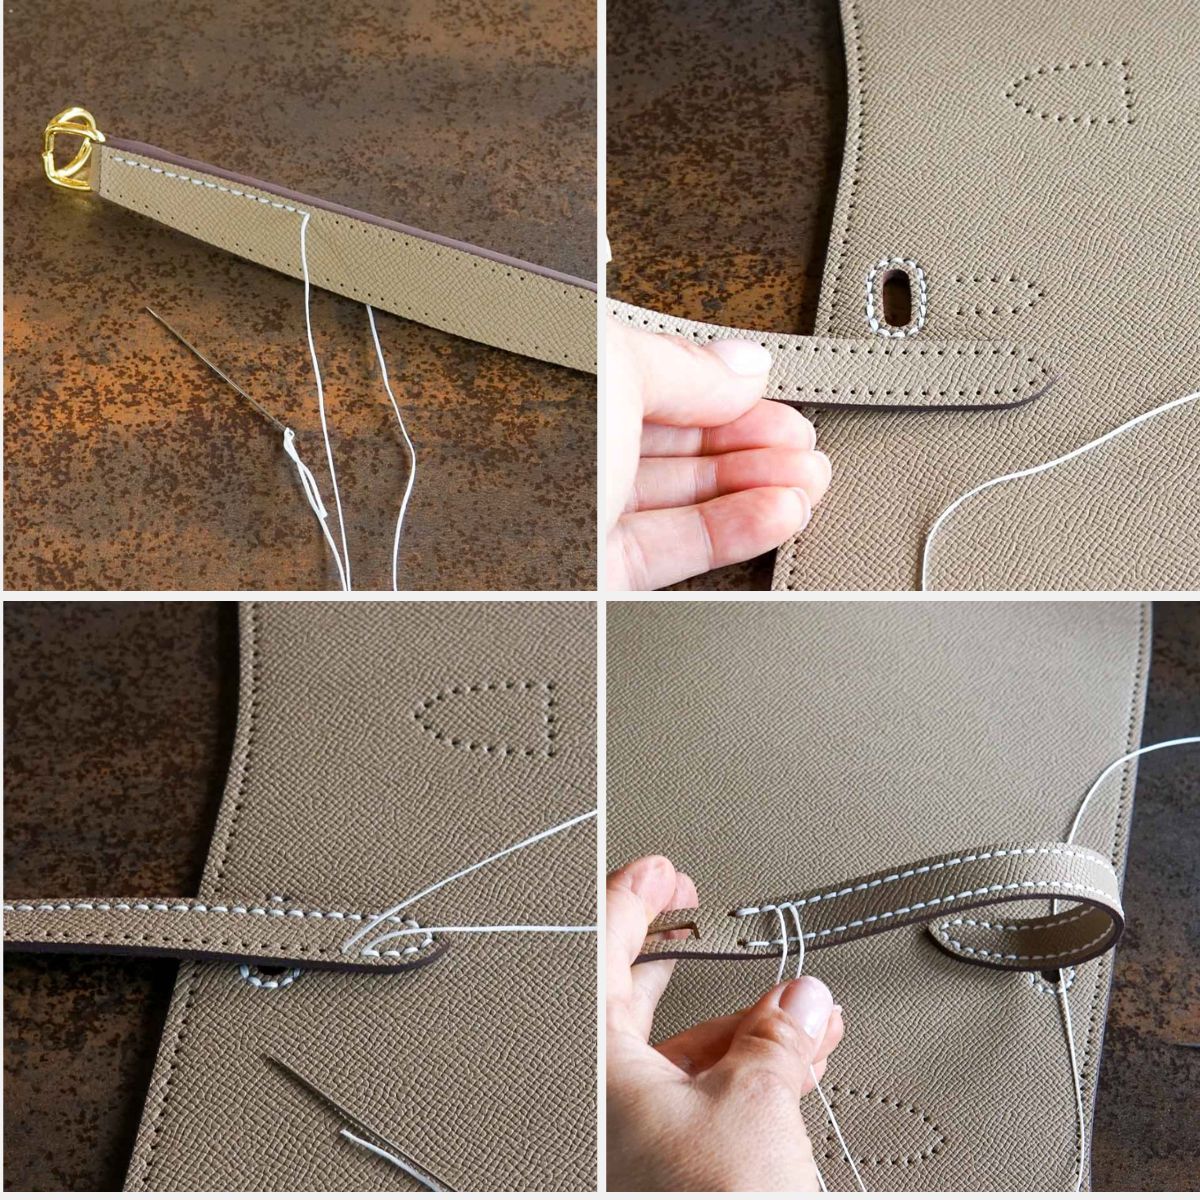
Step 3: Sew the decorative stitching on the handle and straps
Next, I added the decorative stitching to the handle and the long straps that will eventually hold the purse closed.
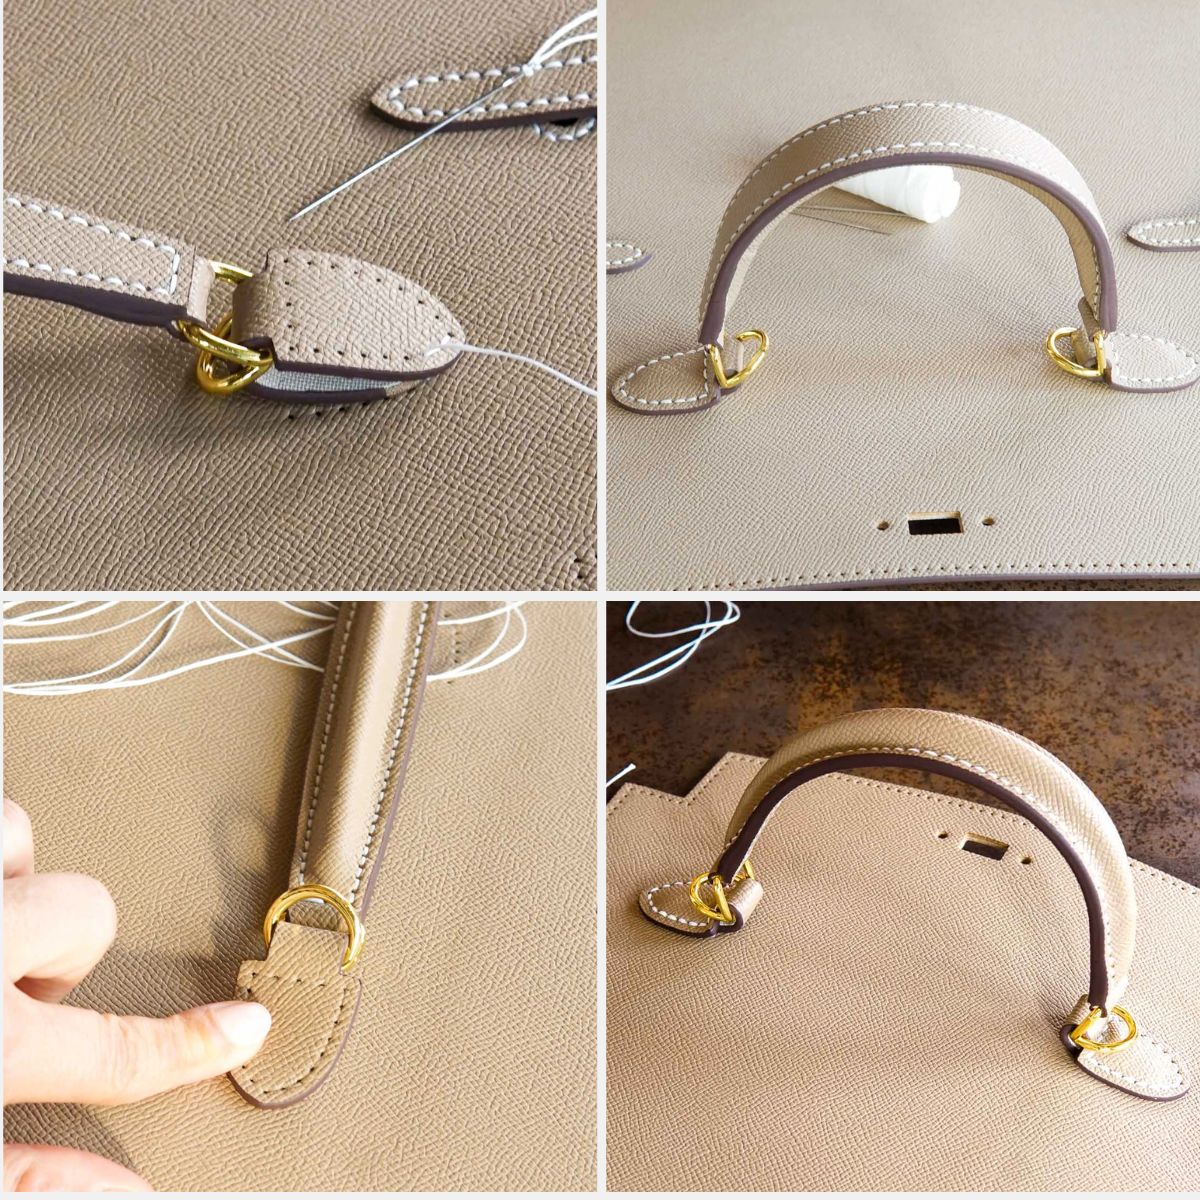
Step 4: Attach the handle
Next, I sewed the handle onto the top flap, along with the metal rings for the shoulder strap.
This is where I made my biggest mistake. I wasn’t paying close enough attention and accidentally sewed the handle on upside down, leaving the rings underneath instead of on top. (I wrongly assumed the flat side of the handle would face up.)
Of course, once I went back and watched that part of the tutorial again, it was obvious what I’d done wrong. I had to cut out the stitching, remove the handle, and sew everything back together the right way.
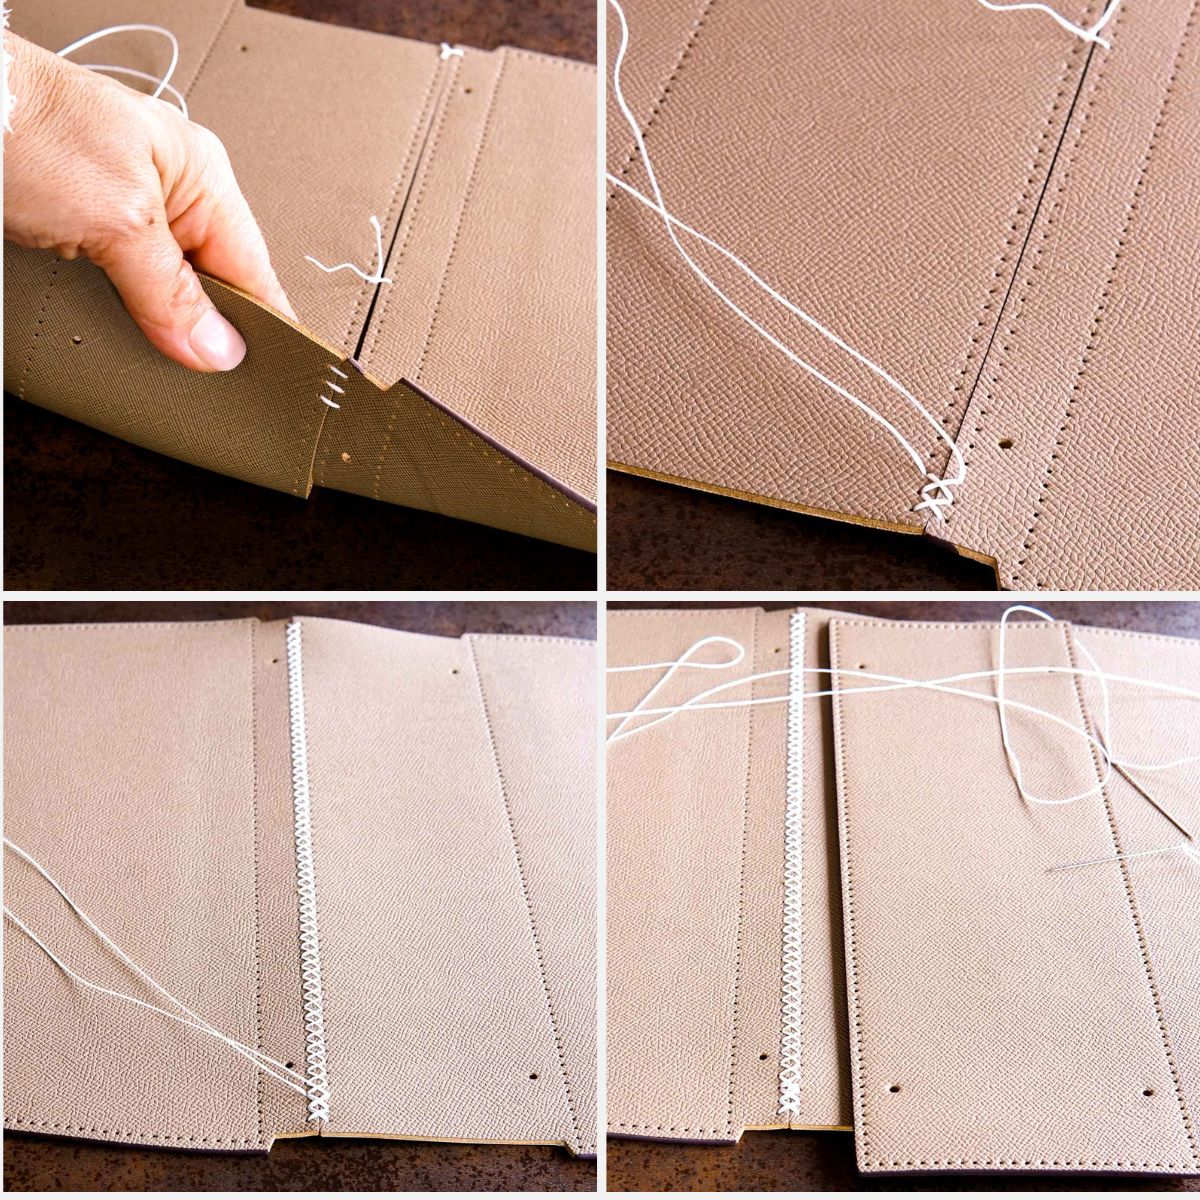
Step 5: Sew the front and back together
With the handle and decorative stitching finished, I could start putting the main part of the purse together.
I joined the front and back pieces along the bottom with a crisscross stitch. That stitching eventually gets covered by another piece of leather, so you won’t see it on the finished bag.
Step 6: Attach the bottom and sides
Next, I sewed on the leather piece that covers the bottom seam, followed by the side panels.
This was when the purse really started taking shape.
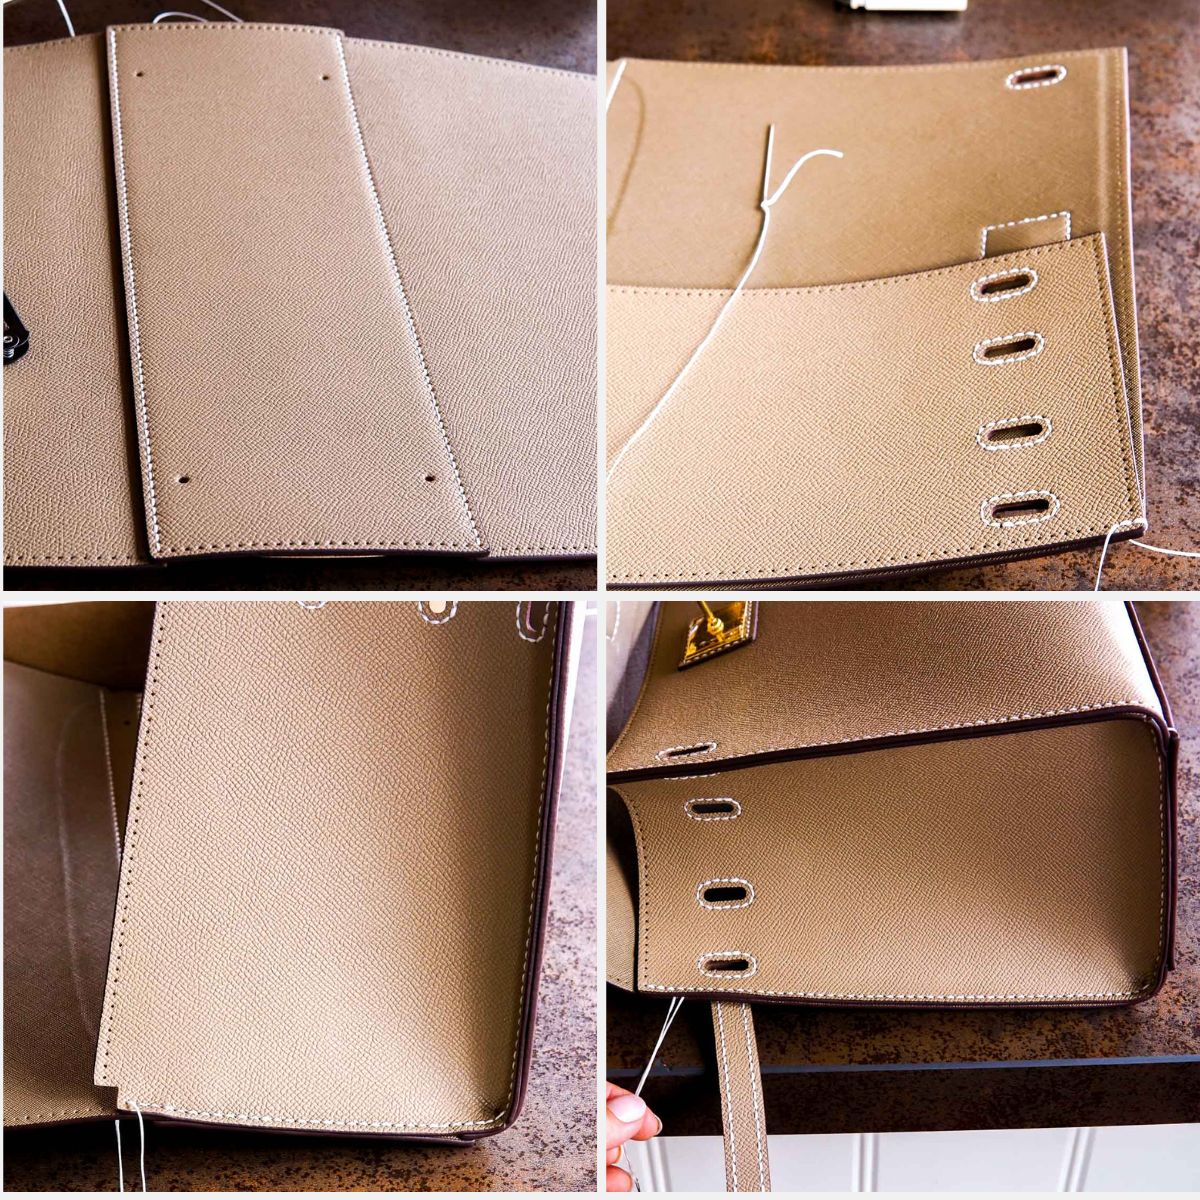
Step 7: Finish the stitching
With the main part of the purse together, I finished the remaining stitching around the top edges and flap.
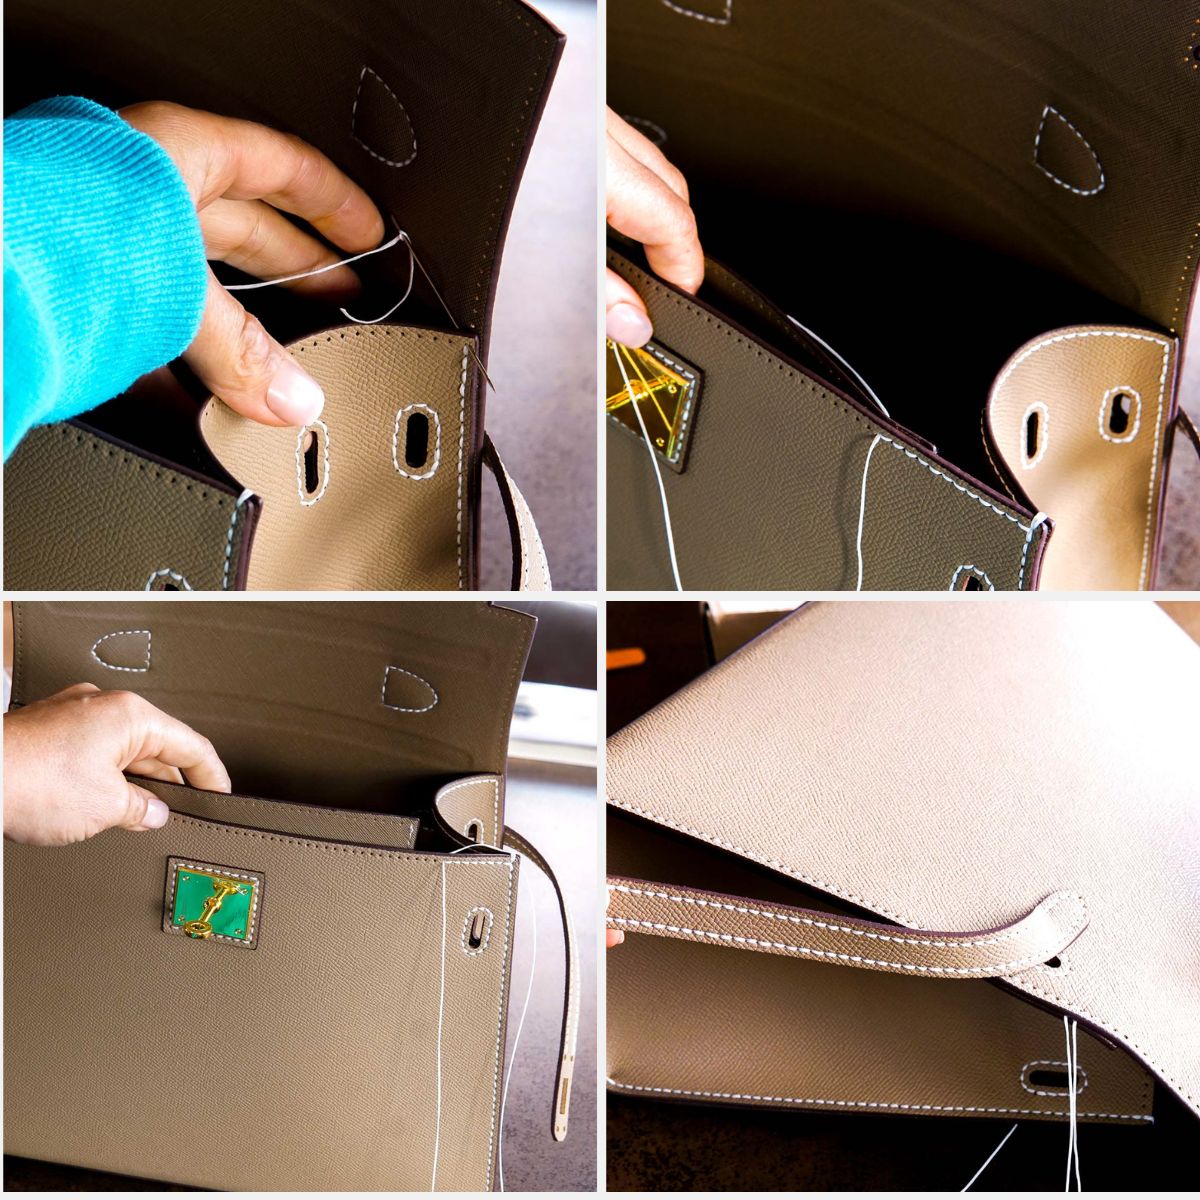
Step 8: Add the finishing touches
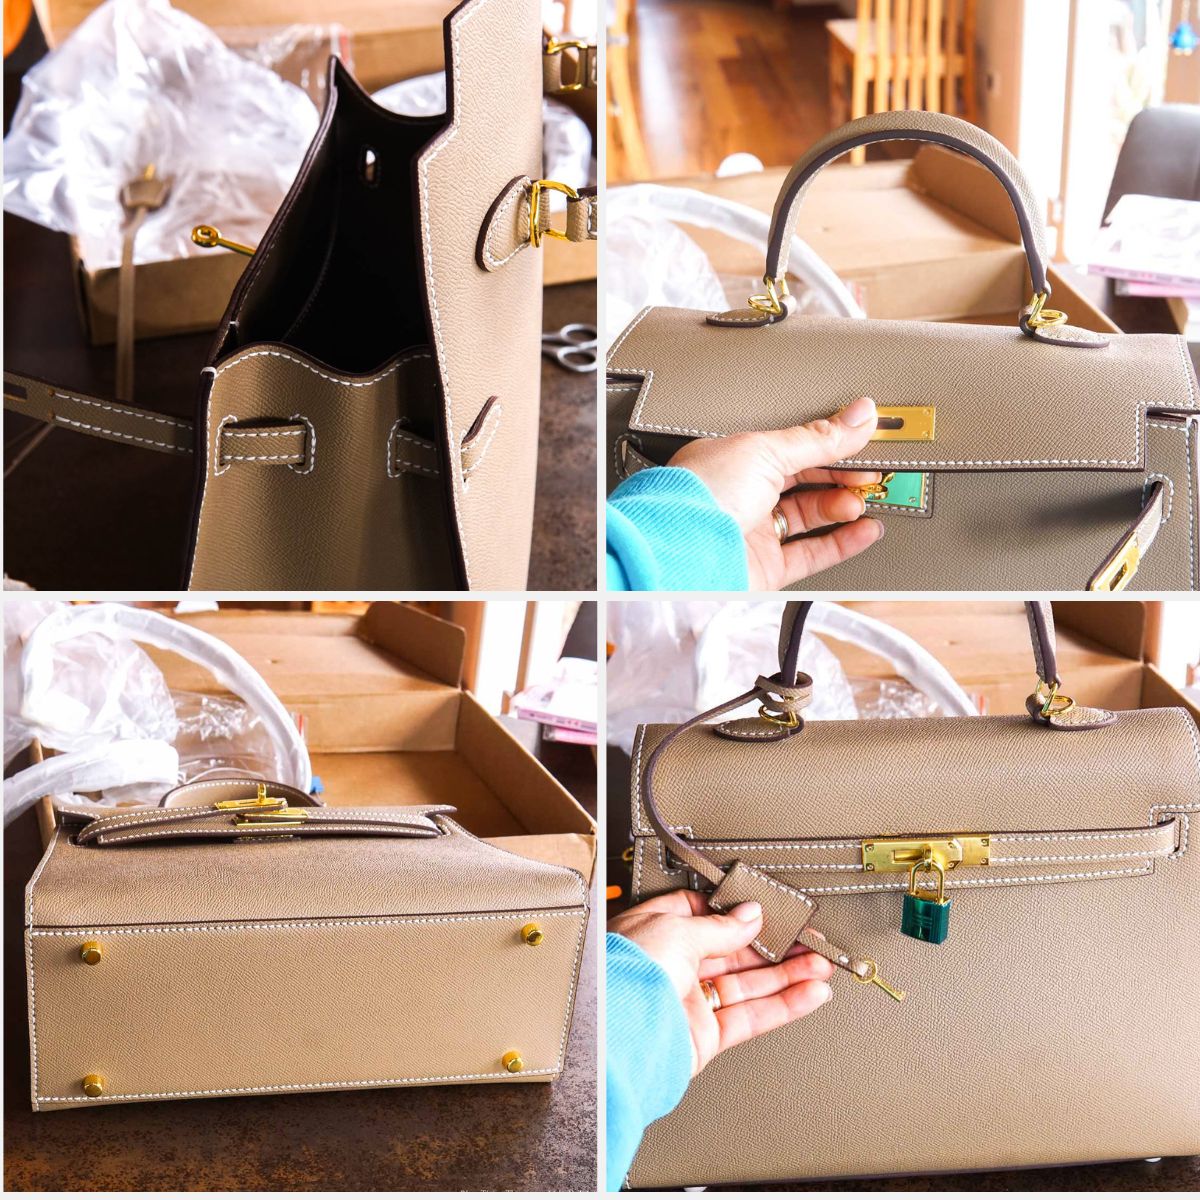
Finally, I attached the remaining hardware, including the little feet on the bottom and the decorative lock pieces.
The metal hardware comes covered in protective plastic to keep it from getting scratched while you’re working. Once everything was attached, I peeled that off, and the purse was finished!
FAQs
Yes! You don’t need any previous leatherworking experience. The leather pieces are already cut, the stitching holes are pre-punched, and the video tutorial walks you through the process.
I worked on mine over the course of about three days, with plenty of breaks in between. I’d plan on making it a weekend project, although the time will depend on how quickly you sew.
Yes. According to Solace Leather, the kit is made with genuine cowhide leather.
You can usually remove the stitches and redo that section. I had to do exactly that when I accidentally attached my handle upside down. Just be careful when cutting the thread so you don’t damage the leather.
Almost everything! It comes with the leather pieces, thread, needles, hardware, and tools for assembling the purse. The only additional thing I needed was a lighter to melt and seal the thread ends. My kit also came with some extra thread.
DIY Structured Leather Handbag
Equipment
- Lighter (for sealing thread ends)
Materials
Solace Leather HB801 Handbag DIY Kit
- pre-cut leather pieces
- waxed thread
- sewing needles
- metal hardware
- small thread snips
- screwdriver
- protective purse feet
Instructions
- Lay out all of the leather pieces and hardware and identify the different parts of the purse before starting.
- Watch the instructional video provided by Solace Leather to learn the saddle stitching technique and assembly process.
- Sew the decorative key strap, add the stitching around the openings on the leather pieces, and attach the front hardware.
- Add the decorative stitching to the handle and closure straps.
- Attach the handle and shoulder strap rings, making sure the handle is oriented correctly before sewing.
- Sew the front and back sections of the purse together along the bottom seam.
- Attach the bottom panel and side panels to give the purse its final shape.
- Finish the decorative stitching around the top edges and flap of the purse.
- Attach the remaining hardware pieces and protective feet on the bottom of the bag.
- Trim the thread ends and carefully seal them with a lighter.