

The Fine Line Between Being a Hoarder and Being Sentimental: The Baby Clothes Keepsake Quilt
Are you sentimental, but don’t want to be a hoarder? Making a baby clothes keepsake quilt is a practical way to save precious outgrown baby clothes.
One of the great differences I have noticed between living in the US and living in Spain, is that sentimentality doesn’t play the same role here that I thought it did in the US. Maybe it’s because the houses are so much smaller on average, and people just don’t have room to save things. Maybe it’s because they just haven’t had the chance to collect as many keepsakes. I don’t see many ribbons or trophies being given out, and most people haven’t even had access to things like cameras until not too long ago.
Whatever the reason, most people don’t have many old photos from when they were a kid, nor have I seen big collections of old drawings and paintings, t-shirts from summer camp, or even favorite toys. My friends, instead, might have a few pictures from growing up; maybe one special old outfit, like a communion suit or dress; their old school book which archived their grades over their entire school experience; and, in some cases, maybe one or two toys or books. That’s about it!
Rather than showing off their memory books, women brag about how much they throw away. It is practically taboo to hang onto anything. Why would you? All of those things just take up space and mean one has to dust more things. (Thinking it through, maybe the excessive amount of dust that accumulates here contributes to the difference. I can’t figure out why, but have noticed that I get more dust in my house in a day here than I did in a month back in Michigan!)
Throwing things away, though, is difficult for me. Especially here, where it is often difficult to find things that would have been easy to access back home, I have a tendency to hoard certain things that I wouldn’t have there. I have been known to buy white marshmallows for making fondant when I find them, for example, because I know they will be difficult to find when I need them. Unfortunately, since I try not to eat a lot of sugar or processed foods, by the time I actually want to use them, they have expired and are unusable anymore. I also impulsively buy craft supplies that I may never use whenever they are available, because I know that when I need them, they won’t be available anymore.
Still, I have been pretty good about keeping my things here to a minimum over the years. I try to go through everything during spring cleaning each year, weeding out what I don’t think I will actually ever use.
Then, though, came my son…
It’s hard not to be sentimental about his things.
I got so many gifts from friends and family that shouldn’t just be tossed out after my son outgrew them. Plus, baby things are pretty cute.
What was I supposed to do with a huge, expanding box of baby clothes that I was never going to use again?
It’s not like I was often going through the box to look at those things. They were really just taking up space that I didn’t have.
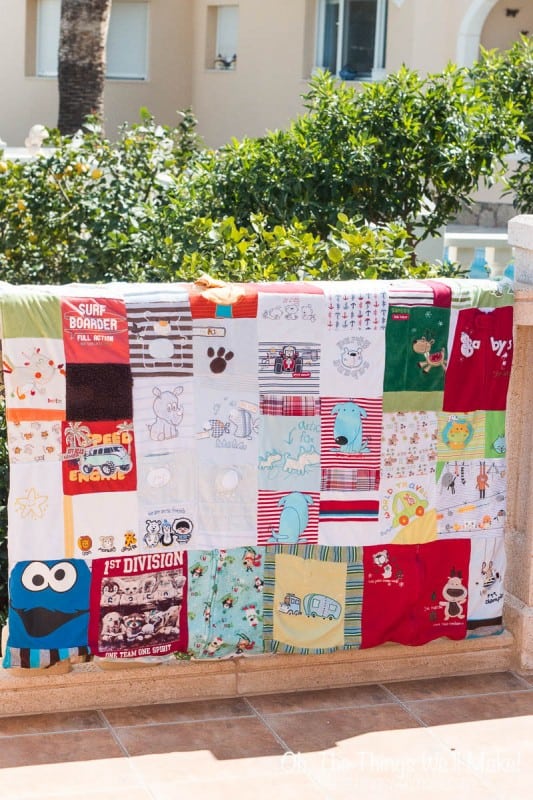
So, I made a baby clothes keepsake quilt out of them!
At first, I have to admit that it was difficult to start cutting up the clothes; I felt like they shouldn’t be hacked into pieces. Then I felt selfish for not having given the clothes to somebody who might need them. I had to remind myself that I did give many (most) away, and so I felt a little better.
Once I started to cut the clothes into small squares and rectangles, though, I felt liberated.
The pile just got smaller and smaller as I discarded the scraps of cloth that I wouldn’t be needing. I did save bigger pieces of cloth for other uses. For example, when cutting out the center of t-shirts using a rotary cutter, I ended up with two rectangles: the printed one from the front that would be used in my quilt, and a plain one in the back that I used as cloth baby wipes.
Most people who make these sorts of quilts try to cut all of their rectangles the same size. That would result in a lot of empty space on the quilt (or a lot of cut off prints). Plus, I prefer a random look to a very patterned one. Keeping them the same size would have been easier, though.
Having so many pieces of such varied sizes, I wasn’t sure how to put them together. I ended up just sewing pieces together as I had them available. If two pieces had similar lengths or widths, they got sewn together. Then, as I started to get bigger pieces of sewn together rectangles, I would sew those larger pieces together.
To keep the quilt squared up, most people also iron the clothes squares onto a fusible interfacing. That would have helped me in certain areas. I do notice a few areas where my fabric got stretched and my quilt isn’t perfectly squared up as it should be. If you are careful, though, it shouldn’t be a huge problem. Using a rotary cutter to cut your squares really helps, as does ironing everything out before cutting.
I wanted this to be as soft and stretchy as the clothes it came from, so I didn’t use any fusible interfacing. Despite the not-so-straight areas, I’m happy I didn’t; I like that it is perfectly imperfect!
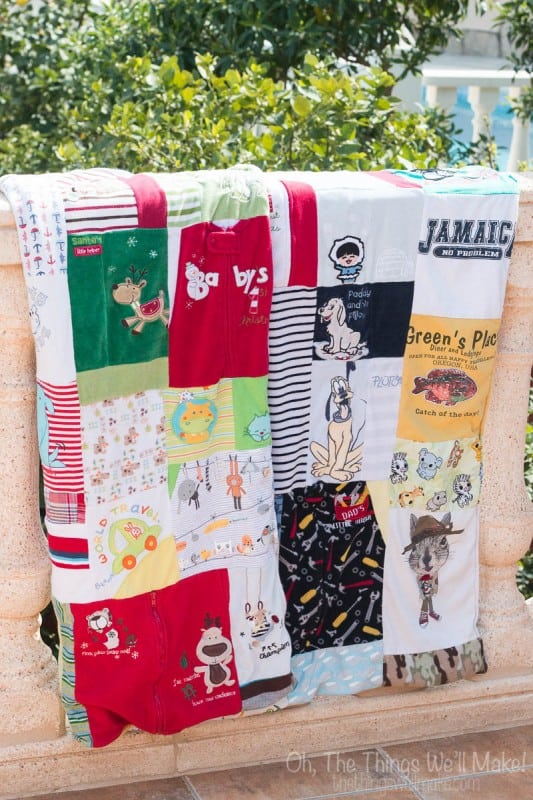
As it started to grow and grow, realized that I was ending up with two similar sized collages of clothes. Rather than sew them together into one long blanket that might be used on a bed, I figured a smaller blanket would be more practical, and decided to make a dual sided quilt. So, I measured and sewed on a few more squares of clothing until I ended up with equal sized pieces.
For the batting, I decided to use a polar fleece blanket. They are inexpensive and easy to find. Plus, I had a few lying around that I had been using for sewing. (Cloth is expensive and difficult to find here).
Before putting it all together, I added some final touches to some of my squares. For example, in some cases I had left the zipper in the center of a jacket or pajamas. For those items, I sewed a small piece of cloth behind the area of the zipper so that they can be unzipped without coming apart or showing the batting underneath.
After making sure that all of my squares were finished, I put both quilt pieces together, right sides facing each other. Then I placed my fleece blanket (batting) on top of the wrong side of one of those pieces.
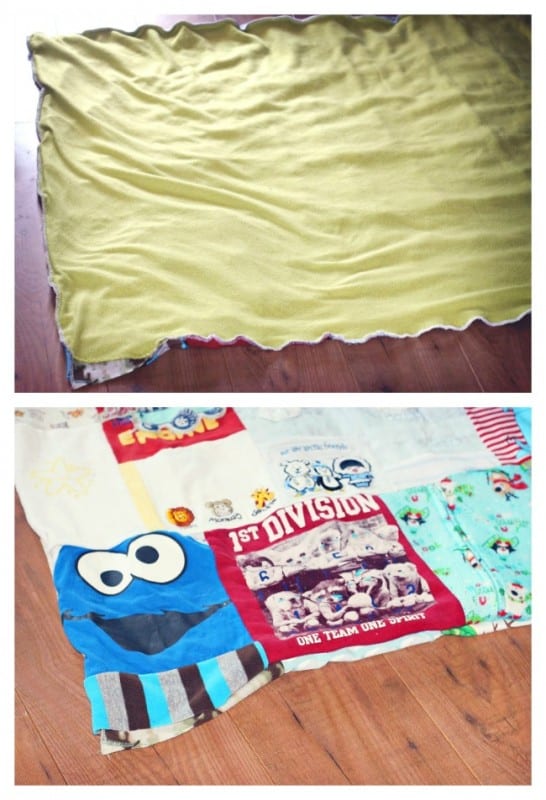
Sewing them together was easy. I just used my overlock machine to serge down the four sides of my cloth sandwich, leaving a small opening on one side. I reached in, between the right sides of the quilt, through the small opening, and pulled the sandwich right-side-out. Voila!! Quick and easy blanket made.
All that was left to do was to sew the opening shut. I also straight stitched down each of the edges, but you don’t need to do that. I found it easier to sew the quilt shut that way. I folded down the fabric at my opening and then sewed across.
You can tie some embroidery floss through the layers in random areas of the quilt to keep it together like a tie quilt. That is especially a good idea if you have made a large blanket.
If you have made a one sided blanket, you could just sew down the edges of some of the squares instead, or sew around certain prints of the blanket. I don’t want seams through the middle of any of mine on either side, though, so I won’t be doing that. My quilt is small enough that it doesn’t really need it anyway.
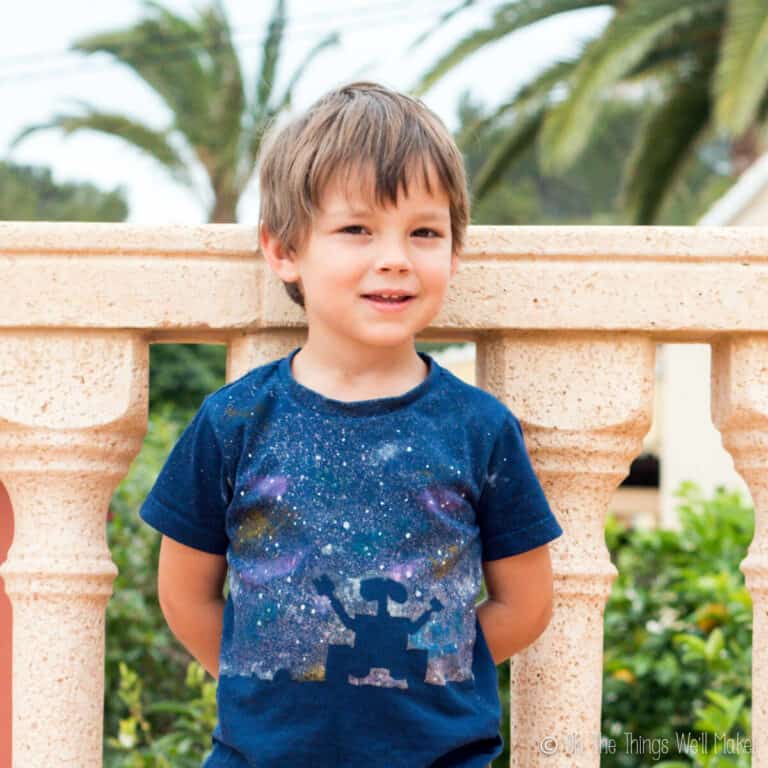
My son seems to really like the blanket!
Now, I am no longer seen as a crazy hoarder of my son’s old clothes, but rather a creative, resourceful, crafty person.
Win-win!
That doesn’t mean that I don’t have a quickly building collection of other things to deal with soon!! It’s a good thing for me that digital photo books exist.

That’s a great idea and you did a great job.
Thanks! I’m glad you like it. My husband and son are always using it when watching TV at night. 🙂
I saved corduroy both plain, wide wale and printed from pants from my children and nieces, did the same thing-various sizes etc. I have a remarkably thick quilt that I used for my youngest Son and daughter-will be sending it as a present to my grandbaby this year for Christmas.
What a lucky grandchild! My mom also loves to quilt and made one for my son to fit with the theme of his bedroom. She, unlike me, knows how to properly quilt. 🙂 I just made it up as I went along.
I like it! Sounds like myself and my ancestors in Appalachia have done for generations! I have quilts up to 50-60 years old. I have made five large quilts in past (from scrap material). I especially like the denim one (from my husband’s old jeans) and polyester one (will last forever, just like those polyester knit fabrics from the 60’s and 70’s!). Great piece!
Thank you so much! I don’t really know how to sew properly, but love throwing things together. My mom, on the other hand, has made many quilts over the years. She made one in flannel plaids to go with my room years ago. I love how you can make something exactly as you want it to be- to go with your theme or color scheme in your home. If you can recycle old fabrics that aren’t being used, all the better!!
That’s cool! I’m thinking of doing it with my daughters 9 years worth of softball uniforms and tournament t- shirts but been too afraid to start! You’ve motivated me.
Yes, it’s hard to get started sometimes. I was scared I was going to screw it up because I’m not great at sewing, but then I realized that it didn’t matter & to just do it!! I’m so glad I did. It’s not perfect, but I love it.