

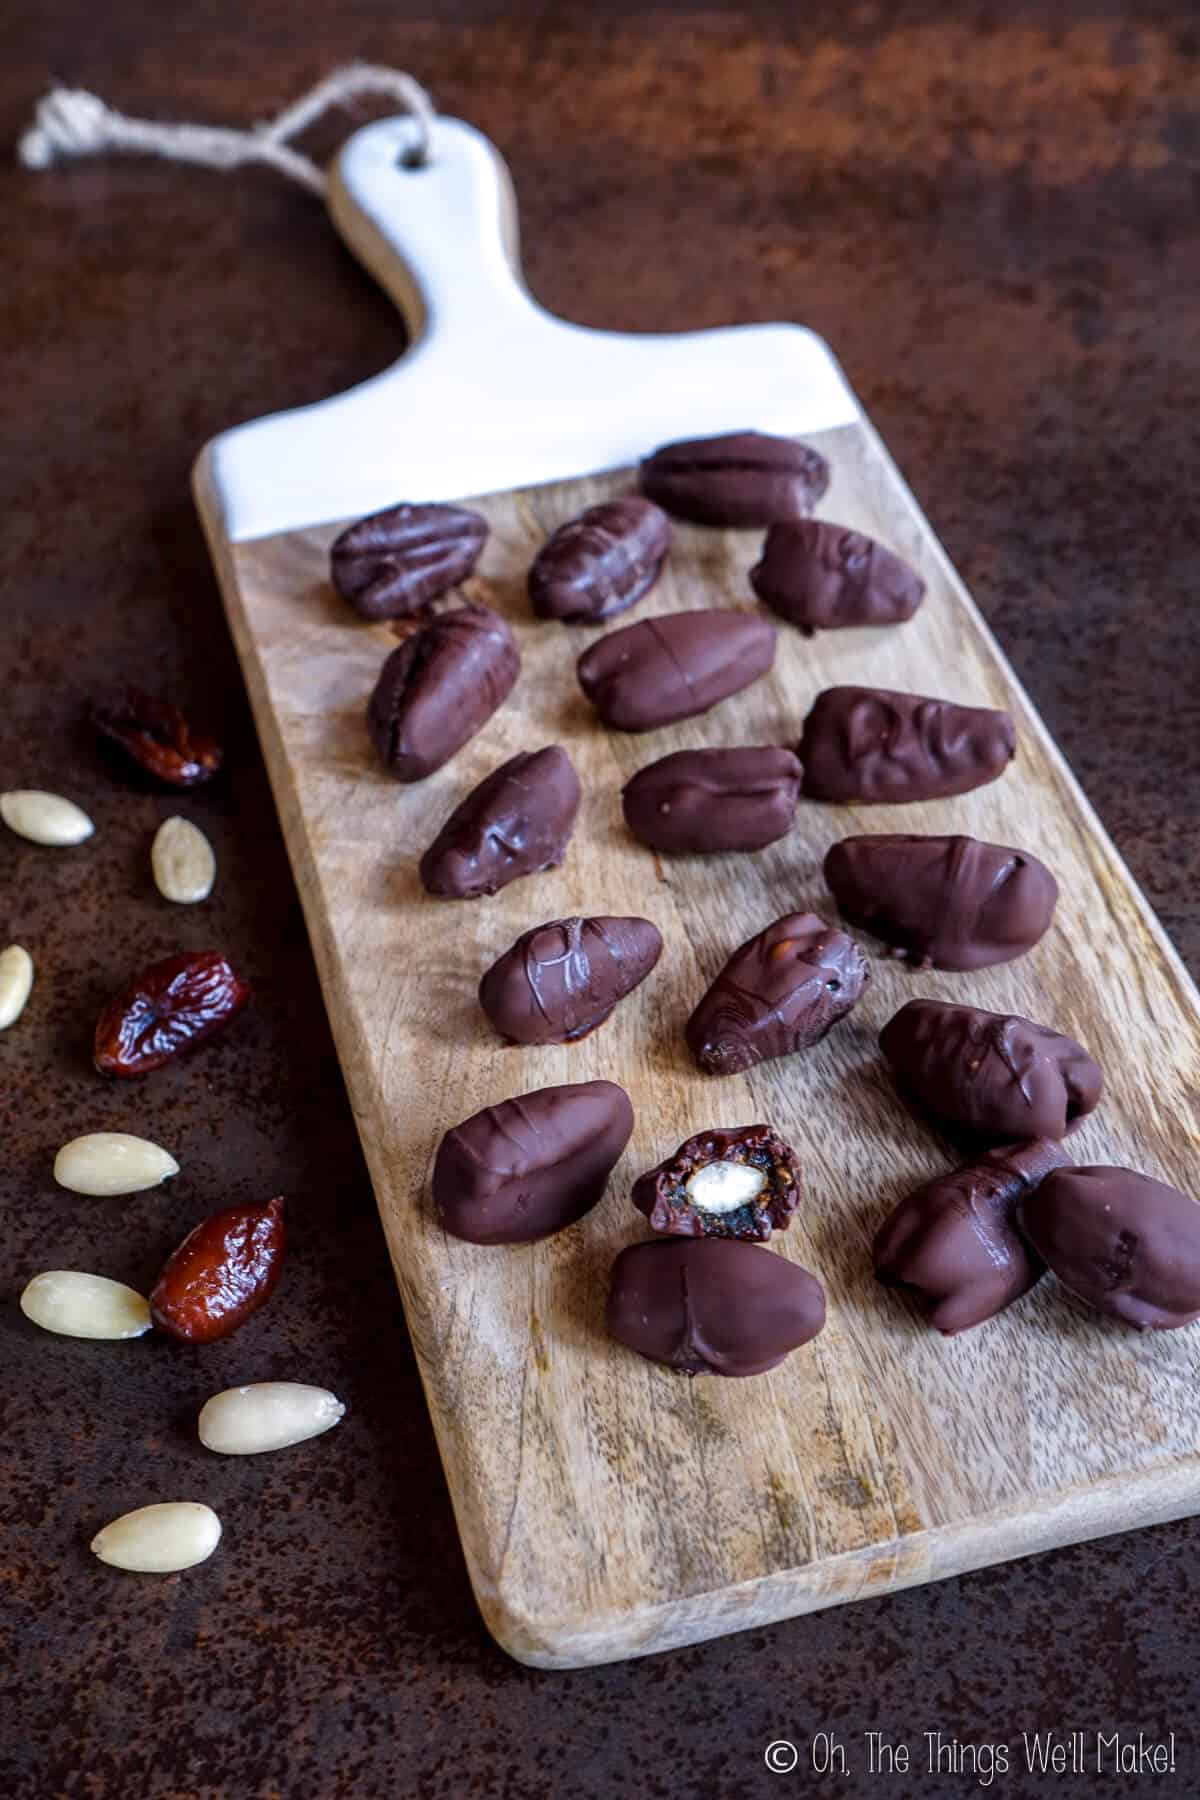
Chocolate Dates with Almonds

Sweet and chewy with a bit of crunch, these easy-to-make chocolate dates with almonds resemble bite-sized candy bars sans the refined sugars and artificial ingredients.

When I first made these, I guess I knew my husband would probably like them. (I made them as a bit of a Valentine’s Day treat. ) I had no idea that he was going to love them as much as he does, though. (Nor did I imagine both my 10-year-old son and I would love them too!)
Everyone in the house is obsessed with these chocolate-covered dates; so much so, that I’ve had to make 5 batches since Valentine’s Day! They have a sweet chewiness almost reminiscent of caramel and a bit of crunch from the almond in the center. Then, of course, you have the delicious chocolate!
I was really surprised to find that they reminded me of some candy bars that I occasionally bought and ate when younger. (Maybe a Milky Way? I don’t really remember.) 😉
Ingredients
These are super simple to make and only use a few ingredients. Obviously you’ll need chocolate and dates. I like to fill mine with almonds, but you can skip that if you want.
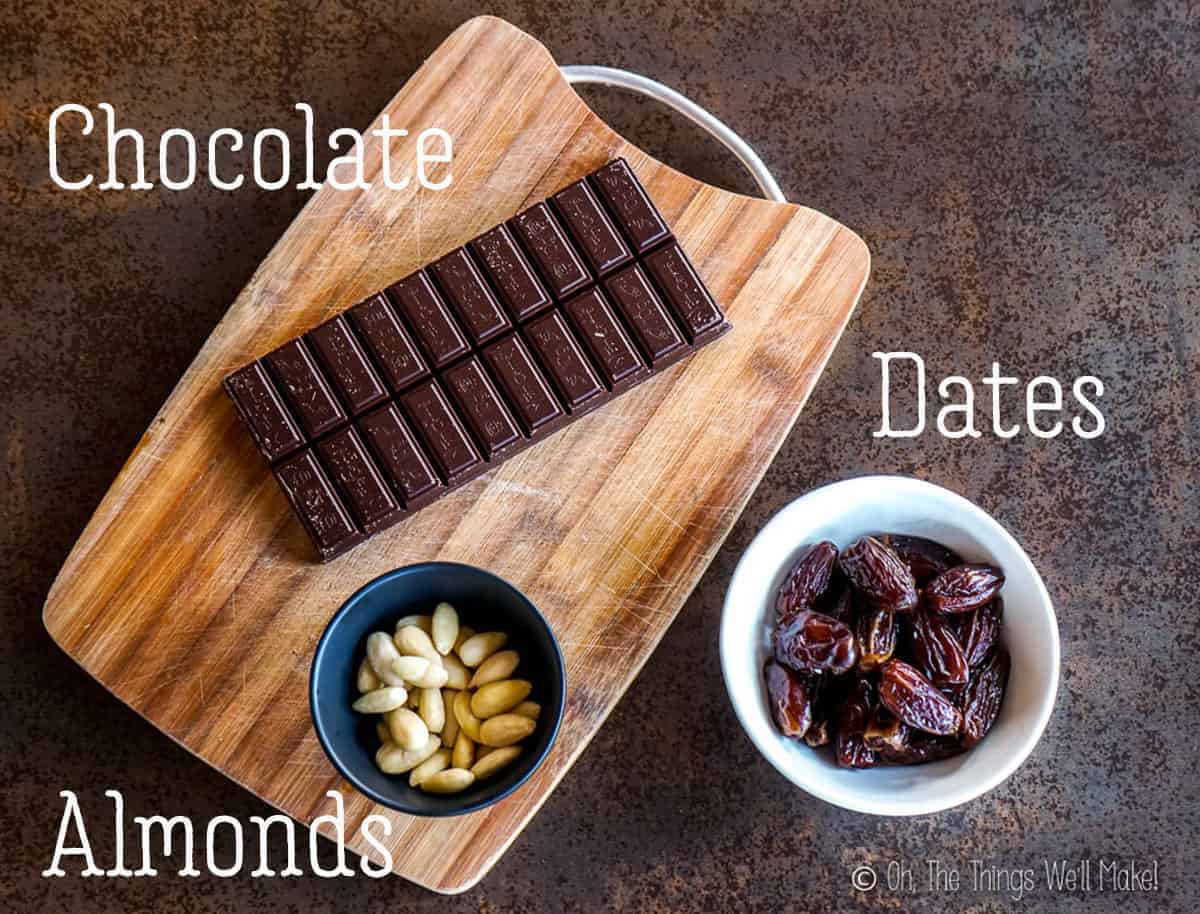
Choose whatever type of chocolate you prefer. We used dark chocolate because we prefer it and figured that with the sweetness of the dates, a sweeter chocolate might be too sweet. You can also use dipping chocolate which tends to harden nice and shiny without needing to worry about tempering chocolate!
The dates you choose can also completely change the outcome of these treats! I found that soft, chewy dates like Medjoul dates make for really delicious chocolate dates. The softer they are, the more the finished dessert will be like a caramel candy. The only issue I found with Medjoul dates is that they tend to be on the larger side. I liked making smaller, bite-sized candies, so I searched for smaller-sized dates. Choosing pitted dates will make your life easier, but isn’t essential.
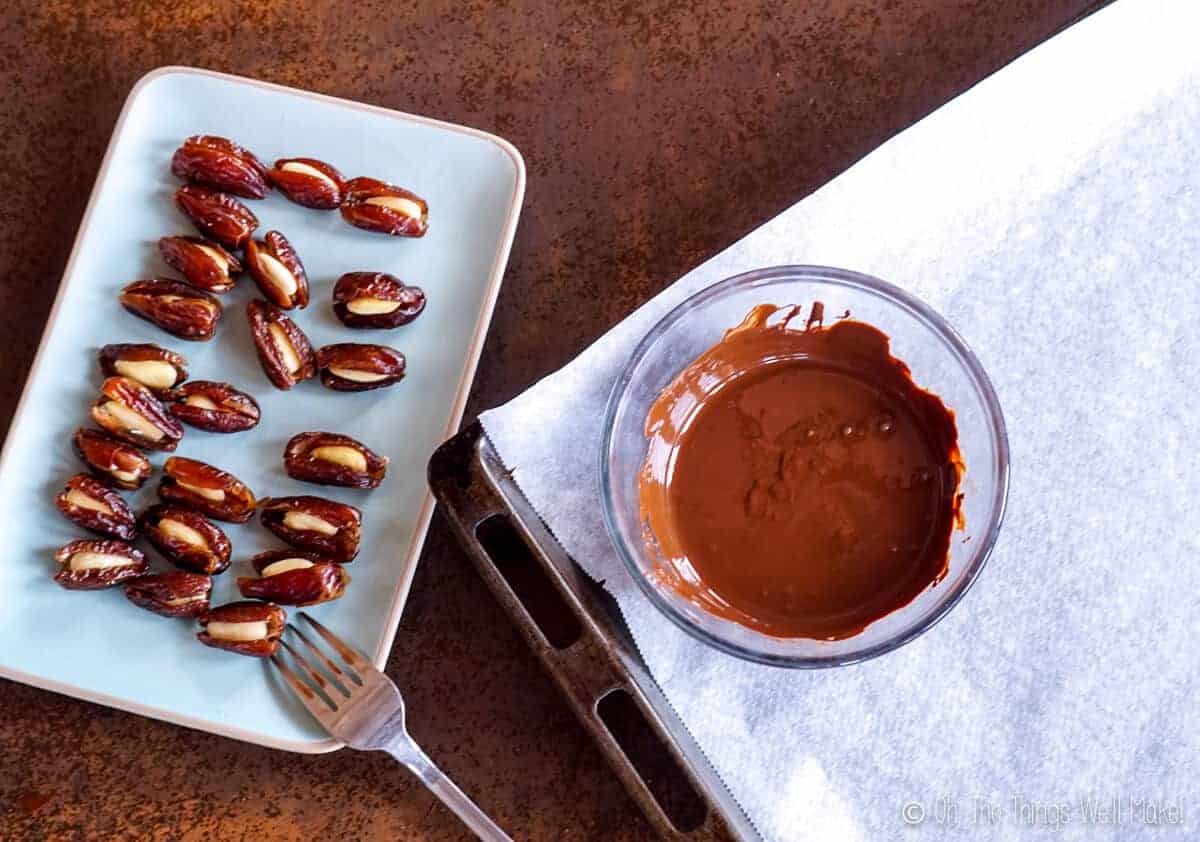
To add a bit of crunch and a contrasting flavor to the sweetness of the dates and chocolate, I chose to fill each date with an almond before dipping it in chocolate. If you don’t like almonds, you can choose another type of nut. You could even try filling them with nut butters or dried coconut chips.
To keep these shelf-stable, only use dry ingredients that normally keep well without refrigeration!
How to make chocolate dates
Luckily, these are really easy to make because they tend to disappear quite quickly!
I like to begin by preparing the dates. If your dates still have them, remove the pit from each date. To do so, slice across each date lengthwise up to the pit. Then pull the pit out.
Open each date at the opening from which the pit was removed. (Pitted dates should also already have a cut from which the pit was removed.)
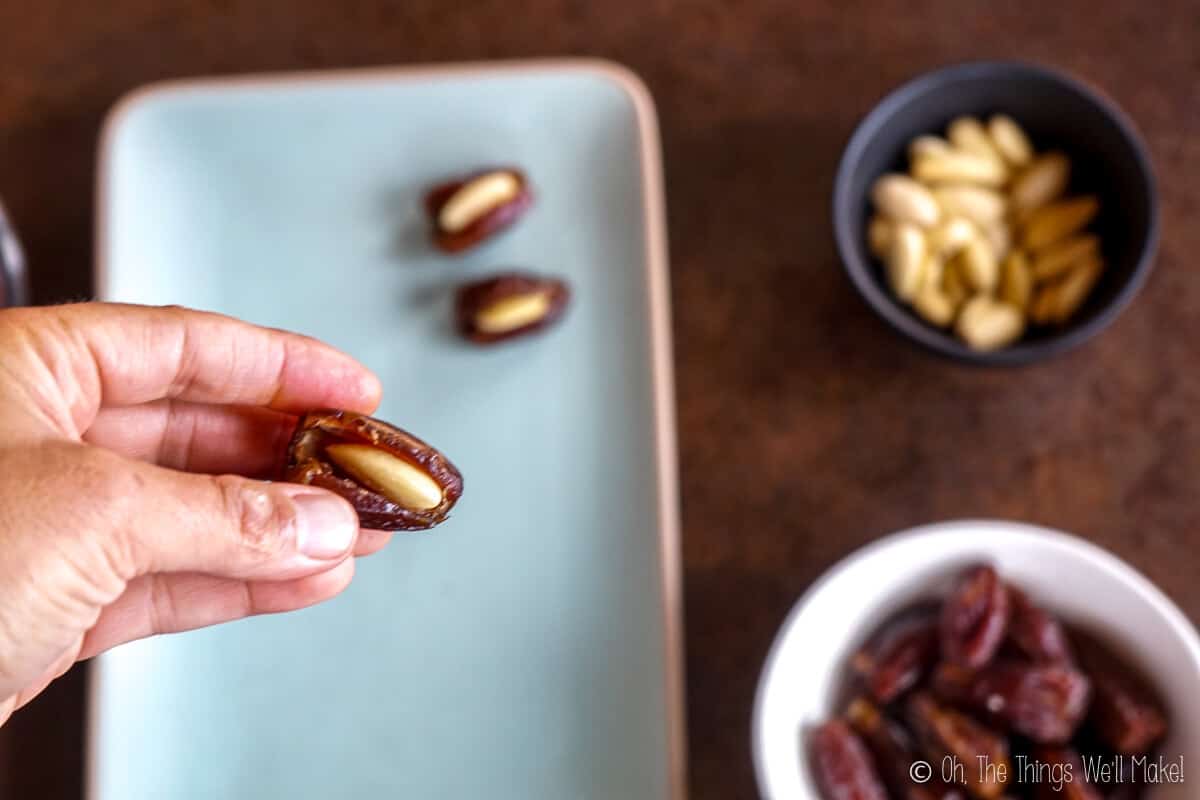
Fill each date with an almond or with whatever filling you choose to use.
Dip them in chocolate
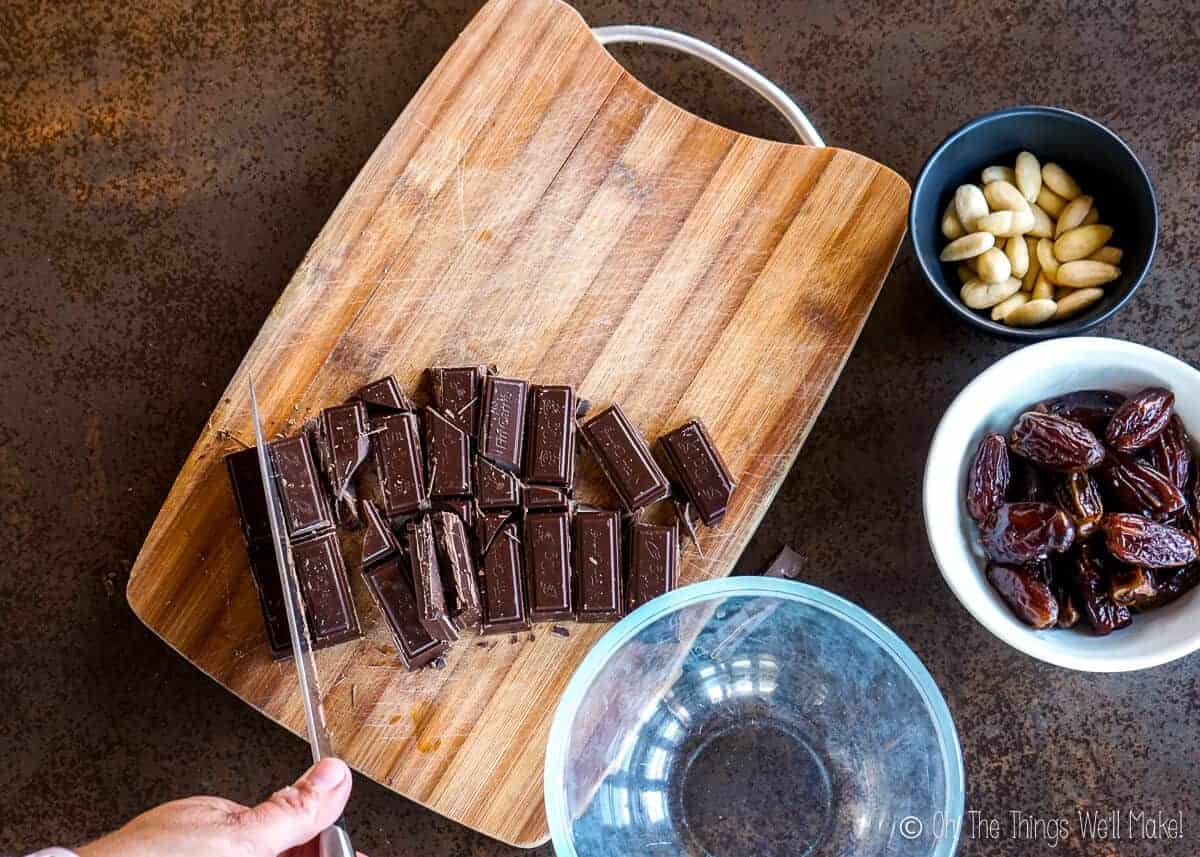
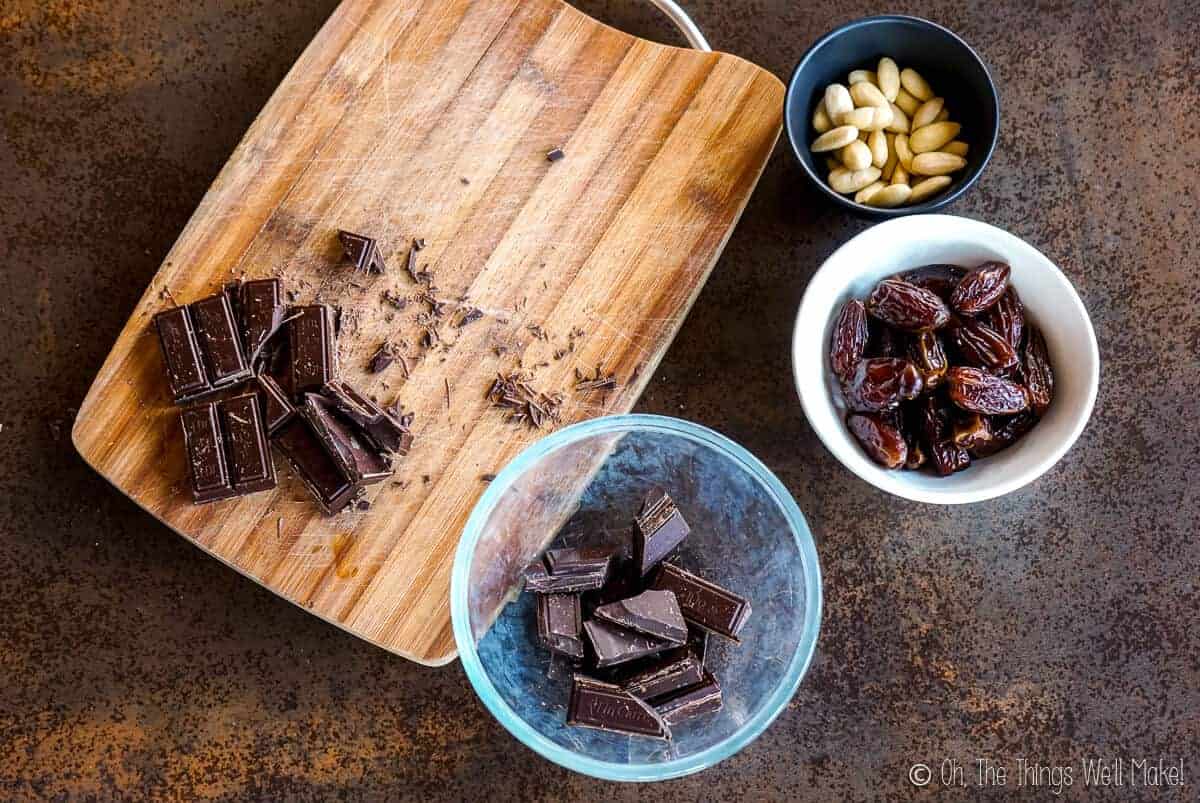
Once the dates are all filled with almonds, prepare the chocolate.
Cut the chocolate into small pieces so that it will be easier to melt. You can melt the chocolate in a double boiler, a special chocolate melting pot, or the microwave.
To melt the chocolate in the microwave, melt in a glass bowl at short, 30 second-or-less intervals. Remove the bowl and stir the chocolate between heatings. The residual heat of the glass helps melt the chocolate slowly without cooking it. This can help keep it in temper if you’re lucky.
Tempering chocolate is a way to keep it looking shiny and hard. It consists of heating and cooling the chocolate in a way that controls the crystallization of the cocoa butter. Untempered chocolate can look dull and/or have white streaks in it. It’s not essential to temper the chocolate in this recipe, but if you are set on having hard, shiny chocolate, it’s something that you can look into. You can also “cheat” by using special melting chocolates or adding a bit of coconut oil to the chocolate to give it more shine.
Once the chocolate is melted, dip the filled dates into it. To speed up the process, I normally throw a few dates into the chocolate at once and stir them to fully cover them in chocolate. I then use a fork to pull each date individually out of the chocolate, shaking off the excess chocolate before placing them on a previously prepared baking sheet. (I line the baking sheet with parchment paper so that the chocolate won’t stick to it.
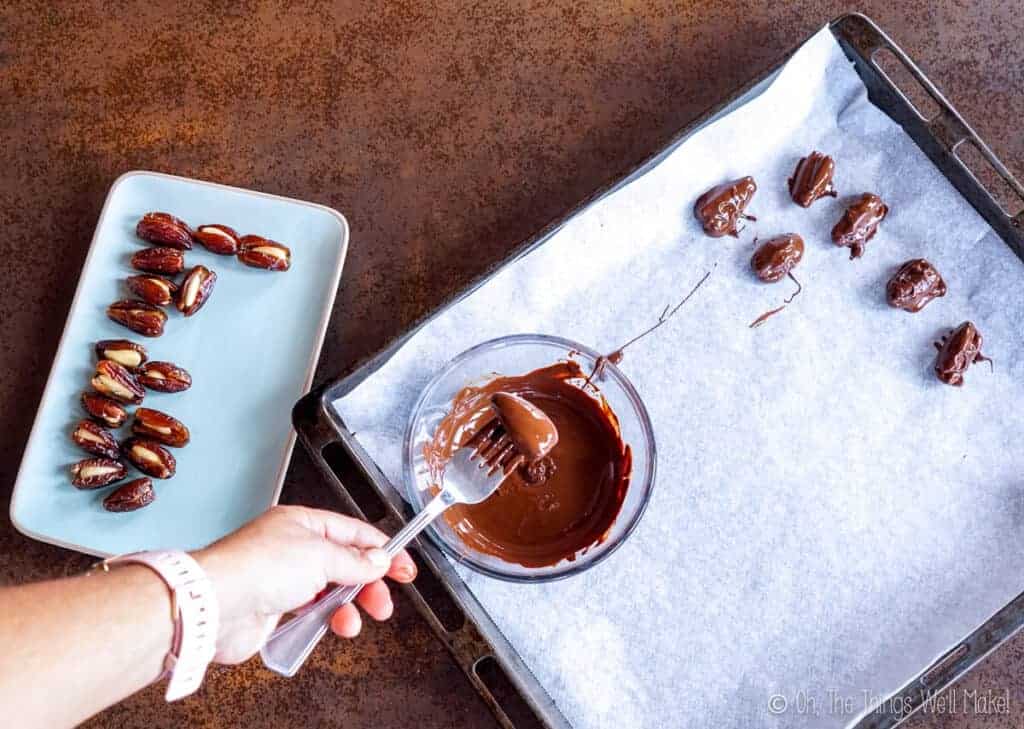
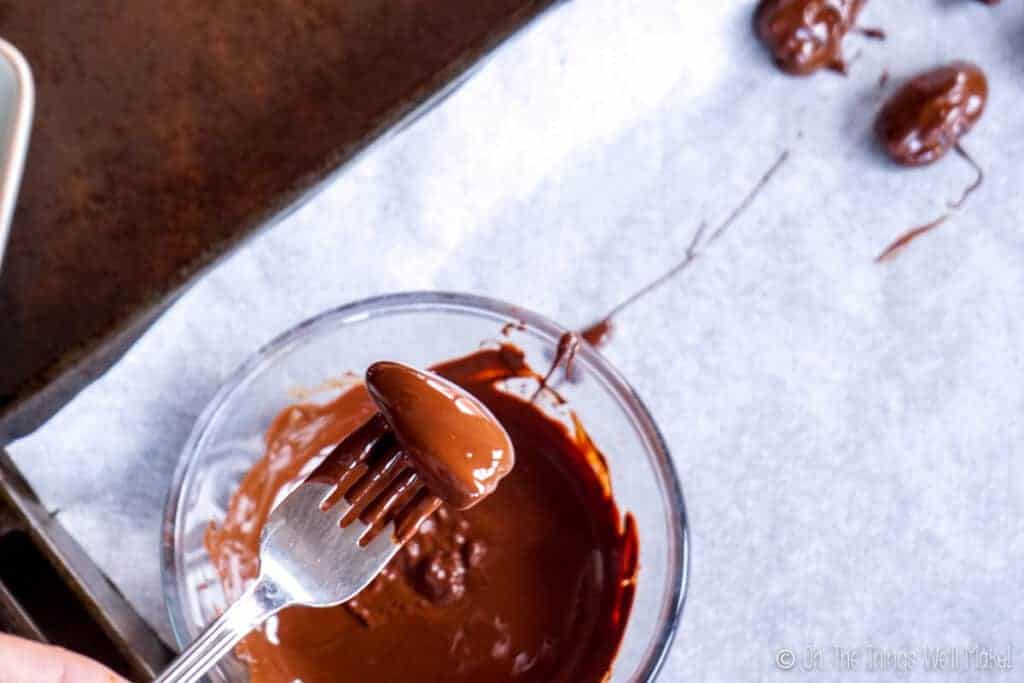
The first time I made these, I used the fork and shook off the excess chocolate by banging the fork against the rim of the bowl. By doing it that way, I had issues with having too much chocolate on each date. I now lift them out of the chocolate with the fork, but carefully pick each date up off the form using my thumb and forefinger, one on either side of the date lengthwise. I’m then able to carefully place the date on the prepared baking sheet without dripping.
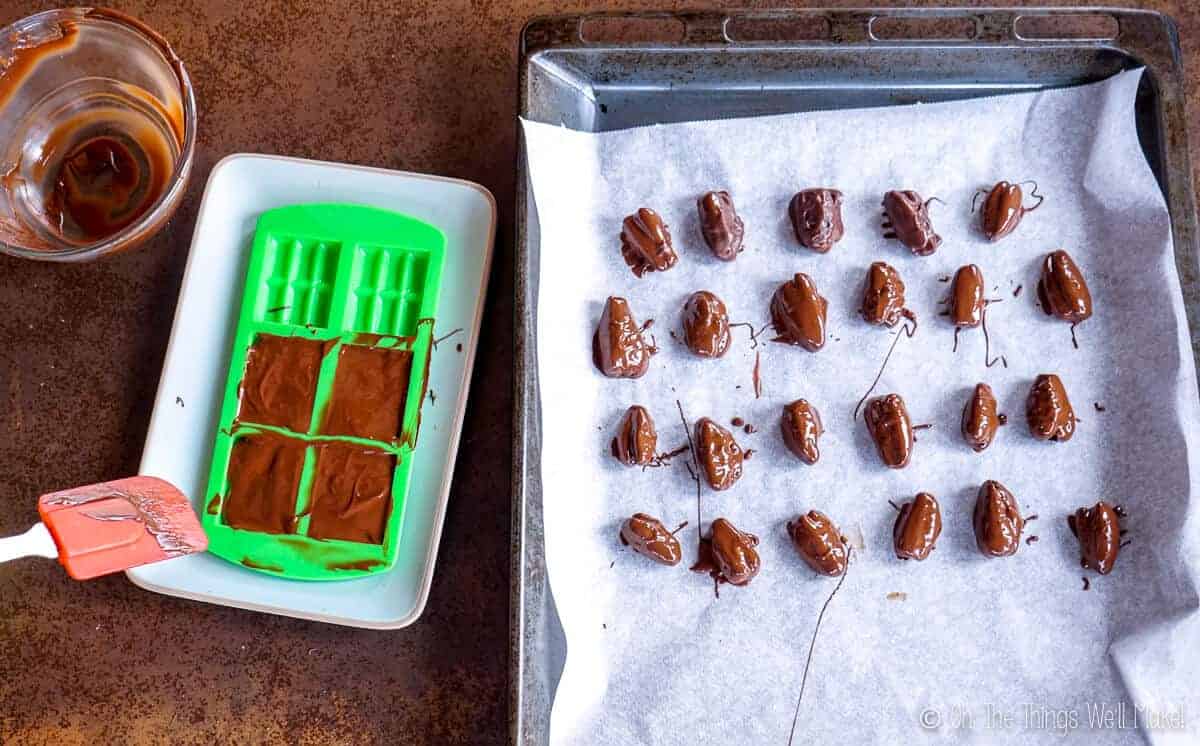
Don’t waste the excess chocolate
Once you’ve finished dipping all of the dates, don’t throw away the excess chocolate. I like to pour mine into chocolate molds that allow for easy using for the next batch.
Storage
If it’s like at my house, these chocolate dates won’t really be around long enough to worry about it, but you can leave them out at room temperature without any problems. Store them where you normally store your chocolate.
If it’s really hot out, try to find a cool place to store them so that they don’t melt.
I prefer not to store them in the fridge because the fridge can cause chocolate to bloom. Some people don’t mind that, though, and like the snap of chocolate in the fridge. So, do whatever you prefer!
Video

Chocolate dates with almonds
Instructions
Prepare the dates for dipping
- If you aren't using pitted dates, remove the pit from each date. This can be done by slicing across each date lengthwise up to the pit. Then pull the pit out.
- Open each date at the opening from which the pit was removed and slip an almond into the date through the slit. (Pitted dates should also already have a cut from which the pit was removed.)
Melt the chocolate
- Cut the chocolate into small pieces so that it will be easier to melt. You can melt the chocolate in a double boiler, a special chocolate melting pot, or the microwave.
- To melt the chocolate in the microwave, melt in a glass bowl at short, 30 second-or-less intervals. Remove the bowl and stir the chocolate between heatings. The residual heat of the glass helps melt the chocolate slowly without cooking it. This can help keep it in temper if you're lucky.
Cover the dates with chocolate
- Prepare a baking sheet by lining it with parchment paper.
- Throw a few dates into the melted chocolate and stir them to fully cover them in chocolate.
- Remove the dates, one by one, using a fork. Carefully pick up the date from the form with your thumb and forefinger on either side of the date lengthwise. Allow the excess chocolate to drip off into the bowl and then place the date onto the prepared baking sheet.
- Continue to remove all of the dates and transfer them to the baking sheet, keeping space between them on the sheet so that they don't stick together. Continue with the process, adding more dates to the chocolate as needed, until all of the prepared dates have been covered in chocolate.
- Allow the dates to cool so that the chocolate hardens.


Such a yummy recipe! I definitely make it again and again. Thank you!
Spit the date, remove seed, put a piece of walnut and add a dab of cream cheese. Try that. Easier and less heavy.
Hi Eman!
I actually posted that exact recipe years ago. You can see my cream cheese stuffed dates here. It’s always been a family favorite, especially during the holidays!
It really takes me about the same amount of time to make either. They’re completely different, but both are delicious.
I have to admit that I didn’t think I was going to like the chocolate dates. I made them for my husband who is a chocolate lover. They’re surprisingly delicious, though. If you ever are looking for a special dessert for your cheese stuffed dates 😉 , give these a try! 🙂