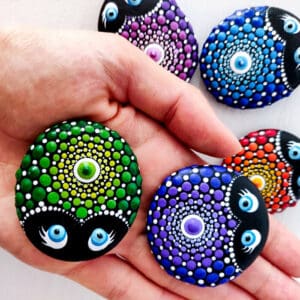
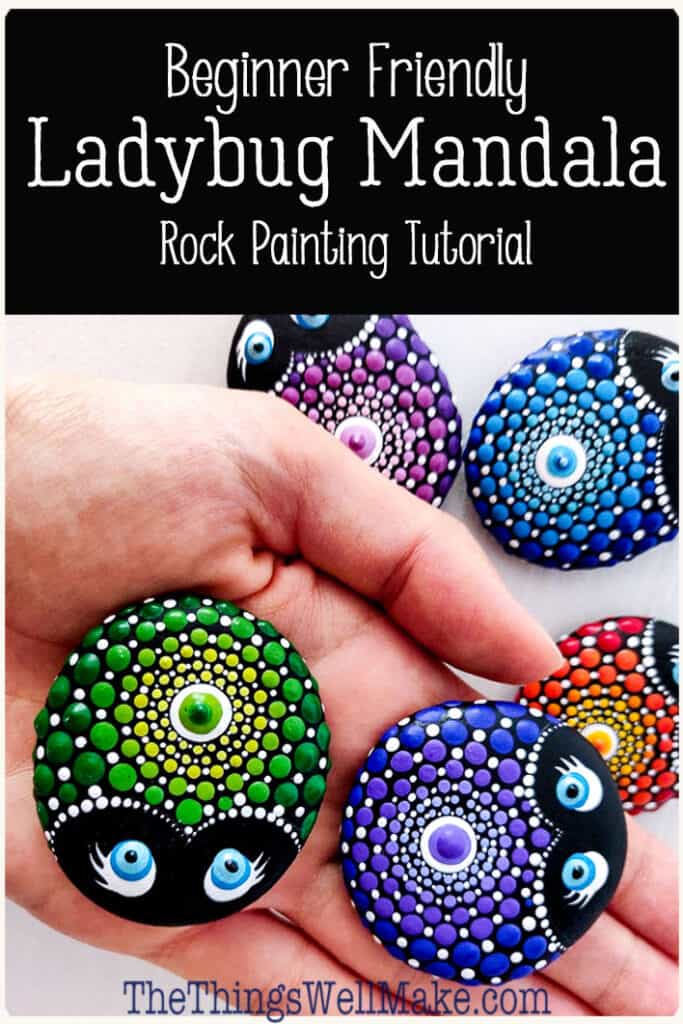
Fun and relaxing, rock painting is a great way to transform something natural and beautiful into something that can be appreciated in a new, colorful way. These ladybug mandalas look impressive but are easy enough for beginner rock painters (like me).
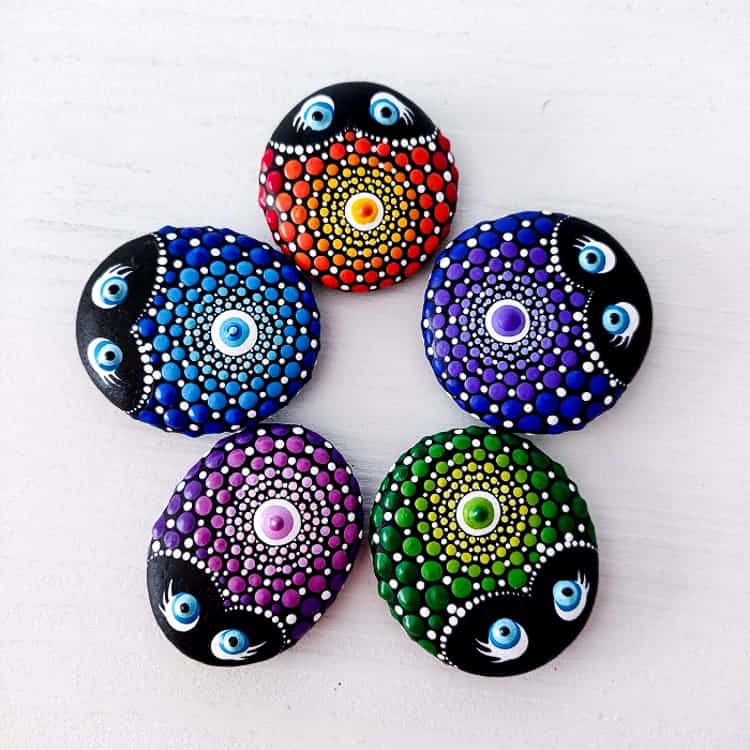
Today I’m going to share with you something a bit different; something that I think is absolutely beautiful; something that I wish I could take full credit for. 🙂
You probably know by now that I love making just about everything I can myself. I also love upcycling things into something new and useful. So, I’m not quite sure why I have never given rock painting a try.
Why paint rocks?
There are really so many cute things that you can do with beautifully painted rocks. They can work as paperweights or be used to decorate your garden or house. I’ve seen them converted into magnets or even into pendants. Kids love playing with them, and some lucky painted rocks even become stone “pets.” Others are painted to be used in games like tic-tac-toe.
One idea I really like is that some people choose to leave their painted rocks in public places for other people to enjoy them (called The Kindness Rocks Project). People can either look at them, photograph them, and leave them be, or they can take the painted rocks on a new journey and leave them elsewhere. It’s a great way to connect with other people in a fun new way.
When I came across Stacy’s painted rocks, I fell in love. They are absolutely gorgeous, so I asked her if she would be willing to do a tutorial for my blog. I didn’t just ask for any tutorial, though. I asked for something that would show how to paint a mandala on rocks.
I’ve always been a sucker for the geometric designs of mandalas, and when they are paired with beautiful colors, what’s not to love? (That’s why I showed you how to easily paint a mandala-like design on fabric.)
I was worried that I might be asking for something that was overly ambitious for a beginner like me (and many of my readers). While I’m sure some of you are expert rock artists, I wanted something that everybody could try and be proud of.
Stacy assured me that these ladybug mandala designs are easy enough for beginners like me.
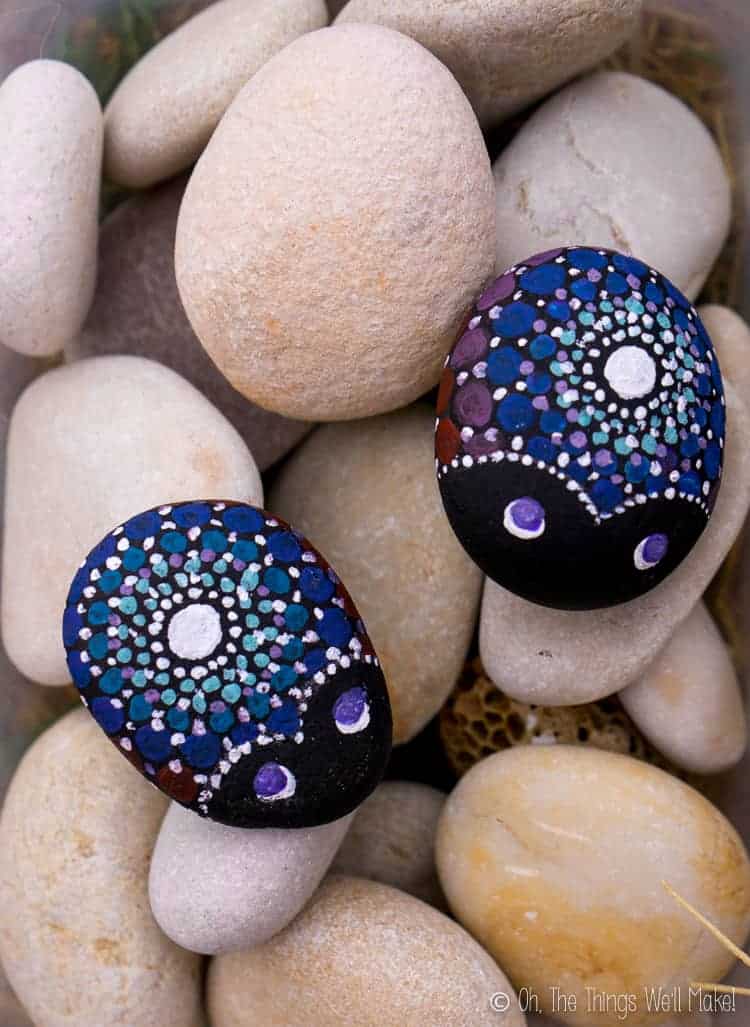
How did my first attempt at painting rocks go?
At first, I had a hard time finding the perfect size and shape rocks for a ladybug. After a wonderful, long walk, though, I found two that I thought would work for this project. One was more rounded while the other was flatter. I purposely looked for more oval stones as I thought they fit the theme better.
Not having a dotting tool, I was going to dot on the colors with a toothpick. I figured I could cut off the pointed end and sand down the bottom. In the end, though, I got lazy and just used a fine paintbrush that was stored away with my acrylic paints.
I now wish I had done the toothpick idea so that I could show you the difference. I think that some sort of solid dotting tool probably works better than a paintbrush because I had issues with the hairs of the brush getting into the way and making it so that my dots weren’t quite so rounded all of the time. That said, I really think they turned out pretty well for a first attempt anyway- especially seeing as I only had some older, not-so-great quality acrylic paints at home. There were places that I had to paint on a second layer because my paints were a bit too transparent. They weren’t as bright as the ones in the tutorial either.
I also ended up not painting the eyes in the same way and I forgot to dot other colors over the center dot. I was having issues getting smooth, larger circles with my tiny paintbrush and not-so-great paints. Next time, I’d listen to Stacy and use a pencil eraser and better paints. It’s all about using what you have, though, and making the project unique to you.
So, now that you’ve seen mine, let let me turn things over to Stacy so she can show us how it’s done! She’s been working with Create and Cherish, whose YouTube Channel is one of the best sources for dotted painting art! Together, they are sharing this super cute project…
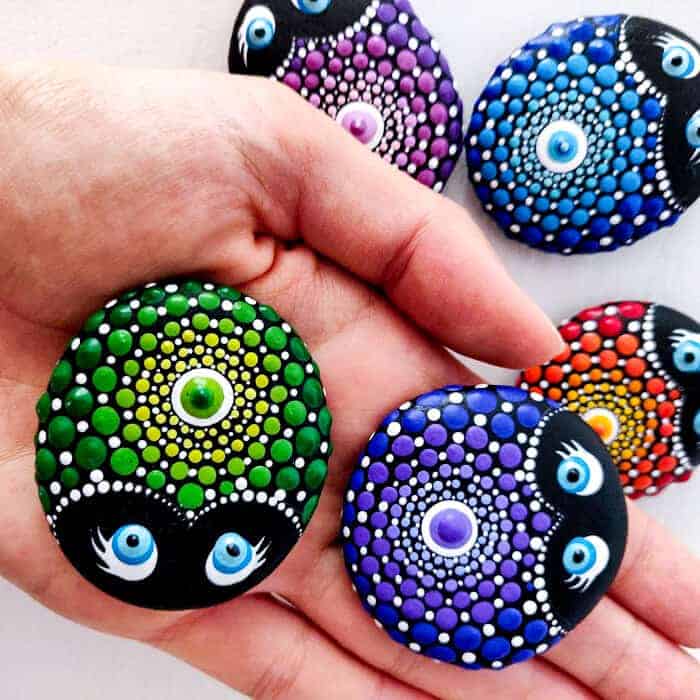
Thanks so much, Tracy, for allowing me to be a guest on your blog! I’m honored to share this ladybug mandala stone painting tutorial on your blog.
The Growing Trend of Stone Painting
Stone painting exploded onto the scene again in the last few years as one very creative lady started the trend of writing encouraging messages onto rocks and hiding them around her area for people to find and keep. She encouraged others to do the same on social media and needless to say the trend of painting rocks took off like wildfire.
After that new websites, youtube channels and books have popped up being dedicated to the art of stone painting.
Where Can You Find Stones To Paint?
Many people collect them from rivers and beaches, however many countries have laws that prevent people from collecting from these places in order to stop the natural erosion. If this is the case where you live, landscaping companies or garden centers usually have an abundance of different types of stones you can buy.
What Kind of Paint is Best for Rock Painting?
You can use any type of acrylic paint. Some paints are thicker like Crafts For All acrylic paint, while others are more thin and drippy like Deco Art’s multipurpose acrylic paint. Either is fine, but if you’re using the thicker paint you’ll need to put a few drops of water on the thicker paint to thin it down to a drippy consistency so it can make nice dots without leaving a pointy peak on your rocks.
Do You Need A Dotting Tool for Stone Painting?
No! You can use a dotting tool, but it’s not absolutely necessary. A pencil, hairpin, bamboo skewer, and many other things also work well as different sized dotting tools. Look around the house and see what you have available.
Watch How to Make a Ladybug Mandala Painted Rock
Let’s dive in!
Ladybug Mandala Rock Painting Tutorial
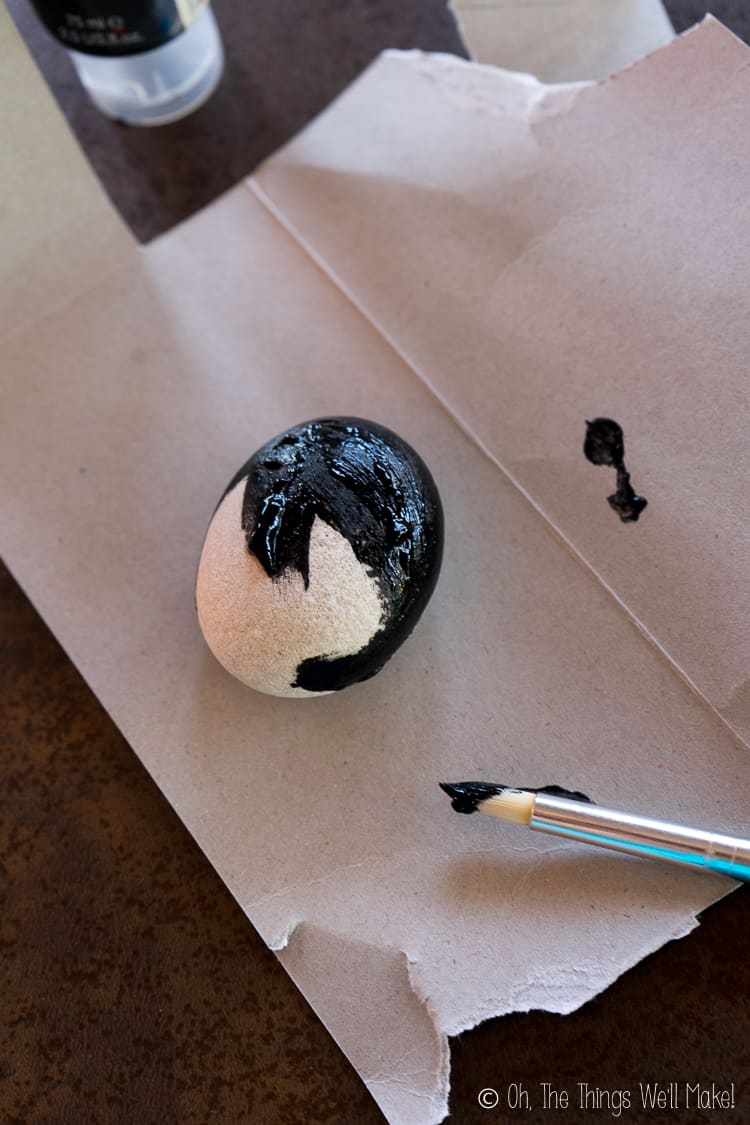
To start your ladybug mandala, begin by painting the entire rock black and let it dry. It works best if your rock is round but oval rocks also work.
You’ll also need to decide on your colors.
For these stones, I started the smallest dots with light colors and dotted to darker colors as I moved outwards. If you’re using one color you can make different shades of that color by mixing in different amounts of white.
Pencil On The Design
You can see from the picture where you should lightly pencil in the lines. This isn’t necessary but it definitely makes things flow easier.
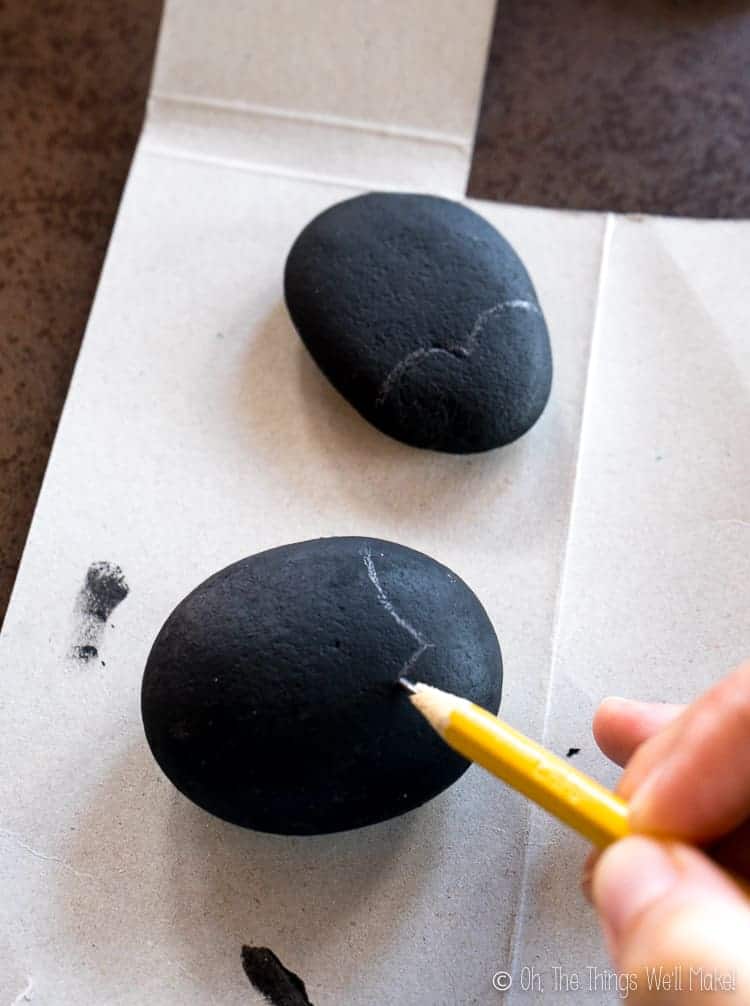
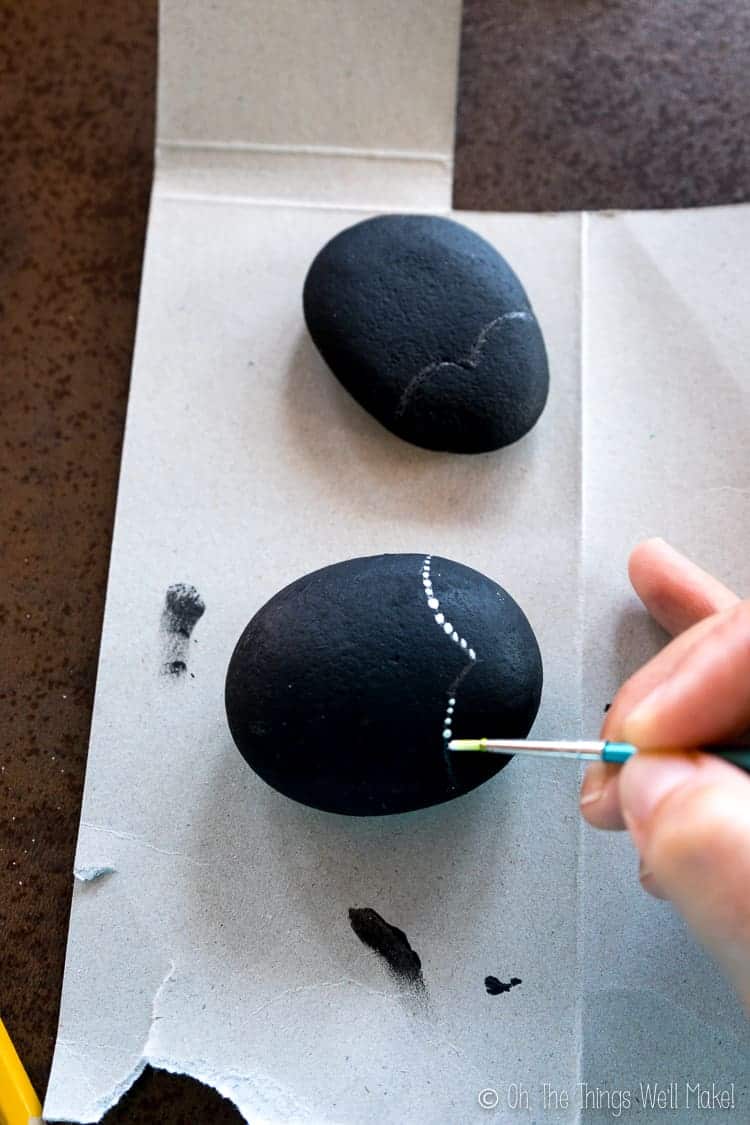
Dot The Face Outline
Start your dots from the highest part of the arch and dot downward in one direction. Then load your dotting tool with paint again and start dotting a new line. Begin next to your first dot and dot down in the other direction.
The dots will get smaller as your paint gets used up. If you don’t have enough paint on your tool to follow the line, simply load your dotting tool with only a little paint. You can also do a few dots on paper first until your dots are the tiniest size you desire, then finish off the dots on the stone.
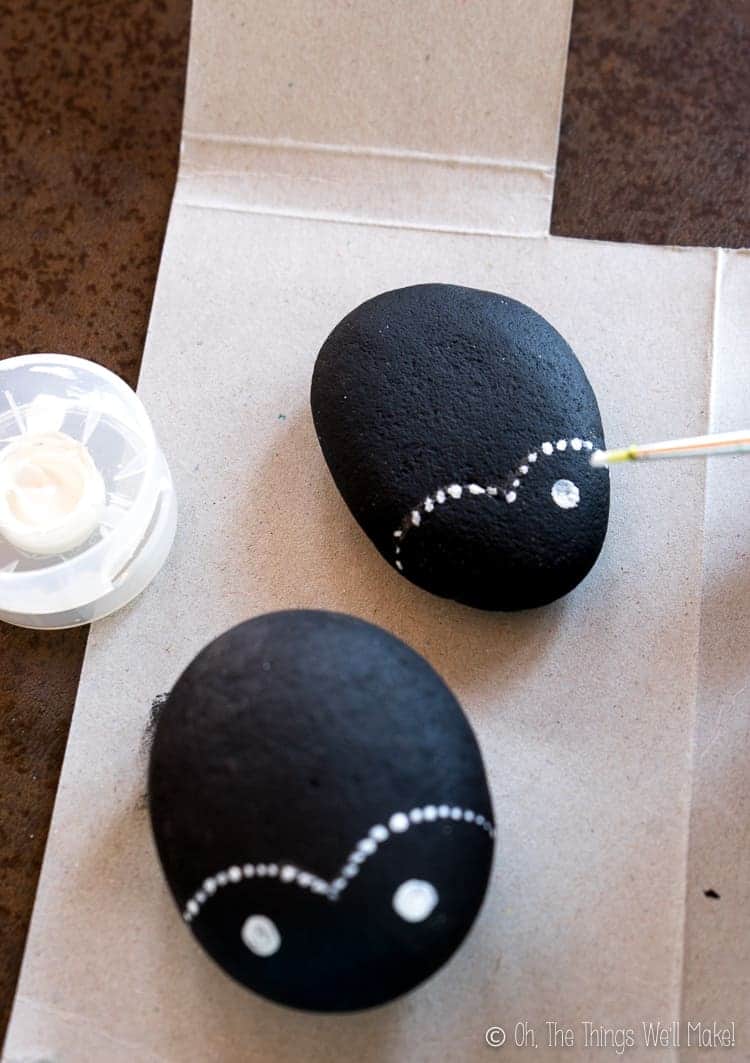
Dot The Center And The Eye’s of Your Ladybug Mandala
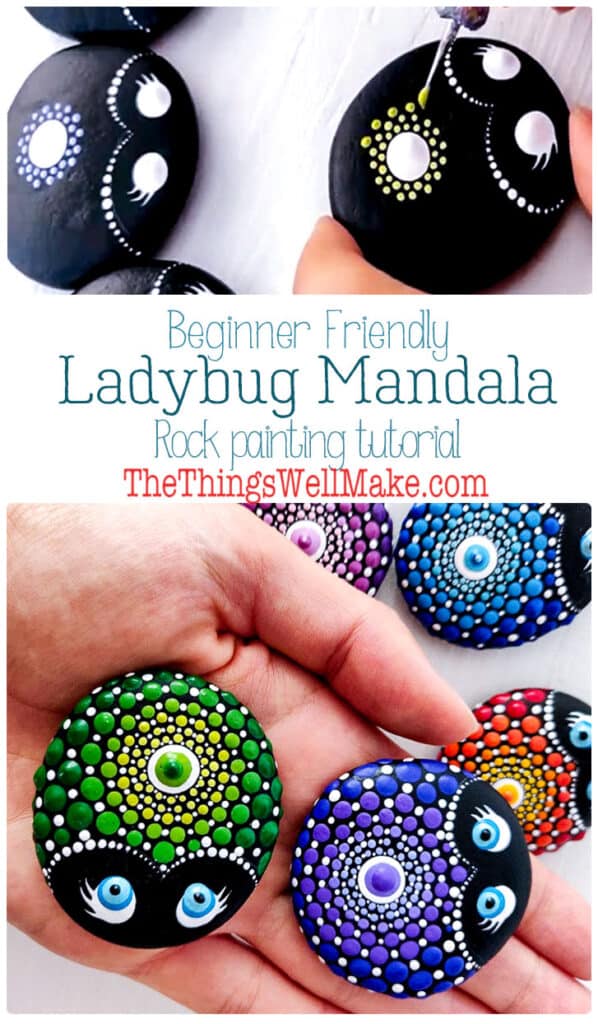
Using a larger sized dotting tool (the flat eraser side of a pencil works great for this), put one dot where you want the center of your mandala to be. Also make 2 large white dots for the eyes.
The eyes will have several layers of paint put on them by the time we’re finished, so be sure you’ve made it large enough. You can also at this point swipe on eyelashes with a small dotting tool, wire, or unwound paperclip if you wish.
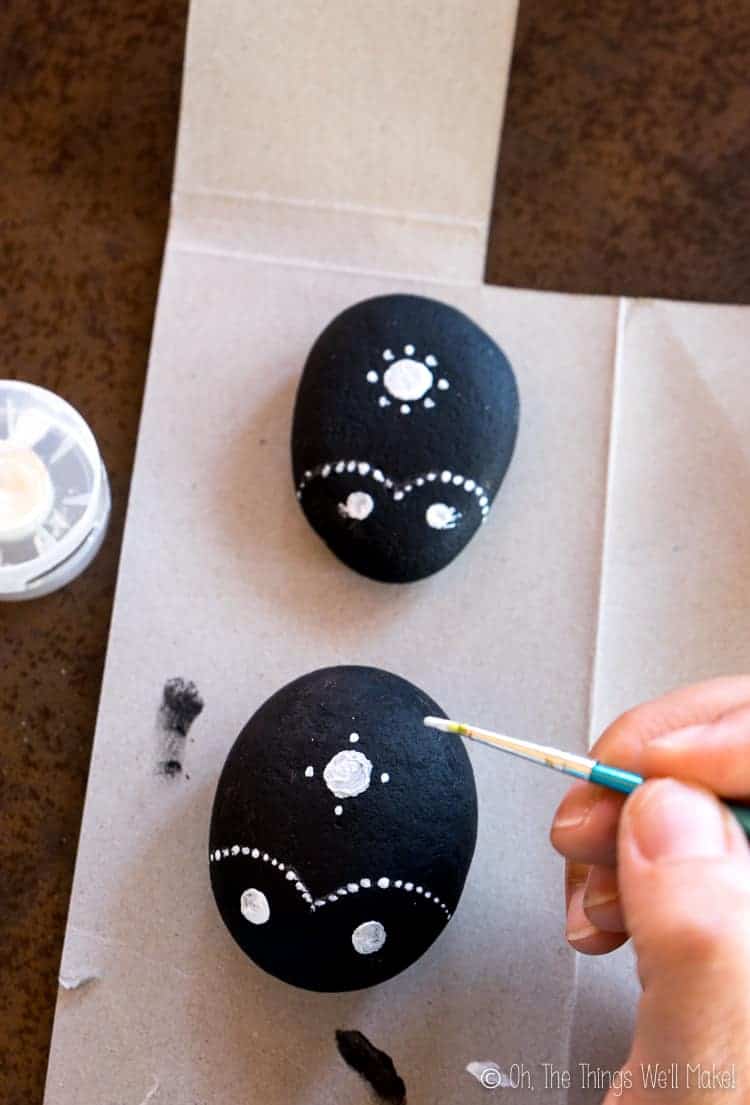
How To Evenly Space Your First Layer Of Dots
Start your first dot with the smallest of your dotting tools and put it anywhere next to the large dot. Then, put another dot exactly opposite this dot on the other side of the large center dot. Next, find the halfway point between these two small dots on the circle and make another small dot there. Then put another dot opposite this one on the other side of the circle. You should end up with 4 evenly spaced dots.
Now you can decide (depending on the size of your rock) how many dots you should put in between each one of these dots to have evenly spaced dots all around the main large dot.
When To Change The Size of the Dots
To begin with, you’ll want to paint two rounds of small dots. This, again, depends also on the size of your rocks and your spacing. When the gaps between your dots will be too big, it’s time to make larger sized dots to always keep the gaps a similar size.
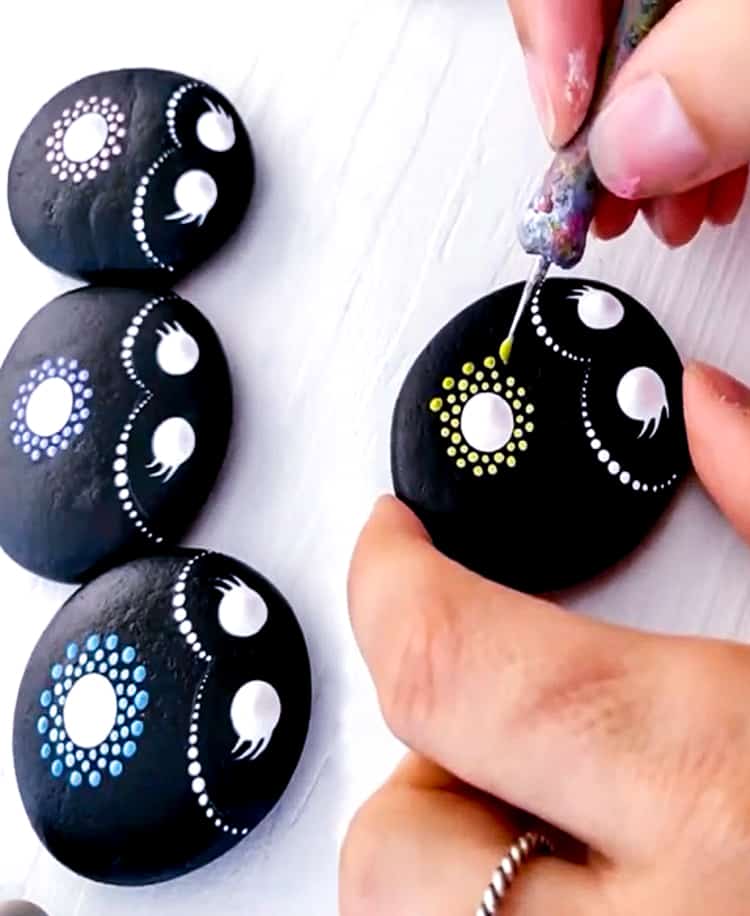
Changing Colors on Your Ladybug Mandala
Each time you change the color you can also put a dot on top of the center dot. By the end of the making the ladybug mandala, you should have several different shades of dots nicely layered on top of each other to give it a 3D effect.
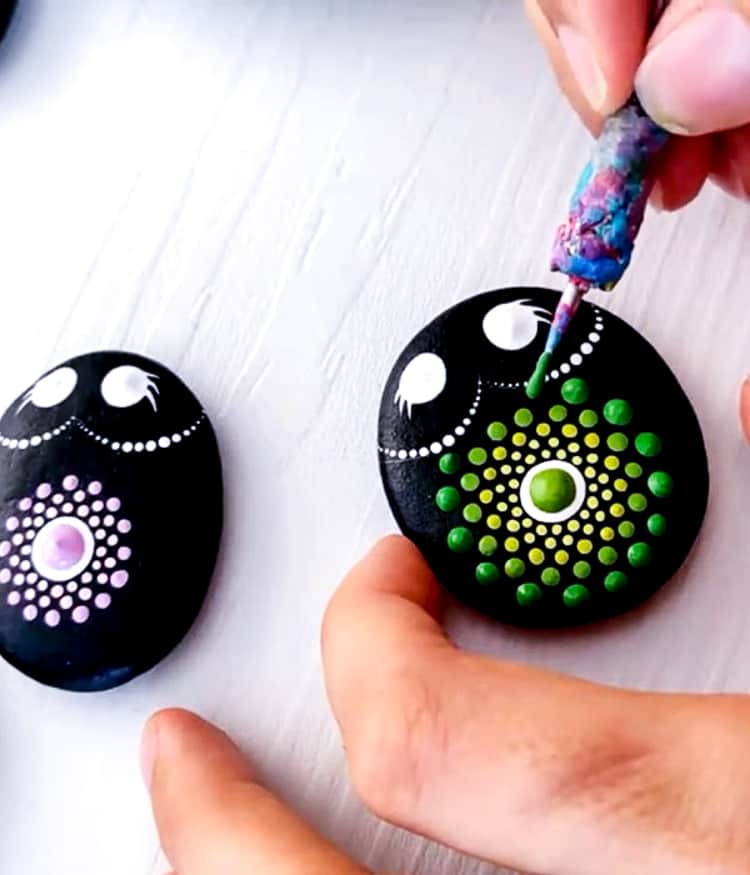
Painting The Eye’s of the Ladybug
The eyes have been made using two different shades of blue and one dot of black. You can use as many or as few dots of blue as you like. Just be sure each dot is dry before you add another dot on top or you’ll have a very messy multi-colored dot.
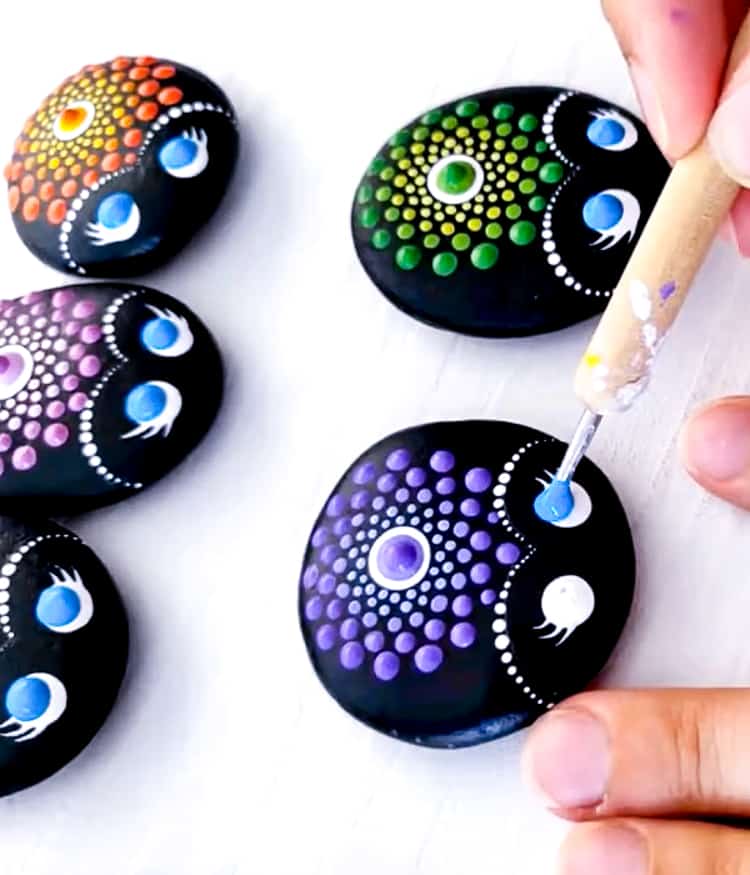
Painting On The White Separation Dots
Our lovely ladybug is almost finished. All that’s left is to paint some tiny white dots in the more open spaces between the colored dots. This gives extra depth and really helps make the colors pop!
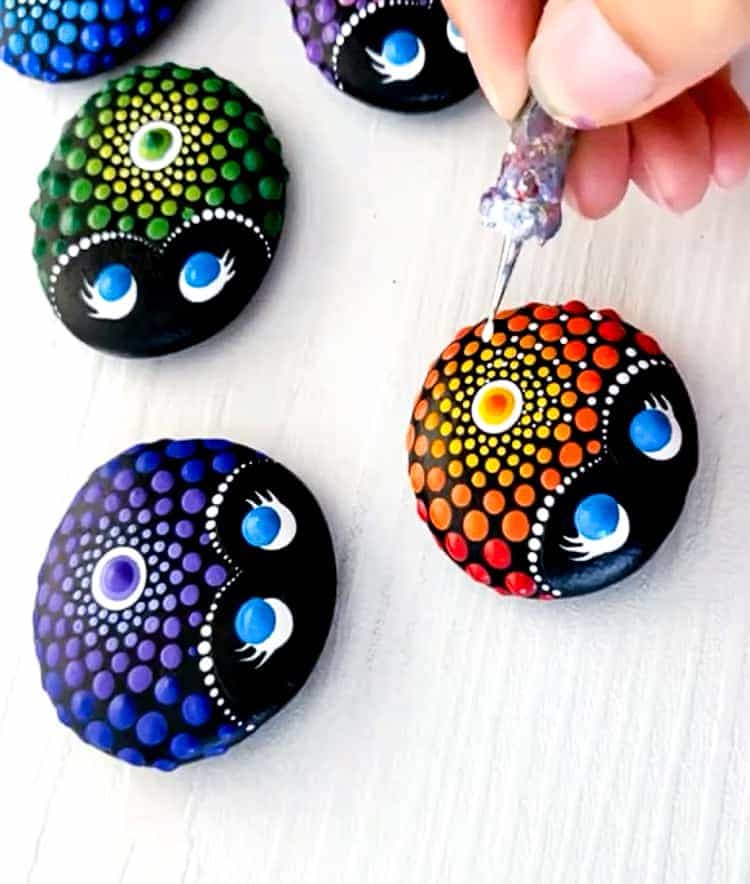
Easy Ladybug Dot Mandala Painted Rocks
Materials
- 1 smooth rock round or oval are best
- acrylic paints
- dotting tool or toothpick or tiny paintbrush
Instructions
- Paint the entire rock black and let it dry.
- Chose your paint colors. It looks great to have the smallest dots in lighter colors and go to darker colors as you move outwards. If you’re using one color, you can make different shades of that color by mixing in different amounts of white.
- Lightly pencil on the design of where the center will be and where you'll make the ladybug's face. This is an optional way to guide you.
- Now, using paint on a dotting tool, dot along the lines that separate the face from the ladybug body. Start from the highest part of the arch and dot downward in one direction. Then load your dotting tool with paint again. Make another line of dots starting next to your first dot, dotting down in the other direction.
- Using a larger sized dotting tool (the flat eraser side of a pencil works great for this), put one dot where you want the center of your mandala to be. Also make 2 large white dots for the eyes. You can also swipe on eyelashes with a small dotting tool, wire, or unwound paperclip if you wish.
- Start your first dot with the smallest of your dotting tools and put it anywhere next to the large dot. Now put another dot exactly opposite this dot on the other side of the dot. Find the halfway point between these two small dots on the circle and make another small dot at that point. Then make another dot opposite this one on the other side of the circle. You should have 4 evenly spaced dots.
- Make several dots between each of these dots. The number of dots will depend on the size of your rock. Try to keep them evenly spaced around the main large dot.
- Paint two rounds of small dots. This, again, will depend on the size of the rock used and your spacing. When the gaps between your dots will be too big, it’s time to make larger sized dots to always keep the gaps a similar size. You can progressively change the color of the paint as you work outwards.
- Each time you change the color you can also put a dot on top of the center dot. By the end of the making the ladybug mandala, you should have several different shades of dots nicely layered on top of each other to give it a 3D effect.
- Paint the ladybug's eyes. The ones in the photo were made with two different shades of blue and one dot of black. You can use as many or as few dots of blue as you like, but make sure each dot is dry before you add another dot on top to keep it clean looking.
- Paint some tiny white dots in the open spaces between the colored dots. This gives extra depth and really helps make the colors pop!
Notes
I’d LOVE to see your ladybug mandala stone painting. You can upload your own picture by commenting on this ladybug mandala facebook post.
If you’ve enjoyed this tutorial I have LOADS more full-length stone painting tutorials on my own blog from rock painting artists around the world in the series “180 Days of Stone Painting”
 Español
 DIY Seasoned Coconut Chips: A Variety of Low Carb Snacks
Laura Stroud
Hi! I love these! I finally found the demo. What kind of paints do you actually use ?
Where do you get the paint thingy to make the dots? And do you use a sealer or something to keep the rocks nice and from fading in the sun? Waiting for your reply. Thank you!!!!
Tracy Ariza, DDS
Hello Laura,
I think any acrylic paint could work. I like the shiny ones better for this than the ones I had at home. [eafl id="27666" name="acrylic paints for rock painting" text="These paints"] specifically say for rock painting as one of the uses. You can find all sorts of acrylic paints at your local craft store, though. You may also be able to find a dotting tool there. (They may also be easy to find at beauty supply shops as they are also often used for nail decorating!) They can be [eafl id="27661" name="dotting tool" text="found online here"].
I didn’t use any sort of sealer, but it’s not a bad idea. Try using a varnish with a UV protection if you can find something like that. Most of mine have held up OK, but a few that were in the planters in full sun have started to peel and fade. I didn’t use good paints, though.
Chris Duhon
You have the Best Teaching Skills. Thank You So Very Much!!!
Tracy Ariza, DDS
Awww. Thanks! 🙂
Tracy Ariza, DDS
Awww, Thanks! 🙂
Anna Barry
Very cute
Tracy Ariza, DDS
Thank you, Anna!
Iin Wibisono
Hi Tracy,
This is very interesting. You are giving me an idea, perhaps I could apply the technique to a bar soap. I am very much inspired by your website that I had taken a diploma in organic skincare business. I learned to make my own cream and lotion and now I am a soap addicts… You rock!
Thank you.
Much love from the tropical country.
Btw, if you ever need anything from my country I will try sending it to you. We are rich in vetiver, Citronella and Patchouli… ?
Tracy Ariza
Awww, Lin, thank you!
You are too kind!
I love all of those oils. I’m also jealous of the climate and the abundance of coconuts in tropical countries. (I’m a coconut addict!) 😉
I always say I should have been born in a tropical country. Ha!
I like the way you think, but I’m not sure how to best apply this idea to a soap. I think there are some glitters and things that people sort of paint on the soap, but I’ve never tried using anything like that.
You could also make a nice pattern on the top of the soap with this sort of idea by pressing into the soap while still soft.
If you do ever try it/figure it out, I’d love to see what it looks like on a soap! 😉