

How to Paint Fabric and Make Fun Gifts
It’s fun to make your own homemade gifts using freezer paper and fabric paint. I’ll show you how to paint fabric so that it looks professionally done easily, and how you can embellish with rhinestones.
One of the nice things about embellishing clothes yourself is that you can make very nice personalized gifts very inexpensively.
My son was invited to a birthday party this week, and I was looking for something nice to give as a gift because I really quite like the family that invited us. Knowing them, I knew that they would probably want clothes or something practical. The problem is I couldn’t find anything that I truly liked!
Once you learn how to paint fabric, that is no longer a problem!! You can make exactly what you want quickly and easily.
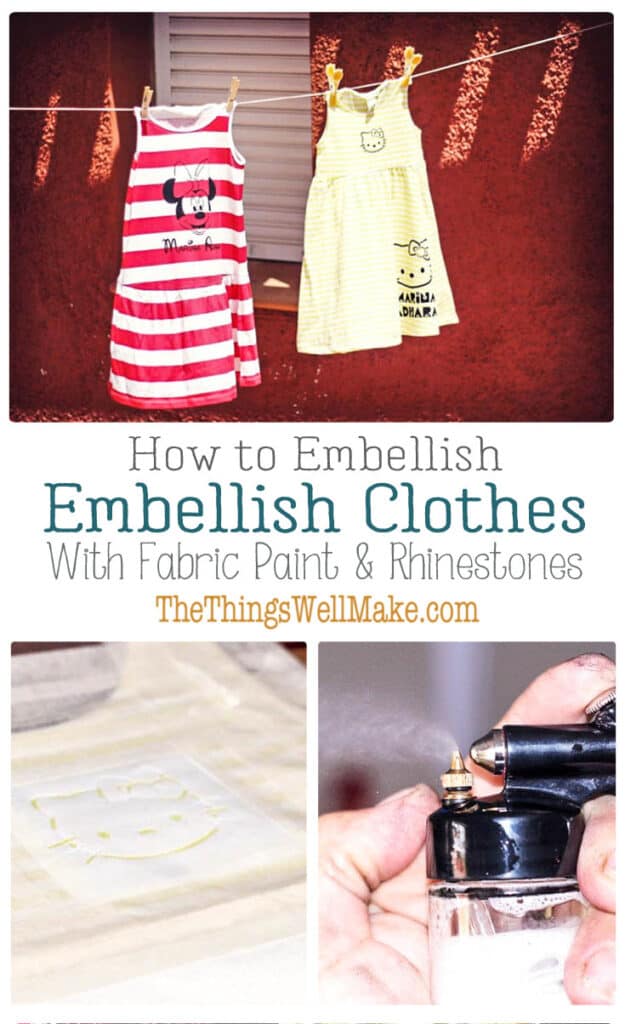
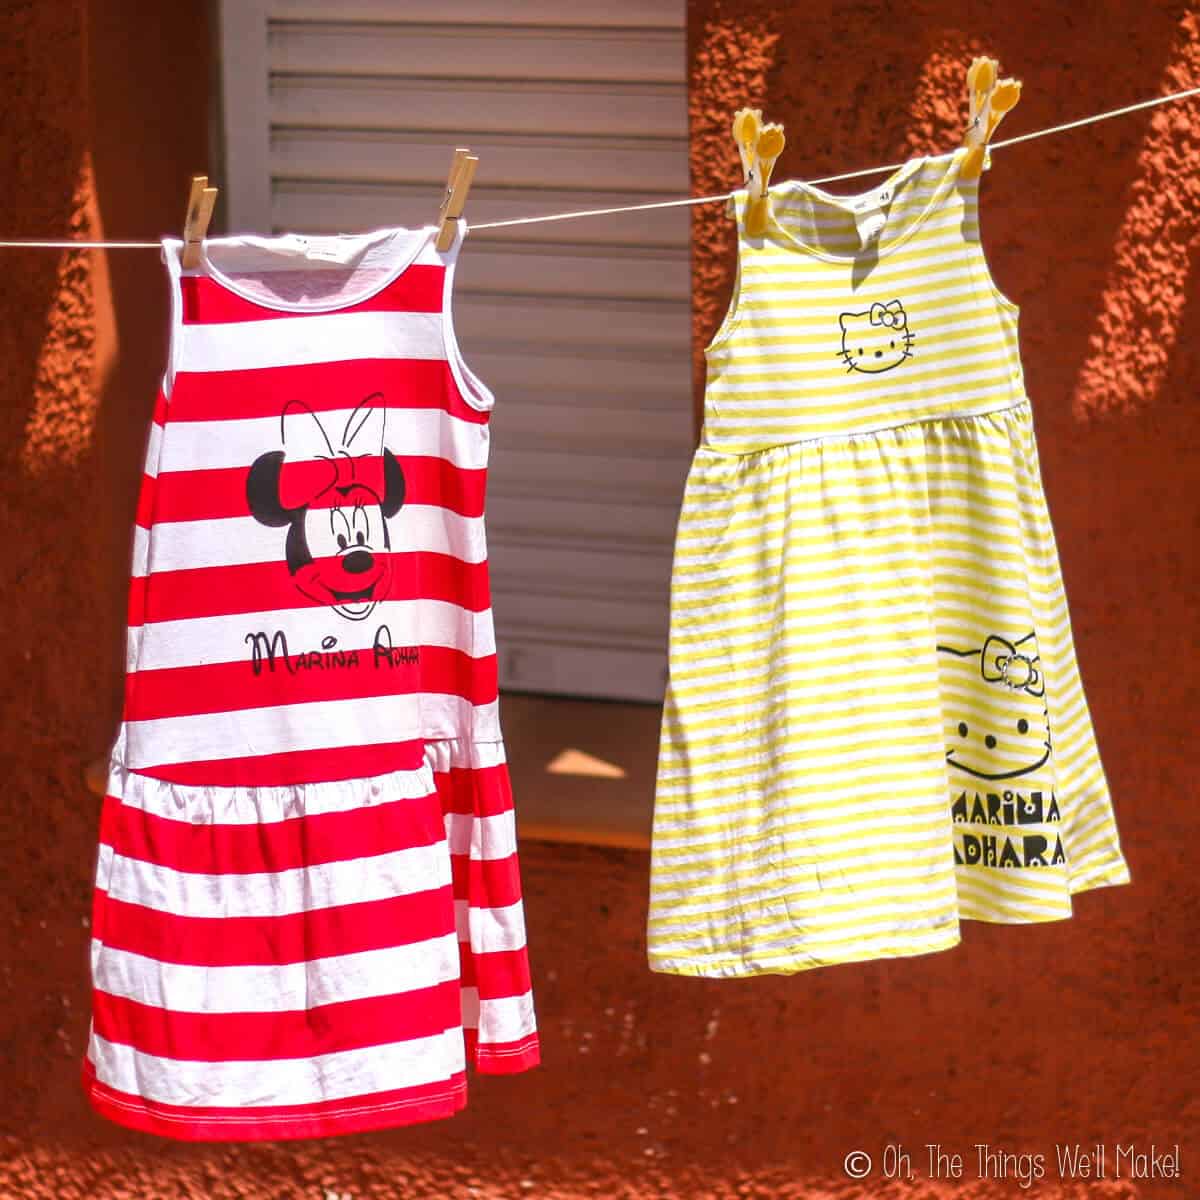
I found some striped t-shirt fabric dresses on sale for, dare I admit it, 3 euros each!
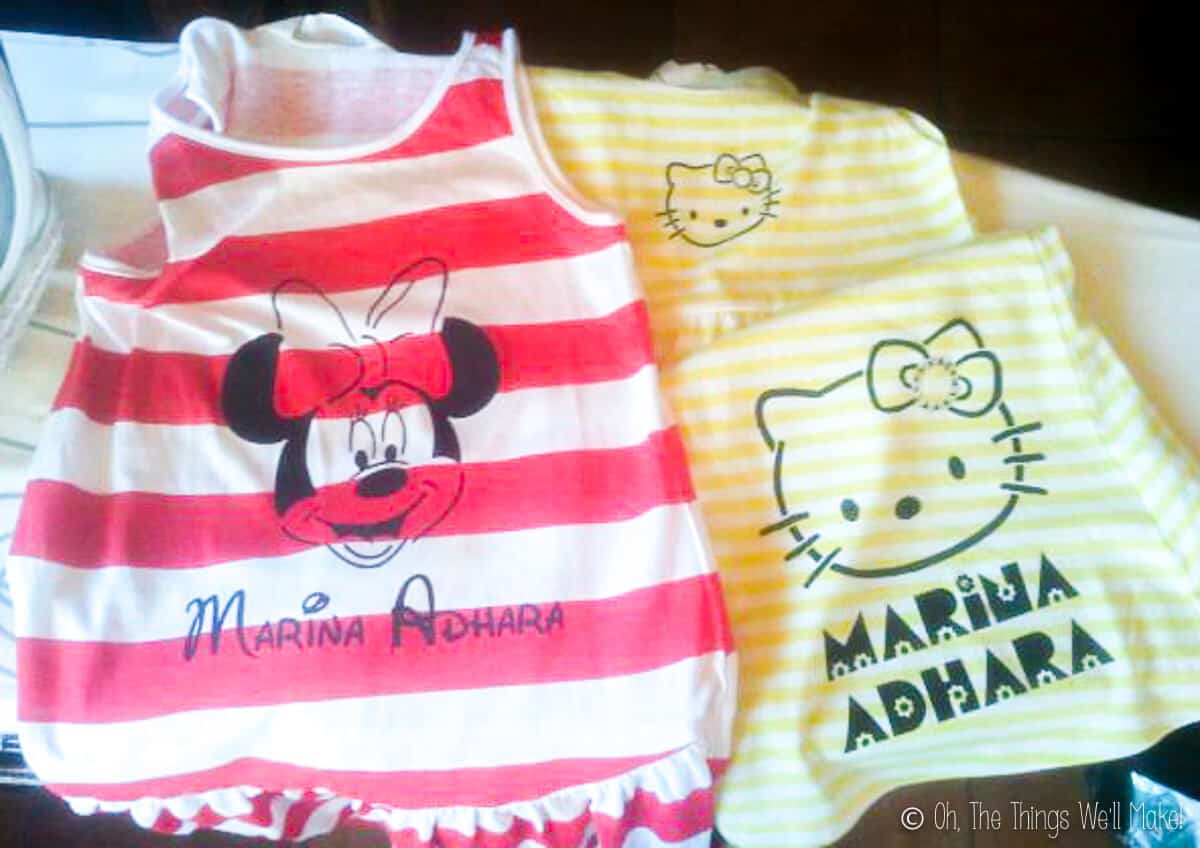
For that price, I could easily make a couple of cute dresses, of course. One of those dresses happened to be red and white striped, and I immediately though about making it into a Minnie Mouse dress. I decided to also pick up another dress, in yellow and white stripes, to make a Hello Kitty version.
How to paint fabric to make embellished clothes…
I wanted to keep things quick and simple, so I decided to paint it with only one color. To make things even easier, I looked for already designed stencils.
A lot of people have designed simple stencils for pumpkin carving, but they also work great as stencils for painting clothes!
In this case, I googled “Minnie Mouse stencil” and “Hello Kitty stencil” and looked through a few stencils people had to offer. The stencils I used are no longer in the same place, so I can no longer link to them, but you can look for something similar.
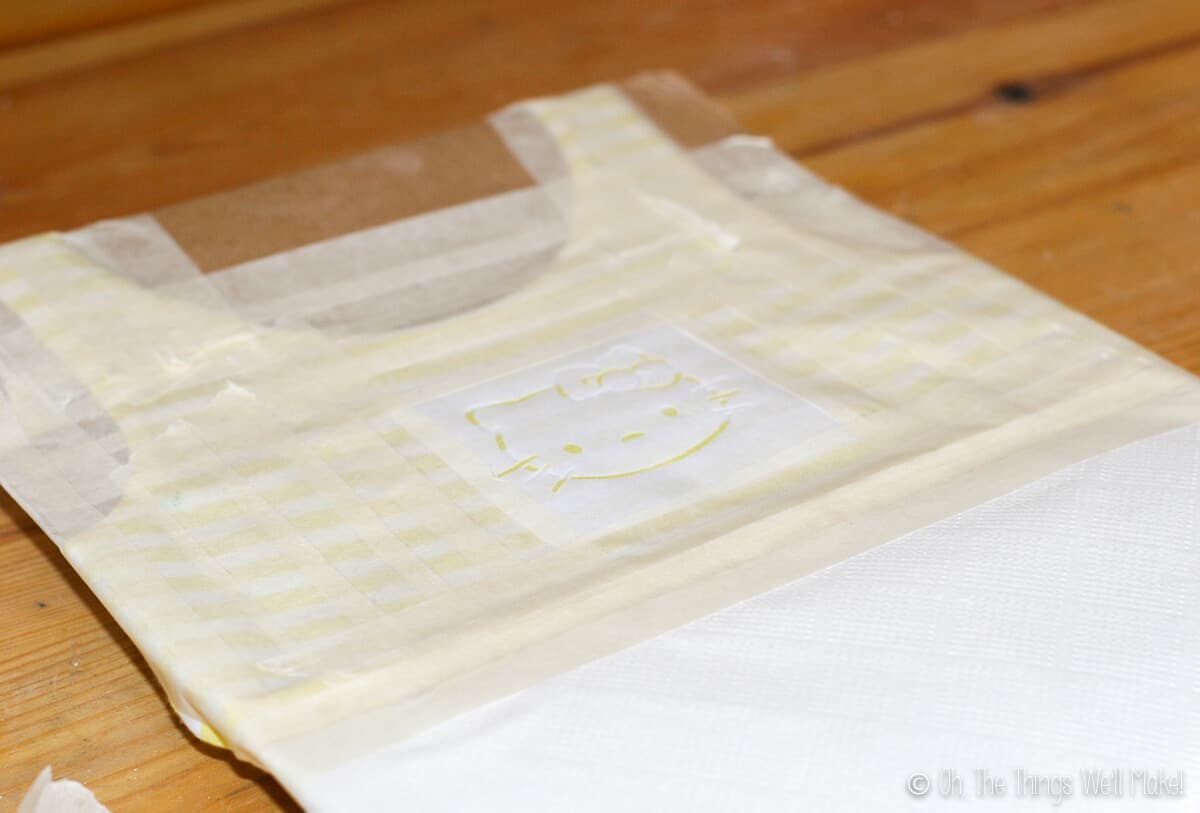
It was very easy to convert these stencils into studio files for my Silhouette Cameo machine. For the Minnie Mouse dress, I added the girl’s name in a Walt Disney Script font. For the Hello Kitty dress, I used a font named Flores.
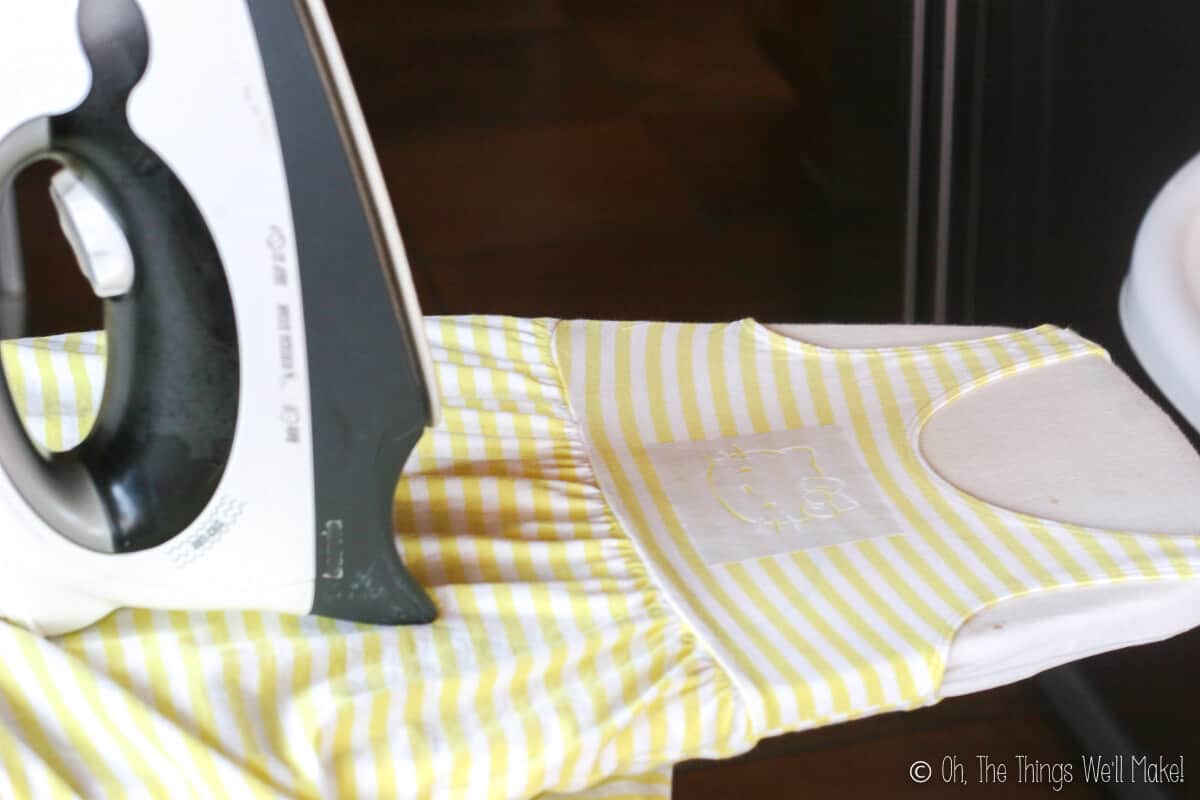
I had my Silhouette Cameo cut the stencils out of freezer paper, and ironed the stencils onto the dresses.
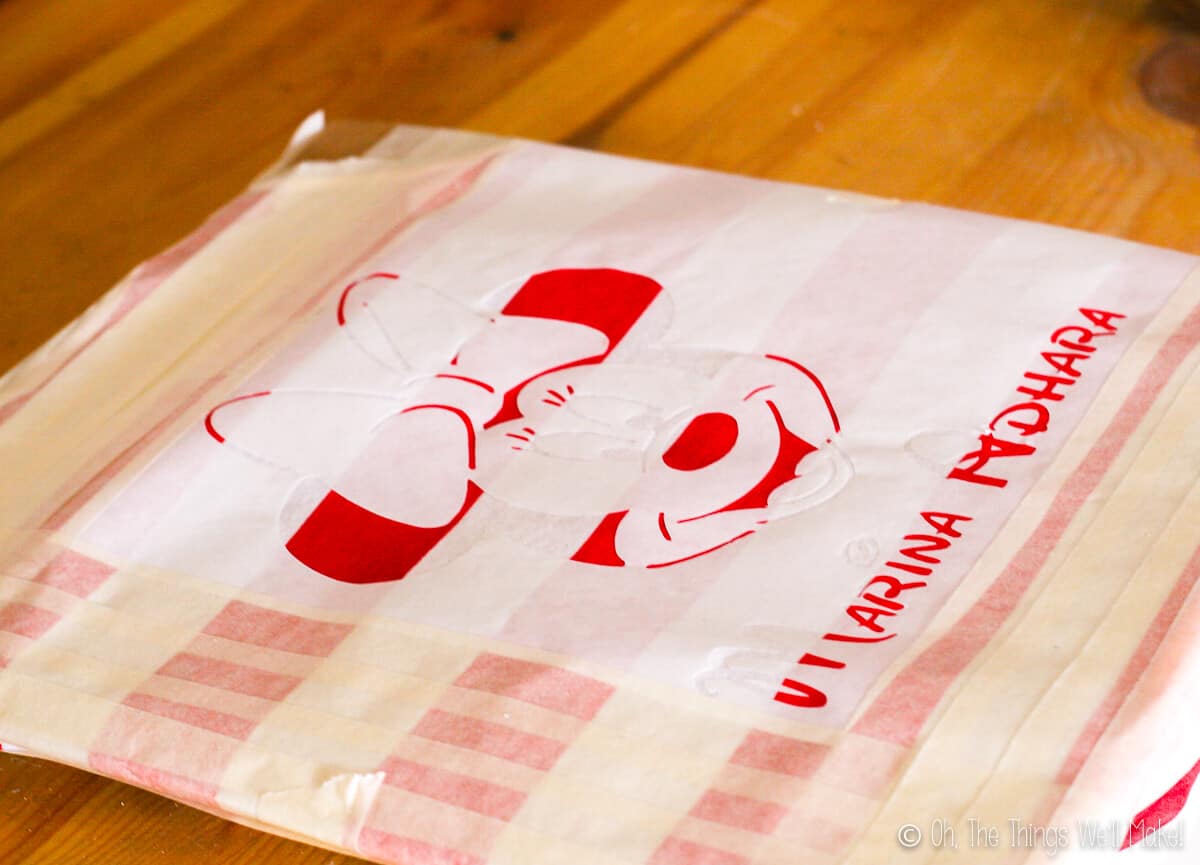
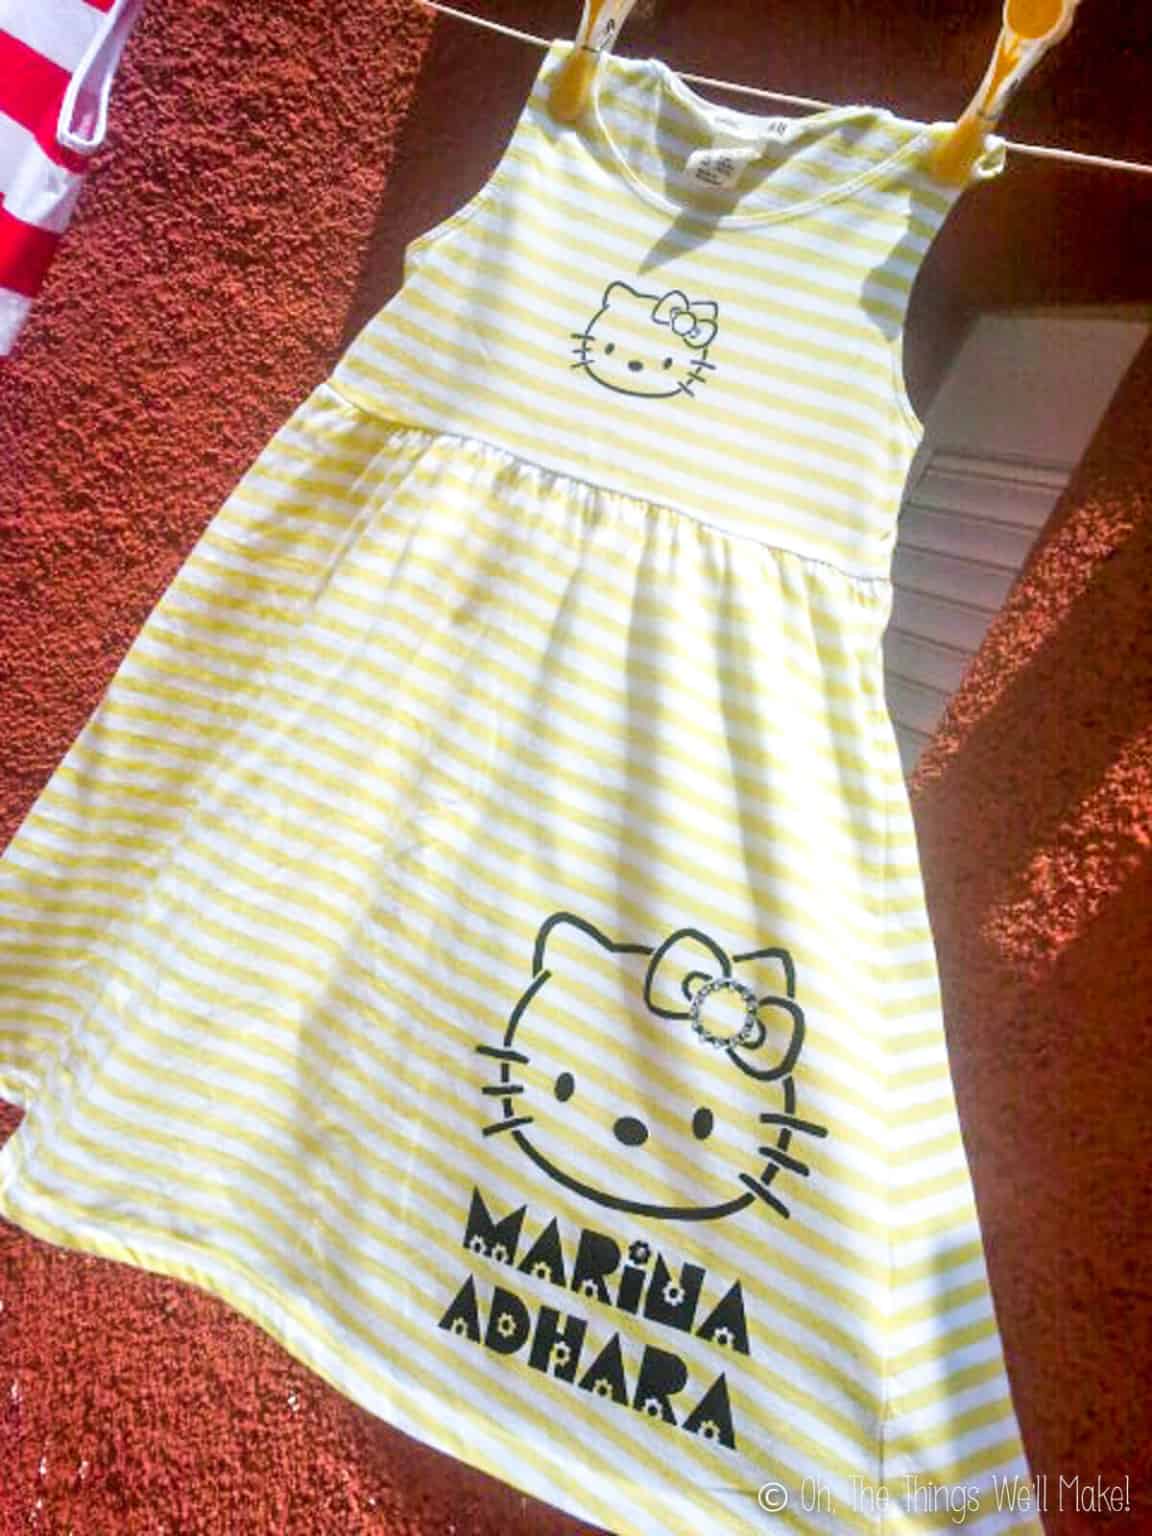
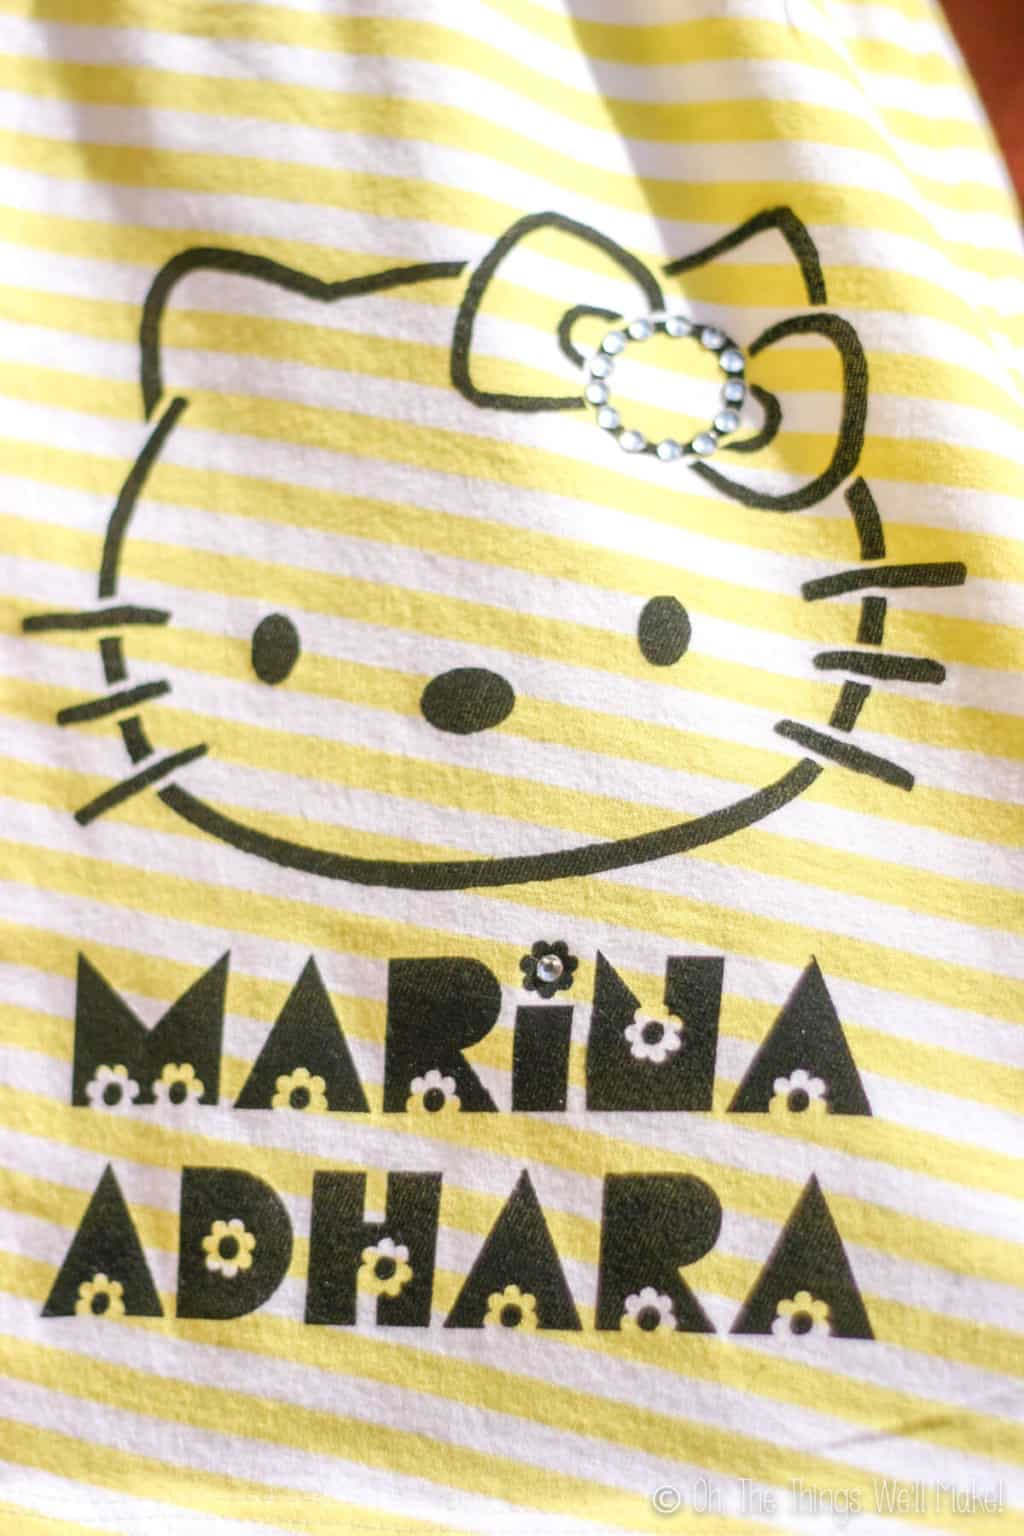
When making the Minnie Mouse dress stencil, I actually took the time to measure and decide on the size that I wanted the stencil to be. Figuring that the dresses were about the same size, I went ahead and made the Hello Kitty about the same size. The area above the waist, though, on that dress ended up being much smaller, and I ended up with a stencil that was too big. I didn’t want to waste it, so I decided to put it on the skirt. A friend who was at my house at the time convinced me that I should add another smaller kitty to the top part. I was worried that it would end up being too busy, but really liked the look of the finished dress.
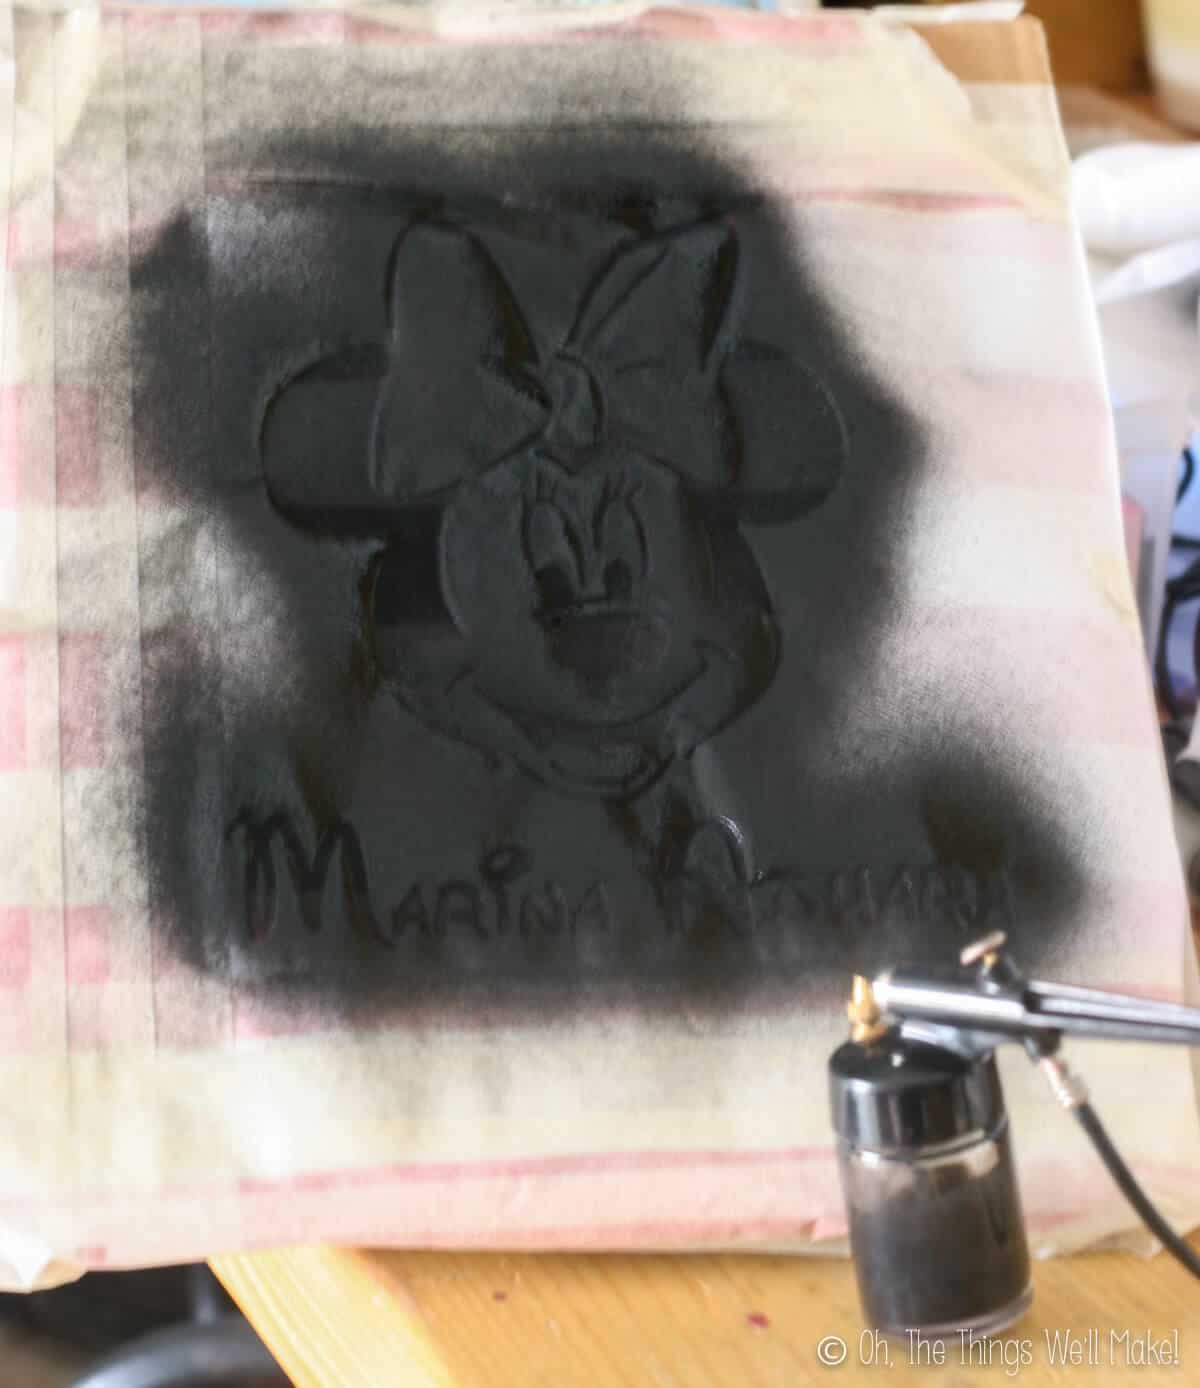
To keep the fabric paint soft and with sharp edges, I have found that painting the fabric paint with an airbrush gives the best results.
I always thought of an airbrush as something expensive and too difficult to use, but I bought a cheap airbrush for around 11 euros, and have found that I absolutely love it!! I use mine all of the time now!!
I’m lucky to have a husband that has an air compressor already, but you can also buy cans of compressed air for use with airbrushes if you don’t have a compressor.

I decided to make my life easier and just paint all of the stencils in black; I wanted them to stand out against the colors of the dresses and didn’t want them to be too busy or gaudy. I really like the way they turned out.
When airbrushing, I make sure to put a piece of cardboard between the front and the back of the shirt, to keep the paint from going through. I also cover up the areas around the freezer paper with masking tape (or more freezer paper), making sure that I seal off all areas well. Paint spray has a way of getting between the seams if you aren’t careful!!
Black paint works very well because it covers well with just one thin coat of paint. To keep the shirt soft, you want the least amount of paint that will do the job. If too much paint gets coated on, it tends to get thick and plasticky, which can later on crack and peel when you wash and dry repeatedly. That is also what tends to happen when I paint on fabric paint with a paintbrush. When I airbrush a thin layer of paint on, though, it seems almost like it was dyed on instead. It looks better, feels better, and holds up better.
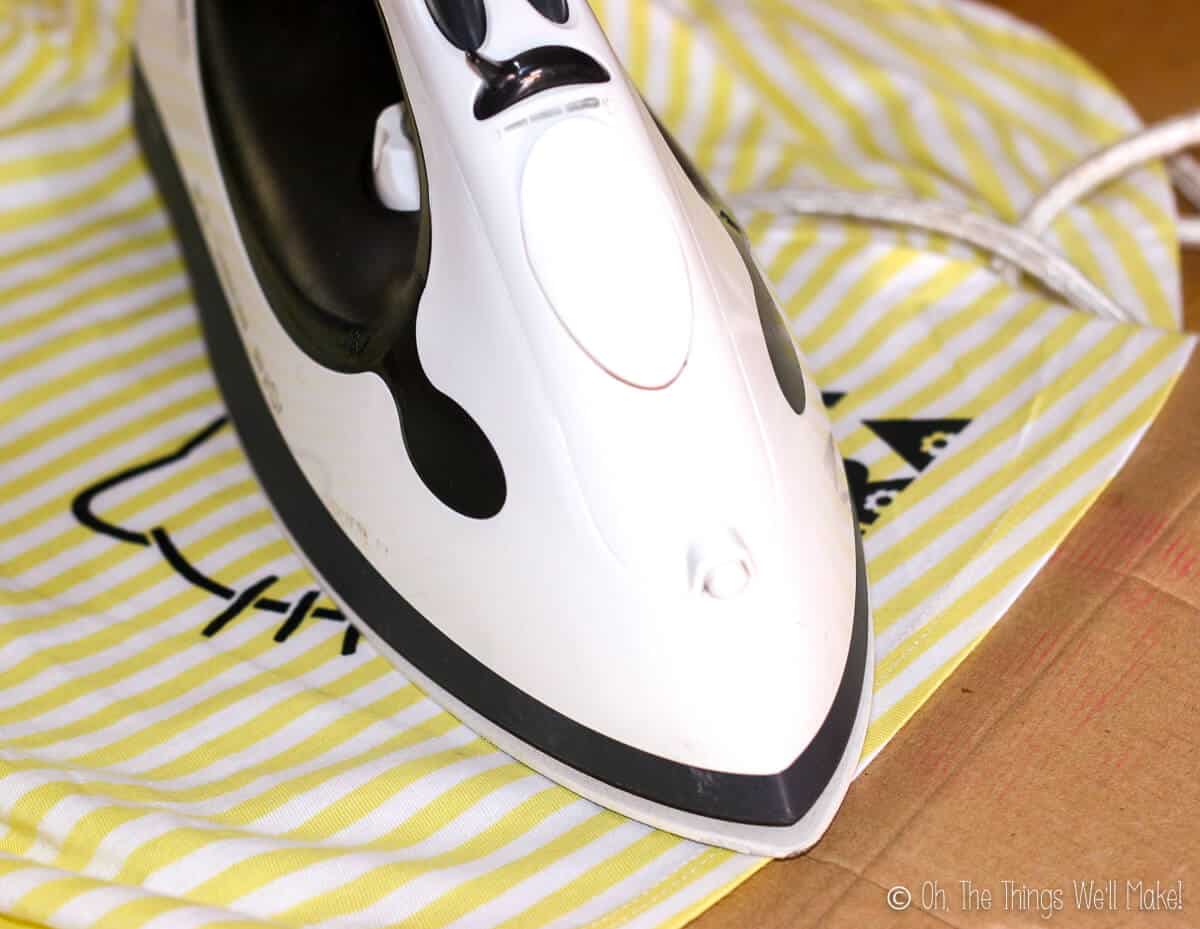
When using fabric paint, especially if using a thin layer, it is important to set it with a hot iron according to the directions. I had some paint that called for 2 minutes and thought it to be way too long to be ironing something. So, I instead ironed it for only a few seconds. I was later kicking myself when the edges had faded quite a bit in the wash!! The same paint, when set for longer with my iron, has never faded since!
I store my airbrush in a box with a few other things, one of which was a rhinestone setter that I had bought but never tried.
Having a boy myself, I don’t get much of a chance to make girly things. I decided to bring it out and give it a try.
I couldn’t really find any good place to embellish the Minnie Dress without covering a really large area with rhinestones. The Hello Kitty dress, though, was screaming out for some rhinestones on the bow and on the dotted “i”.
Adding the rhinestones to the dress was very quick and easy. I used a small heat setting tool to place the rhinestones. All I had to do was to touch it to the top of the rhinestone that I had set into place for around 4 seconds. That was long enough to melt the adhesive behind the stone, fixing the stone in place. Once I was done, I set them all together with my regular iron, just in case.
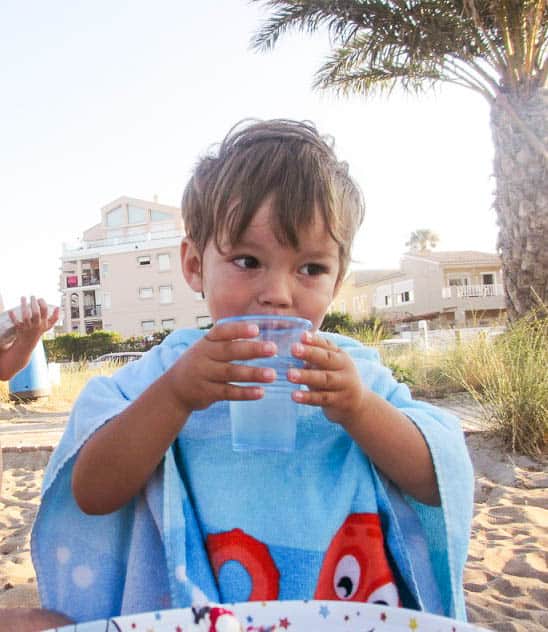
I would have loved to have gotten a picture of the girl opening her present, but we were at the beach and I had a lot of things (and people) to keep my eye on. We ended up bringing my niece with us to the party because she had nowhere else to go that day. My son and she had a lot of fun together playing in the water and eating cake, of course. The dresses were also a hit.
I hope you liked this technique for how to paint fabric with professional results, and that you are ready to try to make your own birthday presents or clothes for your kids. It’s fun!
As always, I’d love to see what you make!

What type of compressor do you have, is it one made especially made for air brushing or just a general compressor?
I actually have both. 🙂
I have always used a general one, though, which is my husband’s. He put an adaptor on it so that I could use the smaller tubes for my airbrush. You can adjust the pressure, so it work perfectly. I also have two different types of airbrush, and both types work really well for small projects like t-shirts.
As for the compressors, I recently found a small one that came with another airbrush and some fabric paints as a package deal. It was inexpensive, and I couldn’t pass up the offer to have a smaller, more convenient compressor in the house. I haven’t tried it yet, but I’m excited about using it!