How to Paint a Snowflake Christmas Gift Pouch
Save the waste of wrapping paper by using beautiful reusable gift pouches. Learn how to paint a snowflake gift pouch made from recycled t-shirt sleeves. This is a fun craft for both adults and kids.
When giving gifts, be it Christmas or any other time of year, the presentation shouldn’t be ignored. In some cases, the packaging can be a beautiful gift in itself. Such is the case with these easy snowflake gift pouches.
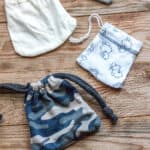
You can buy ready-made cotton pouches to decorate or easily make quick pouches from old t-shirts.
Recycling old t-shirt sleeves into pouches
You may have noticed by now that I like to recycle old t-shirts for many different uses. (One of the most popular is my post on 8 ways to make shopping bags from a t-shirt!)
Old t-shirts are perfect for making all sorts of quick and easy projects. Not only does the fabric not unravel when you cut it, but normally the hems are neatly sewn into a tube which can be very handy for making an easy drawstring closure without any extra effort!
You can use the main body of the t-shirt to make easy, drawstring sacks that can be used in a number of ways. We used this idea to make a cute a trick-or-treat bag. That’s a fun, easy project that even small kids can help you decorate. (Click on the link for the instructions!)
When you making t-shirt projects, you’ll find yourself ending up with leftover sleeves. While you might be tempted to throw away those cloth “scraps,” don’t do it!
T-shirt sleeves are ideal for making quick-and-easy pouches that are perfect for tons of projects. Learn how to make them…
Easy Drawstring Pouches
Decorating your pouches
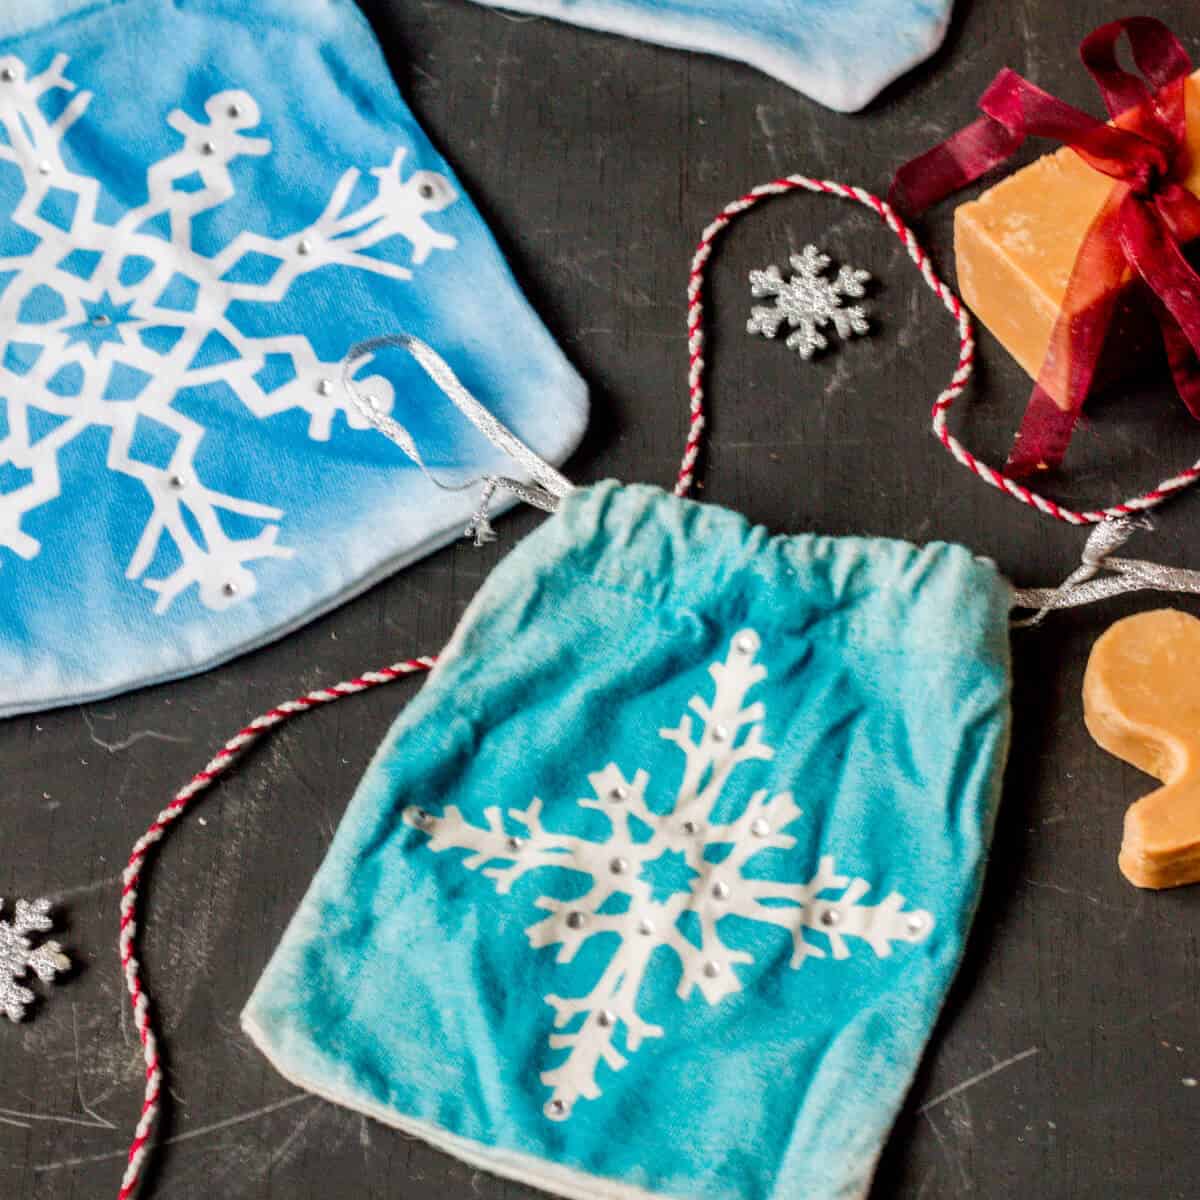
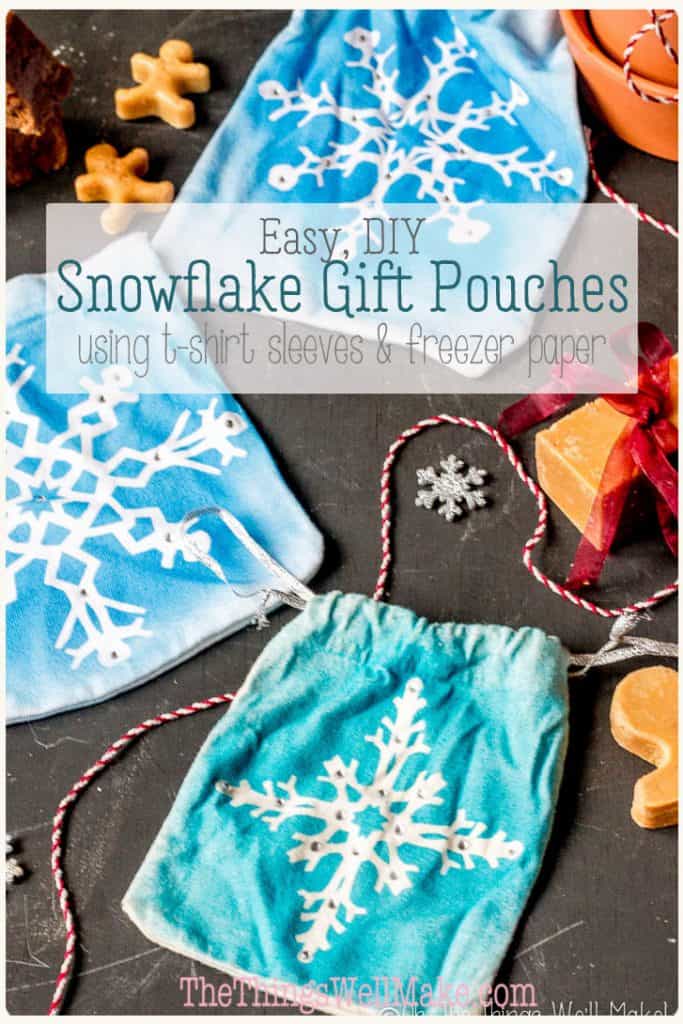
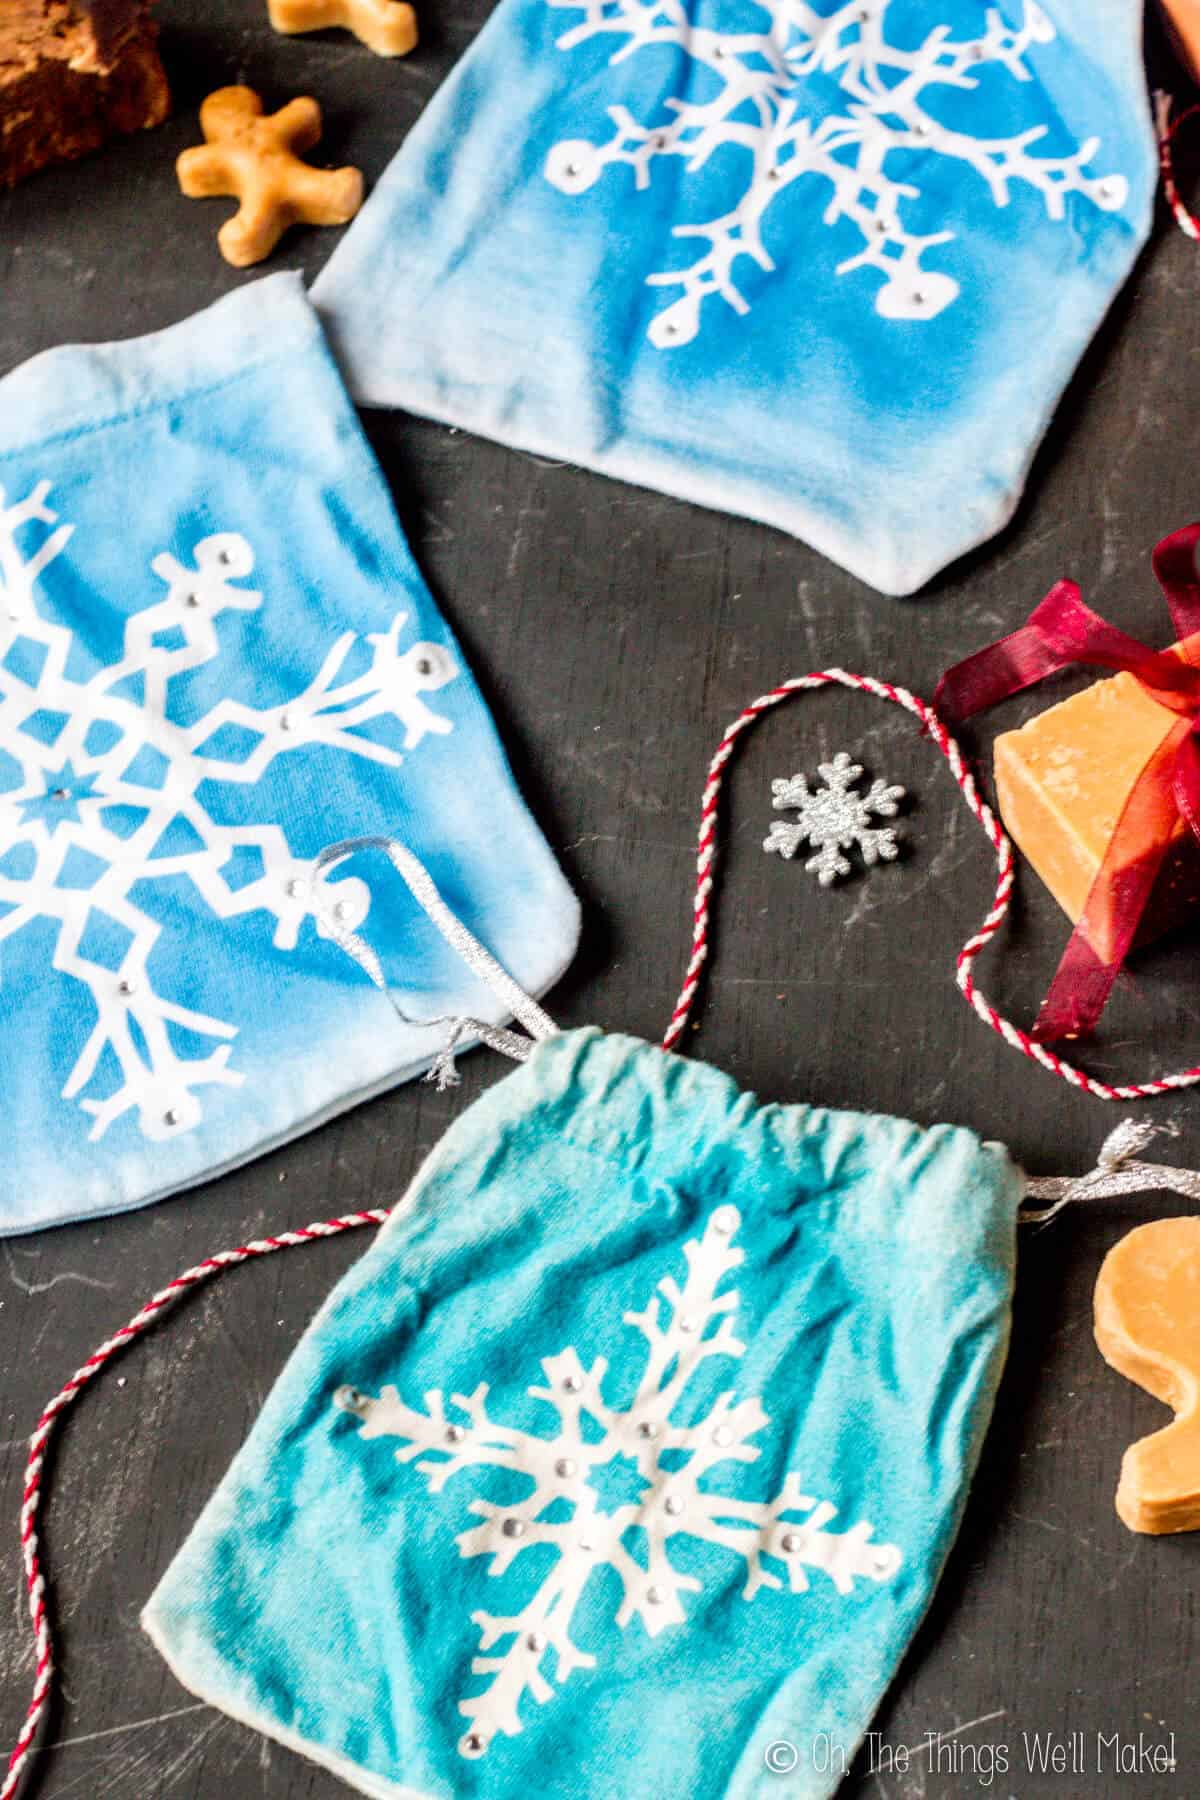
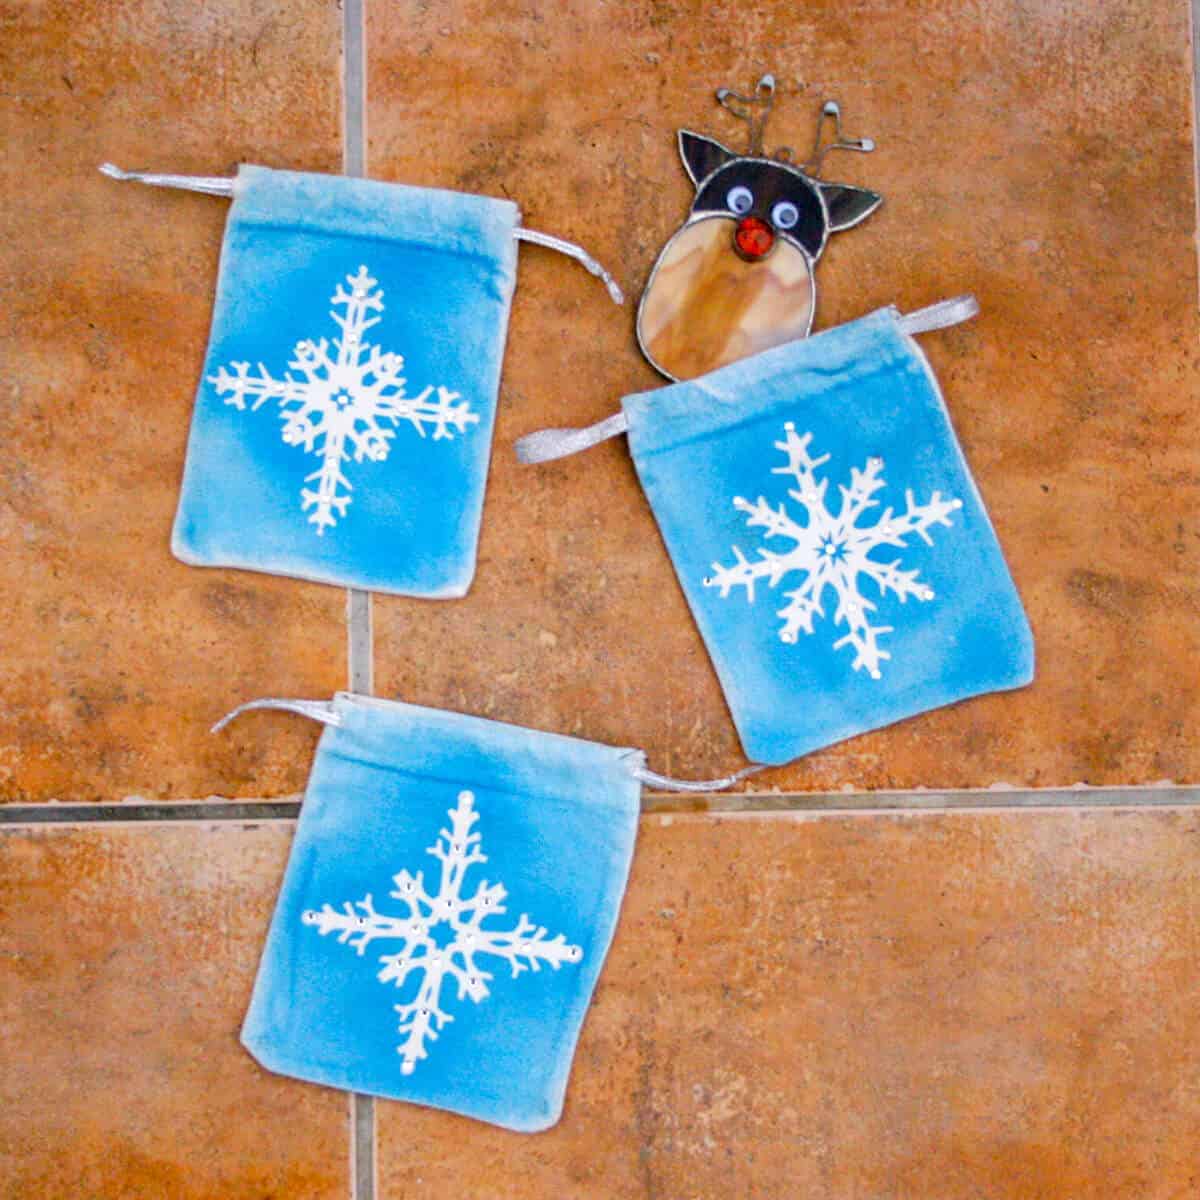
Since I intended these pouches to be used for Christmas gifts, I decided that I would use my freezer paper snowflake stencil technique to paint pretty snowflakes on the pouches.
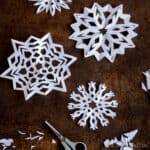
To begin the process, you’ll need to cut paper snowflakes from freezer paper to make stencils for painting the pouches. If you aren’t sure how to cut snowflakes, check out my tutorial here:
How to Make Paper Snowflakes
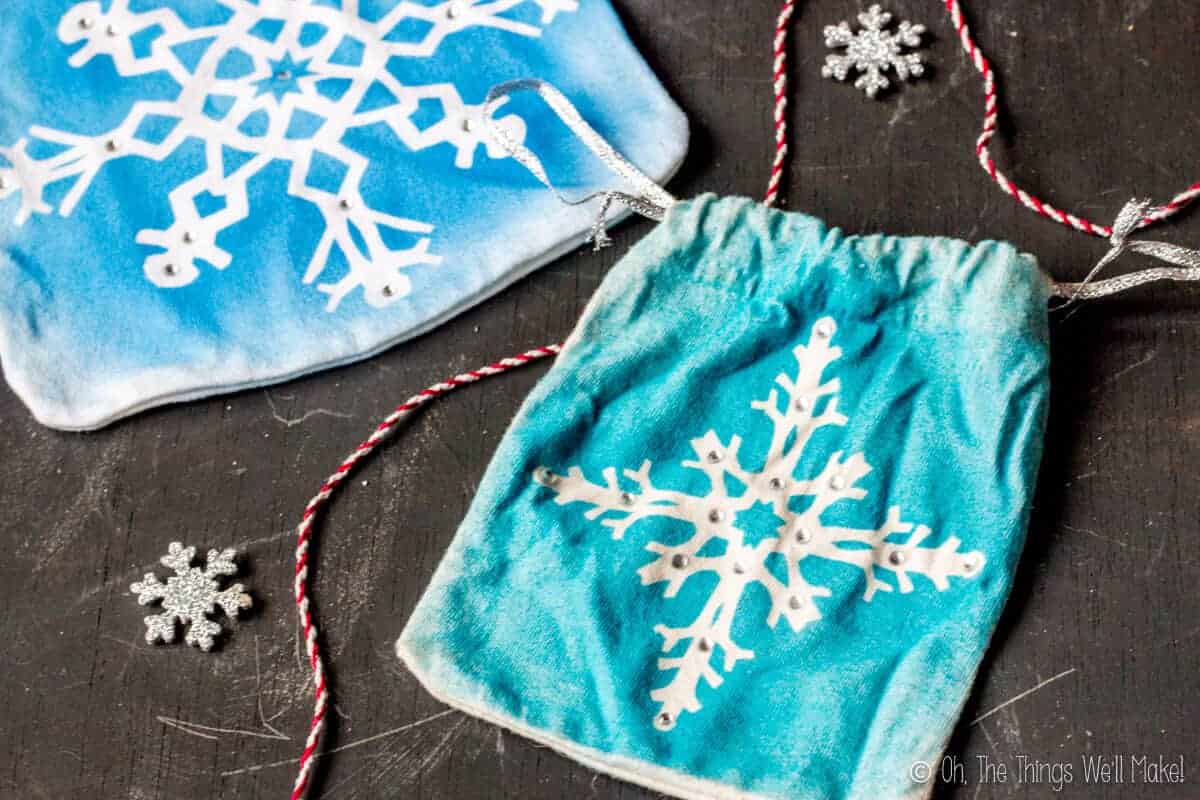
Once the snowflake stencils are made, the pouches will be covered with paint. When the paint has dried, the stencil is removed, leaving a beautiful snowflake below.
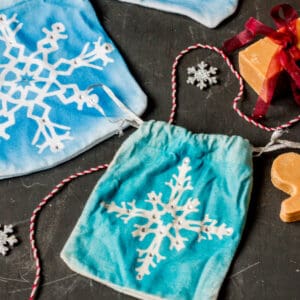
While these can be made in any color, I prefer the combination of turquoise blue with silver and rhinestone accents reminiscent of the Frozen movies.
How to Paint a Snowflake Christmas Gift Pouch
You Will Need:
- Freezer paper
- scissors
- iron
- fabric paint
- your pouches, of course, in the color you want your snowflake to be (I used white.)
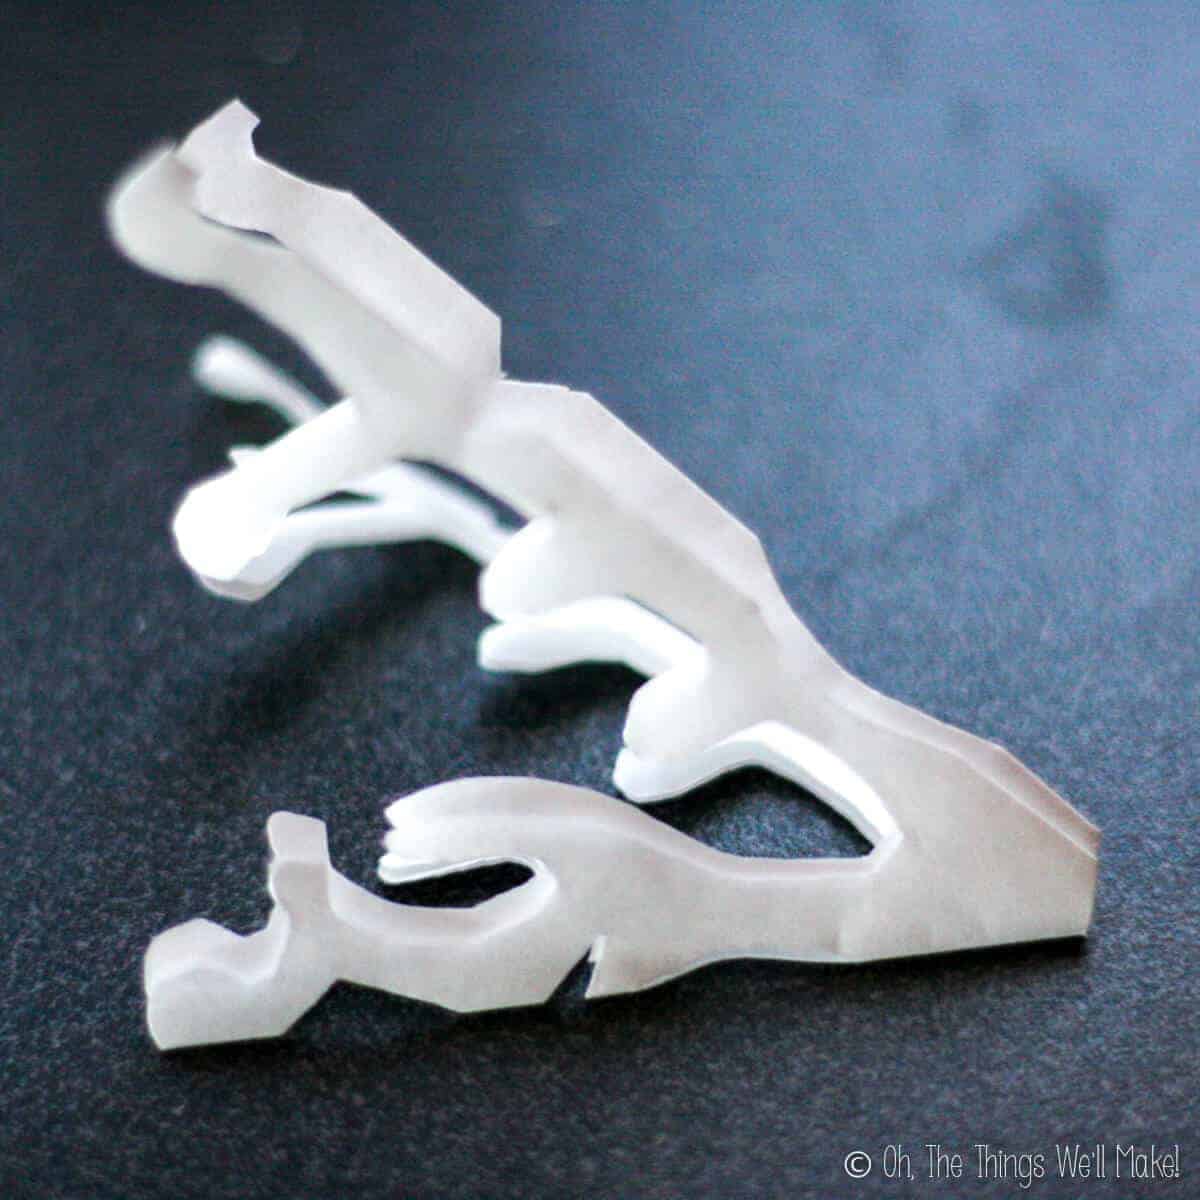
1. Cut out a snowflake from freezer paper. See how to cut a paper snowflake here. To make the paper look more like a snowflake than a mandala, cut a wedge out of the center of the folded triangle of paper, leaving more of a v-shape rather than a triangle. You’ll want to do this in a decorated manner, of course, as shown below.
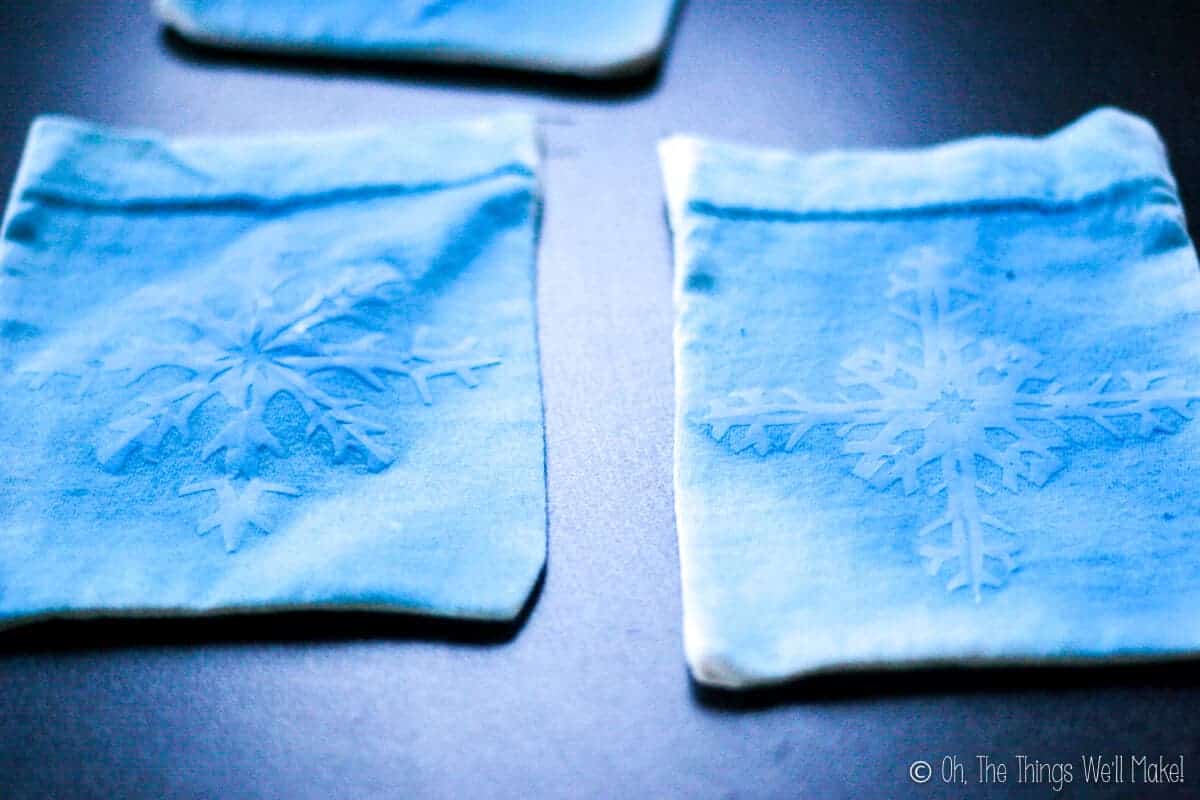
2. Iron the freezer paper snowflake(s), shiny side down, onto your pouch. Slip a piece of cardboard inside the pouch to keep the paint from bleeding through to the back once you start painting.

3. Carefully paint around and over the snowflakes with fabric paint.
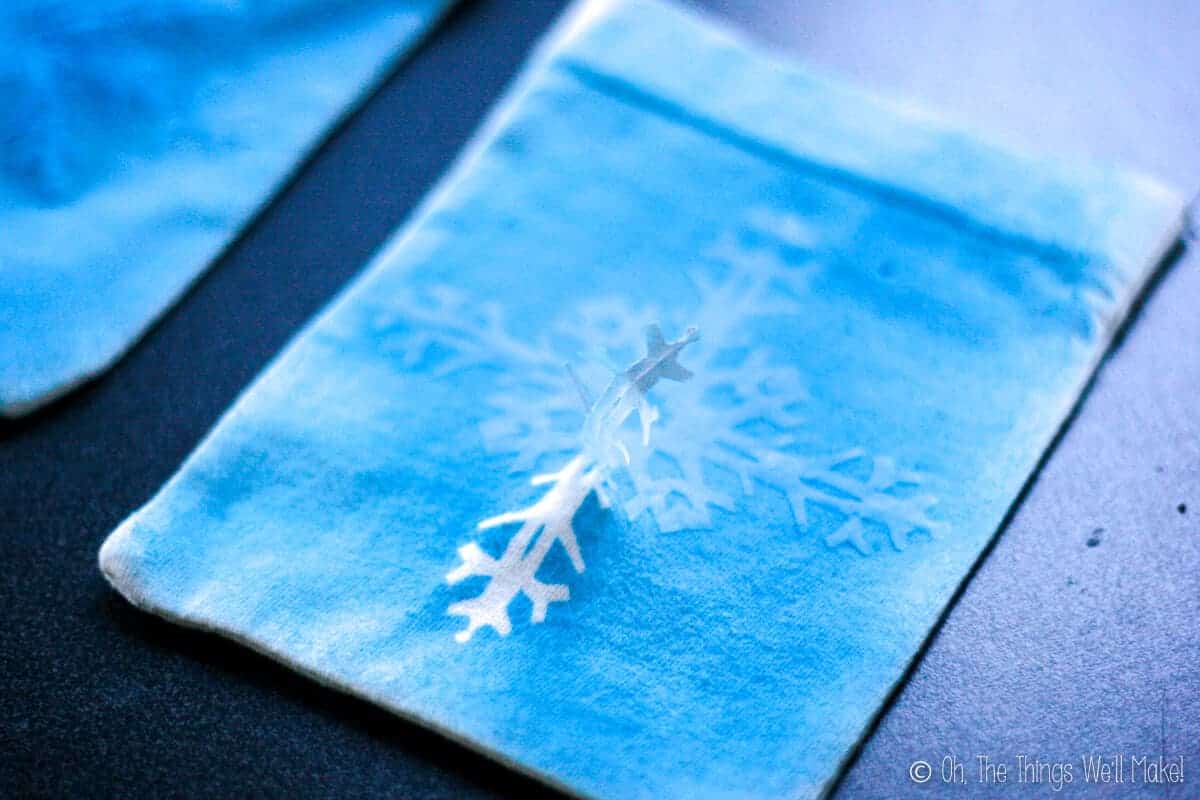
I used my airbrush because it evenly disperses a thin, even layer of paint, giving a professional-looking result. If you don’t have an airbrush, though, you can carefully dab the paint onto the pouch, being especially careful as you paint around the edges of the freezer paper snowflake so that the edges don’t lift, allowing the paint to get underneath.
4. Let the paint dry, and then carefully peel the freezer paper snowflake off of your pouch. Admire your beautiful snowflake!!
5. Iron the pouch to set the paint according to the directions for your particular fabric paint.
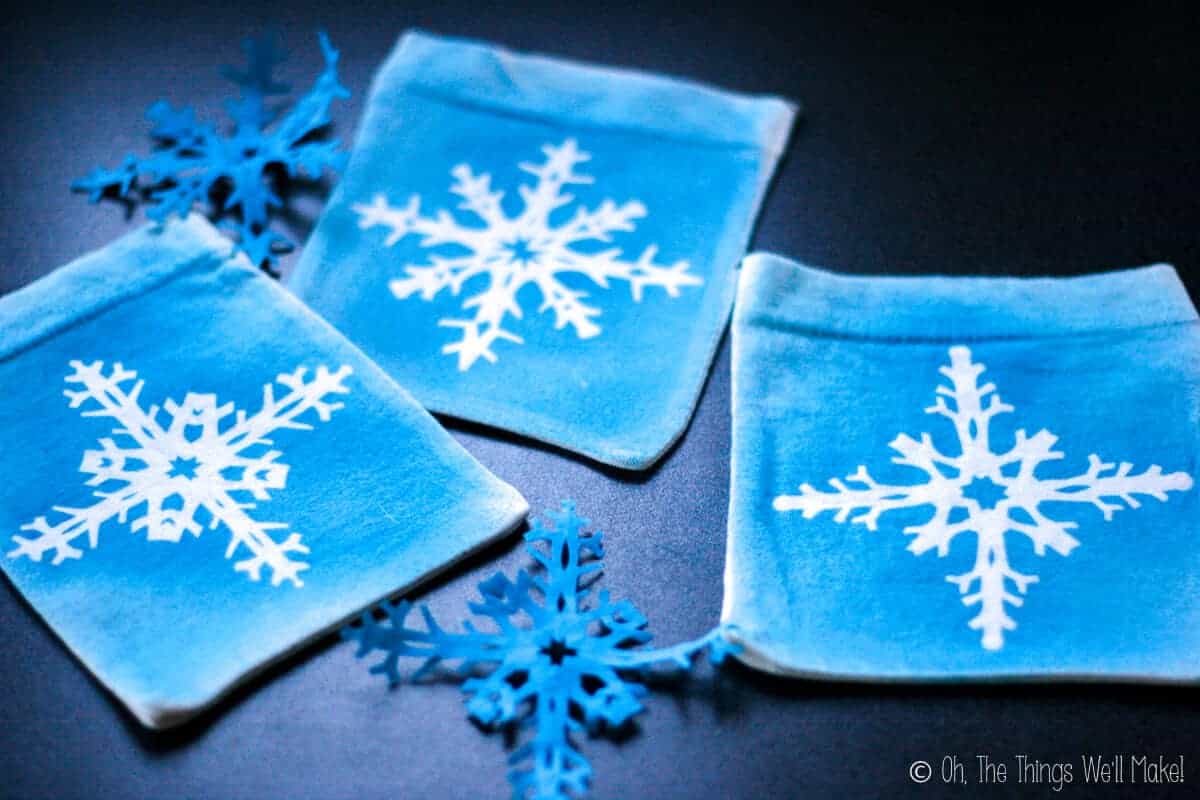
6. Embellish the pouch(es) more, if you like. I ironed rhinestones onto mine, but glitter fabric paint can also give beautiful results.

Now that you have finished making these beautiful pouches, you have the difficult task of deciding how to fill them. Maybe I can help you think of some small, homemade gifts worthy of slipping inside these beautiful pouches. If you have other ideas, I’d love to hear them!
Homemade gifts that can fit in small pouches
- Make your own bars of soap (beginner soap recipe). For Christmas, you could consider making either a gingerbread soap or soap made to look like peppermint candy
- DIY solid perfume
- A natural, car air freshener bottle
- lip balm
- Homemade lotion
- Homemade (or store-bought) jewelry
- Christmas ornaments like these homemade cinnamon ornaments
Other uses for small pouches
I’m constantly making small pouches out of t-shirt sleeves, and they come in handy for all sorts of things. I use them to help organize my son’s small toys and for storing small items like safety pins, q-tips, or buttons, but they can be used for all sorts of things.
- Homemade reusable tea bags
- Party favor bags (While these would be perfect for a Frozen themed party, I also showed you how to quickly decorate them with silkscreening which is how I made my Wall-e party favor bags
- For storing makeup or other items in your purse
- For storing jewelry so that chains don’t get tangled
- As gift pouches to present small gifts to others
Painted snowflake pouches
Equipment
Materials
- 1 sheet freezer paper
- fabric
- fabric paints
- heat-set rhinestones optional
- dimensional paints optional
Instructions
- Make a paper snowflake, cutting your design from freezer paper.
- Place the paper snowflake, shiny side down, onto the fabric where you want your design to be.
- Carefully run a hot iron over the paper snowflake until the paper snowflake has adhered to the fabric. (Make sure no edges are loose.)
- Carefully paint around the edges and over all of the holes in the paper with fabric paint.
- Once the paint has dried, carefully peel away the freezer paper.
- To set the design, follow the directions for your fabric paint. In most cases, you'll need to cover the design with parchment paper and iron over it for a minute or 2.
- You can now further embellish the gift pouches with heat-set rhinestones or dimensional paints.
Notes
This post was originally published on November 20, 2013. It was rewritten with new photos and clearer instructions in December 2019.