• Skip to main content
  • Skip to header left navigation
  • Skip to header right navigation
  • Skip to site footer
es_ES Español
  • About
    • Meet Tracy!
    • Contact Me
    • Disclaimers & Disclosures
    • Terms and Conditions
    • Cookie Policy
    • Privacy Policy
  • Holidays
    • New Years Eve
    • Valentine’s Day
    • St. Patrick’s Day
    • Easter
    • Fourth of July
    • Halloween
    • Thanksgiving
    • Christmas
  • es_ES
Oh, The Things We'll Make!

Oh, The Things We'll Make!

Make it yourself so that you control the ingredients!

  • Recipes
    • Appetizers & Snacks
    • Soups & Salads
    • Breakfast
    • Lunch & Dinner
    • Desserts & Sweets
      • frozen treats
    • Breads & Wraps
    • MIY Pantry Basics
    • Condiments & Sauces
    • Beverages & Smoothies
    • Story Archives
  • Make it Yourself
    • Arts & Crafts
    • Face & Body
      • Cleansers, Soaps, & Gels
      • Deodorants
      • Hair
      • Skin Care
      • Oral Care
      • Baby & Toddler Care
    • Home & Garden
      • Cleaning & Laundry
      • Garden & Hens
    • Soap Making
    • Upcycling
  • About
    • Meet Tracy!
      • More About Me
    • Contact Me
    • Disclaimers & Disclosures
    • Cookie Policy
    • Privacy Policy
  • Recipes
    • Appetizers & Snacks
    • Soups & Salads
    • Beverages & Smoothies
    • Breakfast
    • Lunch & Dinner
    • Desserts & Sweets
      • frozen treats
    • Breads & Wraps
    • Condiments & Sauces
    • MIY Pantry Basics
    • Story Archives
  • Make it Yourself
    • Arts & Crafts
    • Natural Face & Body
      • Cleansers, Soaps, & Gels
      • Natural Skin Care
      • Natural Hair care
      • Oral Care
      • Deodorants
      • Baby & Toddler Care
    • Soap Making
    • Home & Garden
      • Cleaning & Laundry
      • Garden & Hens
    • Photography
    • Upcycling
  • Holidays
    • New Years Eve
    • Valentine’s Day
    • St. Patrick’s Day
    • Easter
    • Fourth of July
    • Halloween
    • Thanksgiving
    • Christmas
es_ES Español
3 homemade applesauce cinnamon ornaments, one hanging from a tree and two on a white plate

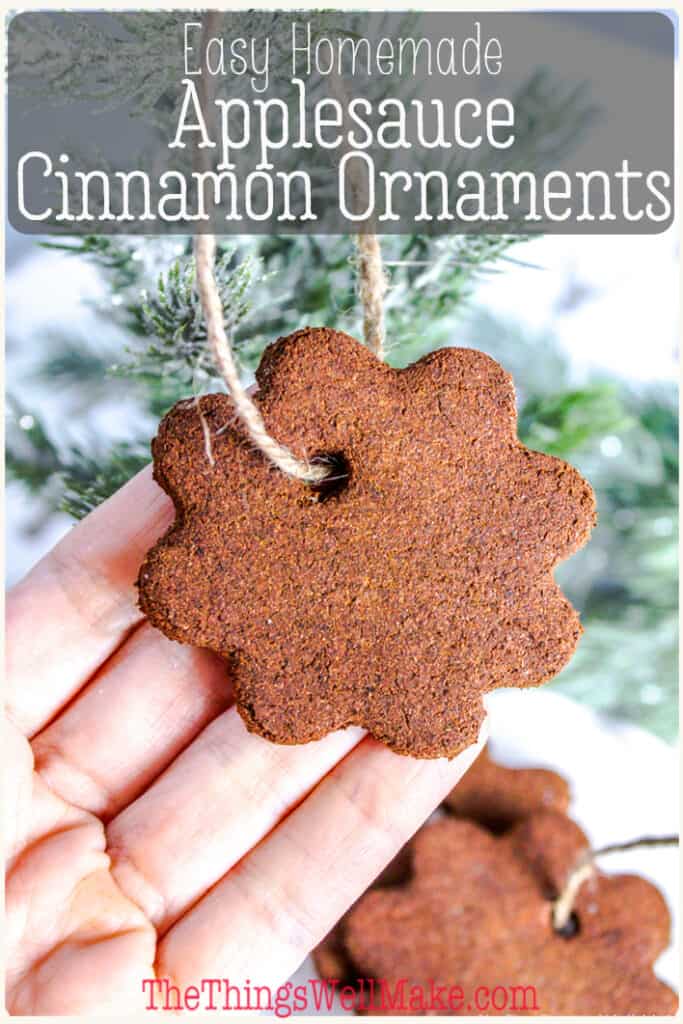
Homemade Applesauce Cinnamon Ornaments

Last Modified: December 16, 2019 // by Tracy Ariza, DDS // December 9, 2019 I may receive a commission if you purchase through links in this post. Learn more here.

es_ES Español

Jump to Tutorial Print Tutorial
With a lovely scent and a rustic charm, cinnamon ornaments are easy and fun to make. They're a beautiful craft to make alone or with kids. Start a new holiday tradition and make some today! #christmascrafts #homemadeornaments #thethingswellmake #miy #naturaldiy #naturalcrafts

With a lovely scent and a rustic charm, cinnamon ornaments are easy and fun to make. They’re a beautiful craft to make alone or with kids. Start a new holiday tradition and make some today!

A hand lifting up a flower-shaped cinnamon applesauce ornament hanging on a Christmas tree
Pin this recipe for later!

Why Make Cinnamon Ornaments

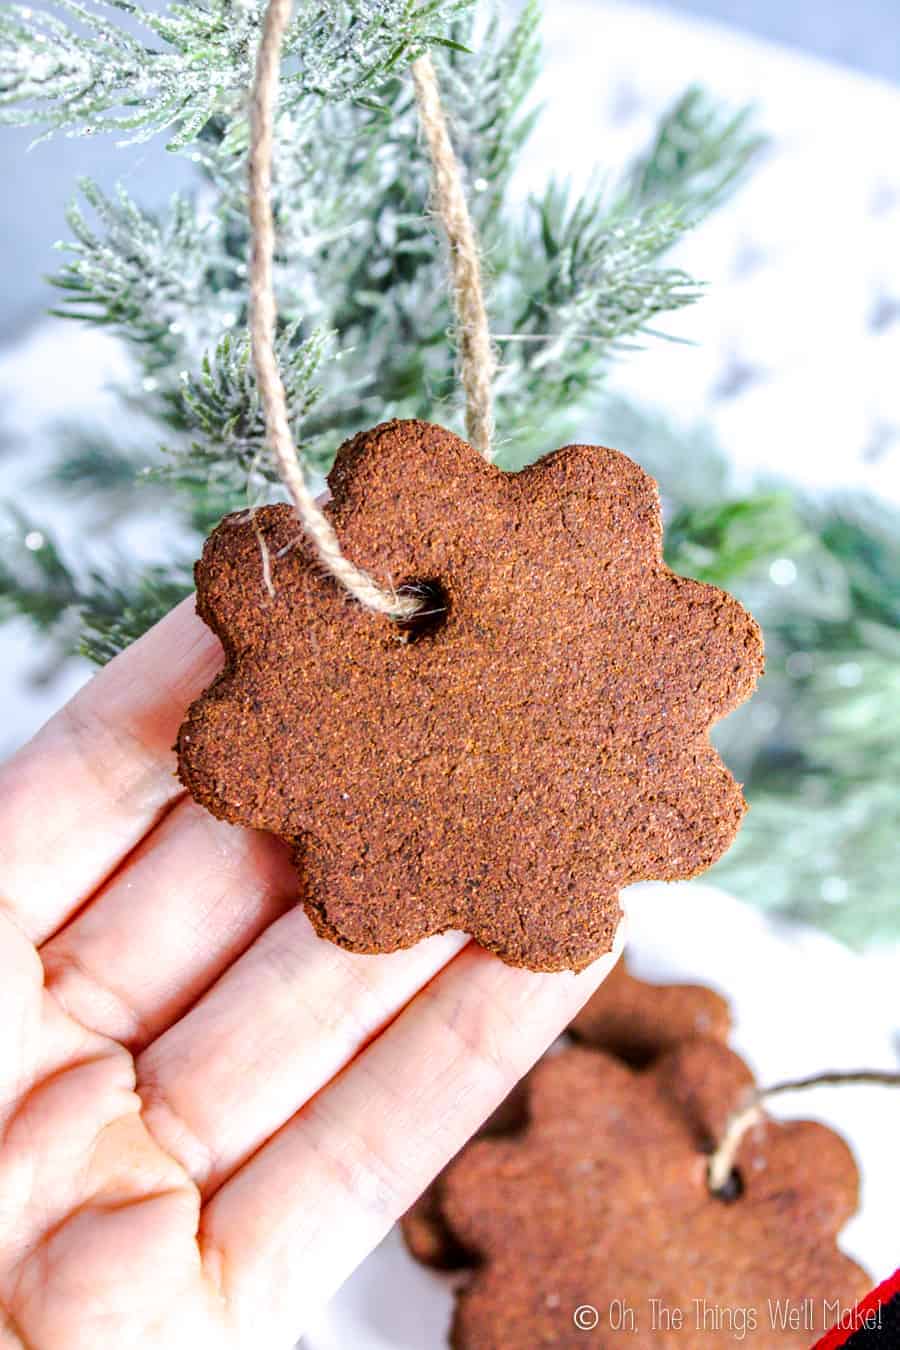
Applesauce cinnamon ornaments have a certain charm to them. They look rustic and natural. Plus, they’re fun and easy to make, and they smell wonderful (especially when you’re making them).

How Long do Cinnamon Ornaments Last?

While they look delicate, they are actually quite sturdy and hold up well to handling. I have even had them stay completely intact after dropping them.

As long as you dry them completely and then store them in a cool dry place, they should keep well for years!

Are they toxic?

There are several ways to make these ornaments. Some people use only cinnamon and applesauce. Others use only cinnamon and white glue. Some people, like me, choose to use a combination of the two.

While none of these ingredients are toxic, I wouldn’t suggest eating these cinnamon ornaments either. If you make the version with only applesauce, I guess you could eat them while they are still fresh, but most people will think they don’t taste very good. (The cinnamon flavor is quite strong.)

Applesauce vs. White Glue

I have made these ornaments several times now. The first time, I made them with mostly applesauce, but I did add a tablespoon or two of glue in hopes that the ornaments would be more flexible and would keep longer.

The second time I made them, I used only glue.

In the end, I didn’t notice a huge difference either way. When mixing the dough, the one made with only glue was slightly stickier than the one made with applesauce. Both were pretty easy to manipulate, though, with a bit of care. With the finished ornaments, I can’t tell the difference between them.

I haven’t tried making these with only applesauce yet, but I have had friends make them that way and they say they turn out just fine.

Watch How to Make these Cinnamon Ornaments

How to Make Cinnamon Ornaments

Supplies needed:

  • 1 1/3 cup ground cinnamon (You can substitute part of the cinnamon for ground cloves. That will darken the color and add a bit of scent.)
  • 1 cup of applesauce (Substitute part or all of the applesauce with glue for more durable ornaments.)
  • parchment paper
  • rolling pin
  • mixing bowl
  • baking sheet
  • straw, skewer, or pencil (for making a hole in the top of the ornament)

Instructions:

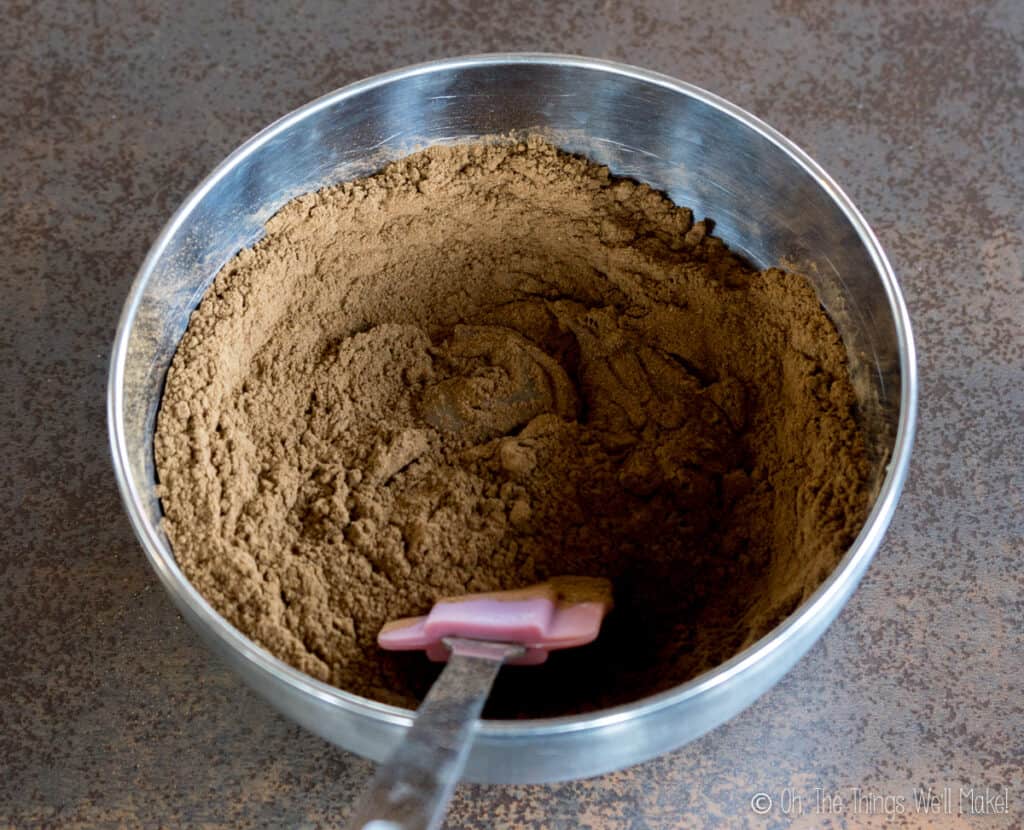
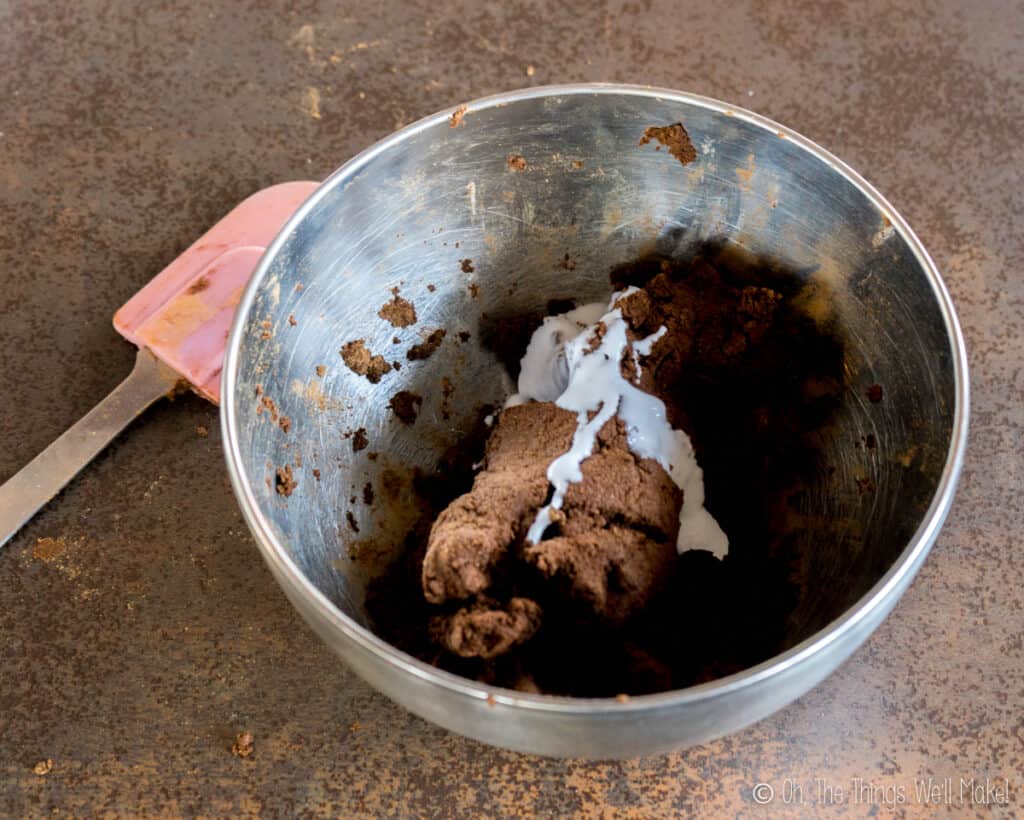
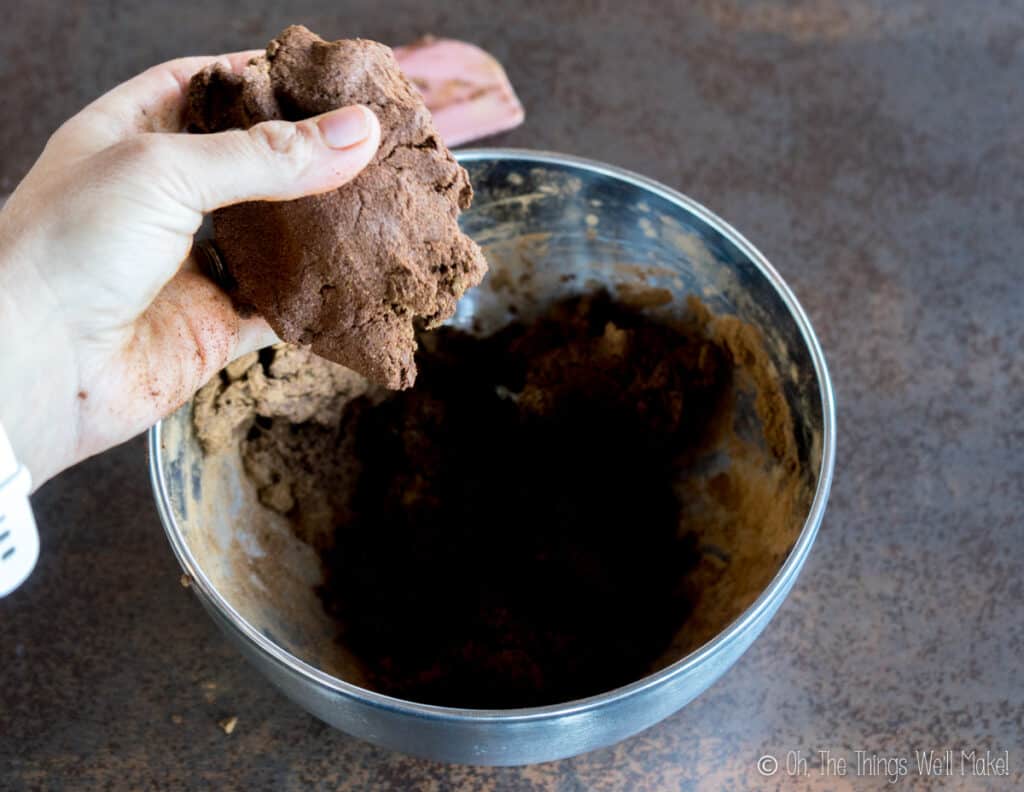
First, combine the applesauce (and/or glue) and cinnamon powder in a bowl. Mix them together well. It’s easiest to mix everything with your hands.

Once you’ve mixed together all of the ingredients, check the consistency of the mixture. It should feel like damp dough and should hold its shape when you squeeze it. If the mixture is too wet, add more cinnamon powder. If it’s too dry and crumbly, add in some more applesauce or glue. (In either case, add only a little at a time, mixing between additions, and stopping once you are happy with the texture.)

  • A bowl filled with cinnamon and applesauce
    Add applesauce to the cinnamon.
  • Cinnamon dough in a bowl with white glue drizzled over it.
    Optionally add glue to make the ornaments stronger.
  • picking up the cinnamon dough and pressing on it to test the texture.
    The dough should hold together well.
  • A ball of dough for cinnamon ornaments
    Roll the dough into a ball.
  • Rolled out dough being cut with cookie cutters. Some cut figures are already on a baking sheet.
    Roll out the dough and cut out shapes.

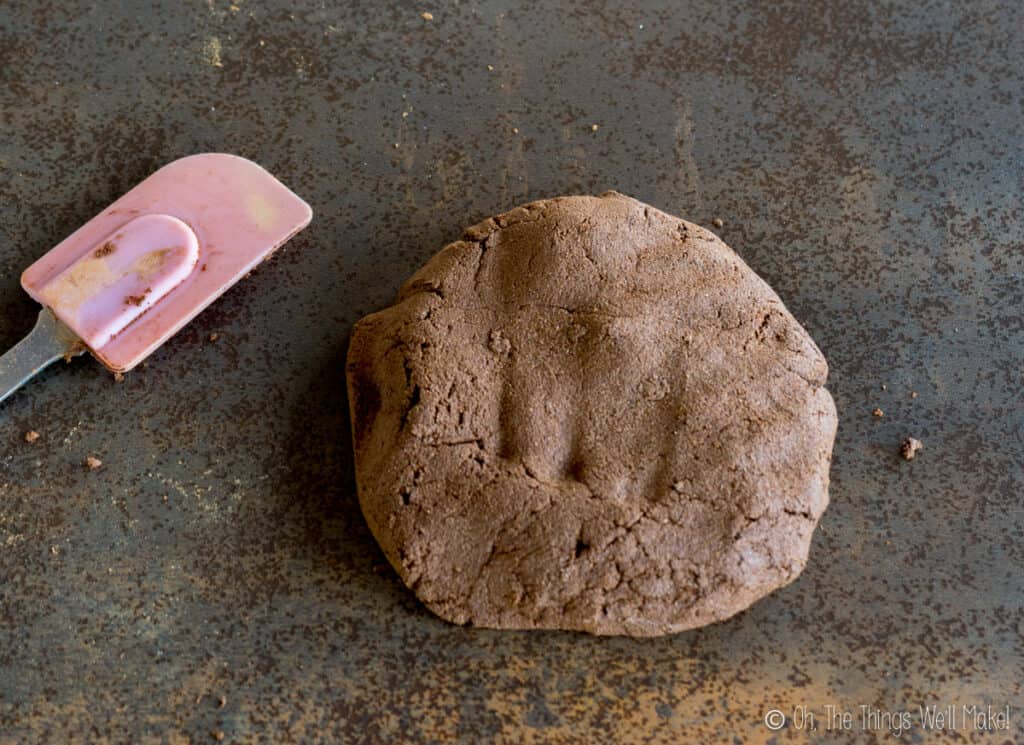
When the dough holds its shape, it’s time to roll it out to around 1/4 inch thickness. Sprinkle a flat working surface with cinnamon powder to prevent sticking and then roll the dough out over top. You can also roll it between 2 layers of parchment paper for easier handling.  

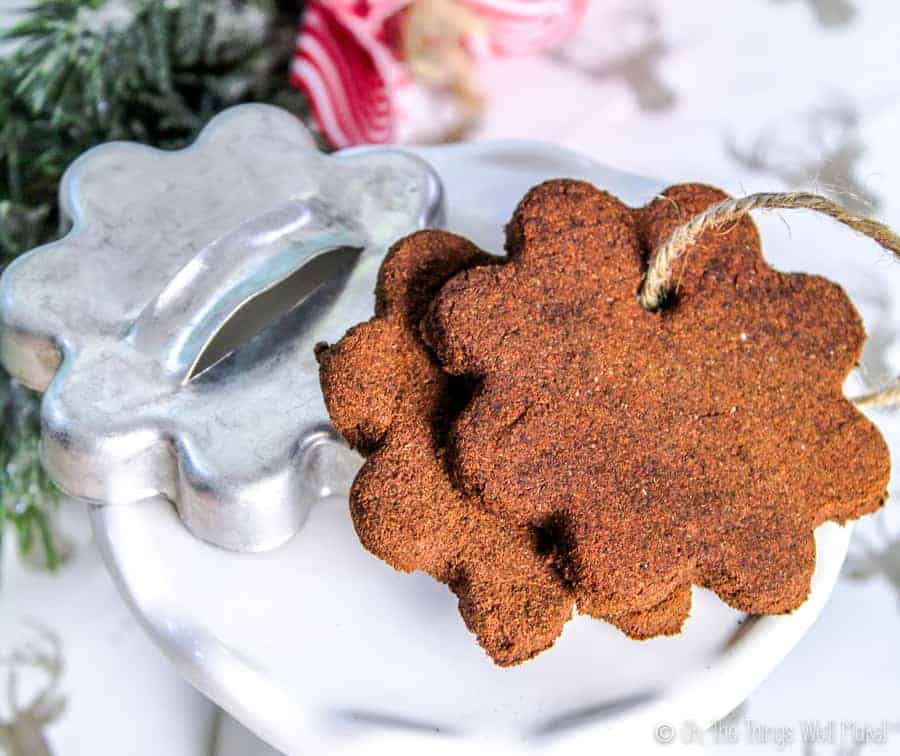
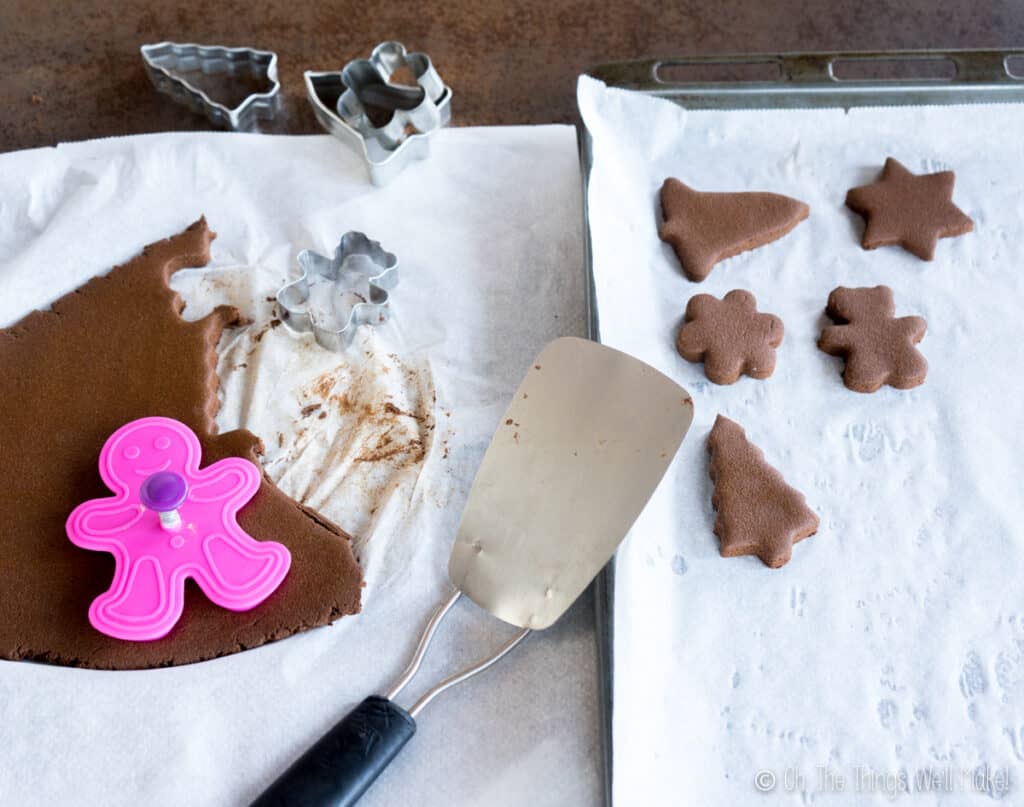
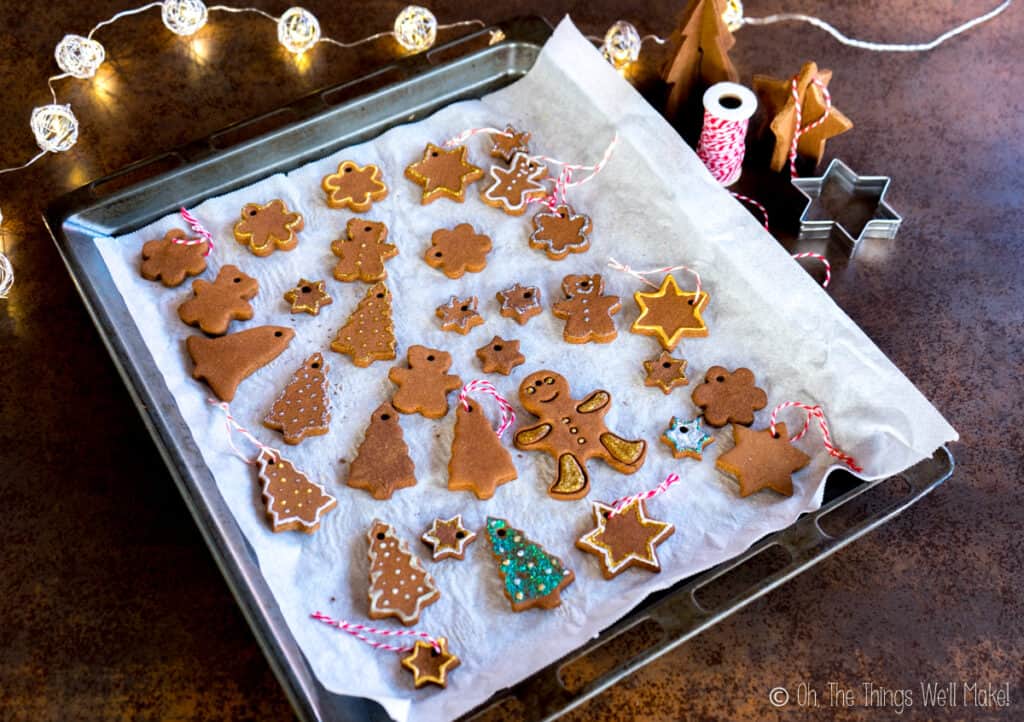
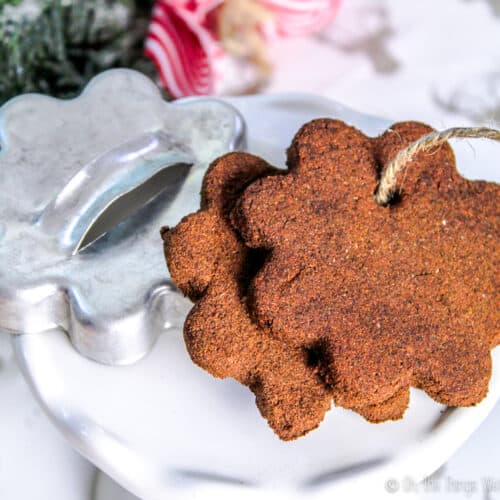
Cut the dough into the desired shapes for your cinnamon ornaments using cookie cutters. With a spatula, carefully transfer them to a cookie sheet lined with parchment paper. 

Poking a hole in the top of a homemade cinnamon ornament

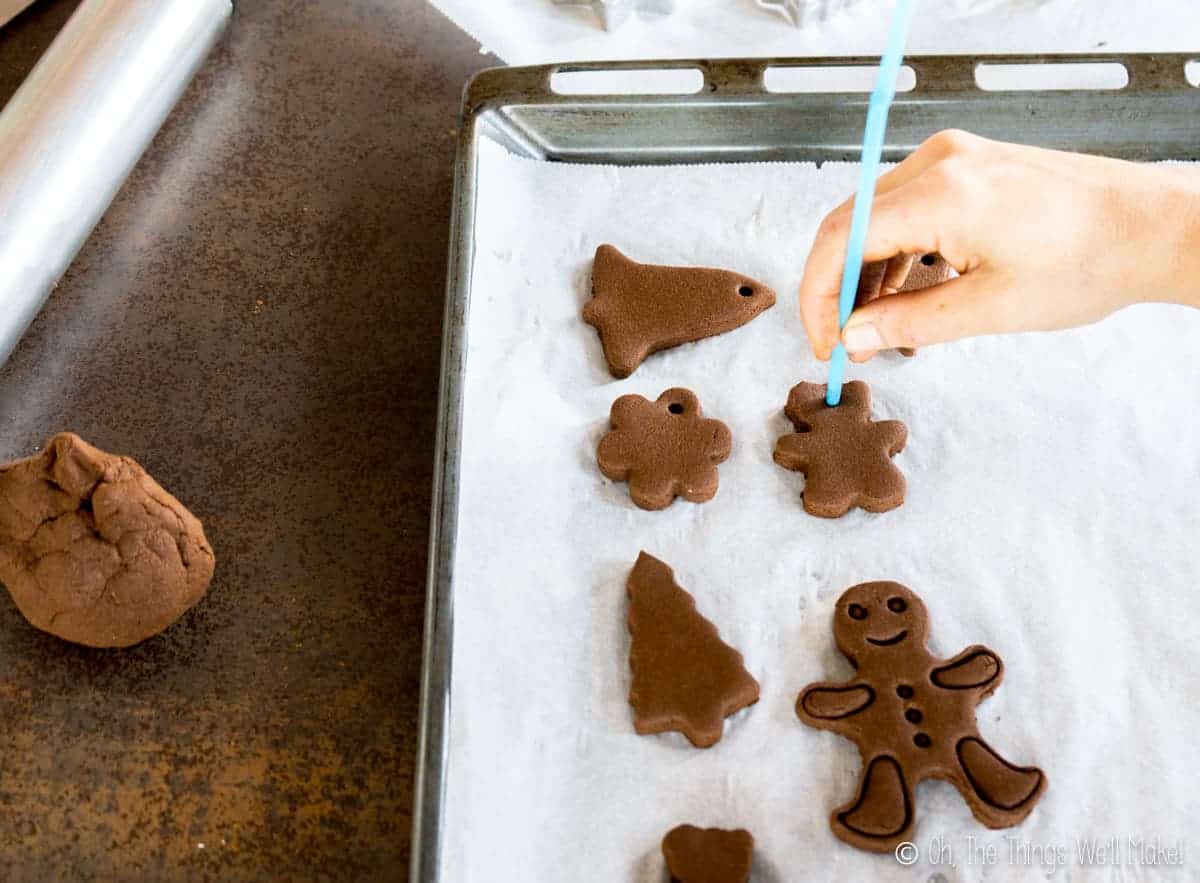
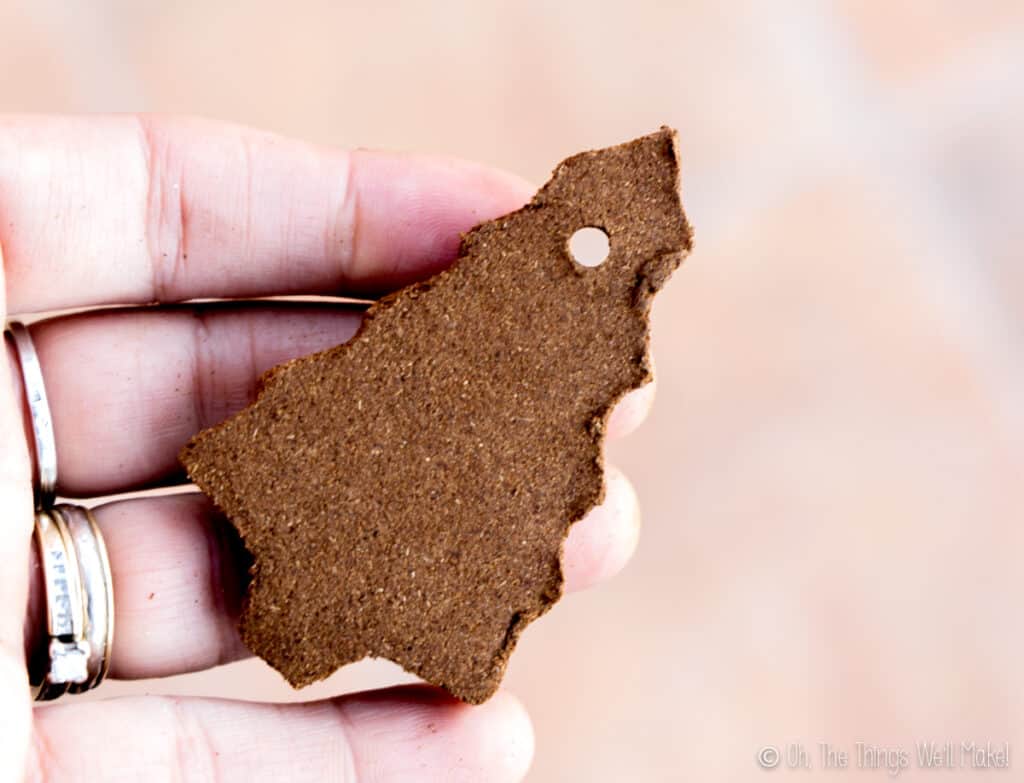
Use a straw to cut out a hole from the top of the ornaments. You can also poke a hole with either a bamboo skewer or a pencil. I prefer using a straw because it works like a cookie-cutter to cleanly cut out the whole.

Note

We have switched to glass and stainless steel straws at our house, but I still have some old plastic straws from years ago that I saved for crafts and projects like this one. Paper straws should also work well. Many stainless steel and glass straws will be too large for making the small holes needed for this craft.
If using a plastic straw, it can be reused again in other crafts or for future ornaments. (So no guilt!)

Bake the ornaments at around 200ºF/90ºC for 2 hours (or a lower temperature for a longer time), until dry. You can also use a dehydrator to dry them instead. (If it’s still warm and sunny where you live, you can also air dry them in the sun.)

When baking in the oven, the cinnamon ornaments may begin to curl upwards with the heat and uneven drying. (The top layer will dry first.) To prevent permanent curling, flip the ornaments and gently press them flat multiple times throughout the drying process.

A baking sheet with several homemade cinnamon ornaments one it. One has edges that have curled upwards.
When baking, the edges may curl up slightly. You can periodically flip them over and gently press them flat. Eventually, they will stay flat.

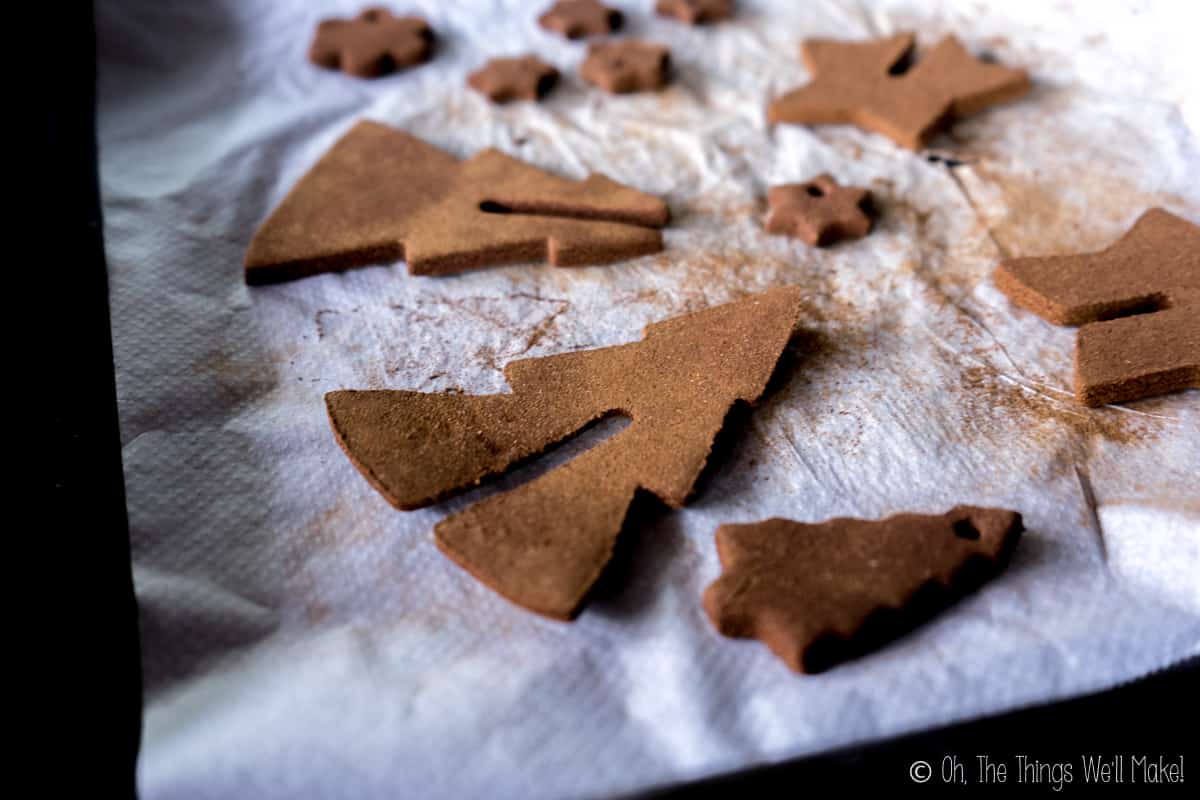
Once fully dry (and cool), carefully remove the ornaments from the baking sheet with a spatula.

Finishing your Cinnamon Ornaments

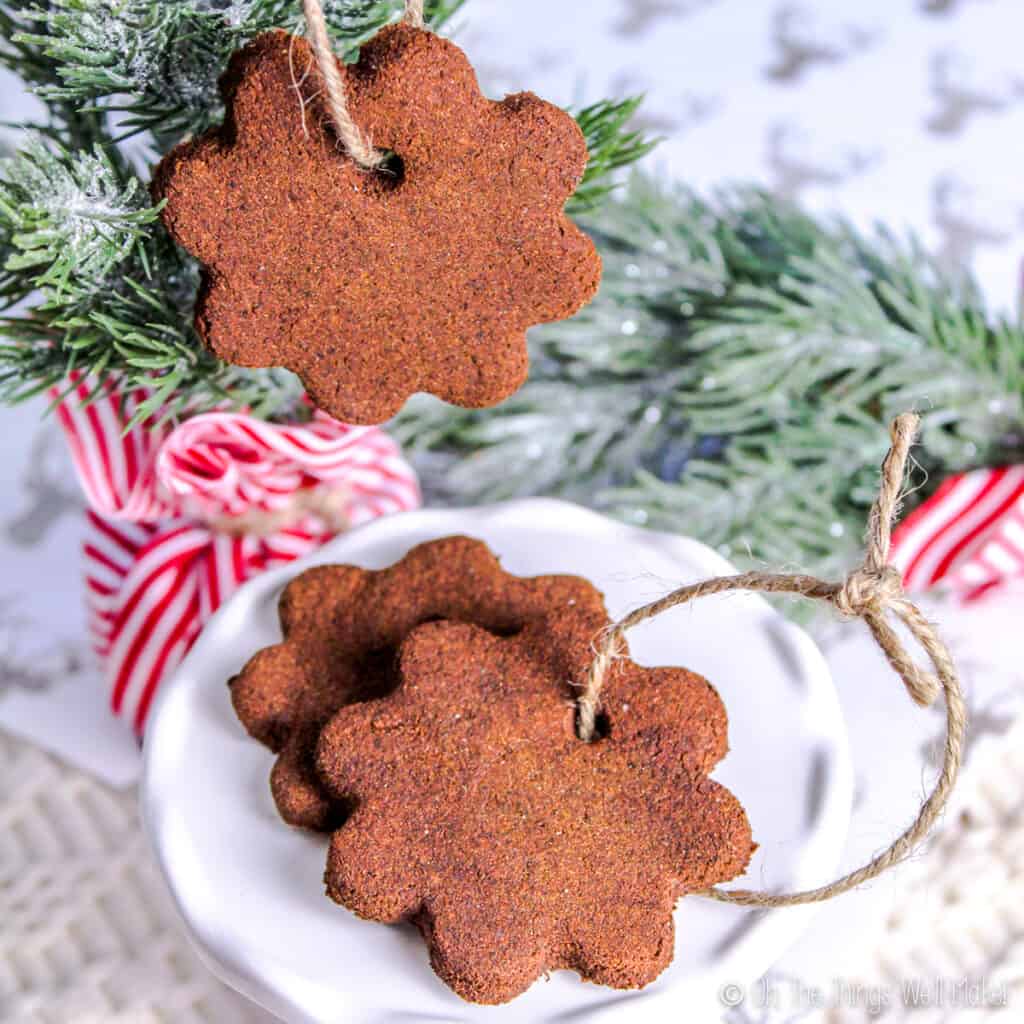
While I think these ornaments are beautiful unfinished, they can also be painted or decorated in other ways.

Smoothing the edges

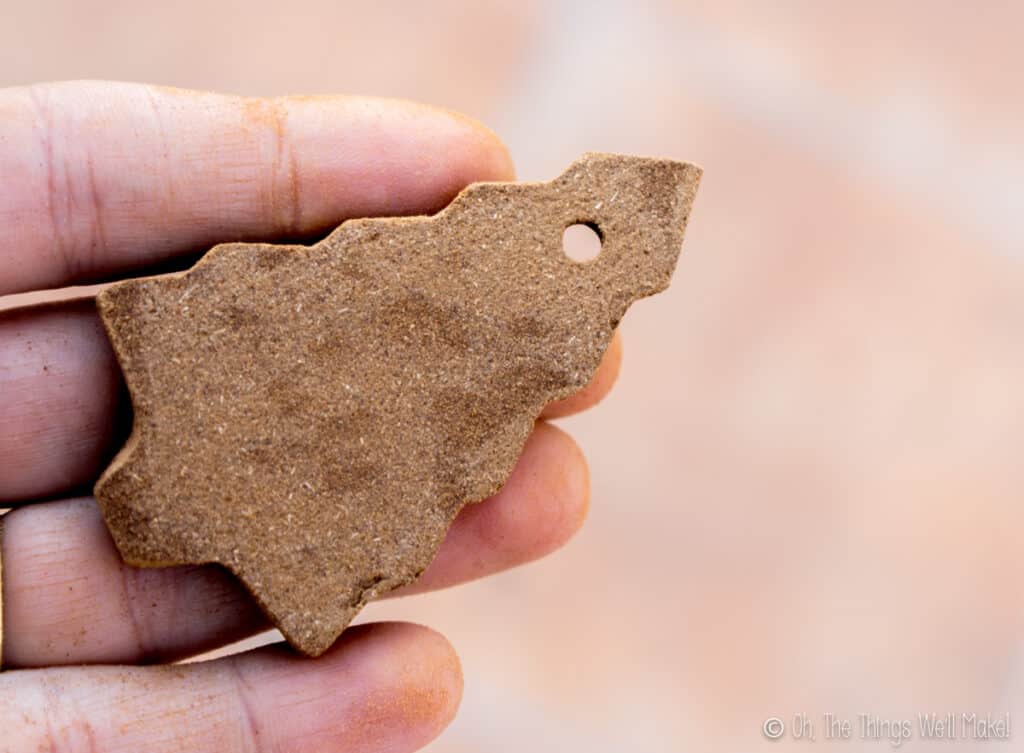
Before painting, see if there are any rough edges. Any rough areas can be gently scraped with a knife or scissors to smooth them. You can even gently sand them to give an even smoother look.

  • Closeup of a cinnamon ornament with rough edges
    Before sanding
  • Closeup of a cinnamon ornament that has been sanded
    After sanding
  • Scrapiing the edges of cinnamon ornaments with the edge of a pair of scissors
    You can also use scissors or a knife to scrape off the rough edges.

Decorating the ornaments

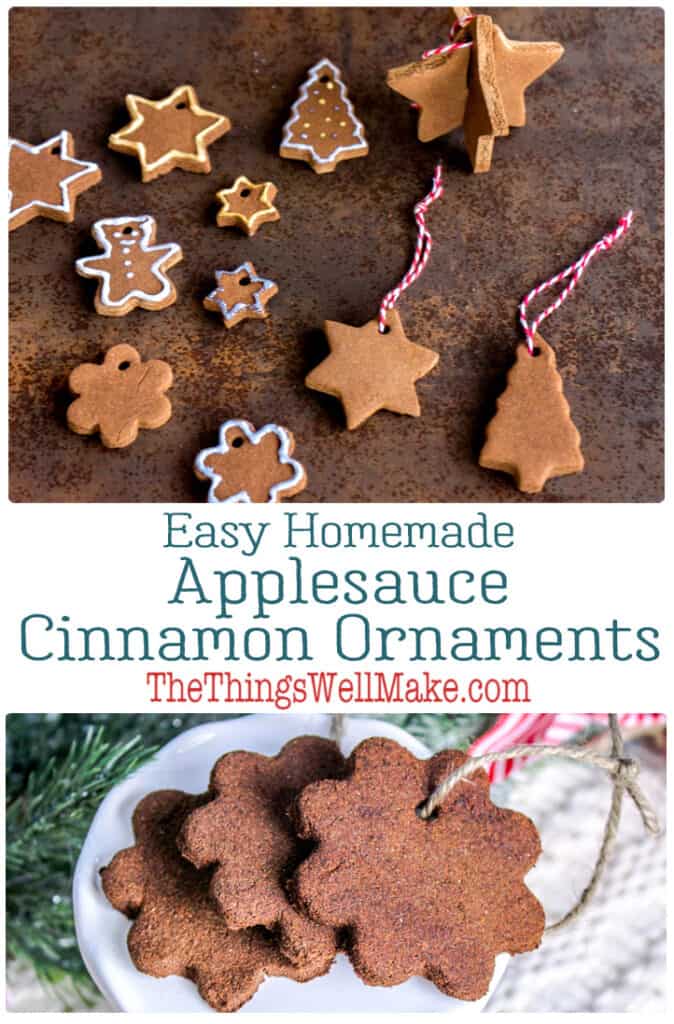
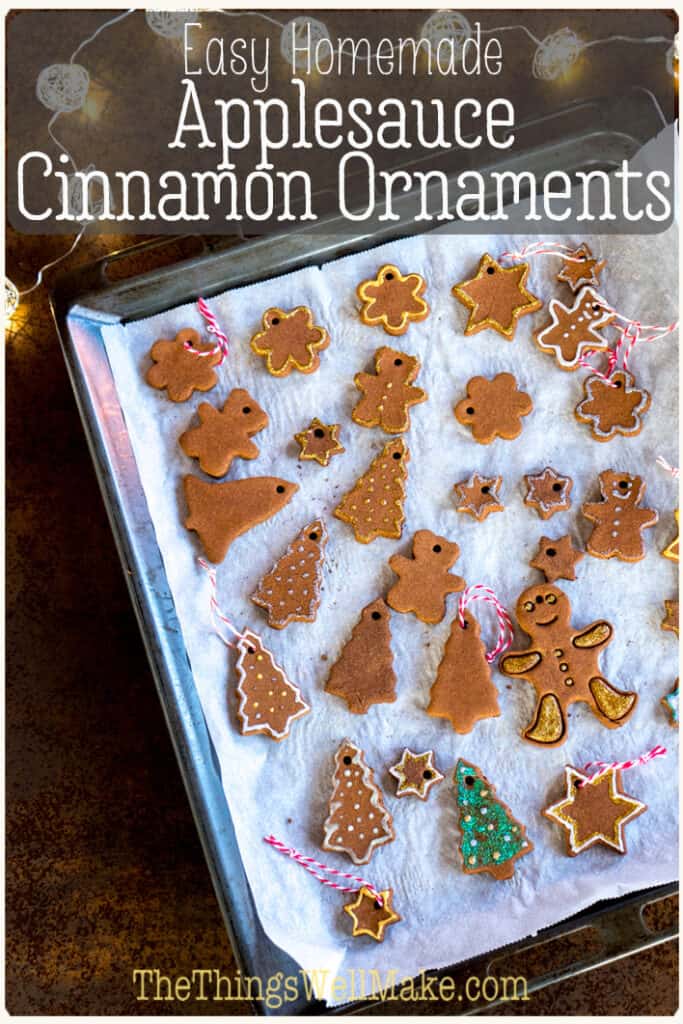
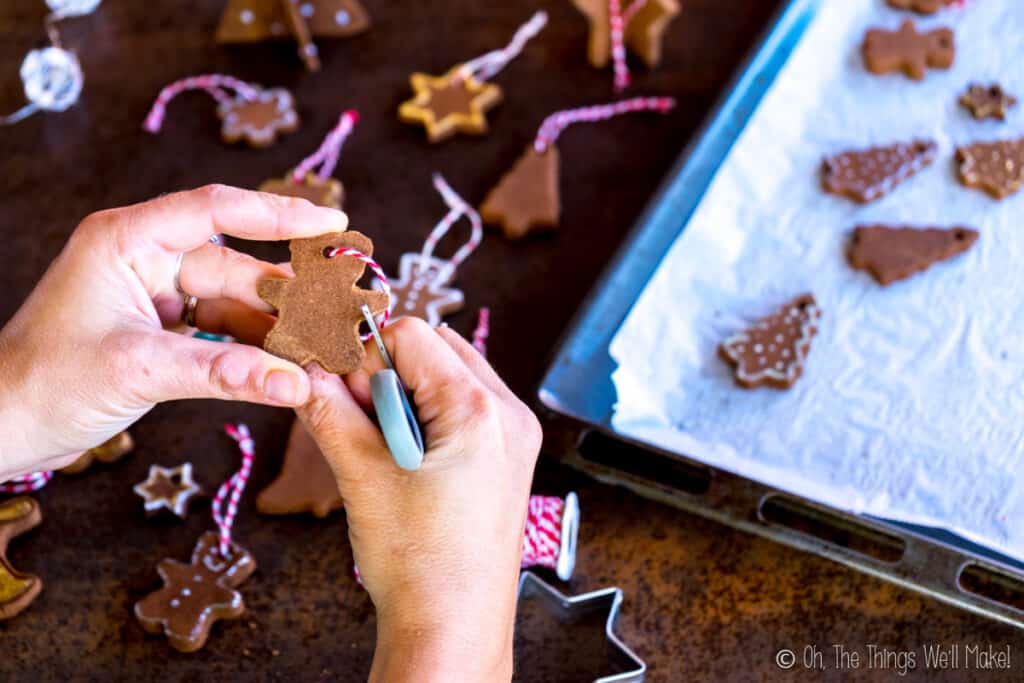
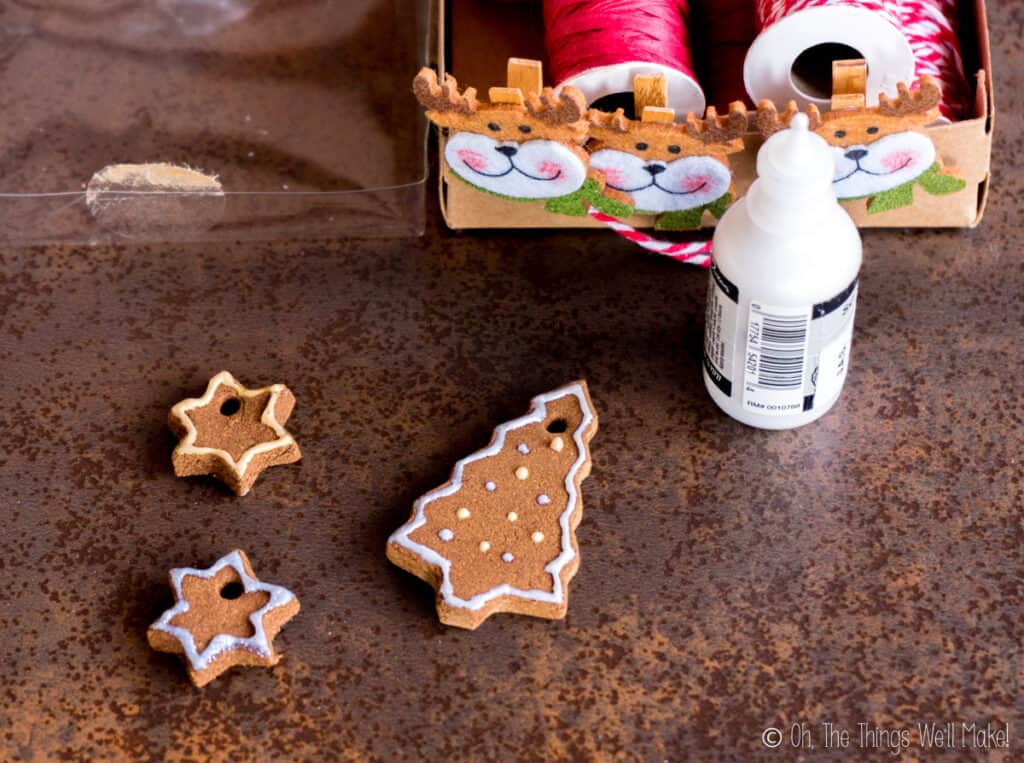
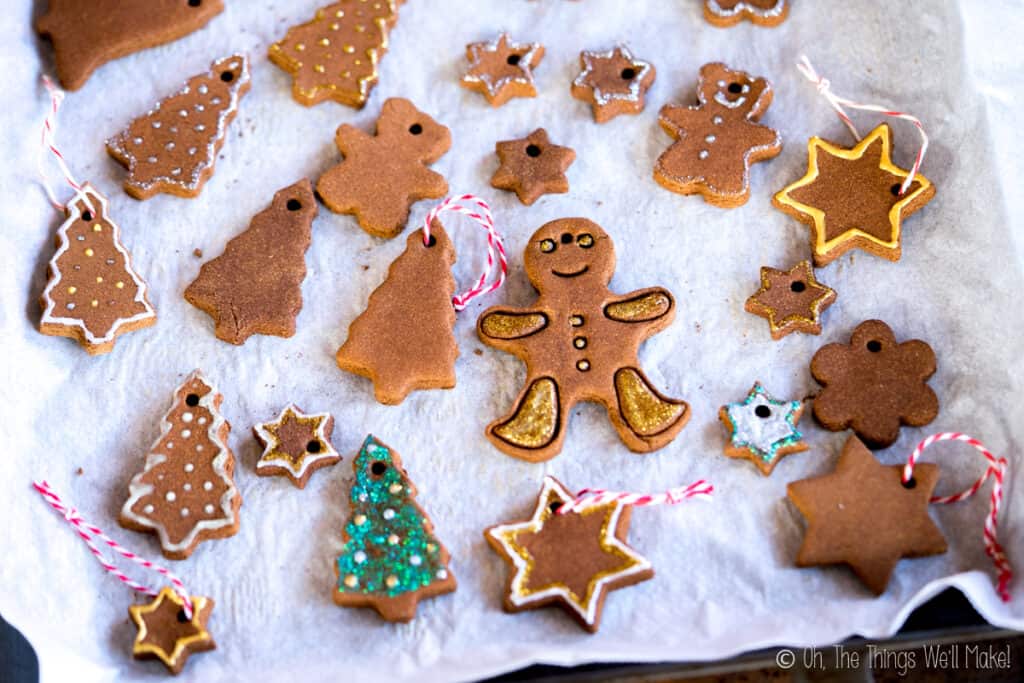
Once smooth, you can either paint the entire surface, or let the beautiful cinnamon color shine through. Either leave them unfinished or embellish small areas with paint, glitter, or sequins.

Because these cinnamon ornaments are the color of gingerbread, I love decorating them in a similar way. Painting around the edges of the ornaments with puffy paints make them look like frosting was piped on them. (Gingerbread men ornaments look especially cute!)

You can also paint these ornaments with glue and then shake some glitter over the glue to adhere the glitter. (Once adhered, shake the excess glitter off.) Or use glue to adhere sequins or small beads for further embellishment.

  • Overhead view of homemade cinnamon ornaments painted with dimensional paints next to a bottle of paint
  • Overhead view of a baking sheet filled with many cinnamon ornaments, some which have been oainted
  • Closeup of a baking sheet filled with many cinnamon ornaments, some which have been oainted

Hanging your ornaments

Once the paint has dried, loop some twine or ribbon through the hole in the top of the ornament to hang it. (See how to make a homemade bakers twine here.)

  • Closeup of a star shaped cinnamon ornament hanging on a Christmas tree
  • 3 cinnamon ornaments, 2 on a plate and one hanging above them

How to Store Cinnamon Ornaments

To keep your ornaments safe for year after year, wrap them in tissue paper to protect them. Then wrap the tissue paper in an airtight container or plastic bag to keep moisture out.

You could also store them inside my easy snowflake gift pouches (made from upcycling t-shirt sleeves). That would also be a lovely way to present them as gifts.

Looking to make more?Subscribe to my newsletter for the latest projects (and recipes)!
Two homemade cinnamon applesauce ornaments on a stand with the cookie cutter used to form them

Homemade Cinnamon Applesauce Ornaments

Create beautiful rustic homemade ornaments that will keep for years.
5 from 1 vote
Print Pin Rate
Prep time: 20 minutes
Drying time: 2 hours
Total time: 2 hours 20 minutes
Author: Tracy Ariza, DDS

Equiment

  • wax paper
  • pencil
  • mixing bowl
  • baking sheet

Materials

  • 1 cup applesauce
  • 1 1/3 cup ground cinnamon
  • 2 Tbsp. white glue optional, for stronger ornaments

Instructions

  • Mix together the applesauce and ground cinnamon in a bowl. (You can also add some ground cloves to darken the color and add more scent.)
  • Check the consistency of the mixture. We're aiming for a damp dough that holds its shape when you squeeze it. If you find that the mixture is too wet, add some more cinnamon (adding about 1/2 tsp at a time).  If the mixture is too dry and crumbly, add more applesauce or white glue (a half teaspoon at a time) until the mixture becomes more firm.
  • Sprinkle a flat work surface with some cinnamon to prevent sticking or cover the surface with parchment paper. Pour the spiced applesauce mixture onto it.
  • Roll the dough out so it is about 1/4 inch thick. Use cookie cutters to cut out your desired shapes.
  • Use a spatula to carefully move the cutouts onto a cookie sheet lined with parchment paper.
  • Poke a hole in the top of each ornament to create a hole for hanging. A straw effortlessly removes the hole cleanly, but it can also be done with a bamboo skewer or a pencil.
  • Bake at 200ºF/90ºC for 2 hours or until completely dry. The ornaments should be firm when done, but not crispy as this may cause breakage.
  • Allow the ornaments to cool. Then, carefully remove them with a spatula.
  • You can leave the cinnamon ornaments natural or paint them. Dimensional paints work wonderfully for decorating these ornaments. Rough edges can be sanded or scraped off with the edge of a knife or scissors
  • Thread some twine or ribbon through hole to hang your ornaments.

Notes

You can omit the applesauce and make cinnamon ornaments with only cinnamon and glue. The white glue adds flexibility to the ornaments that helps strengthen them and make them less prone to breakage. 
These can also be dried in a dehydrator instead of the oven. Ornaments made with glue can be air-dried. 
Store the ornaments in a cool, dry place. It’s best to seal them in some sort of air-tight container to keep moisture out. 
Tried making this? Tag me today!Mention @thethingswellmake or tag #thethingswellmake!
Category: Arts & Crafts, Christmas

About Tracy Ariza, DDS

Tracy Ariza, B.A., D.D.S., left dentistry and the United States to found Oh, The Things We’ll Make!, writing to you from the Spanish Riviera. She loves making things herself in order to keep control of what goes in them. While far from perfect, she strives each day to live a healthier, more sustainable lifestyle.

Previous Post: « a bottle of homemade apple cider vinegar with some apples next to it. How to Make Apple Cider Vinegar
Next Post: DIY Brown Sugar Lip Scrub or Polish A closeup of a homemade sugar lip scrub in a small aluminum tin in front of a homemade sugar body scrub. »

Reader Interactions

Leave a Reply Cancel reply

Your email address will not be published. Required fields are marked *

Recipe Rating


Sidebar

Search

  • Email
  • Facebook
  • Instagram
  • Pinterest
  • Twitter
  • YouTube

Hello, I’m Tracy!

I love making my own natural products like soaps and lotions and my own pantry items like yogurt and salad dressings.
Why do I do it? Sometimes to save money, sometimes because it's healthier, but I always love having control of the ingredients!​
Oh, the things we'll make!...

More about Tracy

I am a participant in the Amazon Services LLC Associates Program, an affiliate advertising program designed to provide a means for us to earn fees by linking to Amazon.com and affiliated sites.

Featured on Buzzfeed, Lifehacker, Fitness, Shape, Country Living, Healthline, Redbook, Redfin

Closeup of 4 bars of homemade soap. Two of them have been wrapped in brown paper and wrapped with ribbons. One soap is wrapped with red ribbon and the other with white ribbon.

Making an Easy, Basic Beginner Soap, and Then Making it Fun!!

Homemade prawn crackers on a plate in front of uncooked homemade prawn crackers and a roll of prawn crackers dough.

Prawn Crackers from Scratch

Impress your friends and save money by making your own soy sauce from scratch. Today we'll learn how to make a homemade shoyu, a fermented Japanese soy sauce made from soybeans and wheat berries. #shoyu #soysauce

How to Make Soy Sauce (Homemade Shoyu)

Two bottles of a homemade conditioner next to a wooden comb and a washcloth.

Easy DIY Hair Conditioner for Natural Hair

A small glass jar filled with an emulsified sugar scrub with a wooden spoon in it.

Easy Emulsified Sugar Scrub

Over head view of a spoon full of tomato paste over a jar full of it. A couple of fresh tomatoes lay next to the jar.

Easy Homemade Tomato Paste Recipe

Featured on Buzzfeed, Lifehacker, Fitness, Shape, Country Living, Healthline, Redbook, Redfin

White logo for Oh, The Things Well Make! website

Copyright © 2023 Tracy Ariza · Disclaimers and Disclosures · Privacy Policy · Cookie Policy