

Easy Silk Screening with Recycled Materials
You don’t need to buy expensive equipment to do your own silk screening. Learn how to silkscreen with common materials that you may already have at home.
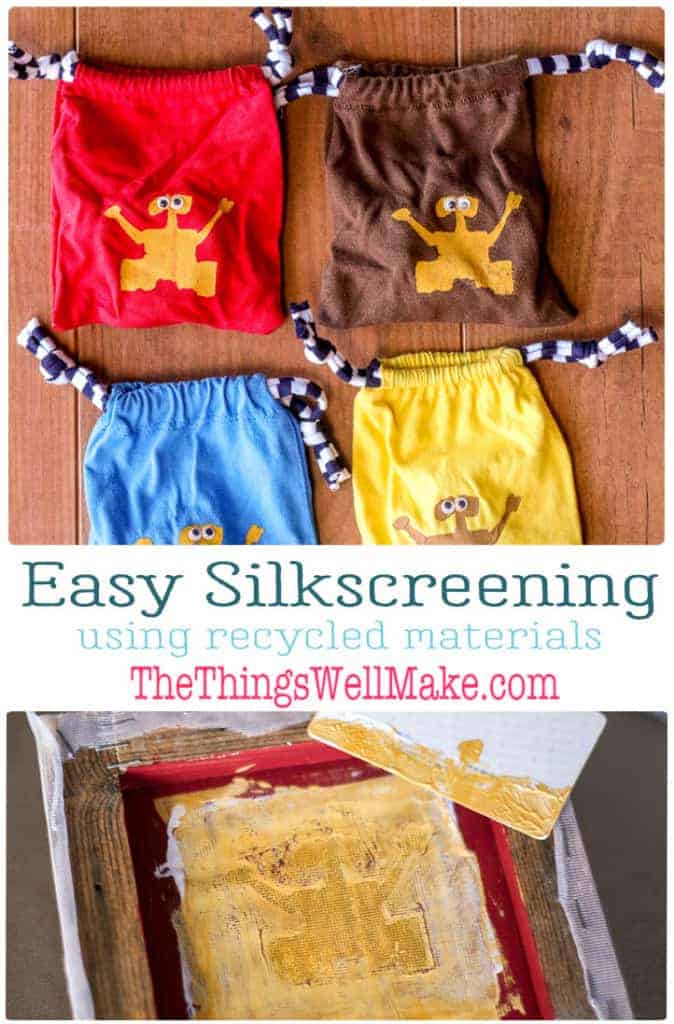
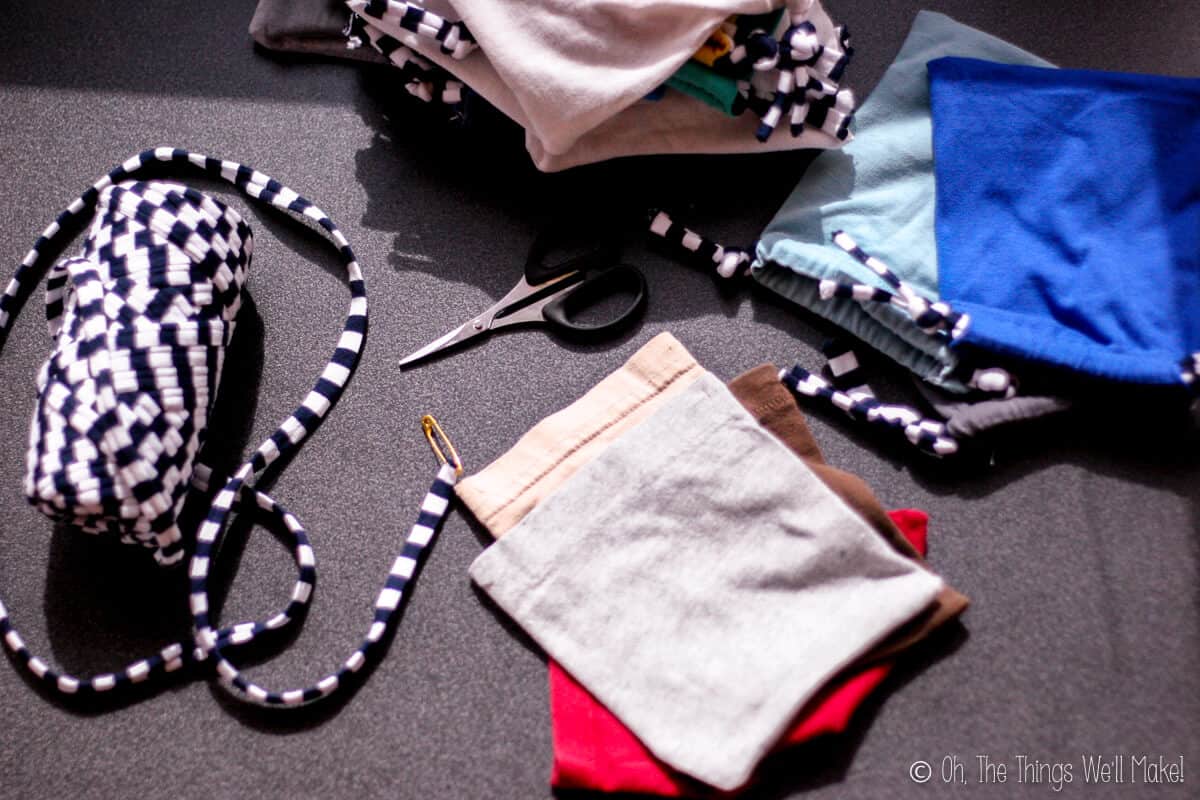
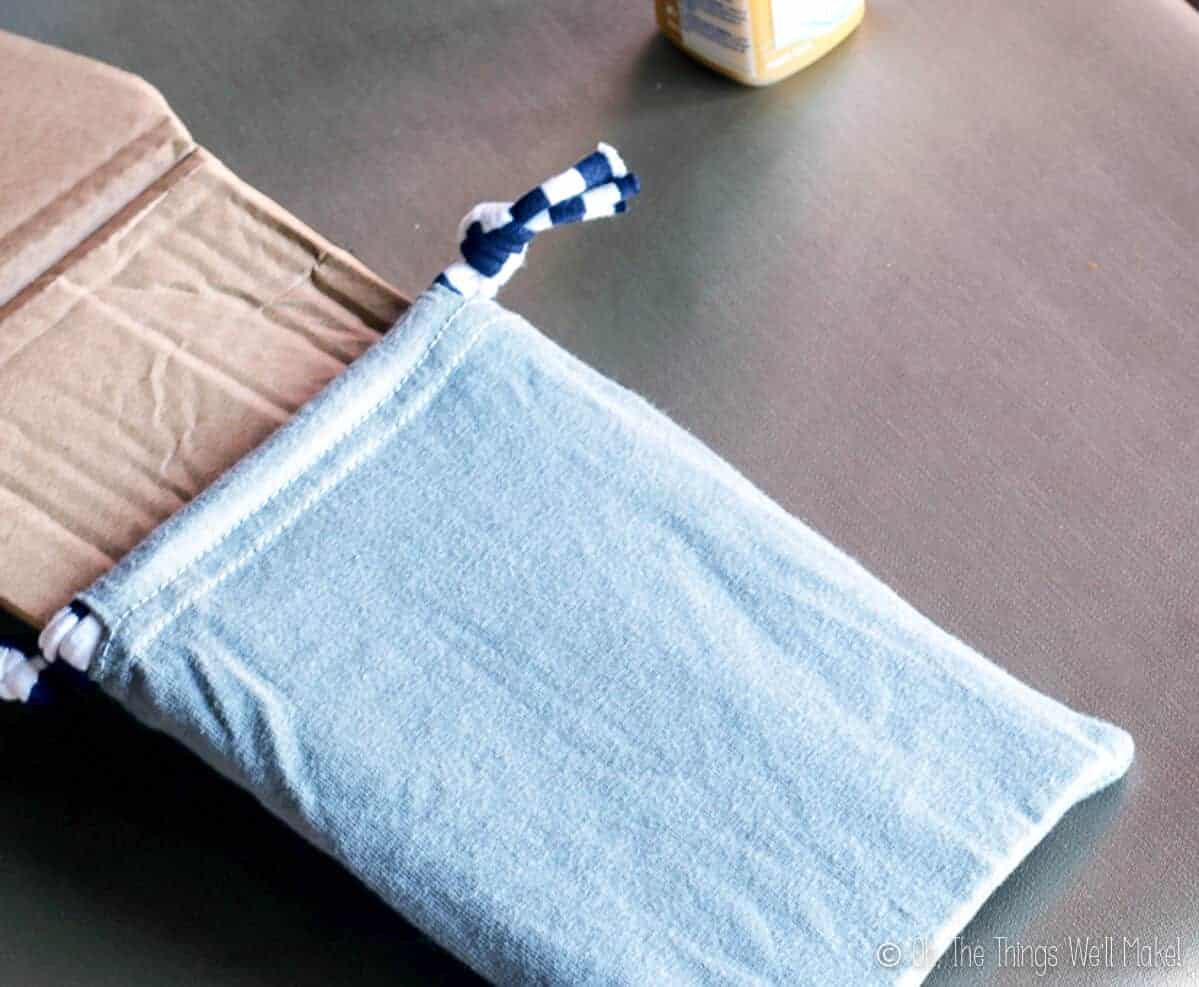
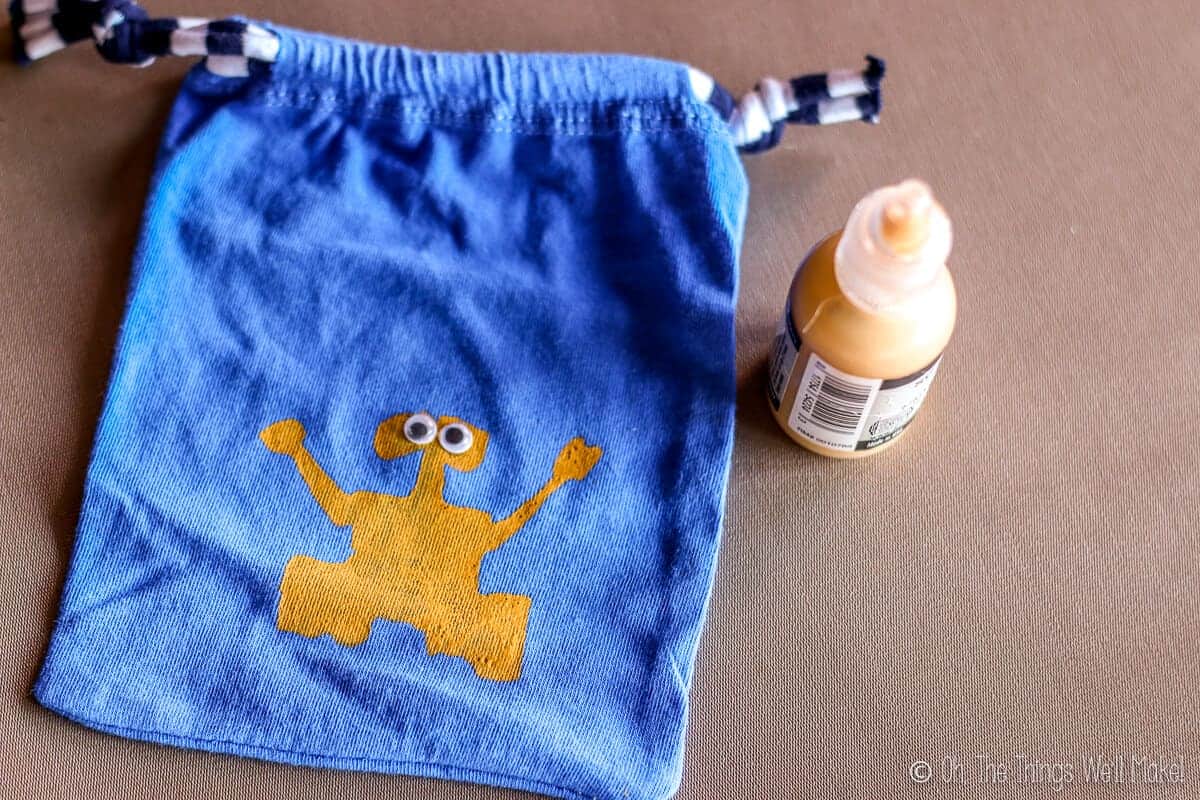
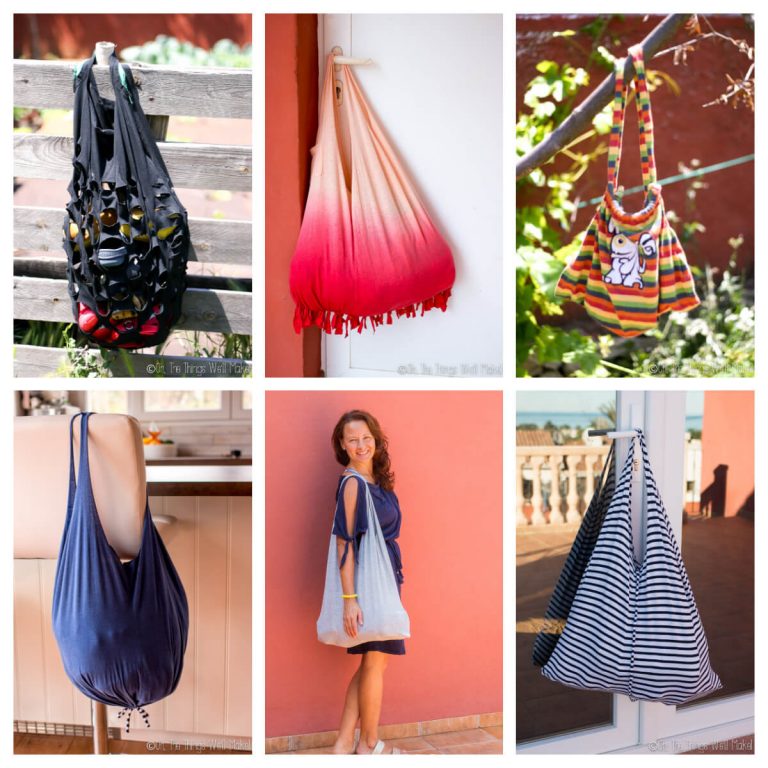
For my son’s Wall-E party, I wanted to do something a bit different for handing out favors. I had a lot of t-shirt sleeves left from other projects, and thought I’d make them into pouches. (Have you seen my tutorial for making a pouch from a t-shirt sleeve in less than 10 minutes? You make use of the hem for a quick drawstring enclosure.)
I figured the pouches would make cute, easy party favor bags that people could use rather than throw away. Considering the theme of the movie Wall-E, I thought it was particularly fitting to use recycled materials for the party favors.
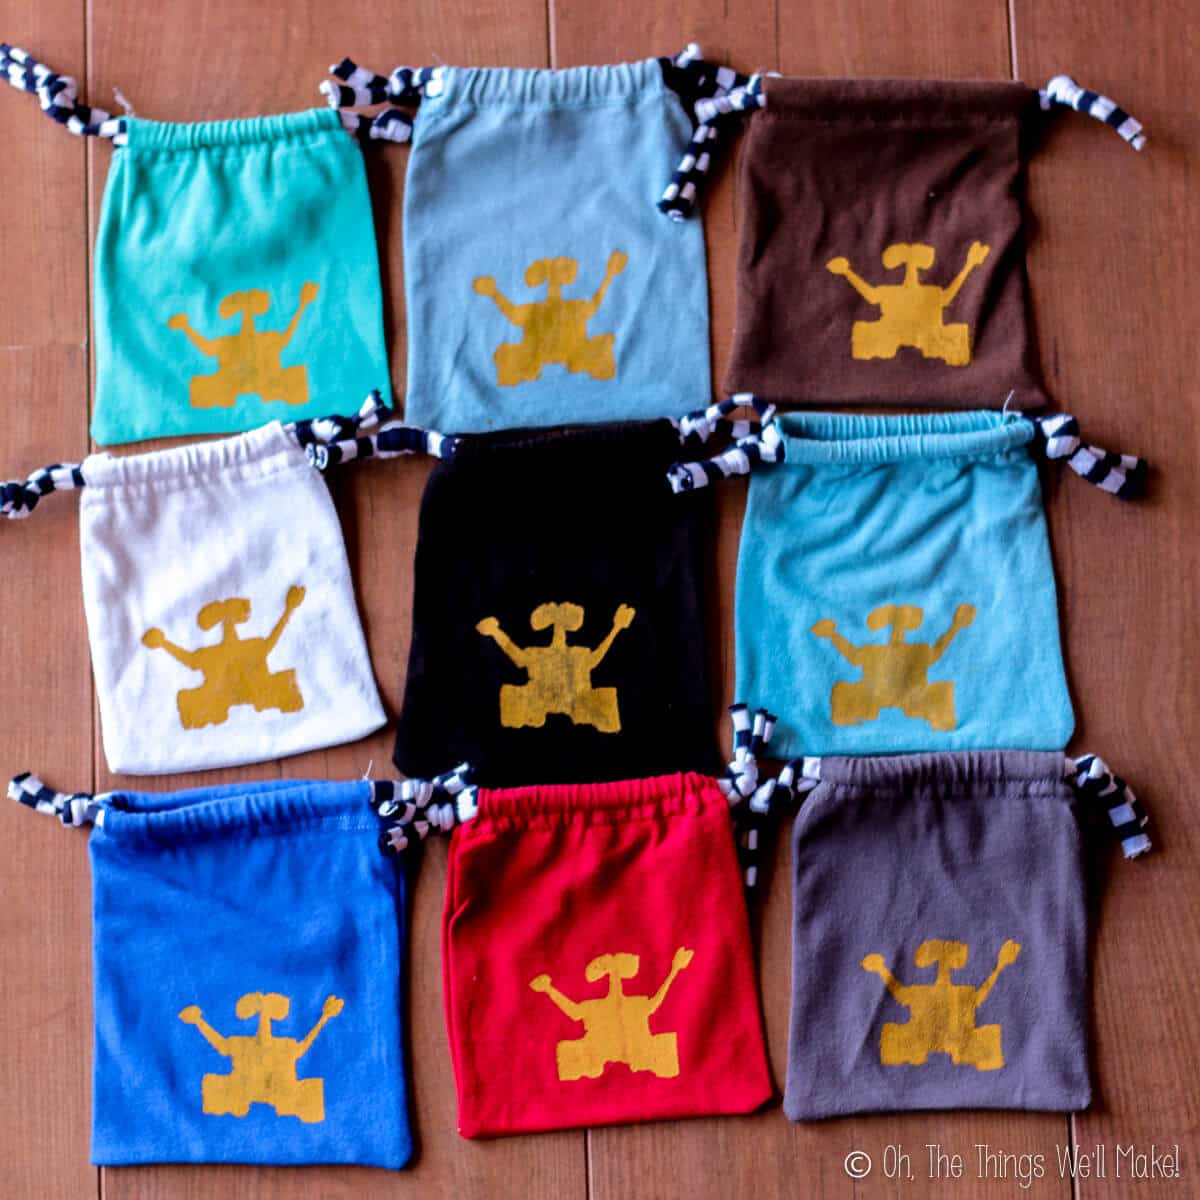
Once I made the party favor bags, I wasn’t sure how to decorate them. I was, after all, making a lot of these. He had 25 kids in his class, and we were inviting all of them! Add to that other friends and family, I decided to make 30 favor bags, just in case.
My first thought was to use my Silhouette Cameo to cut Wall-E’s out of iron-on vinyl for each pouch. I also considered cutting wall-E out of freezer paper like I did for my easy galaxy Wall-E t-shirt. You can use the freezer paper as a stencil to paint each one. I figured painting would turn out better, but making 30 freezer paper stencils didn’t sound like much fun. Then, I thought of something that I have been wanting to try for a while… silk screening.
Why silk screen?
Silk screening is perfect for making multiple copies of one design because once you have your screen made, it is easy to whip out one painted design after another.
I looked into buying silk screening materials, but they weren’t cheap. I figured it would be a waste to spend so much money on a silk-screening kit for such small, simple designs. Plus, you probably know by now that I love the challenge of trying to make things myself.
Materials
To silk screen at home, you don’t really need any specialized equipment. These are the materials I used…
- Wood for a frame (4 strips of wood)
- Loose weave cloth (Something like organza, or even an old nylon would probably work)
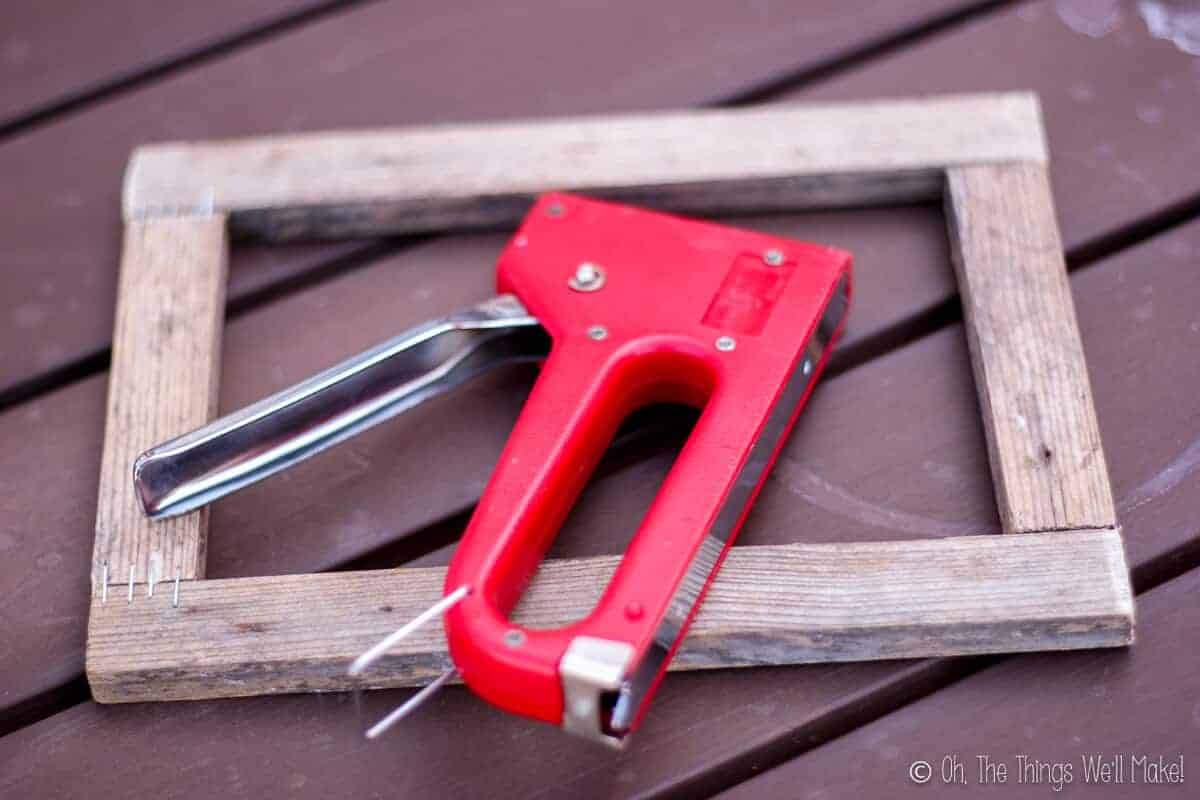
- Staple gun
- Acrylic paint, dimensional paints (aka. puffy paint) or Modge Podge
- Stickers (or contact paper)
- Fabric paints (for the final prints)
- A plastic card (like an expired credit card or something similar)
I raided our garage for supplies. I found a few pieces of wood from which I could make a frame. That said, you can also use a ready made frame. Just make sure that it’s flat so that you can place it against the cloth for printing.
I then went through my cloth stash in the craft room to find a cloth with a loose weave for the screen.
Once the frame was ready, I stapled a layer of light-weave cloth over the frame. Each time I’ve done this, I’ve used a different type cloth. It was much easier to work with the net-type fabric I used years ago. It was more elastic and didn’t fray. This year I used more of an organza. It worked well, but was trickier to work with.
While I was in my craft room, I looked through my craft supplies to see what I could use for blocking off the screen. I decided on “puffy” fabric paints. I had seen tutorials online that used Modge Podge, but it’s not readily available here in Spain. If you do use Modge Podge, I’d suggest using the water resistant Modge Podge, just in case.
Choose a cloth that lets a lot of light through so that it will also let paint through when silk screening. If it’s a cloth that doesn’t fray, all the better. During my first attempt, I used a somewhat elastic fabric that didn’t fray and it worked wonderfully! The second time, I used a less elastic fabric with fraying edges, and it was harder to stretch and attach to the frame.
Make the silk screen
To begin we need to make the actual sreen. This is accomplished by stretching a loose weave cloth over a smooth, flat frame. You can either make the frame out of wood strips or repurpose an old frame.
Make the frame
To make the frame, you need to decide how large you want your design to be. Cut the wood pieces to the size needed and use a staple gun to staple the wood pieces together into a rectangular frame. (You could also nail it or use screws to hold it together.) I used 2 strips that were 12cm long and 2 that were 23cm long to make the frame shown below.
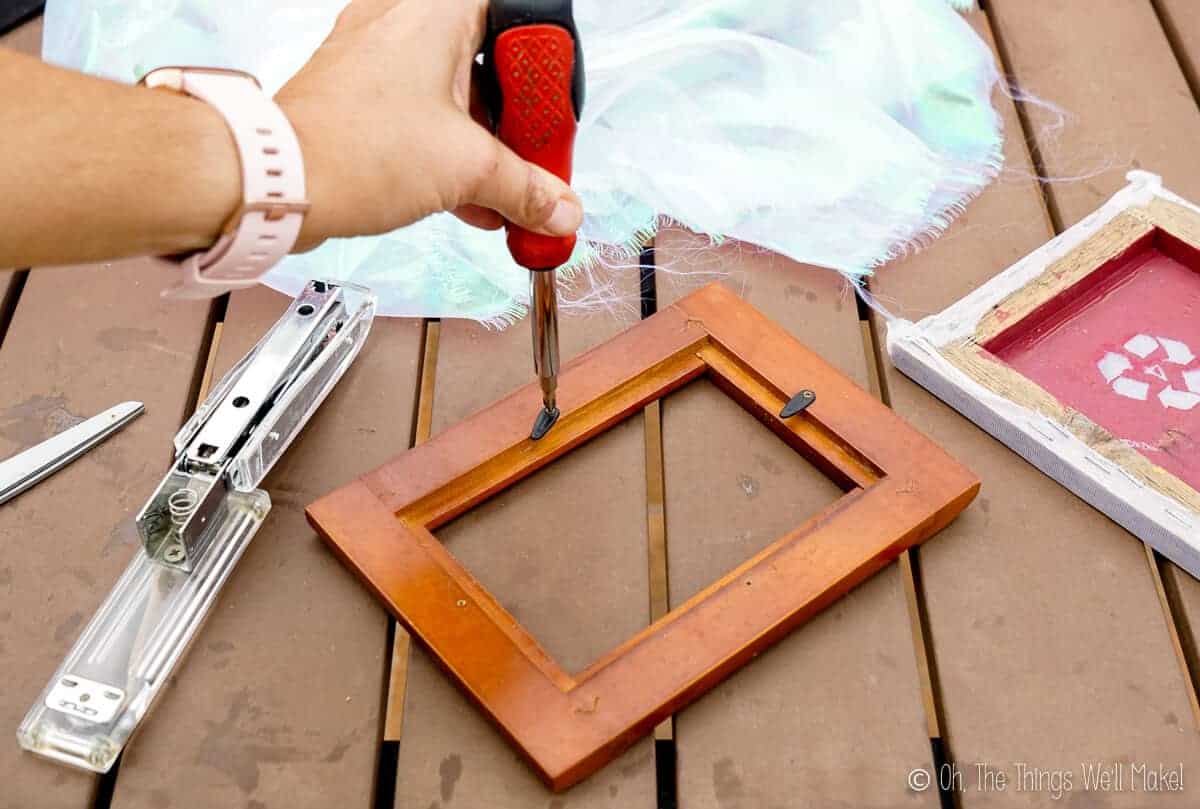
Repurpose a picture frame
When I tried this again this year, I repurposed an old picture frame to see how it would work. As long as the frame has one side that is completely flat, it works well. (My frame was rounded on the front, but the back side was flat.) The flat side will be the one that gets pressed against the cloth when silk screening!
If repurposing an old picture frame, remove the glass and all screws and fasteners used for holding the picture in place.
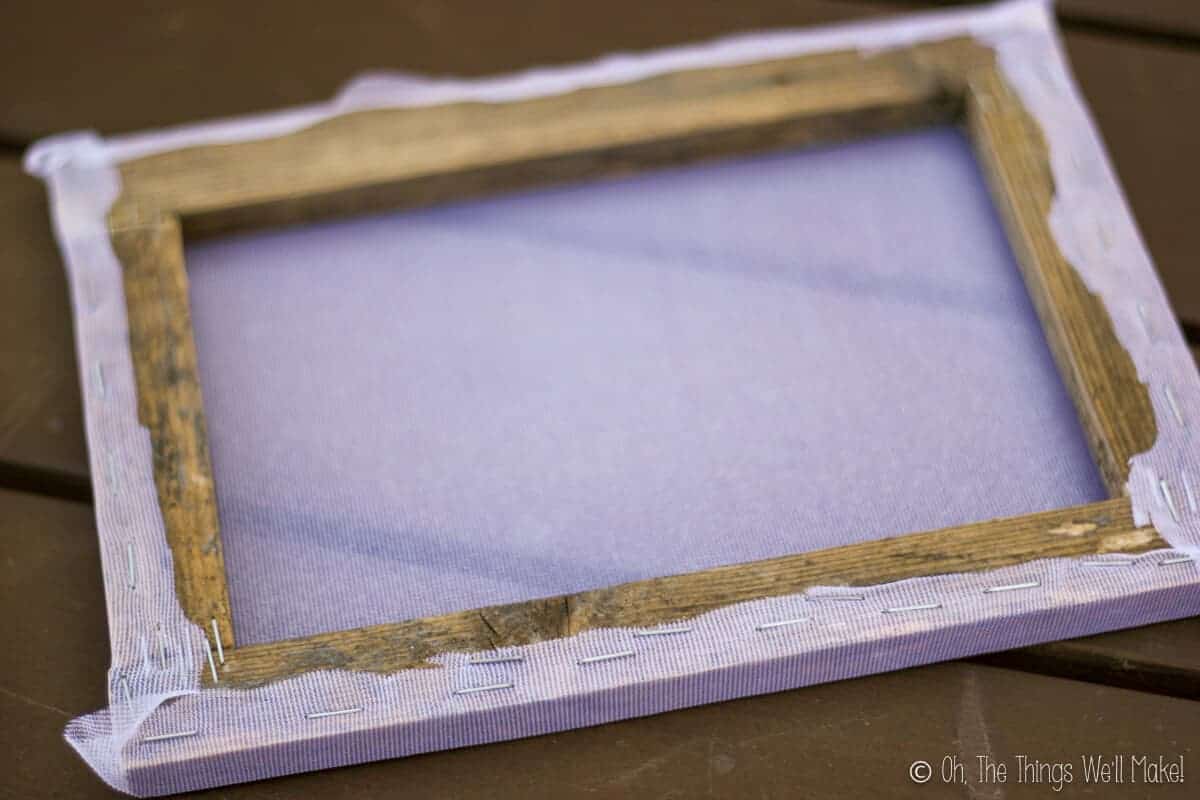
Add the cloth
Once the frame was ready, I stapled a layer of light-weave cloth over the frame.
To stretch the cloth evenly, I began by stapling it to the frame on one side, moving to the opposing side next, and then worked my way to the other two sides. I then cut off the excess fabric. This year I tried using a regular stapler to see if it would work. While it did work, the staple gun is much more efficient. 😉
Make sure to stretch the cloth over the flatest side of your frame.


Add the design
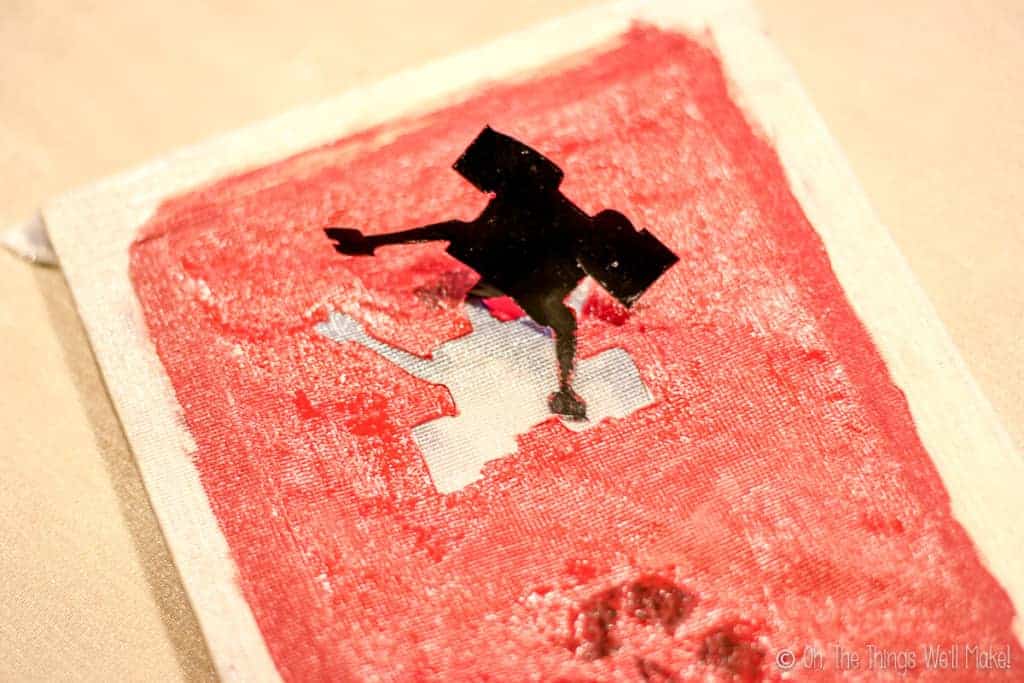
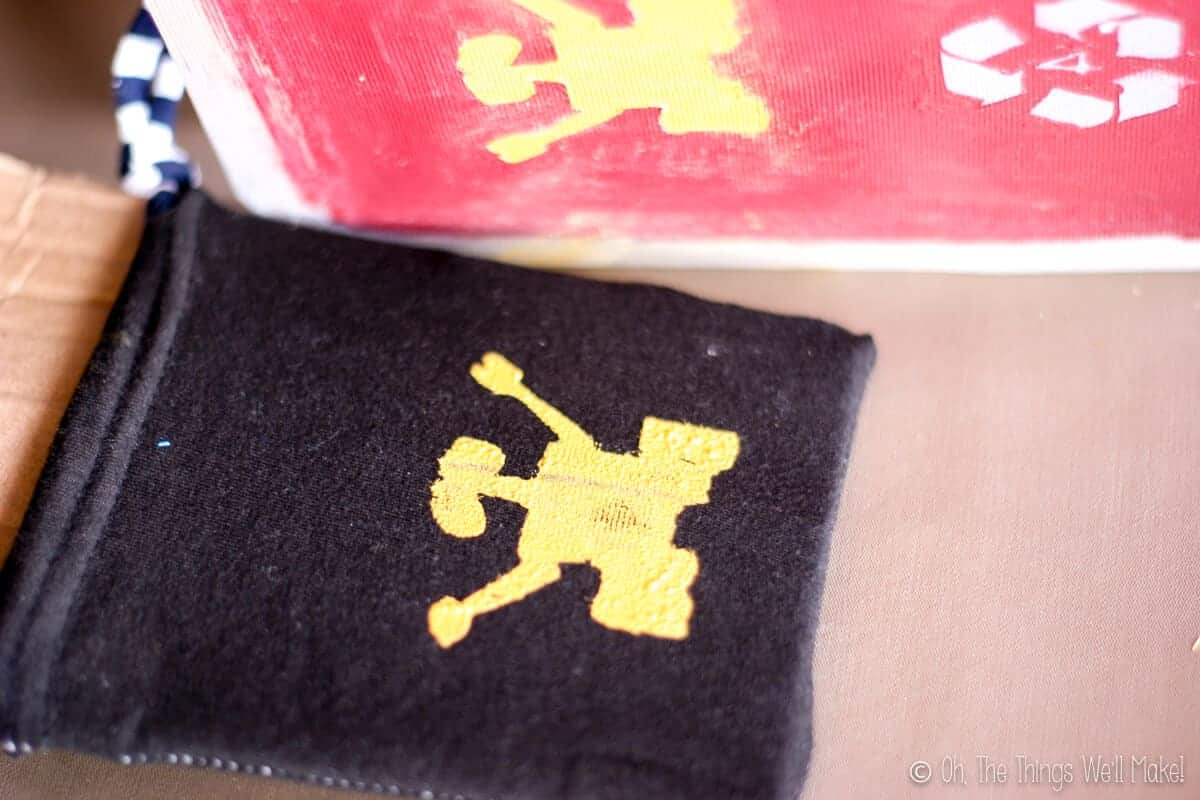
Once the screen was ready, I cut a silhouette of Wall-E out of contact paper to block off certain areas of the screen. You can use ready-made stickers or cut your own design out of adhesive paper like contact paper. (You could probably also use something like duct tape.)
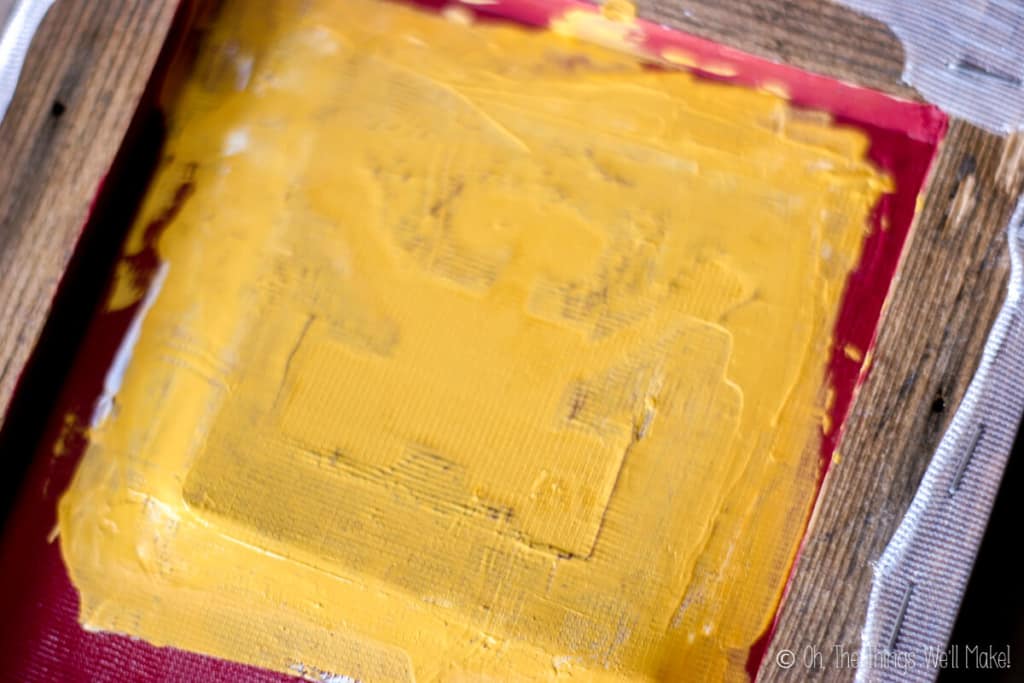
After sticking the design onto the cloth in the center of the frame, paint around it carefully with Modge Podge or puffy paints. (Most acrylic paints should also work.) We are now blocking off all of the spaces in the weave of the fabric around our design. This is to keep fabric paint from passing through the blocked-off areas later on.
IMPORTANT: If using text or a design that can’t be used backwards, you’ll either need to make a mirror image sticker of the design or stick it to the back of the cloth and paint there instead. I wanted to keep the back as smooth as possible for easy printing later on, so I chose to paint the design on the front. That said, it will work just as well to use the sticker on the back side and paint there so that your design isn’t inverted backwards when printed!
We want our design free of any of this paint, so be careful not to get paint under the edges of the design.
If you don’t want to use adhesive paper, you can freely paint your design. Just make sure you paint around it, blocking off the areas that you don’t want painted in the final design.
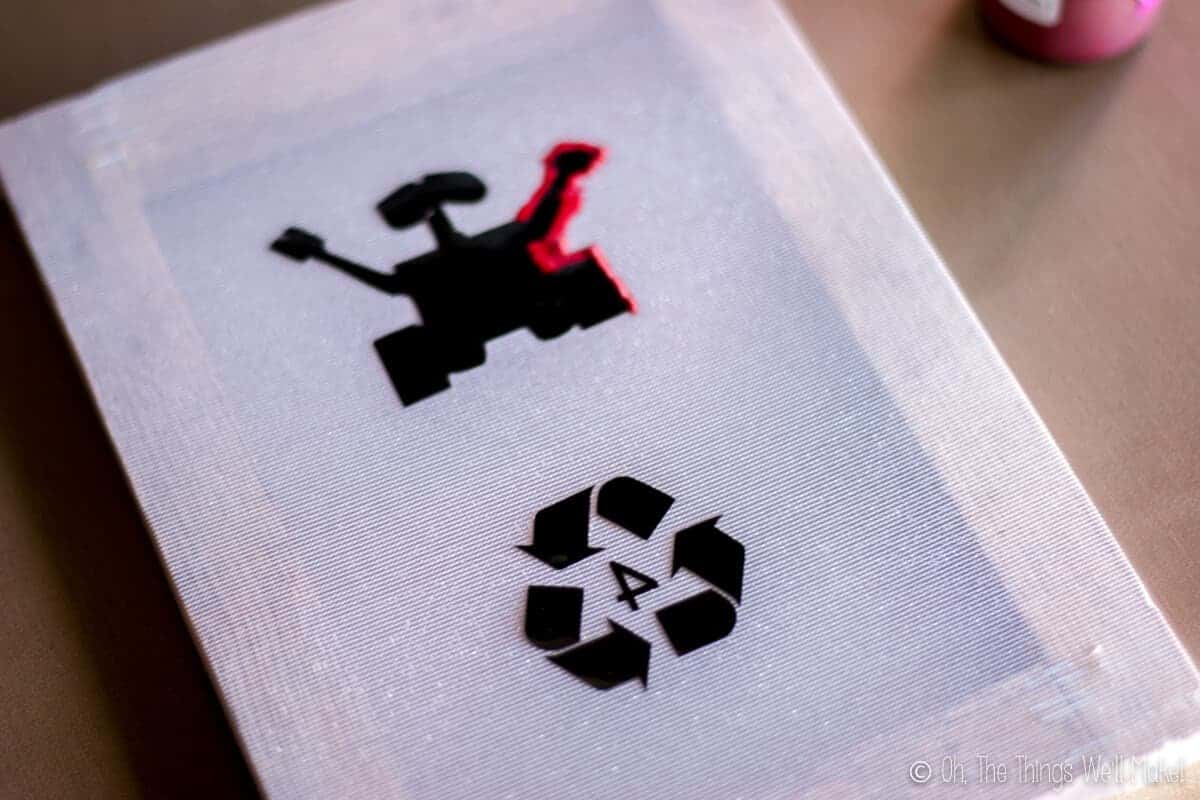
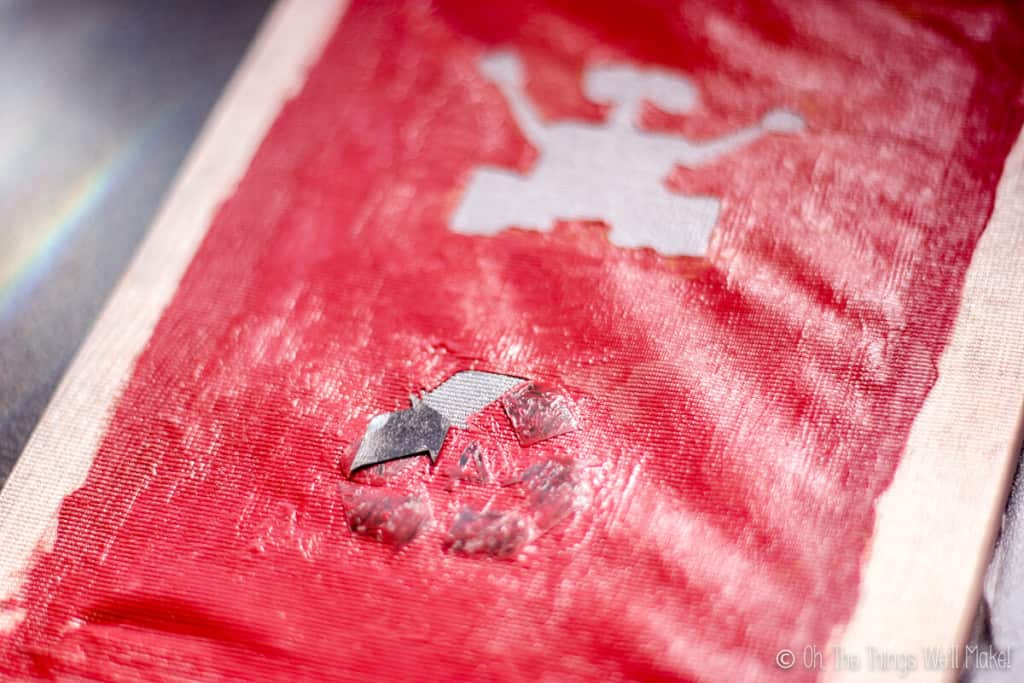
Once you’ve painted the entire screen, set it aside to dry completely. Once dry, peel off the contact paper or sticker(s). If you need to, you can fix tiny details with a little more fabric paint.
How to silk screen
Once your screen is fully dry, you can use it to paint your design on other cloth or even paper. Make sure the cloth you want to print on is smooth. (Iron it, if needed.)
It’s a good idea to practice first on a spare piece of fabric. It took me a few tries to get the silkscreening process right!
If you are going to print onto the front of a pouch or bag like I was, slip a piece of cardboard inside the pouch. This not only ensures that your fabric is held smooth, but also keeps the paint from passing to the back of the bag.
Make sure to use a relatively smooth piece of fabric. You can see that the cardboard I used at first wasn’t completely smooth, and it affected the final design. (I show the problem at the end of the video.)
Cover the pouch (or other cloth) with the screen, ensuring the design is exactly where you want to paint it.
Add a line of fabric paint across the top of the screen above the design.
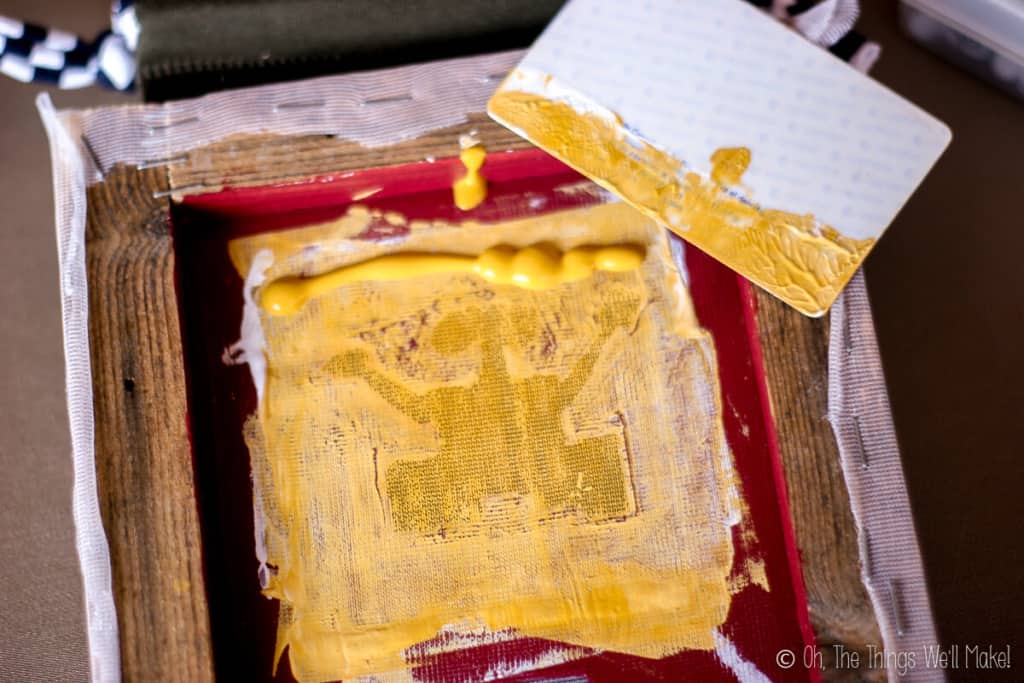
Using an old credit card, or something similar, pull the paint across the frame. Use one stroke with even pressure, making sure the paint gets pushed into all areas of the design.
Once you’ve pulled the paint across the design, pull the screen up off the fabric and admire your work! Easy as that!
You can now immediately paint the next copy, and the next, and the…
Clean up
Immediately after finishing painting all of the designs, clean off the excess fabric paint. You need to clean the paint while it’s still wet or it will ruin your screen. If it dries on the screen, it will block off the design and not allow the passing of the paint through it in the future.
Setting the design
Most fabric paints will come with instructions for how to set the paint so that you can wash your designs without them washing away. Normally, you have to set the designs with a hot iron. Follow the instructions for your particular paint.
Embellishing your design
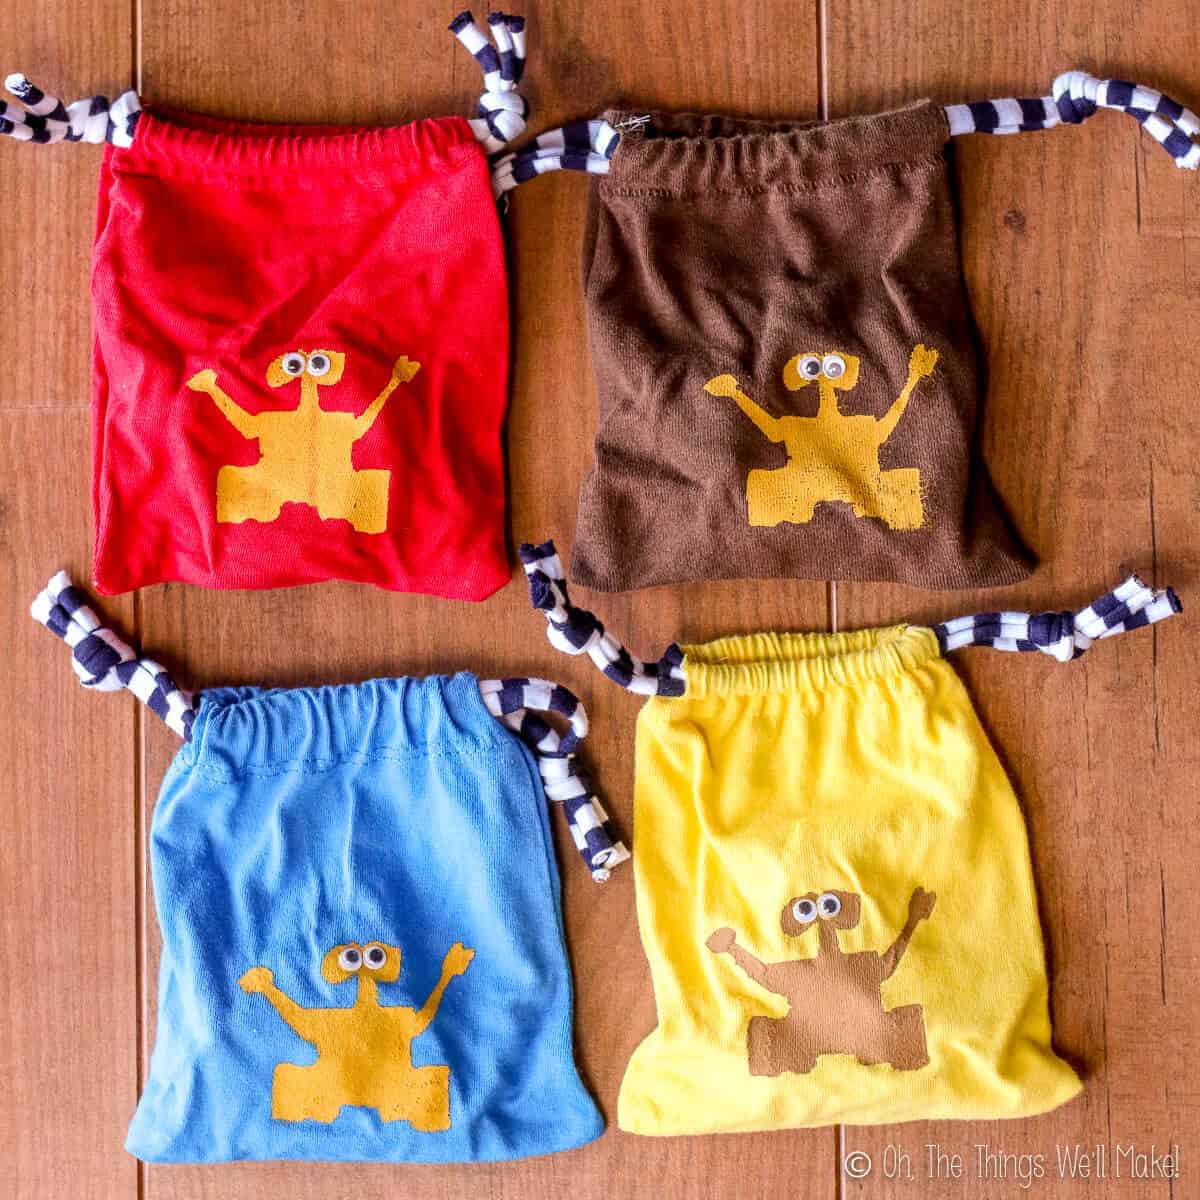
Once the designs dry, you can embellish your work with googly eyes or iron-on rhinestones, if you like. (You can see the process I use to embellish painted designs here. I thought the googly eyes made Wall-E so much more fun. My son loved them!
Video

Easy Silk Screening
Equipment
- A plastic card (like an expired credit card or something similar)
- Staple gun
Materials
- 4 strips wood for a frame (Or upcycle an old picture frame)
- 1 loose weave cloth slightly bigger than the frame
- puffy paints or Modge Podge or another acrylic paint
- stickers or contact paper
- fabric paints for the final prints
Instructions
Make the frame
- Cut the wood pieces to the size you want your frame to be. The finished frame should be slightly larger than what you want your finished design to be.
- Using a staple gun, staple the strips together into a rectangular frame.
Make the silk screen
- Once you have the frame ready, staple a layer of light-weave cloth over the frame. To stretch it evenly, begin stapling it to the frame on one side. Then stretch the fabric and staple it to the opposing side. You can then stretch the fabric over the other two sides.
- Cut off any excess cloth so it doesn't get in the way.
- Choose the design you want to silk screen. Either use ready-made stickers or cut a design out of contact paper or another adhesive paper. (You could also probably use duct tape.)
- Stick the cut design/sticker to the fabric in the center of the frame.
- To block off the rest of the screen, painted around the design carefully with puffy paints, Modge Podge, or another scrylic paint. Be careful not to get paint under the edges, but cover the edges completely.
- Set the frame aside to dry completely. If you can still see light coming in through the painted fabric, paint on another coat. You need to cover all of the holes in the fabric to keep the paint from going through while silk screening.
- Once it is dry, carefully peel off the contact paper or sticker. If you need to, you can fix the details with a little more paint or Modge Podge.
To use the silk screen
- Prepare the cloth or whatever else you want to silkscreen by ironing flat if needed. If using a pouch, slip a piece of cardboard inside to keep the paint from passing to the back side of the bag.
- Place the screen over the fabric. Make sure the design lines up exactly where you want to paint it.
- Make a line of fabric paint across the top of the screen, above the design.
- Using an old credit card, or something similar, pull the paint across the frame, making sure it gets pushed into all areas of your design.
- Pull the screen up off from the cloth, and admire your work! You can now repeat the process to print more copies of your design.
Clean up
- Make sure to fully clean off any excess fabric paint from the screen while it is still wet. Any remaining fabric paint that dries in the design area will block those areas from printing in the future. You can use water and a microfiber cloth or toothbrush to gently, yet fully clean the design area.
Notes
This post was originally published on Oct. 23, 2014. It was rewritten with clearer instructions and updated photos in February of 2021.


For the frame you could also use an old picture frame…
Hi, Tiffany!
Yes, of course you could do that, and it would make your life easier! 🙂 It would probably be easiest for you if your frame were flat, but really, all frames should be flat on the back so you could just wrap your cloth around the back, stapling it on the front. When using it, you’d want the flat side down to get a good contact with whatever you are silkscreening.
I didn’t have any frames on hand, but I did have a lot of scrap wood sitting around, so I used that. The nice thing about making your own is that you can make it whatever size you want, but that doesn’t really matter much.
That’s so creative, I didn’t know you could do that!
Fun, right?!?!
Now we can make those t-shirts we wanted to make. 😉