
Easy Homemade Superhero Costume: Batman & Superman
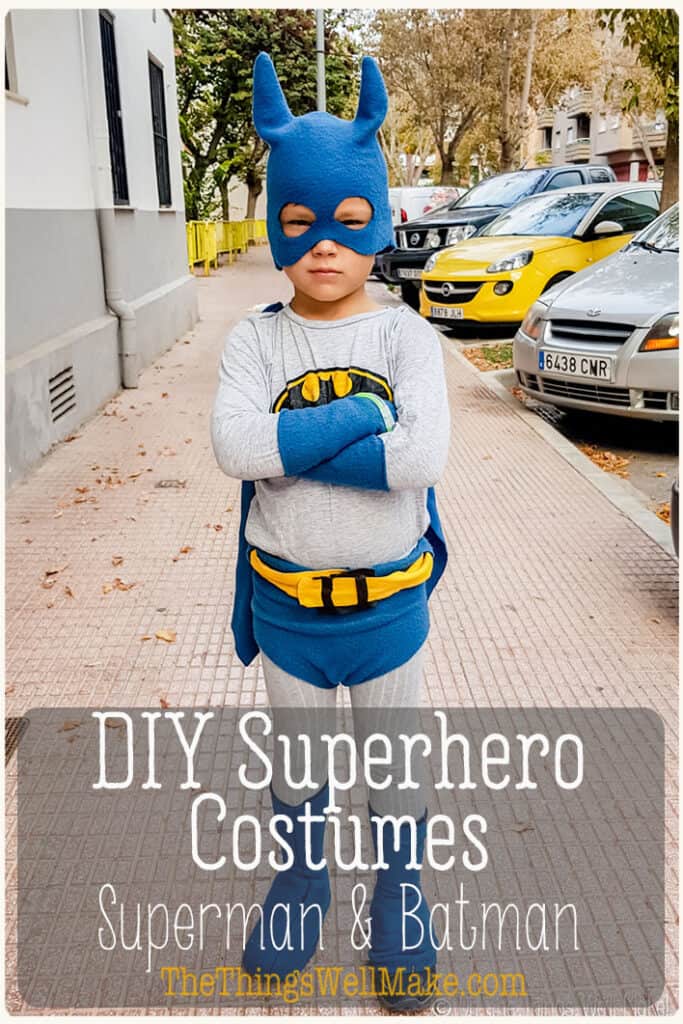
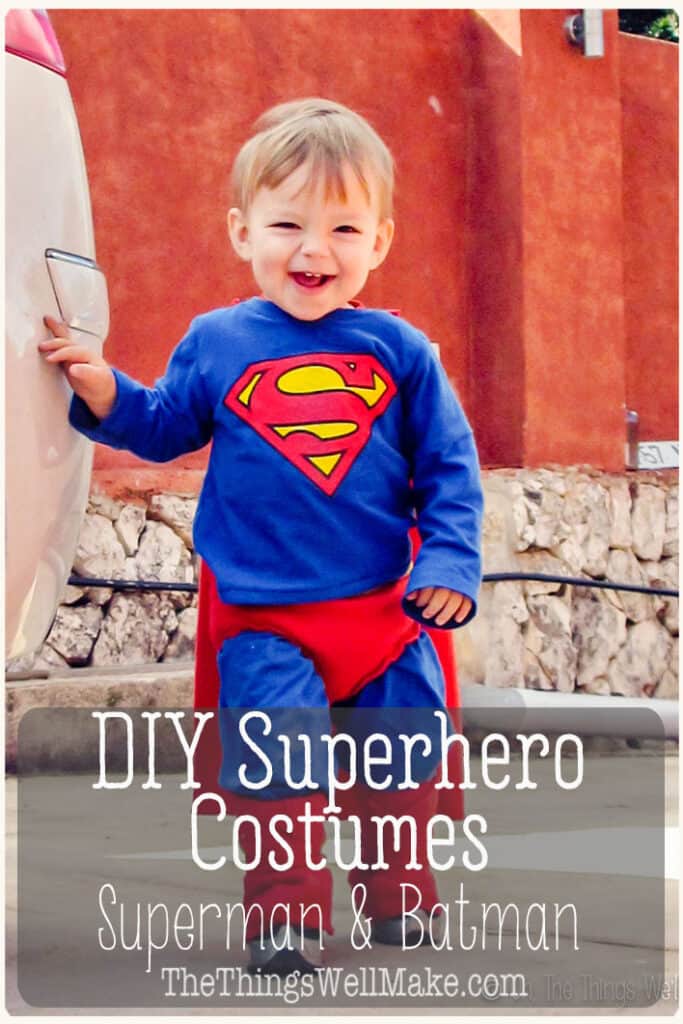
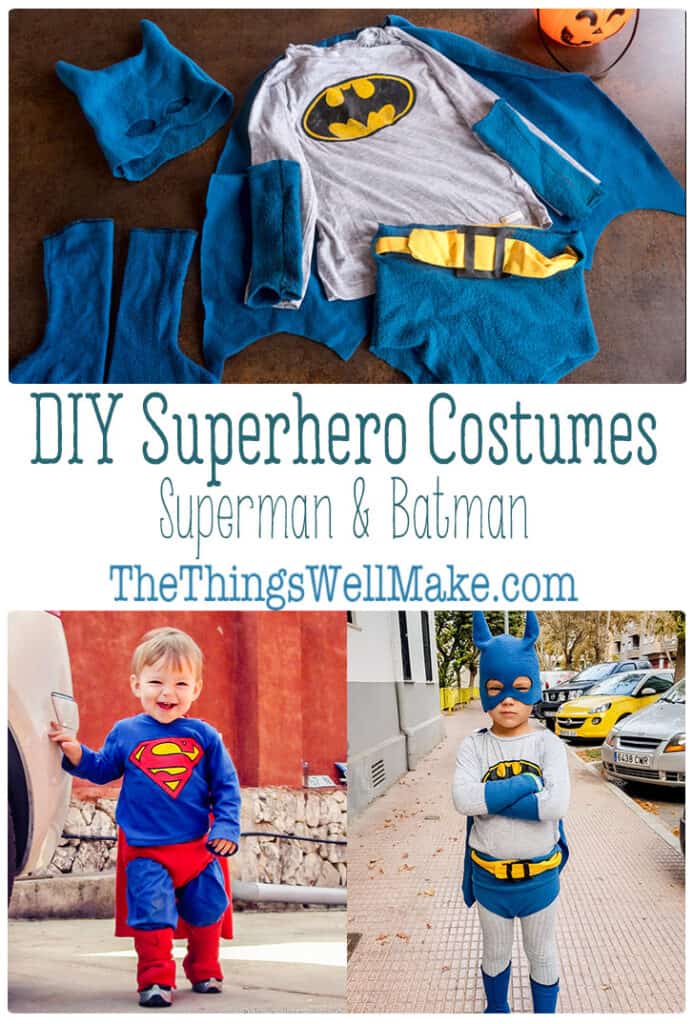
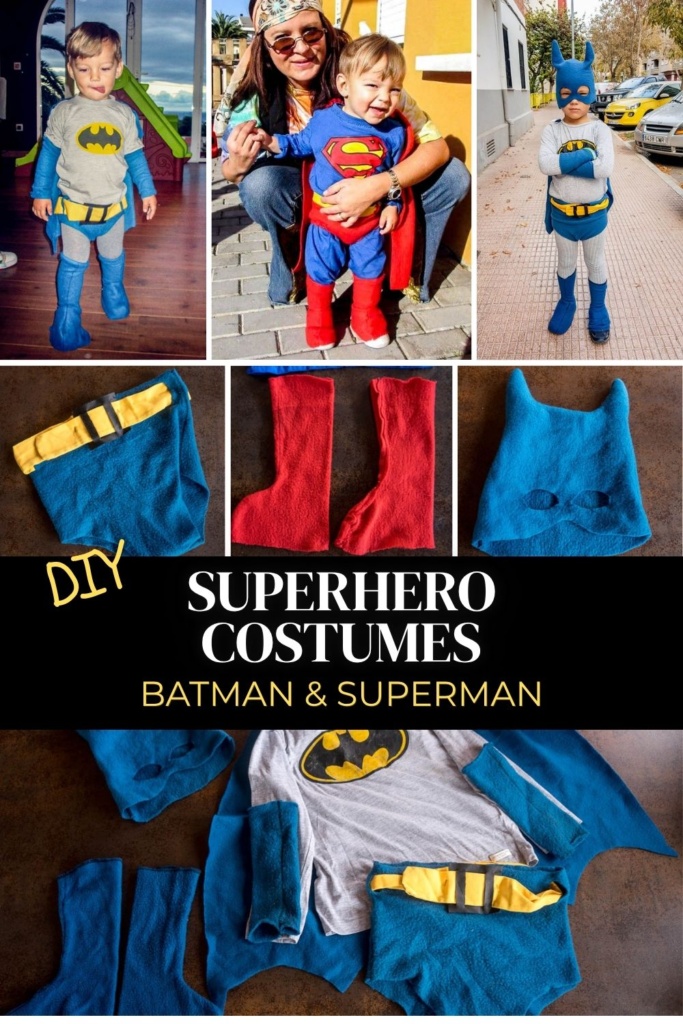
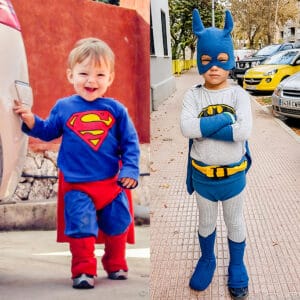
Make your own Batman or Superman costume with a few simple materials! These easy homemade superhero costumes use a T-shirt, fleece fabric, and basic sewing techniques. They’re perfect for Halloween, dress-up, or last-minute costume ideas.
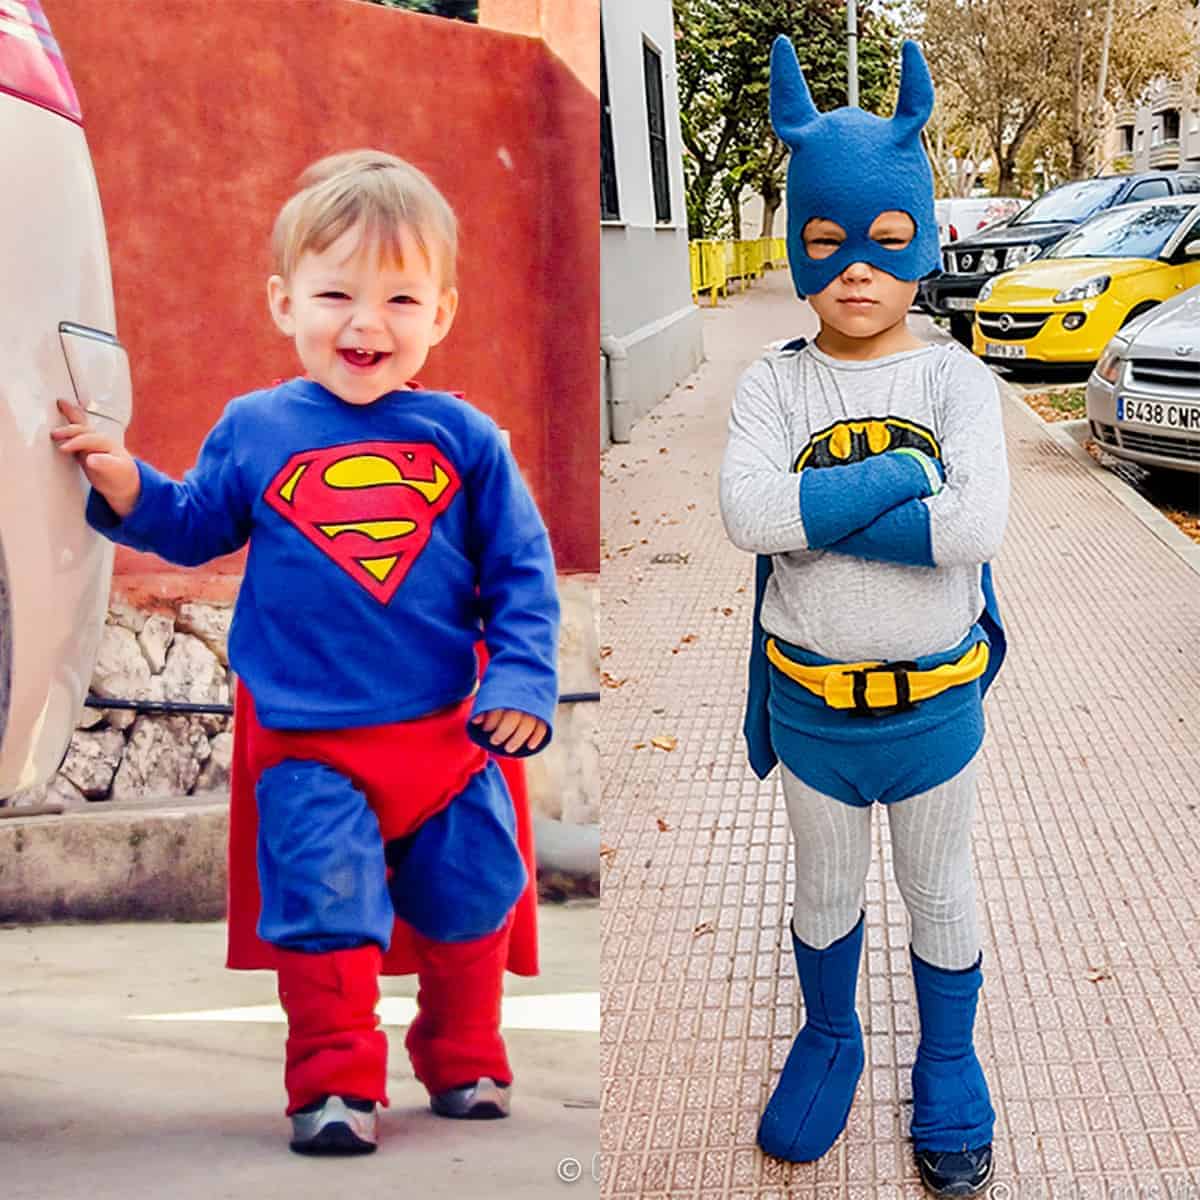
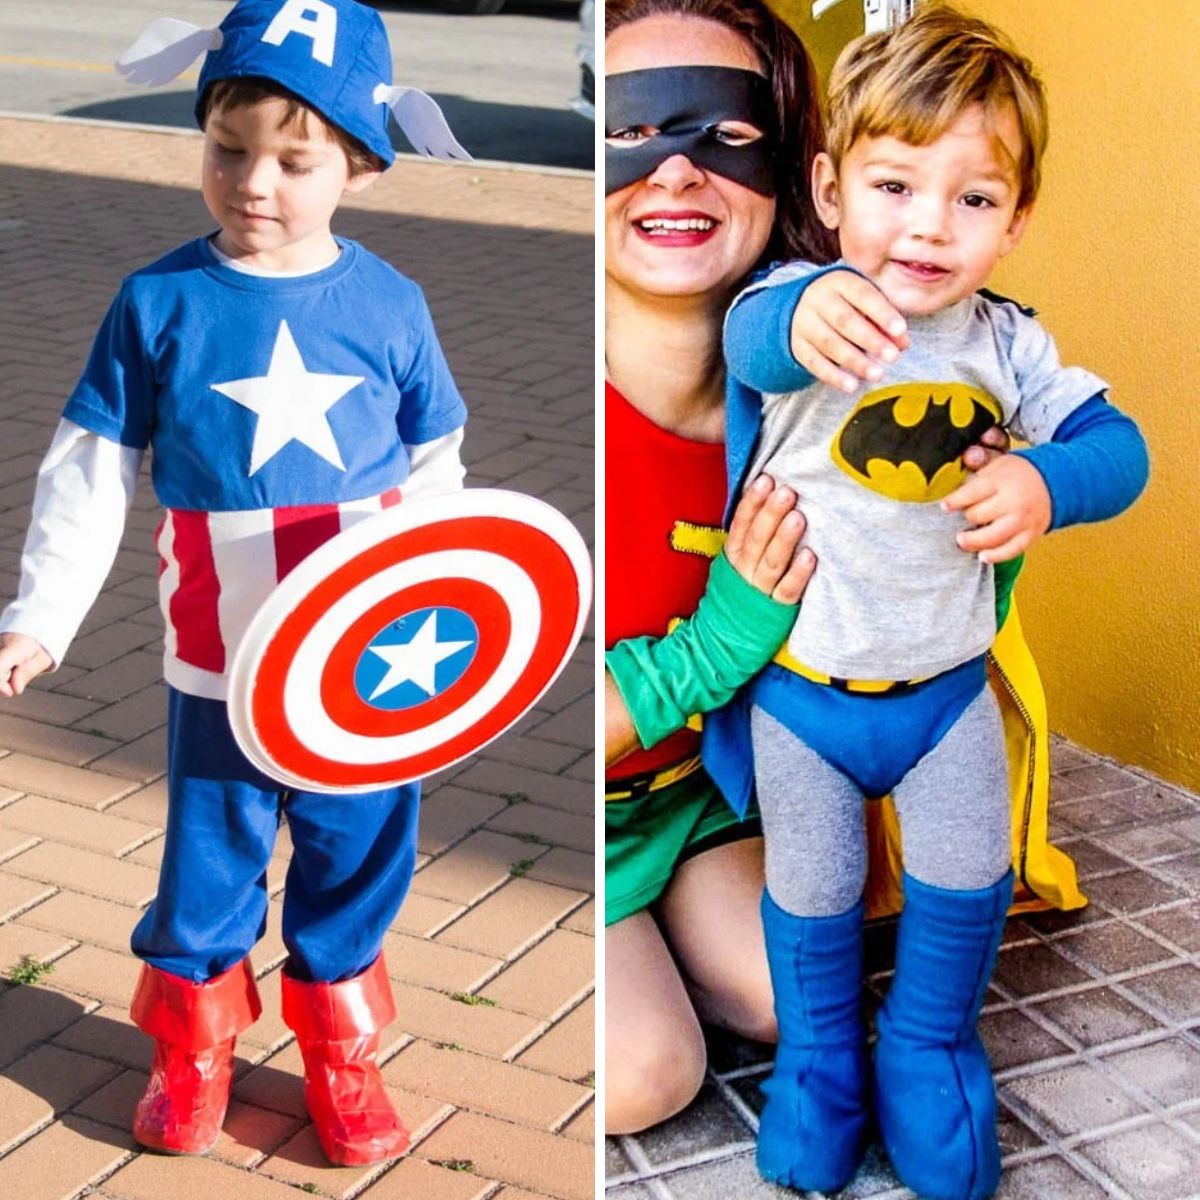
When Eric was younger, he loved dressing up as his favorite superheroes. Over the years, I made him several costumes, including Captain America and Thor.
Those costumes were a little more involved, but his Batman and Superman costumes were surprisingly easy to make. I even used inexpensive fleece blankets that I already had at home!
Both costumes follow the same basic method. Start with a superhero T-shirt, then add a homemade cape, gloves, boots, and trunks. You can also make a Batman mask if you want to complete the look.
I’ll show you how I made each piece, along with a few shortcuts to make the process even easier.
Making the superhero T-shirt
The easiest way to start your costume is with a Batman or Superman T-shirt. If you already have one, you’re one step ahead!
A long-sleeved shirt works especially well because it gives the costume a more complete look, but you can also use a short-sleeved shirt.
If you can’t find a superhero shirt in the right size or color, you can make your own. I’ve tried two different methods: iron-on transfers and freezer paper stencils.
Using iron-on transfers
Iron-on transfers are probably the easiest way to add a superhero logo to a plain T-shirt. I used this method for Eric’s first Superman costume when he was very young.
For colored shirts, I recommend using transfer paper designed for dark fabrics. Unlike transfers for light-colored shirts, these have an opaque backing that keeps the shirt color from showing through the design.
To make the shirt:
- Find a Batman logo or Superman logo and print it onto the transfer paper, following the manufacturer’s instructions.
- Cut around the design, leaving as little extra material as possible.
- Peel off the backing and position the logo in the center of the shirt.
- Cover it with the protective paper supplied with the transfer sheets (or another covering recommended by the manufacturer).
- Iron the design onto the shirt according to the package instructions.
Tip: Transfers for dark fabrics are generally printed without reversing the image, unlike many transfers for light-colored fabrics. Always check the instructions for your particular transfer paper.
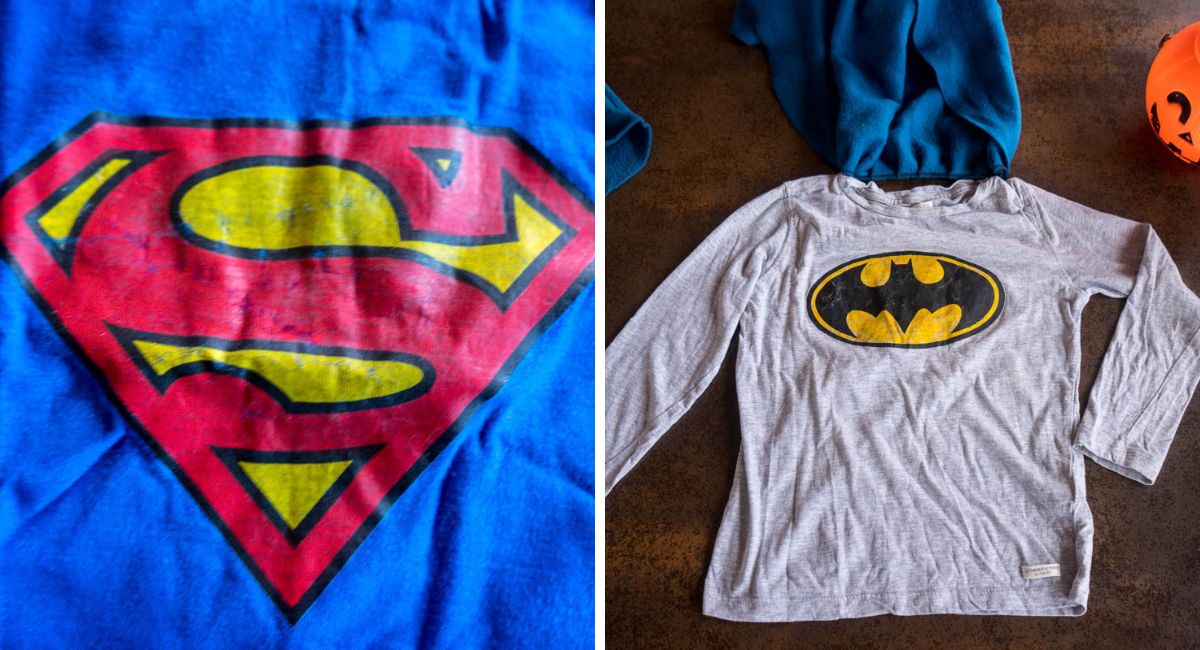
Using freezer paper stencils
Another way to make your own superhero T-shirt is to paint the logo onto a plain shirt using a freezer paper stencil. It takes a little more work than using an iron-on transfer, but the design looks more like it was printed directly onto the fabric.
I used this method to make Eric’s Batman T-shirt.
I have a Silhouette Cameo cutting machine, which makes cutting out stencils much easier. If you don’t have one, though, you can cut them out by hand with a craft knife.
- Prepare the stencil. Print out your Batman or Superman logo in the size you want. Trace the design onto freezer paper and cut it out with a cutting machine or craft knife.
- Attach the stencil. Place the freezer paper on the shirt with the shiny side facing down. Iron it in place so it temporarily sticks to the fabric.
- Protect the back of the shirt. Slide a piece of cardboard inside the shirt to keep the paint from soaking through to the other side.
- Paint the design. Apply fabric paint to the exposed areas using a sponge, brush, or airbrush. If you’re using a sponge, you may need a couple of thin coats to get even coverage.
- Finish the design. Let the paint dry before carefully removing the stencil. Follow the paint manufacturer’s instructions for heat-setting and washing.
Painting a logo with two colors
For Batman’s logo, I painted the yellow background first and then added the black bat symbol over it.
When you’re working with two colors, it’s generally easier to paint the lighter color first and then add the darker color on top. You could make separate stencils that leave each area unpainted until you’re ready for that color, but lining them up perfectly can be tricky.
Painting the yellow first and then covering part of it with black was much easier.
I also have an inexpensive airbrush that I often use for fabric painting. It gives a nice, even finish that looks surprisingly professional. You definitely don’t need one for a small project like this, though. A sponge works well, too, especially if you apply the paint in a couple of thin layers.
Making a superhero shirt and pants from an old T-shirt
For Eric’s first Superman costume, I actually made both the shirt and pants from one of my husband’s oversized old T-shirts!
I was having trouble finding a shirt and pants in the right shade of blue, so I decided to make them myself. I followed this easy kids’ pants tutorial and more or less winged it when making the shirt.
I wasn’t particularly experienced at sewing clothes, so I was pleasantly surprised when they turned out as well as they did!
Of course, you don’t need to go to all that trouble. A ready-made superhero shirt and a pair of leggings or tights will work just as well.
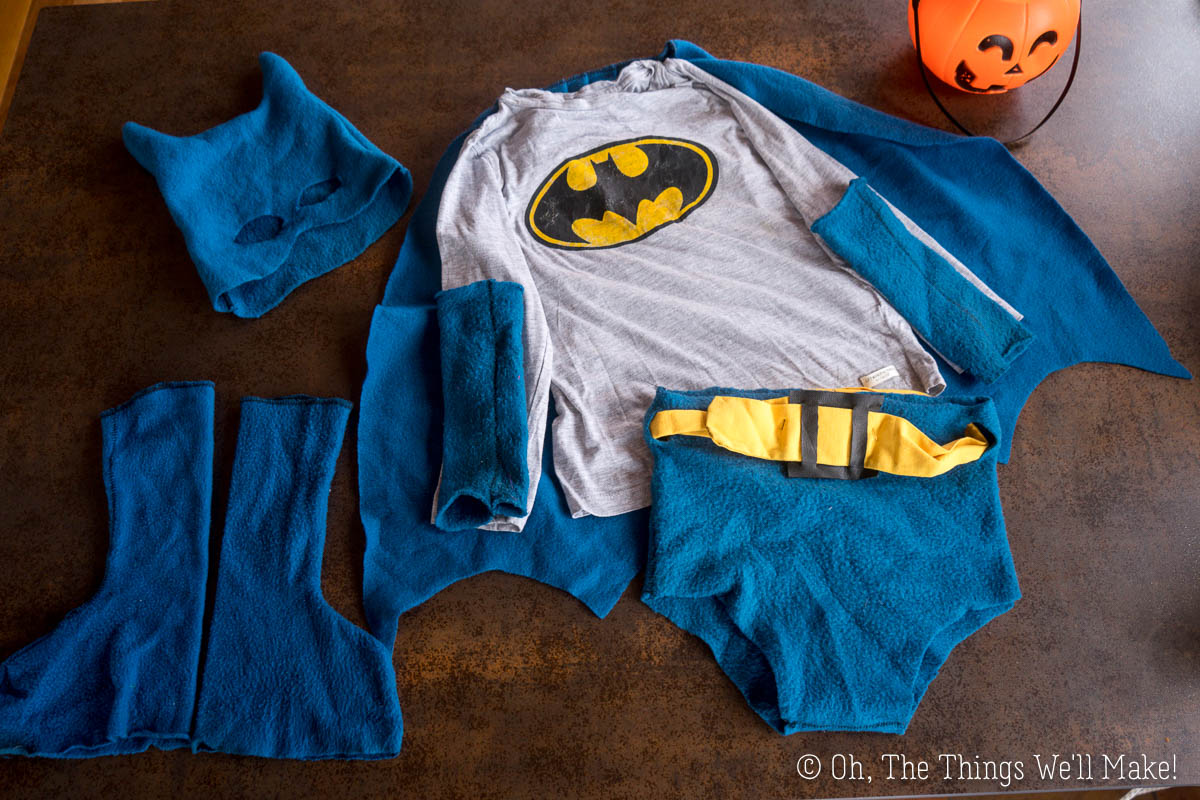
Making the cape, gloves, trunks, and boots
Once you have your superhero T-shirt ready, it’s time to make the rest of the costume!
I used inexpensive fleece blankets to make most of the remaining pieces. Fleece is great for projects like this because it’s soft, stretchy, and doesn’t fray, so you don’t have to worry about hemming all the edges.
You can use the same basic techniques for both Batman and Superman, changing the colors and a few details to get the look you want.
Make the cape
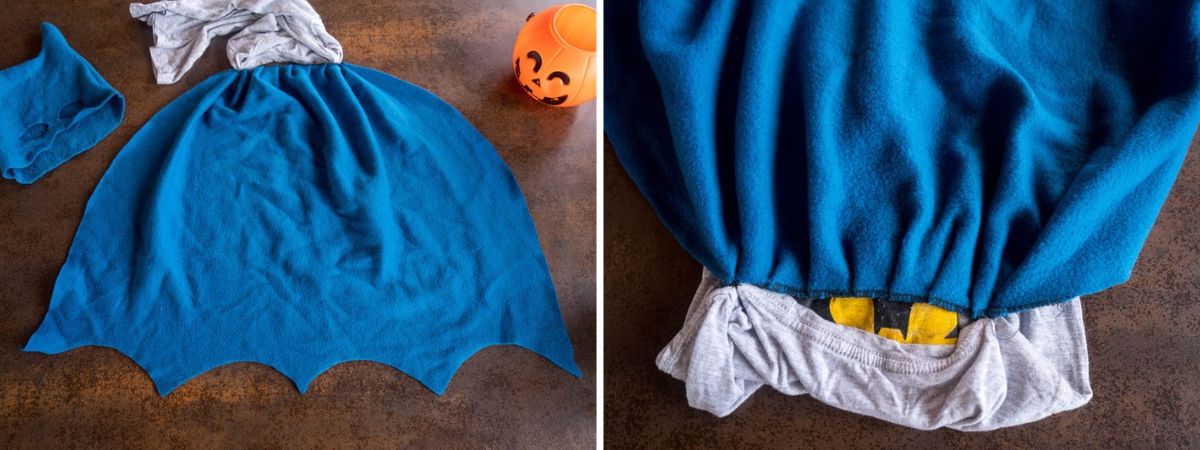
Superman’s cape is a simple trapezoid, while Batman’s has a similar shape with a scalloped bottom edge to resemble bat wings.
Both are easy to make from fleece, and because fleece doesn’t fray, you don’t even need to hem the edges!
Cutting the cape
Start by measuring across your child’s shoulders. This will be the approximate width of the top of the cape. Add a few extra inches if you want to gather or pleat the fabric.
For the bottom, add a few inches to each side so the cape gradually widens toward the bottom.
Next, measure from the shoulders down to wherever you want the cape to end. Superhero capes often reach the knees or calves, but a shorter cape may be more comfortable for younger children and less likely to get caught on things.
Fold the fleece in half lengthwise before cutting to make sure both sides are symmetrical.
For Superman, cut the fabric into a trapezoid, with the bottom wider than the top.
For Batman, keep the fabric folded in half and draw a series of scallops along the bottom edge using chalk or a fabric marking pencil. Space them so the pattern starts and ends neatly at the sides, rather than stopping halfway through a curve.
Cut along the marked lines, and your cape is ready!
Gathering the top of the cape
You can leave the top of the cape flat, but gathering or pleating it gives it a fuller look around the shoulders.
I’ve tried several different methods, depending on the costume and the materials I had available.
Using elastic
For Eric’s first Superman cape, I cut a piece of elastic approximately the width of his shoulders.
I secured the ends of the elastic to the top corners of the cape, then stretched it as I sewed across the top edge. When the elastic relaxed, it gathered the fabric automatically.
This is an easy way to create evenly distributed gathers without having to measure or fold individual pleats.
Unfortunately, I no longer have that cape, so I can’t show you a photo of it!
Sewing pleats
For one of my Batman capes, I made pleats along the top edge by folding small sections of fabric over themselves and sewing them in place.
I didn’t worry about measuring everything perfectly. I just made the pleats as I went, adjusting them until I liked how the cape looked.
You can see a similar technique in this video.
Making no-sew pleats
If you don’t want to sew, you can make the same pleats using hot glue.
Just fold the fabric into pleats and secure each fold with a small amount of hot glue. Let the glue cool completely before handling the cape.
Gathering with thread
Another option is to sew a simple running stitch along the top edge of the cape using a needle and strong thread.
Once you’ve stitched across the fabric, gently pull the thread to gather the fleece until the top is the width you want. Secure the thread at both ends to keep the gathers in place.
This video shows how to gather fabric using a running stitch.
Attaching the cape
Once your cape is finished, you can hand-sew or safety-pin it to the superhero T-shirt.
Another option is to use sew-on Velcro (hook-and-loop fastener). Sew small pieces to the top corners of the cape and matching pieces to the shoulders of the shirt. This makes the cape removable and may allow it to detach if it gets caught on something, depending on how securely the Velcro holds.
Keep in mind, though, that the Velcro will remain on the shirt when you remove the cape. If you want to wear the superhero T-shirt on its own afterward, safety pins may be more practical.
Some people attach capes with ribbon or cord tied around the neck, but I prefer to avoid that for children’s costumes because of the potential choking or entanglement hazard.
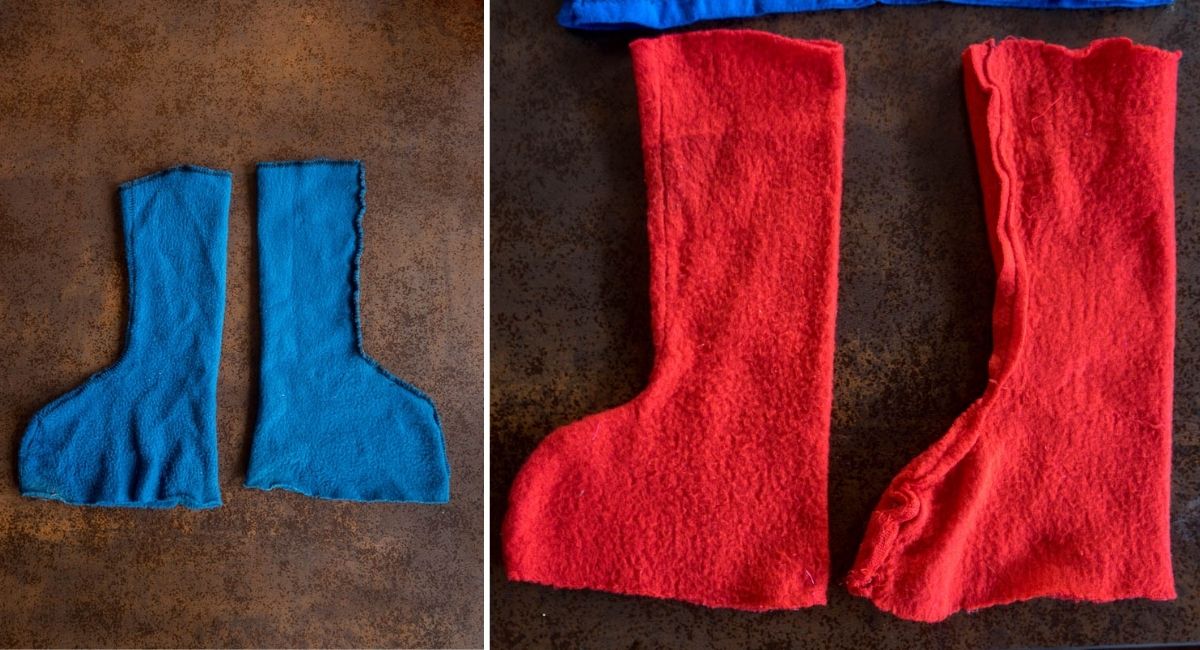
Making the boots
Superhero boots are easier to make than you might think! I made mine using polar fleece to create fabric covers that fit over regular shoes.
There are two different ways to make them, depending on the look you want. I’ve explained both methods in my DIY superhero boots tutorial, with step-by-step instructions and photos.
You won’t need to buy special boots to complete your Batman or Superman costume!
Making the trunks
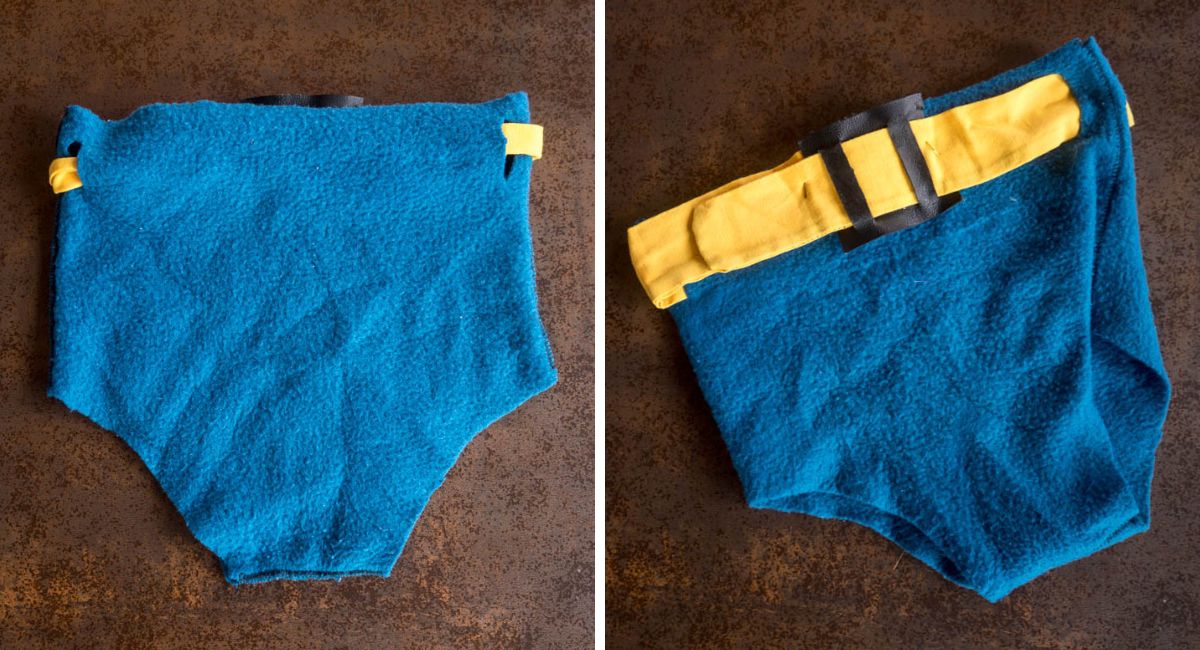
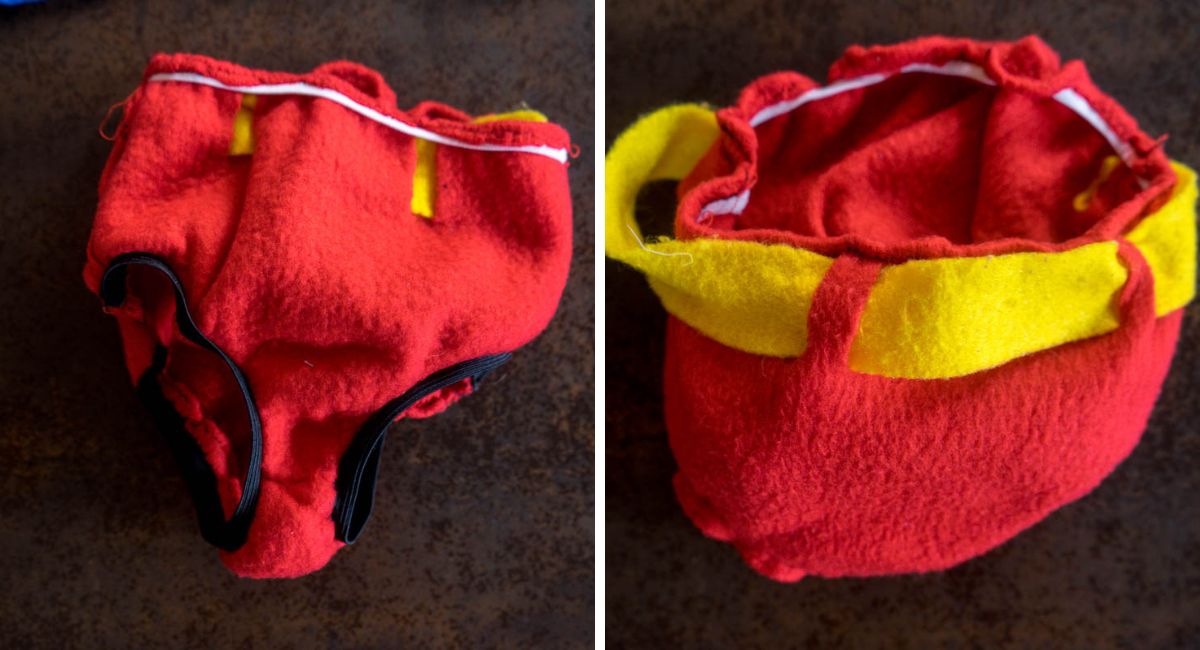
Use a pair of your child’s underwear as a pattern, adding a couple of centimeters around the edges so the trunks fit comfortably over leggings or tights. Make the back slightly longer than the front to allow a little extra room, and add several inches at the waist to make room for the belt.
It’s better to cut the pieces a little too big at first. You can always take them in later, but it’s much harder to make them bigger once you’ve cut the fabric.
Cut out the front and back pieces of fleece. Place them together with the right sides facing inward, then sew along both sides and across the crotch, leaving the waist and leg openings open.
Turn the trunks right side out and try them on over the leggings. Make any adjustments needed for a comfortable fit.
For my Superman costume, I sewed elastic around the waist and leg openings. The waist elastic helped keep the trunks in place, but I didn’t find that the elastic around the legs made much difference. It was extra work that didn’t really improve the costume, so I skipped it on later versions.
You can add elastic around the waist if needed, depending on how well the trunks fit.
Adding the yellow belt
Both Batman and Superman traditionally wear yellow belts, so this is an easy way to make the trunks look more like part of a superhero costume.
I cut small slits on either side of the trunks and threaded a strip of yellow fabric through them to make the belt.
For the buckle, I cut a buckle shape out of vinyl and attached it with hot glue.
You can adjust the width and shape of the belt to match whichever superhero costume you’re making.
Making the gloves
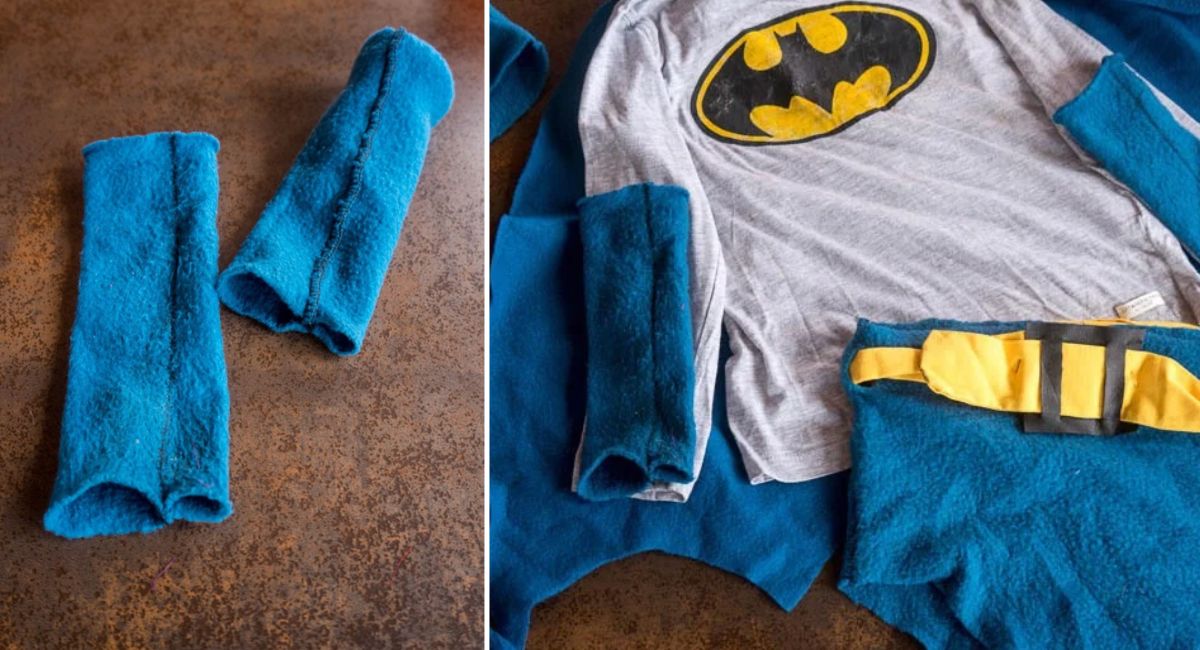
These fingerless superhero gloves are easy to make from fleece. They’re basically fabric tubes with separate openings for the thumbs and fingers, and you can make them as long or short as you like.
- Measure the fabric. Wrap the fleece around the arm of the person wearing the costume to determine the width. Measure the desired length, from the forearm to just below the knuckles.
- Cut the fabric. Cut two rectangles using those measurements, leaving a little extra fabric for the seams.
- Sew the gloves. Fold each rectangle in half lengthwise, with the right sides facing inward. Sew along the long open edge to form a tube, leaving both short ends open.
- Try them on. Turn the tubes right side out and slide them over the hands and arms. Adjust the fit if needed.
- Mark the thumb openings. With the top of each tube near the base of the fingers, mark where the thumb separates from the rest of the hand.
- Separate the openings. Sew a short seam through both layers of fabric at the marked point, creating a smaller opening for the thumb and a larger one for the fingers.
- Try them on again. Slip the thumbs through their openings and the fingers through the larger openings. Make any final adjustments for a comfortable fit.
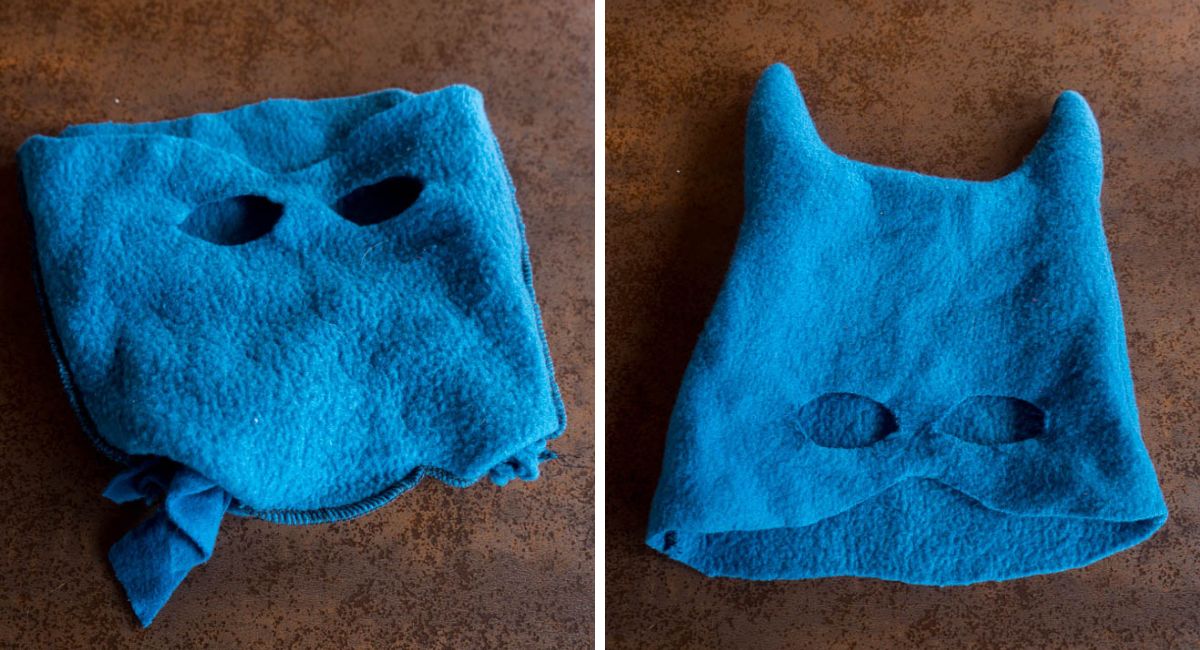
Making the optional Batman mask
I also made a Batman mask to go with Eric’s costume, although he didn’t end up wearing it very often.
It’s made from two pieces of fleece sewn together, with pointed ears at the top to give it that recognizable Batman look.
- Measure the head. Measure around your child’s head to estimate the width of the mask, then measure from the top of the head to just below the nose to determine the length. You can use a knit hat as a guide for the general shape.
- Draw the mask. Sketch a rounded mask shape with two pointed Batman ears at the top. Don’t worry about positioning the eye openings yet.
- Cut the fabric. Cut two matching pieces of fleece, one for the front and one for the back. Folding the fabric in half while cutting helps keep the shape symmetrical.
- Sew the pieces together. Place the pieces with their right sides facing inward. Sew around the sides and top, including the pointed ears, but leave the bottom open.
- Turn the mask right side out. Push the fabric through the bottom opening and straighten out the ears.
- Mark the openings. Have your child try on the mask and mark where the eyes and nose should be.
- Cut the openings. Remove the mask and carefully cut out the eye holes and an opening for the nose.
- Check the fit. Try the mask on again and adjust the openings as needed so your child can see and breathe comfortably.
- Stuff the ears. To help the pointed ears stand upright, tuck a few scraps of fleece into them.
The mask is optional, but it’s a fun finishing touch for a homemade Batman costume!
Putting it all together
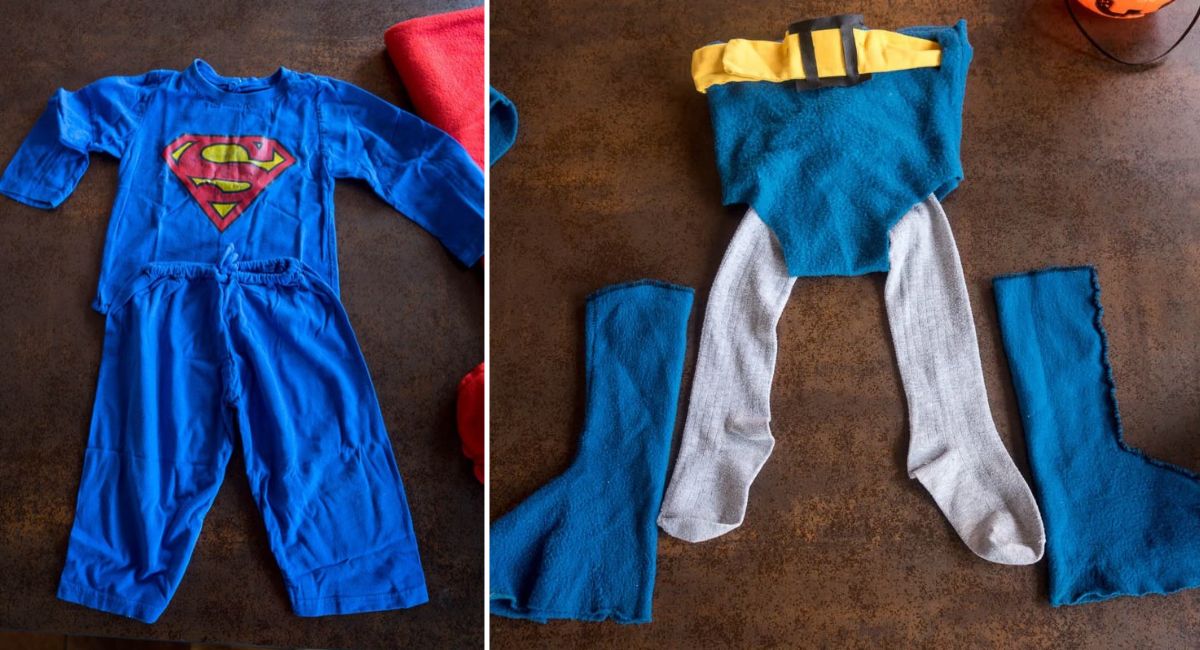
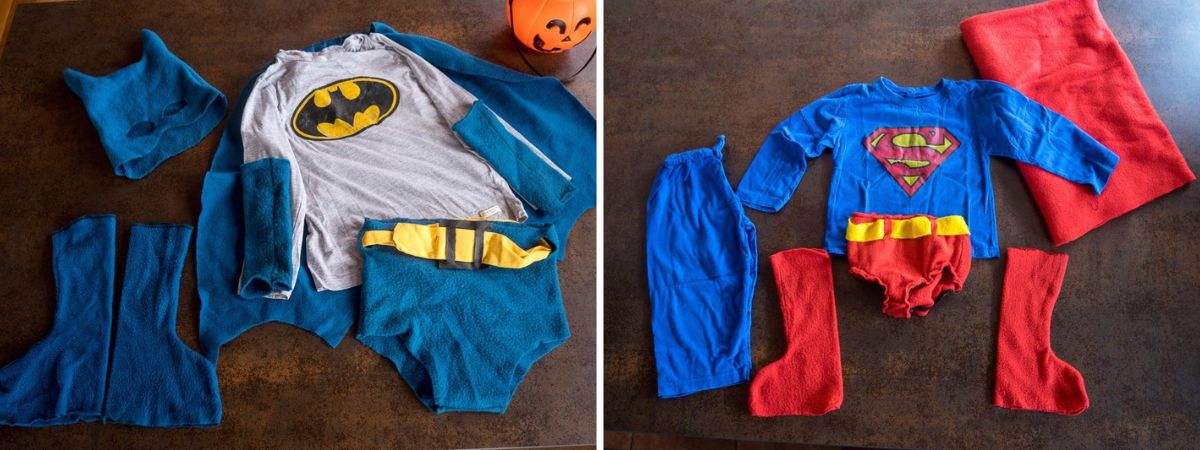
Now that you’ve made all the pieces, it’s time to put your superhero costume together!
Here’s what you’ll need:
- Superhero T-shirt
- Cape
- Trunks (with an optional yellow belt)
- Fingerless gloves
- Tights or leggings (royal blue for Superman or gray for Batman)
- Superhero boots
- Sneakers or other comfortable shoes
- Optional Batman mask
Getting dressed
- Put on the tights or leggings.
- Pull the trunks over the leggings.
- Put on the fleece boot covers and then your shoes. Pull the bottom edges of the boot covers over the shoes to make them look like superhero boots.
- Put on the superhero T-shirt.
- Slip on the gloves, pulling them over the ends of the shirt sleeves.
- Attach the cape to the shirt using your preferred method.
- If you’re dressing up as Batman, add the optional mask.
And that’s it! Your homemade superhero costume is ready for Halloween, dress-up, or a day of saving the world.
Have fun!
Happy Halloween from us here in Spain!
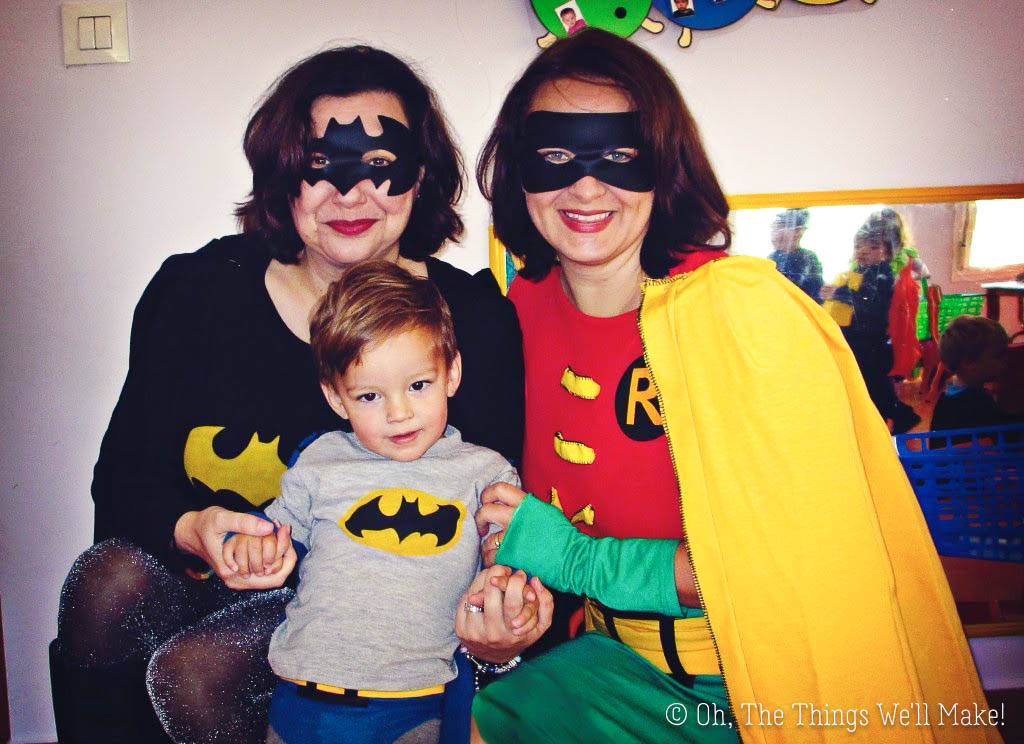
Easy Homemade Superhero Costumes: Batman & Superman
Equipment
- scissors
- Measuring tape
- Chalk or fabric marking pencil
- Needle and thread or sewing machine
- Safety pins or sew-on Velcro (optional, for attaching the cape)
Materials
- 1 superhero T-shirt or a plain T-shirt to decorate
- 2 yards polar fleece (red for Superman or blue for vintage Batman; adjust according to the size of the costume)
- Yellow fabric for the belt
- 1 pair of tights or leggings (royal blue for Superman or gray for Batman)
- Fabric scraps for the optional Batman mask
Instructions
Make the cape
- Measure across the shoulders and from the shoulders down to the desired length of the cape.
- Cut a trapezoid from the fleece. Make the top approximately 4–6 inches wider than the shoulders if you plan to gather it, and the bottom another 4–6 inches wider than the top.
- For Batman, fold the cape in half lengthwise and cut scallops along the bottom edge to resemble bat wings.
- Gather the top of the cape using pleats, a running stitch, or stretched elastic. You can also secure pleats with hot glue for a no-sew option.
- Attach the cape to the superhero T-shirt using hand stitching, safety pins, or sew-on Velcro.
Make the boots
- Follow my DIY superhero boots tutorial to make fleece boot covers that fit over regular shoes.
Make the trunks
- Use a pair of underwear as a pattern, tracing the general shape onto the fleece. Add 1–2 cm around the edges for a looser fit over leggings, and another 2–3 inches at the waist to allow room for the belt.
- Cut a front and back piece, making the back slightly longer to allow extra room.
- Place the pieces together with their right sides facing inward. Sew along both sides and across the crotch, leaving the waist and leg openings open.
- Turn the trunks right side out and try them on over the leggings. Adjust the fit as needed.
- If needed, add elastic around the waist to help keep the trunks in place.
- Cut small slits at the sides of the waist and thread a strip of yellow fabric through them to make the belt. Add a decorative buckle if desired.
Make the fingerless gloves
- Measure around the arms and determine the desired glove length, from the forearm to just below the knuckles.
- Cut two rectangles of fleece, allowing a little extra fabric for the seams.
- Fold each rectangle in half lengthwise, with the right sides facing inward.
- Sew along the long open edge to form a tube, leaving both short ends open.
- Turn the tubes right side out and try them on.
- Mark where the thumb separates from the fingers and sew a few stitches through both layers at that point, creating separate openings for the thumb and fingers.
Make the optional Batman mask
- Use a knit hat as a guide to draw a mask that extends from the top of the head to just below the nose.
- Add two pointed Batman ears to the top of the pattern.
- Cut two matching pieces of fleece.
- Place the pieces together with their right sides facing inward. Sew around the sides and top, leaving the bottom open.
- Turn the mask right side out and try it on to mark the positions of the eyes and nose.
- Remove the mask and cut out the eye holes and an opening for the nose.
- Try it on again and adjust the openings for comfortable breathing and clear vision.
- Stuff the pointed ears with fleece scraps to help them stand upright.
Put the costume together
- Put on the tights or leggings.
- Pull the trunks over the leggings and adjust the belt.
- Put on the fleece boot covers, followed by the shoes. Pull the bottom edges of the fleece over the shoes.
- Put on the superhero T-shirt and fingerless gloves, pulling the gloves over the sleeves.
- Attach the cape to the shirt.
- Add the optional Batman mask.
- Your homemade superhero costume is ready!