

DIY Conditioner Bar
Sustainable and travel-friendly, a conditioner bar is a convenient way to keep your hair healthy, conditioned, and tangle-free. Learn how and why to make your own conditioner bar.
Over the last months, I’ve been a bit absent and busy with summertime activities. Between having my son home from school, the town fiestas, and a family vacation, I feel like I’ve left you all a bit abandoned. I’m now home and finished with most of it, and ready to share some of what I’ve been making lately.
One of the handy products that I made was a homemade conditioner bar.
Let me begin by admitting that I wasn’t even sure I would like using a solid conditioner. I really like the slip and feel of how easy it is to use my “normal” homemade conditioner. It glides easily and I can effortlessly comb through to spread it evenly throughout my hair.
Over the last year or two, though, shampoo and conditioner bars have gained a lot of popularity.
Why make a conditioner bar?
There are a few great reasons to consider making a solid conditioner.
A conditioner bar is a sustainable option
For those who are trying to go “no waste” or who wish to contribute as little waste as possible, making your own shampoo bars and conditioner bars is about as no waste as you can get. I can’t promise you’ll have zero waste unless you can get your hands upon a supplier that allows you to recycle packaging or will fill containers you bring to them, but the products that you are making themselves don’t need any sort of packaging.
Because you aren’t using any packaging for your homemade conditioner bar, you don’t have to worry about if the packaging that you are using is safe or not. (Are toxins from plastic packaging leaching into your products?) You also save yourself the hassle of having to properly clean and sanitize your containers before using them.
Conditioner bars are travel-friendly
With all of the new regulations regarding liquids that can be taken aboard airplanes, having a solid option means less hassle when traveling. You don’t have to worry about separating your shampoo and conditioner in a plastic baggy when passing through security nor will you have to worry about a TSA agent taking your homemade conditioner away from you for not following regulations regarding liquids.
Even if you aren’t flying, there are advantages to traveling with shampoo and conditioner bars versus their liquid counterparts. You don’t have to worry about your homemade shampoo and conditioner spilling all over your other luggage, potentially ruining your clothes and your trip.
Concerned about preservatives?
Just as with the shampoo bar, I recommend that you use a preservative when making your conditioner bar. This product is going to be stored in a humid environment and will be used with water often. It is very possible for mold or other microbes to form on the exterior of your bars, especially if you aren’t careful about drying the product properly between uses.
That said, if you are set against using a preservative, this is the safest way to go.
I personally don’t recommend making a liquid conditioner and keeping it in the fridge. Some people try doing that to avoid using a preservative. Even in the fridge, though, you should really only keep homemade emulsions for around the same amount of time as you would keep homemade food-based emulsions like homemade dressing or mayonnaise. (Seven to ten days is the absolute maximum amount of time that I would recommend.)
Conditioner bars, on the other hand, technically don’t need a preservative themselves. They don’t use any water-based ingredients, so there is no need to preserve the bars themselves. You are really only using them because of the way the bars are used. These bars have fats and are quite solid which keeps them more protected from water than the shampoo bars. They tend to repel water quite well. So, if you are careful about getting them dry between uses, yes, you could probably be fine not-using a true preservative. (Yes, I still recommend it.)
Very frugal!
With conditioner bars, you use a lot less product on your hair than what you would use when using a liquid conditioner. So, not only are you wasting less, which is, again, more environmentally friendly, but they are also great for saving money. I’ve been using the same conditioner bar for months now, and I’m not sure I can appreciate much of a difference in size from when I first started using it!
Watch how to make a homemade conditioner bar

How well do conditioner bars work?
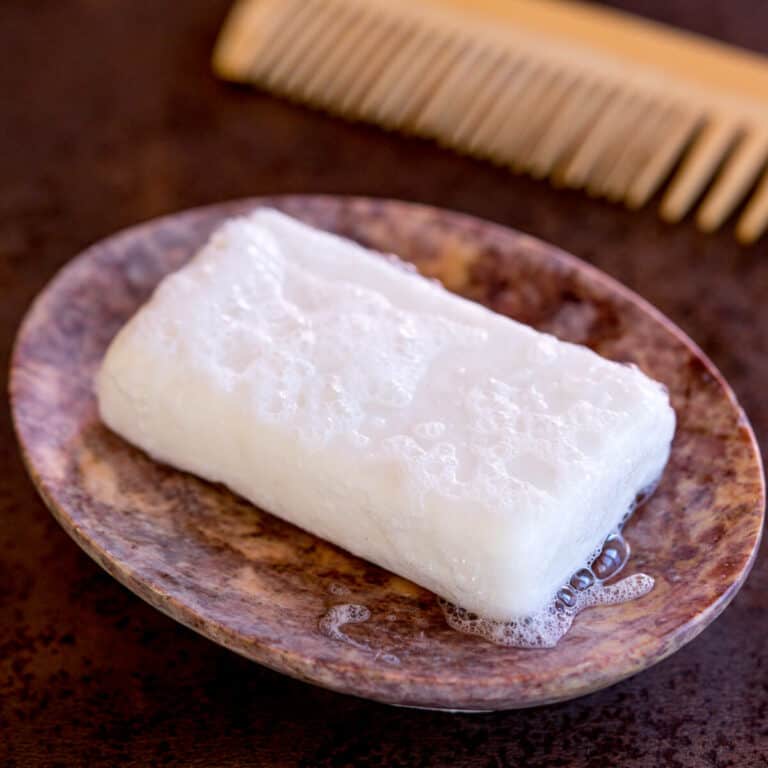
If you’re used to applying a large amount of conditioner to your hair, you may find it frustrating to adapt to a conditioner bar at first. The hard, solid quality of the conditioner bar needs to glide over your hair. It rubs off and onto the hair as you rub the bar against it.
With shampoo bars, you can tell that something is happening immediately. You get a lot of lather when you rub water over them, and you can use the abundant lather on your hair with or without the bar in hand. When you run water over the conditioner bar, though, nothing appears to happen. In fact, the water will be repelled by it. You have to patiently run the bar over your hair.
I’m not an especially patient person. I can be patient with people and with formulating weird DIY experiments, but have little patience for slow technology and don’t like wasting my time on certain tasks that I think should be quick. That’s why I didn’t expect to like using a conditioner bar (and why the first time I used it, I wasn’t completely convinced). In the end, though, the conditioner bar has definitely grown on me.
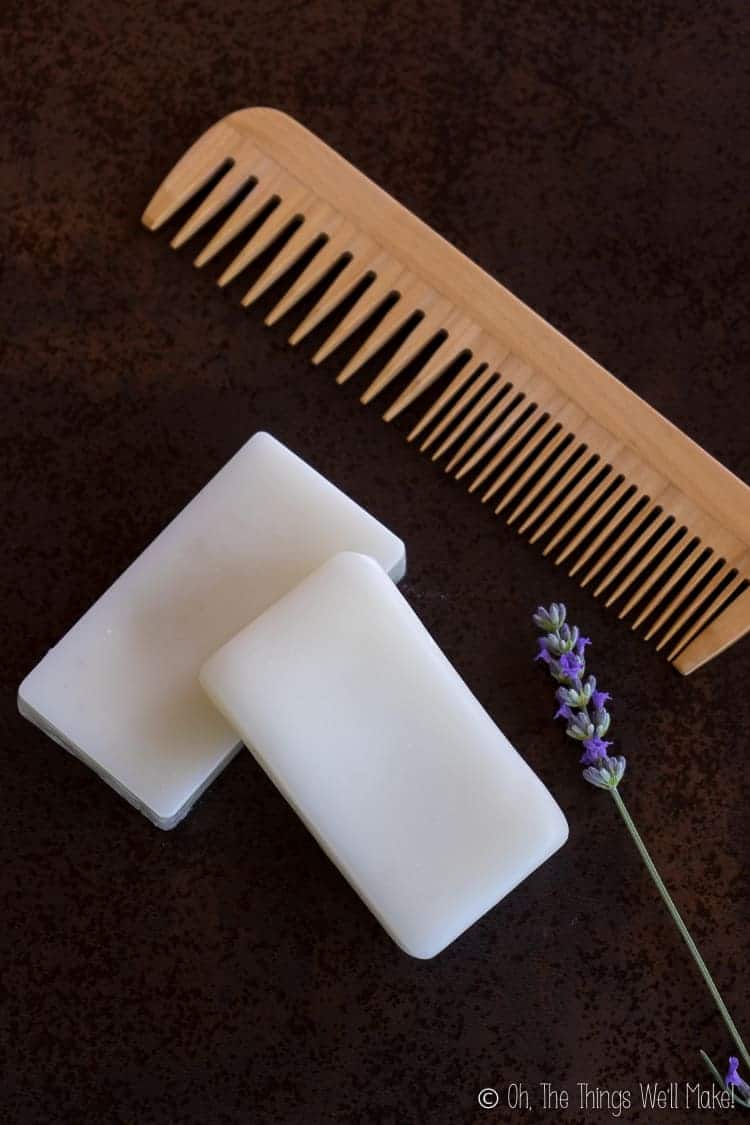
With either type of conditioner, I use my comb to spread the product through my hair. For those who are having a hard time using a conditioner bar, just that small tip may make all the difference for you. With the conditioner bar, not much product is needed. You just need enough to easily get your hair untangled. I run the bar over my hair, comb through, and then rub the bar again over the areas where my comb appears to stick.
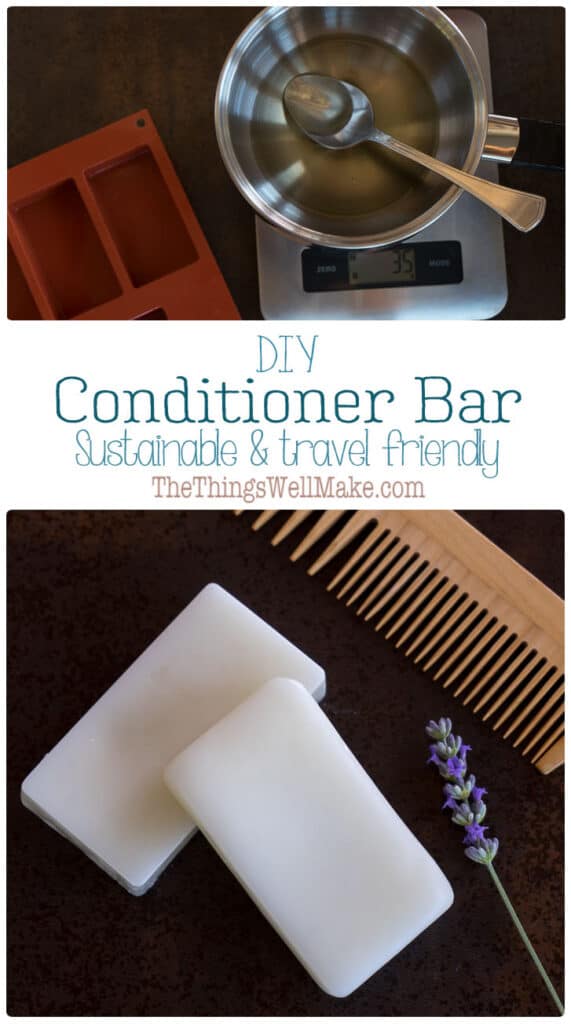
DIY Conditioner Bar Recipe
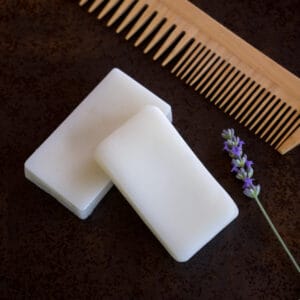
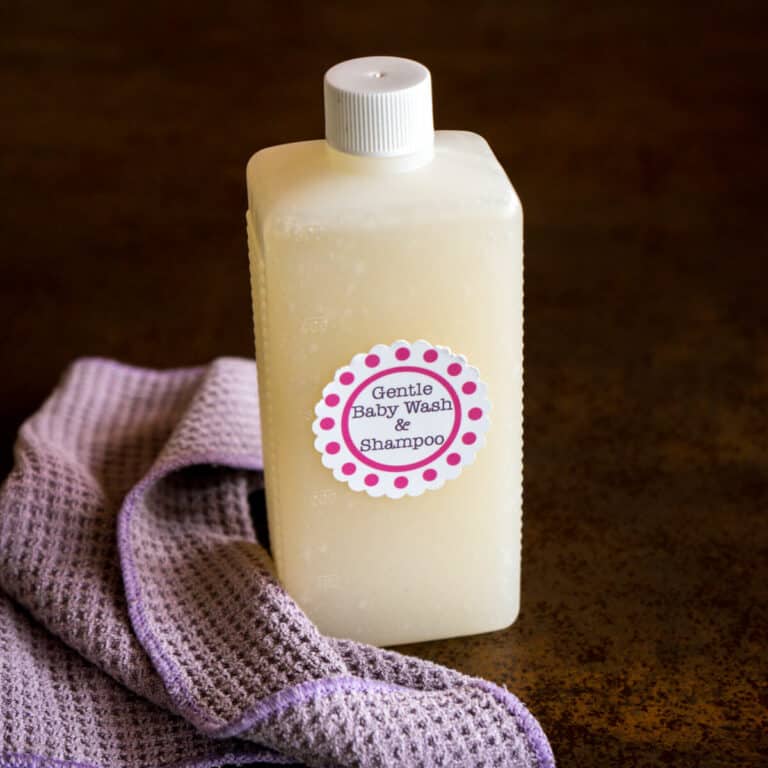
Homemade conditioner bar
Materials
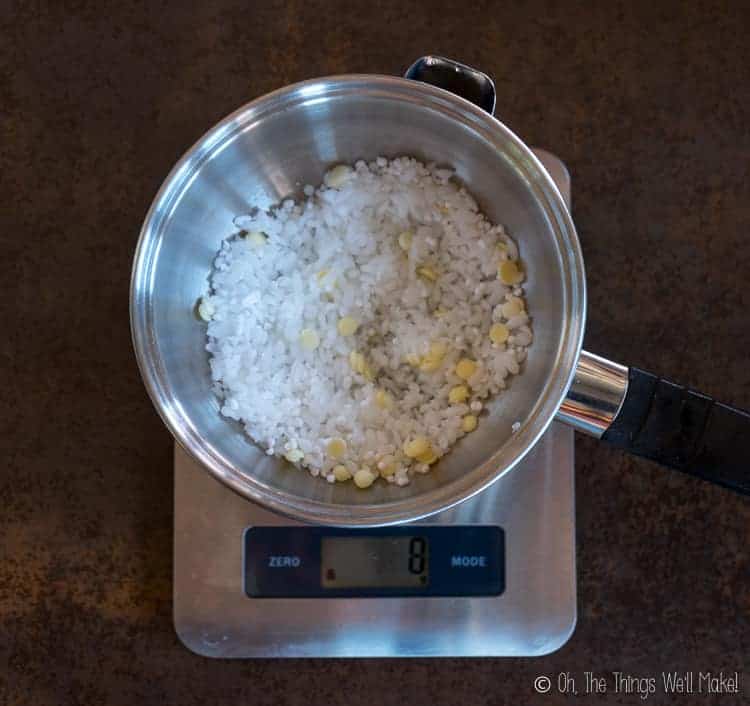
- 70 g BTMS
- 10 g cetyl alcohol
- 5 g cocoa butter
- 5 g coconut oil
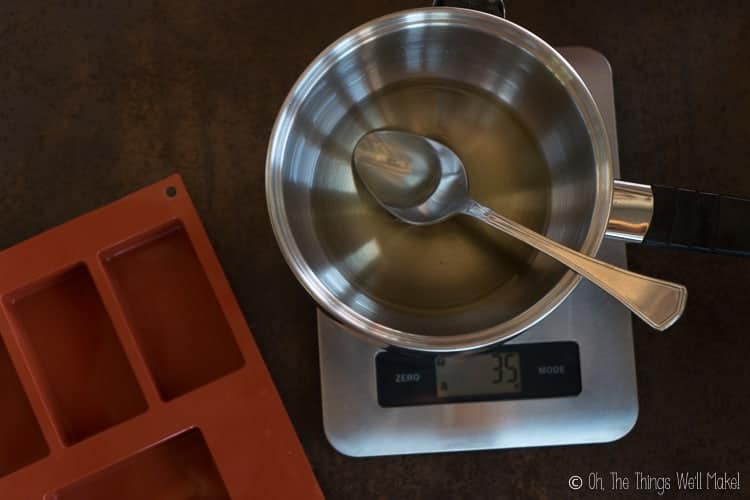
- 2 g d-panthenol
- 2 g lavender essential oil or other essential oils or a combination of oils
- 1 g Sharomix or another natural preservative at the correct percentage for the recipe
- .5 g vitamin E
Instructions
- Weigh out the BTMS, cetyl alcohol, cocoa butter, and coconut oil in a double boiler insert or a stainless steel bowl that can be used over a pan of water.

- Gently heat (over a double boiler) until all of the ingredients have melted. Stir them well to combine them.
- Remove the pan from the heat source.
- Weigh out the other ingredients (preservative, essential oils, etc.) and add them to the melted oil-phase ingredients. Mix together all ingredients.
- Immediately pour into bar sized mold. (I used a silicone mold meant for soaps or mini loaf-shaped muffins.) You can find something similar here: https://amzn.to/2SAxYMj

- Allow the bar(s) to cool completely.
- Remove the conditioner bars from the molds.
- You can now immediately use your homemade conditioner bar.


I’m in the US and can’t find Sharomix. Is there another natural preservative that I could use instead and, if so, how do I figure how much of it to use?
Hi, I can’t watch the video, Youtube says “this video is private”.
Thanks for the heads up, CJ. I fixed it!
Sorry for the delay in answering you as we celebrated my son’s birthday with a big party this weekend and I’m just now catching up!
Hi! I just made this recipe with btms 50 because that’s what I had. As a hairstylist, I’m really picky about my products. Im not exaggerating when I say my super tangled hair has never been more smooth and sleek. I can run my fingers through it immediately after I apply the bar conditioner, and that’s never been the case in my whole life. I’ll never use anything else again. It’s incredible. It’s a nice, hard bar and after a few uses, doesn’t appear to have gotten smaller, leading me to believe it will last a long time. Im in awe
Also, generally after conditioning, I have to load my hair up with leave in conditioner, oils, etc to make it feel less tangled. Not the case at all now. It’s light, fluffy, but not frizzy, and feels so smooth. Amazing
Hi Rebecca,
I’m so excited to see your comment! That’s wonderful!
Yes, the bar lasts and lasts for a really long time, I’ve been using the same one for months.
I’ve never used BTMS-50, but I hear they work almost identically. I feel the same way as you do about simple products made with it and not too many other ingredients. In a cream form, it works really well too!
Would there be a way to make this oil-free? I use your basic BTMS conditioner recipe minus the oil—my curls love it! My hair HATES conditioners with oils.
Hi Jenna,
While you could try it, I’d think it would end up being too solid to use. Perhaps there is a way to substitute it for water seeing as the BTMS is an emulsifier. Of course, if you do it that way, you’d definitely need the preservative.
You’d also probably have to experiment a bit with how much water to use to soften the bar enough to make it useable, but not so much that it’s soft and gets used too quickly.
(This, of course, is all a guess for me as I haven’t tried making this with water.)
Thank you!
You’re welcome! 🙂
Help! After my first successful batch, I’ve had some issues ?
Well, one issue I guess. Wrinkles on top of my bars within seconds of pouring the mixture into molds. Soooo ugly. ? did I overheat?
Hi Rebecca,
I’m not sure, but it could just be that it cooled really quickly and was too thick to smooth out. It’s hard to get the top of the bars to be smooth.
You could perhaps try covering it with some wax paper to help smooth it and then peel it off when cool. (I haven’t tried that, but may do it next time to see what happens.)
Thanks for posting this recipe! I definitely want to give it a try and get started on making my own conditioner and shampoo bars. Where do you source the Sharomix preservative from?
I live in Spain, so unless you live nearby, it’s probably not going to be helpful. (I tend to buy from a place online called CremasCaseras.)
I’m actually working on a post that will help better explain and give alternatives for natural preservatives. Use whatever one you can find and feel comfortable using.
There are a lot of them that you can use: Preservative ECO, Euxyl® K903, Cosgard/Geogard, Rokonsal, etc.
Hi Tracy,
I live in Sn Diego CA, . It is still hot here.
I would like to try your Hair conditioning bars.
Is BTM225, that I saw it on Amazon okay to use. You did not specify any number for BTMS.
Thanks for all your natural creation.
Radha
Hi Radha,
Yes, that’s the one I used. I didn’t specify because either should work fine in the recipe. ?
Still hot here too! (Not complaining, though!)
I will apologize up front for this question but the info isn’t coming together for me LOL! I’m trying to figure out just how the conditioning bar would be used. I get rubbing it on your hair but that would just be on the top layer of hair, right ? And then what? How does it get evenly distributed? And does it get rinsed out or is it a “leave in”?
I’m intrigued by the concept of a conditioning bar… thanks for sharing!
Hi Marie,
Don’t apologize!
I get it. It’s weird at first, but some of the conditioner rubs off and onto the hair as you rub it over your hair. Perhaps obviously, the more areas you rub it directly, the better. (I usually lift up my hair and rub it underneath too.) I then use a comb to make sure it gets through all of my hair. You’ll notice that as you comb, your hair detangles more and more easily as the conditioner is dispersed.
I choose to rinse it out as I normally do with other conditioners. I suppose that if you have very dry hair, especially if porous, then you could probably leave some in. I think for most people, though, this one would weigh down the hair if left completely in.
Thank you for creating a more detailed picture…. I get it now!
Hi, I noticed that in your other conditioner you used Leucidal, but in this one you’re using Sharomix. Can I use the Leucidal in this one or the Sharomix in the liquid conditioner? I’m new to this and am hoping to reduce the amount of ingredients I have to buy until I’m sure I’ll be doing this longer term and will use everything up. Thanks!
Hi Erica,
Yes, that’s fine.
I’m going to be updating all of the recipes soon. I am working on a post about some natural preservatives. At first, I was using Leucidal because I know a lot of people are looking for what seems to be the “most natural” and something made from fermented vegetables just seemed very appealing. Since then, I’ve been experimenting with a lot of natural preservatives and haven’t really gone back to Leucidal. I never had any issues with it, but I’ve read that it’s been known to fail microbial testing at times. I also don’t really like the fact that you need to use it at around 4% of the recipe for it to be effective on its own.
You don’t have to use Sharomix either. It was just what I’ve been using lately. Find one you like and use it at the recommended dosage. (Most are somewhere around %0.5-%1.5).
Firstly thank you so much for all these recipes – I’m loving them.. I have a query about this one tho as from what I can gather if you add the liquid ingredients not long after the BTMS mixture is heated up, then it’s too hot and will degrade a couple of these ingredients – notably any preservative or vitamin e. However I’ve also tried waiting for the BTMS to cool down and it becomes solid at around 60oC so you can’t keep it liquid until under 40oC to add the last ingredients. Have you any ideas about this?
Hi Caroline,
As you saw, you can’t really wait to add them after a certain temperature (like you normally would) as it will solidify again. You just have to add them last and immediately pour them into the molds. They aren’t at a high heat for long, and if you’re worried about it, you can put the mold into the fridge or freezer to speed things up.
The basically said to do the same in one of the haircare courses I took. I know it’s not ideal, but it shouldn’t be enough to cause any problems. 😉
Hi, I’m a newbie so this might be a silly question, but I have DL panthenol. Would that work instead of the d panthenol? I don’t know what the difference is between the two>so hoping I can use what I have. Thanks for sharing your recipes! How long have you been using your shampoo bar and conditioning bar? I find that it takes a month or so of using something before I know how my hair is really reacting to it, and how well it is working for me. Thanks again!!
Hello!
To be honest with you, I hadn’t seen dl-panthenol anywhere before. I looked it up and found some information on the making cosmetics site. From what I can tell, it shouldn’t be a problem to switch them out.
As for how long I’ve been using them? It’s been using the bars for at least a couple of months now. I was using my clarifying shampoo and my homemade liquid conditioner before that. I don’t see a huge difference in my hair between using these vs. those. In either case, I only shampoo 1-2 times a week, and may occasionally wash with the conditioner between shampoos. I have delicate hair that began wavy, but that is quite curly now that the condition of my hair has improved with these milder cleansers. 😉
Thanks so much for the info, I really appreciate it!! I’m going to try the shampoo and conditioner bars soon!
Awesome! I hope you enjoy them! 🙂
2 questions:
First I was just curious if you had any good ways to colour the shampoo and conditioner bars. I can’t really tell the difference just looking at them so if I could colour one without
1. dying my hair accidentally or
2. messing up the mixture so it doesn’t work
That would be super handy. (If not it is really just a convenience thing)
Second on avoiding growth issues without a preservative:
Would it potentially work to keep the bars in a dry spot cut/shaped into chunks appropriate to what you would need for each wash? Then one could just take one piece for each wash and all the others would remain safely dry. I haven’t tried myself but I had the thought and figured I would put it out there.
Hi Bernadette,
I haven’t tried coloring either bar, but I don’t see why you couldn’t do that. I’d probably do it with the shampoo bar because you’re more likely to leave something behind with the conditioner bar. I’d assume that you could use the same sort of colorants that you use for bars of soap: micas, iron oxides, or other not-so-natural colorants. Because these don’t use lye, you may even be able to use food coloring.
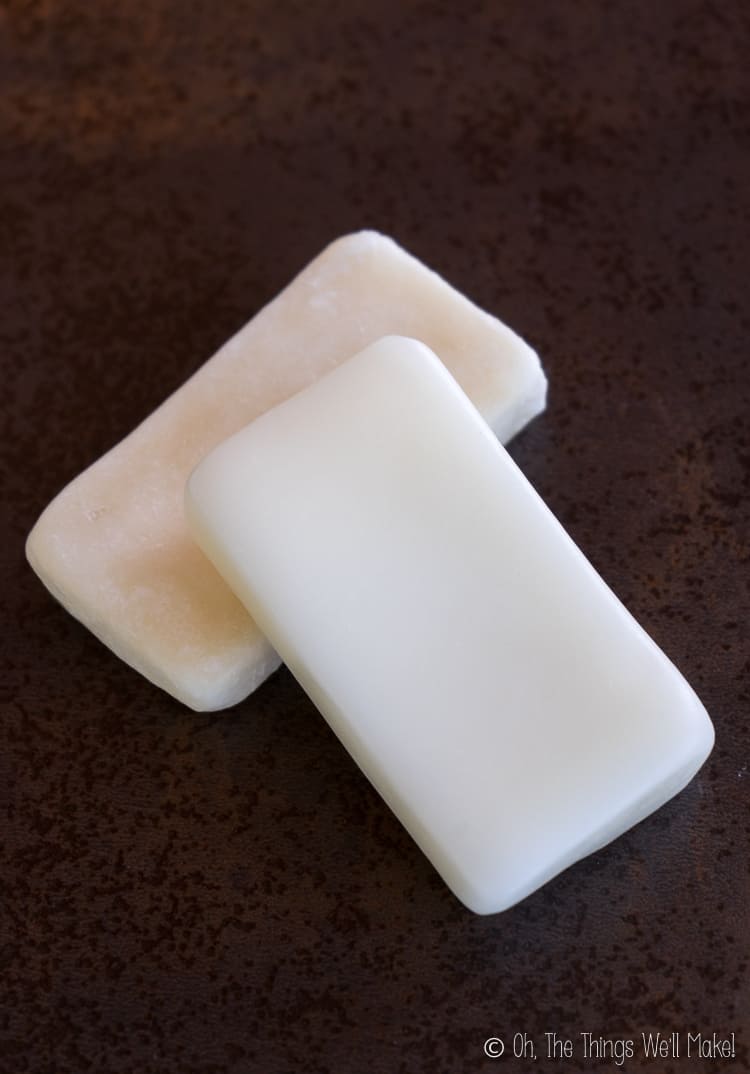
I don’t have a problem telling them apart as the conditioner bar is a brighter white and is smoother and harder. (That can also be adjusted if you want a softer bar.)
You could try cutting it into smaller pieces, but the problem with that is that it would be harder to use and you would use them up more quickly. Honestly, these last for a very long time. I’ve been using the same bars for a couple of months now and they are still quite large. I keep them standing on the short side as shown in the photo taken on my cruise, so they do dry quite quickly that way!
Hi! I tried this recipe but opted out of refrigerating the bars after pouring. My hair was great after the first use. However, my hair turned frizzy after the second and third use. Would you have any idea on what may have caused this?
Hi Anne,
I’m not really sure. I haven’t had that issue at all. I can try asking in one of my haircare groups to see if they have any suggestions.
Have you made any other changes to shampoos or other hair care products?
If this had been the liquid conditioner, I would have maybe suggested trying it without glycerin. Glycerin is great for most people, but for some hair types and/or in some climates, it can cause frizziness. Here, though, I have no idea what could be causing the frizziness.