

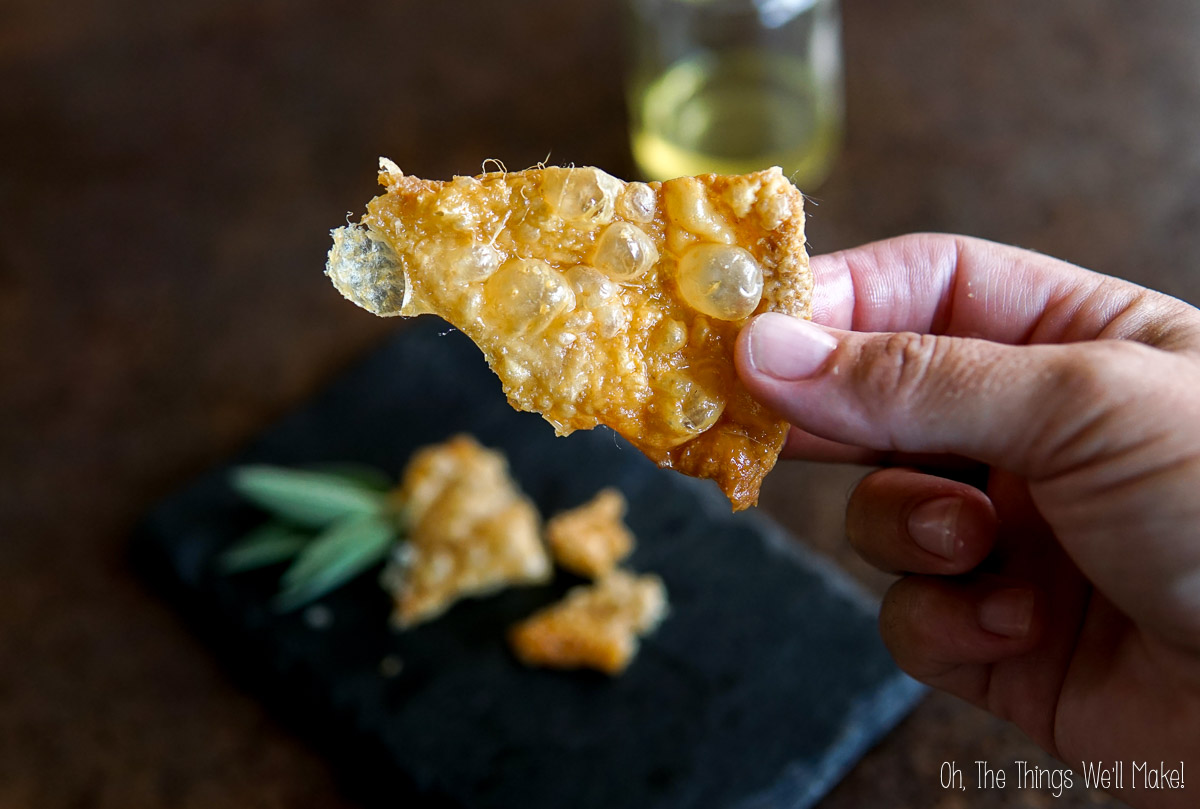
Crispy Chicken Skins
Learn how to make perfectly crispy chicken skins in the air fryer or oven! This quick and easy recipe makes a no-carb, crunchy, irresistible treat.

Why make them?
If you enjoy crispy, salty snacks, you’ll love this recipe!
Meat sold with the bone and skin is generally cheaper. I prefer roasting chicken with the skin on, but some recipes, like my keto chicken nuggets, use only the meat.
Why waste such a delicious ingredient when you can whip up golden, crunchy chicken skins?
They make a tasty keto snack or a no-carb crunchy topping! Cooking them in the air fryer makes it fast and easy, with minimal cleanup!
Are they healthy?
As a child, the crispy chicken skin was my favorite part of a roasted chicken. Sadly, conventional nutritional information scared me into avoiding it for many years.
We were told that the saturated fat in the skin would make us fat and give us heart disease. (The American Heart Association still advises replacing saturated fats from meat and butter with inflammatory seed oils like canola and soybean oil.) They claim that it increases your LDL levels.
Ironically, one year, I managed to lower my LDL cholesterol by 30 points by indulging in fatty meats the entire day leading up to my test. My doctor was shocked and asked me which medication I had taken to bring my “cholesterol” down so far. I could only laugh at the answer.
Saturated fat affects people differently, but growing evidence suggests it doesn’t clog arteries. If you’re concerned, eat them in moderation, but don’t reject the skin!
Ingredients
To make crispy chicken skins, you only need a couple of simple ingredients. You’ll obviously need the main ingredient: chicken skins. You can pull it off the chicken thighs or breasts and use the meat for other recipes. (Like keto chicken nuggets) If you’re lucky, you may be able to get some chicken skins from your store or butcher.

Salt is optional, but it brings out the natural flavors, so I recommend using it.
If you want to change things up, add smoked paprika, garlic powder, or black pepper for a hint of spice. Experimenting with herbs like rosemary or thyme can also add new flavor.
Instructions
First you’ll want to preheat your air fryer to 375°F (190°C). This temperature allows the skins to crisp up without burning.
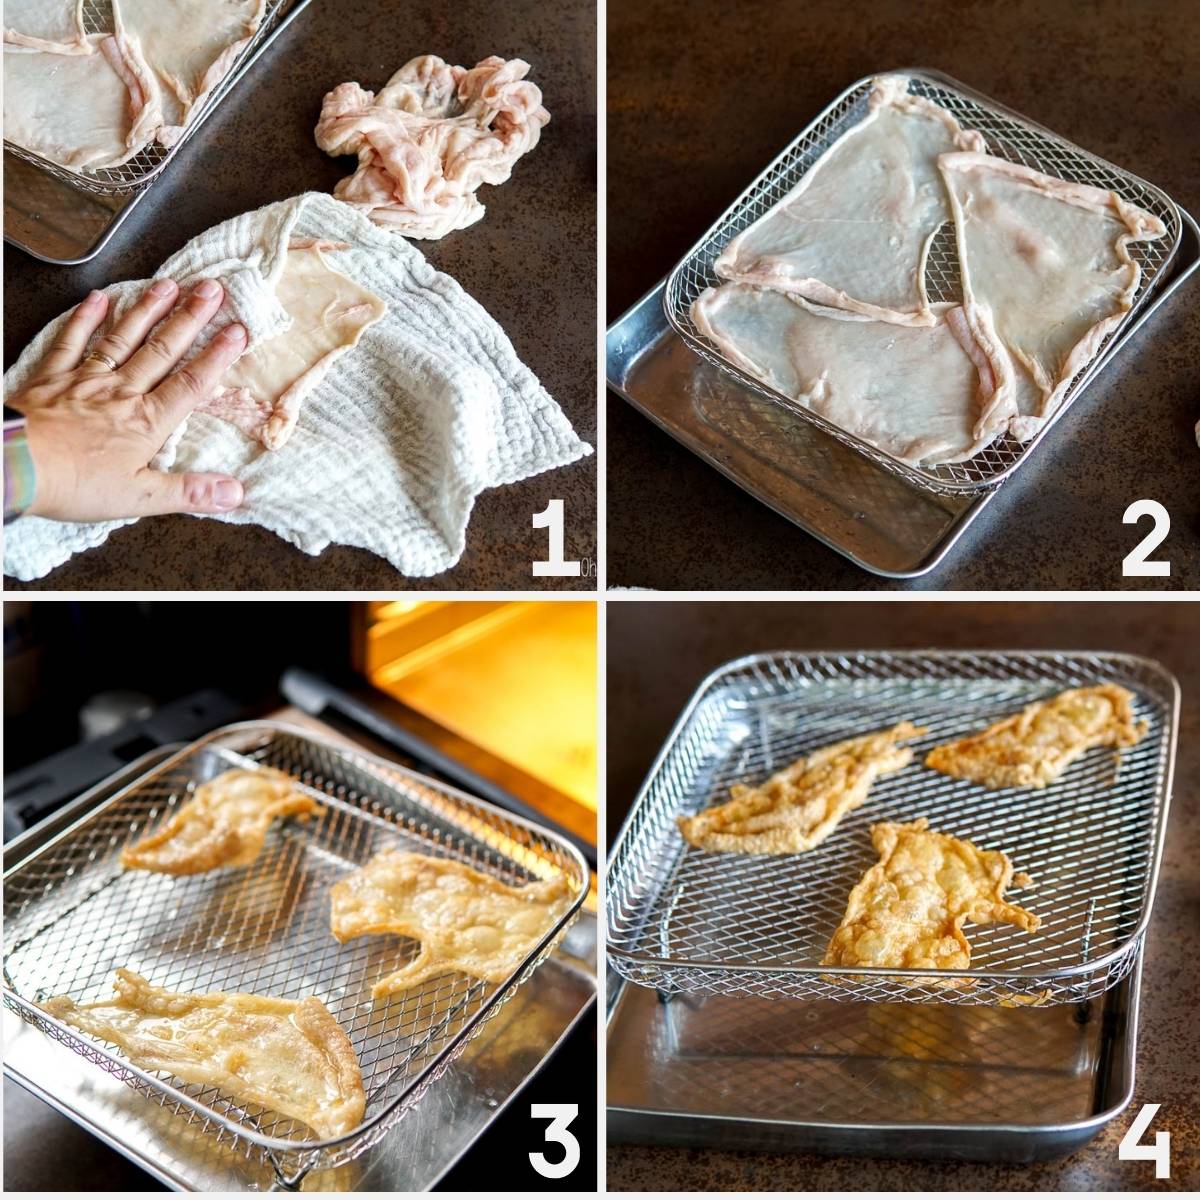
- To begin, pat the chicken skins dry with a paper towel or cloth to remove excess moisture. This will help them become crispier! Sprinkle salt evenly over both sides of the chicken skins.
- Arrange the chicken skins in a single layer in a tray or air fryer basket without overlapping. This allows them to cook evenly and get nice and crispy. If you have a mesh griddle, you can place your skins there for better air circulation around them.
- Cook the skins for about eight to ten minutes. Flip them halfway through cooking, being careful not to tear them if they’re stuck. Flipping them ensures they cook evenly, and helps them cook flat. After about eight to ten minutes, the skins should be golden brown and crispy. If they aren’t yet, air fry them for another two to three minutes, keeping a close eye on them to prevent burning.
- Remove the chicken skins from the air fryer and let them cool. They will get crispier as they cool.
O
Making them in the oven
I like using the air fryer because I usually make just a few at a time and don’t want to heat the whole oven. It’s also faster for small batches. If you’re preparing a large batch or lack an air fryer, though, the oven method is likely your best option.
- Preheat your oven to 400°F (200°C) and line a baking sheet with parchment paper for easy cleanup.
- Prepare the chicken skins in the same way. (Dry the skins thoroughly and season both sides.)
- Lay the chicken skins flat on the baking sheet, leaving space between each piece. Bake for fifteen to twenty minutes or until golden and crispy. Flip the skins halfway through baking to ensure even crisping.
- Remove the skin from the oven and allow them to cool before serving. They will continue to crisp as they cool.
Tips for Crispy Chicken Skins
- Make sure to pat the skins dry before cooking them; excess moisture can prevent crispiness.
- Don’t overcrowd the skins. Overlapped areas won’t crisp properly.
- Try different seasoning blends to match your taste! Sprinkle on delicate herbs after you remove the skins from the oven to avoid burning them.
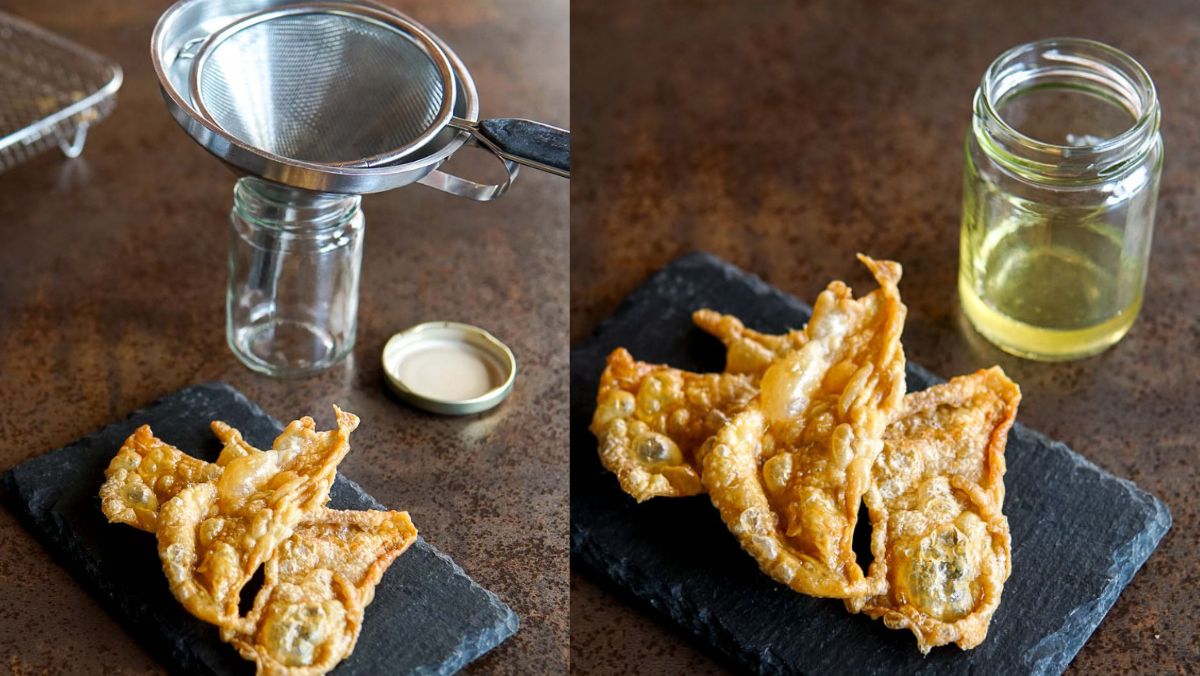
Saving the rendered chicken fat (aka. shmaltz)
Save the rendered liquid fat, or schmaltz, for other recipes. I like to brush it over my air-fryer keto nuggets before cooking them!
To save it, pour the liquid fat through a stainless steel strainer into a heat-safe jar. Like homemade tallow and lard, it will solidify when it cools.
W
Storage
For the best flavor and texture, enjoy your crispy chicken skins fresh! If you’re set on storing them for later, though, here are some tips.
To store your crispy chicken skins, allow them to cool completely after cooking to keep them from getting soggy. After cooling, store the skins in an airtight container lined with a paper towel or cloth to absorb excess oil. Store them in the refrigerator for up to 3 days.
To regain their crunch when you’re ready to eat them, reheat the skins in the oven or air fryer at 350°F (175°C) for two to three minutes. Avoid microwaving them, as it can make them lose their crispy texture.
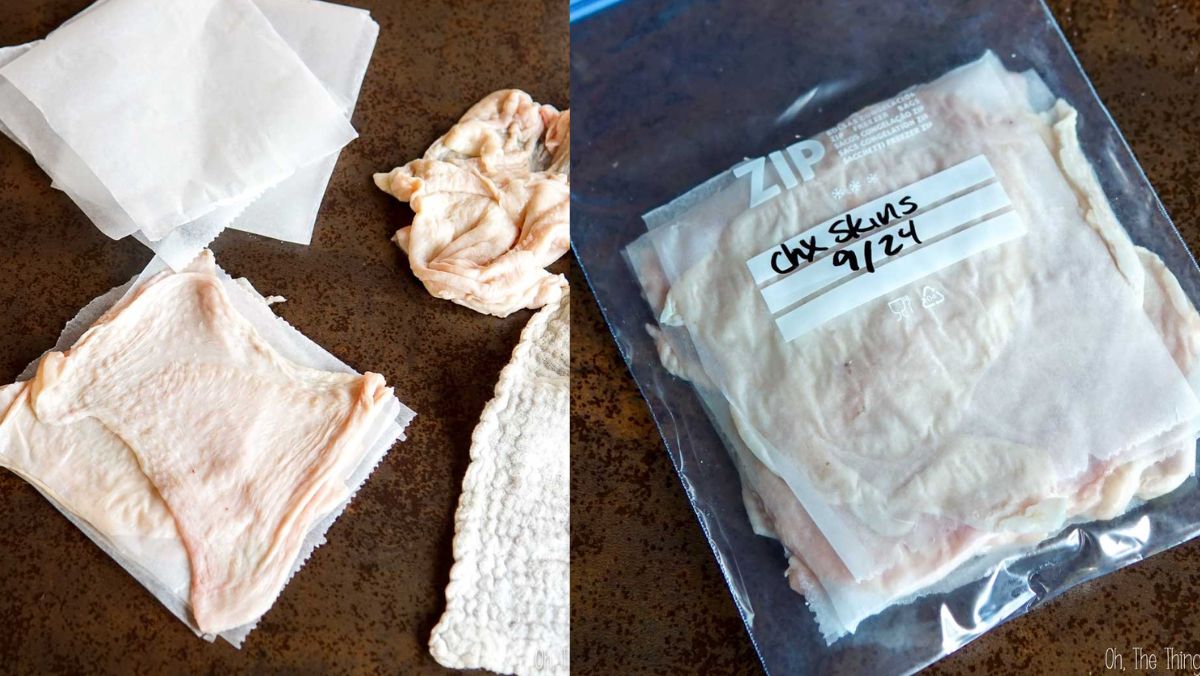
Freezing
Rather than storing the cooked chicken skins, I recommend freezing excess skins for whenever you’re ready to cook them. Ensure the skins are thoroughly dried before placing them in layers between sheets of wax paper or baking paper. Then, place the stacks of chicken skins in freezer bags and freeze them until you’re ready to use them.
Serving Ideas
I like eating the crispy chicken skins alone as a snack, but there are other creative ways to use them!
Some people like to crumble them over their salads instead of croutons as a keto-friendly topping. They can also be added to other dishes for a crispy topping. (I think they would be delicious on a hamburger or over some meatballs!)
However you decide to use them, I hope you enjoy them!

Crispy Chicken Skins
Equipment
- Air fryer
Ingredients
- 3 Chicken skins from chicken thighs or breasts
- 1 pinch Salt or any preferred seasoning blend, like garlic salt or smoked paprika
- pepper optional, or smoked paprika, garlic powder, or fresh herbs for added flavor
Instructions
- Start by patting the chicken skins dry with a paper towel to remove excess moisture.
- Sprinkle salt evenly over both sides of the chicken skins.
- Place the chicken skins in a single layer over a lined baking sheet or the air fryer basket. Ensure they don't overlap. This helps them cook evenly and get nice and crispy.
In the air fryer
- Preheat your air fryer to 375°F (190°C).
- Cook the skins for about 8-10 minutes, checking halfway through to ensure they’re not sticking to the basket. Flip them if needed.
- After about 8-10 minutes, the skins should be golden brown and crispy. If they aren’t quite there, air fry for an additional 2-3 minutes, keeping a close eye on them to prevent burning.
In the oven
- Preheat your oven to 400°F (200°C).
- Prepare the chicken skins in the same way. Bake for 15-20 minutes, or until golden and crispy. Flip the skins halfway through baking to ensure even crisping.
Finishing up
- Take the chicken skins out of the air fryer or oven and put them on a paper towel or cloth to soak up extra oil. Allow them to cool before serving for extra crispiness.
Saving the rendered shmaltz
- Pour the liquid, rendered fat from the tray into a jar, straining out any pieces of skin or meat.
Notes
- Pat the skins dry before cooking them as excess moisture can prevent crispiness.
- Don’t overlap the skins as overlapped areas won’t crisp in the same way.
- Try different seasoning blends by sprinkling them on the cooked chicken skins immediately after removing them from the oven or air fryer.
- Crispy chicken skins are a great snack on their own or with a dip. You can also crumble them up and sprinkle them over other foods for more crunch!
- The nutritional information is calculated automatically considering the approximate size of the skin of one-fourth of a chicken. It includes the skin and the accompanying rendered shmaltz.

Tried this recipe and it is GREAT! So easy and very little clean-up.
Thanks, Sylvia! I’m so ahppy to hear you enjoyed it!