

How to Make a Leather Purse
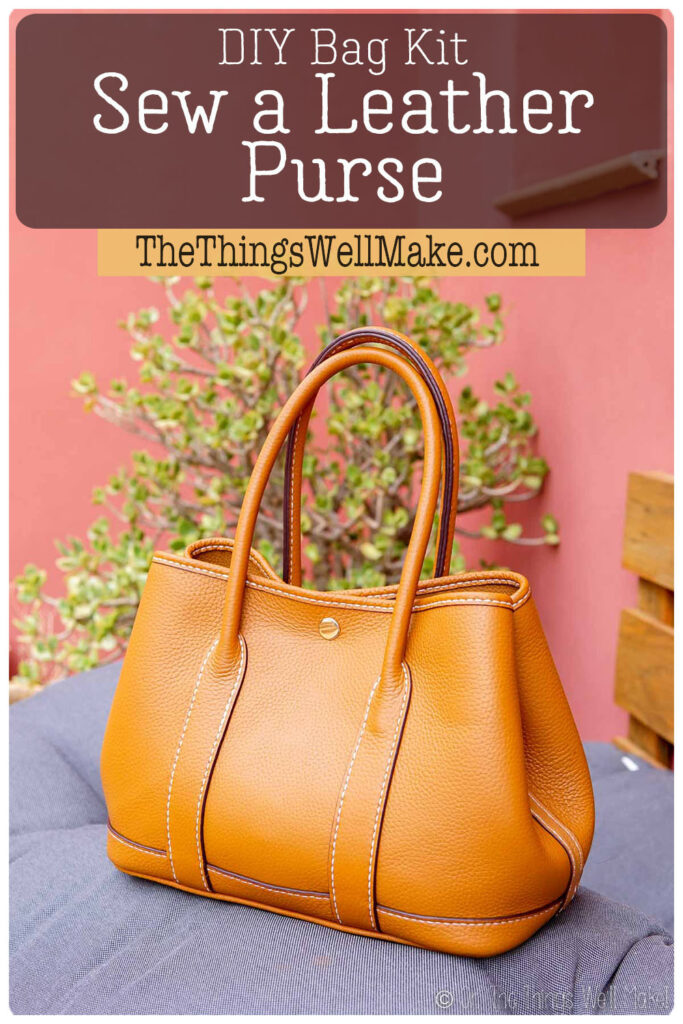
Even beginners can easily make a beautiful, supple leather purse with a complete, simple-to-make DIY bag kit.
As a blogger, I often get emails from companies that want to send me their products to test out and possibly promote on either my blog or social media. Truth be told, I usually ignore the messages or promptly decline. I like the freedom of doing what I want to do and say without worrying about what companies will think.
That said, when I received an offer from Babylon Leather to try making my own leather purse, I was intrigued. I’ve always wanted to try making something out of leather, but I was equally intimidated by it. The woman who contacted me, though, assured me that they have designed their leather kits to be suitable for beginners. According to her, I should have no problem making my own leather purse.
Excited at the idea, I picked out one of their beautiful purses and anxiously awaited my package. (So, yes, in full disclosure, they sent me the purse at no cost to me.)
Buy your Own Leather Making Kit at a discount!
Use my Coupon Code: TRACY20 for a 20% discount on your order at Babylon Leather!
Materials
When the DIY bag kit arrived, I opened it up to see what they sent me. (You can see me unboxing the kit in my video.)
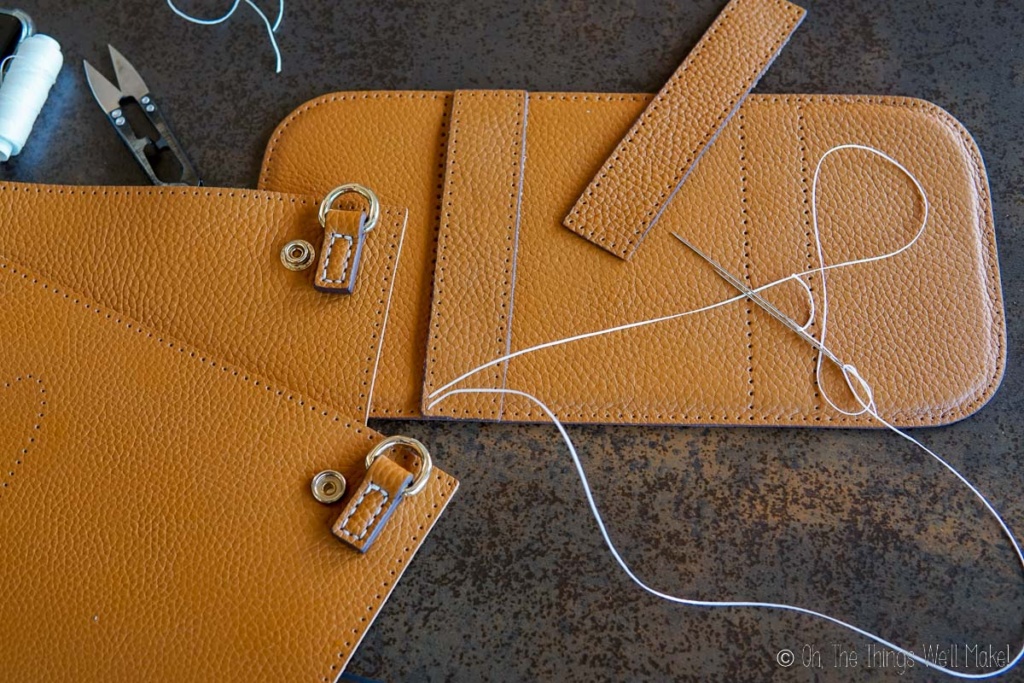
Inside, there were several strips of leather of varying widths and thicknesses as well as several larger pieces of leather. There were also some metal rings for sewing onto the purse, plastic cording for the piping and for reinforcing and forming the leather straps, tapestry needles, and some strong waxed white thread. They even included a small pair of snips for cutting the thread and some binder clips. I was happy to see that they had sent me pretty much everything I was going to need. (In hindsight, the only exception is a lighter that you’ll need to burn off the loose ends of thread.)
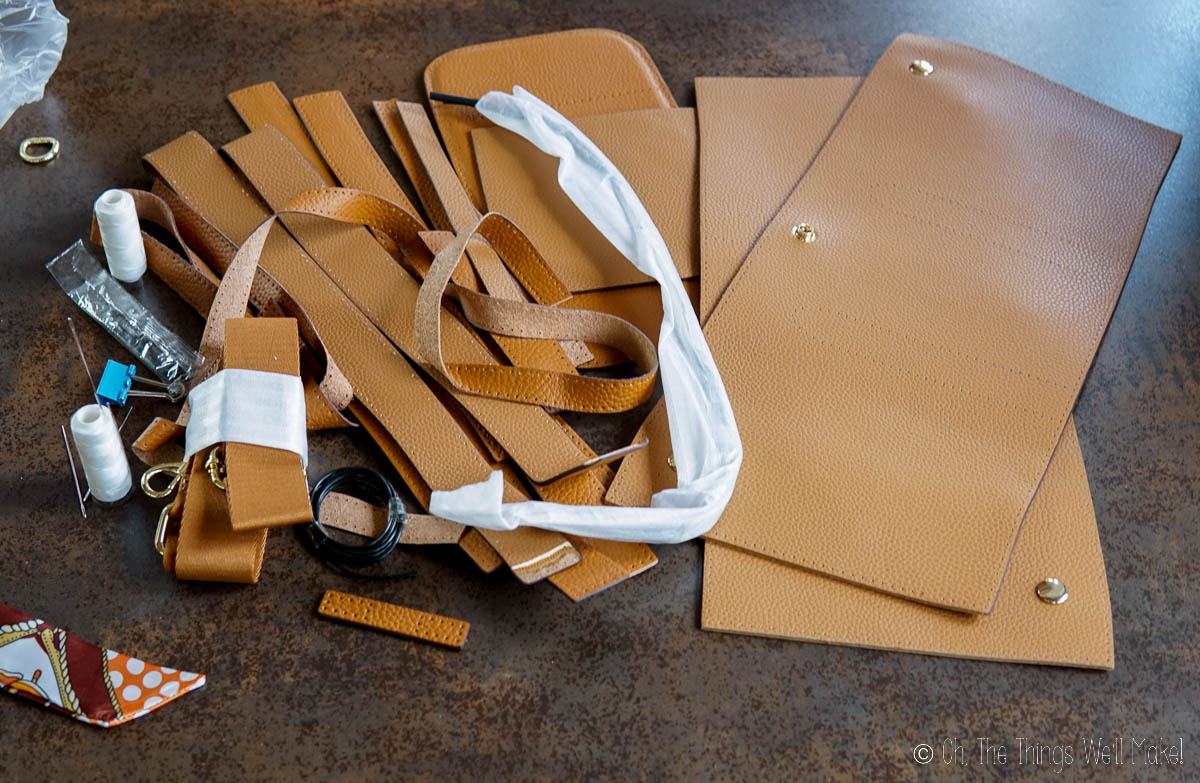
The leather pieces and strips had stitching holes pre-cut along their edges, simplifying the sewing process. (There’s no need for special tools like a rotary cutter to cut the leather yourself. Nor do you need a sewing machine. It’s all ready for beginners to begin putting their purses together.)
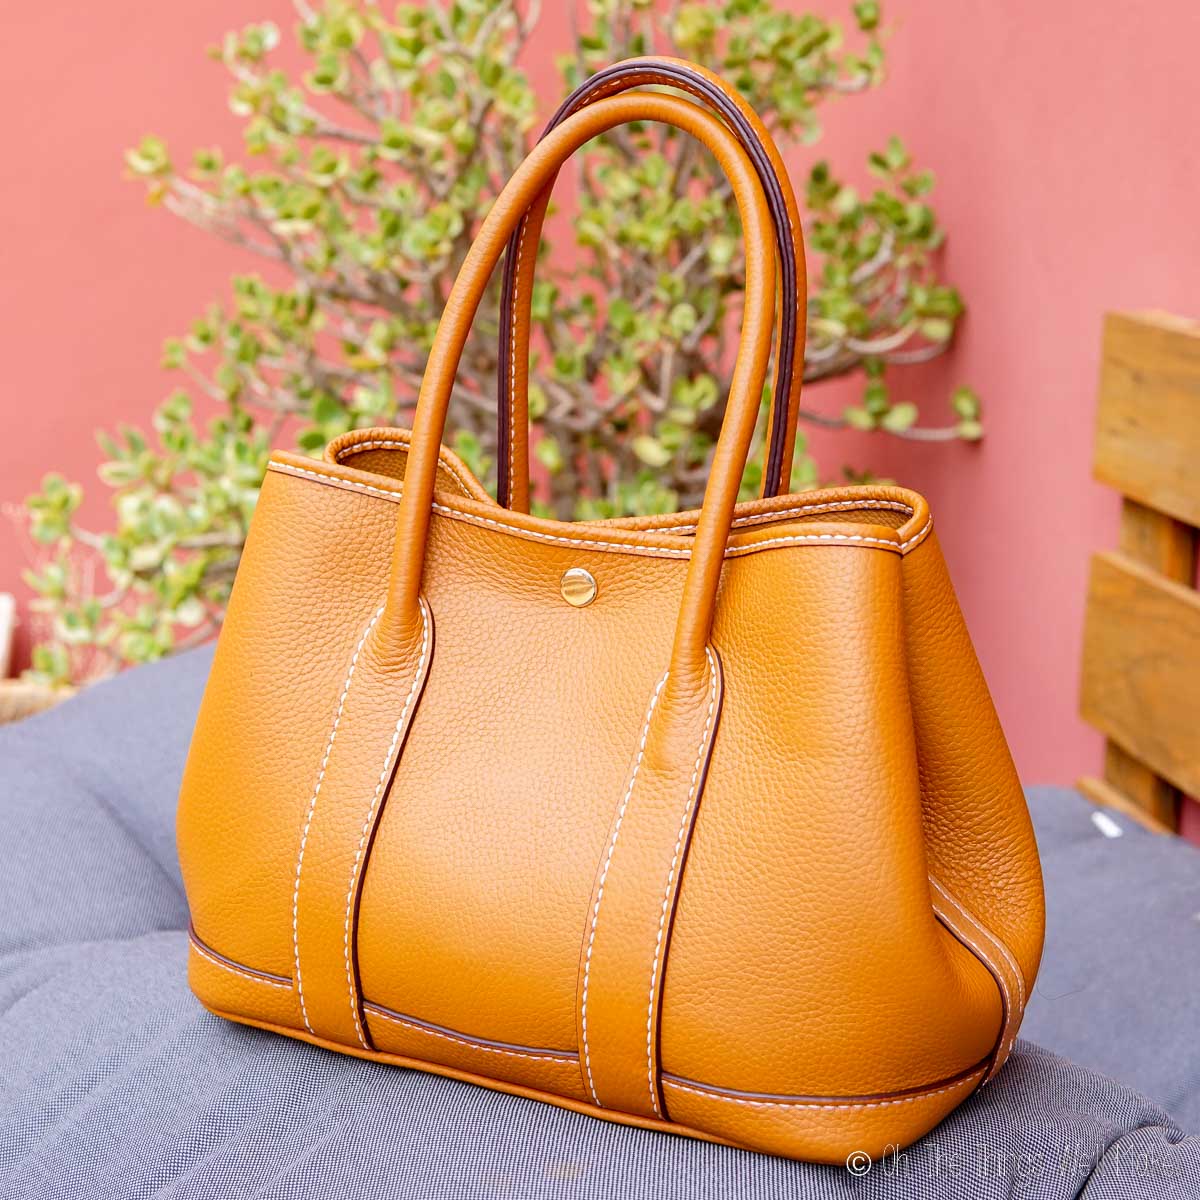
The edges of the leather are all nicely finished and oiled, giving the finished purse a professional look. (I’ve shown the purse to many people and everyone says it looks professionally made.)
Putting it together
When my kit first arrived, I noticed that it didn’t come with detailed instructions, so I was a bit worried. It turns out that the company was in the process of switching all of the written instructions to step-by-step videos. The video tutorials make it easier for beginners to visualize the process and understand what to do. They listened to feedback from their clients and quickly provided a solution to help people make their purses more easily.
The video tutorials
They sent me the link to the tutorial for my purse as soon as it was ready. The video was very clear. Despite my never having worked with leather, I was able to easily follow the steps.
My only confusion was in the very first step when the video showed how to do the stitching. I assumed that each thread had a needle on only one side (as is normally true when sewing). So, I prepared two threads each with one needle. Instead, you should use one thread with a needle on either side. After watching more carefully, I realized my error. After that, all steps were super clear. I had no problems figuring out how to assemble the purse.
The stitching
Through a search online, I learned that the stitch used throughout the project is the saddle stitch. The saddle stitch is simple and easy to do. It’s the only stitch you need to learn to make your purse.
Finishing the stitching
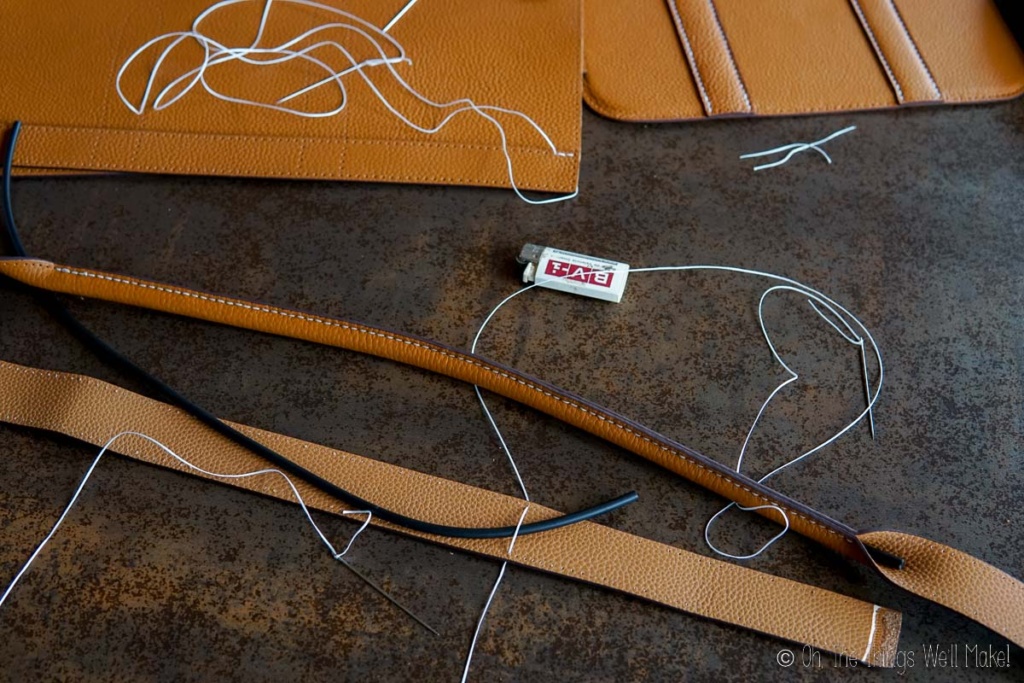
To neatly finish the seams, you should burn the ends of the threads off after a few backstitches. The backstitches help reinforce the seam and keep it from unraveling.
Once again, I made a bit of a silly error. The first lighter I found at home was more of a small torch than a regular lighter. I stupidly thought that its focused flame would allow me to better traget the ends of the thread. The result? I slightly burned the leather. Luckily, that first step has you finish the ends on the inside of your purse. So, my error isn’t visible in the finished purse. I ended up painting over the burn with a tiny bit of acrylic paint anyway.
Using a regular lighter, it was very easy for me to burn the ends of the thread without burning the leather. I had no issues getting a nice finish to my threads anywhere else on the purse!
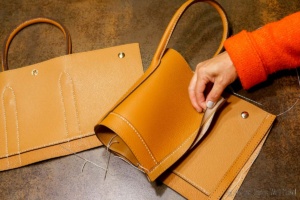
Sewing the purse
The instruction videos are very clear and show you in which order to assemble the purse.
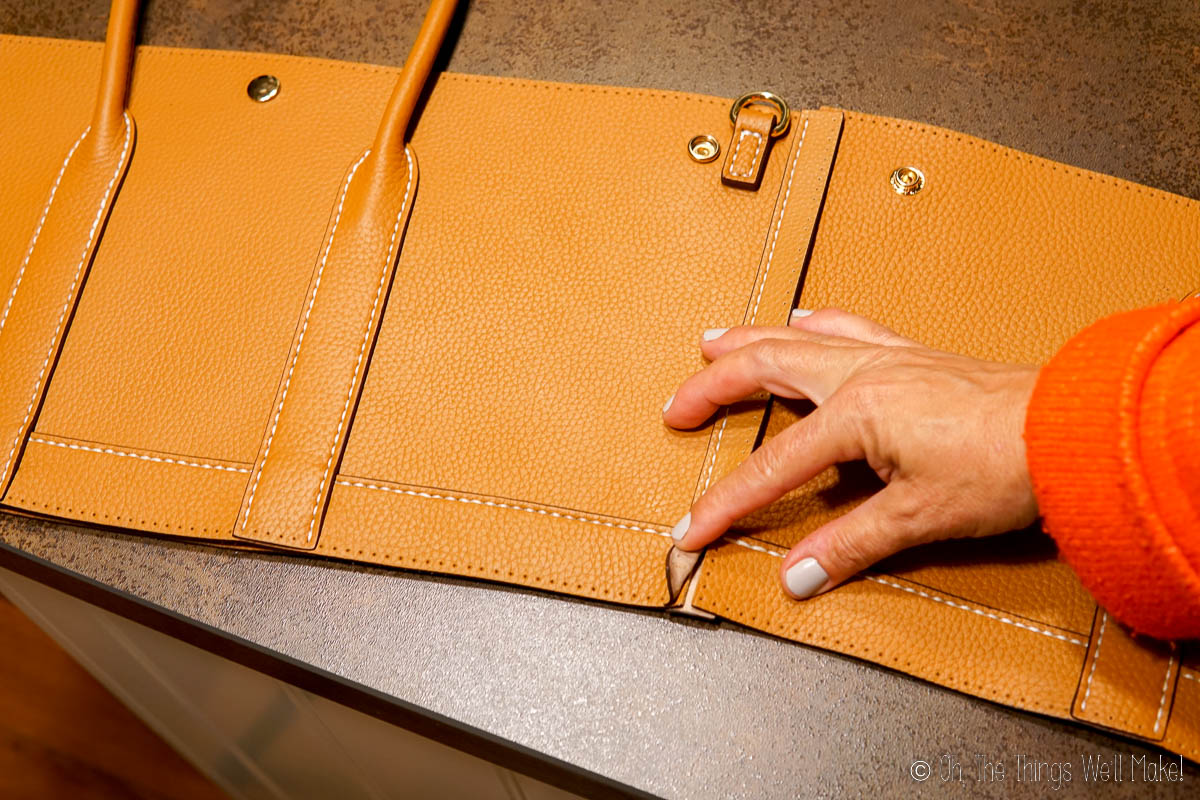
First, I added the metal rings to leather straps and sewed them onto the main pieces of leather. These rings are for use with a long strap that came with the purse kit. Next, I sewed some decorative leather strips onto the thick leather bottom. That was followed by sewing a decorative strip of leather across the bottom of each main piece.


Once I had finished with those steps, I sewed leather strips around some thick plastic cording to form the straps. They show you how to mark the holes where to begin and end the seam. I later used those unsewn holes to attach the straps to the main pieces of leather.
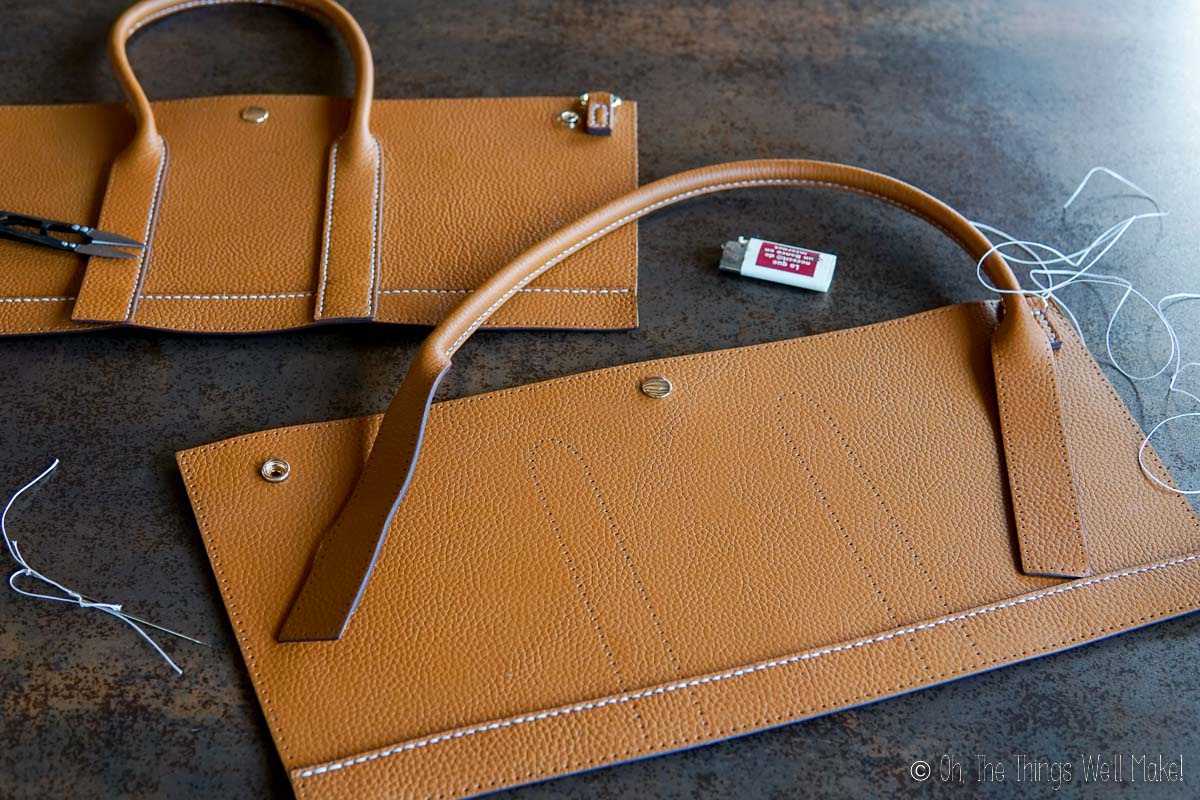

Once the main pieces and the bottom were finished, it was time to put them all together. Using 4 strips of leather (2 on either side), I connected the two main pieces of leather. (The strips of leather-covered the seam.)
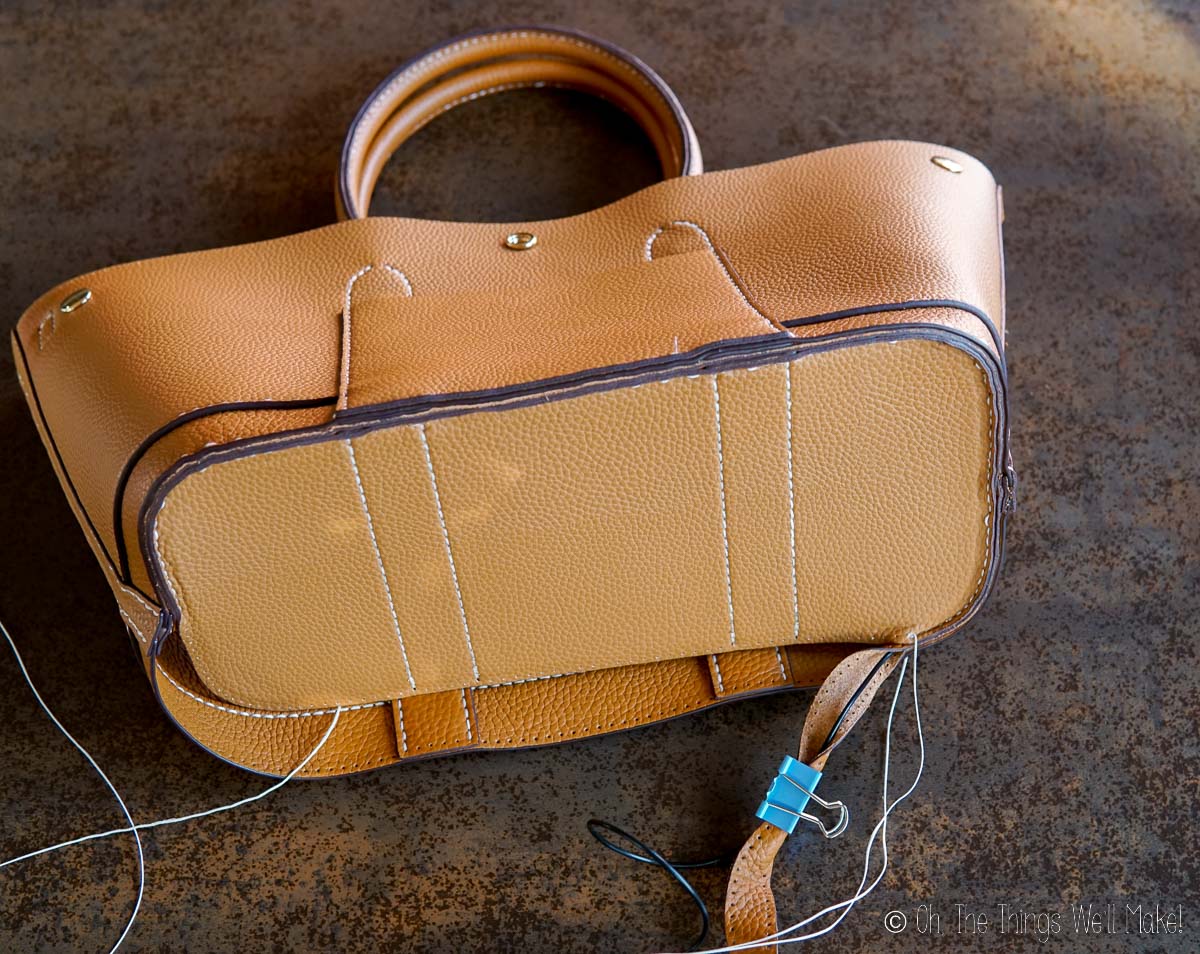
Next, I sewed the bottom onto the tube of leather. This step was the trickiest because you have to form the piping while connecting the purse together.
While it uses the same stitch and is easy enough to do, there are more layers to go through. This makes it much easier to make mistakes if you’re not paying attention to what you’re doing. Distracted watching videos while sewing, I missed a few stitches somewhere in the middle. Once I noticed my error, I took apart some of my stitching and was able to incorporate a new thread to fix it. I was worried I’d have to start the seam all over but was able to fix things pretty easily.
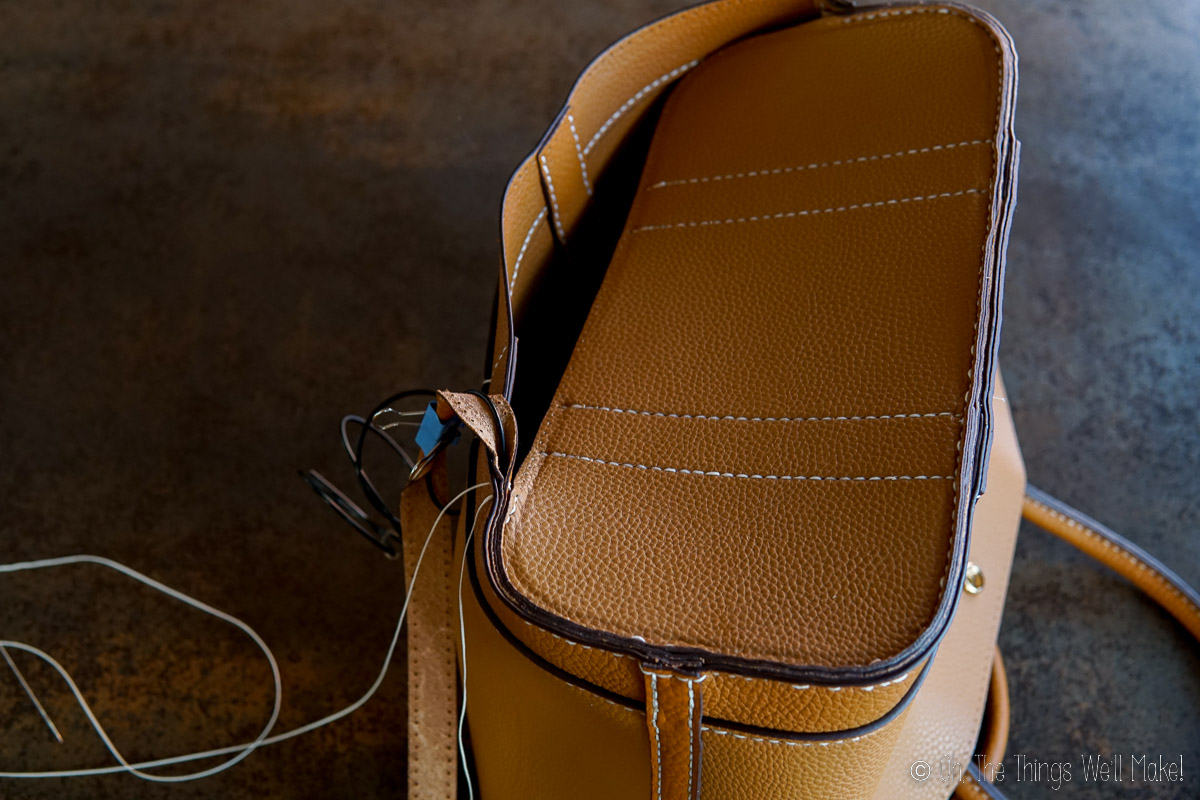
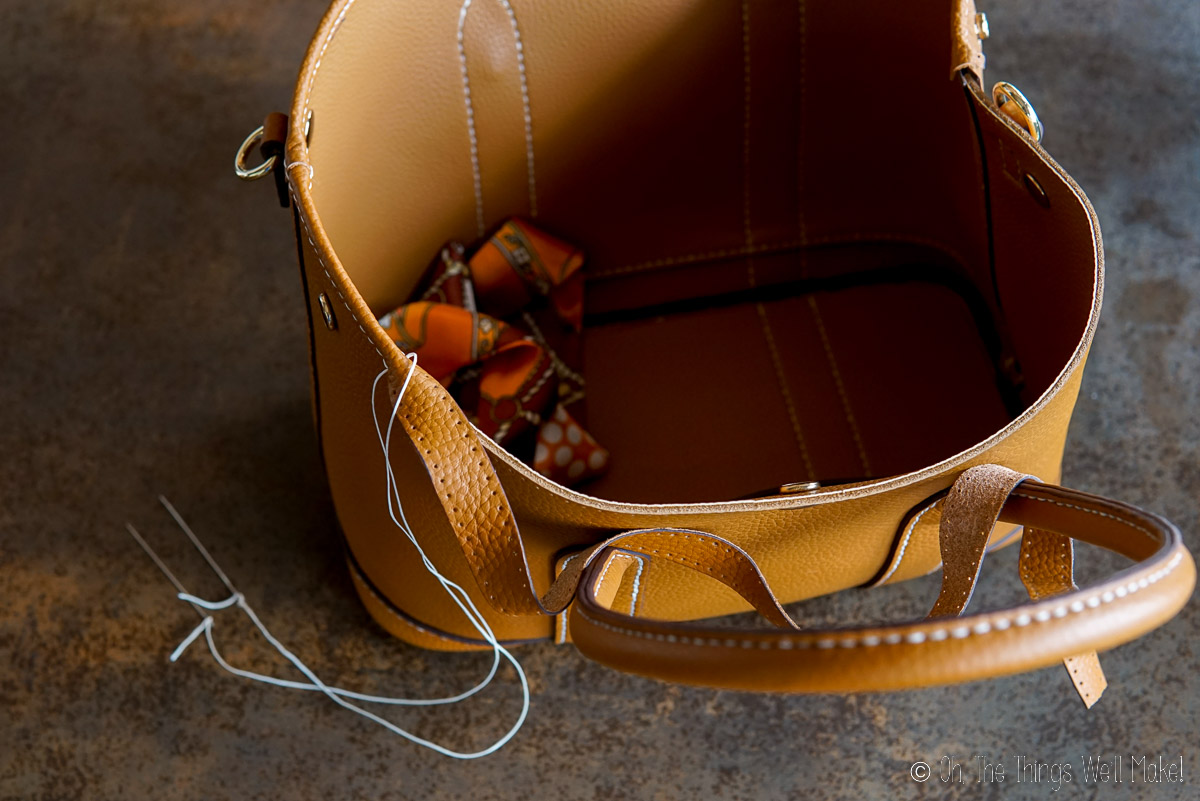
After sewing it all together, I flipped the purse right-side-out. It was almost finished. To complete the project, I sewed a decorative strip of leather around the top of the purse!
The project took me a bit of time to sew, but it was easy to do and the results were beautiful.
Using the purse
The purse I chose has a very cool design. It can be used unsnapped, making it look like a classic leather tote. On the other hand, you can snap up the sides, squaring it up into a smaller purse. I generally use the snaps because I like smaller-looking, squarer bags. It also closes the purse more, protecting the contents better. That said, I think it looks great both ways.
The purse came with a decorative scarf that can be tied onto one of the straps. I don’t generally use scarves on my purses, so I haven’t used it yet.
It also comes with a long strap that can be hooked onto the metal rings added in the first step. I love the length of the sewn leather straps. They’re just long enough to comfortably wear over your shoulder. Still, I love the option of having a longer strap.

Want to Buy your own DIY Bag Kit?
I’m no expert in leather. On the other hand, my friend, a lover of high-end brands, was really impressed by the quality of the leather. It’s nice and soft, but not thin and flimsy. I’m really happy with the quality.
The company that sent me my kit is called Babylon Leather. They don’t only have purse kits. They also have a wide variety of bags for both men and women, wallets, belts, card cases, coin purses, and other small leather projects like keychains, AirPods cases, eyeglass cases, and pen holders.
Sending internationally
Babylon Leather sends to most countries worldwide. They have warehouses in several countries (United States, Canada, Australia, France, the UK, and Germany), making it much easier to receive your packages without dealing with customs fees. Here in Spain, customs has been stopping pretty much all packages from outside of the European Community lately and charging high fees, but I had no issues receiving my kit and didn’t have to pay anything to receive it.
Ordering with a coupon
If you like my purse, here’s the link to the tote bag kit I ordered. They now have a super-cute dual-colored leather tote. I chose the caramel color to go with a pair of boots that I love, but if I were to choose today, I’d likely choose the dual-colored one. (It’s super cute and perfect for Dress Your Truth Type 1 women!)
Use my Coupon Code: TRACY20 for a 20% discount on your order
Watch me Make it!

Materials
Instructions
- Sew the metal rings to the main leather pieces by wrapping them in small leather strips and using a saddle stitch to sew them in the prepared spot along the top.
- Sew leather strips across the leather bottom in the prepared areas.

- Sew a decorative strip of leather across the bottom of each main piece.
- Sew up the leather straps by sewing two leather strips around the thick plastic cording that comes in the kit following the directions for which holes to sew up and which to leave unsewn.

- Sew the unsewn holes of the straps to the main pieces of leather.
- Sew 2 thin leather strips on either side of one of the main pieces of leather (one behind and one in front of it).
- Form a tube of leather by connecting the two main strips of leather together, inside out.
- Sew the bottom onto the tube of leather. To form the piping, sew a strip of leather around some plastic cording between the sides and the bottom of the purse.

- Flip the purse right-side-out.
- Sew a decorative strip of leather around the top of the purse to finish it!


Thanks for the post!