

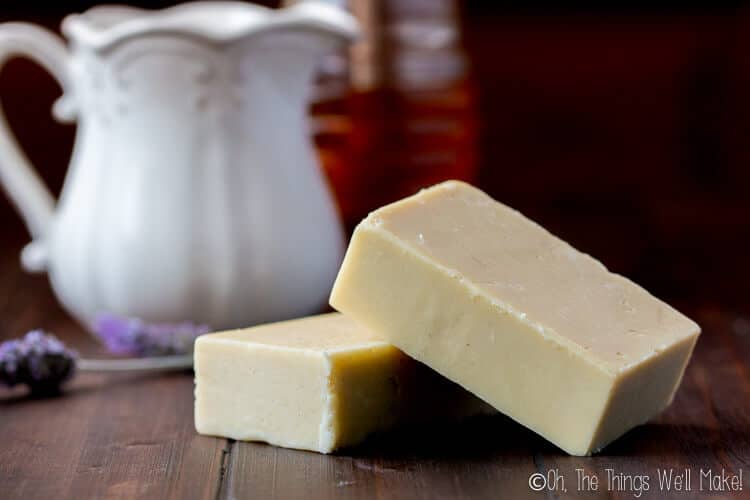
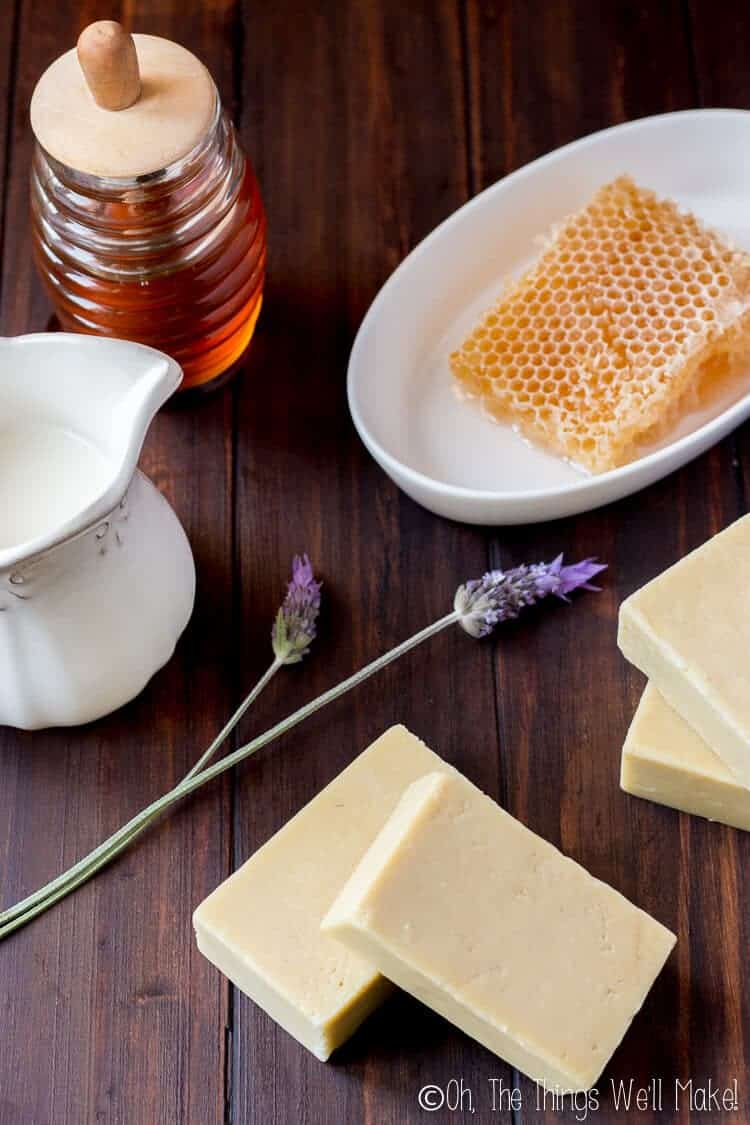
Goat Milk Soap with Honey

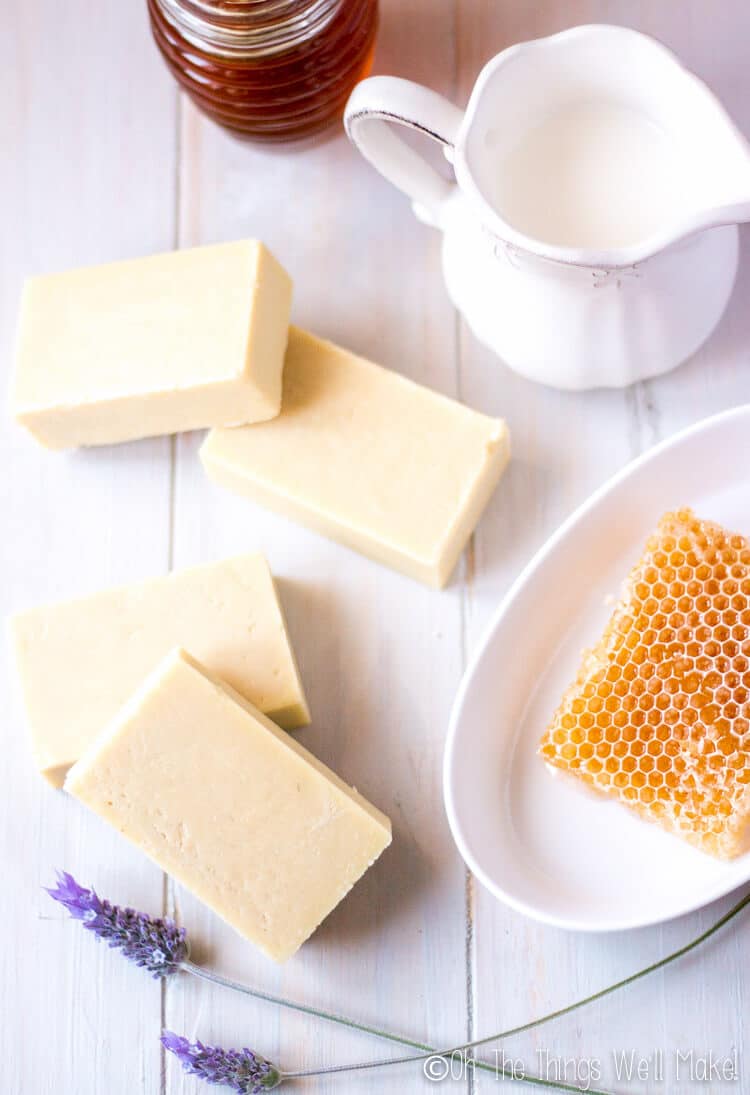
Gentle on the skin, and with a nice, creamy lather, this goat milk soap with honey is one of my favorites. Learn how to make soap with both milk and honey from scratch with this recipe.
Many of you have been asking for either a soap made with goat milk or one made with honey, so I decided to kill two birds with one stone and teach you how to make a soap with both goat milk and honey.
Because of the sugars in both milk and honey, they do provide a slight challenge when using in soap making, but I’ll share my tips and tricks to ensure you end up with pretty, light-colored bars of soap.
Watch how to make this goat milk soap with honey
Goat milk soap
Using milk in soap is a wonderful way to make a soap that is gentle on sensitive skin. It can help with eczema and psoriasis, and also has a nice, creamy lather.
I introduced working with goats milk in my pumpkin spice soap recipe, which as really just an adaptation of the easy, beginner soap. So many people asked for a goats milk soap, though, that I decided to formulate a new recipe which focused more on it and the techniques that can be used when working with it.
Adding milk to soap without burning it
While not difficult, working with milks in soap making can be slightly tricky. You need to take a few steps to ensure that the milk doesn’t burn when you mix it with the lye. Even when making a cold processed soap like this one, the heat from the reaction of the water and milk with the lye can cause the sugars in the milk to burn if you aren’t careful, resulting in a not-so-pretty, dark-colored bar that may even give off an unpleasant odor.
There are a couple of ways to prevent the milk from scalding. Most people freeze the milk before mixing it with the lye, and that method has always worked well for me. The heat generated when you mix the lye together with the liquids will melt the frozen milk rather than burn it. Those who don’t want to bother with pre-freezing can choose to add the milk at trace instead. (Trace is the point in soap making when the lye has emulsified with the oils and the soap is ready to be poured into molds.) At trace, there isn’t enough lye left to cause a heated reaction when the milk is added.
One of the benefits of freezing the milk is that you could potentially use a higher percentage of milk in your recipe. If you want to add the milk at trace, you’ll need to use enough water or other liquid, apart from the milk, to make the necessary lye solution for making the soap before adding in the milk.
Should you try to reach the gel phase with goat milk soap?
If you aren’t familiar with the gel phase, it’s basically a point in soap making when higher temperatures are reached and the soap begins to look gel-like. You can recognize a soap that has reached the gel phase because it normally gets a slightly translucent look to it which often makes the soap also look slightly darker. Some people aim to get their soaps to the gel phase, especially when working with colorants so that their soaps show off brighter, more vivid colors. Gelled soaps also tend to get slightly harder more quickly, probably because the soaps lose more water from evaporation at the higher temperatures.
To reach the gel phase, soaps are usually either heated right after being poured into the mold or at least well insulated to keep their heat in for the first day or two. It depends a lot on the recipe and the climate you are working in what needs to be done to reach a full gel phase.
With milk soaps, I don’t recommend trying to reach the gel phase. Milk soaps are prone to overheating which can lead to dark bars of soap that don’t smell very pleasant. It is also very easy to end up with a partially gelled soap that looks dark in the center and lighter and more opaque on the outside. While partially gelled soaps can still be used, they don’t look as nice as a uniform soap that is either gelled or not.
How to avoid reaching the gel phase
To avoid getting a partially gelled soap, you can either work the entire process cold as I have and then leave your soap molds uncovered in a cool place, or you can move the recently poured soaps into the fridge or freezer to finish the saponification process. I made the soap in the pictures when it was still cold in my house, and I had worked with frozen milk and cold oils. I didn’t put my mold into the freezer or fridge and you can see that my soaps turned out uniform in color.
If you are working in a warmer environment, I’d recommend placing your soap in either the fridge or freezer for the first 24 hours after having poured the soap into the molds to prevent getting a partially gelled soap.
Adding honey to soap
Honey is another nice additive for soap. The sugar in the honey helps make a nice, bubbly lather. While honey is nourishing for your skin, too much honey can result in a soft bar of soap (especially if you don’t account for the liquid in honey by reducing the amount of water in the recipe).
Just like when adding milk to soap, the sugars in honey could burn if things heat up too much. There are several ways to add the honey to the soap without that happening. One solution is to add the honey to the oils, rather than the water, before combining them with the lye solution. By doing it this way, you aren’t making the lye solution with the honey in it. I haven’t tried that method yet myself.
I, instead, add the honey as soon as the soap reaches a light trace, and haven’t had any problems.
Reaching trace when working with cold ingredients
One of the trickiest things about making soaps using cold ingredients is being able to recognize when you’ve reached “trace.”
Trace is the point in soap making when the oils and lye have emulsified and the saponification process begins. If you don’t reach trace, your soap won’t set correctly or may have pockets of oils and/or lye within the areas of the soap that have set.
Avoiding “false trace”
Normally, to ensure you have reached trace, I’d have you blend until the soap thickens up slightly, almost like pudding. The problem with working with cold temperatures, though, is that the thickness of the soap mixture can be misleading. At cold temperatures, it may take a very long time to thicken up. On the other hand, if you’ve melted your coconut oil, it may begin to slightly solidify again as everything cools, making it appear that the mixture is thickening. This can lead to people thinking the mixture has reached trace when it hasn’t. This recipe doesn’t use enough coconut oil that I think that you’ll have problems with false trace, but it is something I wanted you to be aware of.
If you find your recipe isn’t thickening up after blending for several minutes, and you plan on pouring it into the molds at a light trace (thinner mixture), you’ll want to take special care to ensure that everything is well blended and that there are no streaks of oil anywhere in the mixture. (If in doubt blend for longer than you think you need to!)
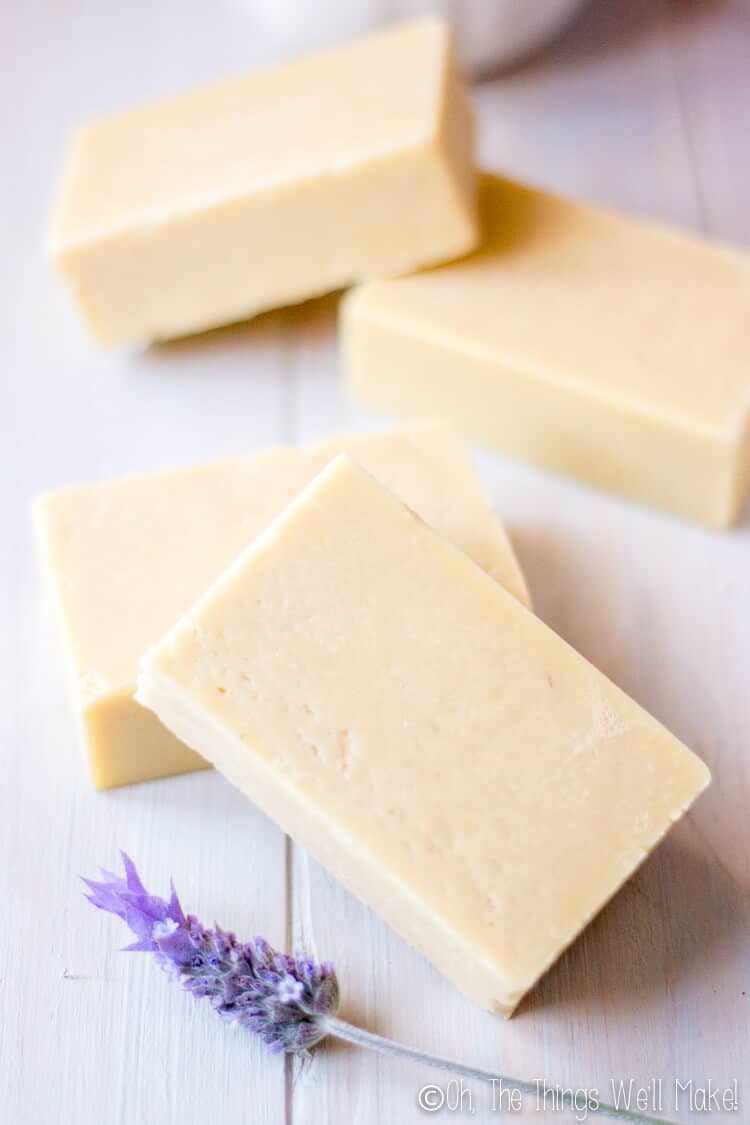
Goat milk soap with honey
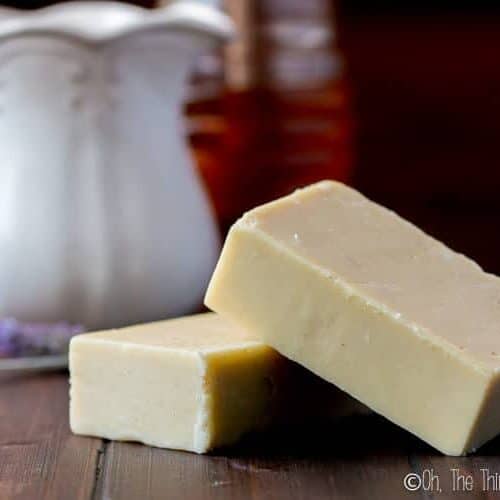
Goat Milk Soap with Honey
Fills up a loaf pan for 8-10 bars of soap
Materials
- 350 g olive oil
- 175 g coconut oil
- 75 g avocado oil
- 90 g distilled water
- 95 g goat milk
- 84.96 g lye
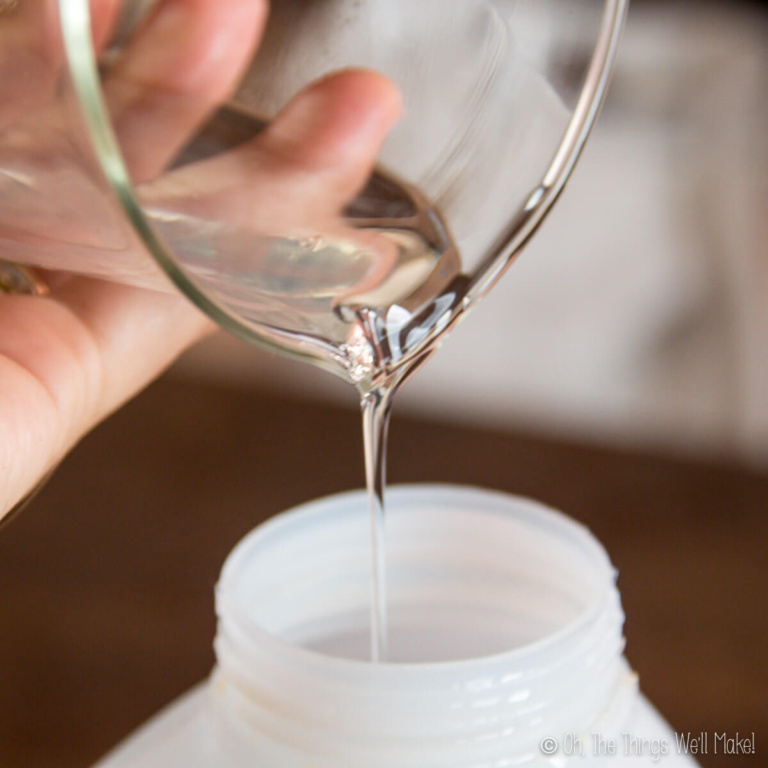
- 1 Tbsp. honey
Instructions
- Before beginning, freeze the goat milk to prevent it from burning when mixed into the lye solution. You can use it at the slushy stage or you can fully freeze it and use it in ice cube form.
- Weight out the distilled water and lye, and pour the lye into the container with water. (I like to use stainless steel bowls for this. Never pour the water into the container with lye.)
- Mix the lye into the water until it is fully incorporated. You’ll notice that the solution will heat up and become opaque, but if left will later cool off and become transparent again. (Work outside or in a well-ventilated area, and avoid inhaling the fumes. Protect your eyes and hands with gloves and goggles.)
- Add the frozen goat milk to the lye solution, and continue to stir as you incorporate it. It may turn slightly orange or brown due to the caramelization of the sugars in the milk reacting with the lye. To prevent it from burning, stir continuously until it has all melted and been fully incorporated into the solution.
- In a separate bowl, measure out the oils. You can weigh them all in the same bowl by taring (setting the weight to zero) your scale between oils. (In the video you’ll see that I was using solid coconut oil and didn’t melt it before using it. That was only to prove a point. I’d suggest melting the coconut oil to make the process move along more quickly and make things easier. There is no need to heat the other oils, though. If things get too hot you may end up scorching the sugars in the soap.)
- Add the lye solution to the oils and gently stir together until the lye solution has fully mixed with the oils.
- You can now begin to carefully blend together the oils and lye solution with an immersion blender. You’ll want to blend for several minutes, until your soap has reached “trace.” Trace is the point in soapmaking when the oils and lye have emulsified and the saponification process begins. (Read more about reaching trace in this soap above.)
- Once you’ve reached trace, you can add the honey and any essential oils or fragrance oils that you want to use. Blend until they’ve been fully incorporated.
- Pour the soap into soap molds. I used a silicone loaf pan for this recipe.
- If it is warm outside, you may want to pop your soap into the fridge or freezer to prevent having the soap partially gel. (You can read about the gel phase above.) Otherwise, leave it uncovered in a cool, ventilated area.
- After a couple of days, unmold the soap. If you’ve used a loaf type pan, cut the soap into bars.
- Allow the bars of soap to cure and dry for 4-8 weeks before using. (While you “can” use it before then without issues, the bars will harden and improve with time. Soaps will harden into longer-lasting bars and will mellow out during the curing process.)
- Enjoy your soap!


I’d like to try this recipe but you don’t mention how much honeybto use.
In the recipe, I put 1 Tbsp. honey. That means one US Tablespoon.
If you don’t have measuring spoons, that’s about 21g of honey!
Hi just wondering how many poinds this recipe makes. Also ifyou can add oatmeal, and if so how much?
Thank you.
It will make just under 2 pounds.
Yes, you can add oatmeal to it. I’d start with up to only about 1 Tbsp. of oatmeal and see how it goes.
You can find more information about working with oatmeal in soaps here: http://www.annelwatson.com/soapmaking/creative/september/oatmealsoap.html
I’ve never personally worked with oatmeal, but she warns that it can make the soap softer, so you may want to add some beeswax.
Hi Can I use raw cows milk instead of the goats milk? I am really interested in making my own soaps and I would love to be able to use the cows milk as it’s so creamy.
Many thanks Joy
Hi Joy,
Yes, of course! You’ll need to treat it like goats milk so it doesn’t burn.
I chose goats milk because many people request it, but any milk can be used instead.
I love this recipe but I have a question, can I substitute the water for milk?
Hi Claudia!
Yes, that’s fine.
I made this soap to show how to work with ingredients that can burn like honey and milk. Many people were requesting a goat milk based soap. That said, you can use water instead.
can i combine honey,coconut,aloe vera, rice and milk?
if so, do i use exactly the amount of lye soapcalc suggests? I’m asking because I learnt some substance are acidic and neutralizes with the lye causing a gel soap rather than a hard soap
I supposed you could try it to see what it is like.
Aloe Vera is slightly acidic, but it shouldn’t be enough to cause any problems (especially if you aren’t using a lot). I’ve used it before without issues.
You could slightly increase the lye amount to have it be less superfatted, if you are aoncerned about that.
You can also reduce the total amount of liquid to help get a harder bar.
Thank you for a brilliant video and directions on soap making.
What I like about your site is the fact that you take time to answer people’s questions, which is great.
So I will give it a try to make my first soap. Many thanks.
John from England
Hi John,
Embarrassingly, I missed your comment. 😉
Sometimes a couple slip through when I get a lot of spam comments and I don’t find them until I manually clear out all of the junk.
I apologize, and, yes, I do try to answer everybody as best I can!
I hope it went well for you!
I’m so glad to have found you. I’ve added you to my Favs list and I agree with John great video. And the fact that you take the time to answer our questions is fantastic. I’m relatively new to soap making as well.
Thanks again
Hi Shirley,
Thank you so much!
You’re very kind. 🙂
What brand of essential oils do you use?
Hi Erin,
To be honest, I am constantly testing out new brands. I don’t notice a huge difference between them.
I live in Spain, so most of the brands I use from day to day are European.
I’ve seen good things said about oils from plant therapy, though, from friends who have done a lot of research on oils. There was a newer brand that also gets a lot of good reviews, but I can’t remember the name off the top of my head. (I’ll try to remember to get back to you.)
Learned a lot here. May I ask if you superfatted your soap?
Hi Katrice,
Yes. I can’t remember by how much, exactly, but I normally superfat bar soaps around 5%, except for my coconut oil laundry soap.
Hi Tracy,
Just found your site and I love it cant wait to try goats milk soap and Tia maria
Thank you so much
Hi Val,
Thank you so much!
I hope they go well for you!
I may be making another batch of “Tía María” again very soon myself. My husband quite likes using a splash of it in his weekend coffees. 😉
This look like a fantastic recipe and I cannot wait to try it! Question: After you pour the soap into the mold, do you wrap it in a towel or leave it unwrapped? Thank you!
Hi Karen,
Well, that’s a bit of a tricky subject. I need to write a post about it someday.
Normally, you are insulating the soap to get it to gel completely- it’s a process where the soap becomes a bit more translucent and can make for a more brightly colored soap. This usually is done when your soap is still warm to ensure it transforms evenly over the entire soap.
In the case of this soap, I try to keep it mostly cold so that it won’t gel. In this soap, it would make for a darker colored soap.
That said, if it were to be hot at the time of pouring, there’s the possibility that the soap could partially gel- and you’d end up with a soap that is gelled in the center (where it would look darker and slightly more translucent in the center) but not on the outside.
I try to avoid that by keeping things as cold as I can throughout the process, and I don’t wrap it.
For other soaps, where you want that brighter color (like my Christmas candy soap), you can pour them and wrap them while warm to try to get them to gel completely.
I hope that makes sense.
Could I add some vitamin E oil to this with the essential oils?
Hi Yammie,
If you want to add in some vitamin E to help extend the shelf life of the soap, I’d recommend adding it to the oils at the beginning rather than at the end with the essential oils.
A good amount would be around 0.5% by weight of the amount of oils you use. (So, for every 200g of oil, you’d add around 1g vitamin E.)