

Homemade Papadums From Scratch

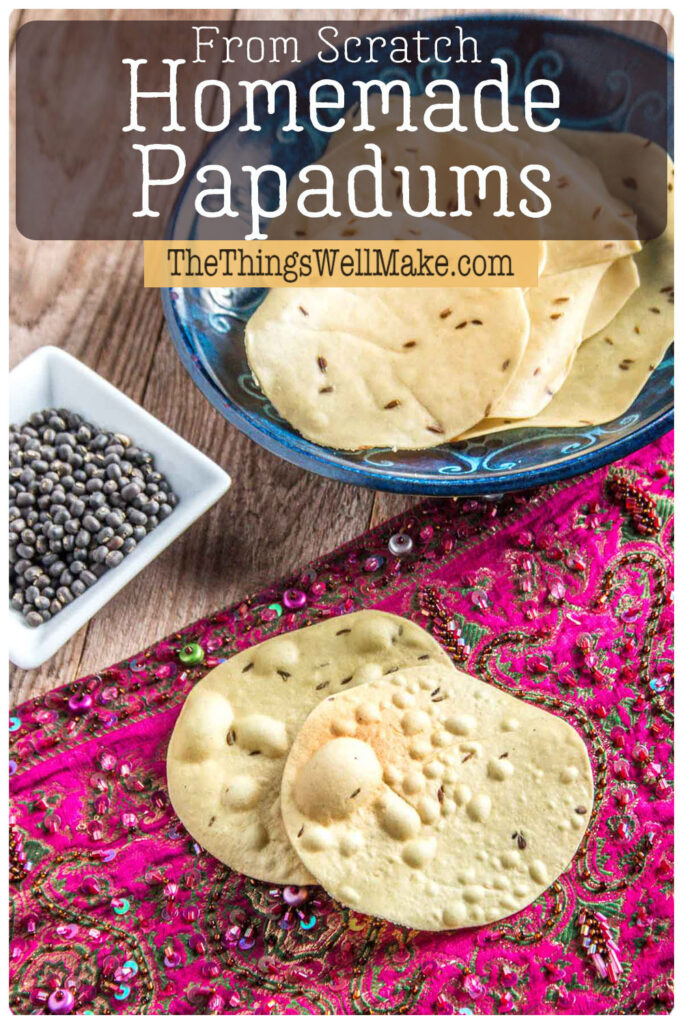
Crispy and addictive, papadums are an Indian snack that is also the perfect complement to any meal. They’re delicious when eaten alone, with chutneys, or with other dipping sauces. Learn how to make them from scratch at home.
Years ago, I made papadums from scratch for the first time. When I say “from scratch,” I really mean it! I wasn’t able to find urad flour here in Spain (not even online!), so I had to get creative. It was something that I really wanted to do, though, so I kept at it and successfully made some delicious, crispy papadums!
What are papadums?
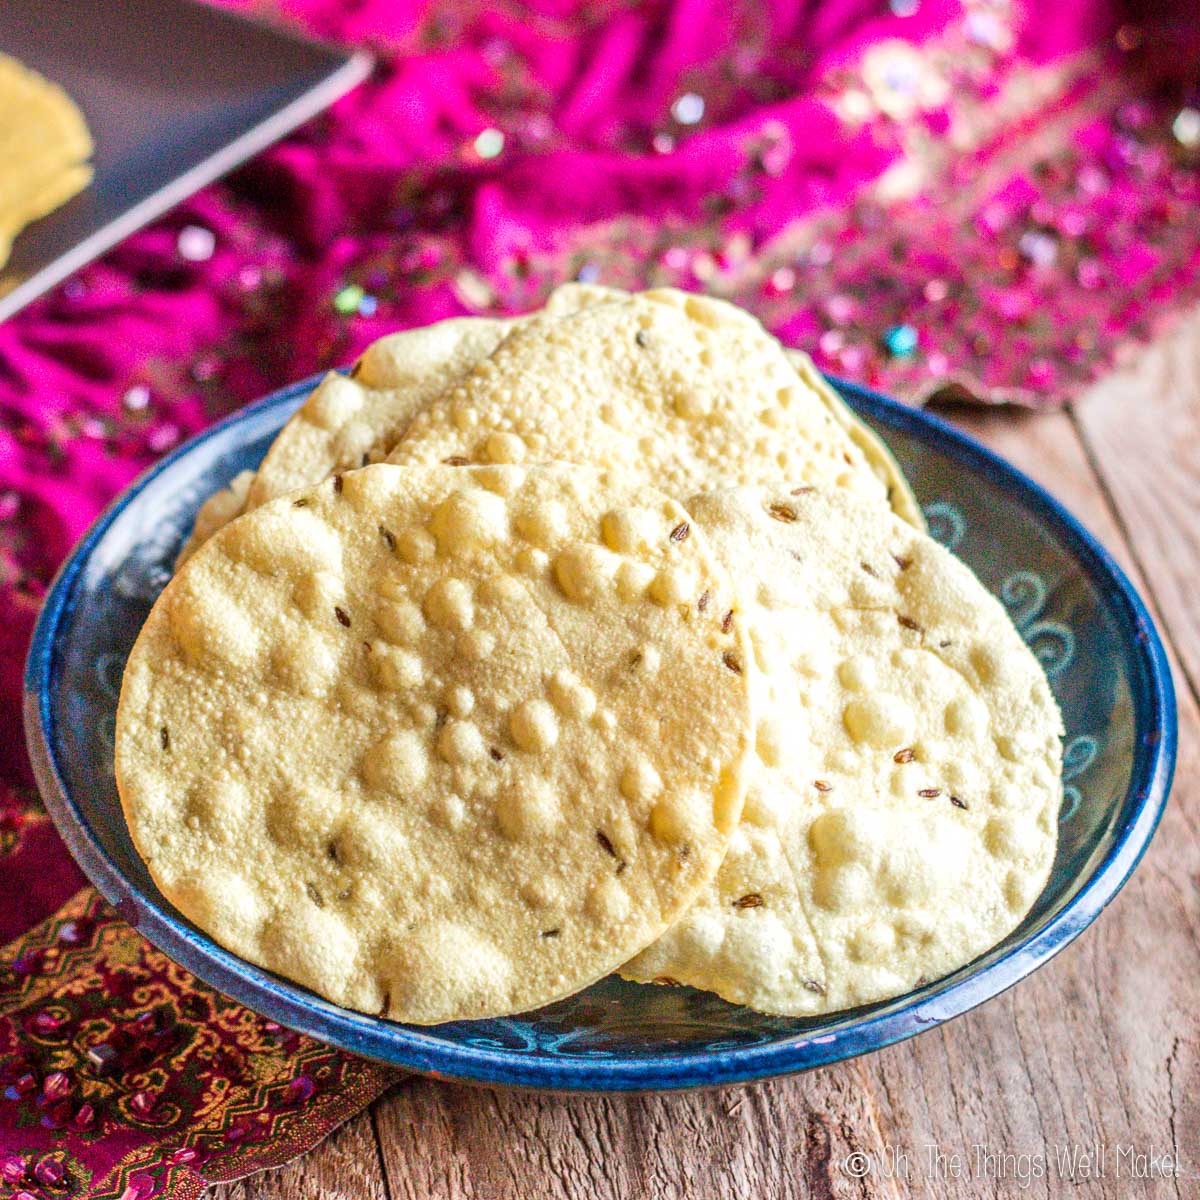
If you aren’t familiar with papadums, also known as poppadoms or papad, they’re a delicious, crispy, chip-like flatbread with origins in India. They’re generally made from urad flour (also sometimes referred to as black gram flour) and can be cooked in a number of ways. Some people prefer frying them, others cook them over an open flame, and yet others choose the microwave!
They may be served as a snack, an appetizer, or as a complement to a main dish, especially Indian food!
Ingredients
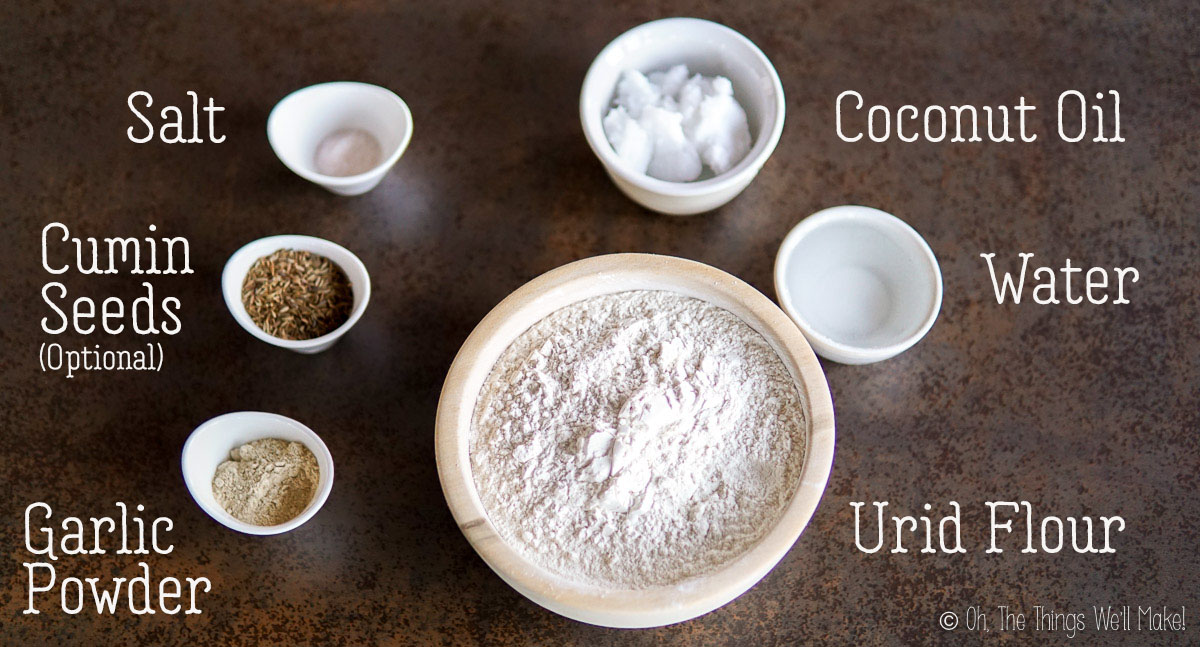
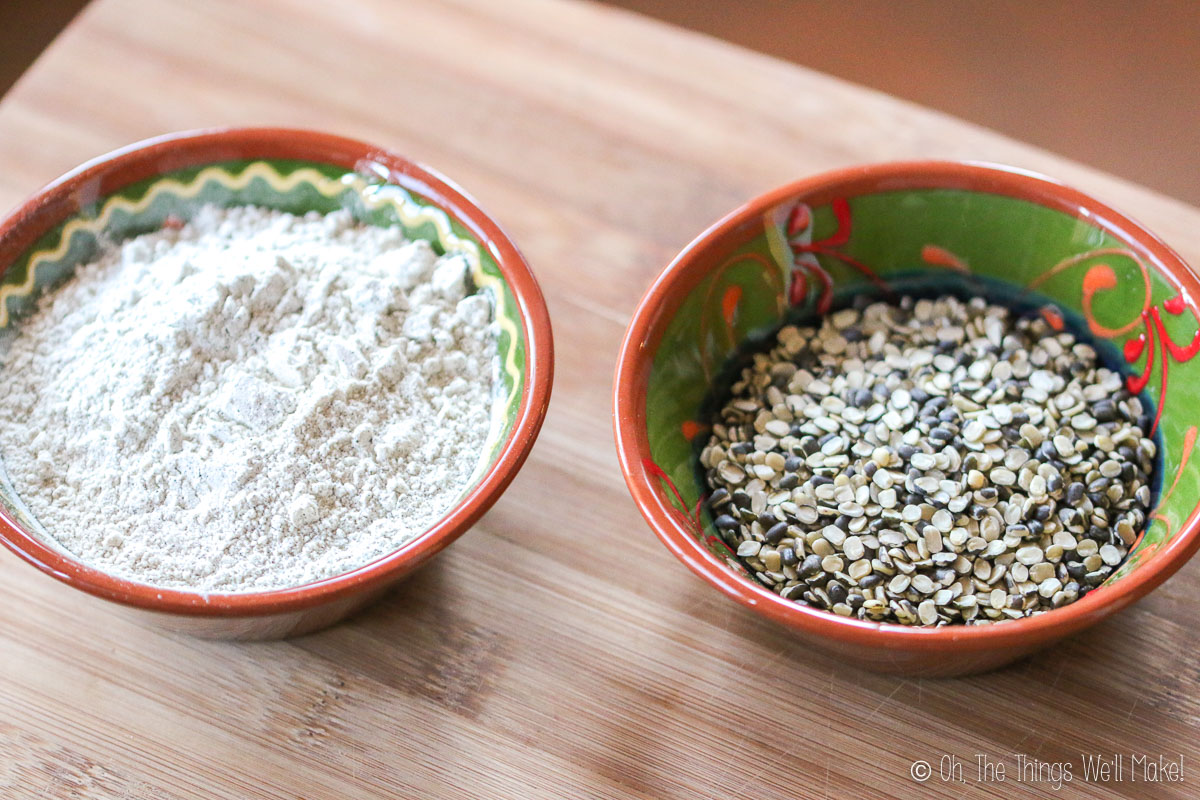
Papadums use only a few simple main ingredients. The most difficult to find is the urad flour which is also known as urid flour, urad dal flour, black gram flour, or black gram bean flour. This flour is made form grinding whole, peeled urad dal (vigna mungo). Urad dal is a type of legume that is also sometimes called a black lentil or black gram.
Apart from the flour, you’ll need some water, salt, and some oil for rolling out the dough more easily and also for frying the finished wafer.
Papad can be further flavored with a variety of different ingredients like garlic powder, onion powder, black pepper, cumin, or dried chili peppers. Some people add either baking powder or sodium bicarbonate to help them puff when cooked.
Making urid flour from scratch
As I said, I had been wanting to make papadums from scratch. Partly, it was out of curiosity, but also because they were quite hard to find (and expensive) here in Spain. After some research, I learned they were made from “urid flour” (aka. urad flour) but couldn’t find either urad flour or “urid lentils” anywhere here in Spain. I gave up on the idea for a while until….
One day, I went to a new fruit and vegetable shop run by a Pakistani family. At their shop, I found bags of urid “lentils” and papadums for sale (These very ones, actually). I ended up buying both.
Since I happen to have a grain mill, I decided I’d try making my own urid flour. For my first attempt, I used the whole urid bean. Unfortunately, the peel resulted in dark-colored papad with a thicker, different texture. The dough was a bit difficult to work with too.
While they were good, it wasn’t what I was hoping for.
Peeling the urad lentils (urid beans)
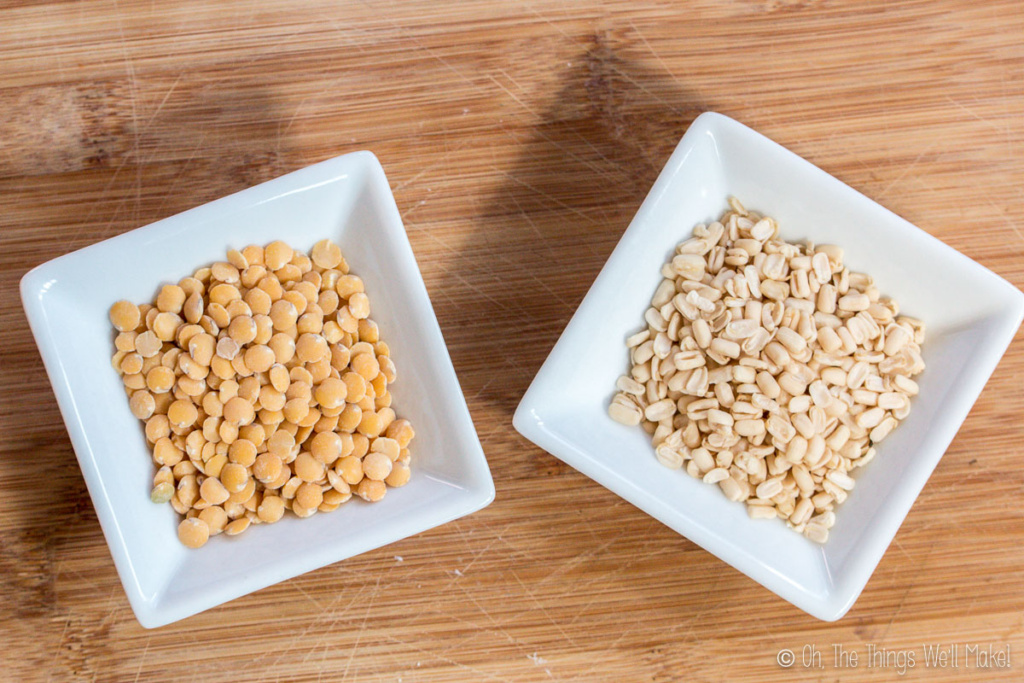
At a different store, I came across some peeled lentils for sale. I bought some to try making homemade papadums with those. I figured, “if the urad flour is normally made with “black lentils”, how different could they be?” Sadly, they were quite different. Again, lentil crackers were tasty, but they weren’t what I was trying to make.
I told a friend about my plans and she replied, “You know that you can peel your own lentils, right?“ (Light bulb moment!)
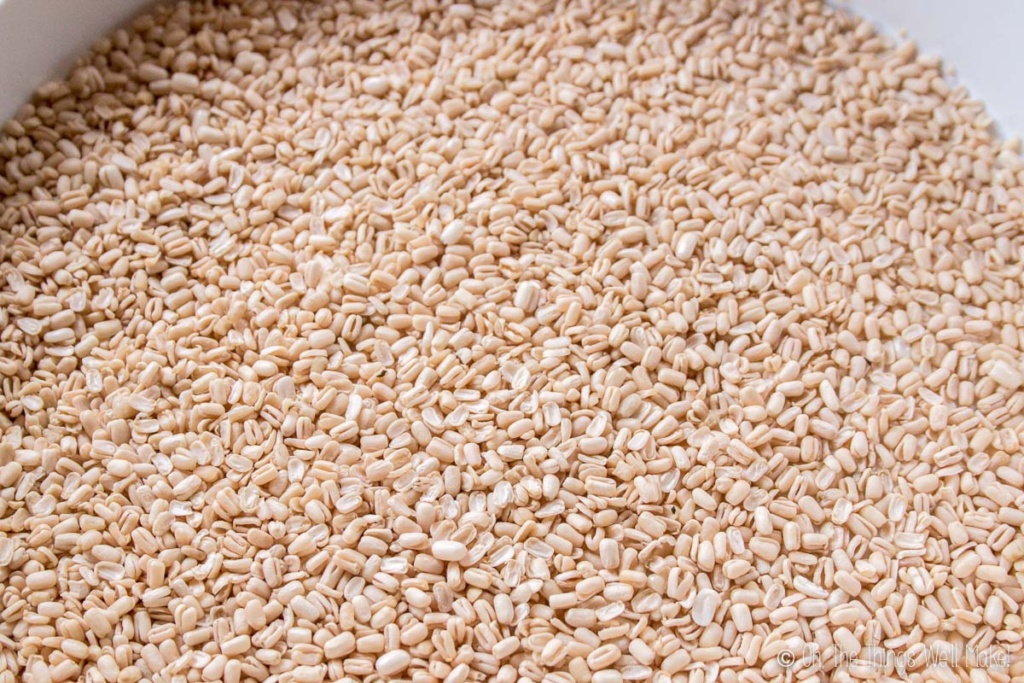
Not knowing what I was getting myself into, I bought more whole “black lentils” (urad beans) to give it a try. For some reason, I thought it would be easier to peel the whole ones than the split urid (urid dal), so I bought those. (If I were to ever do this again, I’d probably try the split ones!)
I soaked the beans overnight. While it’s true that you can easily rub the skins right off, you basically have to do it one by one. As you can imagine, it’s very time-consuming.
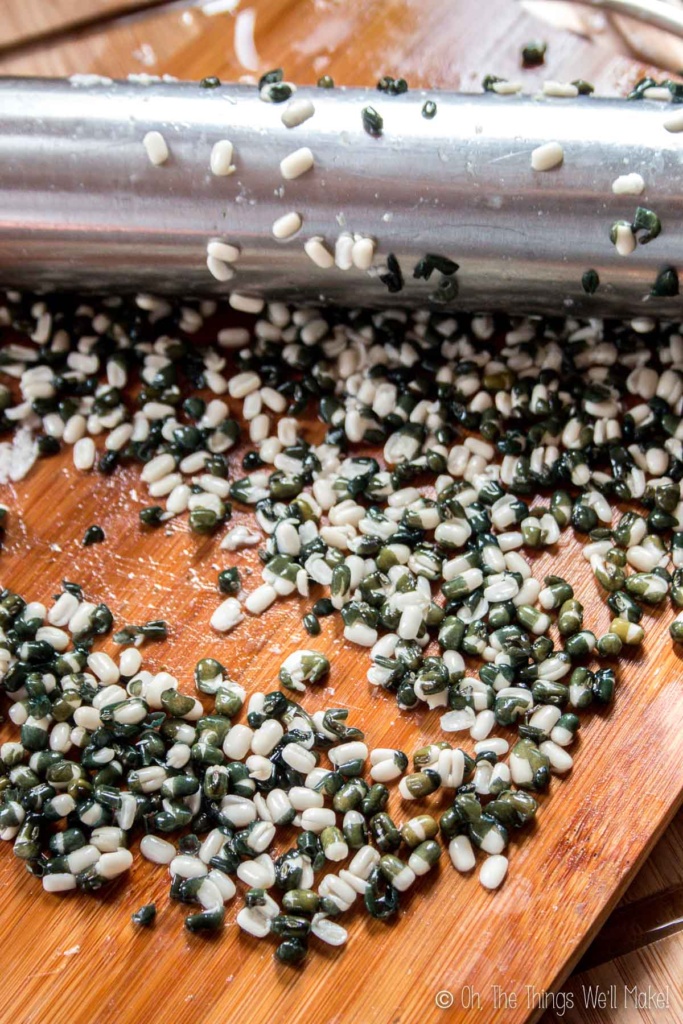
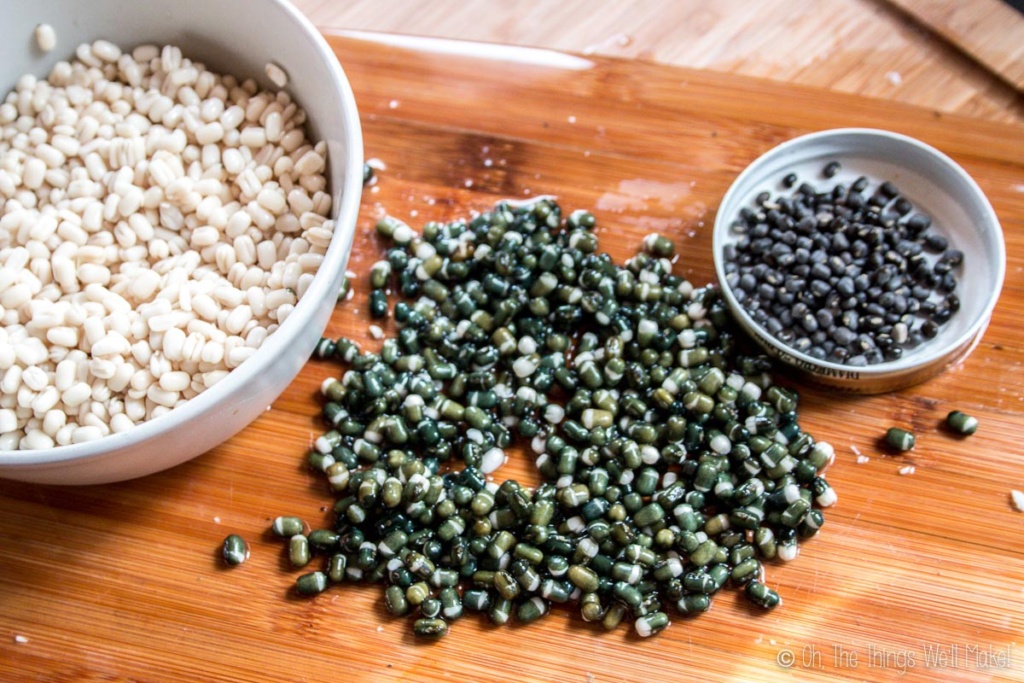
Determined to come up with a better way, I smashed the urids just enough to split them. This separated many of them from their skins. I hoped that the skins would float and I’d be able to rinse them off.
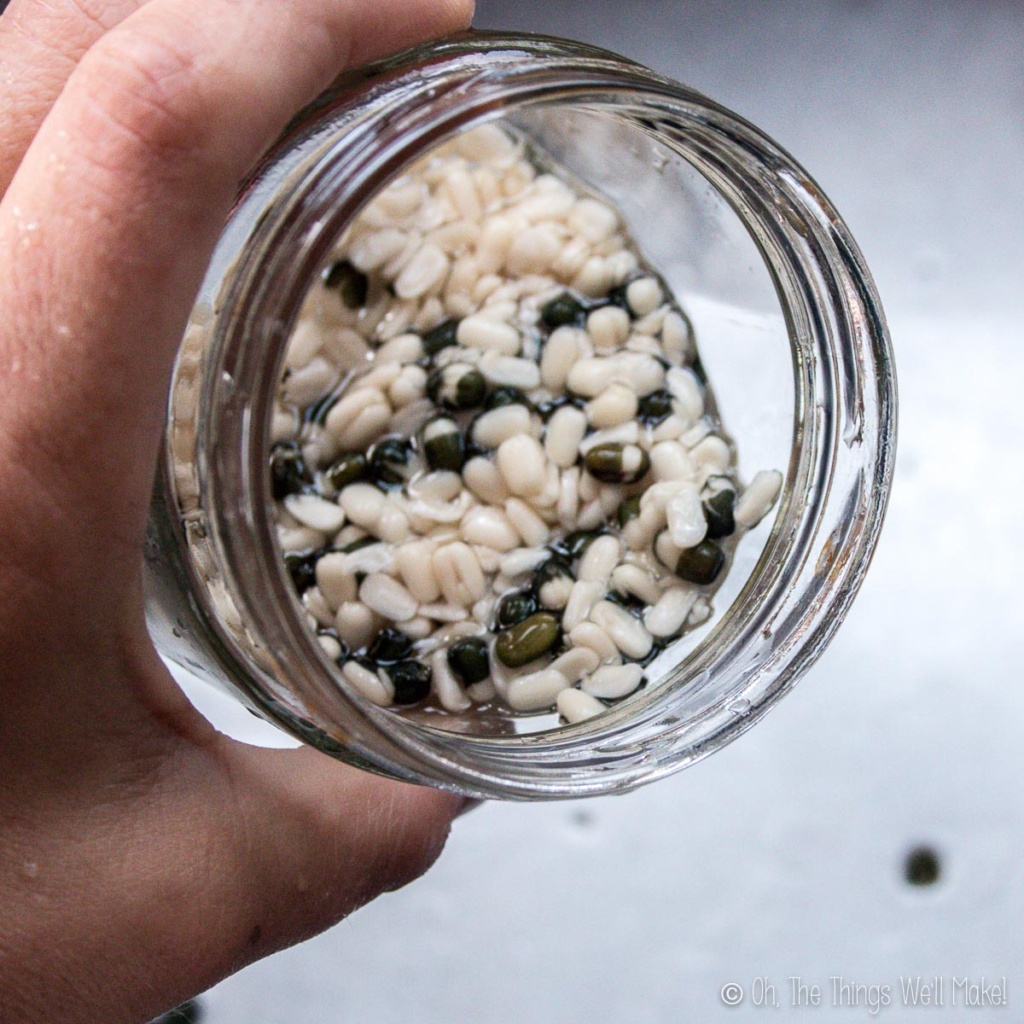
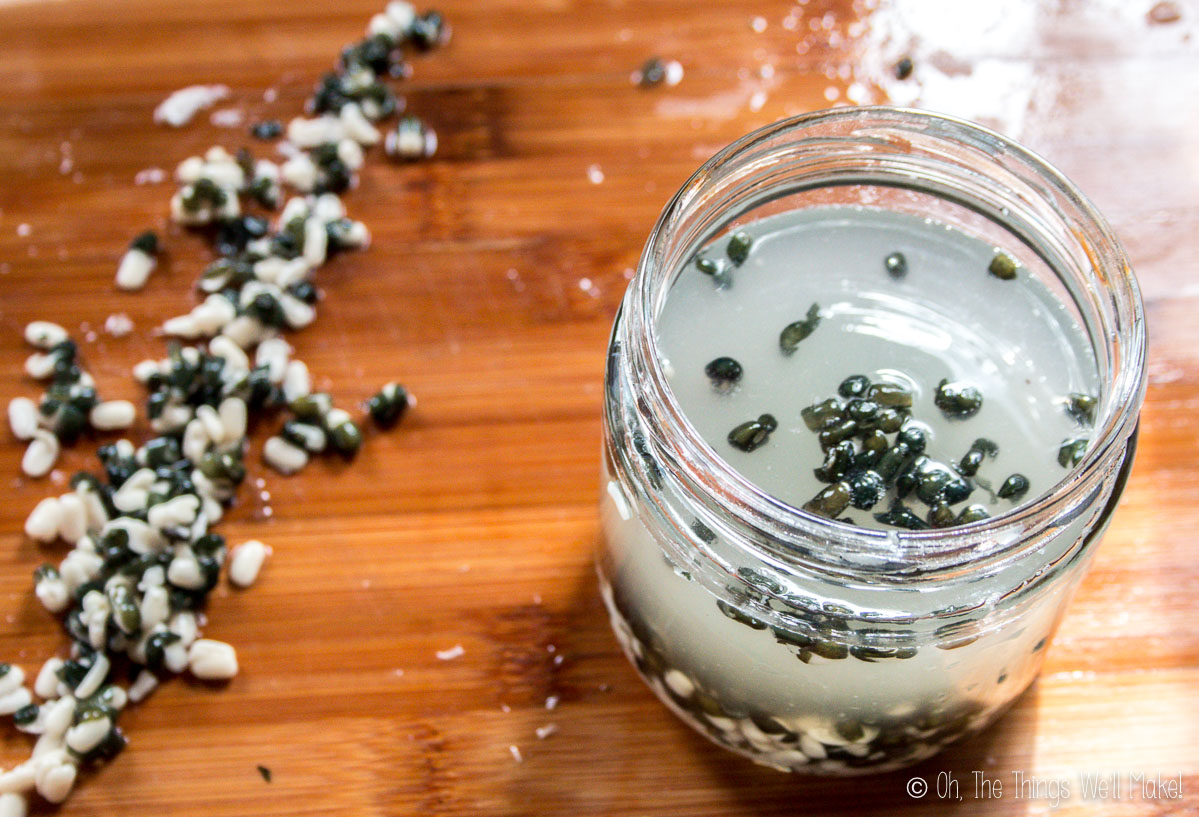
The skins didn’t float as well as I hoped. I put the smashed urids in a jar of water, shook them to help separate them from their skins, and then poured off the water and skins. The beans themselves (now “white lentils” without their skins) were kept inside by the lip of the jar when pouring. I repeated the process several times and eventually ended up with a couple of cups of peeled urid, ready for drying and grinding into urid flour.
I lightly roasted the peeled urad on the lowest heat setting in my oven. When fully dried, I ground them into urad flour.
If you can find urid flour, or even just peeled urids, though, do yourself a huge favor and use those!
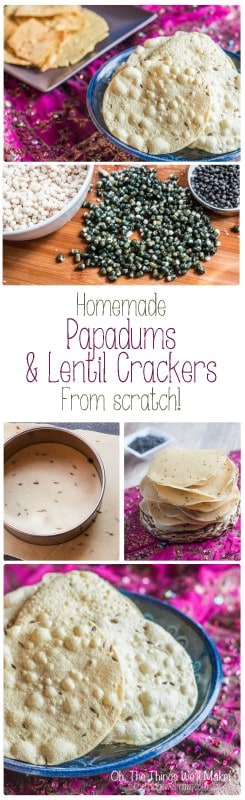
Making papadums
Once you have the urad flour, these are actually quite simple to make!
Make the dough
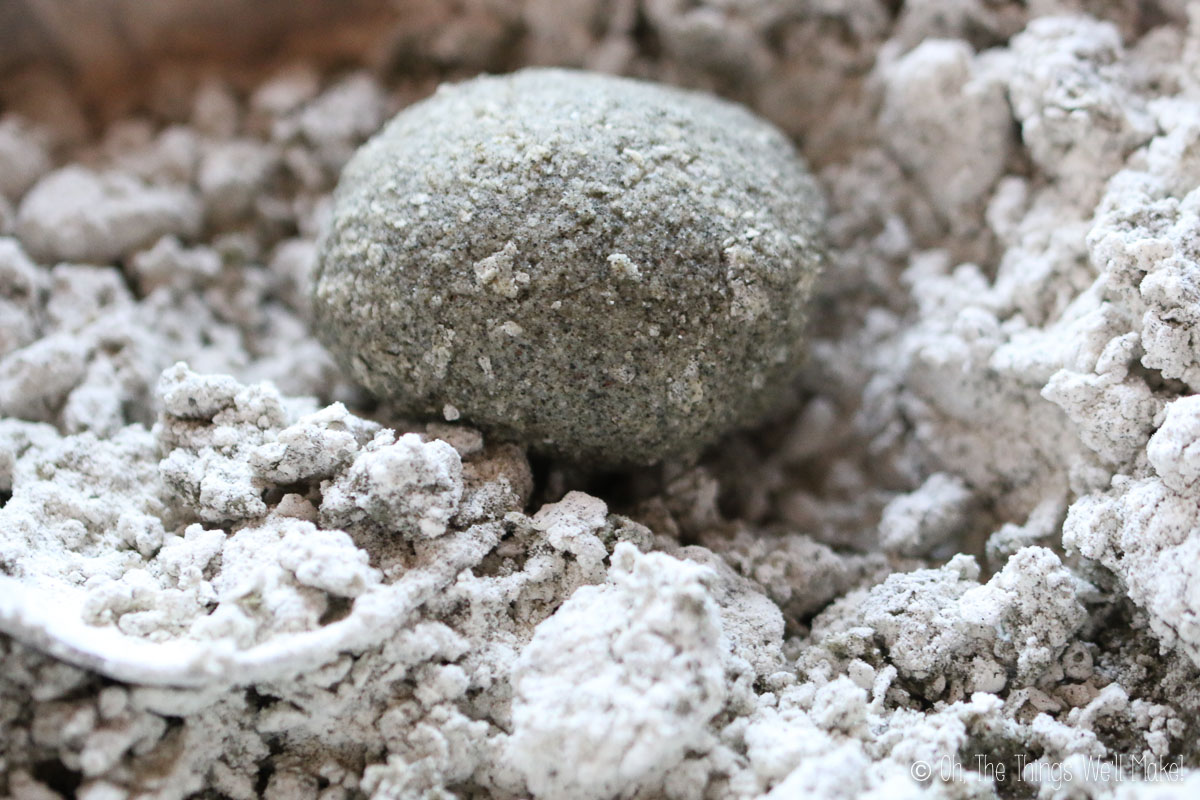
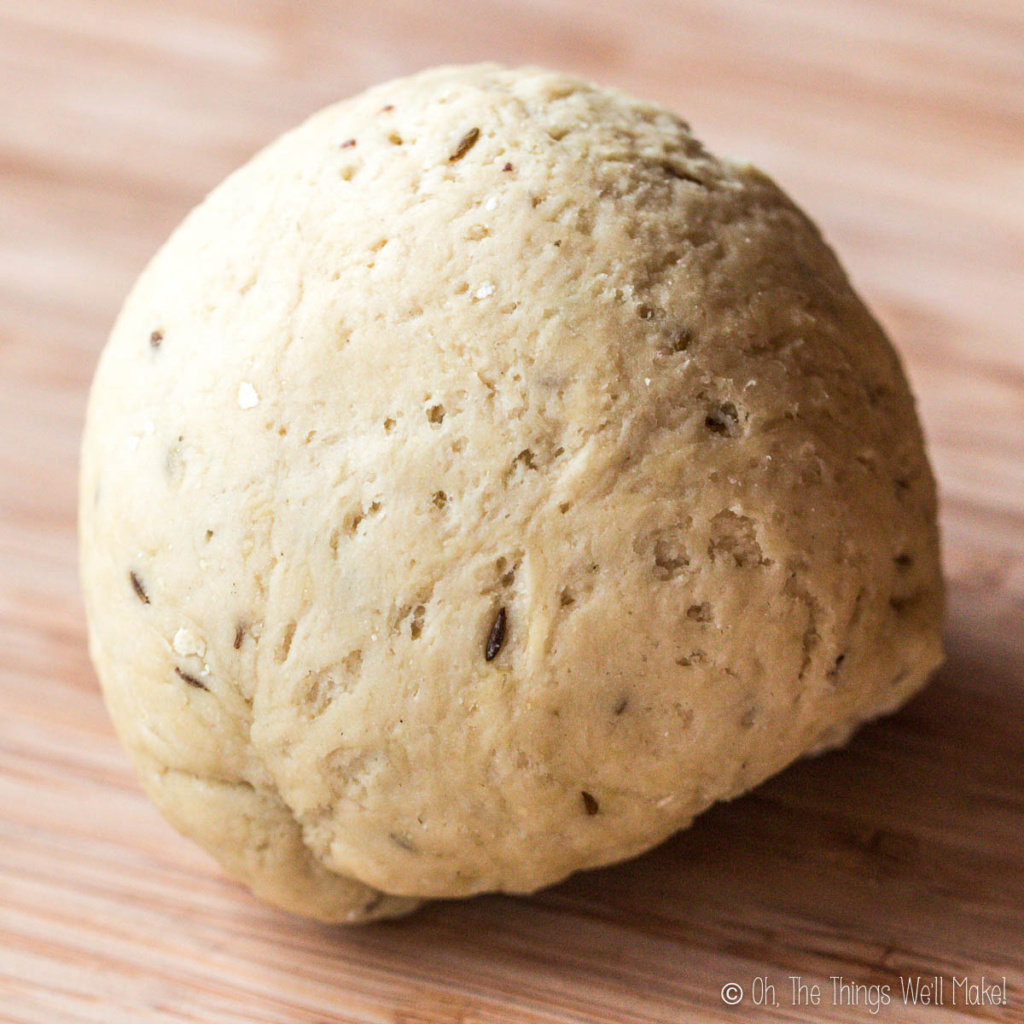
Mix together the flour and salt. If you like, you can also add some garlic powder or another fine powdered spice. Once the dried ingredients are well mixed, start adding water, little by little. You want to end up with a stiff dough. Add just enough water to be able to form the dough into a relatively hard ball.
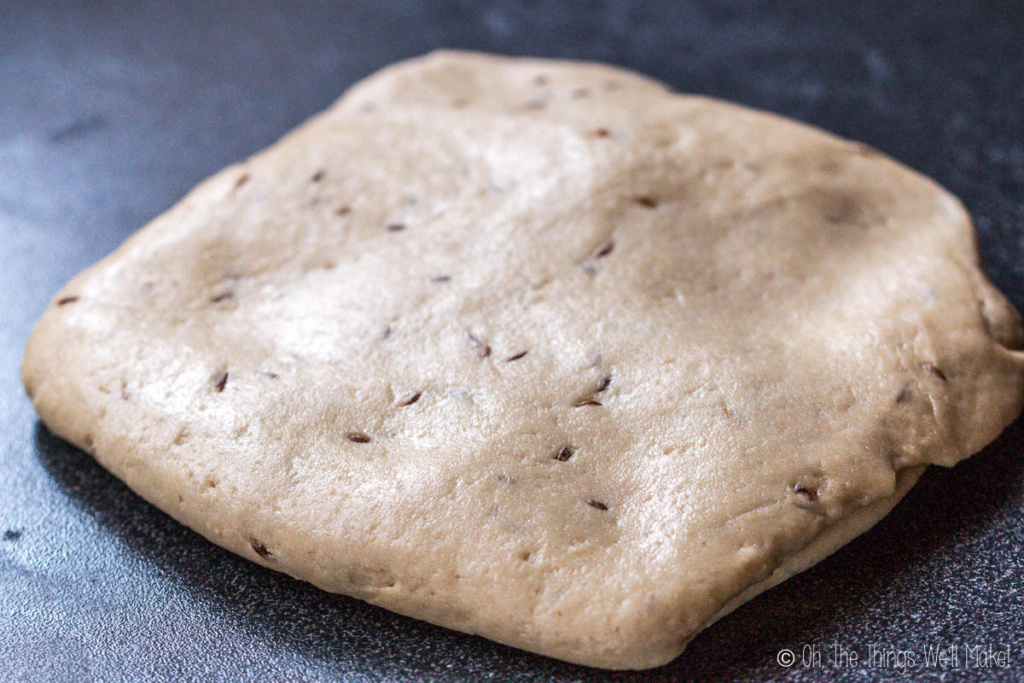
Knead and pound on the dough for several minutes. If you think you added too much water and your dough is too sticky, you can knead it over a sprinkling of urid flour at first. If not, use oil instead for greasing both your hands and the working surface. (I’ve used both olive oil and coconut oil with success!) At first, the dough will be slightly sticky, but as you knead and pound on it, it will start to come together.
Forming the papadums
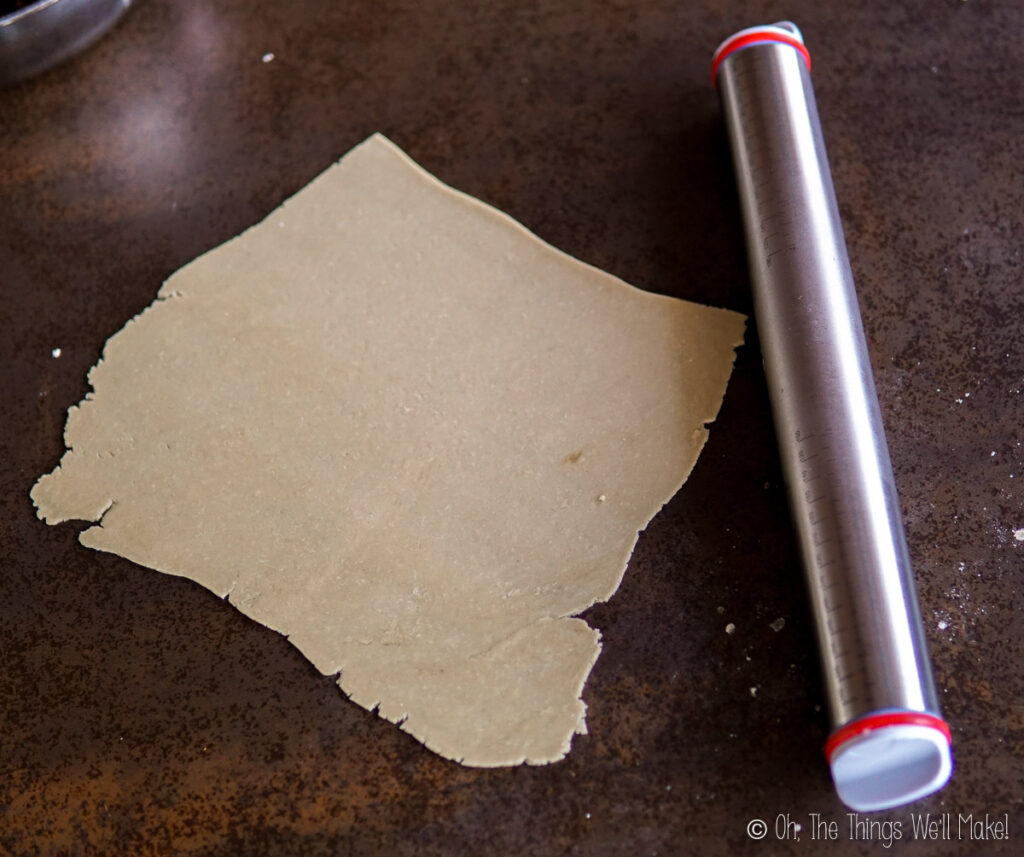
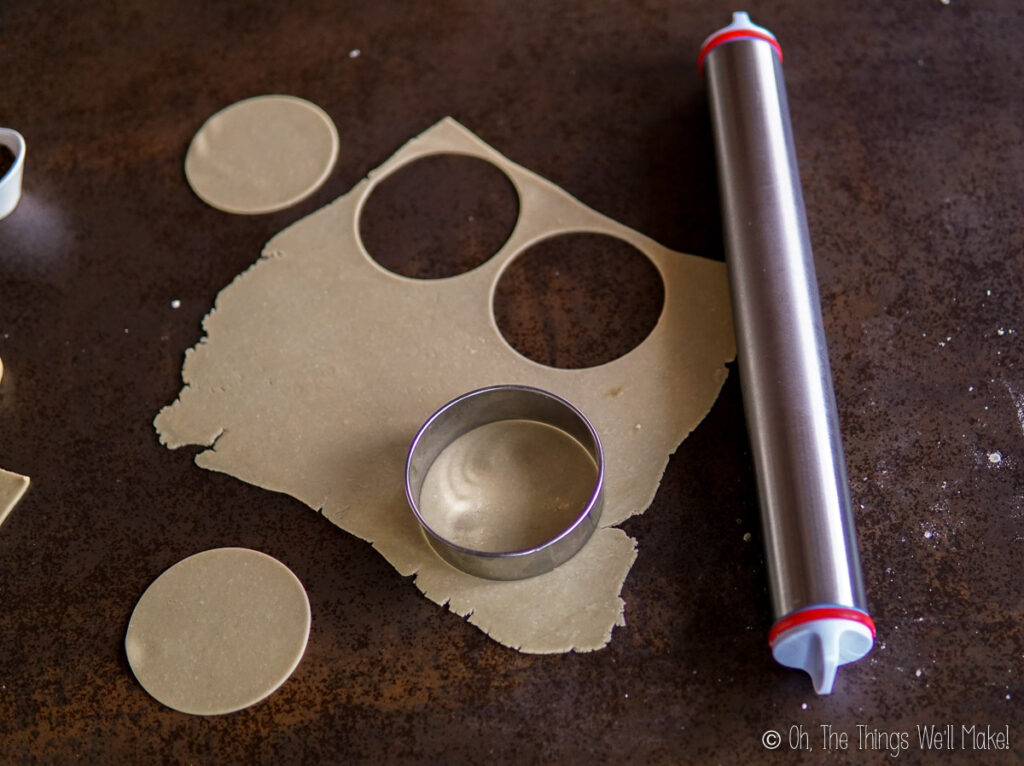
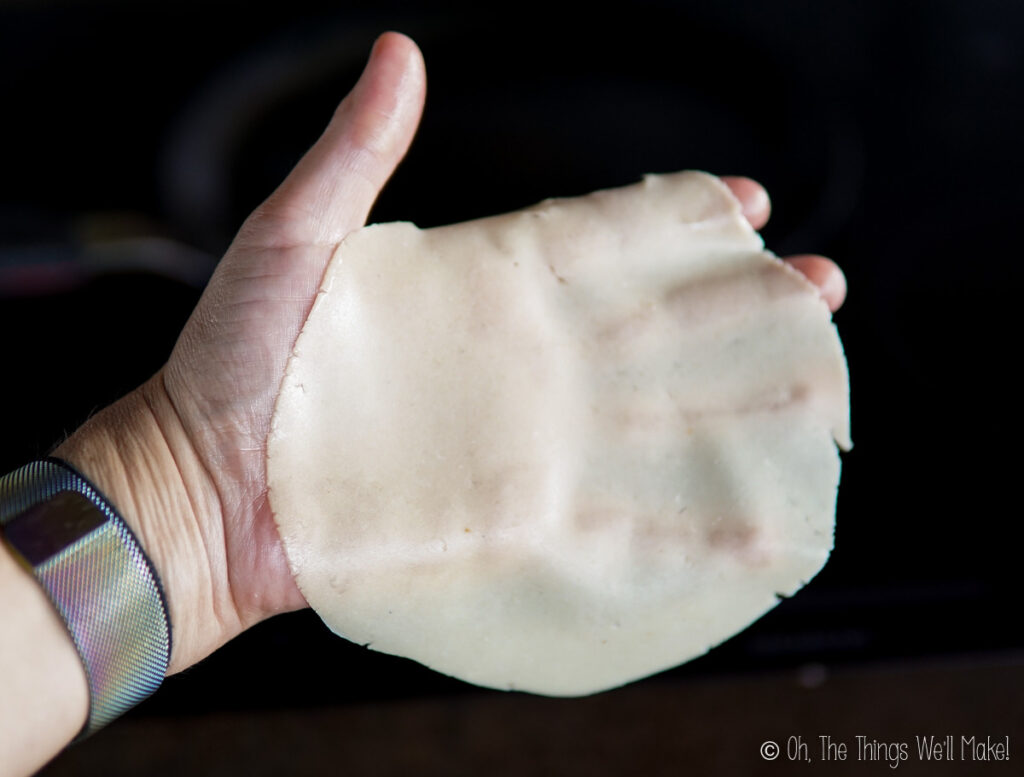
Divide the dough in half to make it more workable. Then, roll the dough into a thin layer around 2mm thick. Cut the dough into medium-large sized circles with a knife or circular cookie cutter. Continue rolling out all of the dough until it has all been cut into thin circular disks.
While it is possible to roll each disk into a thinner one immediately, I find that it’s much easier to do so after allowing the dough disks to rest and chill for several hours in the refrigerator.
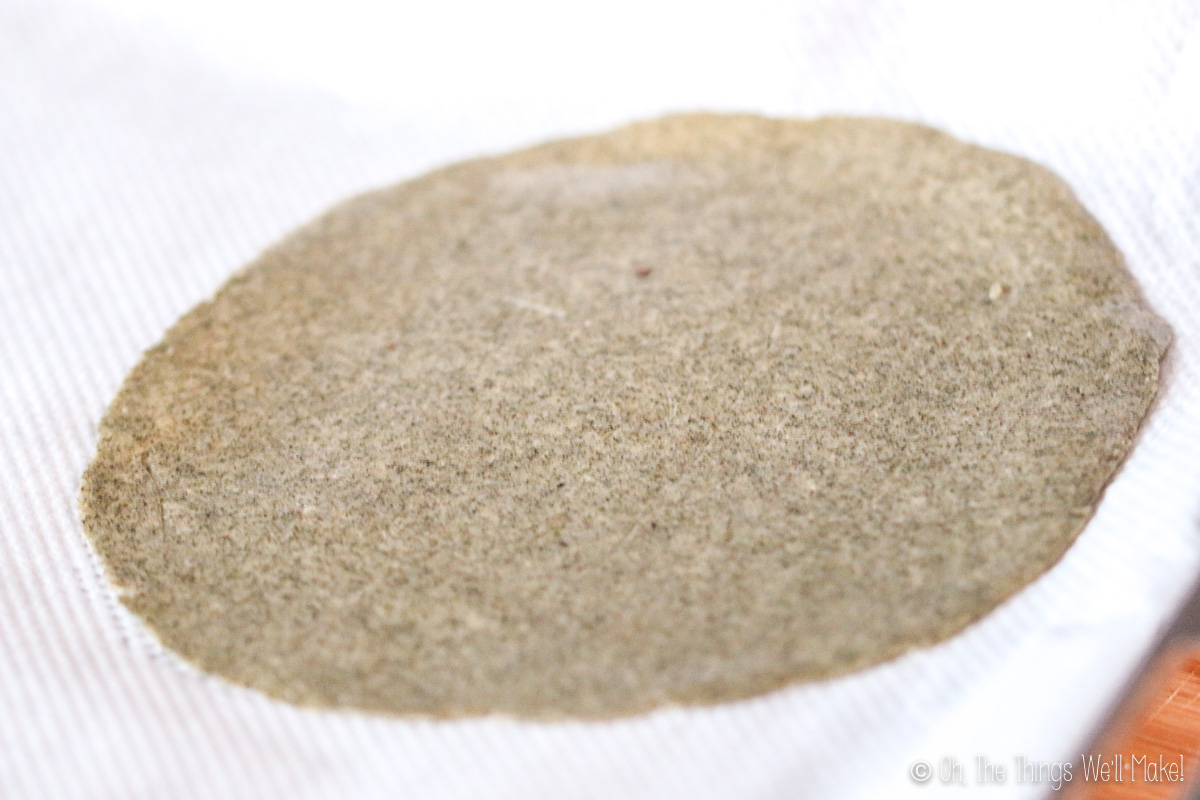
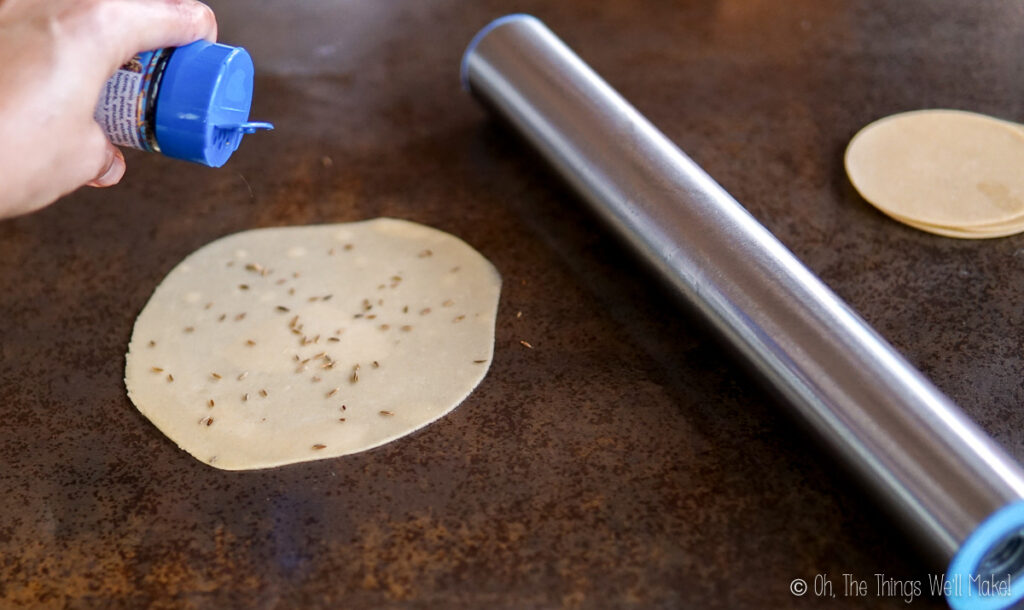
Ideally, you want to roll the disks to be as thin as possible. This will allow them to cook quickly and evenly and get the perfect crispy texture when cooked! To make them as thin as possible, work over an oiled surface, rolling them out with a rolling pin. (See the video if you’re having problems.)
You may notice in the photos that I added cumin seeds directly to the dough the first time I made these. While it’s possible to do it that way, I find it easier to roll out the dough without them. The seeds can be more evenly added to thinner papadums if added later instead. (See that Variations section below.)
Drying the wafers
While I was told that they could be cooked immediately, I’ve tried both ways and prefer using dried papadums instead. As they dry, they get even thinner, and when the thin disks are cooked, they cook more quickly and evenly, resulting in a perfectly crispy snack!
Plus, once the uncooked papadums are dried, they can be stored away for future use! As long as they are completely dry (to the point of being hard and brittle), they can be stored in a well-sealed, cool, dry place for quite some time. (Probably months, as long as they are thoroughly dried!)
Once they’ve been rolled as thinly as possible, allow them to air dry over a sheet of parchment paper. To speed up the process, you can also dry them in the sun (or in the oven at the lowest heat setting).
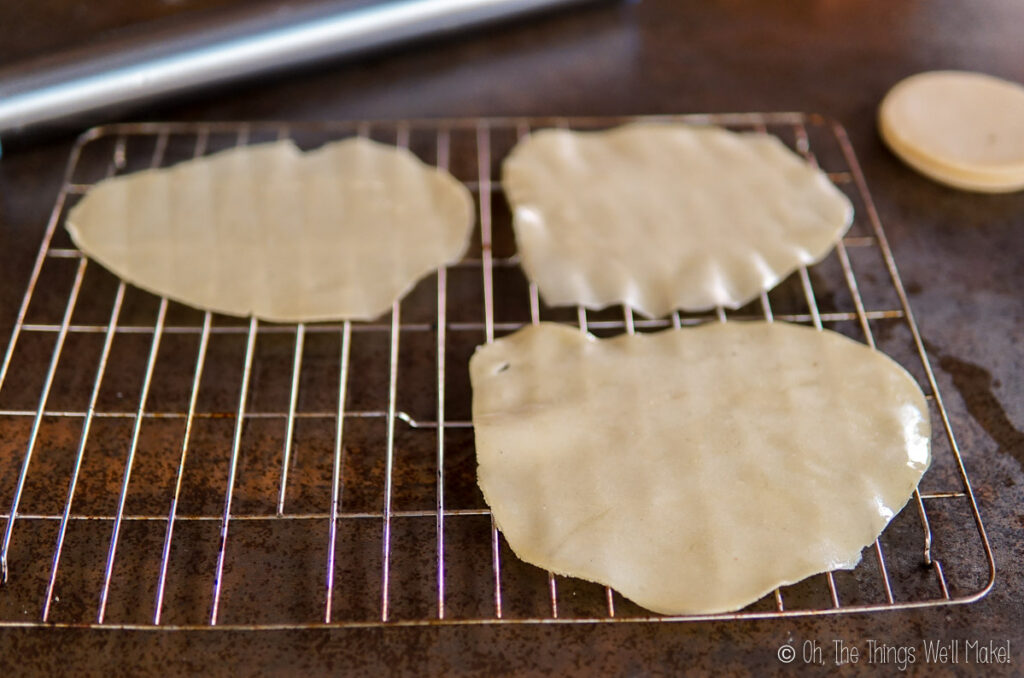
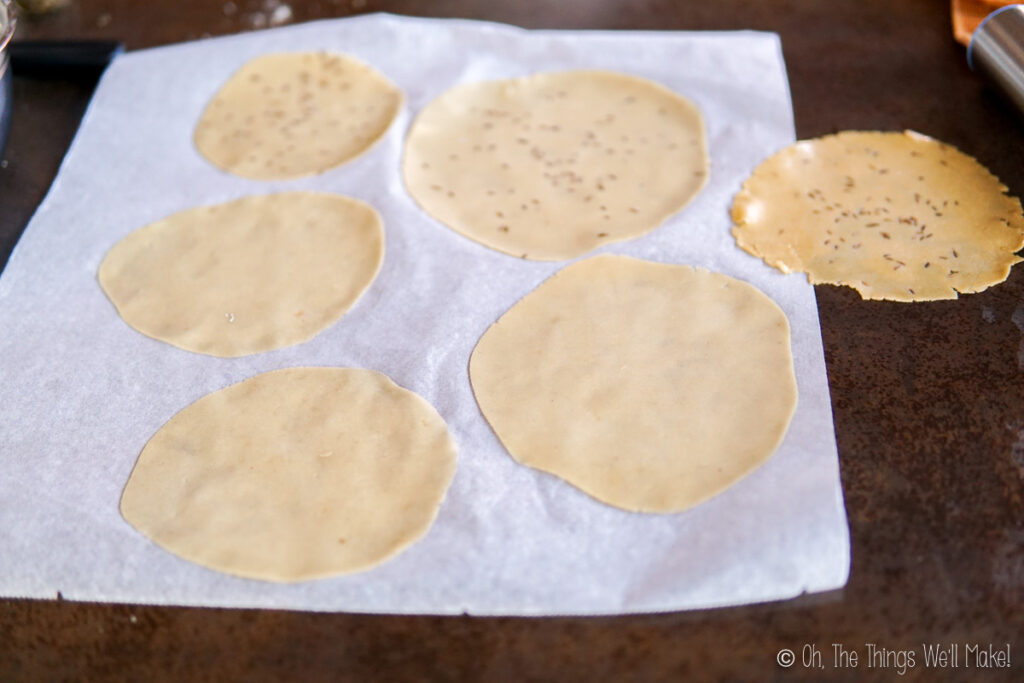
At first, I tried drying them over a grill-like drying rack, but I didn’t like the indentations the bars made on them. So, instead, I found it was easy enough to dry them on parchment paper, occasionally flipping them so that both sides of the papadum would dry.
Cooking the papadums
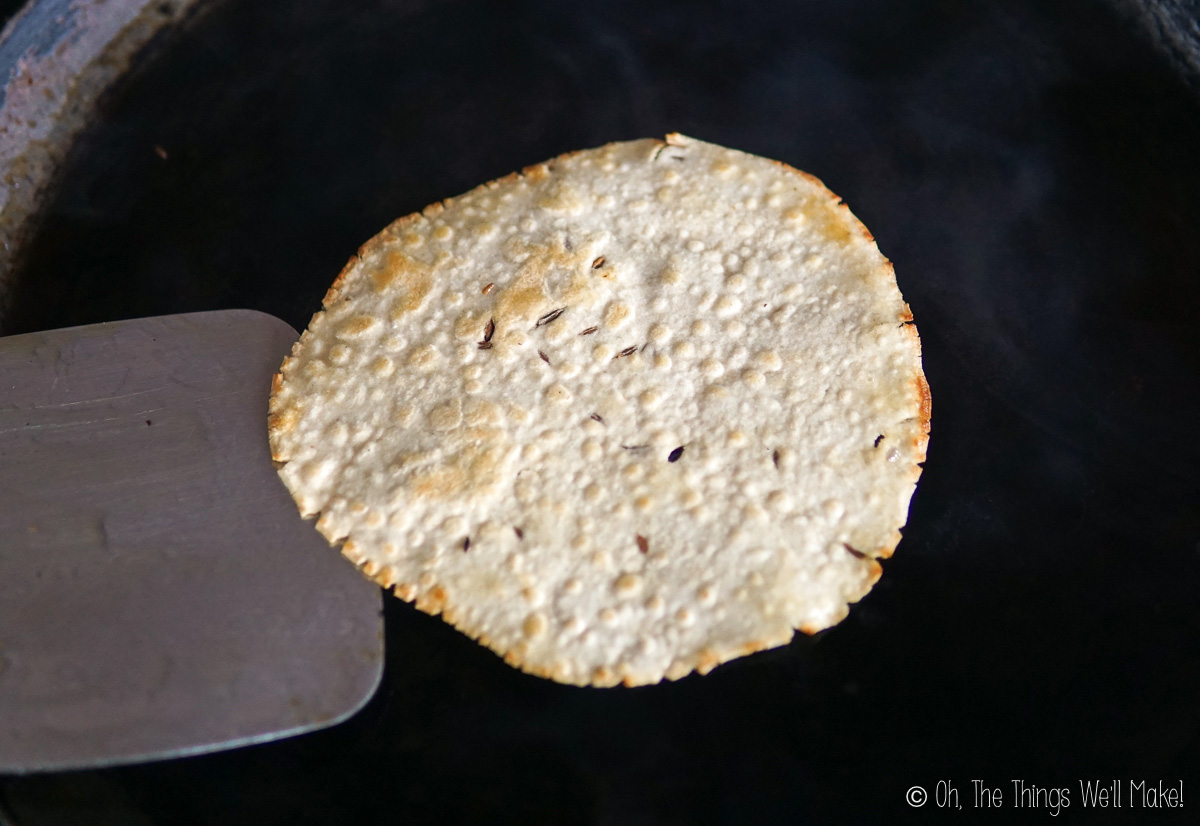
To prepare your homemade papadums, you can broil them in the oven, puff them in the microwave or deep fry them.
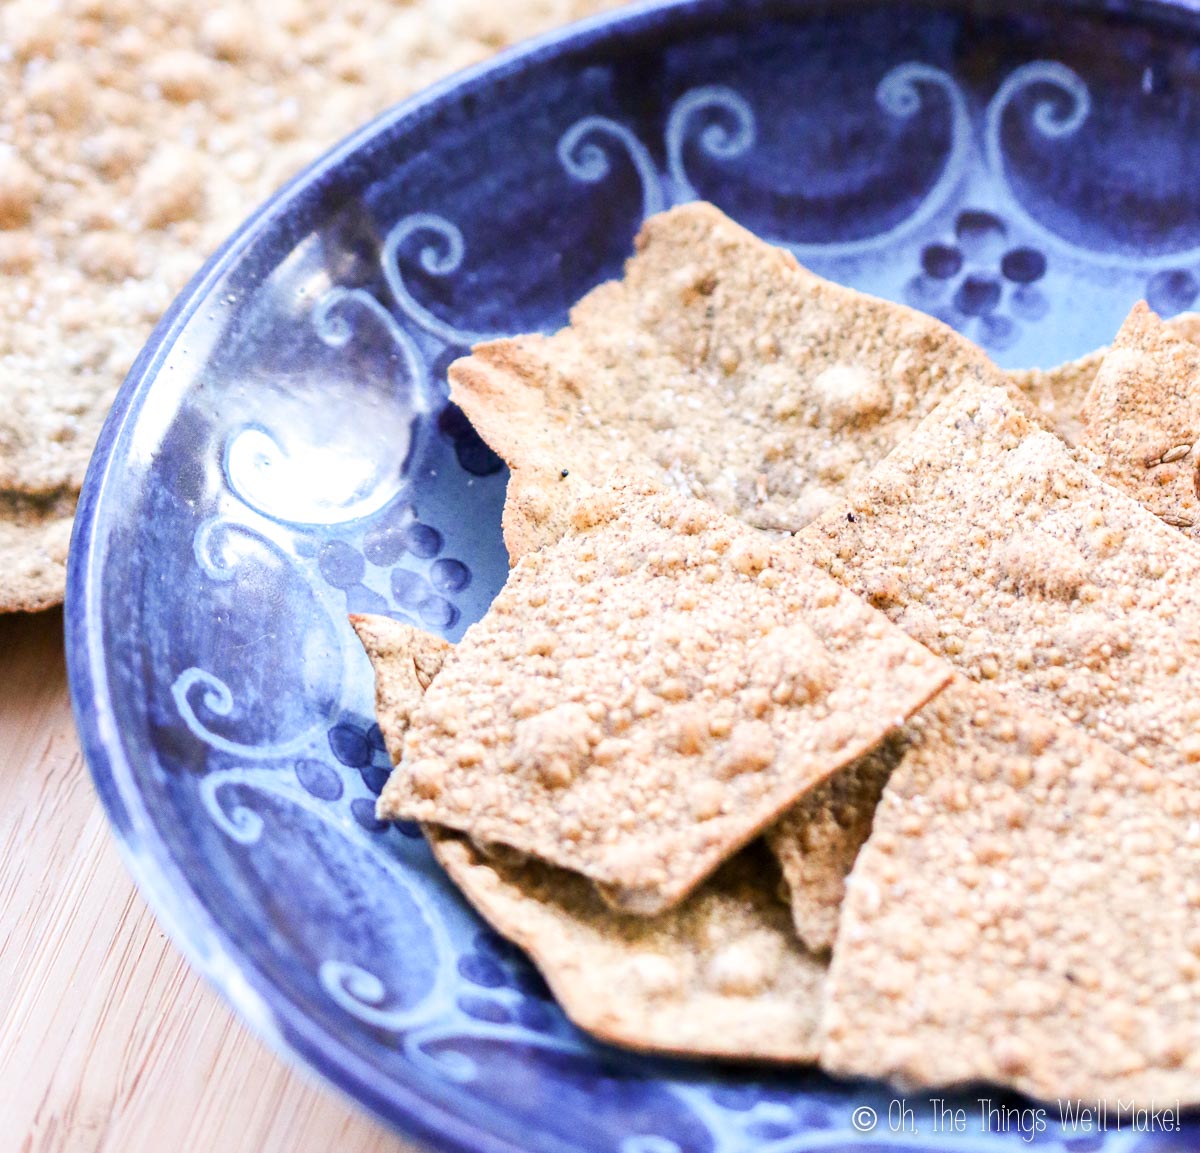
I have tried all three methods, but my favorite was method is to either deep-fry them or to pan-fry them in an oil-coated skillet on the stove. The deep-fried papadums crisped up instantly in the hot oil, becoming light and crispy. While I normally use either olive oil or coconut oil, you can use other types of vegetable oil (such as sunflower oil or peanut oil).
The broiled and microwaved ones also crisped up quickly, but they weren’t as light and flaky as the deep-fried ones.
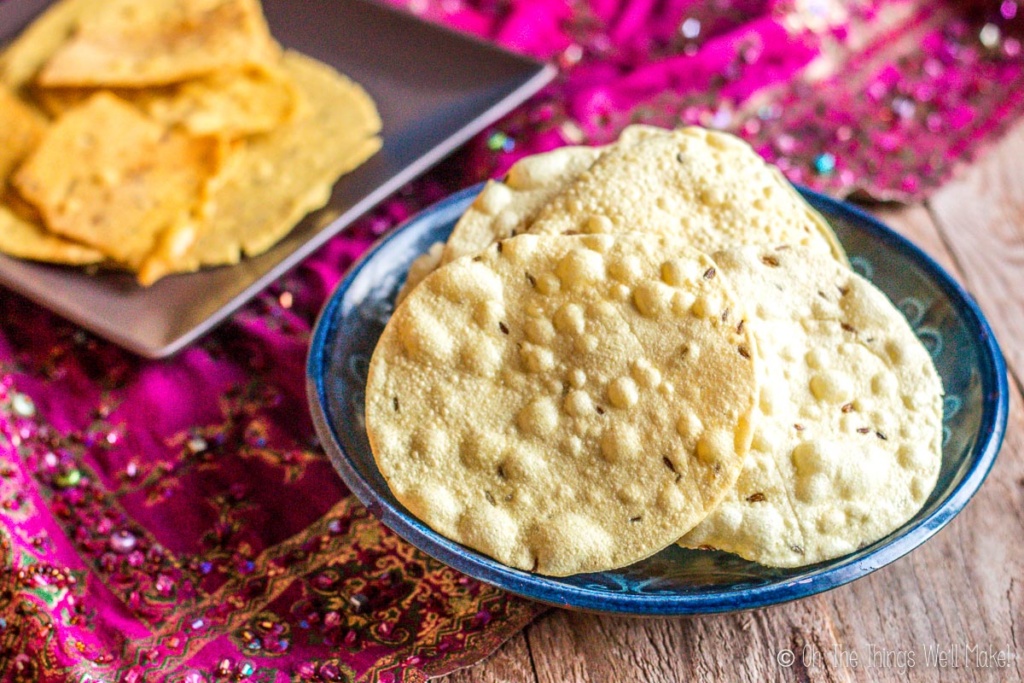
Serving suggestions
Papadums can be eaten on their own as a snack. They make a great side to curries and other main dishes. Just like tortilla chips, they can be served with dips or salsas.
Variations
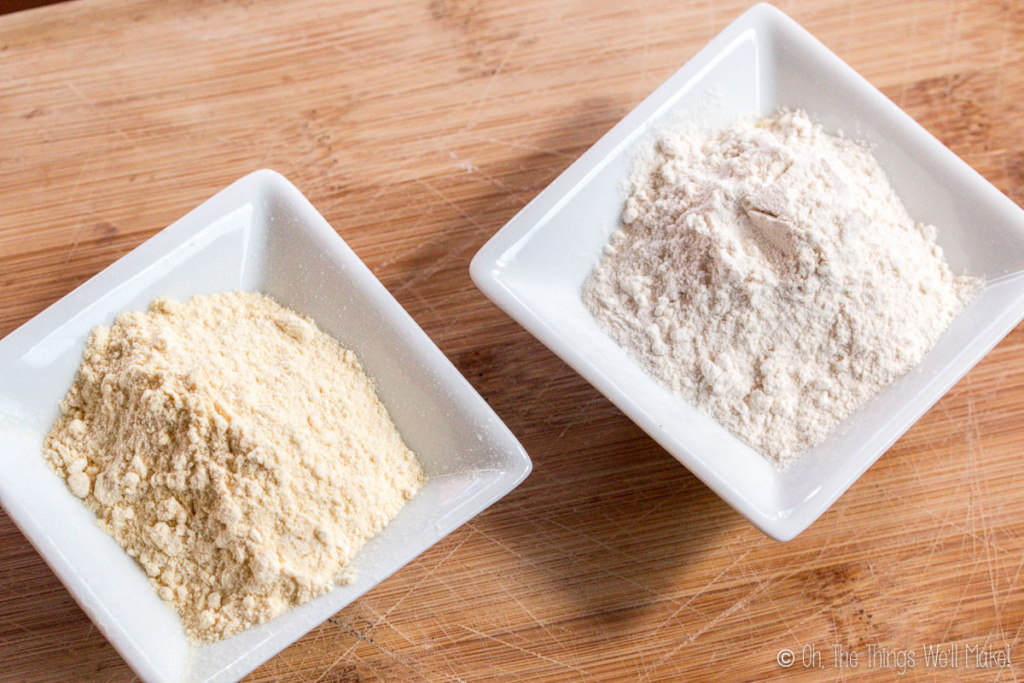
While most papadums are made with urid flour, you can try making papadums with other flours, especially other legume flours. While they won’t taste or look exactly the same, you can make tasty cracker-like snacks in the same way.
I’ve tried making these with both regular, peeled lentils, and also with mung beans. While my favorite papadums were made with the urad flour, the others were also quite good. I found the urad flour the easiest to work with, allowing me to make very thin wafers. The mung beans made slightly darker colored wafers that were also slightly thicker. They cracked on the edges when I tried to make them thinner.

I’ve also seen people using chickpea flour or combining the legume flours with wheat flour.
Adding spices
Papadums are often sold with cumin seeds or cracked pepper within the papadums themselves. When I first made these, I tried adding some cumin seeds directly to the dough, but I found that it made it very difficult to roll the dough into thin sheets.
To add cumin seeds, dried chili, or cracked black pepper, try sprinkling them onto the thin disks of dough before drying them. Use a rolling pin to press the seeds into the dough. Then, flip the disks and use the rolling pin one last time to press them from the other side.
Allow the disks to dry and then cook them just as you would the unflavored papadums.
If you’d like to add garlic or other similar flavorings such as powdered spices, use them finely powdered and incorporate them directly into the dough. Powdered garlic makes a great addition to all of the papadums.

Homemade Papadums From Scratch
Ingredients
- 2 cups urid flour
- 1/4 cup water
- 3/4 tsp. salt
- garlic powder optional, to taste
- 1 tsp. whole cumin optional, for flavored varieties
- coconut oil or olive oil (for kneading and possibly deep frying)
- freshly ground black pepper to taste
Instructions
Making the papadums
- Mix together the flour, salt, optional powdered spices, and water until the ingredients just come together. Add the water little by little while mixing together, until you end up with a stiff dough. Feel free to adjust the salt and spices to taste. (Garlic powder and pepper are optional additions.)
- Knead and pound on the dough for several minutes. At first the dough will be sticky, but as you knead and pound on it, it will start to come together. You can grease your hands and counter to help keep everything from sticking. I've used both coconut oil and olive oil and both work well. (Any vegetable oil shoud work.)
- Take sections of the dough and roll them out on the countertop thinly, around 2mm thin. Use a round cookie cutter to cut out circular-shaped papadums and then use a rolling pin to roll the disks out it even thinner.
- Optionally sprinkle whole cumin seeds or other spices over the disks and use a rolling pin to gently press them into the papadums.
- Spread the poppadum disks over parchment paper to allow them to dry. Flip the disks ocassionally throughout the drying process. (You can speed up the process by drying them in the sun, a dehydrator, or an oven at its lowest temperature.)
- Dried papadums can be stored in an airtight container for later, or cooked for immediate serving.
Cooking the papadums
- Papadums can be broiled in the oven, puffed in the microwave, or deep-fried. My favorite method is to deep fry or pan fry the papadums in a small amount of oil. Papadums made in this way crisp up instantly in the hot oil. Broiled and microwaved papadums also crisp up quickly but aren't as light and flaky as the deep-fried ones.
Notes
Making urid flour from scratch
Papadums are most easily made if you can obtain urid flour. If you have a flour mill, though, or a high potency food processor, you can grind your own flour from the legumes. For best results, use peeled urad dal. If you can only find the unpeeled legumes, you can soak them and peel them too, but it’s a time-intensive job.Serving suggestions
Papadums can be eaten on their own as a snack. They make a great side to curries and other main dishes. Just like tortilla chips, they can be served with dips or salsas.Variations
While most papadums are made with urid flour, you can try making papadums with other flours, especially other legume flours. While they won’t taste or look exactly the same, you can make tasty cracker-like snacks in the same way.- lentils
- chickpeas
- mung beans
This post was originally published on April 24, 2015. It was updated adding new photos, clearer instructions, and new tips.


Hi! My mom grew up in India. She said to rub a bunch between your palms after soaking. Rub like if you wanted to start a fire with a stick. Did that make sense? It’s a lot of work. Bravo for making them. I’m Indian American and haven’t tried.
Hi Alpa,
Interesting. So I’m glad to hear I’m not the only one to have done the crazy amount of work to peel them. 😉
If I were going to attempt it again, I’d try her method, but since I can now find the peeled variety, I think I’ll stick with the easy route from now.
In any case, I’m glad I got to see the whole process through from beginning to end. 🙂
This looks amazing! I can’t wait to try it!! One question though: do you have to dry it? Or can you use it fresh? If you do have to try it, what temp and how long in a dehydrator? Thanks!
Hi May,
I haven’t tried frying them fresh. Perhaps you could try and see how it works?
I dry them because that’s always the way I’ve seen them ready to use when sold, and it’s easier for storing so you don’t have to make them all at once. I’m not sure how they’d hold up fresh.
I dried mine in the lowest heat of my convection oven, but a dehydrator would also work. (I’m not sure what the normal temperature settings are on them.) How long it takes really depends a lot on the thickness of your papadums. I just occasionally check on them, and take them out when they are brittle. I hope that helps!
I just found your blog and I LOVE it. I wanted to suggest an easier way to peel lentils and beans after soaking. Just use your food processor. Pour the soaked beans into the processor with a little water, and pulse 2 or 3 times. Transfer to a bowl and add more water and stir. The skins will rise to the top.
I always peel beans this way.
Hi Adaobi,
Thanks so much!
That sounds like a great idea. I’m not ready to go through the entire process again any time soon, but I’d definitely try your method next time.
I luckily found some peeled ones locally since then and use them for making papadums now. It was fun to see the whole process from beginning to end, though. 🙂
Hello, nice article, thanks. Which kind of oil do you recommend for frying the poppadums in?
Thanks, Pat.
You can really use any oil that you normally use for deep frying. I like frying in saturated oils like coconut oil, lard, or ghee, because they are said to be more stable under the high heat of deep frying, but it’s really up to you. It depends upon what you have had on hand and what you feel comfortable deep frying in. They have turned out pretty much the same no matter which oil I use; they just taste a bit different if you use an oil with a strong flavor. So, I guess the main thing is…Just don’t use an oil that gives off a flavor that you don’t like.
Wow, these look brilliant! Impressive amount of work you did there. Now I know what to do with the urad dal I bought at an Indian market here in Munich! I have a Vitamix dry grinder container so can whip up that flour in no time. Can’t wait to try these!
Hi Gale,
I hope it works out well for you, and that you like them as much as I did.
I was actually lucky this week. I went back to the store and asked if she could order the peeled urid (urad) for me, and she told me she would! I should be able to pick them up this weekend! Yay!
I’m so happy. Peeling them wasn’t very fun, but I’d love to make these again. 🙂
Thanks for submitting to Yum Goggle! We appreciate you putting your posts into our hands – we will treat with care! we will tag you in as many social media posts as we can!
Wow, totally impressive! 🙂 <3
Thanks, Megan. 🙂
We had dinner at Prune, here in NYC, last night and they put papadom on the table in lieu of bread which I thought was brilliant! I’ll be on the lookout for that flour.
You have inspired me to have a go at making them myself, these look amazing.
Hi Sara,
Do try them. They really are simple if you have the flour. 😉
Those macadamia nut tarts look amazing. They remind me of the pecan pies I used to love as a kid- only better. (And I love making homemade ice cream!!)
Tracy you’ve out done yourself here! I am officially de-throned as the self professed queen of ‘make it from scratch’ My husband LOVES poppadoms can I send him over??
Haha–
One of the links I sent you to the place for gluten free shopping here in Spain interested me because they had peeled urid dal available, but shipping costs were a bit steep for just one item. Too bad the Amazon in Spain doesn’t have them available like the one in the US!!
I really liked the homemade poppadoms, but didn’t love peeling the urids!!
If I buy some peeled urids, I will happily make you all some homemade poppadums when you come over. 😉