

Homemade Liquid Coconut Oil Soap
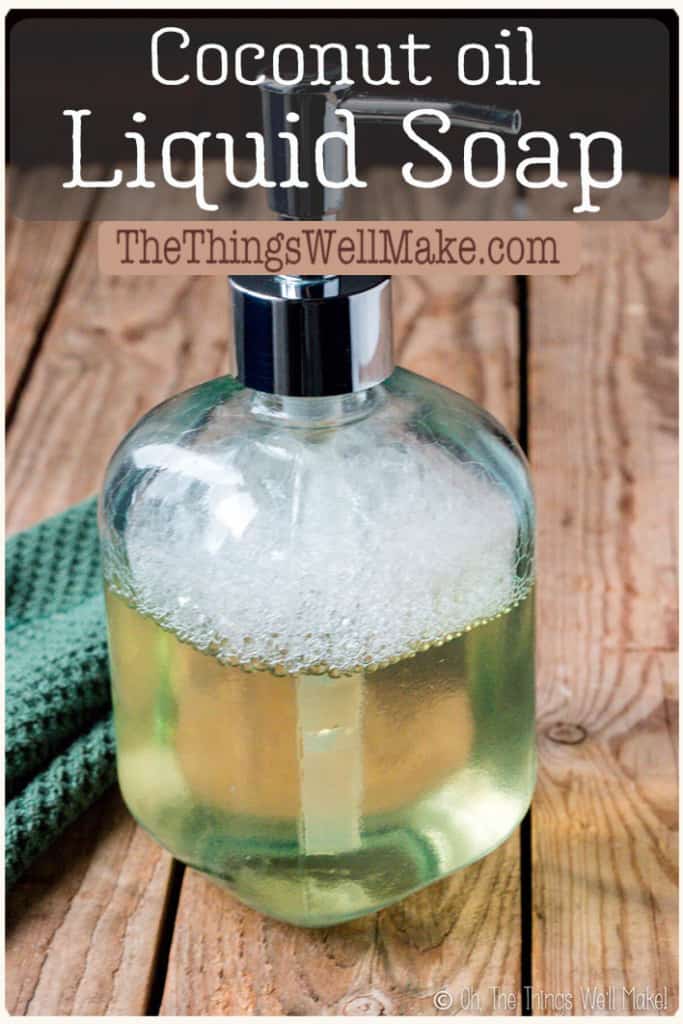

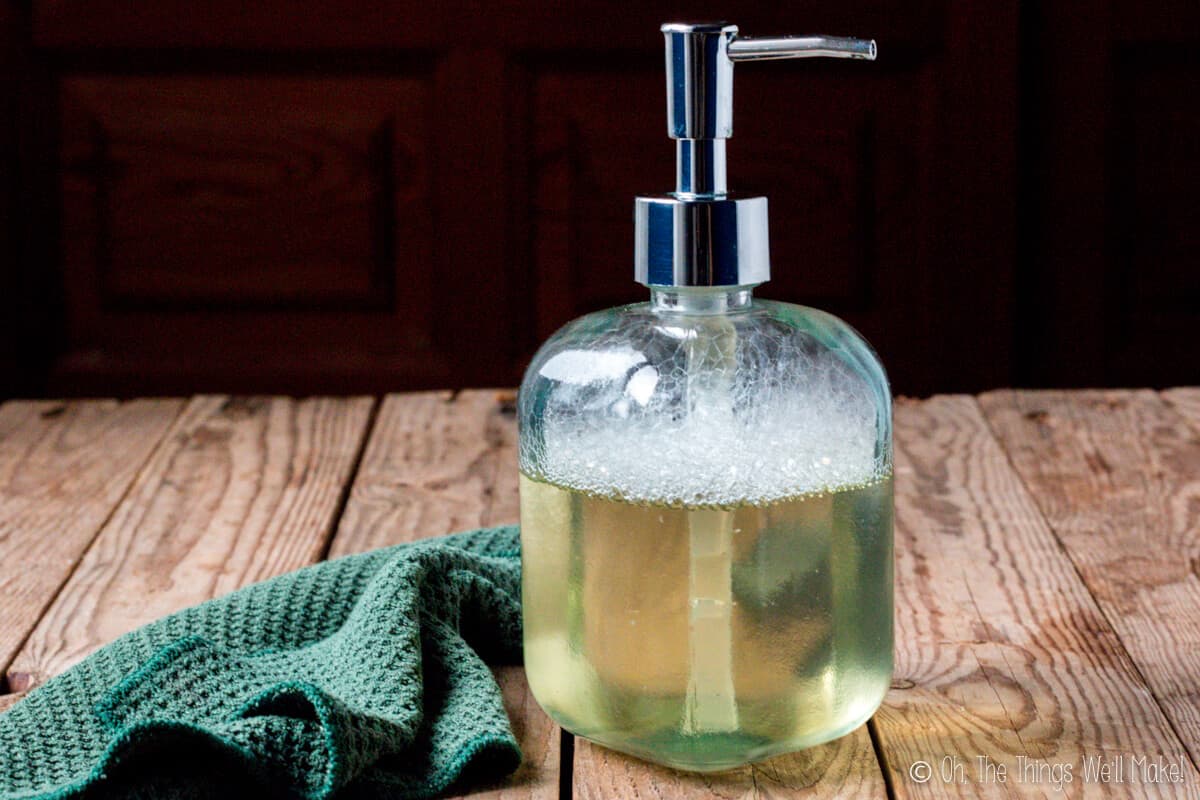
Making your own homemade liquid coconut oil soap is simple, thrifty, and very rewarding. Coconut oil soap provides lots of lather and cleaning power for all-purpose cleaning.
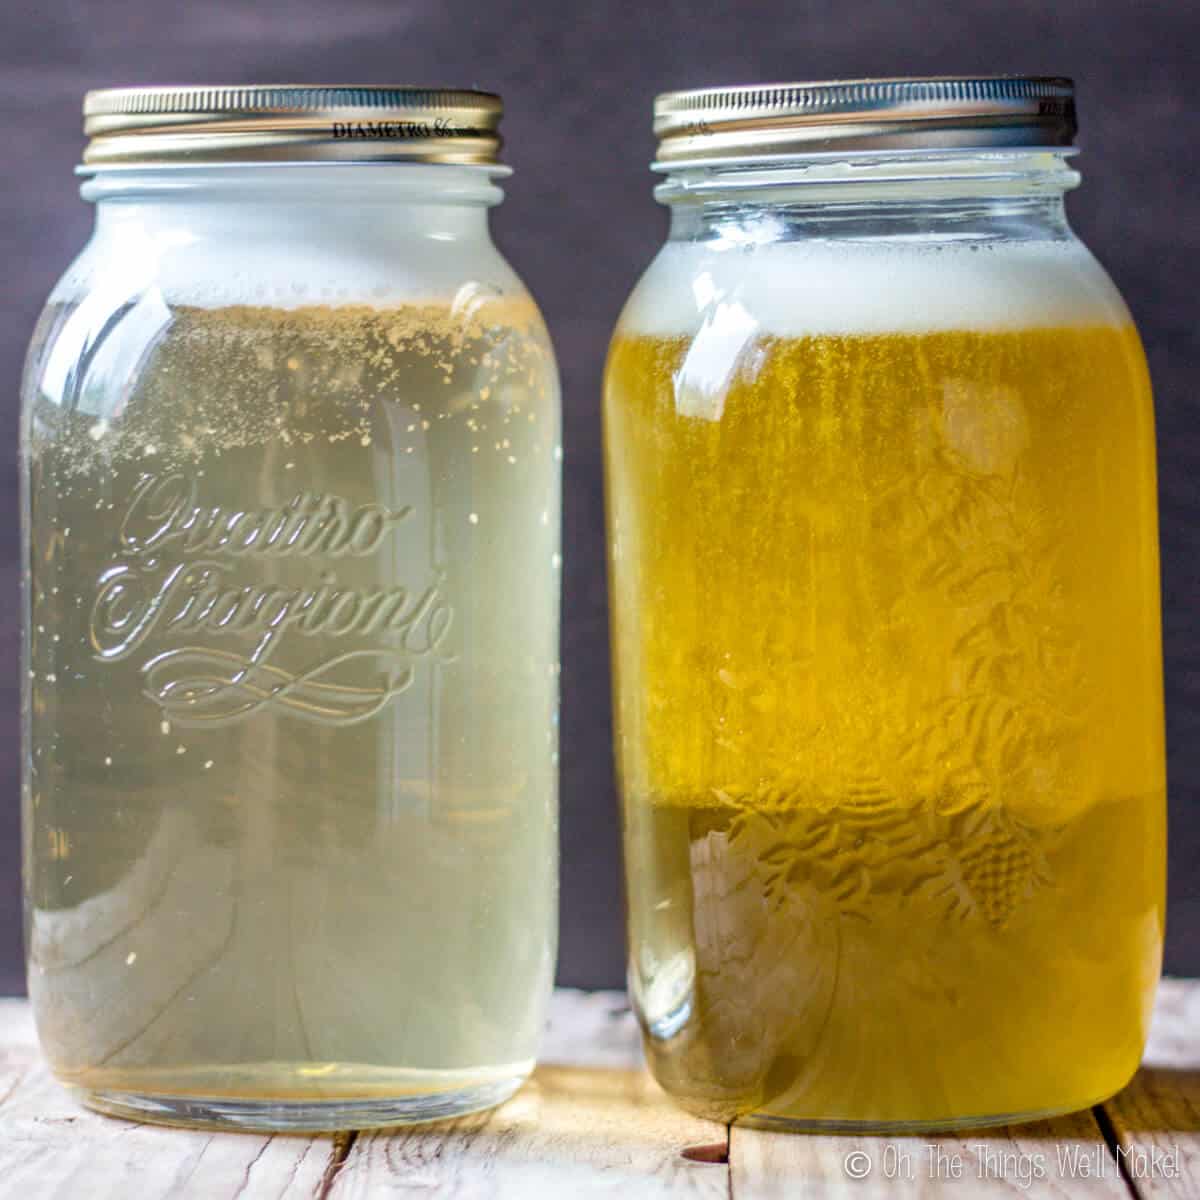
When I first made this soap, I had a great idea. I made a pure liquid Castile soap (made with only olive oil) and this liquid soap made with only coconut oil. My idea was that I would combine them, as needed, for different purposes around the house.
Oils in soapmaking
I had my reasons. Each oil in soap making brings different properties to soap (different from the properties they’d bring to a homemade lotion, for example). In a bar soap, there is a HUGE difference between a pure Castile soap made with only olive oil and soap made with only coconut oil.
Soaps made with olive oil are more conditioning. Olive oil is great for soaps meant for the face and body for that reason. On the other hand, soaps made with only olive oil don’t make much lather and they aren’t as “cleansing” as soaps made with coconut oil. Some people find them “slimy.”
Soaps made with coconut oil are cleansing and they provide a nice bubbly lather, but they can be drying to the skin when used alone.
Most people prefer using a soap with a combination. They want a soap that isn’t too drying, but that has some lather and cleansing ability. That’s why I used a combination of the two oils in my easy beginner soap recipe. I wanted a conditioning soap that provided some lather. If you haven’t tried making soap yet, you may want to begin with that recipe to get your confidence up before moving on to liquid soaps.
Read my post about the best oils in soap making for more information.
Oils in liquid soap making
Now that I’ve made these liquid soaps several times now, I have to admit that I don’t notice as much of a difference between the liquid soap made with olive oil and this liquid soap as I thought I would. In fact, I generally make this soap most often.
The biggest differences are cosmetic. This soap is much lighter in color while the liquid Castile soap is more golden in color. They also have a different scent. (If you add essential oils or fragrance oils when you dilute your liquid soap, though, you probably won’t notice a difference.)
I’ve found that both of these soaps provide a lot of lather. This one makes a slightly more abundant and bubbly lather. Neither one is excessively drying, although the one made with olive oil is slightly more conditioning.
My husband prefers my homemade liquid soaps for use in the shower to gels made with other surfactants because he likes the amount of lather they provide. (Yes, even the one made with only olive oil provides a lot of lather.)
Refined coconut oil, sold for soap making, generally is very inexpensive, so I like using it to make soap. I haven’t noticed a difference when using refined coconut oil vs. virgin coconut oil (which I used to use before I could find the more inexpensive coconut oil locally). (I used to make soap with olive oil more often because here in Spain it was the least expensive oil.)
Those with coconut allergies will be happy to learn that pure Castile liquid soap is also a great multi-purpose soap.
Why Make this soap?
Making your own liquid soap makes a lot of sense financially. It’s a bit intimidating, but once you’ve successfully made it, you’ll see it’s not that difficult. Liquid Castile soap is surprisingly expensive. Not only can you save a lot of money by making it yourself, but you are able to control which ingredients you use. This is especially helpful for people with allergies and skin sensitivities.
It’s also more sustainable. You can keep using the same containers and dispensers over and over again, meaning much less waste! One big batch of soap will keep for a very long time.
Before making this soap, you may want to read my post about how to make a liquid soap with general information about the process. It may also help you choose which soap you’d like to make.
Ingredients
This recipe uses only a few simple ingredients.
Coconut oil
Obviously, you will need coconut oil. You can use refined coconut oil or virgin coconut oil. It doesn’t really matter which you choose. Avoid using fractionated coconut oils or coconut oils that have been modified to melt at a different temperature. (If you want to use them, you’d have to run the recipe through a lye calculator and adjust the amount of lye used. Read more about using a lye calculator here.)
Lye (KOH)
Apart from the coconut oil, you will also need lye. In the case of liquid soap, you will need a different type of lye than the one used in bar soaps. For liquid soap, we will be using KOH, potassium hydroxide. (Bar soaps use NaOH, sodium hydroxide). All true soaps use lye. (For more information about lye and why it is needed in soap, read my post about why soap needs lye.)
Do not use NaOH, sodium hydroxide, to try to make liquid soap!
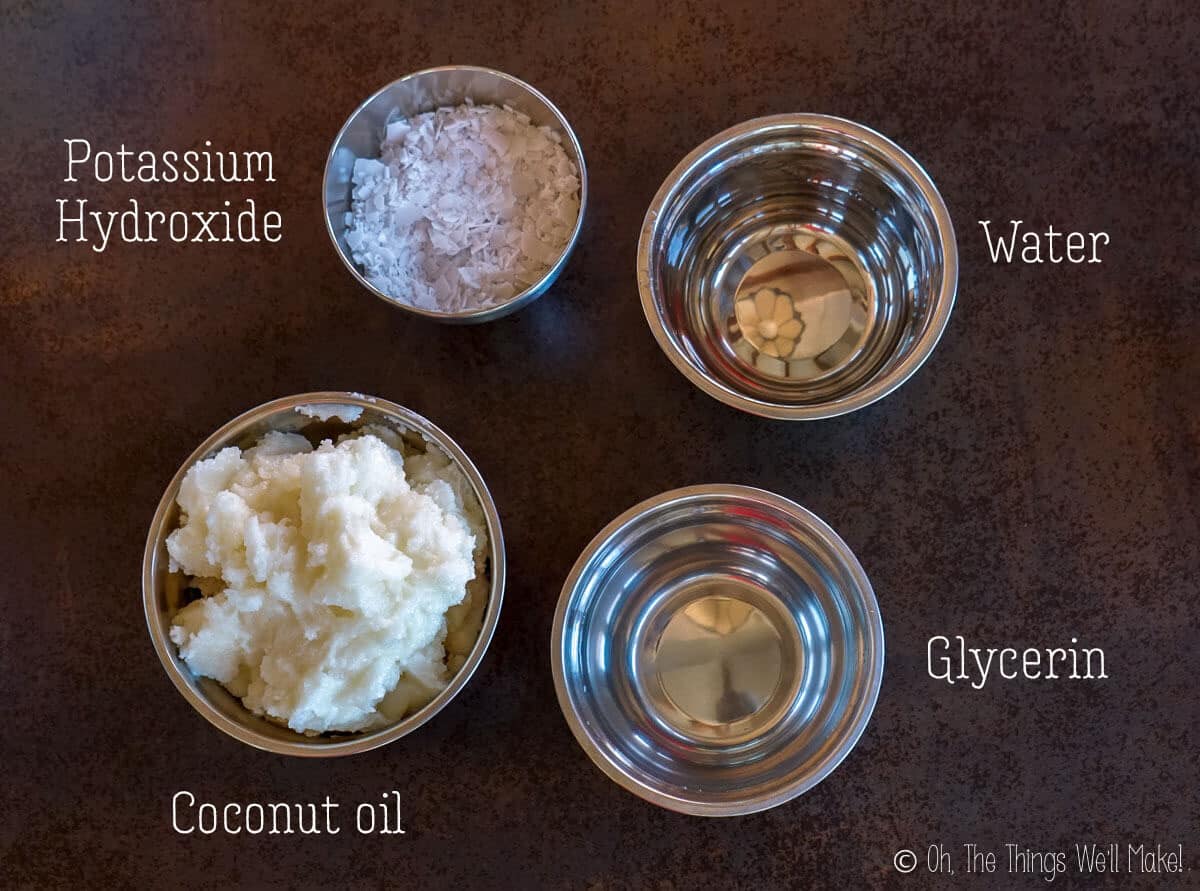
Glycerin
I use glycerin when making liquid soap for several reasons. Glycerin is normally a by-product of the soap making process. Adding more glycerin makes the process of liquid soap making easier and more fool-proof.
Not only is it said to move the process along more quickly, making the process quicker and easier, it also has other advantages. Soap pastes made with glycerin tend to be easier to dilute in water. They also may be more transparent and conditioning to the skin. (Glycerin is a humectant which can draw moisture into your skin.)
If you don’t want to use glycerin, you can just sub it out for more water. Just know that it may take longer to make and your resulting soap may be slightly different from mine.
Water
We’ll also be using water in our lye solution. I recommend using distilled water to avoid adding impurities and minerals that could result in a cloudy soap.
Procedure
Making liquid soap is very similar to making bar soap. Most people hot process their liquid soap, though. That means that they will cook it in some way or another to help finish the process of saponification. (Someday I will write about my experiments in trying to cold process liquid soap.)
In the past, I have recommended making this soap in a slow cooker. Over the years, though, I’ve had many questions about how to make this if you don’t have one. I made my last batch of this soap in the oven, and it worked quite well and was very easy to do too.
So, if you are using a slow cooker, you can add the weighed out coconut oil to the slow cooker and allow it to melt in there. If not, I’d suggest melting the coconut oil in a large bowl.
Making the lye solution
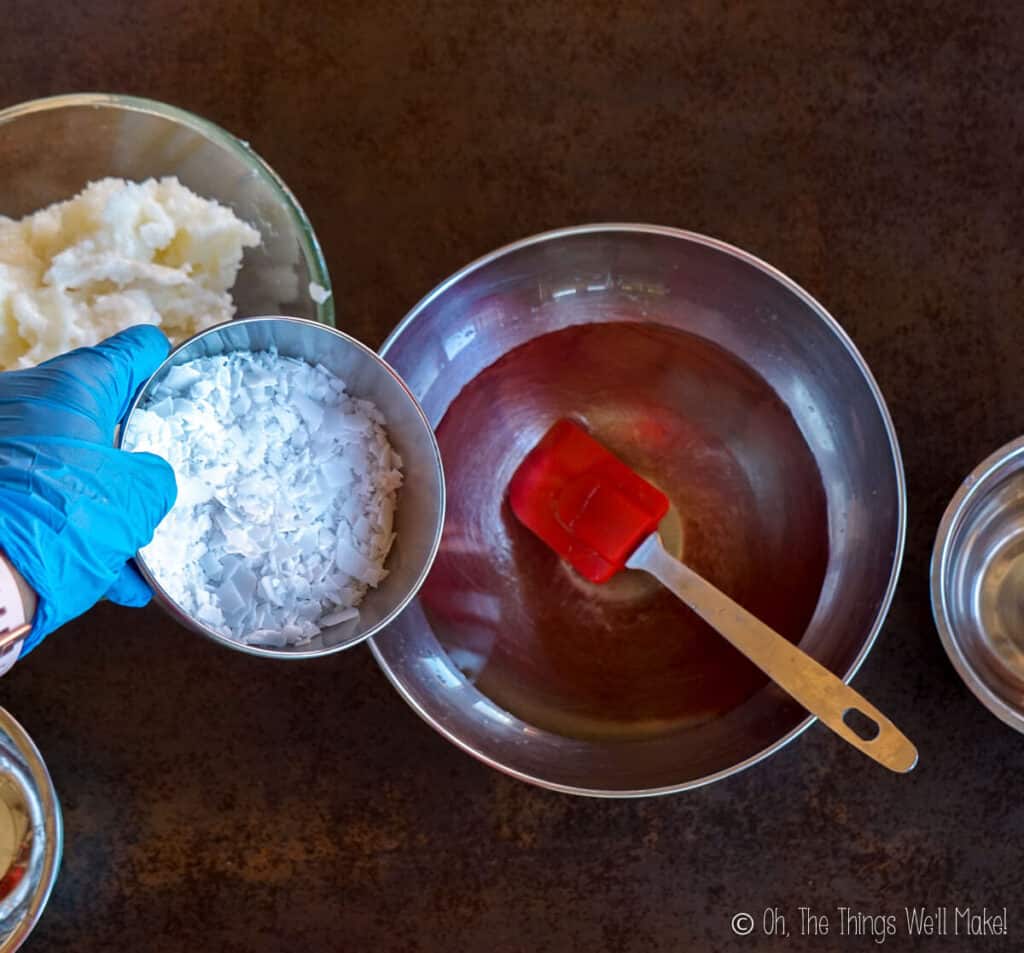
In a separate medium-sized bowl, mix together the water and glycerin. In a separate smaller bowl, weigh out the potassium hydroxide (KOH).
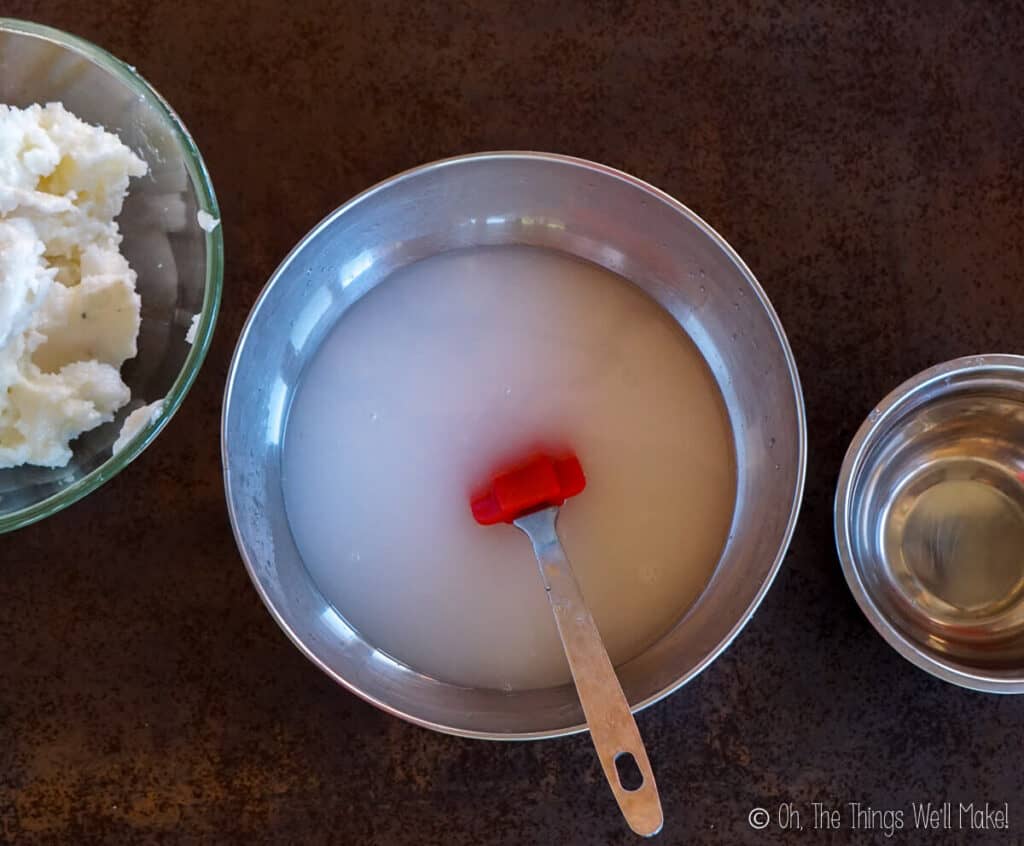
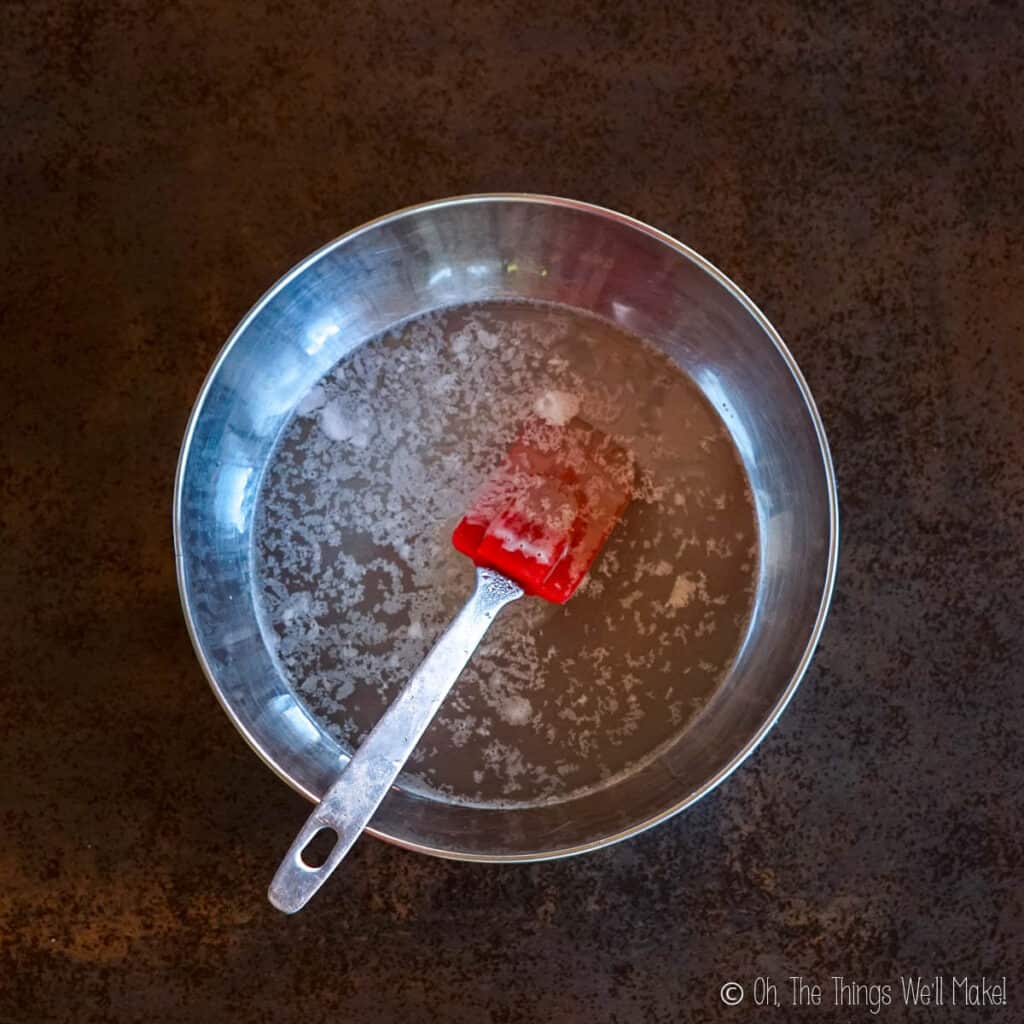
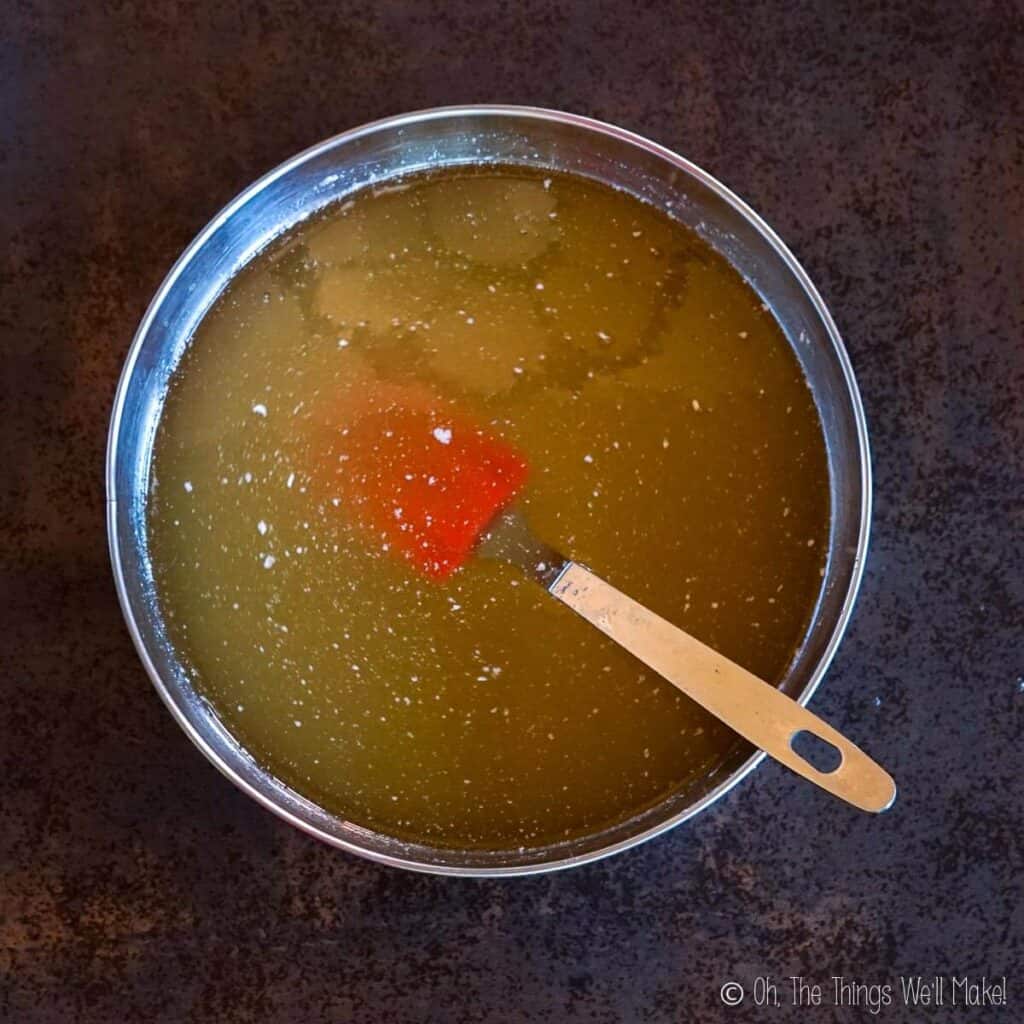
Pour the KOH into the water and glycerine mixture. Mix them together until the KOH is fully dissolved into the water and glycerine mixture. It will be cloudy at first but will clear up. It will also get very warm.

Making the soap paste
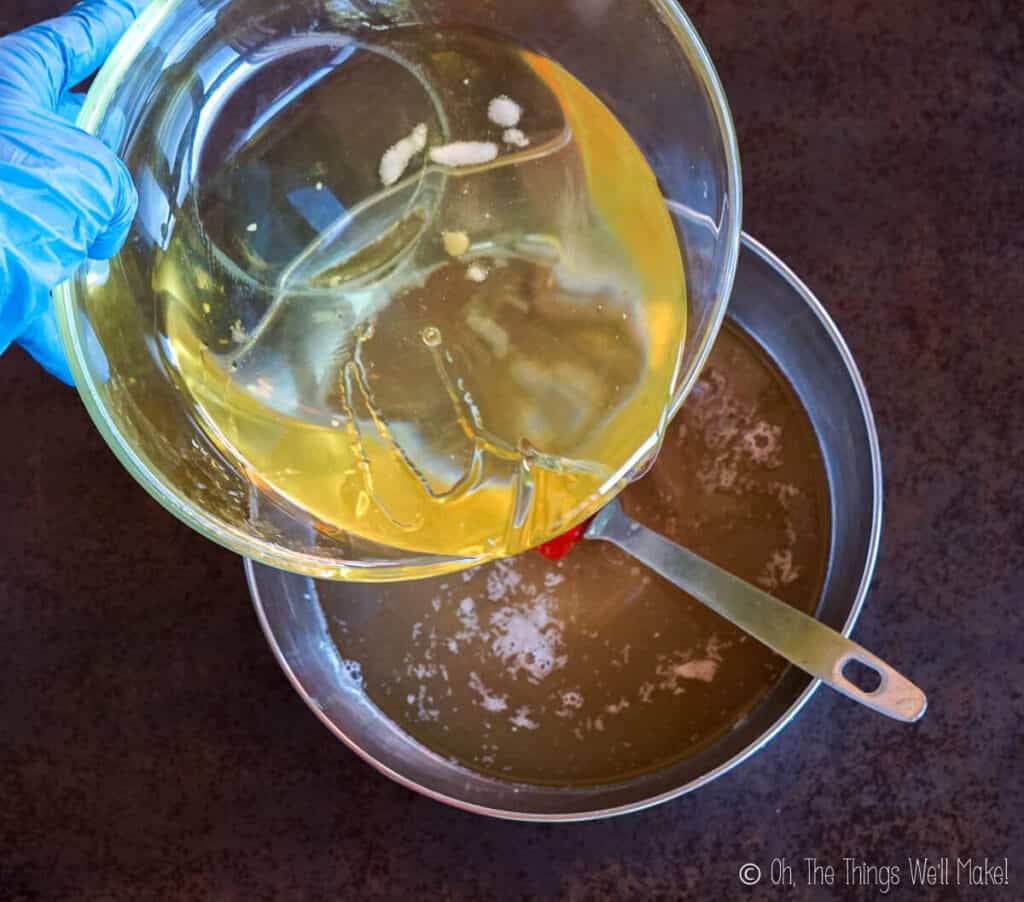
Carefully pour the KOH mixture into the warm coconut oil, and slowly mix them together. This can either be done right in the slow cooker crock or in a large bowl.
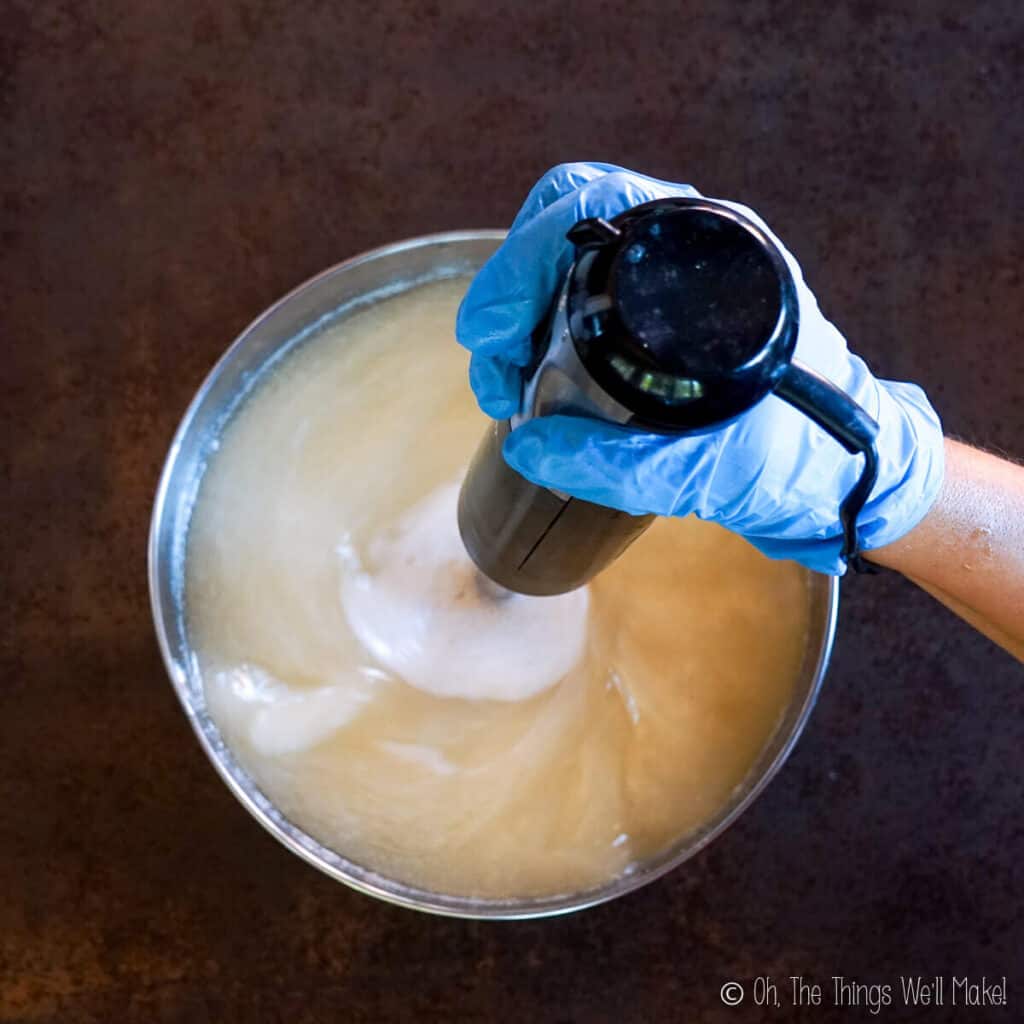
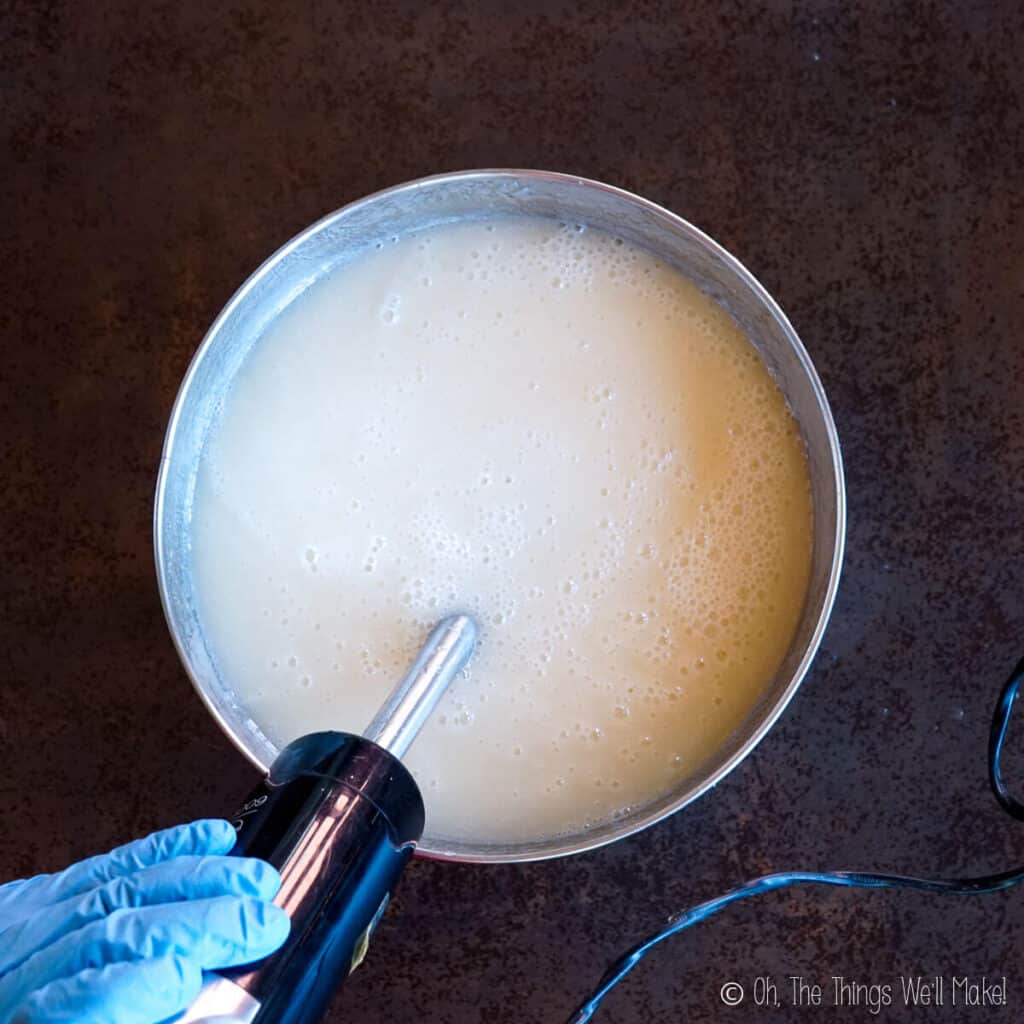
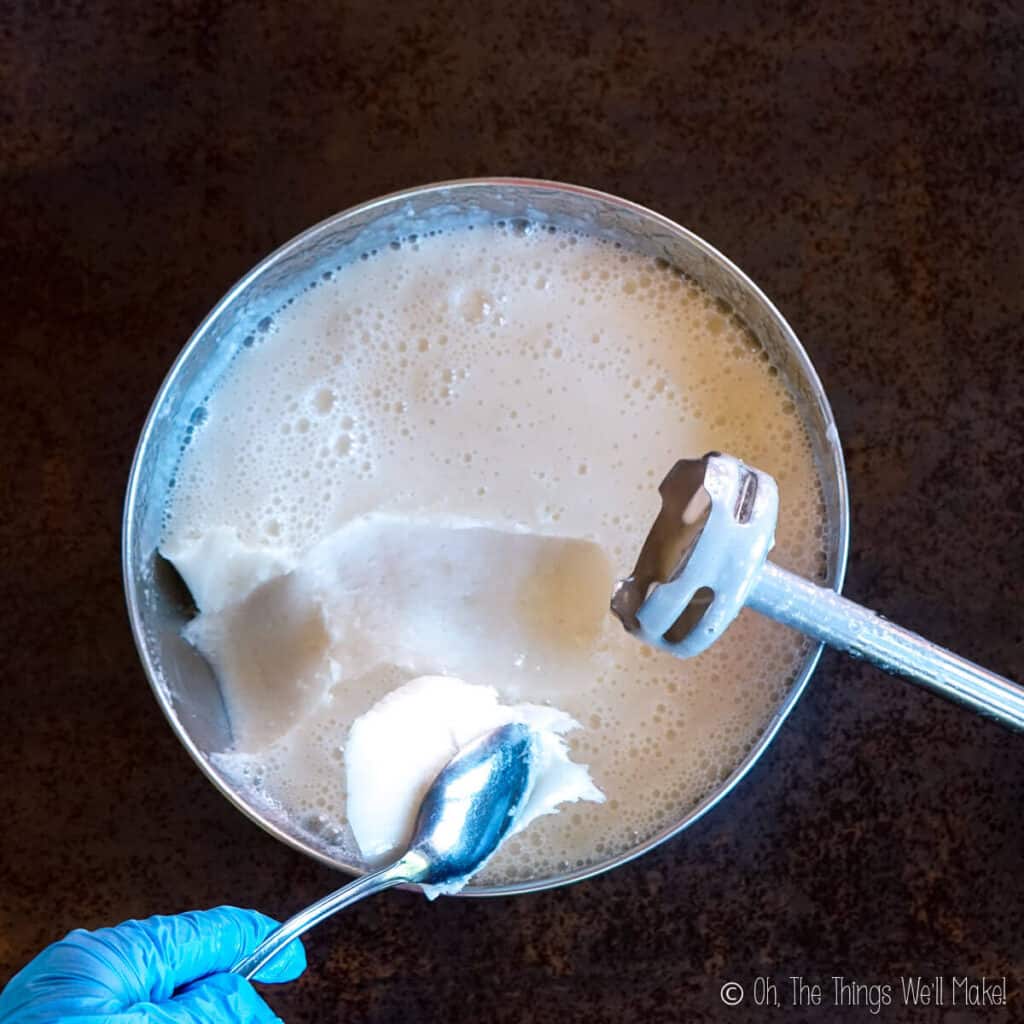
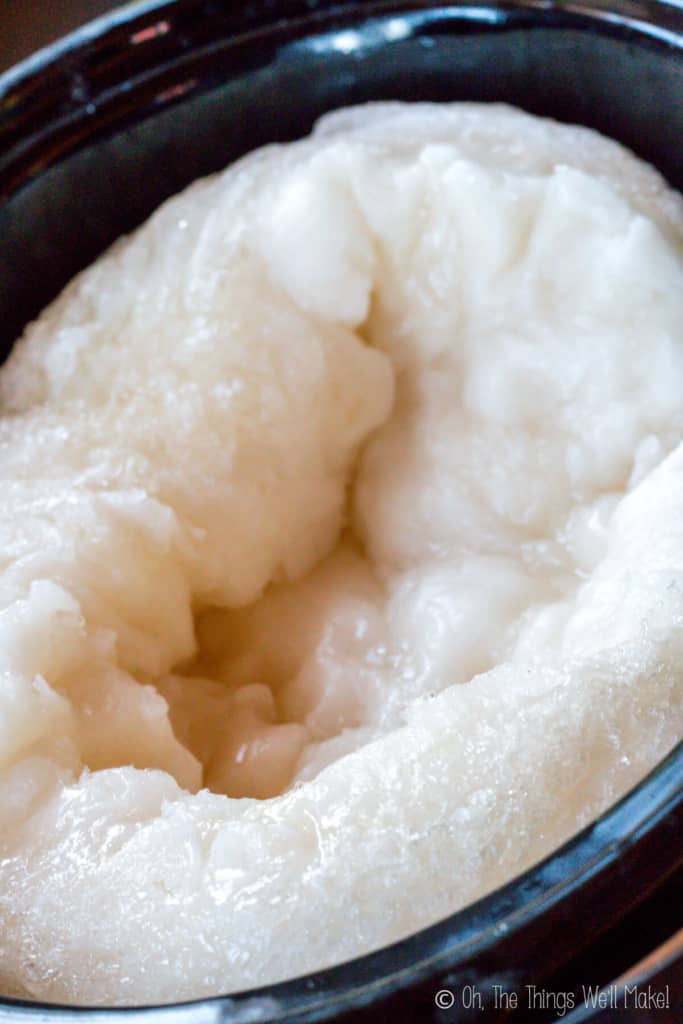
Using an immersions blender, blend the ingredients together. The mixture will begin to thicken after a few minutes. A couple of minutes later, the mixture will probably begin to look grainy. Continue to blend. (You can take breaks to give your blender time to rest. This helps prevent burning out the motor.)
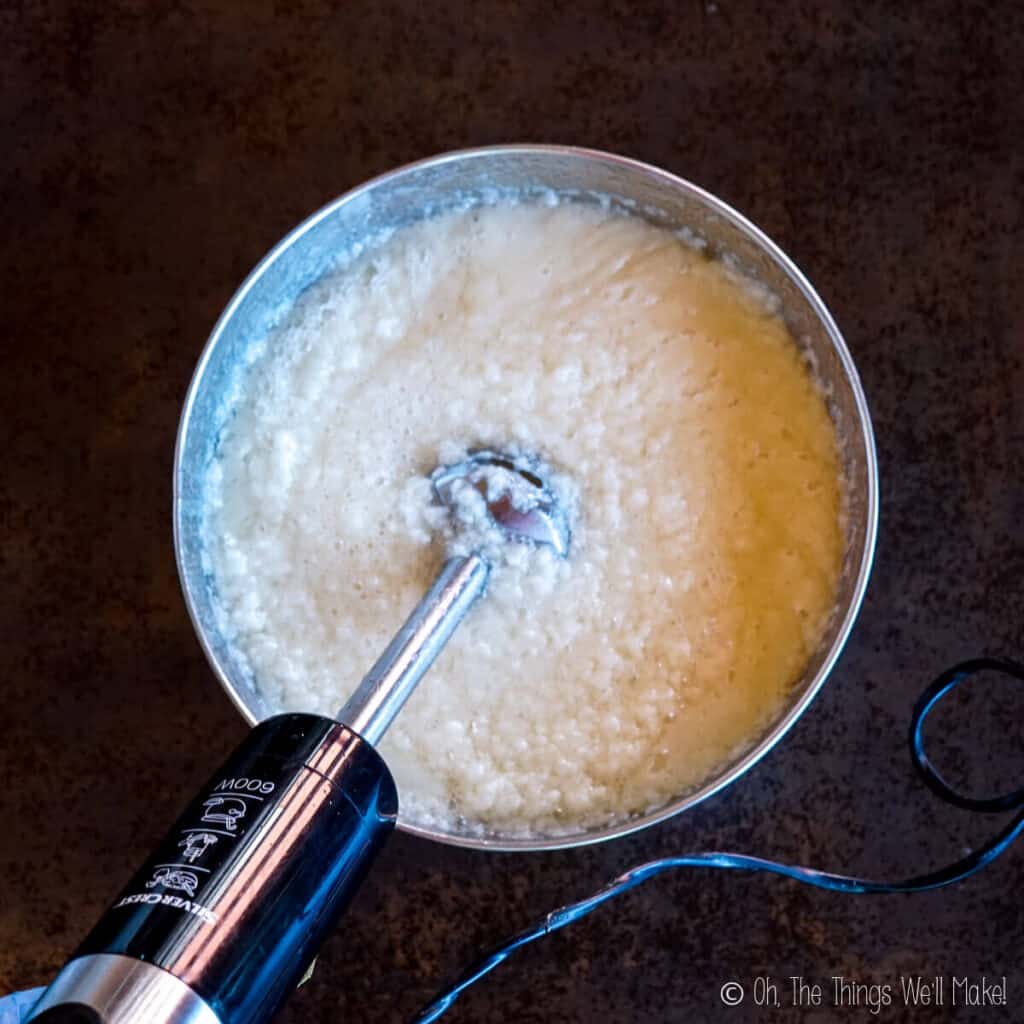
Soon after the mixture gets smooth again, it will start to thicken. At that point, you may want to remove the immersion blender as the mixture turns into a paste pretty suddenly. (You don’t want to burn out the motor of the blender or get it stuck in the soap paste.)

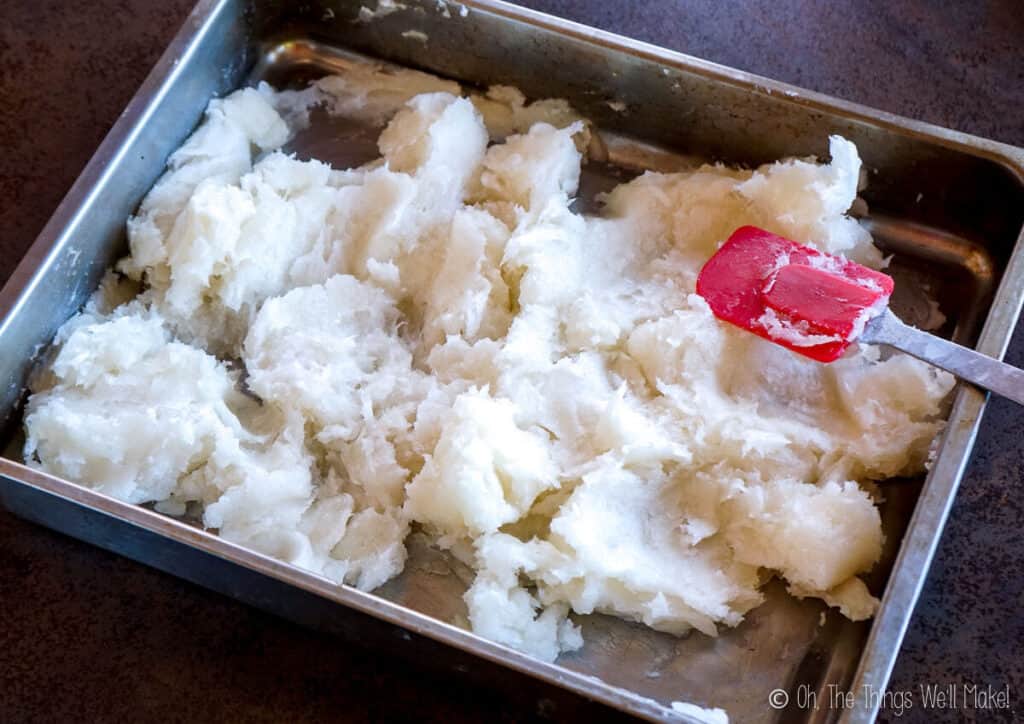
Cooking the soap paste
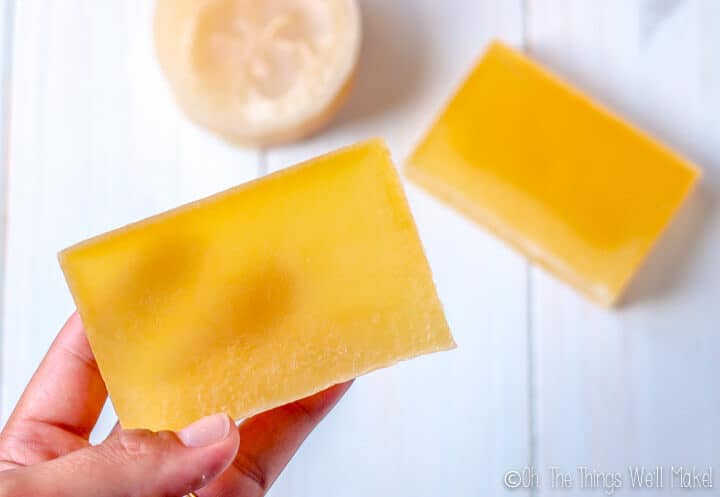
Once the paste has formed, it should be cooked to help finish the saponification process and make a translucent soap. (I’ve tried skipping this step and the paste stayed opaque and the finish soap was on the cloudy side. Even cooking for a short time, though, was enough to get the paste to the point where it could finish the process on its own, with time.)
Cooking in the slow cooker is the best option, if you have one. If you’re using a slow cooker, cover the soap and cook it on low for several hours.
If you don’t have a slow cooker, the paste can be spread out on a baking sheet and baked in the oven at around 70ºC/160ºF. (Ideally, cover the soap paste so that it doesn’t dry out too much.)
I tried cooking my last batch in the oven and my soap paste didn’t get as translucent as it does in the slow cooker. Perhaps, it would have had I cooked it longer and covered it. It may have also helped to increase the temperature slightly. In any case, the saponification process did complete and the soap is safe to use, but it was slightly cloudier than the soap I make in the slow cooker. (See my video!) I’ve found that soap pastes that haven’t gone fully translucent generally improve with time.
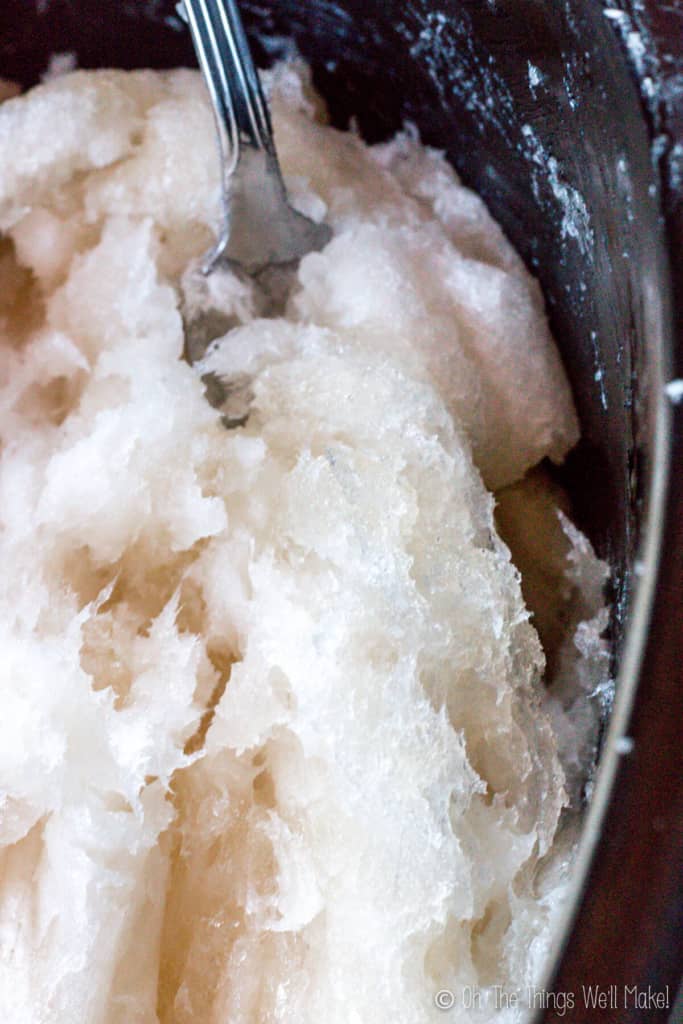
Every half hour or so, try to mix the soap paste as best you can. You can flip it over to expose different parts of the soap paste to cook the paste evenly. As it cooks, the mixture will become more translucent. The process will take 3-4 hours.

Check for doneness
There are several ways to test for “doneness.”
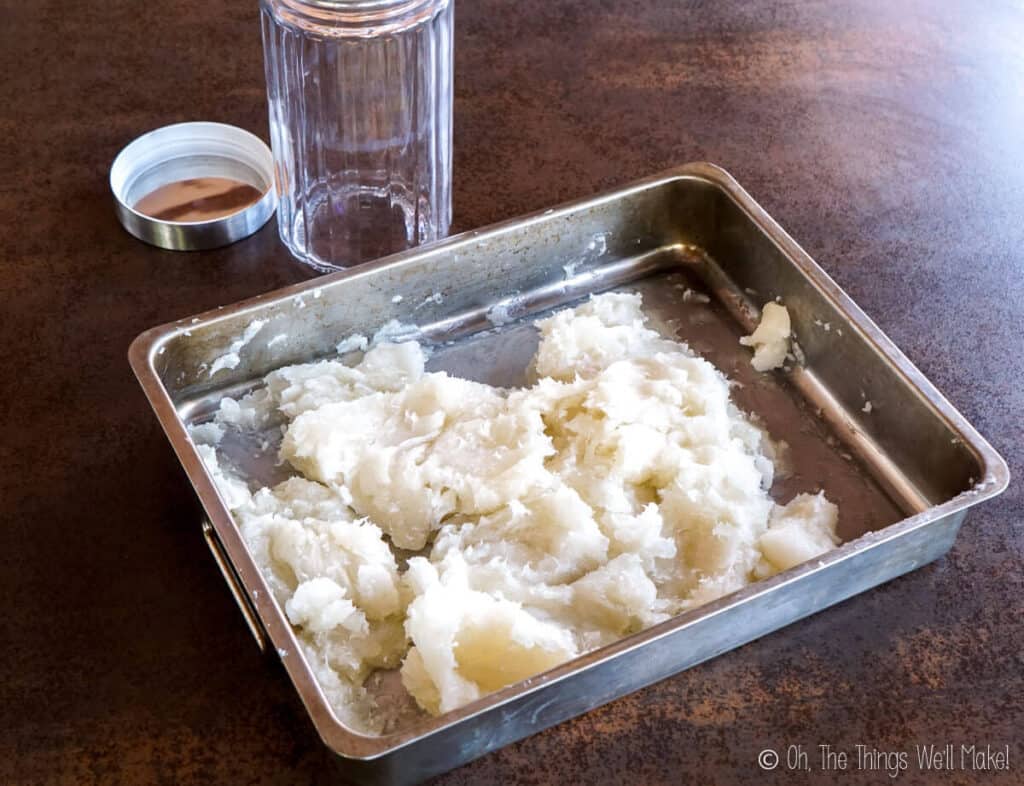
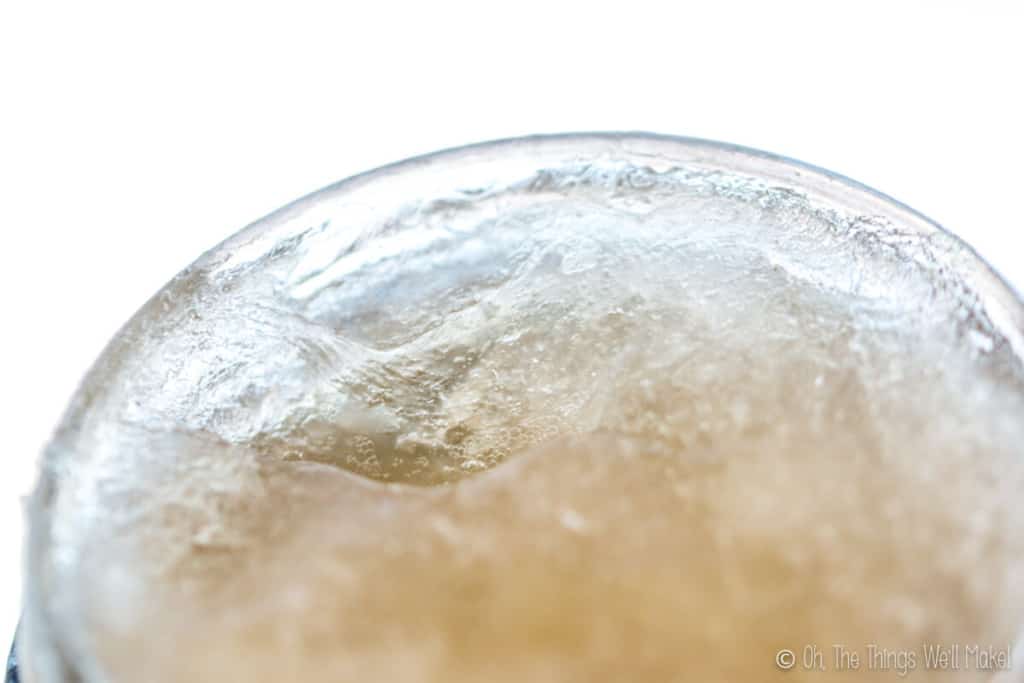
One method is to dissolve a small amount of the paste into distilled water, checking to see if dissolves into a clear soap. If the liquid is cloudy, you can continue to cook the soap in the slow cooker for another half an hour before checking on it again. If it dissolves clear, you are finished making the soap paste.
Another method is to use the zap test.
The zap test
To check for safety of the soap, many soap makers rely on what is called the zap test. To zap test a liquid soap paste, run your wet finger over the surface of the paste and then touch your soap-covered finger to your tongue. If the soap is caustic, it gives a zapping sensation. (This has nothing to do with flavor.)
If the soap doesn’t zap (if you can’t tell, it doesn’t), then it doesn’t have any more active lye, and should be safe to use.
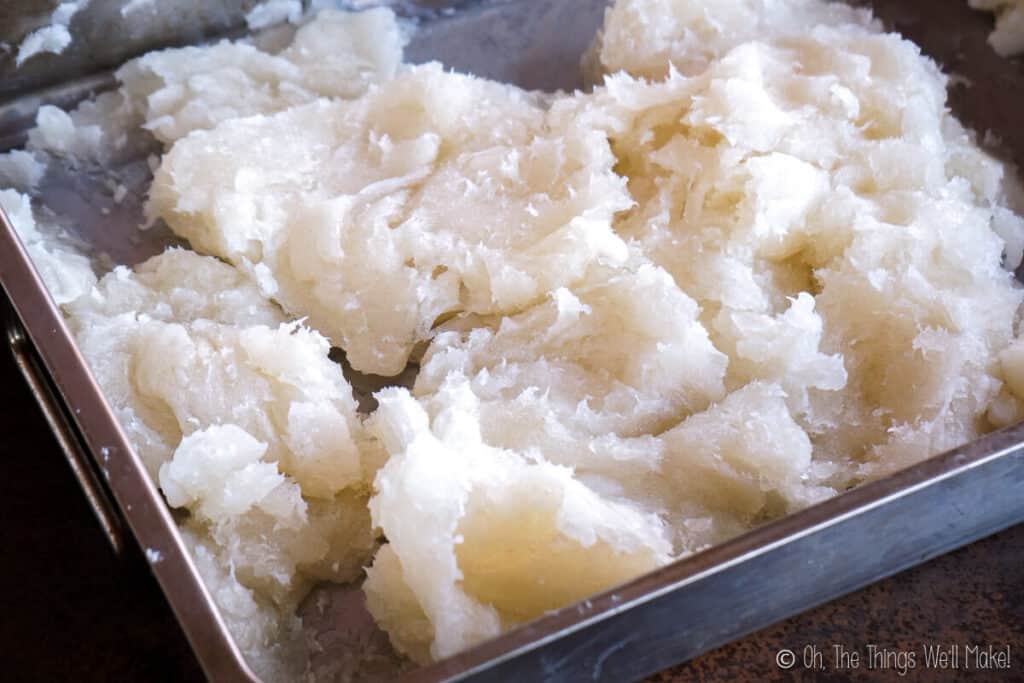
If the paste passes the zap test, but is still cloudy, it’s your call whether or not to continue cooking. Cloudiness is generally only a cosmetic issue and may be caused by a number of factors (including minerals in your water). Often, soap paste that isn’t translucent after cooking for a while will eventually get more translucent on its own.
(I once removed part of a soap paste before it was fully cooked to see what would happen, and after a few weeks, it looked just like the rest of the batch that had been fully cooked.)
Once ready, the soap paste can be stored or dissolved into liquid soap as needed.
Storage
To store liquid soap paste, scoop it into a covered glass or plastic container or in Ziplock type plastic bags. The soap paste can be kept in a cool, dark place for a very long time. (I’ve had soap pastes stored for years without issues.)
Avoid storing in metal containers and avoid contact with metal as certain metals can react with the soap paste and shorten its lifespan. (Don’t ask how I know that. 😏)
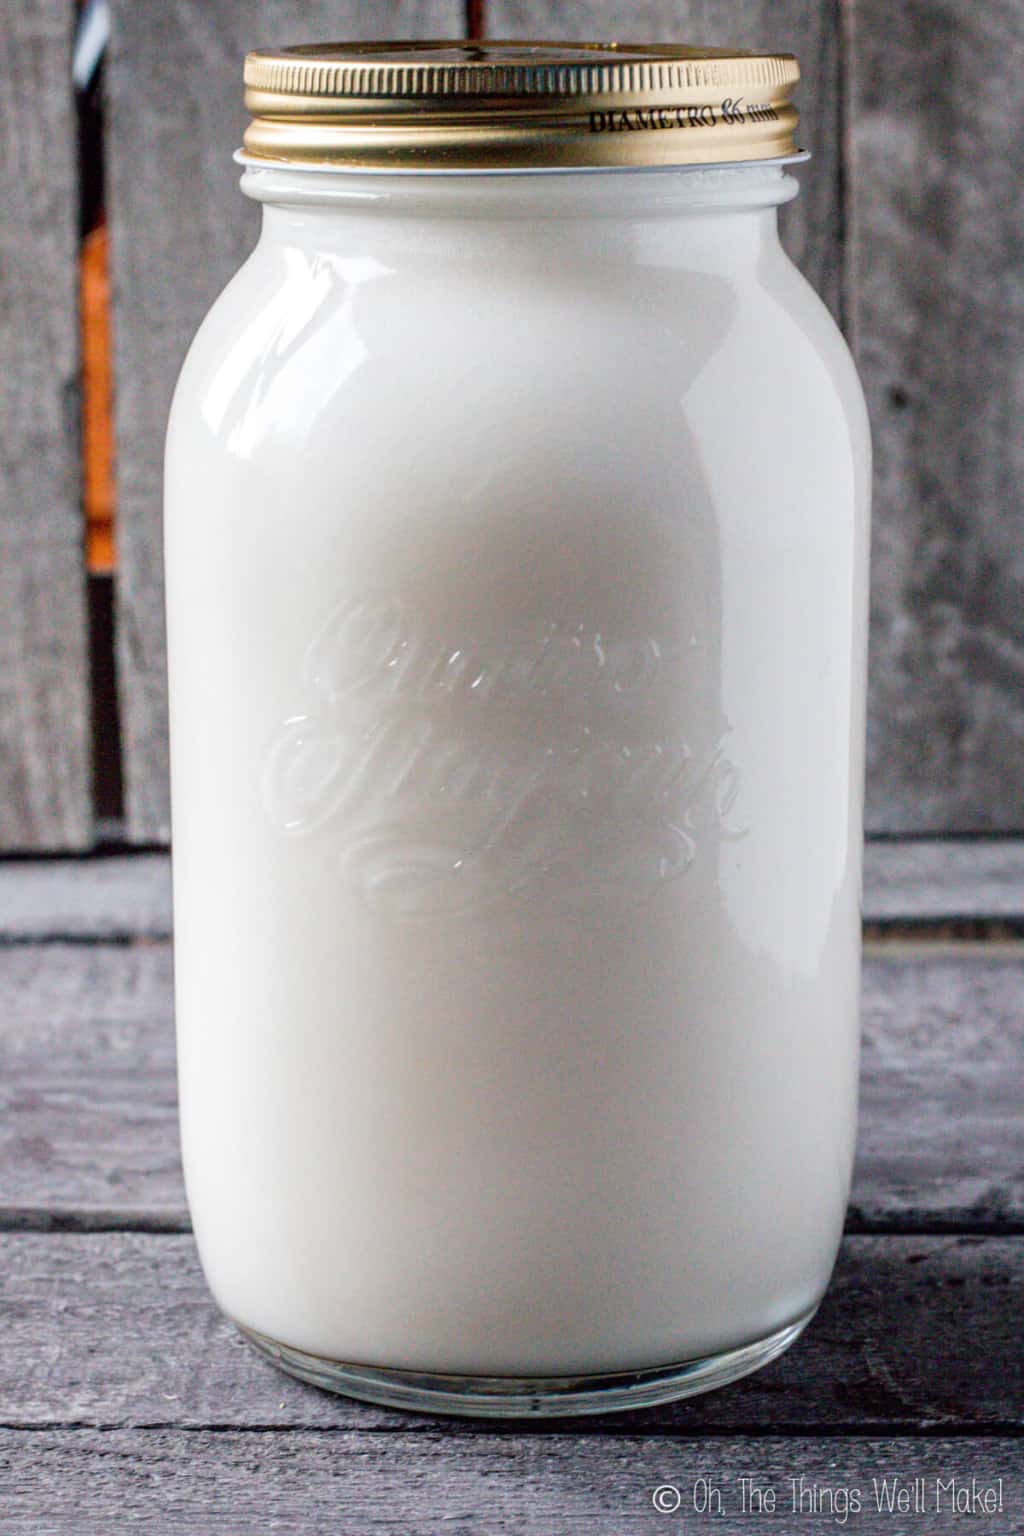
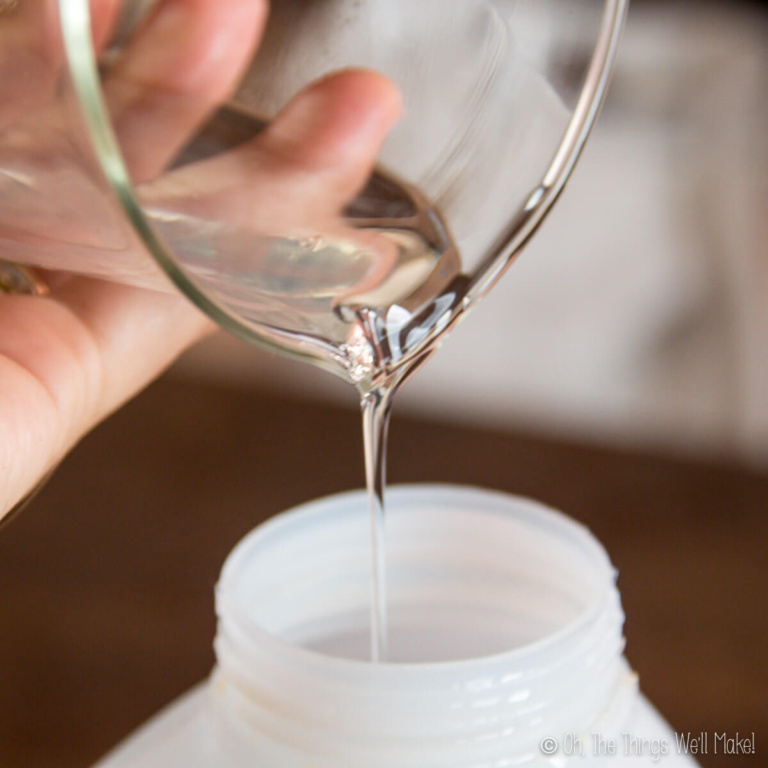
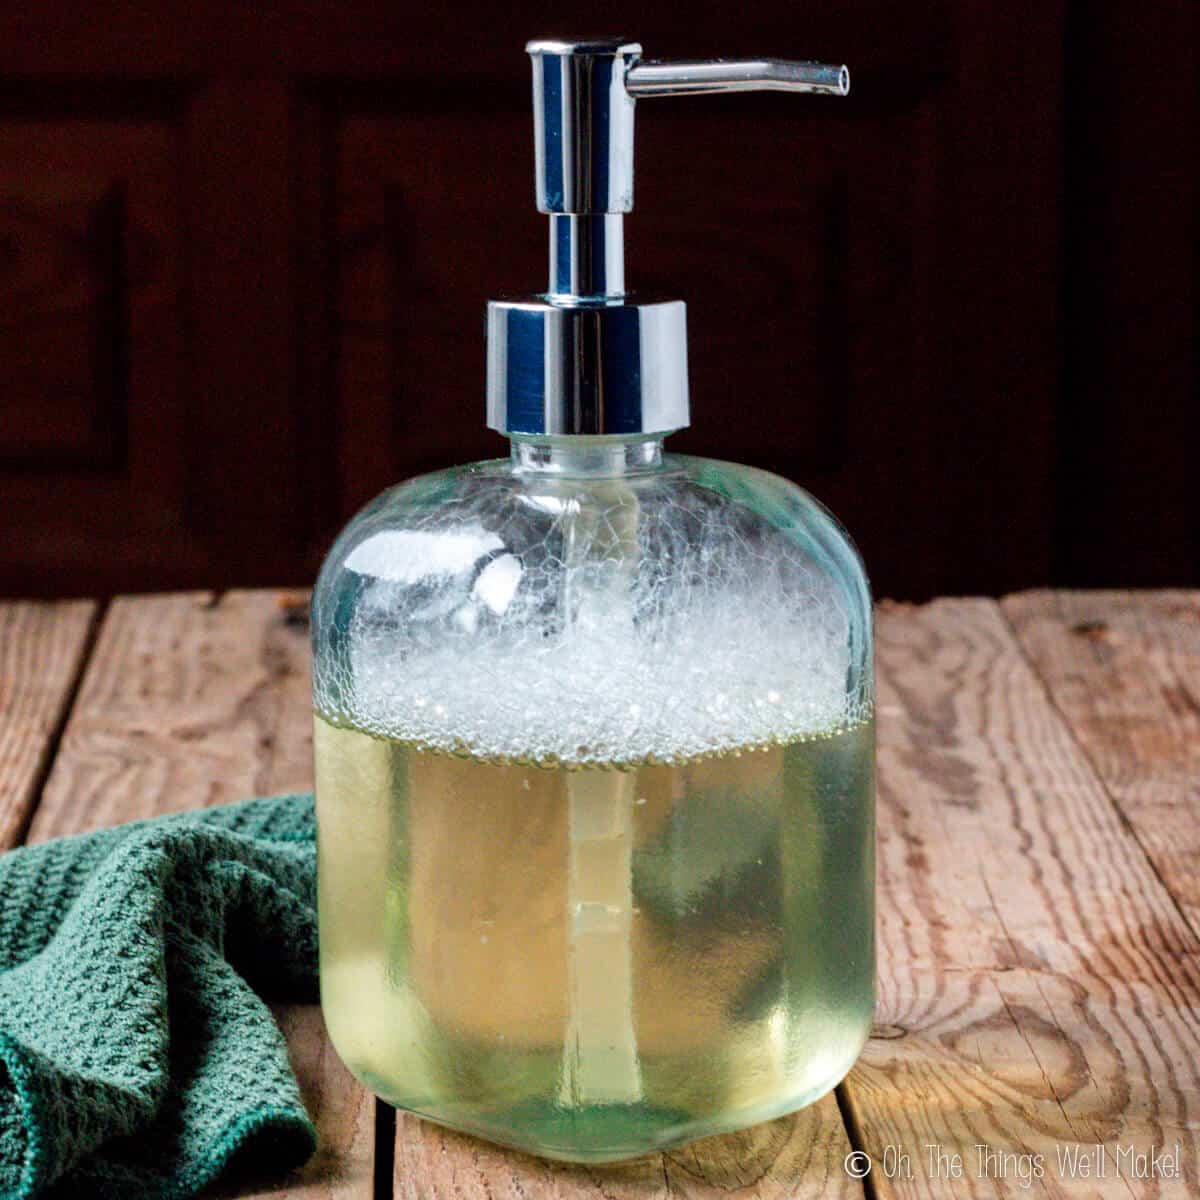
Diluting the soap paste
To use the soap paste, it will need to be diluted in water. I suggest using distilled water to ensure a transparent soap. You can add more or less water, depending on the desired concentration. I generally 1 part soap paste to 1-3 parts water.
For fragrance, I also often add a few drops of essential oils to my liquid soap at the time of dilution.
For more information about diluting the soap paste, read my post on diluting soap pastes.
Troubleshooting
Over the years, I’ve had many people writing me with various problems. One of the most common is that the soap isn’t transparent or that the paste doesn’t get clear no matter how long they cook it. There are several reasons that your soap may not be as transparent as you’d like.
Keep in mind that cloudy soap is generally safe to use, it just isn’t as pretty as clear soap. If your soap paste passes the zap test, it should be completely safe to use.
Temperature
Just as coconut oil turns solid and opaque in cold temperatures, so does this liquid soap, to a certain extent.
My partially diluted liquid coconut oil soap turned an opaque white and thickened up in the winter. When the weather warmed up again, the soap cleared up. This is only a cosmetic issue, but you can dilute it more in the winter than you would in the summer if you want it to be clear.
amzn_assoc_placement = “adunit0”;
amzn_assoc_search_bar = “true”;
amzn_assoc_tracking_id = “nativeads0f-20”;
amzn_assoc_ad_mode = “manual”;
amzn_assoc_ad_type = “smart”;
amzn_assoc_marketplace = “amazon”;
amzn_assoc_region = “US”;
amzn_assoc_title = “My Amazon Picks”;
amzn_assoc_linkid = “79ececd6ba76b6700c7f1df1a7973f22”;
amzn_assoc_asins = “B00H4BZM9M,B001EDK0WK,B00TJTASYG,B004O07LRC”;
Water used
The other most common issue is having used tap water to make the soap. Tap water has minerals and can have impurities that often make the soap look either cloudy or even opalescent.
For other problems, read my post about troubleshooting liquid soap problems.
Video

Homemade liquid coconut oil soap
Materials
- 32 oz. coconut oil
- 8.59 oz. KOH Not the lye (NaOH) used in bar soap.
- 17.77 oz. water
- 8 oz. glycerine
Instructions
Making the soap paste
- Melt the coconut oil. You can do this in a slow cooker or in a large bowl.
- In a large bowl, mix together the water and glycerin. In a separate, smaller bowl, weigh out the potassium hydroxide (KOH).
- Carefully pour the KOH into the water and glycerin mixture (not the other way around). Stir until fully dissolved. It will heat up and go from cloudy to clear.
- Pour the lye solution into the warm coconut oil and begin mixing.
- Use an immersion blender to blend the mixture. It will begin to thicken and may go through a grainy stage. Keep blending until it becomes smooth again and then thickens into a paste.
- Once the mixture reaches a thick, putty-like consistency, stop blending.
Cooking the soap paste
- Cook the soap paste to help finish saponification. If using a slow cooker, cover and cook on low for several hours. If using an oven, spread it on a baking sheet and bake at about 70ºC/160ºF
- Stir or flip the paste every 30 minutes or so to help it cook evenly.
- The paste is ready when a small amount dissolves into clear soap in distilled water.
Dissolving the liquid soap paste
- To make liquid soap, dissolve the paste in water. Start with about 1 part soap paste to 1–3 parts water and adjust as needed.
- Let it sit to dissolve, or use gentle heat and stirring to speed up the process.
Notes
This post was originally published on October 21, 2016. It was rewritten in May of 2021, adding clearer instructions, new photos, and video.


Dr Ariza, I’ve been making soap for a few years and this looks fantastic. Couple of things: Have you tried adding in a little washing soda to your dilute? And here is a little tip. Get a butterknife you don’t want to use anymore and cut the paste into chunks. It makes it much easier to fold if you do that first rather than fight it.
Hi Jim,
Thanks for the tip! The paste is actually quite soft, so I don’t really find it difficult to scoop out what I need, but, yes, it could save time to be able to quickly grab a few cubes to add to some water and be done with it!
I don’t add any washing soda to mine, unless using for washing clothes or something like that. (And now, I normally use a non-soap detergent instead.) What is your purposed for adding it?
You are very welcome, Dr Ariza. I am experimenting with making dish soap And I am thinking a little washing soda might help boost its cleaning power. Oh yea, a few ounces of castor oil will also really boost the foaming action of your liquid soap, but it makes for a really stiff paste and will start sapinofication very quickly.
I make several kinds of soaps now and being that I am currently doing nothing of important, I figured I might as well try something new.
Great tips!
Enjoy the experimentation time!
Hi, I’m wondering what 4.5-5 lbs of soap paste is volume-wise. I just want to make sure I have proper storage containers before trying this.
Hi Becca,
It’s been a while since I made my last batch. (I’m about to make more soon.)
To be honest, I can’t remember. I think I normally fill up 2 medium-large containers- which, obviously, isn’t helpful without knowing the volume of them. I usually just fill up whatever I have empty at the time and haven’t really worried too much about it.
Can you use a hand mixer in place of the blender?
Hi Marisha,
I haven’t tried it, but it should work fine. They say you can even make it by hand, but it takes a really, really long time that way. Using an electric appliance helps make it easier and take less time.
Tracy, I made it and it came out just like yours ? I will say the lye mix was even hotter with this recipe, I had to wrap a towel around the doubled up container so I could handle it. Even with my nitrile gloves on. Maybe not a project for the grands until they’re older ?
Tracy,
I’m really new to this and am asking so I do not make major mistakes. You use un/descented coconut oil correct? or the coconut oil that smaells like coconut? Either way, I’m making soap next week. I have sensative skin, so the glycerine will be a great add for me. Thank you.
Holly
Either one is fine. Just don’t use fractionated coconut oil. You can use refined or virgin oil, though.
Thanks for your thoughts Tracey,
It is strange that the problem is consistent, I even bought a new crockpot :0)
Your recipe is very similar to the one I’m using, but I’ll certainly give it a go. Is the excess fat at 0% for washing up liquid?
I have tried adding 10% to ensure that the oil all gets converted, but I seem to continue with the same results.
This last batch is again the same, it cools similar to hard soap and when I add hot water it becomes clear but very gel-like and amber in colour. Its great for the body and hands (with some olive soap in) but creates a fat scum when used for washing up.
I’ll post my results of trying your recipe.
Sally
Sorry- I missed this before…
Yes, I left the recipe at 0% to keep it translucent. Most liquid soap recipes use excess lye to get clear soaps, but I haven’t found it necessary and wanted to keep things as simple as possible. By using the lye excess, you later have to try to “neutralize” the soap.
In any case, I have found this soap to be very mild even without superfatting. I don’t think it’s needed and haven’t found the soap to be drying. Liquid soaps appear to be much different from bar soaps in many senses. I haven’t noticed a huge difference between the olive oil liquid soap and the coconut oil one. With bar soaps, though, the difference is HUGE!
I don’t feel like liquid soaps really need the same sort of superfatting personally.
Did you ever get around to trying my recipe?
Hi Sally, it’s possible that your KOH flakes are not the same concentration as used in this recipe. Most soap recipes do not state KOH concentration. You can find between 80-90% KOH flakes on the market. If you are using flakes at the lower end of this concentration, then it’s possible that some of your fats are unsaponified.
Hi Tracy, I have been making liquid soap with linseed for cleaning and olive for the body for about a year successfully, but despite half a dozen tries I have not been able to produce a liquid coconut soap for washing up. In the crockpot the paste goes amber in color and the is a liquid separation that looks like maple syrup. I can cook it for the whole day but it stays in the separated paste form. I have discovered that adding water will allow it to turn translucent, but there is oil separation if I use it for washing up.
I have changed the KOH (I use 90%) and the coconut oil. I’ve added 10% lye to no avail. I use brambleberry lye calculator.
I have trawled through posts and blogs and I’m beginning to lose moral on this, can you offer any suggestions, please. Thanks.
Sally
Hi Sally,
I’ve never had the results you describe.
Have you tried my recipe? It’s actually the liquid soap I make the most these days as I don’t really notice much of a difference between the liquid soaps once made. (Which really surprised me because of the huge difference in bar soaps.) With the many times I’ve made it by now, I’ve never had any of those issues.
I will mention that-
I use the SBMCrafters advanced lye calculator for liquid soap recipes as I’ve read that it’s the most accurate for liquid soaps. I’m not sure how much that would change things for you.
I also wonder about how high the heat is on your crock pot (is it too hot?) as my coconut soap is always completely white and never gets amber in color. If you successfully make the other liquid soaps, though, maybe the heat isn’t too high. I don’t know.
Hi Tracy
Oops apologies, I didn’t realise my waffley first post had posted which is why I posted again!
I did forget to say that my soap tested at ph8 which is low isn’t it?
Any thoughts you have will be much appreciated.
Thank you
Hi Julie,
I just trashed the first comment as they were very similar anyway. 😉
Hmm- Tap water may do that, depending on what is in your water, as something could prevent the soap from being perfectly clear. In any case, I’d just wait it out and see. A lot of times the soap will clear up on its own! I actually experimented with only cooking for a very short time. The soap started out cloudy, but over the course of several weeks, it cleared up.
Some people say that cloudy soap is a sign that it hasn’t fully saponified (which was probably accurate in the case I described above), but I sort of doubt that’s your issue if you followed the recipe accurately and were cooking for so long.
It’s hard to know what the issue is.
Seeing the rest of your
secondthird comment, though- about the pH- makes me wonder again.That does sound low. Most soaps are normally around 9 or even higher. That’s what makes them self-preserving. It makes me wonder if, for some reason, you didn’t have enough lye for the oils. That could be some sort of issue with the lye you used or the scale or some other problem?
If that is the problem, that would explain the cloudiness because, yes, in your case it would be a sign of the soap not fully saponifying because there are too many oils for the amount of lye used.
The thing that worries me about your low pH is that it may fall into a range where microbes could grow in it. I’d almost consider mixing some KOH with water, and slowly adding it to your soap, stirring over a low heat as you add it, little by little. I might add until I got to around pH=9 and see if things start to clear up? That would also bring it into a safer range for keeping without preservatives. 😉
See- I’m thinking out loud as I answer you- so my answer is all over the place and a bit waffley too. Is that a word? Ha!
Hello from south africa.
Thank you for the recipe.
Would you be able to share on how much dilution should be added on a bundle of clothing.
And what is the purpose of the glycerin
Hello Amanda,
The glycerin helps move the recipe faster and makes it more fool-proof for beginners. It also may help make the paste easier to dilute in water, and may make for a more gentle soap.
For clothes, I’d probably experiment- beginning with using a small amount- maybe around a tablespoon- and see how that works for you.
It will also depend on your dilution of the paste.
Hi Tracy
Thanks for your wonderful posts. The photo’s are so helpful to know you are at the right stage.
I realise now I have overcooked my soap as it never seemed to reach the clear water test stage so I just kept cooking!
Thank goodness the soap is useable though. Do you have any idea why it never cleared? The only thing I did wrong was not use distilled water.
I’m really keen to make a clear soap so ideas for future attempts would be appreciated.
Many thanks
Hi, Tracy
Thanks for your sharing.
One question,
Is coconut castile soap better to use on pets compare to olive castile soap? Which one have PH that suit the pets? As i am thinking of using on my dog.
Hi Oliver,
All soaps have a pH on the higher side. Soap is alkaline, and that’s why it’s not the best choice for a shampoo normally. That said, because you aren’t supposed to bathe animals very often, I’ve found that soap actually works really well on dogs. I actually have a soap based dog shampoo bar up on the blog. You don’t have to follow that recipe exactly, but can read through it to get some ideas. Despite normally preferring liquid soap, I actually prefer using a bar soap on my dog. I find it easier to handle by rubbing it all over her rather than having to keep squirting out a liquid. The only downside is that the soap does get fur on it, but if it’s only for your dog anyway, it’s not a big deal. You can rinse most of it off.
I use my homemade conditioner on my dog afterward, and it works wonders on her fur. It makes her really soft. I love it. It also helps bring the pH back down.
As for the question about which oils to use. In a liquid soap, I’ve found it doesn’t make that much of a difference. Theoretically, olive oil should make for a milder, more conditioning soap, but in practice, I don’t notice a huge difference in liquid soap. In the end, these days I normally only make a coconut oil based liquid soap as it’s cheaper to make and prefectly multi-use.
In bar soaps, though, the difference is huge! In bar soaps, I’d suggest using a mix. The coconut oil would give more lather and cleansing abilities, while the olive oil is more conditioning. 😉