

Homemade chocolate from cocoa nibs
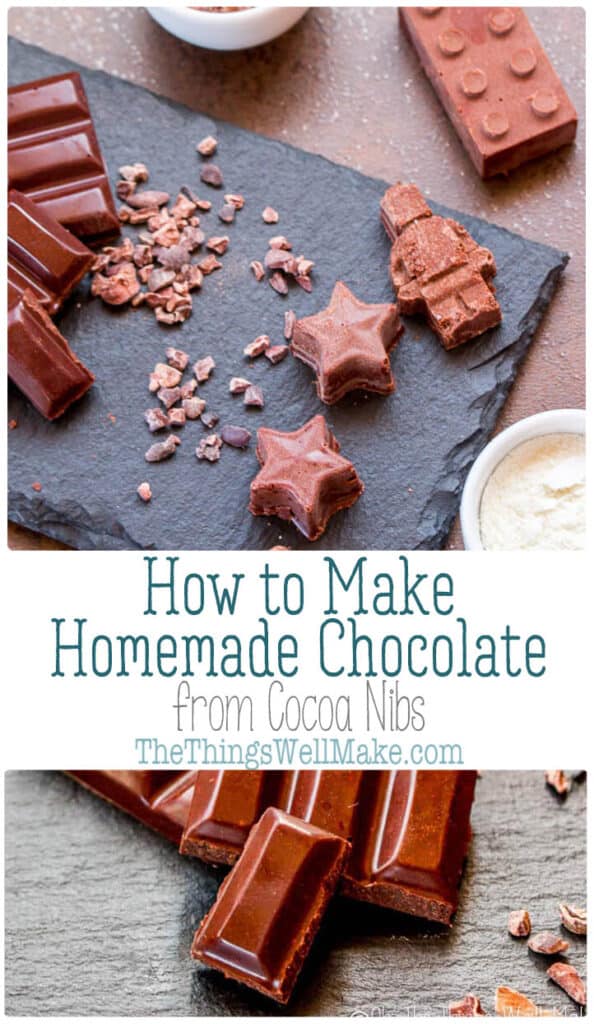
Avoid emulsifiers and other unwanted ingredients and control the process by making your own homemade chocolate bars from cocoa nibs.
This post comes as a result of experimentation after having bought some cocoa nibs. It was mostly out of curiosity to try to figure out how to make chocolate from scratch. I had read a bit about the whole chocolate making process before, but I hadn’t really experimented with using cocoa nibs for anything.
Cocoa nibs vs. Cacao nibs
First, let’s tackle the whole “cocoa” vs. “cacao” issue. This is only an issue in English as in Spanish all cacao is called cacao because, well, “cacao” is really just “cocoa” in Spanish. When I was a kid, all cocoa powder and cocoa nibs were called just that, “cocoa” powder and nibs. That was also at a time when I remember my mom having carob chips at home as the healthy alternative to chocolate chips.
Since then, though, a lot has changed. Chocolate, or at least cocoa (or, if you prefer, cacao), has been found to have health benefits. Not all chocolates are equal, though, especially considering that milk chocolate has a lot of added sugar (and milk, of course). The same goes for hot “cocoa,” which is usually made from a highly processed drink powder filled with lots of sugars, emulsifiers, thickeners, and, well, cocoa powder.
The need to distinguish the “good” powder from the “bad” sweetened cocoa powders that have other additives is probably what spawned the use of different terminology in the first place. “Cacao” is now usually used to specify that the powder (and nibs, and butter) have been extracted without an excess amount of heat. It is marketed as a raw “superfood.” It is often said that cacao powder, then, is much healthier than cocoa powder because the heat doesn’t kill off all of its beneficial properties.
What does “raw cacao” even mean?
The problem is that the terminology is controversial. Those who make chocolate will argue that even the natural fermentation process used to process the cocoa beans will result in them reaching temperatures that are higher than those normally stated as the temperatures “raw” foods can’t reach. (“Raw” is sort of like “natural” in that it’s a term that isn’t really regulated, so you’re not really sure what it means most of the time.) You can read more about the fermenting process here.
While it is possible to process them without reaching high temperatures, most people say it’s not really a good idea because most cocoa beans aren’t processed in optimal hygiene conditions in the countries where most chocolate it processed.
The truth about cacao is that it’s almost impossible to know if you’re really getting a superior product when you buy cacao vs. cocoa powder as the terminology isn’t really regulated either. I’m not saying don’t buy cacao powder, but do want to make you aware of the situation so that you can make an informed decision and buy whatever cocoa or cacao you prefer.
How to make cocoa powder (or cacao powder)
As much as I’d love to share with you a tutorial for how to make cocoa powder, it isn’t something that I think we can easily accomplish at home, at least not if we want to approximate what we normally buy in the store. Common sense would have you believe that grinding up cocoa nibs would leave you with cocoa powder. I guess, in a way, that’s true, sort of. You can make a sort of cocoa powder by grinding up cocoa beans, but that’s not what we normally are buying in the store.
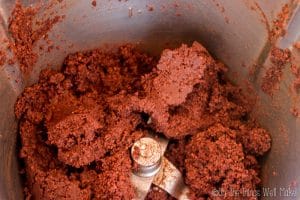
If you’ve ever tried grinding up cocoa nibs, you’ll find that, at first, you do begin to make a sort of coarse cocoa powder. If you keep grinding, though, you won’t end up with a finer, fluffier cocoa powder, but instead will end up with melted chocolate! That’s because the nibs include both the cocoa powder part along with the cocoa butter part. As you grind, the grinding action itself generates heat that begins to melt the cocoa butter, leaving you with a soupy mixture of cocoa powder suspended in cocoa butter.
Here in Spain, the ingredient listed on unsweetened cocoa powder is “cacao desgrasado,” meaning cocoa with the fat removed. I was always curious about why they would want to remove the fat from the cocoa powder, but then, when trying to grind it too fine, I realized why.
Cocoa powder is made by grinding up the cocoa nibs, but that first result is basically melted chocolate. The light colored cocoa butter is then removed, which is great for using in lotions and balms, and the leftover dark colored material left behind can be finely ground into what we know as cocoa powder.
Watch us make homemade chocolate from cocoa nibs:
Dutch processed vs. natural cocoa powder
It took me years to figure out that there were actually several ways to process the cocoa powder, resulting in different types of cocoa powder. While I don’t really think that there is usually much of a difference (if any) between cocoa powder and cacao powder, there is an obvious difference between the different types of cocoa powder.
In the US, most cocoa powder is the “natural” kind. It is made, as I stated above, in the section about how to make cocoa powder. Here in Spain, though, the cocoa powder that is most typically sold in the store tends to be a much darker, flavorful cocoa powder. When I first wanted to make the switch from the supermarket brand cocoa powder to the stuff in the health food stores, I couldn’t figure out why all of the health food brands seemed so much lighter and less flavorful. I kept trying brand after brand until I finally figured out what was going on.
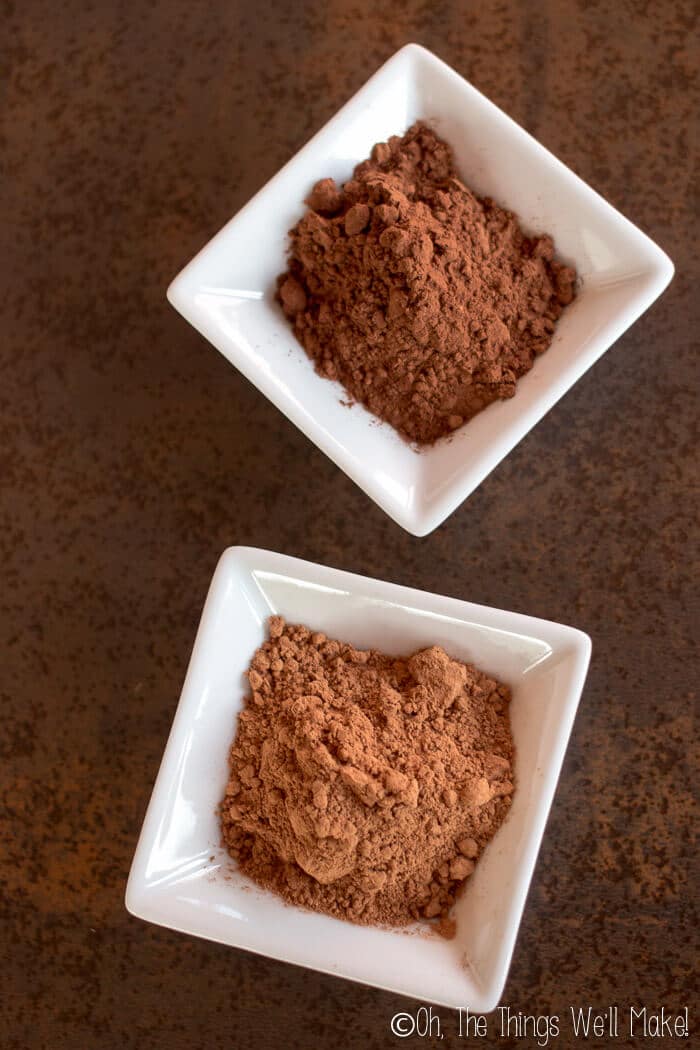
The supermarket brand cocoa powder had been alkalinized in what is called “Dutch processing.” The idea is that the pH of the cacao, which is normally on the acidic side, is alkalinized with potassium carbonate bringing it to a more neutral or even an alkaline pH. This gives the powder a darker hue and makes the flavor smoother and more reminiscent of black, dark chocolate. Being the type of person who loves dark chocolate and sticks her nose in the air up at milk chocolate, I have to admit that I prefer the color and flavor of Dutch processed cocoa.
The difference isn’t just in the appearance and flavor, though. Because the pH is different, it can react differently in recipes. If a recipe uses baking soda as the rising agent, it was probably meant to work with the acidity of “normal” cocoa powder. Just as vinegar and baking soda combine to give a bubbly chemical reaction that releases carbon dioxide, some recipes rely on the same sort of reaction where the gas released helps keep the cake from being too dense. Recipes meant for Dutch processed cocoa are more likely to call for baking powder, whose pH is more neutral. (Switching one for the other in recipes that don’t need a leavening agent is fine.)
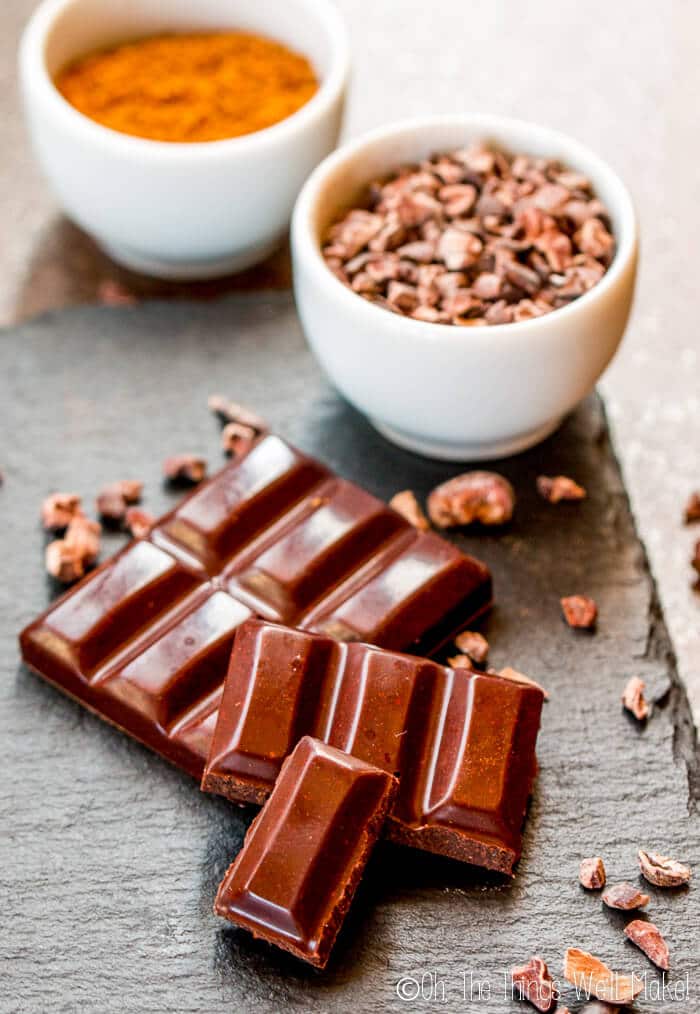
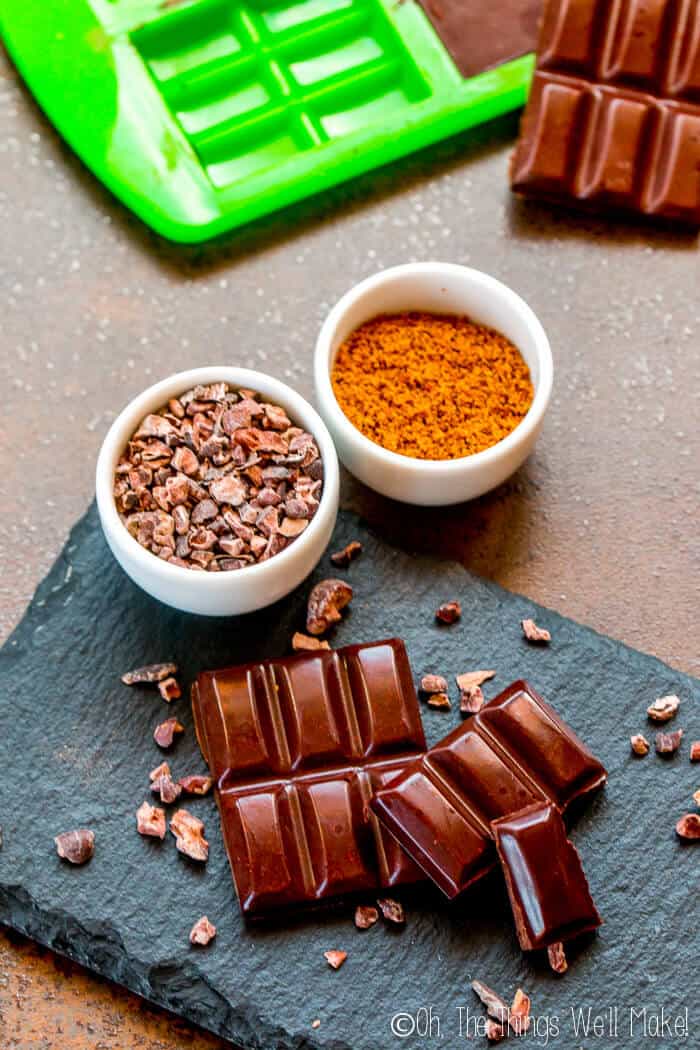
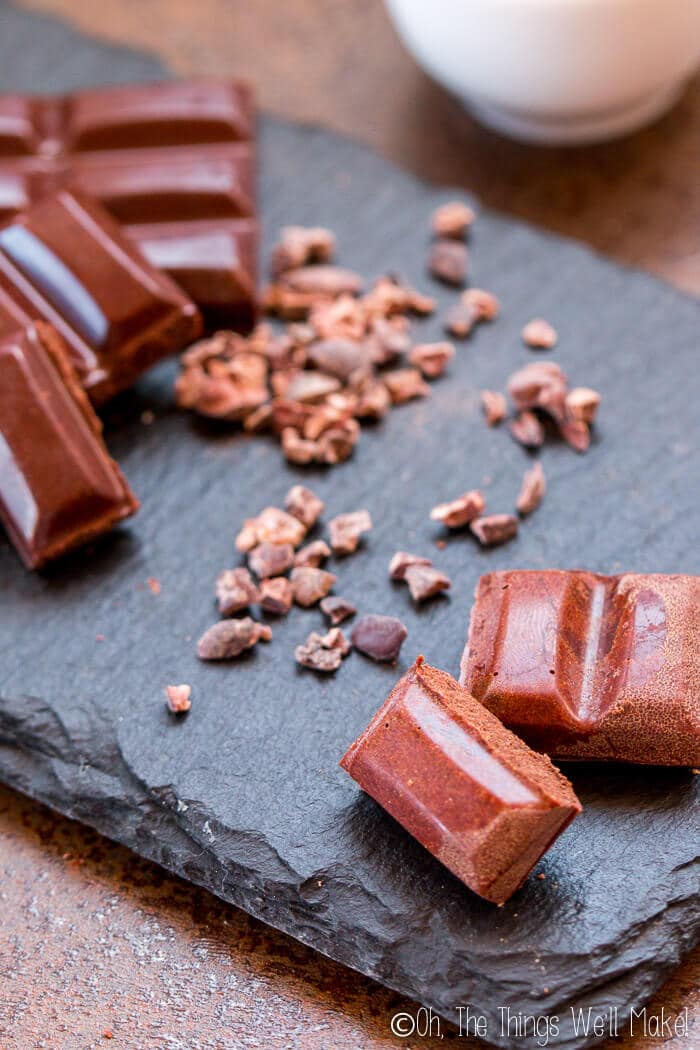
Making homemade chocolate from cacao nibs
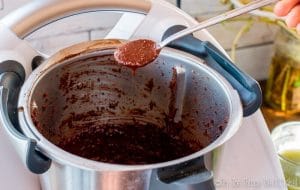
I’ve already hinted at the process of making chocolate from scratch with cocoa (or cacao) nibs. It’s actually quite simple, and you really only need to blend the nibs until you end up with what is basically melted chocolate. The nibs include the fat of the cocoa beans, the cocoa butter, and the chocolate flavor and color you’re accustomed to seeing in cocoa powder and whatever is made with it.
As you process your cocoas nibs, they will release more of the fat, and the heat of the blending process liquifies the cocoa butter into an oil so you end up with a liquid. If you’ve ever made homemade coconut butter (or even almond butter or peanut butter), you’ll find that the process is very similar. How long it takes will depend on your food processor.
Making a smooth chocolate
I love making my own chocolate from scratch using whatever cocoa nibs and whatever type of sugar I choose, but I would like to warn you that homemade chocolate made with a food processor will have a grainy texture. For somebody who eats chocolate by biting into it and chewing it, it isn’t too much of an issue. For those, like me, who like to have chocolate melt in your mouth slowly and to experience the smoothness of a well-milled chocolate, then food processor chocolate might not leave you 100% satisfied.
To make chocolate that is completely smooth, the cocoa nibs are normally ground for many hours using a wet grinder that is also known as a melanger or chocolate refiner. I haven’t had the pleasure of using one (yet!), but love the idea of using one for making perfectly smooth chocolate. It would also be great for grinding up some smooth coconut butter and almond butter!
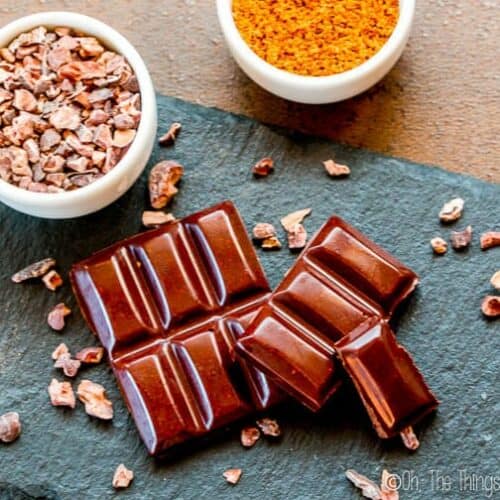
Calculating the chocolate percentage (And should you add cocoa butter?)
I’m not too picky about making a specific percentage of chocolate, and normally just go by taste. I grind down the cocoa nibs and slowly add sugar until I’m happy with the final results. That said, if you are wanting to make a specific type of chocolate, say a 70% chocolate, you’ll want to calculate the amount based on the percentage of cocoa nibs used.
70% chocolate
So, let’s say you want to make 500g of 70% chocolate. You’ll want to use 350g cocoa nibs which is the equivalent of 70% of the 500g of chocolate.
What do you end up using for the other 30%?
Well, you could add 150g of sugar, or you can divide up those 150g and use several other ingredients.
Adding cocoa butter
Many people add cocoa butter. While it isn’t necessary (cocoa butter is already present in the cocoa nibs), it can make the process move along more quickly. This is especially helpful if your food processor isn’t especially potent. It may also help you get a slightly smoother chocolate. Normally one would add about 1/5th of the 30% in weight of cocoa butter.
So, to make a 70% chocolate with cocoa butter and sugar, you’d use 350g cocoa nibs, 120g sugar, and 30g cocoa butter. Make sense?
85% Chocolate (500g)
425g cocoa nibs and 75g sugar
If using cocoa butter: 425g cocoa nibs + 15g cocoa butter + 60g sugar
95% Chocolate (500g)
475g nibs + 25g sugar
If using cocoa butter: 475g nibs + 20g sugar + 5g cocoa butter
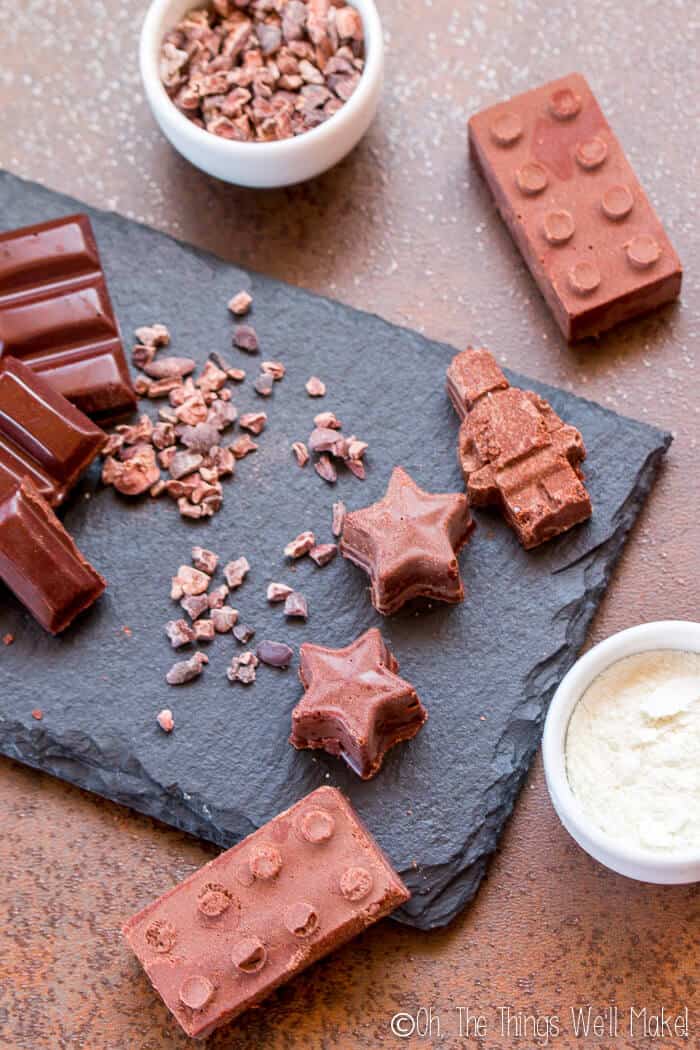
Making homemade milk chocolate
My son isn’t really a fan of dark chocolate (yet!), so I decided to let him help me make some milk chocolate for him. I had already bought some goat milk powder for making goat milk soap, and experimented with adding that to our homemade chocolate. It worked well, and the more milk powder we added, the more it lightened up and looked like milk chocolate.
I will say that his chocolate ended up a lot less smooth looking (as you can see in the photo above). It may be because of the addition of a lot of powdered milk, but it may also have something to do with the chocolate not being tempered. Be as it may, my son enjoyed the chocolate and was quite proud of having made it.
Should you temper homemade chocolate?
Tempering chocolate is a process done to get the fats in the cocoa butter to align correctly. Tempered chocolate is shiny in texture and snaps when broken into pieces. It’s prettier and has a nicer texture. Chocolate that hasn’t been tempered will be duller in appearance and can bloom quickly.
I didn’t bother trying to temper either of the chocolates, mainly because they were already going to be slightly grainy anyway. For me, this was more of a fun experiment. If I had a melanger (chocolate refiner) and were working to make a more professional grade chocolate, I would be more concerned with trying to temper the chocolate. I think I ended up being lucky with my homemade dark chocolate as it seemed to have fallen into temper on its own. You can help improve your luck by checking the temperature when you are about to pour the chocolate into the molds. If it’s around 31-32ºC (88-90ºF) it may fall into temper on its own.
How to temper homemade chocolate
I’m not going to go into a lot of detail here as there are many people who have written about how to temper chocolate know a lot more about the subject than I do. I will say, though, that there are several ways to temper chocolate if you choose to do so.
Seeding method
If you’re making your chocolate from scratch, you can’t really use the popular “easy” way of tempering chocolate called “seeding” unless you already have a batch of homemade tempered chocolate available. Seeding is basically adding a small amount (1/4th-1/3rd of the total chocolate amount) of already tempered chocolate to your hot, melted chocolate (around 49ºC/120ºF for dark or 46ºC/115ºF for milk chocolate). Cooling your chocolate down with the tempered chocolate helps temper the entire batch. You’ll want to cool to around 32ºC/90ºF for dark chocolate or 30ºC/86ºF for milk chocolate.
Temperature method
If you don’t have tempered chocolate available, you can temper it by raising and lowering the temperature. First, you’ll want to heat the chocolate over a double boiler until you reacharound 49ºC/120ºF for dark or 46ºC/115ºF for milk chocolate. Next, you’ll want to cool the chocolate over ice or over a marble slab (being careful not to allow even a drop of water into the batch or it may sieze). You’ll want to cool dark chocolate to 28ºC/82°F, milk chocolate to 27ºC/80°F. Finally, you need to reheat the chocolate to32ºC/90ºF for dark chocolate or 30ºC/86ºF for milk chocolate.
Roasting the chocolate nibs
I didn’t bother roasting the chocolate nibs before grinding them because I wanted to see what a “raw” homemade chocolate would taste like, but many people prefer roasting the nibs before grinding them into chocolate. To roast them, spread them out over a baking pan and bake them at around 150ºC (300ºF). You’ll want to check on them after around 10 minutes, and then after that keep a close eye on them to ensure they don’t burn. The roasting process should take 10-15 minutes, until the chocolate gives off a pleasant, baked chocolate aroma.
Homemade Chocolate From Cocoa Nibs
Homemade Chocolate 85%
Nutritional information based on a 12.5g serving.
Ingredients
- 425 g cacao nibs
- 75 g sugar
Instructions
- If you choose to roast your cocoa nibs, roast them in the oven at 150ºC/300ºF for 10-15 minutes.
- Add the cocoa nibs and sugar to your blender or high powered food processor and begin to blend. At first you’ll end up with a chocolate paste.
- Continue blending until you start to obtain a liquid, melted chocolate.
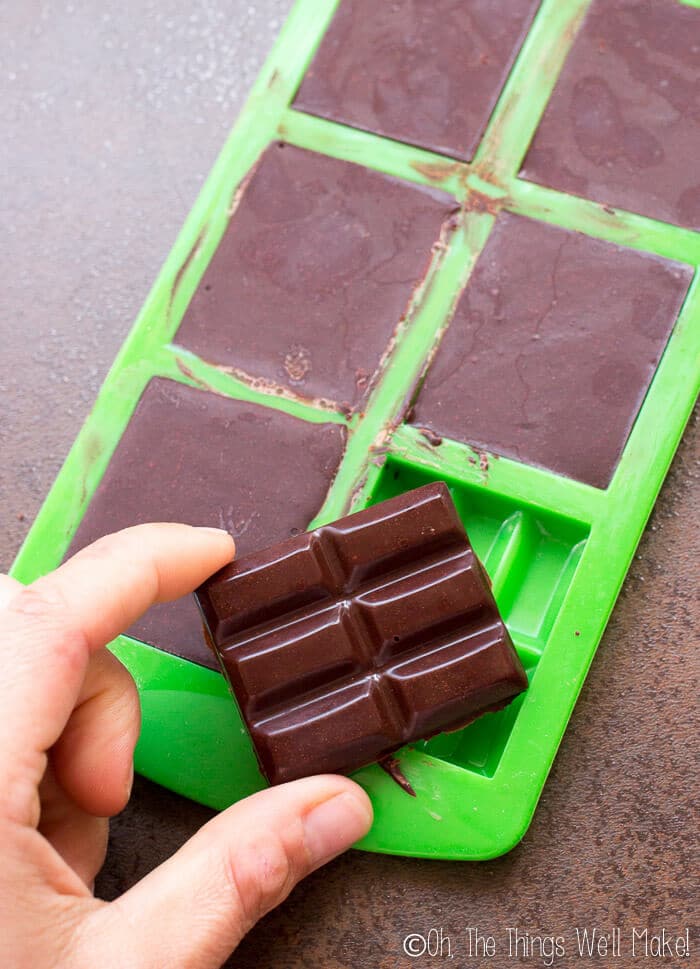
- Pour the chocolate into molds and allow to cool.
- Remove the cooled chocolate from the molds and enjoy your homemade chocolate.


Hi Tracy
please I need to know what kind of sweetener and percentage the chocolate needs.
for example Maltitol, Stevia, Tagatosa.
thanks.
Hello,
It’s not important, but you want to use a powder and NOT a liquid. A liquid won’t emulsify into the chocolate and can make it go bad more quickly! (From incorporating moisture into the chocolate.)
Hi. I just made this and it is delish. Quick question, Do I allow to cool on the counter or in the fridge or freezer?? Thank you!
Hi Nicolette!
Awesome! I’m happy you like it.
I just let it cool on the counter. Chocolate can go a bit weird if you have it in the fridge too long. 😉
Hi Tracy. Thanks for this awesome post. I too have a Thermomix and I was wondering how long and on what speed you processed the nibs, please? Thanks for your help.
Hi Sarah,
It’s really going to depend a lot on each individual mixer. Mine is a Thermomix, which is popular here in Europe.
I think I started with a slower speed, to get the nibs broken down, and then I increased to high speed until it basically liquified. I can’t remember how long, exactly, it took, but it ended up being a few minutes. (I think.)
Hi, do you imagine you could use a sweetener instead of sugar?
Hi Vicky,
I don’t see why not. You’d only want to avoid using liquid sweeteners, so stick with something in dry, powdered form.
Any liquid you incorporate into the recipe will cause it to go bad more quickly.
Hola! I use the Stevia individual packages 2 or 3 every 100gm of nibs. So I guess, my final product is 99.something % cacao, hahahaha
Hi Marcelo,
Well, yes, then I guess it would be. 🙂
I actually often buy 100% chocolate and like it. My husband thinks it’s too bitter and gross. My favorites are probably in the 95-98% range.
Good day! We have quite a number of fruit bearing cacao trees in our backyard and we have accumulated cacao beans. We make these into cacao balls and give to our friends. We ferment the beans and sun dry after 5 days. Then we roast it to remove the shell of the beans. Then we grind it with very little raw sugar. And mold into little balls. I wanted to make it into powder but its sticky after grinding. Can anybody pls tell me how can i make it dry so i can make powder instead of molded ones? Thank you and hoping for your reply.
Mi Mearl,
The problem is that the oils are being released when you grind the beans. To make cocoa powder, they “degrease” (or that’s my direct translation of how they say it on the cocoa powder packaging here in Spain) the beans before grinding to a powder.
I really don’t know how one would do that at home. I didn’t look that far into things, but I guess you’d have to remove the cocoa butter from the bean somehow.
Maybe someone else with more experience will have an answer.
I tried to use honey, but it separated in the blender from the cacao. Is there any way to get honey to work instead of sugar?
Hi Asmal,
I wouldn’t use honey. Not only will you have the problem of separation if you don’t use an emulsifier, but you’ll also have the problem that the chocolate won’t keep well for very long. Honey by itself is self-preserving. It’s an amazing ingredient.
Unfortunately, when you add it to other ingredients, it becomes very difficult to preserve. In this case, it will add humidity (water) content to the chocolate, and will have a very short shelf life.
I’d stick to using unrefined sugars like coconut sugar.
I use honey. I melt cacao paste in a double boiler and add the honey, about 10% or it will be very melty even after tempering. To temper, after cooling in the fridge I reheat and melty in some grated cacao paste before pouring into molds. I keep my chocolates in the freezer…but they don’t last long enough to go “wierd”!
correction: reheat and melt! (not melty)
You would have to use dry granulated sugar that you grind fine before adding.
Sorry, I meant dry granulated honey.
This page has been amazingly helpful, thank you! I’m currently volunteering on a farm in Costa Rica and we were given cacao beans but don’t have access to cacao butter. We want to make a 70ish% chocolate (to appease those not yet in Love with dark chocolate). We have fresh goat milk, would that work instead of dried? If so, what ratio of milk to ground cacao should we use? Thank you in advance!
Hello,
I’m not really sure about adding fresh milk to the chocolate. I’d be worried about bacterial growth because of the added moisture.
Hi Tracy!
I want to give this recipe a go very soon! I was just wondering, could I use jaggery in place of sugar?
Thanks!
Hi Lavanya,
Yes, you can use any sort of sugar you like! 🙂
What kind of food processor is that? I have used my 30 year old coffee grinder, works pretty good but takes a lot of pulsing.
Hi Amanda,
I live in Europe, so this is a popular European food processor called a Thermomix.
You’ll definitely want to use something with a good motor that you aren’t afraid will burn out when using for long periods of time.
how long does the chocolate last?
Hi Corrine,
We’ve eaten ours pretty quickly each time we’ve made it, but I’d assume it would last around the same amount as a “normal” chocolate bar. 😉
Hi there, thank you for all the insight, such a good read. Just wondering, I have a plastic Kenwood food processor and notice yours is metal. Do you think it would work in plastoc as well? Also; at what point in the process do you add the cocoa butter? Thanks heaps ?
Hi Ashleigh,
When working with a plastic food processor, you have to be very careful when processing for long periods of time. Don’t ask me how I know that!
OK, I’ll actually tell you an embarrassing story anyway…
I once was trying to make Spanish turrón in a plastic (coincidentally Kenwood) food processor, and the plastic actually melted at the base of the processor! It melted in a way that the whole thing broke. the bottom part completely broke off, and the top part melted in such a way that I couldn’t get the removable center piece off. Luckily I had already bought a replacement container, but I needed the center part to make it work. So, I had to have my husband saw the plastic part off of the center piece to be able to use my food processor again.
So, if you do use plastic, take breaks so it doesn’t overheat!
You can add the cocoa butter in at any time in the process. You could try processing and add it in if your machine is having a hard time processing the mixture- or just add it in right from the beginning.
Thank you for the great advice Tracy, definately good to know. Im going to give it a go this weekend 🙂