

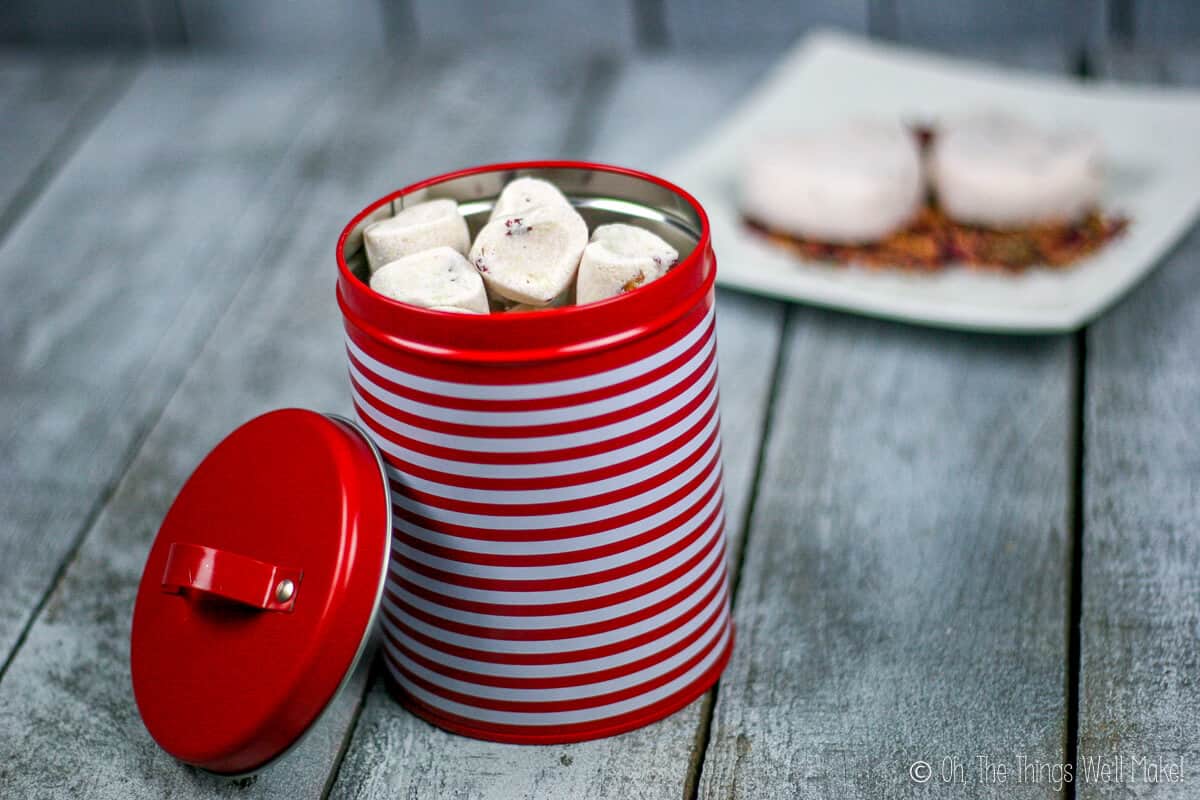
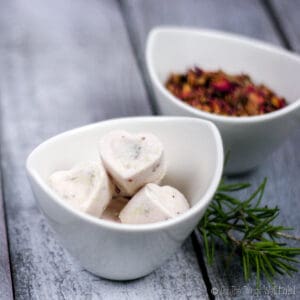
Rose Petal Bath Bomb Fizzies
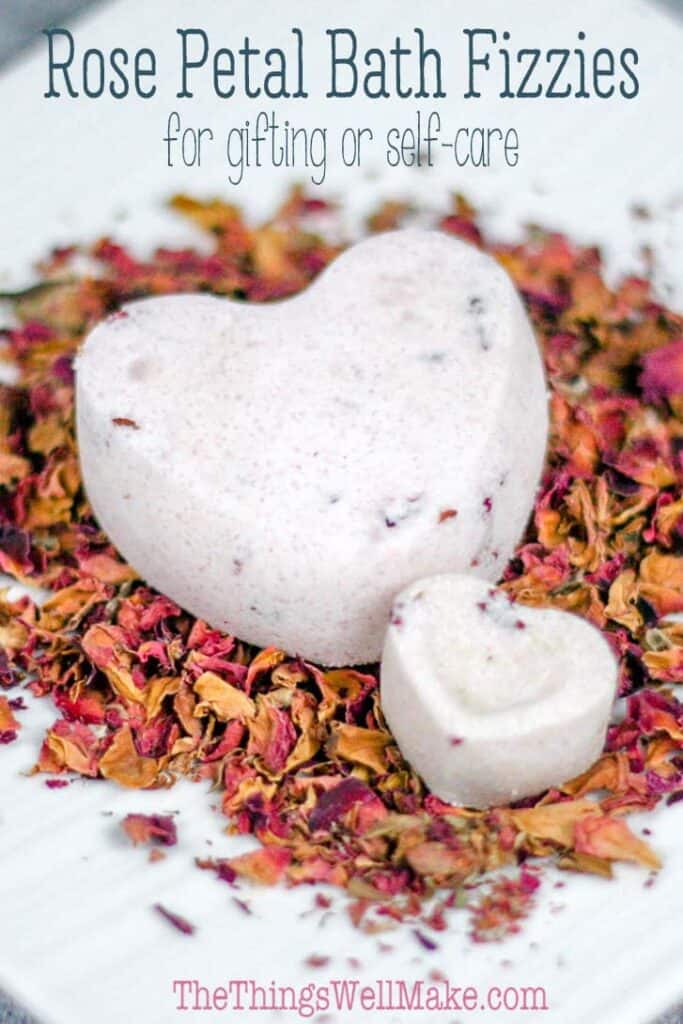
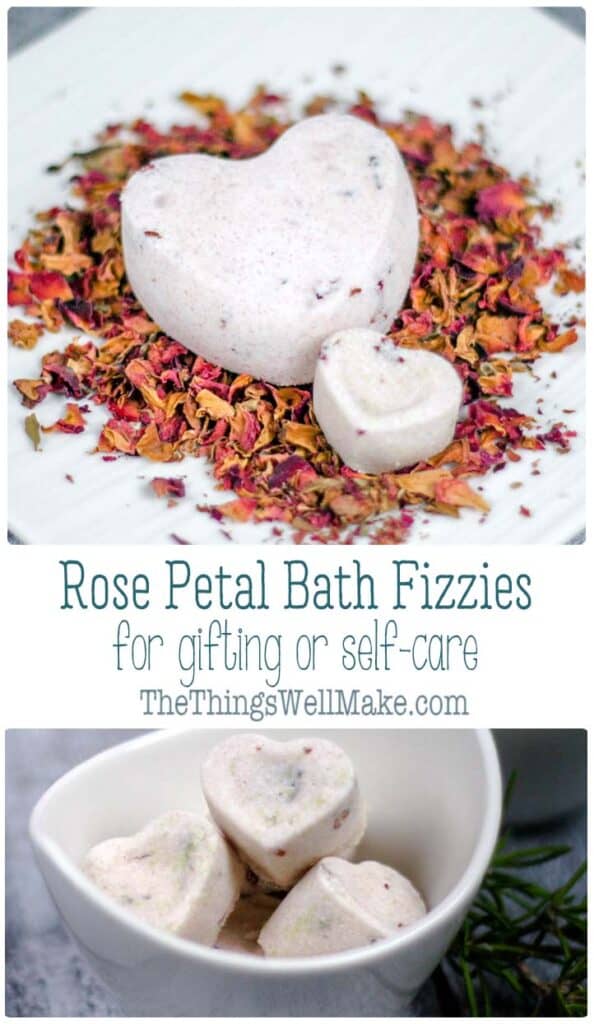
Soothe your skin and relax in a luxurious bath using these homemade rose petal bath bombs (aka. bath fizzies). Great for gifting or just a bit of self-care.
Making bath bombs, or bath fizzies, is something that I’ve wanted to do for quite some time now. With the emphasis on flowers and hearts and relaxation, I figured that Valentine’s Day was the perfect time to try it out.
I had already experimented with making things with rose petal tea and rose water, and I decided to stick with the theme and use those same rose petals for making Valentine’s Day themed bath bombs.
Of course, that doesn’t mean that you can’t make these year-round! Relaxing in a bath and soothing your skin and stressed muscles is something that we should consider doing much more often.
What are Bath Bombs?
Bath bombs are masses of compressed powders and oils that are most commonly sphere-shaped. They are meant for adding to bath water. Once added, they dissolve in a playful, effervescent way (aka. They’re fizzy)!
Bath bombs are fun to watch, and they leave your bath water smelling great! They also add oils and salts to the water that help leave your skin feeling soft after your bath.
How do bath bombs work?
The fizzy effect that you see when you place a bath bomb in water comes from a chemical reaction between an acid and a base (something alkaline).
For these, we’ll combine citric acid, a powdered acid, with baking soda, an alkaline substance in powder form. Because the acid and base are in solid form, they don’t react until they get wet.
Once you drop the bath bombs into water, the acid and base will dissolve in the water and combine together, setting off the chemical reaction that will make a fizzing action. During the process, the bath bomb will dissolve away, releasing any active ingredients that you hide away inside them. This can include oils, salts, or even small toys hidden inside.
Why Make your own?
There are several reasons you may consider making your own bath bombs.
Control the ingredients
Many bath bombs on the market use synthetic fragrances and colorants. They may also include other ingredients that many of us prefer to avoid.
I like making my own bath bombs using essential oils for a more natural fragrance. Most of the time, I don’t add colors to mine either. Not only do I find them unnecessary, but it helps keep them from staining the tub.
Hiding treasures inside
Another fun thing to do when making bath bombs is to hide little toys or other treasures in the center of larger homemade bath bombs. Kids love watching the bombs fizz away, and love the surprise of finding something hidden for them inside.
Choosing bath bomb ingredients
Bath fizzies normally use a combination of citric acid, oil(s), corn starch, salt(s), baking soda, and water or a hydrosol (the aqueous phase).
Citric Acid
Citric acid is the trickiest ingredient to find when making bath bombs, but I was able to find it easily online. It’s necessary if you want to make your bath bombs fizz.
You can make these without citric acid, but they will no longer fizz when you add them to your bath water. They will still make your skin feel soft and will smell nice, though. If you don’t add citric acid, there is no need to add either cornstarch or tapioca flour either.
Starch
Most recipes for bath bombs include cornstarch. I assume that the corn starch is being used to absorb some of the humidity to help keep the citric acid from reacting with the baking soda before you actually use the bath bombs in the bath.
Many people prefer to avoid cornstarch, though, for various reasons. Some are concerned with the GMOs in corn starch. Others worry that corn starch may contribute to yeast infections. So little is used that I doubt there are serious health implications either way. That said, there is an alternative.
For one of my batches, rather than use cornstarch, I chose to try using tapioca starch. It seemed to work just as well. Perhaps you can also get away without using a starch. Not much is really needed anyway.
Oils
Oils add a conditioning effect to the bath water and also help hold the ingredients together without setting off the fizzy reaction. You can play with raising up the amount of oil in the recipe if you are having a hard time getting the mixture to clump up without setting off the reaction.
Also, any oil can be used. For rose petal bath bombs, I had considered using rosehip oil, but it’s a pricey oil. So, I decided to just go with coconut oil instead.
Essential Oils
While they aren’t necessary, adding essential oils will give your bath bombs and bath water a pleasant fragrance. To stick with the rose theme, you can add a drop or two of rose essential oil, which gives a lovely rose fragrance. It tends to be an expensive essential oil, though.
You can change the scent of these by switching up the oils. I also love using lavender essential oil for making a nice, relaxing bath.
Aqueous phase
For the liquid component of my bath bombs, I decided to use rose water. I love the delicate fragrance that rose water imparts to homemade products made with them. (I love using it in my homemade facial moisturizer because they give it a perfect scent without needing to add any other fragrances.)
If you don’t have rose water, you can use another floral water. You can also just use plain or distilled water instead. The rose water by itself won’t be enough to add much scent to your bath, which is why adding essential oils will help boost the fragrance.
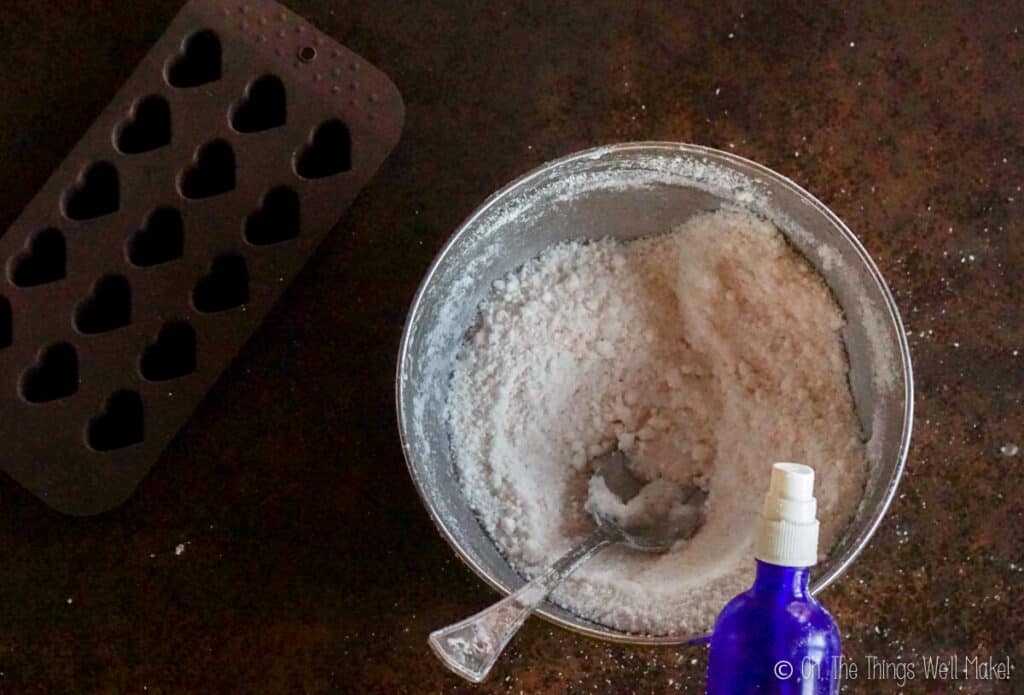
The key to making these bath bombs properly is to avoid getting the mixture too wet so that the ingredients don’t combine with each other while making them. You don’t want to set off the chemical reaction that makes your bath bombs fizz until they hit the water. Use a spray bottle to dispense just enough liquid to get the ingredients to hold together without fully wetting any area of the mix.
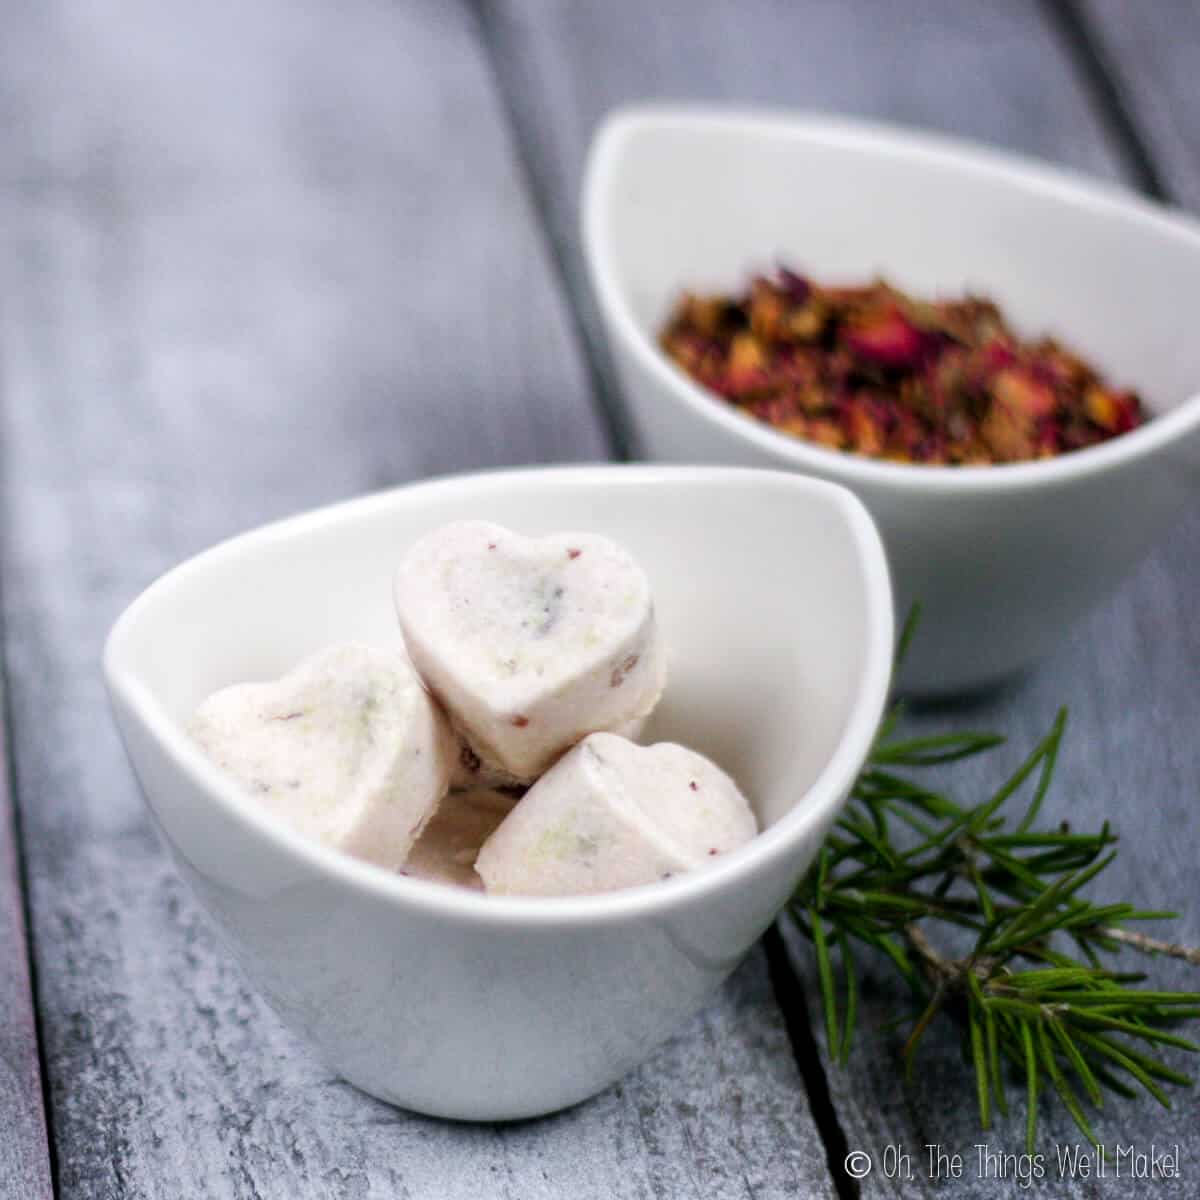
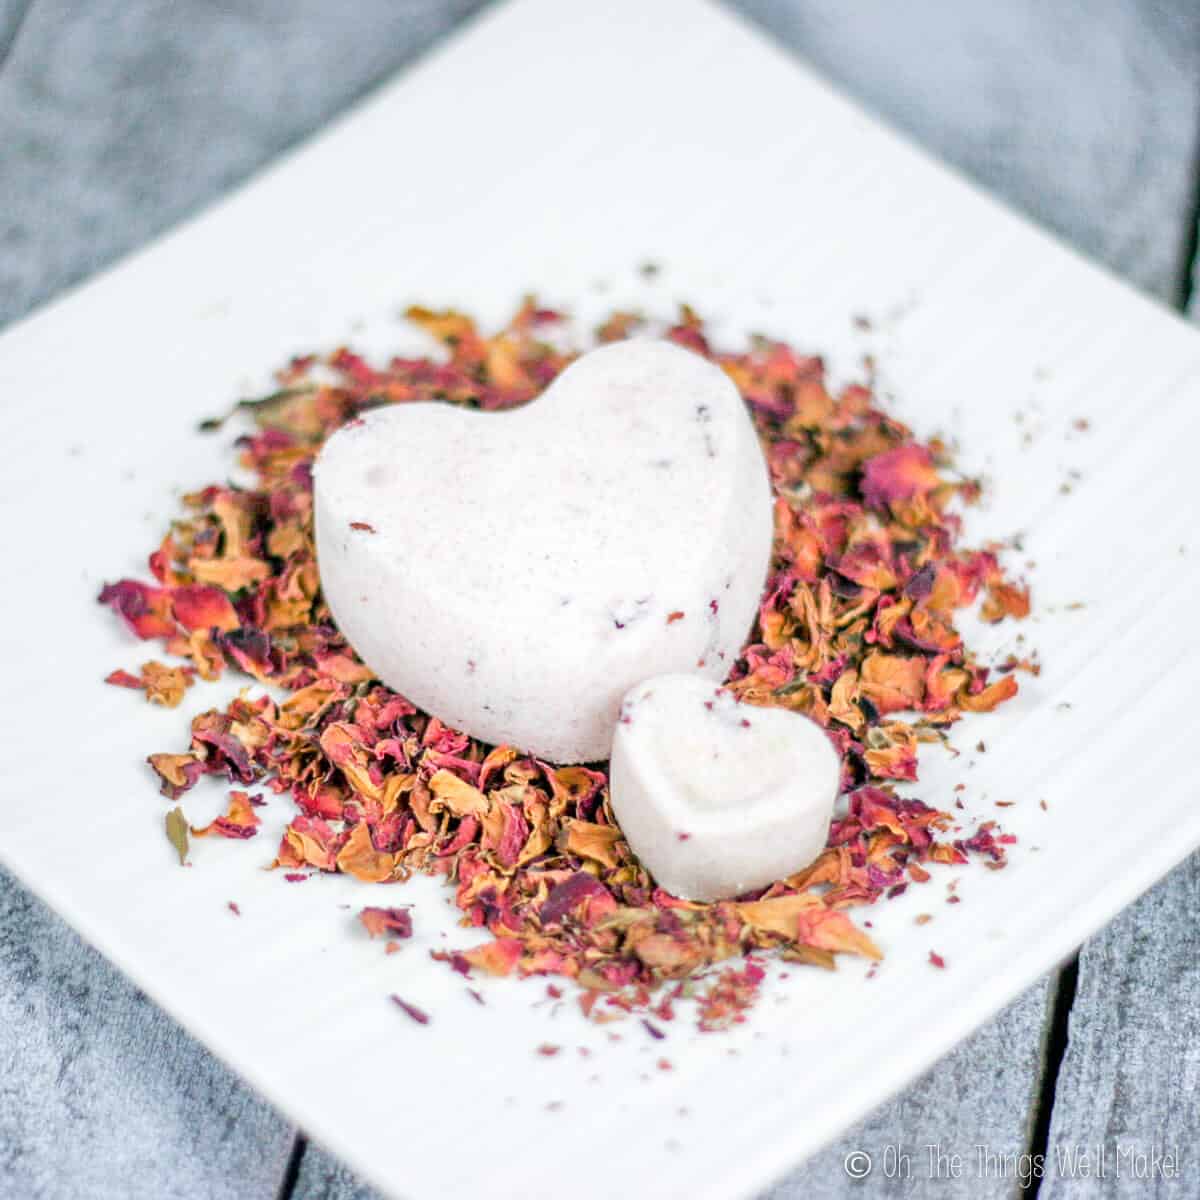
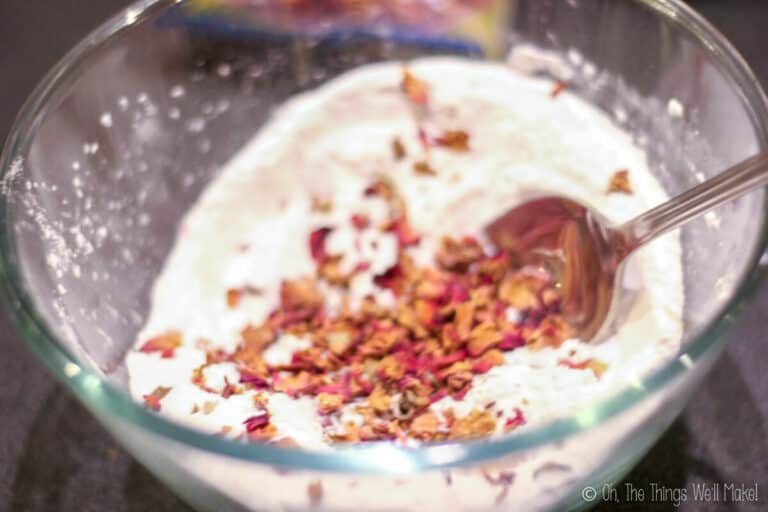
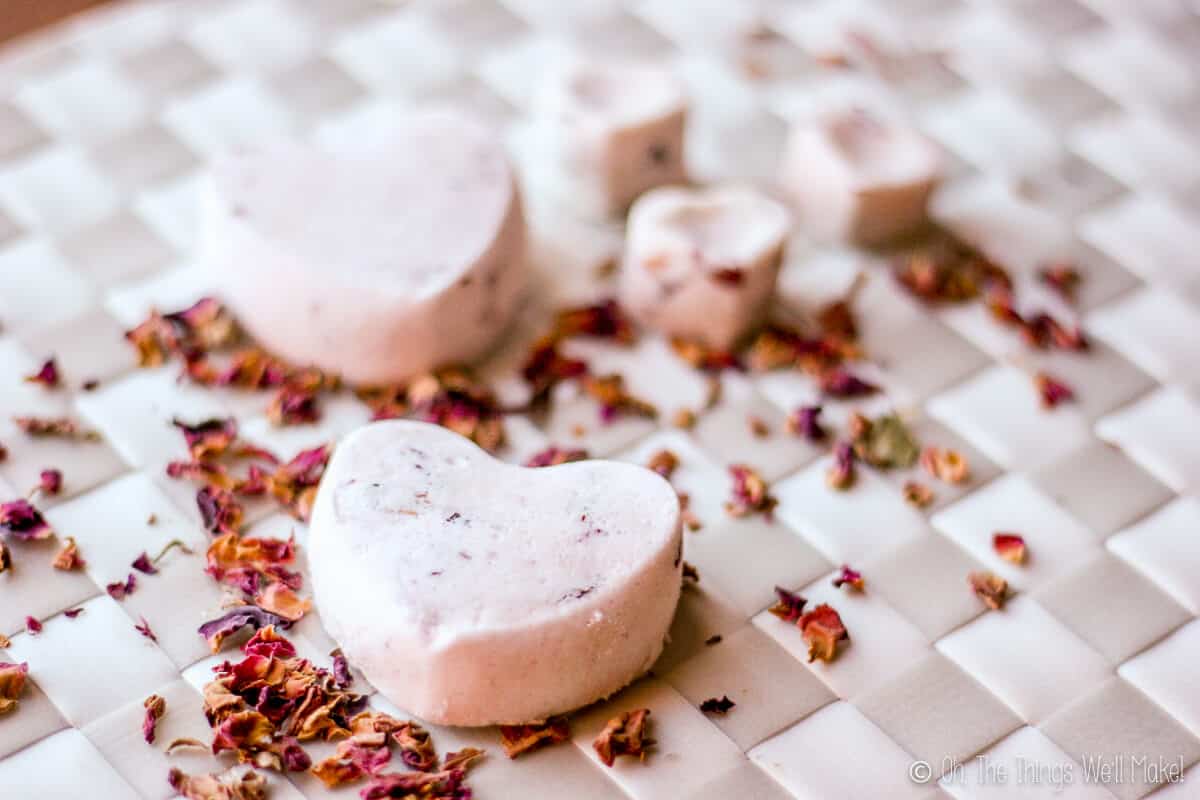
Rose petals (Or other fun stuff)
When I first made these, I incorporated rose petals into the recipe. Keep in mind, though, that if you add any solid ingredients that don’t dissolve that they will also be in your bath water and tub. If the rose petals bother you, feel free to leave them out!
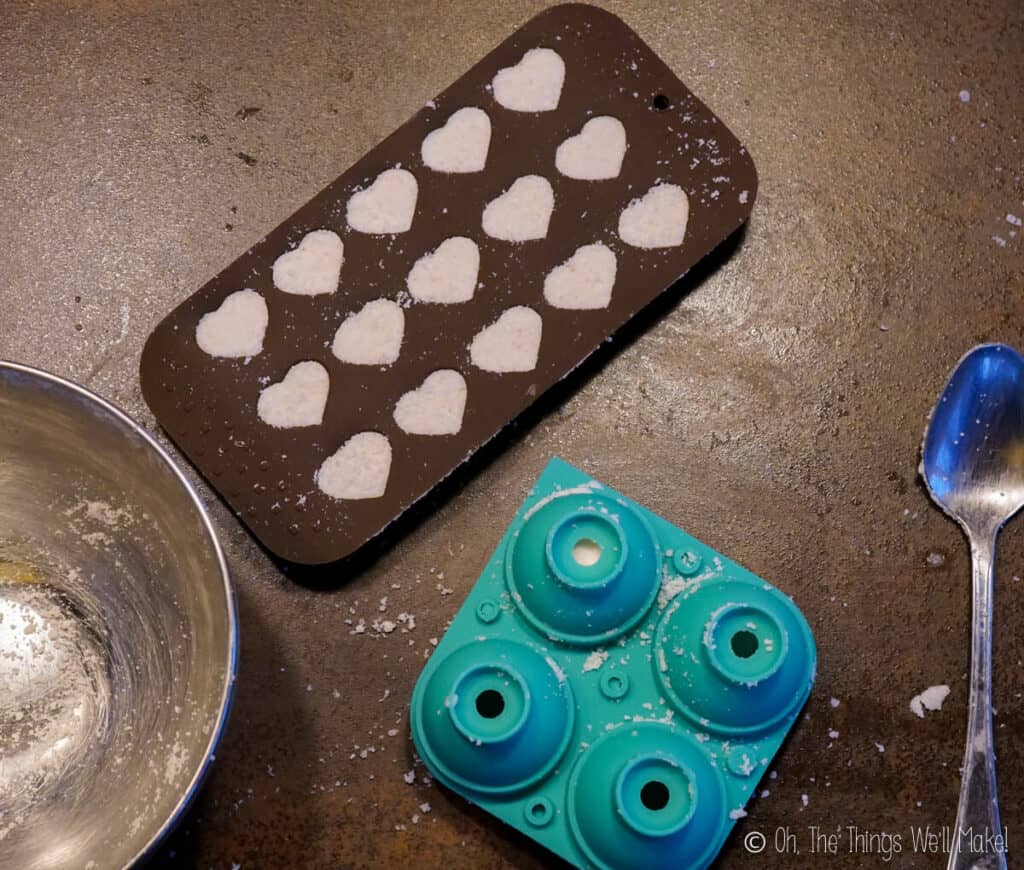
What molds to use
Ideally, if you use bath bomb molds, they work the best for making these. They allow you to press hard and compact the ingredients well. This allows you to work quickly and unmold your fizzies more quickly.
(There are even special bath bomb presses that help make them professionally or kits that include shrink wrap plastic for storing the finished bath bombs properly.)
Other alternatives
That said, I used silicone candy molds to show you they also work. There is no need to buy yet another product that you won’t be using often. The silicone candy molds generally make smaller sized bath bombs.
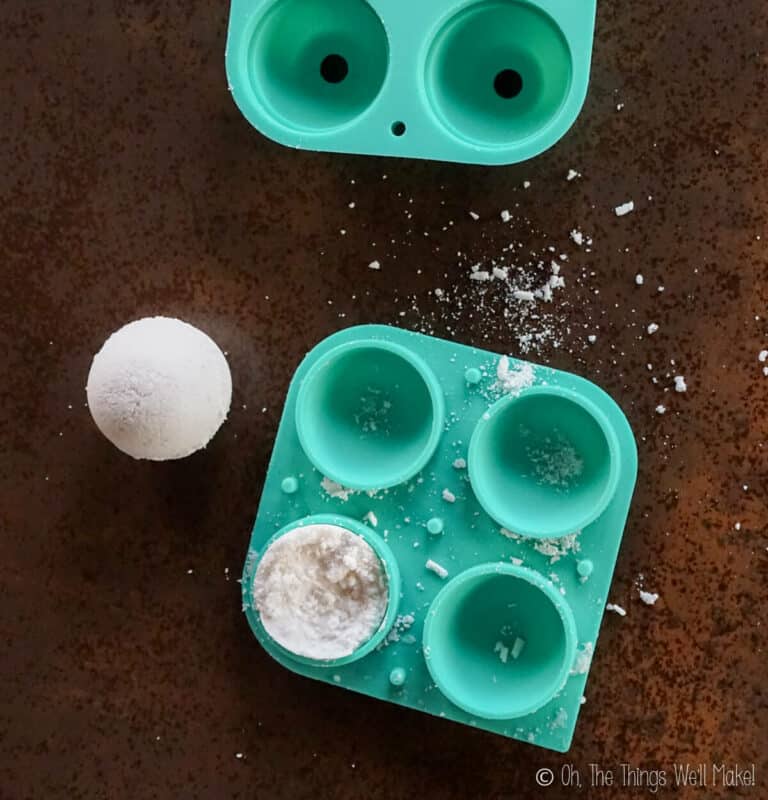
Silicone ice cube trays also work well for making bath bombs. I just happened to have a larger, spherical ice cube tray and it made a perfectly round bath bomb just like the ones you’d buy at a store.
Keep in mind that silicone is flexible, so the shapes may slightly deform as you press the mixture into them. You want to press hard enough to make sure the mixture will stay together well.
How to Make Bath Bombs
Making them is really easy, and I’ve hinted at most of the process already.
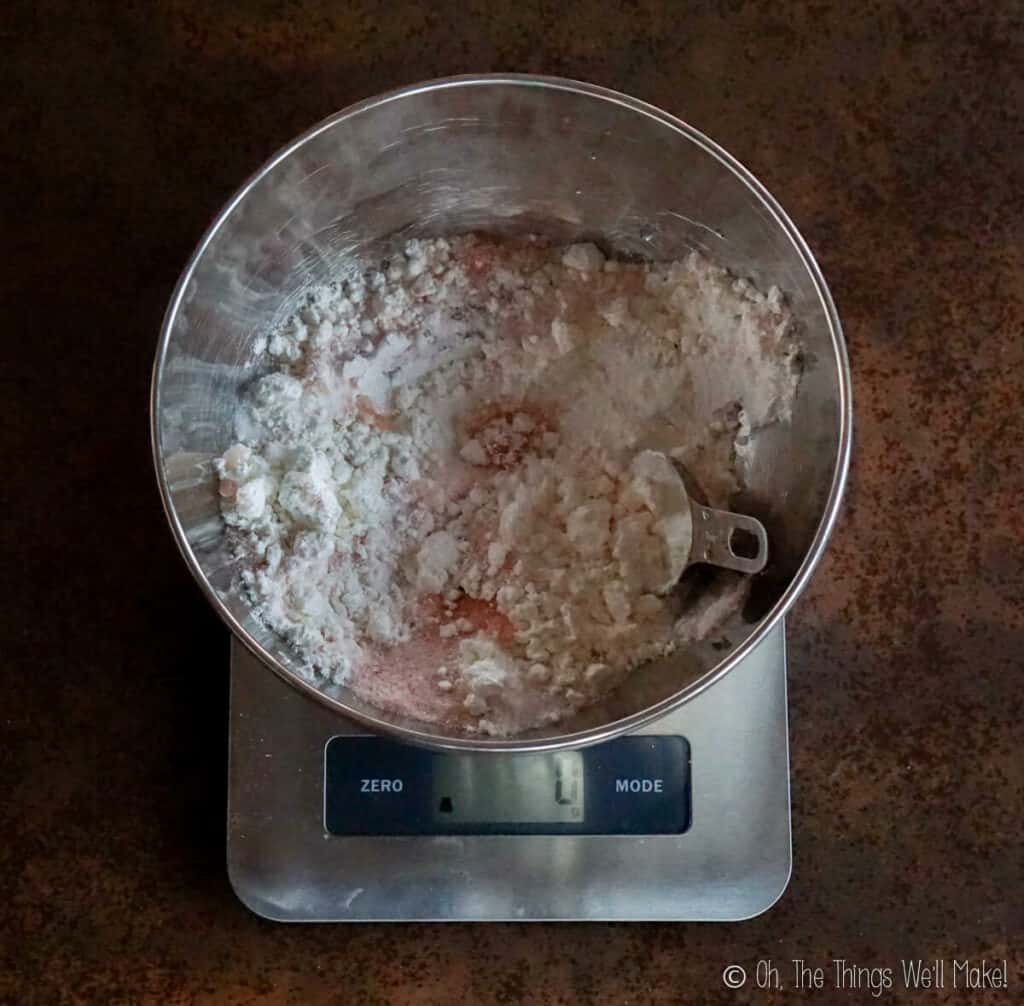
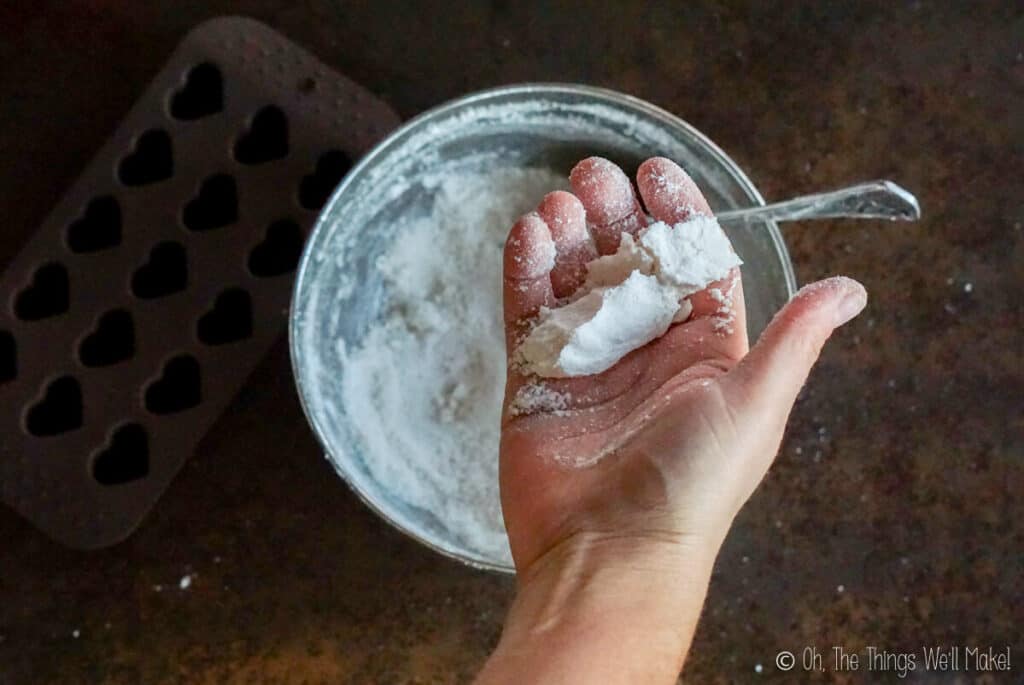
Start by weighing out the dry ingredients. I used equal parts of the citric acid, the starch, and the salt. For all of those, I added 2 parts of baking soda. If you want to add any flower petals, now is also the time to add them in.
Once you’ve mixed together the dry ingredients, start spritzing them with water or a hydrosol. (I used rose water for mine.)
As you spritz, continually mix the ingredients together to incorporate the humidity. You don’t want a lot of water to go to any part excessively or you may set off the chemical reaction. (Some fizziness is normal and almost impossible to avoid. Bubbling up fizziness means that you’re adding too much liquid.)
When the mixture holds its shape if you press it together in your hands, it’s ready to press into the molds.
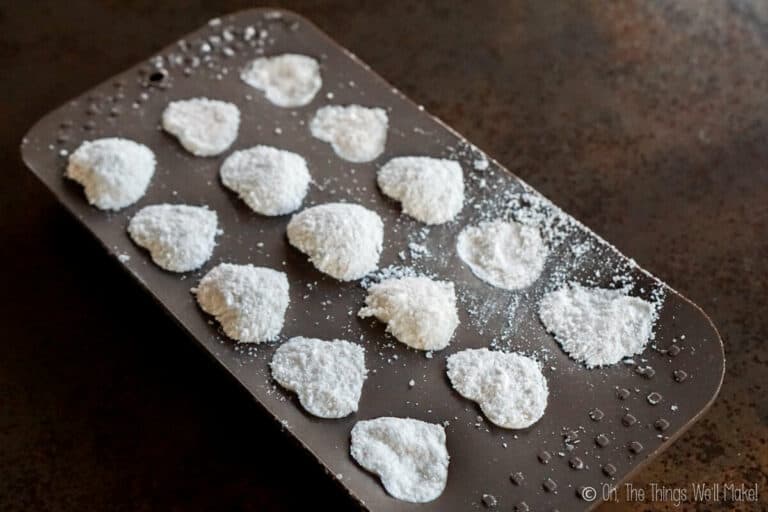
Press the mixture into the molds as firmly as possible to compact the ingredients well. Allow them to dry overnight.
The next day, you may find that they have fizzed up and expanded slightly if you are using open molds. This depends on the humidity of the area you are working in and is also normal. You can press back down on the back of the expanded bath bombs to compact them before carefully removing them from the molds
If the mixture is too dry when you try to press them into the molds, the finished bath bombs may be crumbly. Using a lot of pressure helps keep them together, but it is a bit more difficult to achieve when using flexible molds. So, keep that in mind.
How to Use Them
Using the finished bath bombs couldn’t be simpler!
All you have to do is throw them into the bath water and watch them fizz as they dissolve. You can either add them before or after getting into the tub.
Relax and enjoy!
Storing Finished Bath Fizzies
Bath fizzies that haven’t been used immediately should be stored in a dry, well-sealed container. It’s important to keep the humidity out, or they’ll lose their fizziness before you can use them.
Those who make them for sale normally use shrinkwrap plastic. While it’s not a sustainable option for home use, it’s something that you could consider for gifting larger bath bombs. (Of course, you could also gift them in a pretty airtight container.)
Watch me Make Bath Bombs
Rose Petal Bath Bomb Recipe
Rose Petal Bath Fizzies
Equipment
- silicone molds
Materials
- 100 g baking soda
- 50 g citric acid
- 50 g corn starch
- 50 g salt (I used Himalayan salt, but you could use sea salt or epsom salt, too.)
- 1 Tbsp. coconut oil or other oil
- spritzes rose water or distilled water or other hydrosol
- rose petals optional
- 3 drops rose essential oil or other oil, for fragrance
Instructions
- Mix the dry ingredients together. If any are coarse, you can pulverize them in a coffee grinder. Optionally add in some dried rose petals to make them pretty for Valentine's Day. Keep in mind, though, that anything solid that you add to them will end up floating in your bath water. So if you don't want to be bathing yourself with bits of rose petals, don't add them in.
- Once the dry ingredients are mixed, work in the oil(s). If using coconut oil when it's in its solid form, you can either melt it first or work it into the dry ingredients much like you would work butter into a pie crust.
- At this point, the mixture should have the consistency of slightly wet sand. It should slightly hold its shape when you press it together.
- Have your molds ready and nearby because once you start adding in your liquid, you'll want to work quickly.
- Spritz in the water with a spray bottle, adding a very little bit at a time. Mix it in well after each addition. It will slightly fizz, and that is OK, but you want to try to minimize the amount of fizzing by not adding too much water at a time and by working it in quickly.
- Once the mixture holds its shape when you clump it together in your hand, you can press it into the molds. Make sure to press your ingredients in firmly, trying to squeeze out any air bubbles.
- Allow the fizzies to dry for several hours or overnight.
- Carefully pop them out of their molds.
- You can use them immediately or store them in a dry, airtight container until ready to use them.
Notes
This post was originally published on February 9, 2014. It was rewritten with more tips and tricks in February of 2020.


This looks really interesting and informative! <3 I'm definitely going to try some of the recipes and things for myself. I actually found this due to a few factors:
1) Just over this past year or so, I've been trying to go more 'natural' – my family already makes sure not to use anti-bacterial soap, but I've also switched to bar bath soap & Aveeno oatmeal conditioner/shampoo (curly girl method) for my showers.
2) I'm an anime fan and was watching this one anime "Ascendance of a Bookworm" where a modern girl about to become librarian 'dies' and ends up in body of 5 year old of medieval place (no books!). They did a great thing where luckily, she knew how to make her own soap and could wash her hair – as it felt so itchy & she hadn't washed it in a week. Modern hygiene in olden times basically.
3) 2020 being 2020. Need I say more? This is both in the sense of number one, but also due to some other things. I had a plantar wart or 2 and was having my doctor treat it and then 2020 happened. So I figured I'd wait (only found what it was last year, but had them for the past 15 years or so).
And then they started spreading – so treating them at home and it's much easier to soak feet with active-heat foot spa then changing the water every 20 minutes. I added some baking soda last week and decided to put in some soap petals – with my 1st foot spa (broke after a week) it just turned water pink. This time, it gave me insane amounts of bubbles (luckily, I have 2 towels under it in my room as bubbles did spill over). I was wondering if I supposed to get bubbles with the soap petals or if it was the baking soda & soap petals reacting with each other.
Anyway, I'm glad I found this website. Not only would this be a helpful skill to acquire, I can also see where this could help in terms of expenses and time-savers, especially with how uncertain things still are as we start off 2021. Thank you for making this info & stuff available! <3
not sure if i missed it but when do i add the citric acid..
Hi Cynthia,
You did miss it, but it’s because it’s a bit confusing the way I wrote it, so I apologize. I wrote to mix all of the dry ingredients together, and that includes the citric acid. What’s confusing is that I followed that with the statement that I pulverized all of the ingredients other than the citric acid in my coffee grinder to make it all smoother, so it could be interpreted as the citric acid being separated from the rest of the dry ingredients. I’ll try to edit it to make it less confusing tomorrow when I can sit down at the computer. I hope that helps!
What a fun project and great gift for Valentine’s Day!
mmm… I can smell them now. I love the smell of rose petals. These would be a great gift for a friend who needs a break.