

Homemade Coconut Milk (and Coconut Flour)
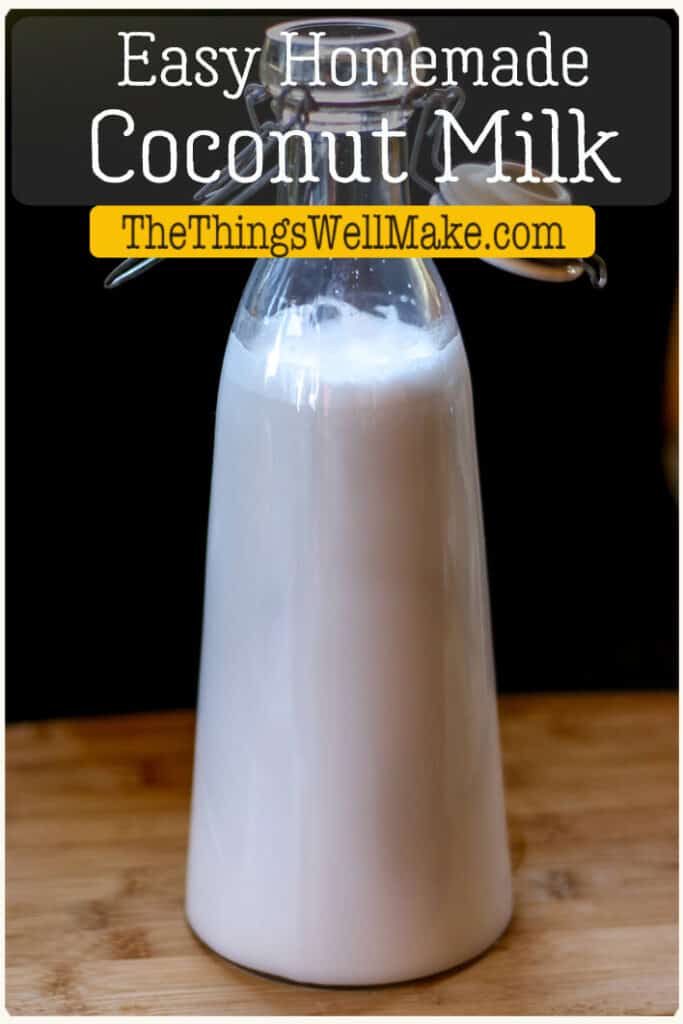
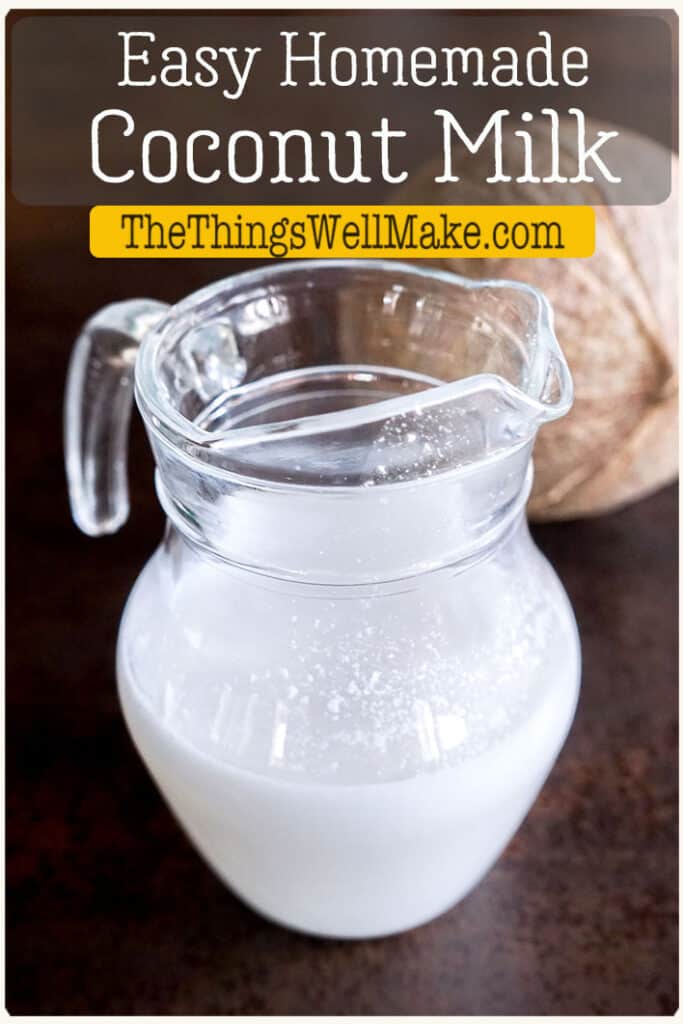
A delicious alternative to milk, coconut milk is an allergy-friendly beverage that is easy to make yourself at home using either fresh or dried coconut. For a no-waste product, make coconut flour with the remaining coconut pulp.
Those who know me well know that I should have been born somewhere with coconut palms. Not only do I love coconuts, but I also love the tropical climate that coconut palms need to survive.
While I have moved a bit closer to the tropics from Michigan to the Spanish Riviera, I don’t live in a climate that allows for coconut palm trees. Nor do I live in a place where it is easy to find coconut flour. I can find canned coconut milk here, but it’s ridiculously expensive.
Why make homemade coconut milk?
Not only is homemade coconut milk much cheaper than the coconut milk that you buy in the stores, but it’s a lot more natural. It doesn’t have all of the unwanted ingredients found in canned coconut milk. Plus, you don’t have to worry about BPA or other endocrine disruptors that might be found in the lining of the cans.
Ingredients
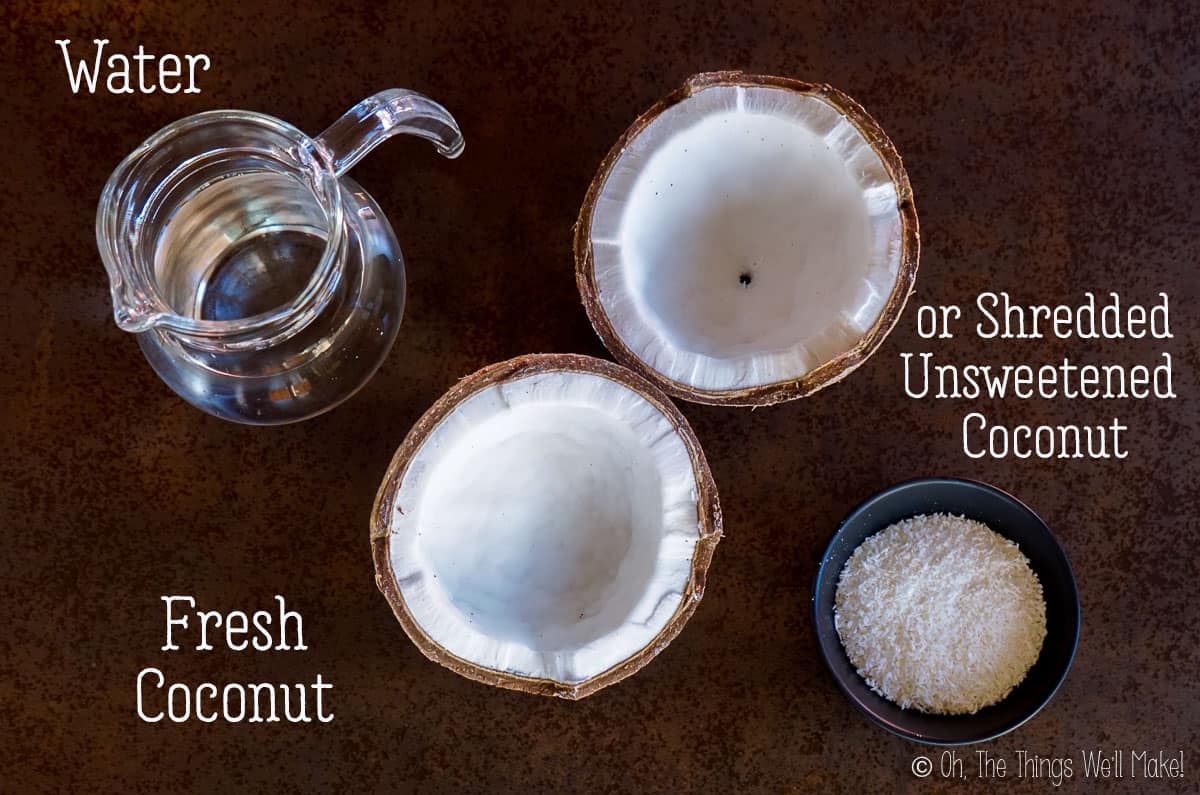
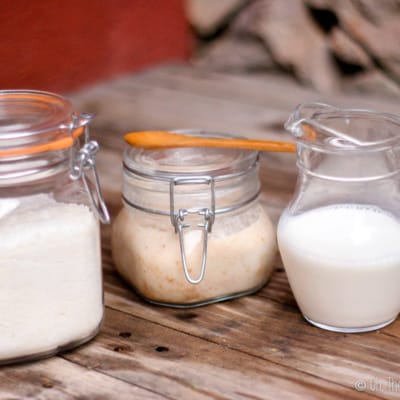
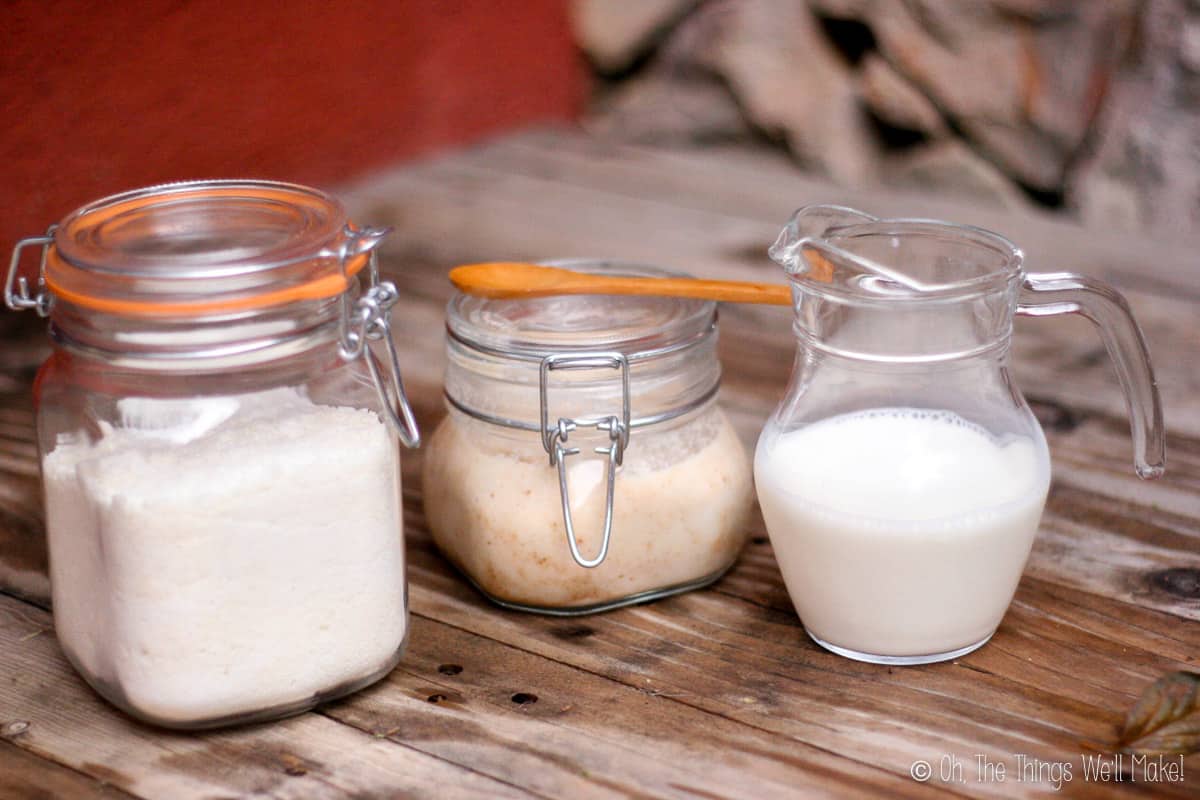
Coconut milk can be made with either a fresh coconut or with shredded dried coconut.
Apart from the coconut, the only essential ingredient is water.
Some people like to add a pinch of salt or a dash of sweetener to their coconut milk or even a dash of vanilla extract. Whether or not you add anything else is up to you!
How to make coconut milk
First, decide how much coconut milk you want to make. You’ll need roughly 2 parts water to 1 part shredded coconut. So, if you need to make 2 cups of coconut milk, use around 1 cup of shredded coconut and add slightly more than 2 cups of filtered water to it. (Some of the water will remain with the fiber of the coconut, so you want to account for that.)
If you want to make a thicker, creamier coconut milk, use less water and more coconut. (Try 1 part water for every part of coconut.)
Next, soak the shredded coconut in the water. Using warm water helps release more of the fat from the coconut, giving a creamier milk. I generally soak the coconut right in the container of the blender I plan to use to make the coconut milk.
I used to soak the coconut in warm water for at least an hour before blending, but I later found that in warm weather, the coconut milk would quickly sour when made in that way. Now, I only briefly soak the shredded coconut (up to around 10 minutes) or use room temperature water.
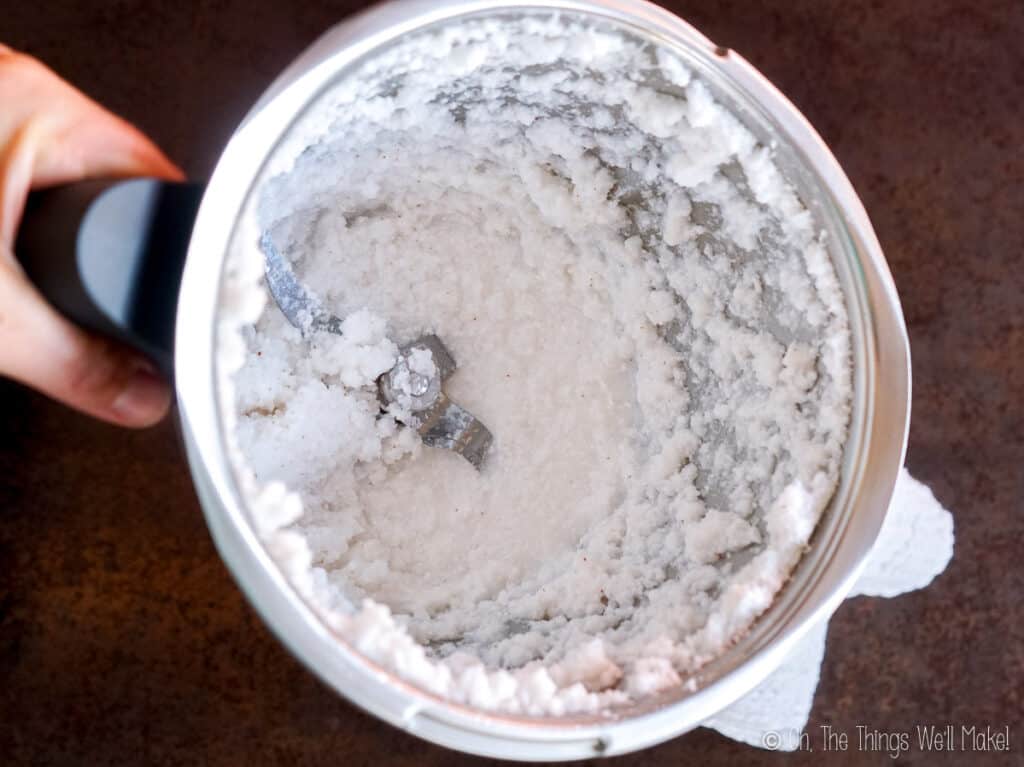
Blend the coconut with the water for a minute or two. It’s not essential that you blend that long, but the longer you blend it, the more the coconut bits get further shredded and give up more of their goodness into the water. (The heat of the blending process also helps release more fat and flavor.)
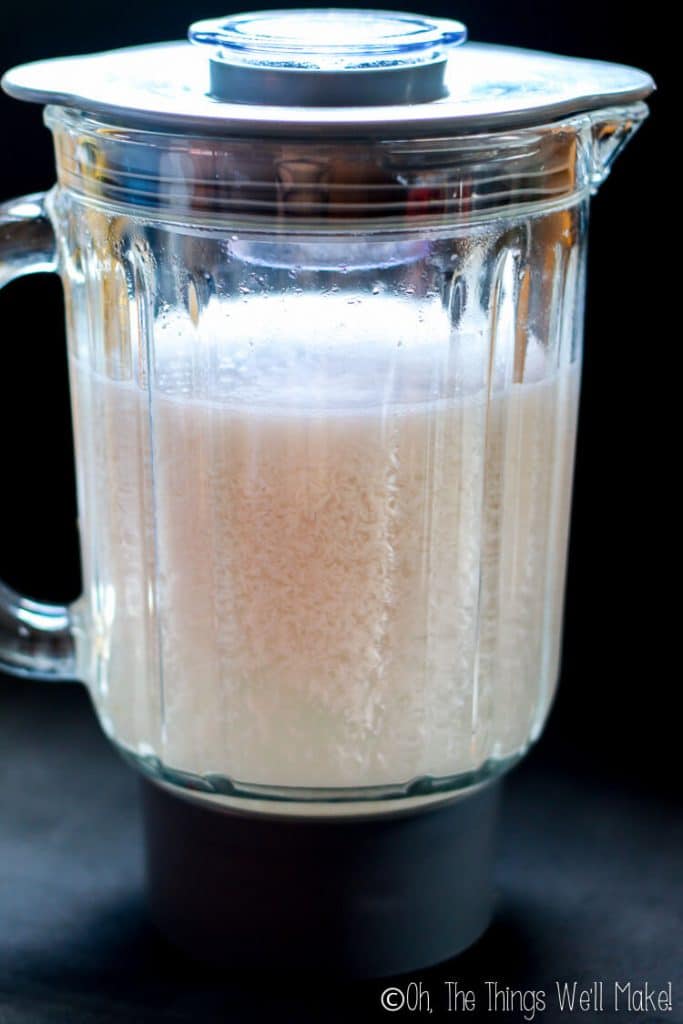

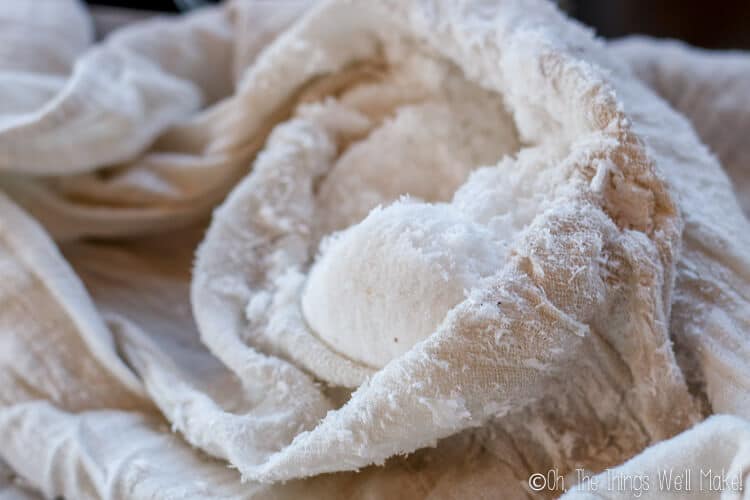
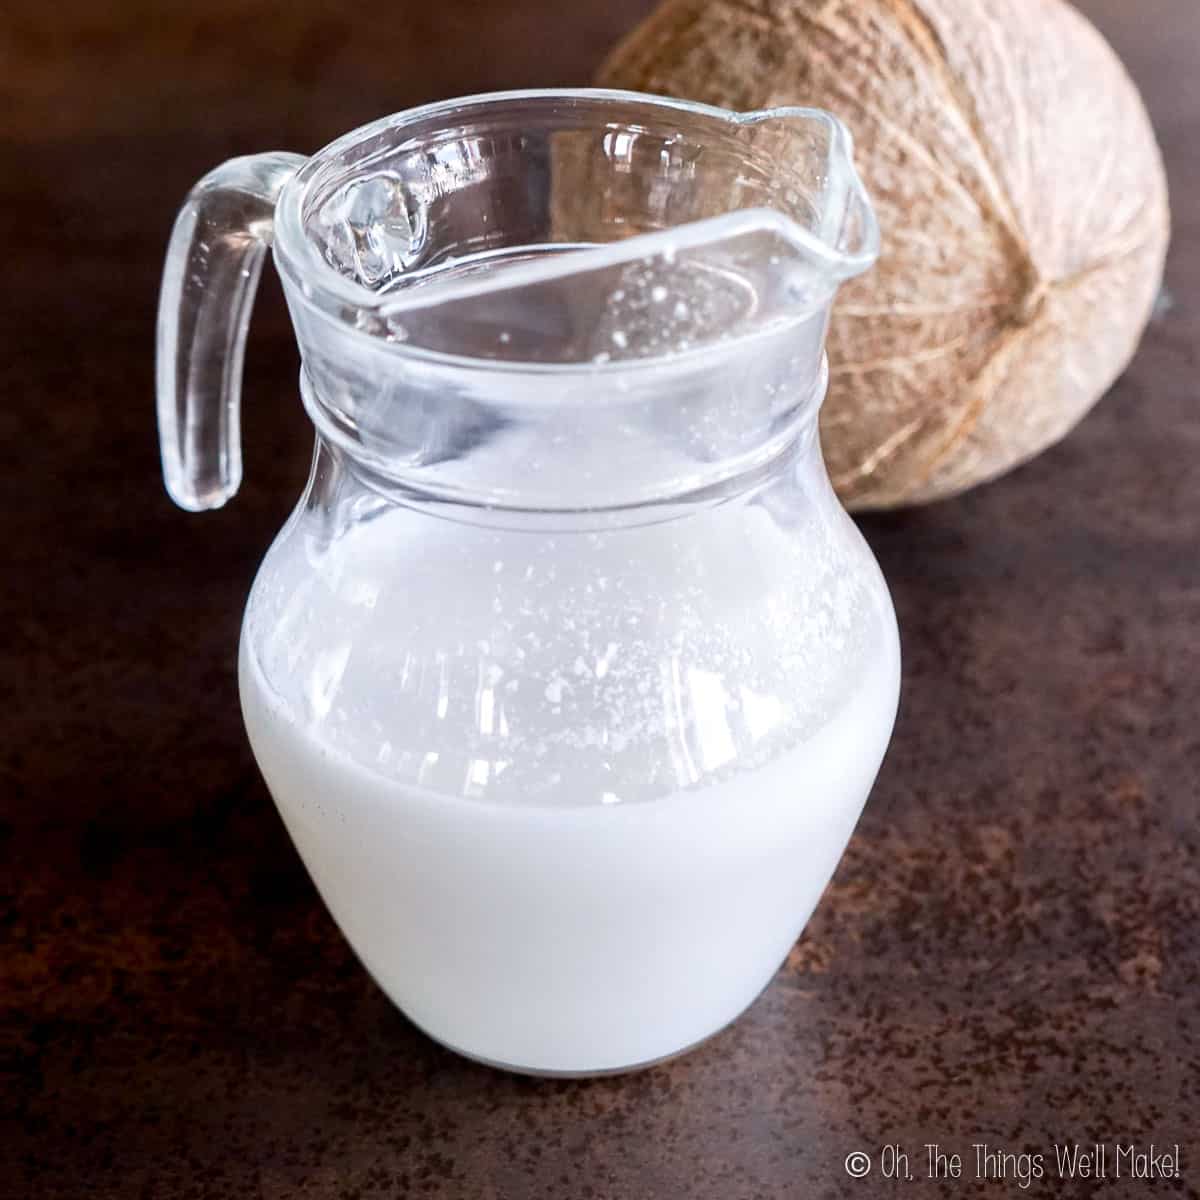
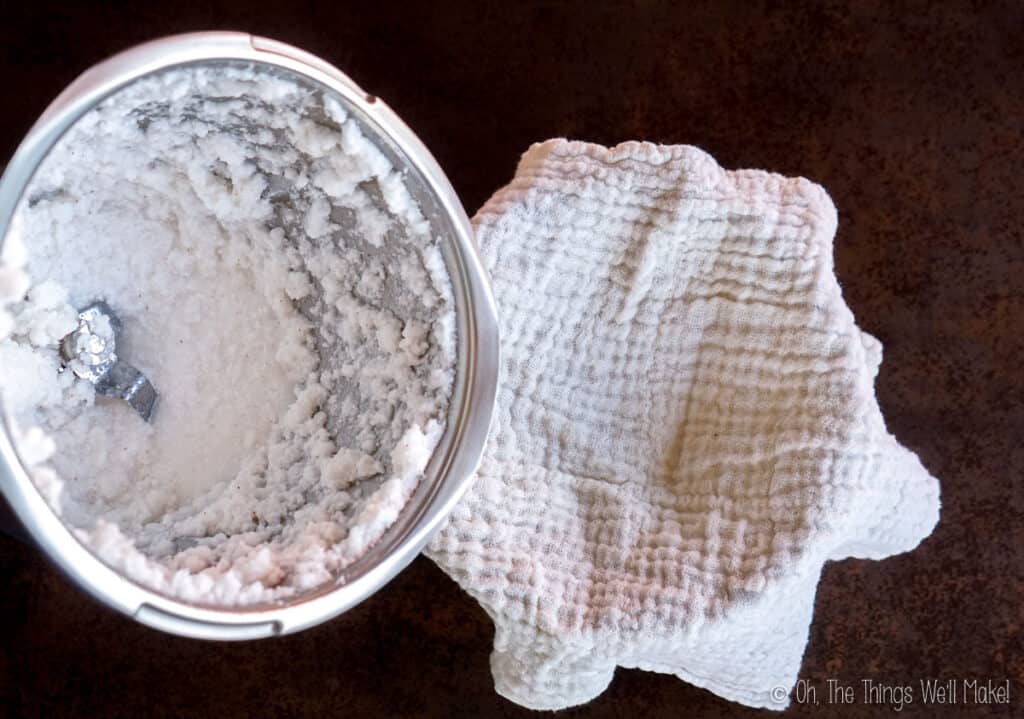
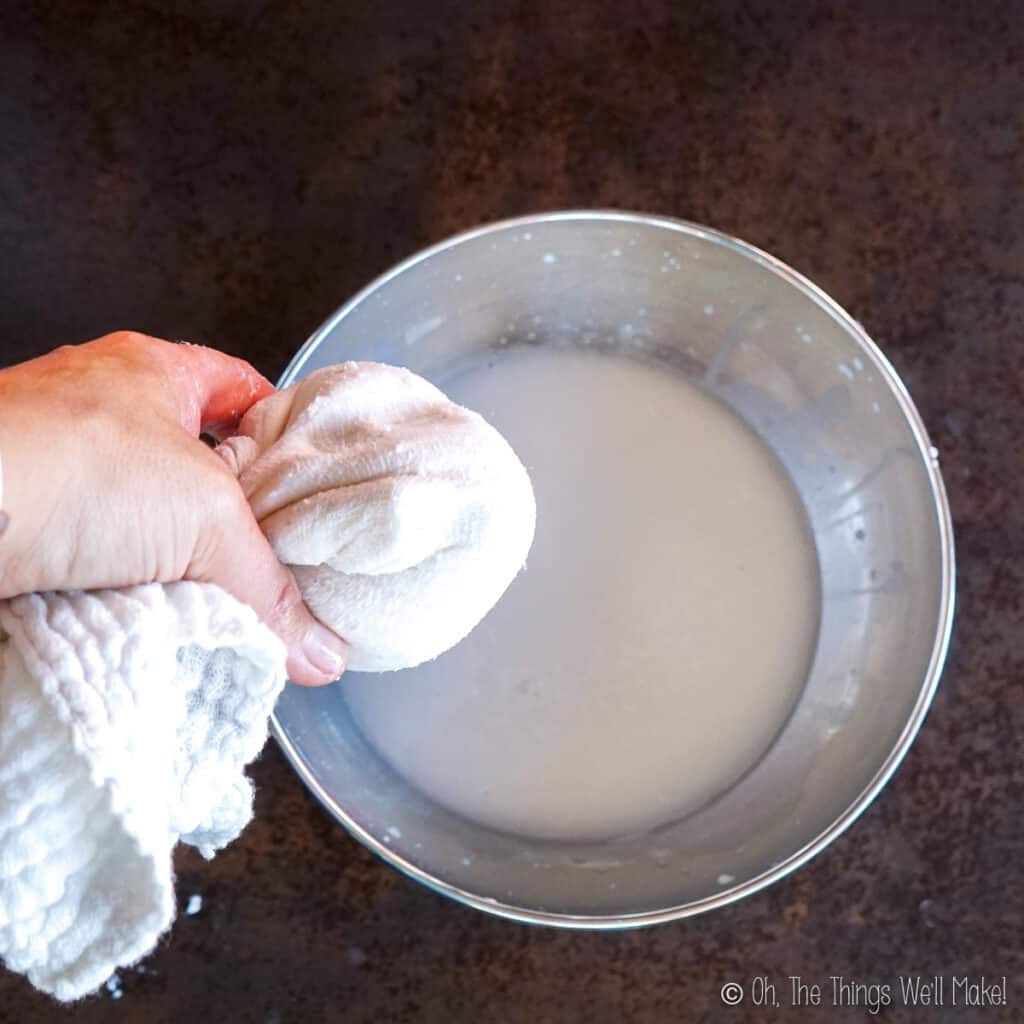
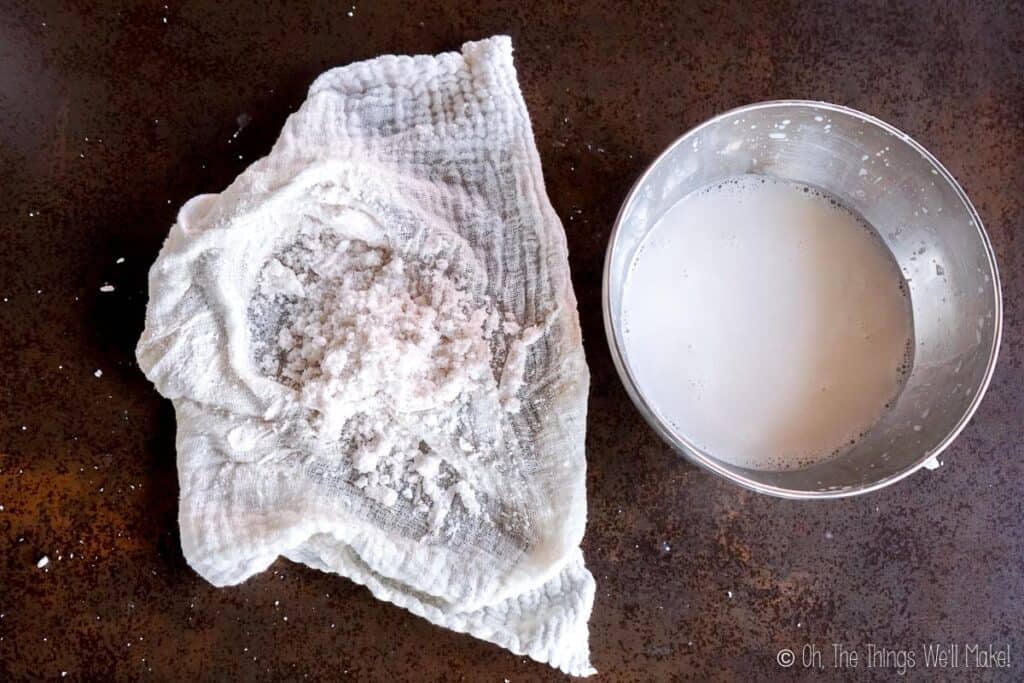
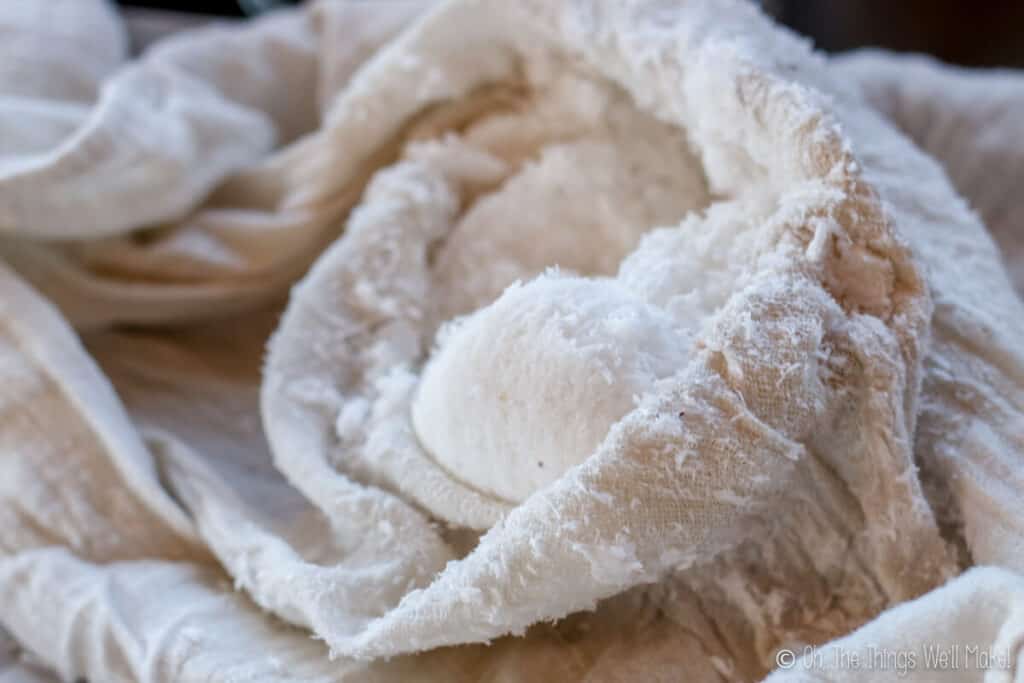
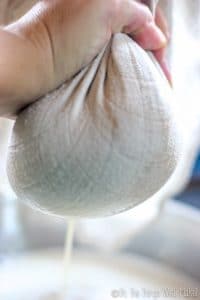
Once you’ve blended the coconut and water together, strain out the coconut pulp. This can be achieved by straining with a clean cotton cloth. I normally line a bowl with a cloth and then pour the water and coconut mixture into it. I then wring it to strain out the coconut milk into the bowl below.
Vegetable milk materials
For those who often make vegetable milks, there are nut bags and also vegetable milk makers that can also be used to more easily strain out the coconut milk.


Using fresh coconuts
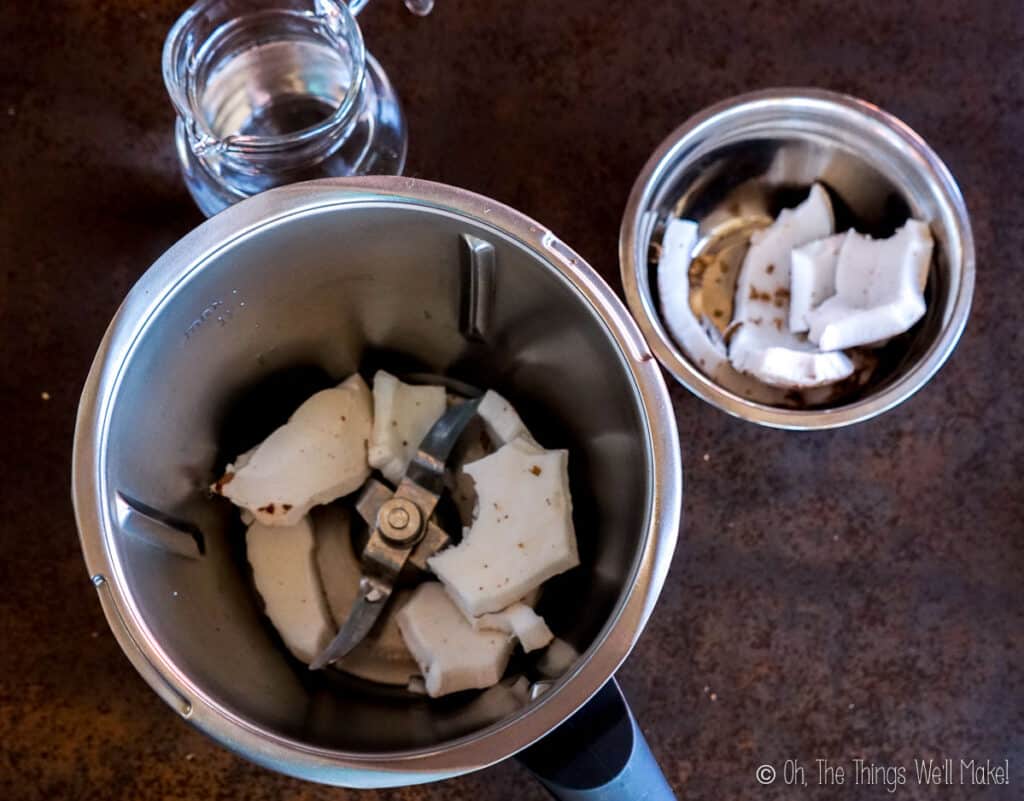
If using a fresh coconut, first open it. (Read my tips on choosing a good coconut and how to open it.)
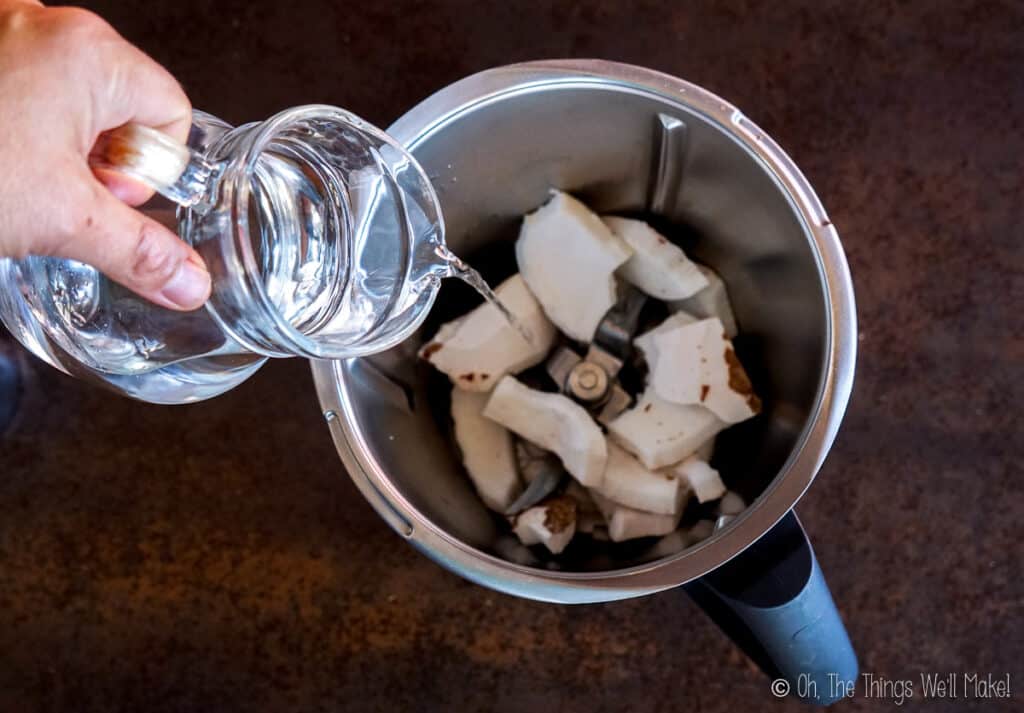
Once you’ve opened it, remove the pulp of the coconut. Cut the coconut into chunks and add it to the food processor or blender with some warm water. (I usually use around 2 cups for a full coconut.)
If you plan on using the remaining pulp for homemade coconut flour, peel off the brown skin. You can use a vegetable peeler to make the process easier. (If you don’t plan on using the pulp, you can save yourself some time and just leave it on!)
Storage
Keep in mind that homemade coconut milk doesn’t have any added thickeners, emulsifiers, or preservatives, so it’s best used immediately.
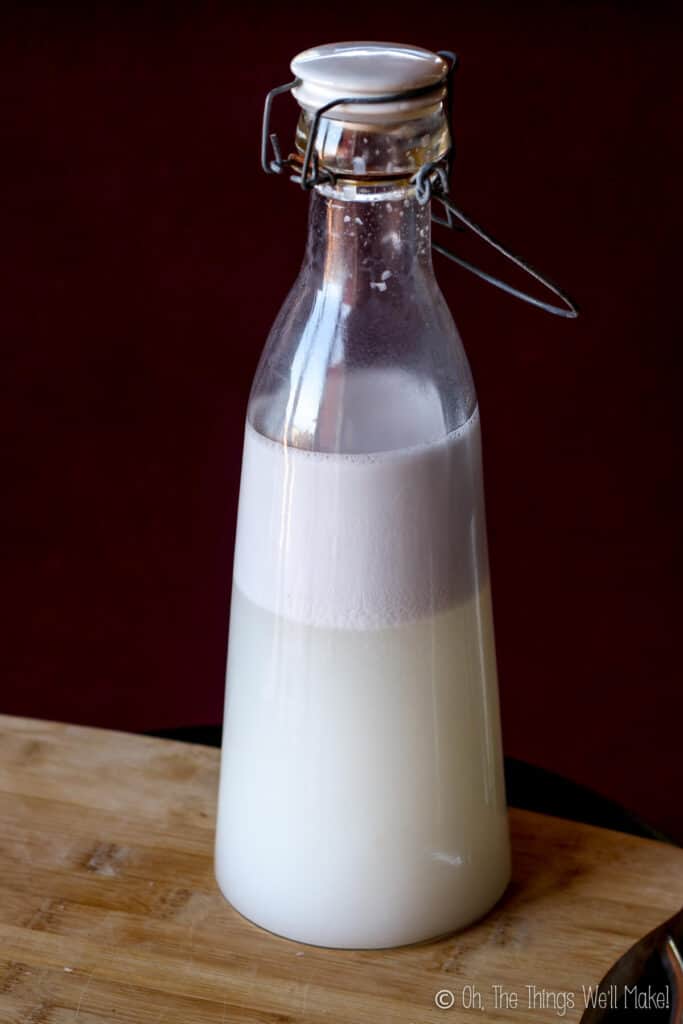
If you store homemade coconut milk in the fridge, it’s normal for it to separate developing an oily, solid layer on top and a liquid, watery layer below. The upper layer may be thick and creamy or even become quite hard, depending on the fat content.
Coconut milk is made of the fat of the coconut and water. Because fat and water don’t mix (and we aren’t adding any emulsifiers) the coconut milk will slowly start to separate into two layers.
If you do need to store it, it’s best to shake it or stir it to help combine the layers before using it. (You may need to slightly heat it to help “melt” the top fatty layer first.)
Use it within a couple of days or it will start to sour. You can also freeze it for longer term storage.

Uses
While this is perfect for adding to your coffee or tea, it won’t work for every recipe that uses canned coconut milk.
Some recipes depend on the thickeners and emulsifiers of the commercial coconut milk to work. This is true for recipes like “whipped cream” made from the thick layer that forms on a can of coconut milk when you store it in the fridge. That also goes for recipes like my easy no-bake strawberry cream pie. (You may be able to make it with homemade coconut milk if you add more gelatin to help stabilize it, but the resulting texture will be different.)
Some recipes on the blog that work well with homemade coconut milk is my coconut flan recipe. It’s also great in smoothies like my son’s favorite Popeye smoothie! Perhaps my favorite, though, is adding it to frozen fruit to make a creamy dairy-free ice cream. (Try my easy watermelon ice cream or my 5-minute pineapple ice cream!)
Getting more milk from the pulp
Rather than waste a lot of coconut goodness left in the pulp, you can repeat the process by blending the leftover pulp with warm water. I always use warm or hot water on the second round to help release more of the fats.
If you plan on making coconut flour with the remaining pulp, it’s a good idea to try to remove as much of the fat as possible from the remaining pulp anyway.
Keep in mind that the first batch is generally the thickest and creamiest. Subsequent batches will be more watery, but are still great to add flavor and creaminess to teas or soups, for example.
Thickening homemade coconut milk
While you can make a slightly thicker and creamier coconut milk by using less water and more coconut, it will still be quite different from commercial coconut milks that are on the thicker side.
If you’re really set on thickening your milk, there are several things you can try.
Some people thicken their coconut milk by mixing it with some cornstarch or tapioca or wheat flour and then simmering it while stirring over medium heat until it thickens. It’s how I thicken my homemade egg drop soup, but I’ve personally never tried that method for coconut milk.
On the other hand, you can use a thickener like guar gum, just like the commercial brands do. To thicken with guar gum, use a small spoonful of guar gum to the finished coconut milk, and blend it in with an immersion blender or a milk frother.
For a healthier way, you can also blend the coconut with some chia seeds. Chia seeds release a gelatinous fiber. Some of that fiber will slightly thicken the milk and you can strain out the chia seeds along with the coconut pulp. (For best results, soak the chia seeds for longer or soak them in warm water before blending them with the coconut and water.)
I’ve found that coconut milk thickened with chia seeds or guar gum doesn’t separate as much as coconut milk made without them. On the other hand, the chia seeds do give a bit of a different flavor which may or may not bother you.
Coconut flour
Coconut flour is really just a byproduct that can easily be made from the pulp after making coconut milk.
What is coconut flour?
Coconut flour is a high fiber, low carb “flour” that can be used in place of wheat or other grain flours in cooking and baking. It is especially used in recipes for diets that seek to eliminate wheat flour like gluten-free diets, GAPS, and paleo diets.
How to make coconut flour
To make it, dry the remaining coconut pulp after extracting as much of the fat from it as you can (by making coconut milk).
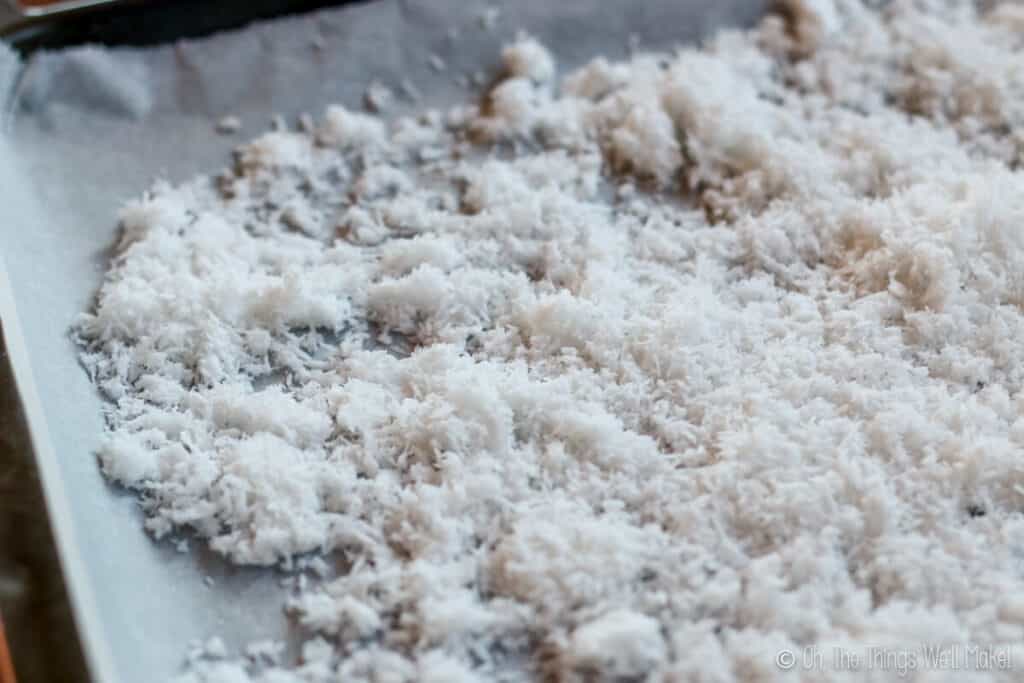
To dry the pulp, you can either use a food dehydrator or spread it over a baking sheet and dry it in the oven on low heat. Make sure it’s completely dry or it won’t store well and will grow mold.
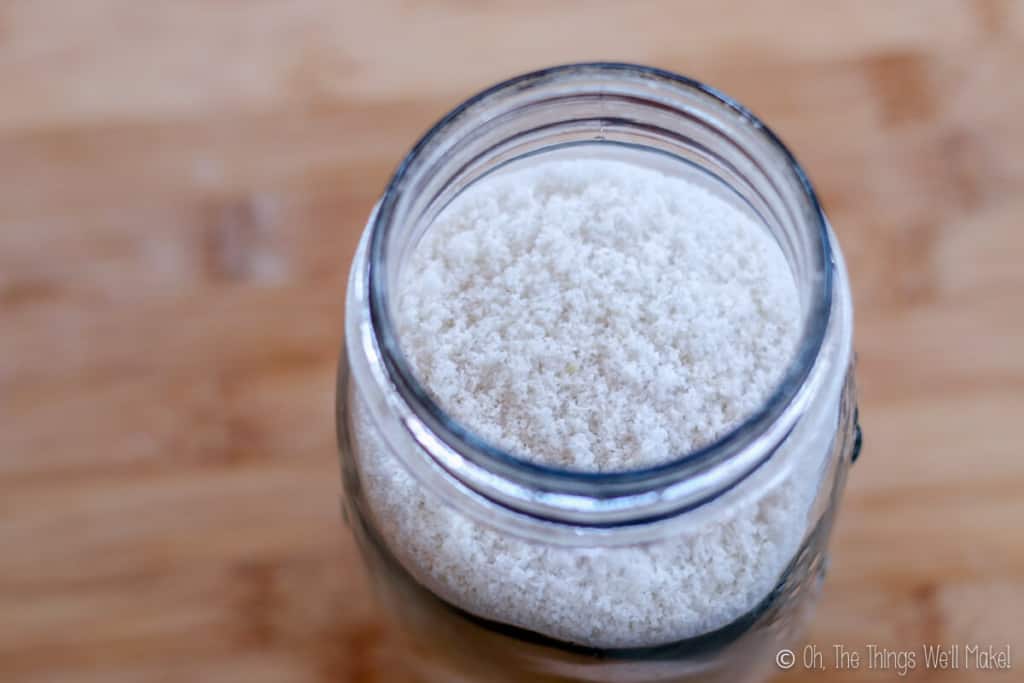
Once dry, process it as finely as you can with a food processor.
When making homemade coconut flour, you probably won’t be able to “mill” it as finely as store-bought coconut flour. For most recipes, I haven’t found it to be a problem, but keep it in mind as it may affect certain recipes.
To get a finer grind, you’ll either need a powerful food processor or you can try running it through a coffee grinder after the food processor.
As long as you fully dry the pulp before grinding, the homemade coconut flour stores well at room temperature.
How to use it
You have to be a bit careful when replacing other flours with coconut flour in baking recipes as coconut flour tends to be a bit drier and absorbs a lot of water. (You normally need to add some more liquid to compensate for the difference.) It also has a different consistency than wheat flour so it’s normal for the texture to change when using it.
It’s a better idea to experiment with only substituting a small percentage of the flour in a recipe to reduce your flour intake. (Or look for recipes that already use coconut flour.)
Video
Homemade Coconut Milk (and Flour)
Instructions
If using shredded coconut
- Soak the shredded coconut in the water for around 10 minutes. You can use the blender jar for this step as we'll be using that next.
If using a fresh coconut
- Open the coconut and remove the coconut "meat" from the shell. Break the coconut into pieces and add it to the blender with the water. (Remove the brown skin with a vegetable peeler if you want to make coconut flour with the remaining pulp.)
Making the coconut milk
- Blend the coconut and water mixture in a blender for a minute or two. The longer you blend, the more you'll release the fats and flavor from the coconut.
- Meanwhile, prepare a cheesecloth or white cotton towel and a bowl by lining the bowl with the cloth.
- Pour the mixture into the cloth lined bowl and strain out the liquid from the pulp. This can be done by twisting the top of the cloth (so the pulp doesn't escape) and wringing the liquid into the bowl below.
- The liquid that you squeeze from the pulp is your coconut milk. You can use it right away, store it in the fridge for a couple of days, or freeze it in ice cube trays for easy future dispensing.
Make Coconut Flour
- If you want to make coconut flour, don't throw away the remaining coconut pulp. Instead, spread it out in a thin layer on a baking sheet lined with parchment paper.
- Bake on low heat until it feels completely dry. (If not completely dry, it won't keep well and will grow mold.)
- Grind in a food processor until fine. You can follow up with a coffee grinder to get a finer flour if your food processor or blender doesn't get it as fine as you'd like.
Notes
Using coconut milk
When storing homemade coconut milk in the fridge, it normally separates into a thick layer that floats on a thin, watery layer. Before using, shake it or stir it well. (You may need to slightly heat it first if the top layer has hardened.) Note that homemade coconut milk can’t be used successfully in all recipes that call for canned coconut milk. That is because some recipes, like coconut whipped cream, take advantage of the thickeners and stabilizers generally found in canned coconut milk.Flavoring coconut milk
Optionally add a dash of salt and/or some sweetener to add some flavor to your homemade coconut milk. (Some people also like to add a dash of homemade vanilla extract!)Coconut flour notes
Remove as much of the fat from the coconut pulp before drying it to make flour. This can be done by making a new batch of coconut milk with the same pulp using hot or very warm water. (Keep in mind that subsequent batches of coconut milk will normally be thinner than the first batch. Thinner coconut milk can be added to flavor teas and/or soups or other recipes.) It’s very unlikely that you’ll be able to grind your homemade coconut flour as finely as commercial varieties. In most recipes, though, I haven’t found it to be a problem. It may vary by the recipe, though.This post was originally published June 30, 2013. It included the recipe for how to make coconut butter. Because of the caused confusion, I separated the coconut butter recipe into a new post. I also updated this post with clearer instructions, new photos, and video in June of 2021.


Is there a way to thicken it a little ? Maybe using agar agar or something else
Hi Rebecca,
The easiest way to make thicker coconut milk is to simply use more coconut and less water when blending. That will naturally give you a richer, creamier result.
If you want to thicken it after making it, you could experiment with small amounts of tapioca starch, arrowroot starch, or a gum like xanthan gum, which are sometimes used in commercial coconut milks. Just keep in mind that those will change the texture a bit and can make it feel slightly more gel-like.
If you’re mainly looking for something closer to coconut cream, though, adjusting the coconut-to-water ratio usually works best.
Thank you for this
how can I make the mil from fresh coconut , any recipe?
also how can I make plain coconut yogurt?
thank you
Hi Michelle,
Yes, of course.
I have made it with fresh coconut. It’s basically just the same, but you don’t need to soak the coconut in water to rehydrate it first. Just cut the coconut into chunks and add a couple of cups of water and blend the water with the coconut. Strain in the same way. (It’s actually better with fresh coconut, I think.) 😉
Thanks for this! Although I dont use a blender but just grind it from the farmers market and mix it with hot water at home and extract the milk from hand.
Hi Richard,
That sounds delicious!
I’ve been making these from scratch from fresh coconuts lately too. I’ve been meaning to update this post with the different ways to do it and separate out the coconut butter into a separate post. Having them together has confused some people.
I’ll also add video. 😉
My coconut pulp is still oily and I even put it back in the oven to dry more. Is it supposed to be a little oily than other flours?
Hi Michaela,
If it was still oily, you probably could have gotten more coconut milk out of it.
You may want to process the grated coconut a couple of times with the water to remove as much oil as possible first. It should then be much easier to grind too.