

DIY wool dryer balls: how to make and use them
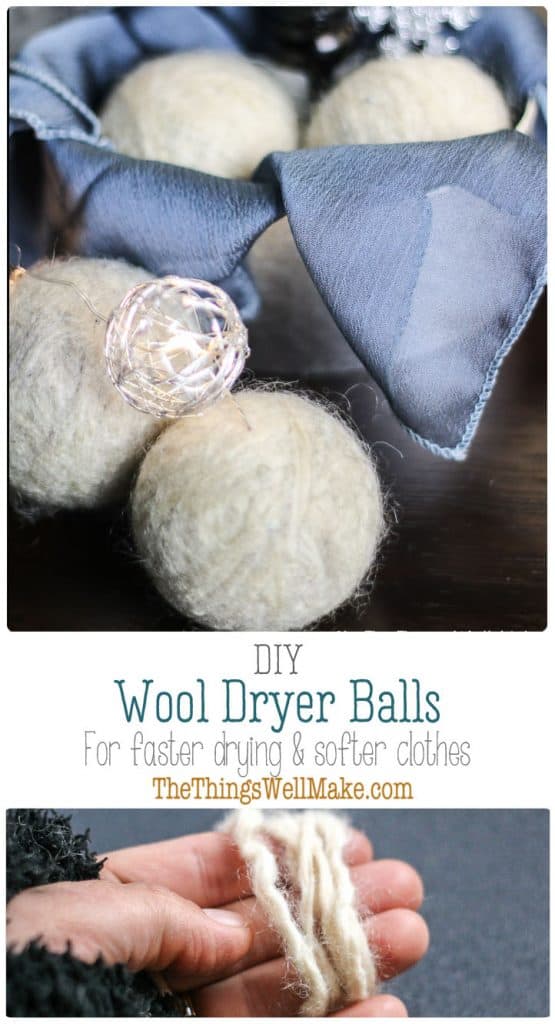
Learn how to make DIY wool dryer balls. They’re a reusable alternative to dryer sheets and may help soften laundry, separate clothes, and reduce drying time.
I’ll be honest… I don’t love line-drying clothes. I do hang certain things to dry when it makes sense, but some things, like towels, can end up feeling a bit stiff afterward. So while I use the clothesline sometimes, I still use my dryer pretty regularly.
I also try to avoid dryer sheets and fabric softeners. The strong artificial scents really bother me, and I’ve never loved the idea of adding something extra to my laundry that doesn’t really need to be there. (If you’re curious, I’ve shared what I use instead in my post on natural fabric softeners.)
That’s what led me to try wool dryer balls. They’re a simple, reusable alternative that can help soften clothes, keep everything from clumping together in the dryer, and may even help things dry a bit faster.
And, of course, once I realized what they were… I figured I could just make them myself. 😊
What are wool dryer balls?
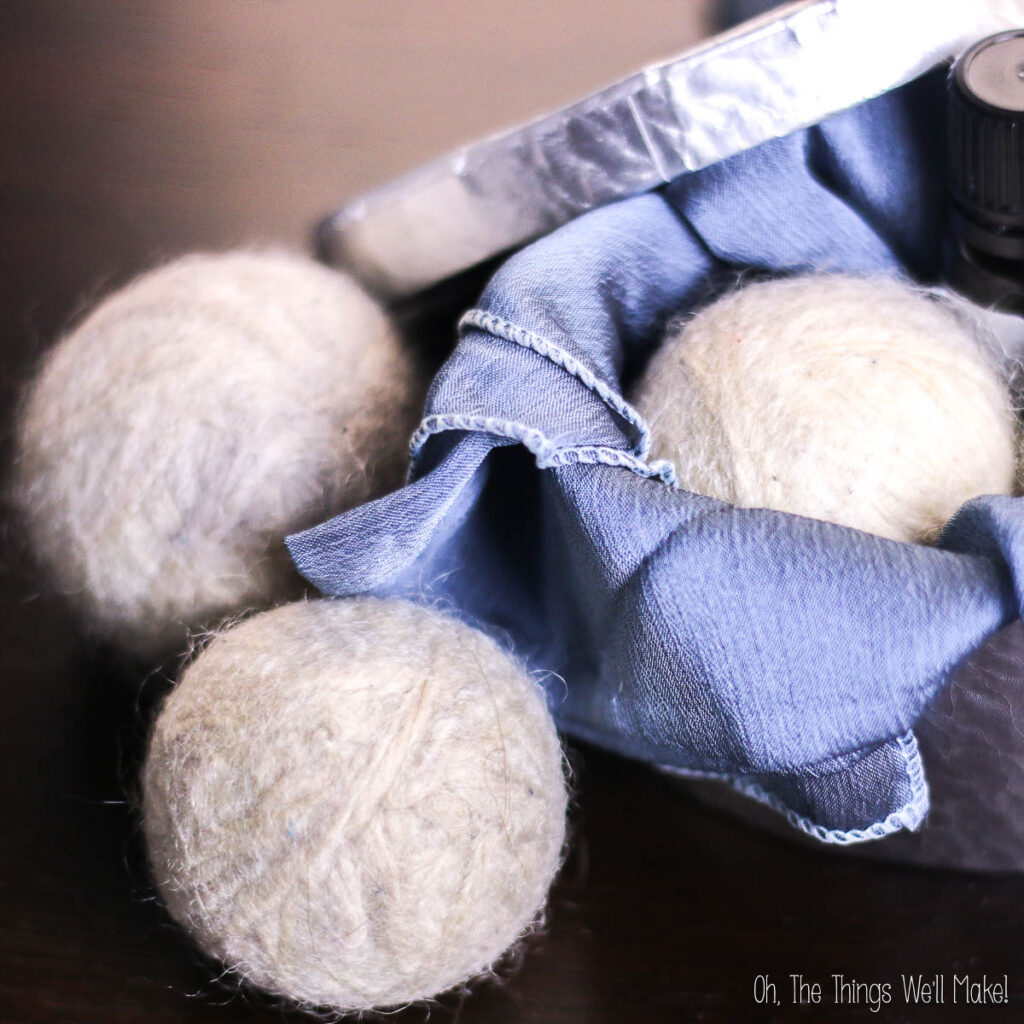
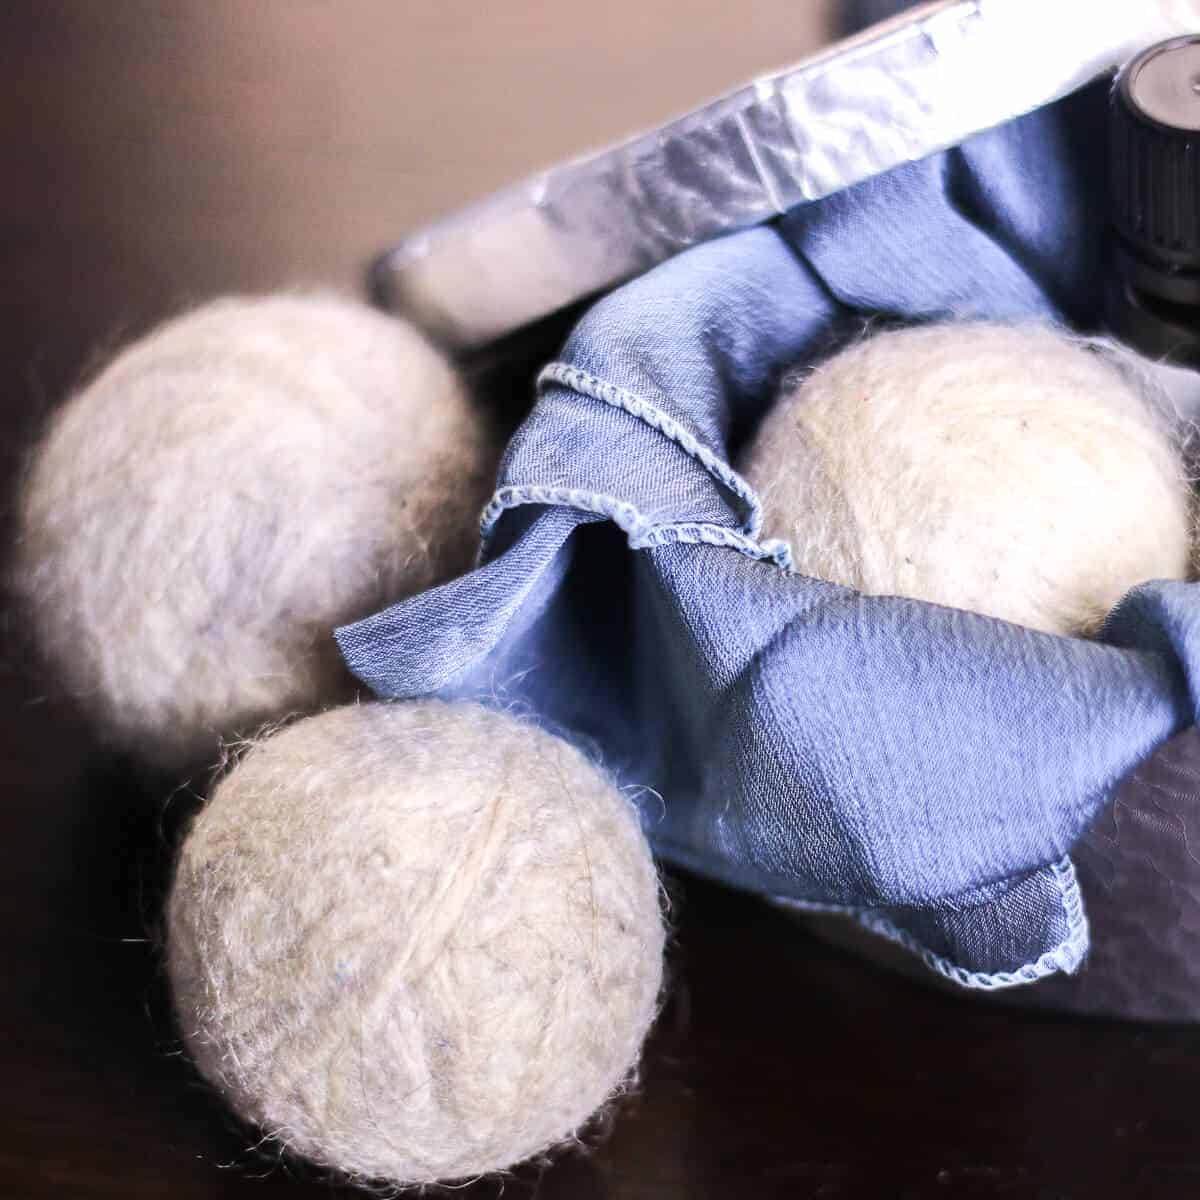
Wool dryer balls are simply balls of felted wool that you toss into the dryer with your laundry.
They’re meant to replace disposable dryer sheets and liquid fabric softeners, but they work in a very different way. Instead of coating your clothes, they move around in the dryer with your laundry, helping to separate items and improve airflow.
Because they’re made from natural wool, they can also absorb a bit of moisture as your clothes dry, which may help speed things up slightly.
They’re reusable, last a long time, and don’t leave behind any fragrance unless you choose to add one.
Do wool dryer balls actually work?
You’ll see a lot of claims about wool dryer balls. Some people say they make clothes softer, reduce static, and even shorten drying time.
I haven’t really tested any of that in a super precise way, but I can share what I’ve noticed using them over time.
- They do seem to help keep laundry from clumping together, especially with things like sheets or larger loads. That alone can help things dry more evenly.
- As for softness, I think they help a bit. I honestly haven’t used dryer sheets in years, so I can’t really compare anymore, but my clothes feel soft enough for me without adding anything else.
- Static is a bit harder for me to judge. I don’t usually have issues with it, but I also don’t dry a lot of synthetic fabrics, and we have a fairly humid climate here. So that probably plays a role.
- As for drying time, I haven’t timed it, but since the balls help separate the clothes, it makes sense that they could help things dry a little faster.
So while I can’t say exactly how much of a difference they make in each area, they’ve worked well enough for me that I’ve kept using them.
These days, I keep my laundry routine pretty simple with wool dryer balls and a detergent that works well in hard water.
Can you add essential oils to wool dryer balls?
You’ll often see people suggest adding a few drops of essential oil to wool dryer balls to lightly scent your laundry. I still do this sometimes with lavender, and it gives a subtle, natural fragrance.
That said, it’s worth being a little careful.
Dryers use heat, and essential oils are concentrated and flammable. The risk is small when using just a drop or two, but I try not to overdo it.
If you want to be extra cautious, you can add the oil to the dryer balls and let them sit for a bit before using them, or add scent after drying and run a short no-heat cycle.
Another option is to use lavender sachets in your closet or drawers instead.
What kind of wool to use
For this project, it’s important to use 100% wool.
Wool is what allows the balls to felt together into a dense, solid shape that will hold up in the washer and dryer. If you use acrylic or other synthetic yarns, they won’t felt properly and the balls can come apart over time.
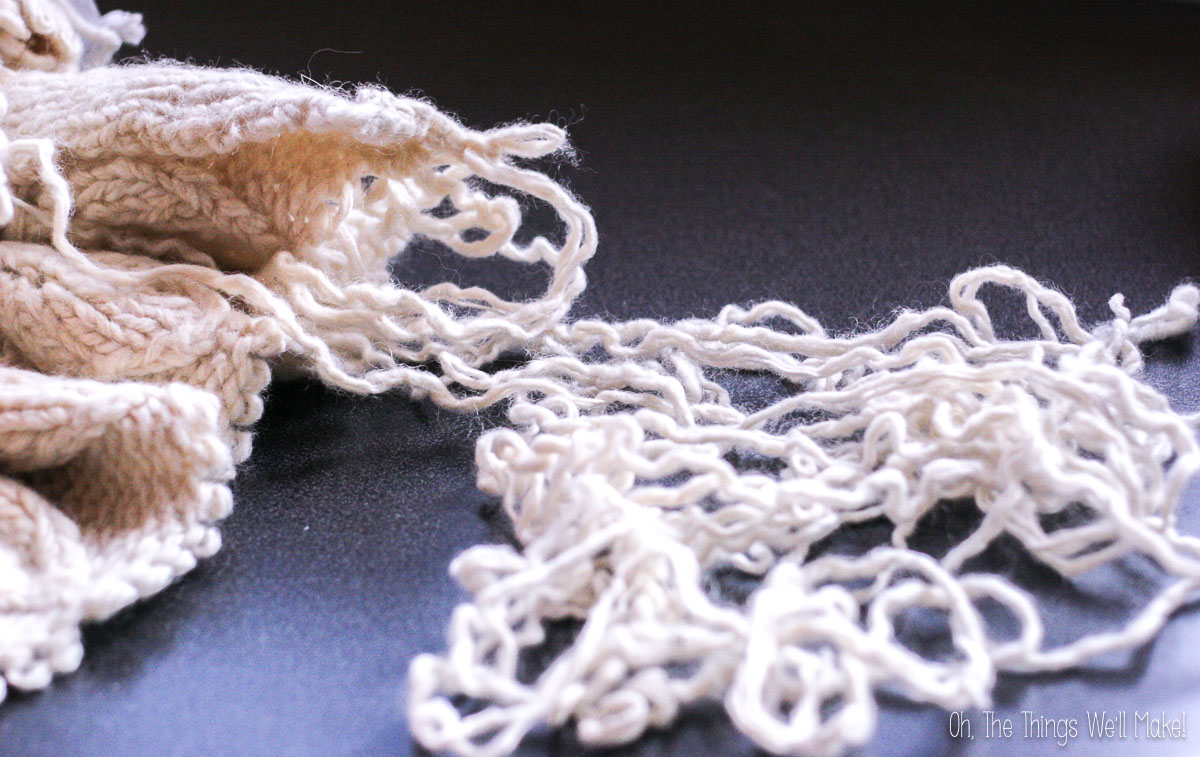
You can use wool yarn, roving wool, or even unravel an old wool sweater like I did. If you go the sweater route, just make sure it’s actually wool and not a blend.
I also like to stick with light or neutral colors, just to avoid any chance of dye transferring onto clothes, especially when the balls are new.
How to make wool dryer balls
Making wool dryer balls is really simple. You’re basically winding wool into a tight ball and then felting it so it holds its shape in the washer and dryer.
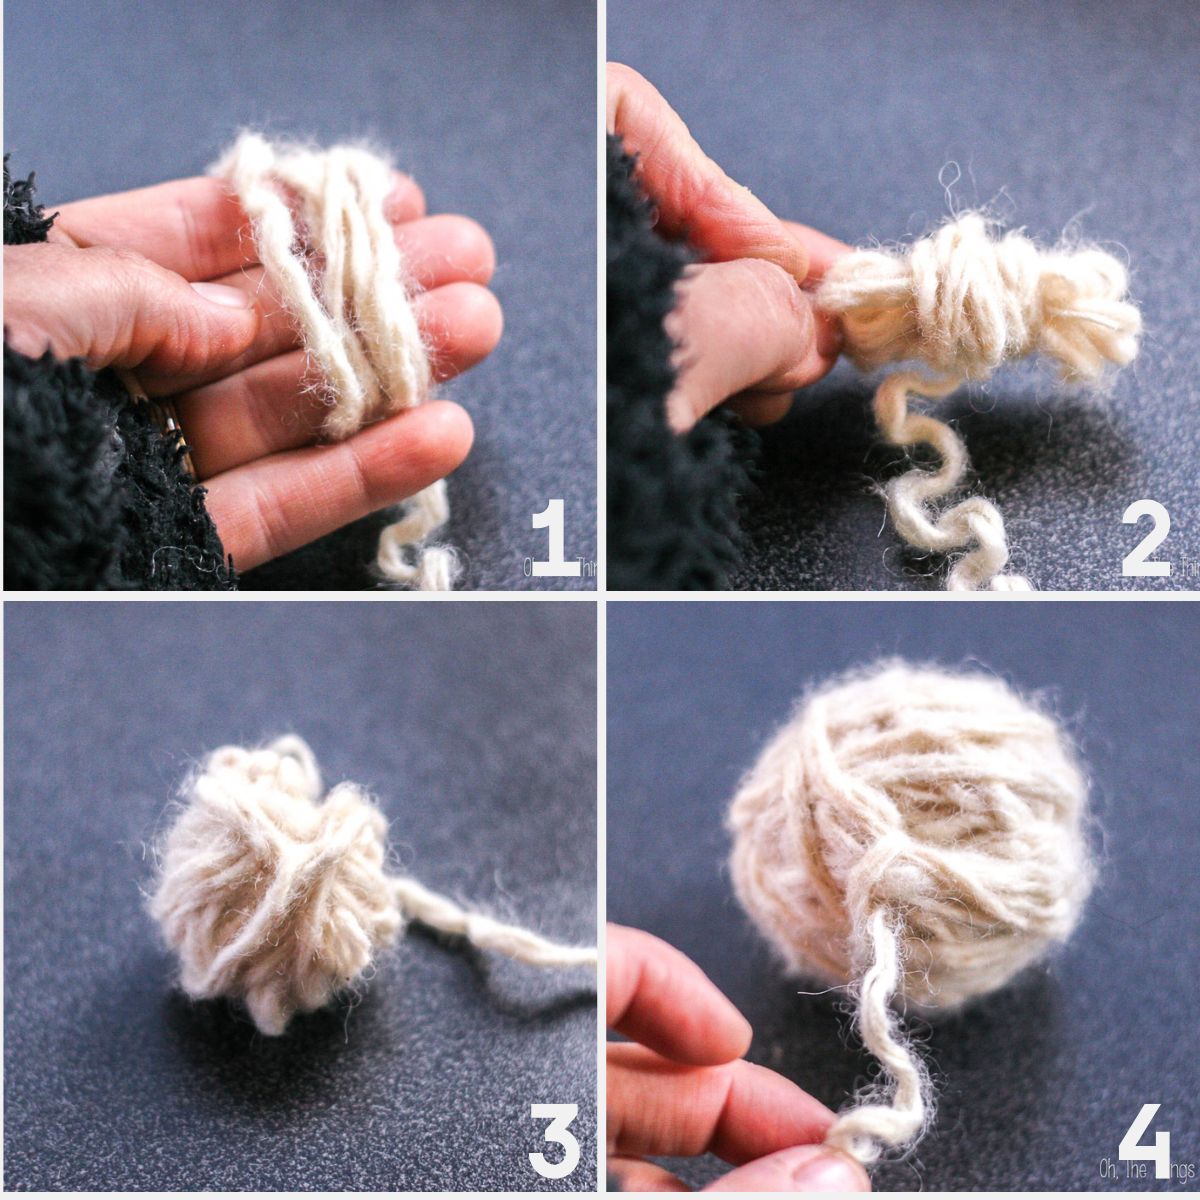
1. Start by wrapping the yarn
Wrap the wool yarn around a few of your fingers several times to create a small bundle.
2. Remove the loops and wrap in the opposite direction
Slide the loops off your fingers and begin wrapping the yarn around them in the opposite direction. This helps start forming a more rounded shape.
3. Keep wrapping to form a ball
Continue wrapping the yarn around the bundle, changing directions as you go, until you form a firm, round ball.
4. Aim for the right size
Keep wrapping until the ball is about 2–3 inches (around 5–7 cm) in diameter. Smaller balls can work, but larger ones tend to be more effective in the dryer.
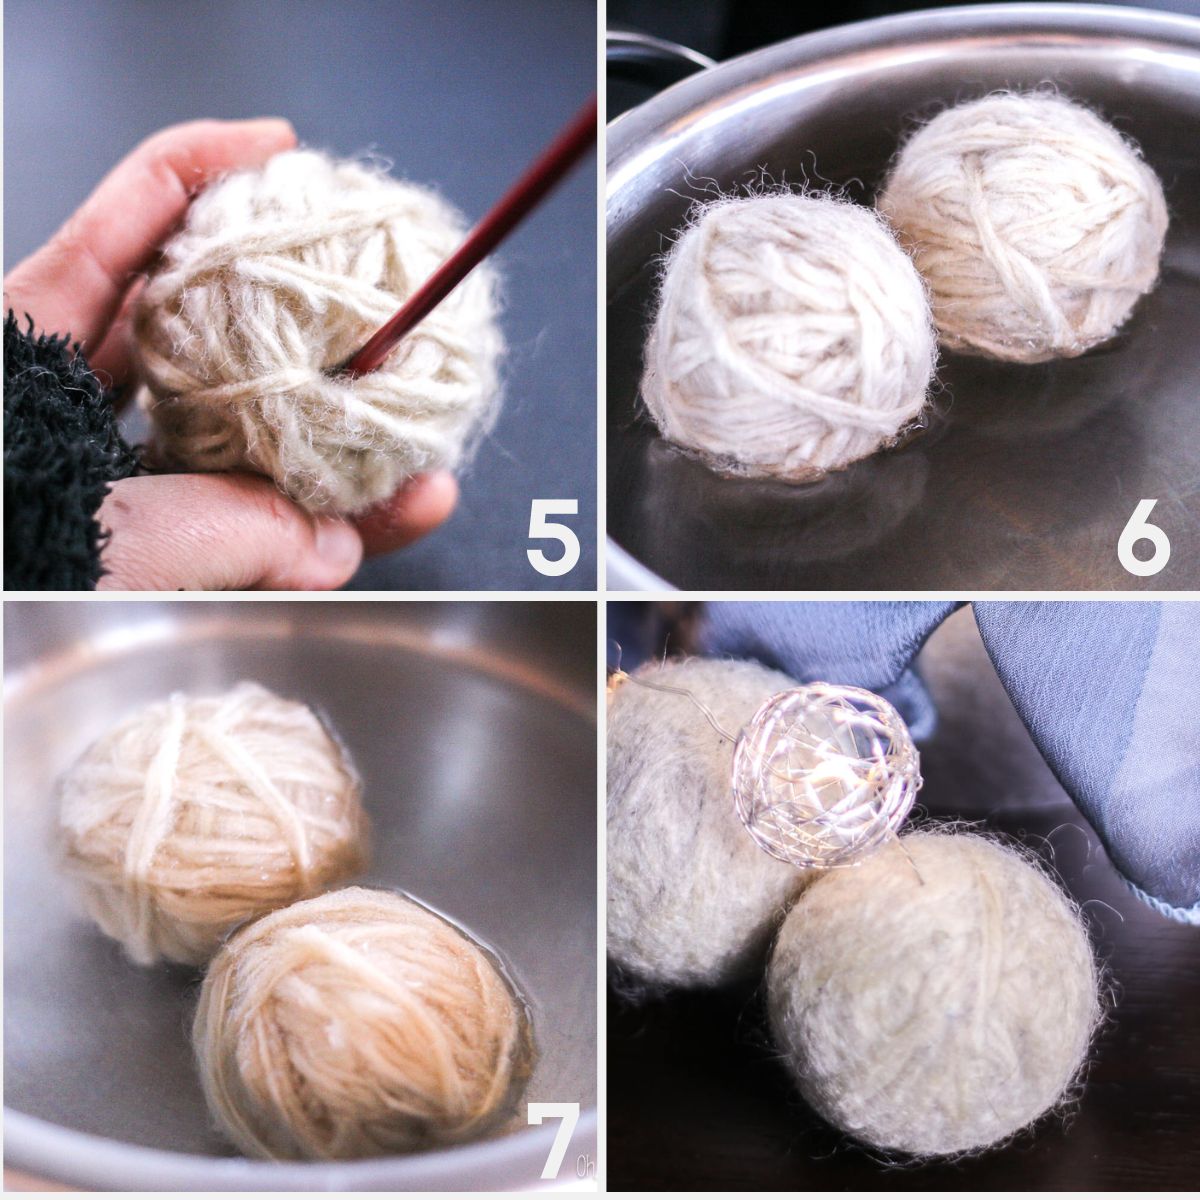
5. Tuck in the loose end
Cut the yarn and tuck the loose end into the center of the ball. You can use a crochet hook or just push it in with your fingers.
6. Felt the wool balls
To turn the yarn into a solid, durable ball, you’ll need to felt it.
Start by boiling the balls in water for a while to begin the felting process.
After that, you can run them through a hot wash and dry cycle to finish felting them. If you’re worried about them coming loose, you can place them in an old sock or nylon for those first cycles.
7. Repeat the process if needed
If the balls still feel loose or look like they might come apart, you can repeat the process.
Boil them again for a while, then run them through a hot wash and dry cycle to help them felt together more tightly.
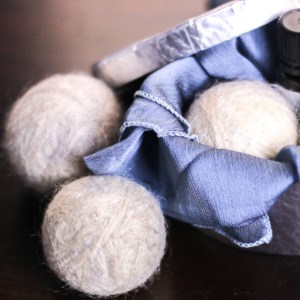
Once they feel firm and hold their shape well, they’re ready to use.
How to use wool dryer balls
Once your dryer balls are fully felted, you can use them right away.
Just toss them into the dryer with your laundry. I usually use around 4–6 balls per load, depending on how big the load is.
They work best when they have room to move around, so try not to overload the dryer. As they bounce around, they help separate the clothes and keep things from clumping together.
You can leave them in the dryer between loads or store them in the laundry area so they’re always ready to go.
If you like, you can add a drop or two of essential oil to one of the balls for a bit of scent (just don’t overdo it).
FAQs
I usually use around 4–6 balls per load, depending on the size. Larger loads benefit from more balls since they help separate the clothes.
They last a long time. I’ve used mine for years. Over time, they’ll get more compact and felted, but that doesn’t affect how they work.
Sometimes, but not always. It depends a lot on what you’re drying and your environment. Synthetic fabrics and very dry conditions tend to create more static, and dryer balls alone don’t always solve that.
Yes, and I still do this sometimes with lavender. Just use a small amount. Since dryers use heat, it’s best not to overdo it.
It usually takes one or two hot wash and dry cycles for them to felt well. If they still feel loose, you can run them through another cycle.
Some people use things like tennis balls, but they’re not quite the same. Wool balls are quieter, made from natural fibers, and don’t have the same rubbery smell.
Not really. They don’t usually get dirty, but if you ever want to freshen them up, you can toss them in with a load of laundry.
DIY Wool Dryer Balls
Equipment
- 1 crochet hook or blunt needle optional
Materials
- 100% wool yarn (or wool from an old sweater)
- Old nylons tights, or socks
Instructions
- Wrap the wool yarn around a few fingers several times to form a small bundle.
- Slide the loops off your fingers and begin wrapping the yarn around them in the opposite direction.
- Continue wrapping the yarn, changing directions as needed, until you form a firm, round ball.
- Keep wrapping until the ball is about 2–3 inches (5–7 cm) in diameter.
- Cut the yarn and tuck the loose end into the center of the ball. (You can use a crochet hook or blunt needle.)
- Place the ball into an old sock or nylon and tie it off.
- Repeat with additional balls, tying knots between them if using one long stocking.
- Wash the balls in hot water.
- Dry them on high heat.
- Repeat the wash and dry cycle once or twice more, until the balls are firm and hold their shape.
Notes
Originally published December 1, 2014. Updated in April 2026 with revised instructions and new collages to make the steps easier to follow.


tennis balls work also.
Thanks for the tip!
How long did you boil them for?
Thanks
Hi Kim,
To be honest, I made them so long ago that I don’t really remember.
I don’t think you really have to boil them for very long at all. Maybe 5-10 minutes?
They will be going through the dryer, and that will help felt them together.
Especially if you help hold the balls together in an old nylon stocking or tights (I’d put a few in the same stocking, putting knots between each ball so they don’t touch each other), you should be fine with just boiling them for a little while. The important thing is that they get wet and subjected to heat for a long time, which they will in the dryer, whether you boil them or not. The boiling just helps move the process along more quickly, and ensures that the yarn already begins to stick to itself somewhat before you throw it in the dryer.
I hope that helps!