

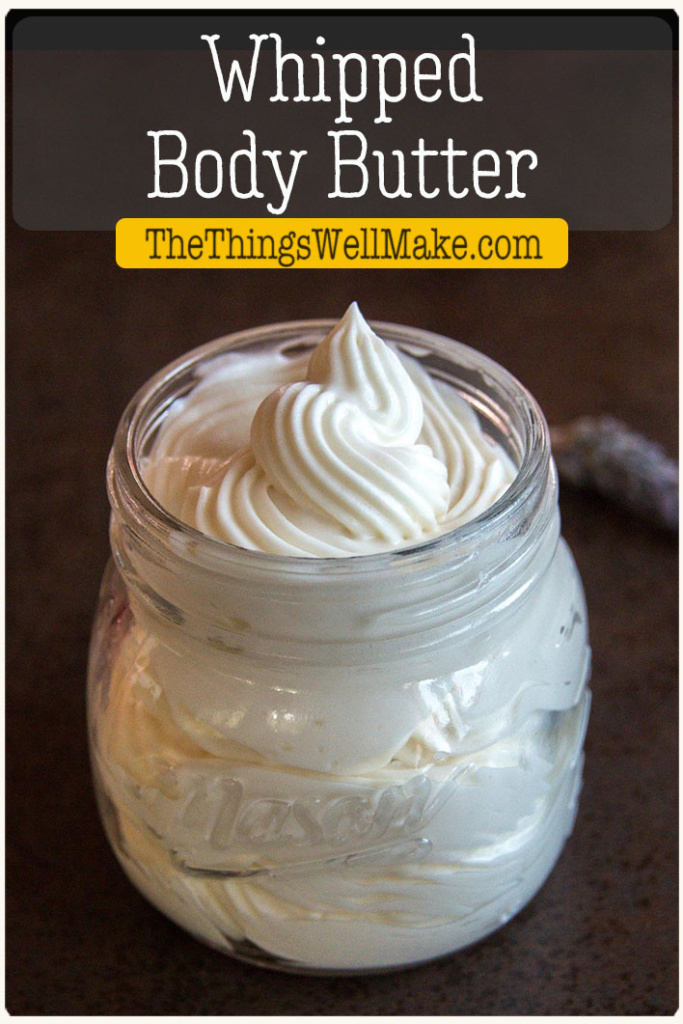
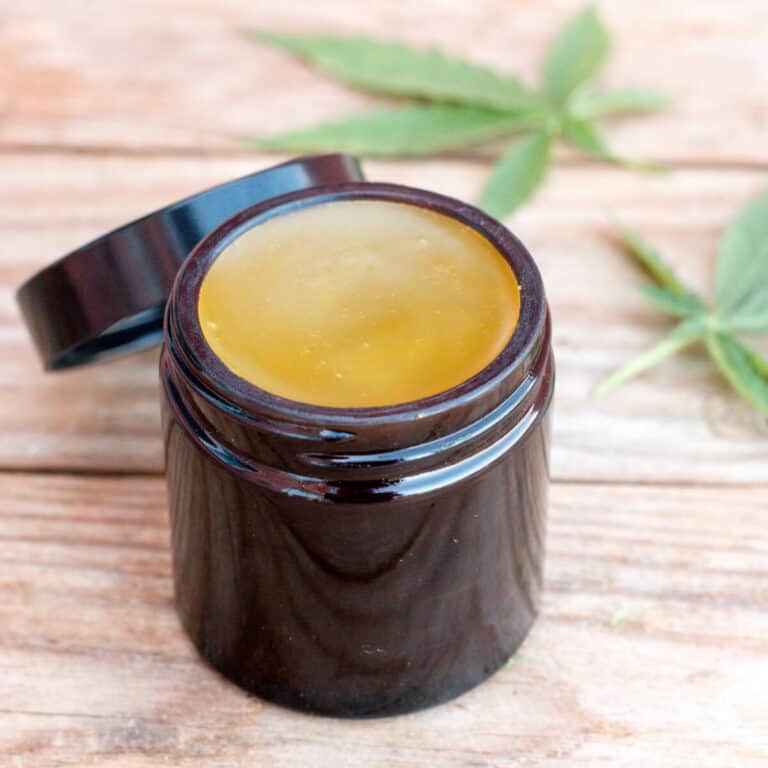
Whipped Body Butter Recipe
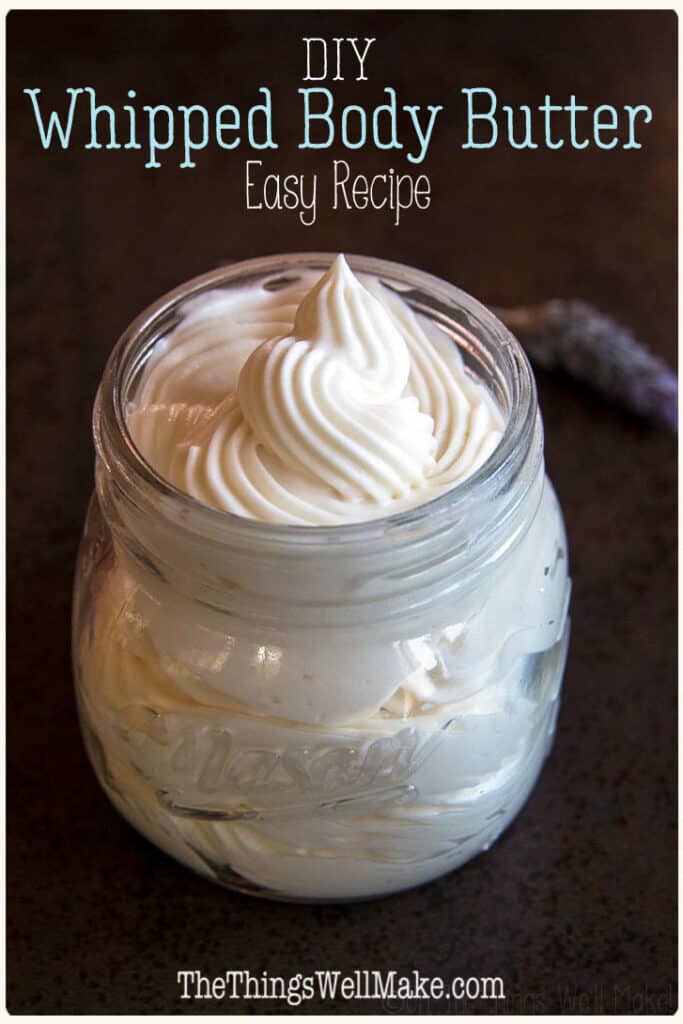
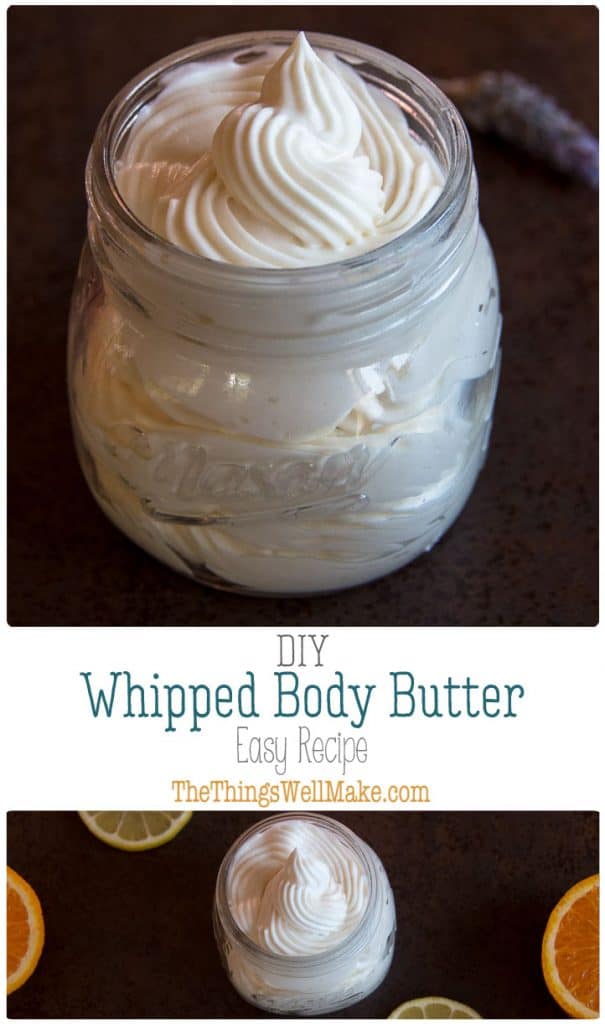
Nourish your skin with a whipped body butter that’s simple to make. If you want to make your own natural products, but aren’t quite ready for emulsions and preservatives, this recipe is a perfect starter recipe.
For many years, I was hesitant to share a recipe on my blog for how to make body butter. Don’t get me wrong, many people absolutely love them. I, on the other hand, rarely make them myself, preferring light homemade lotions that provide lots of hydration.
With time, though, more people asked me for simple recipes that don’t require the use of emulsifiers and preservatives. Body butters and lotion bars are perfect for those who are looking to nourish their skin with homemade products that don’t need specialized ingredients.
What is a body butter?
Body butters are generally thick mixtures of oils, butters, and, sometimes, waxes that protect one’s skin from drying.
They are normally anhydrous products, meaning they don’t incorporate any water as a lotion would. Instead, they are completely oil-based. Some emulsified body butters do include water, but to a lesser extent than a lotion.
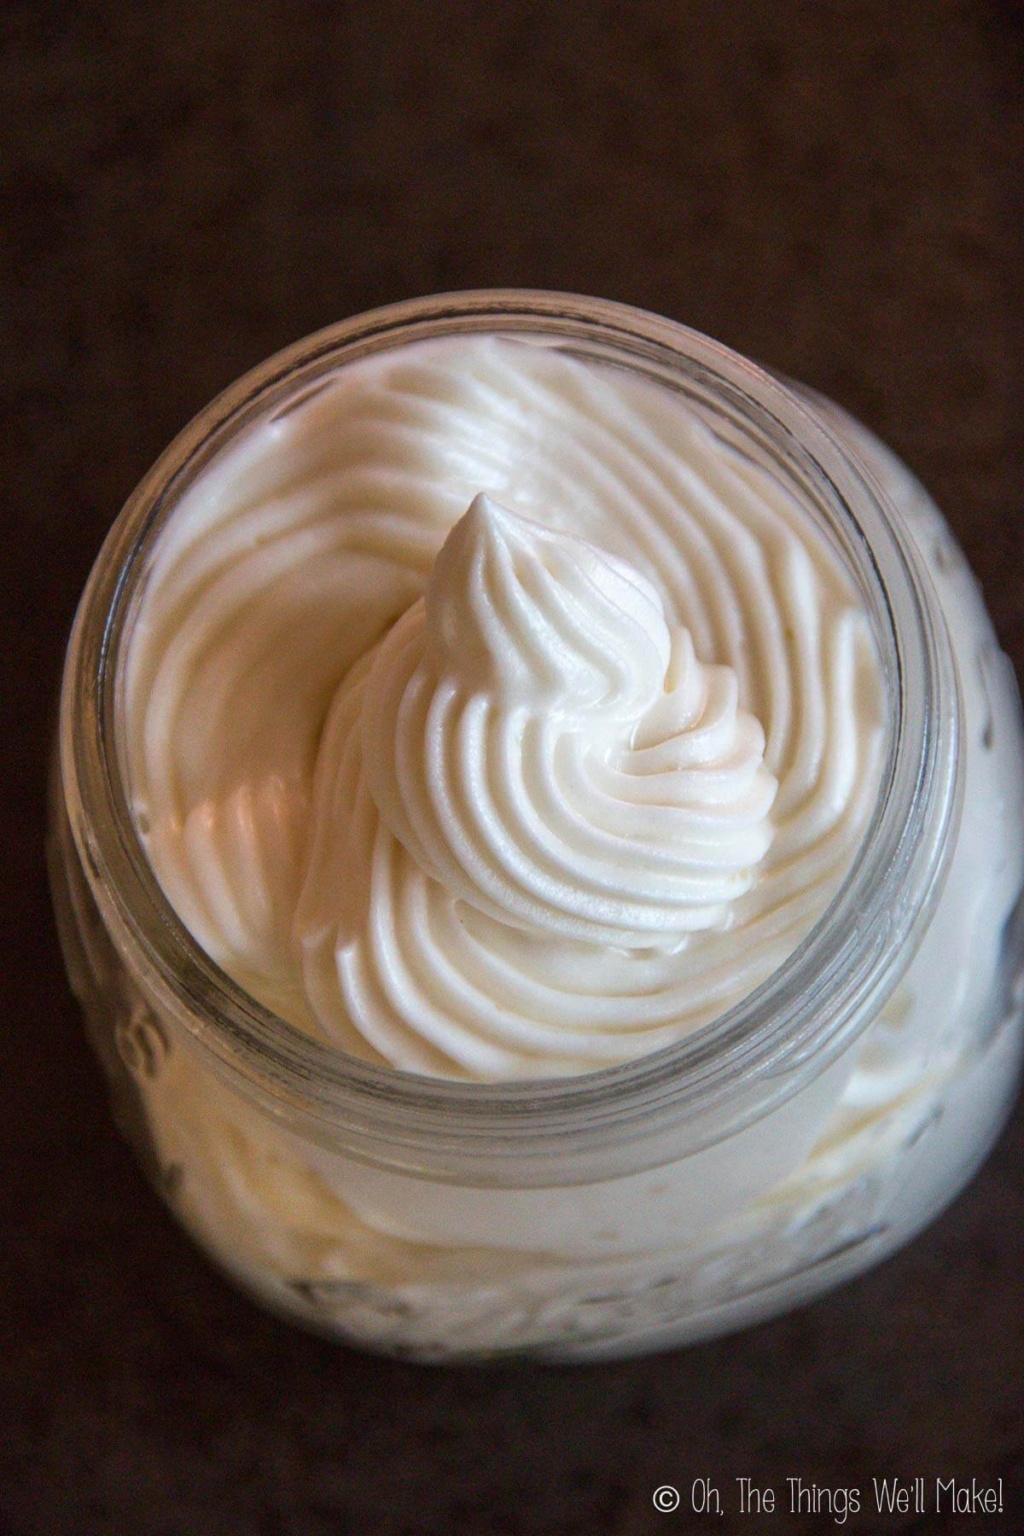
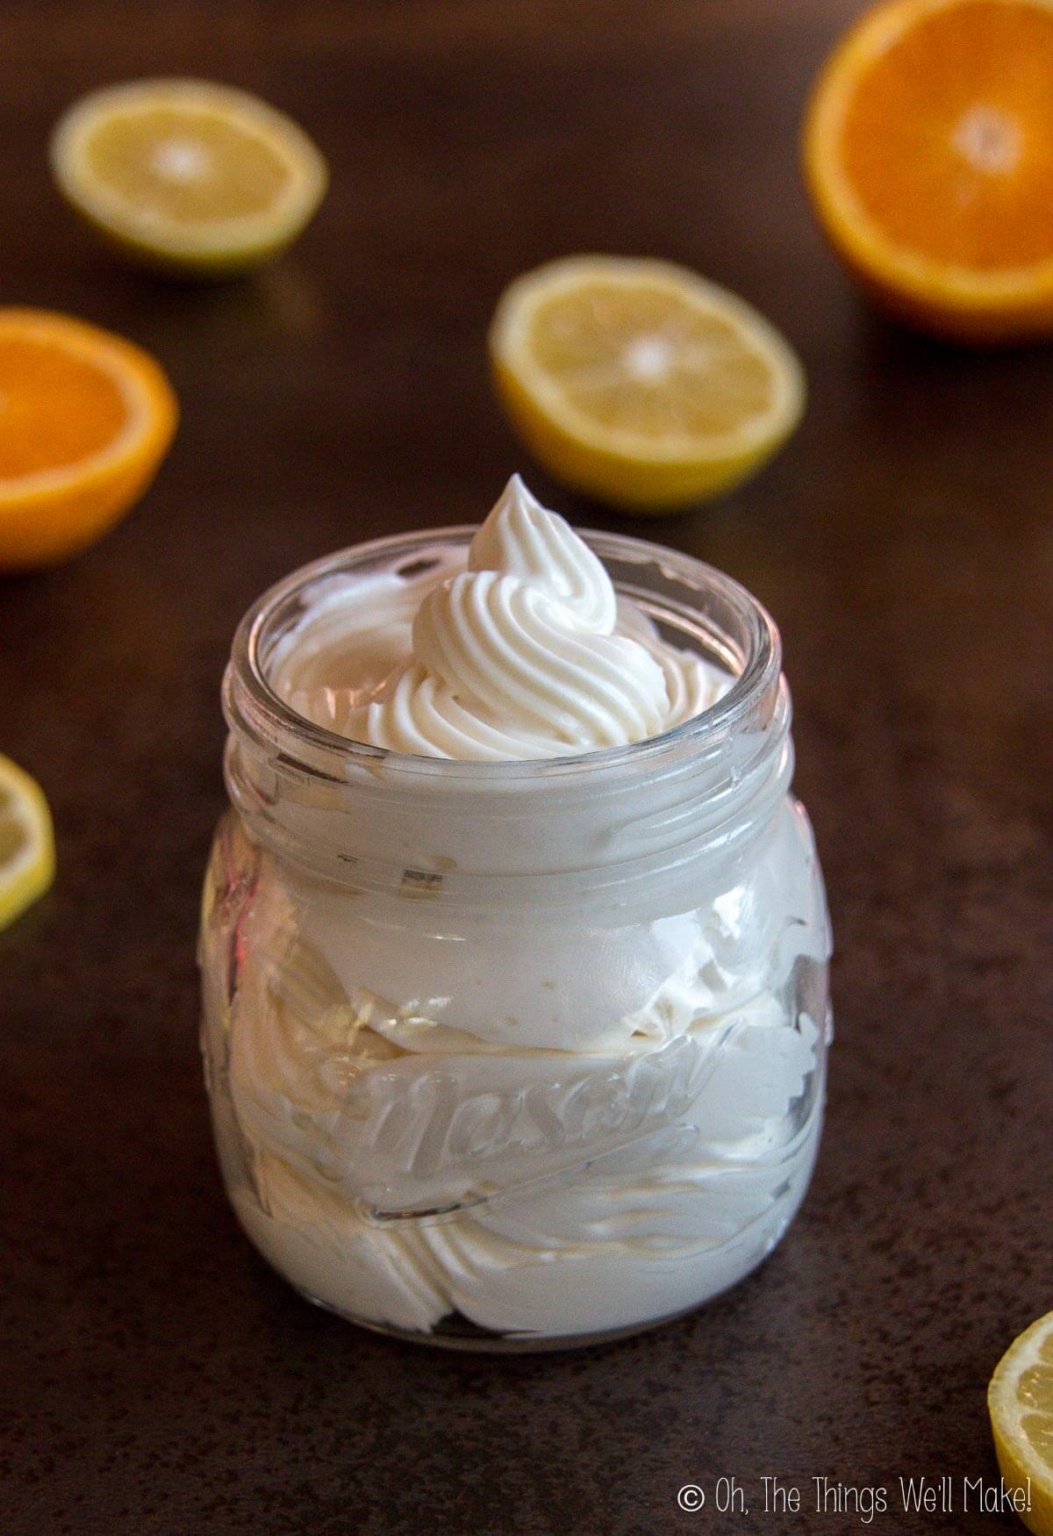
Because they are generally quite thick, they are often whipped to give them a lighter texture, making them easier to apply.
Body butters vs. lotions
While I generally prefer lotions, there are times that a body butter could be the best choice.
The advantages of body butter over a lotion
- Simple ingredients: For those who enjoy making their own homemade cosmetics, body butters are quite popular because of their simplicity. They can be made with few ingredients and don’t need a preservative or an emulsifier. That makes them perfect for beginner MIY-ers (make-it-yourself-ers).
- Protective barrier: Because they are denser than lotions, they are also more occlusive, meaning that they can create a barrier that helps keep moisture from leaving your skin. For the same reason, they have better staying-power on your skin than a lotion.
- Long shelf life: Because they lack water, they aren’t as prone to microbial growth, so they have a longer shelf life.
The disadvantages of using a body butter
- More expensive: Unlike lotions that are composed mainly of water, most body butters are completely made from active ingredients like oils and butters. That makes them more expensive to make.
- Greasiness: Because they are thick and dense, they may feel greasy to some people. There are ways to reduce the greasy feeling and improve their texture, though.
- Not as hydrating: Because they don’t include water, body butters don’t incorporate moisture deep into the skin. You can help resolve that issue by either applying it over wet skin or even applying it over a lotion.
For more information about preservatives and emulsifiers (and when you need to use them), check out my beginner’s guide to natural preservatives and my guide to emulsifiers.
When best to use
Body butters provide a great barrier that prevents moisture from escaping your skin. That makes them ideal for people who live in areas with dry climates.
Those who have very dry skin, or dry skin patches like rough elbows or heels, will probably also prefer the heavier, creamier feel of a body butter for those rough, dry areas.
When I have severely dry and rough hands, which often happens in winter, I like to apply a body butter to them at night time and go to bed wearing cloth gloves. (The gloves help keep the product in place, preventing it from rubbing off onto the sheets.) Overnight, my hands become soft and improve in appearance.
Those with dry, rough feet could consider doing the same thing, using socks to keep the butter in place.
Can you use it on your face?
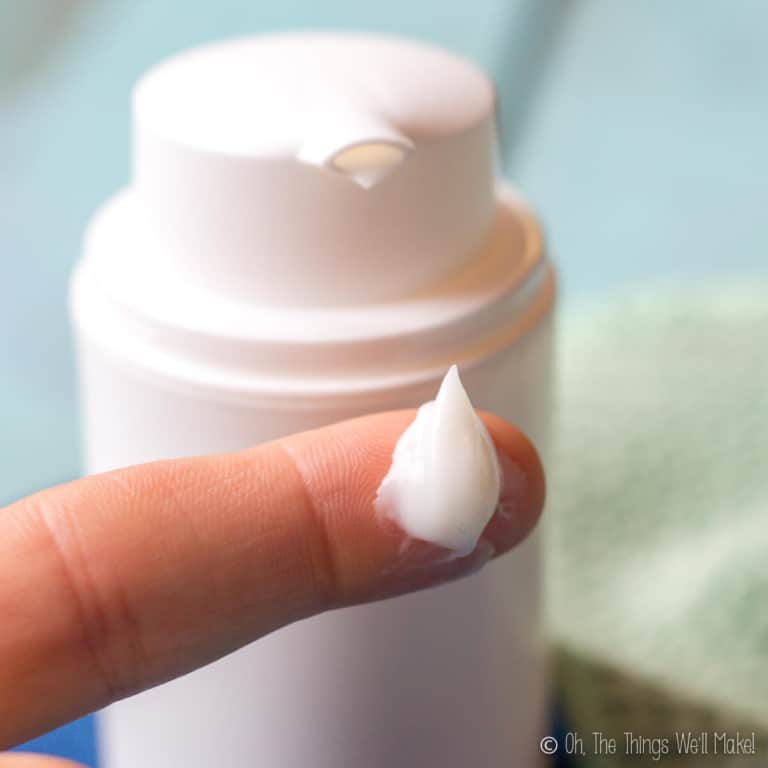
While you can use body butter on your face, most people will find it too heavy for comfortable use there. Because it tends to sit on top of the skin, rather than be absorbed into the skin like a lotion or moisturizer, it is also more prone to leaving your skin looking oily or greasy.
Ingredients
A simple whipped body butter can be made with only a few ingredients that you may already have at home. In fact, you could even just whip up one of the medium-weight butters in a pinch (or whip one with a small amount of oil to lighten it up).
I generally use a combination of a hard butter, a medium-weight butter, and a soft butter or liquid oil. Using a variety of fats allows you to incorporate the beneficial properties of each one.
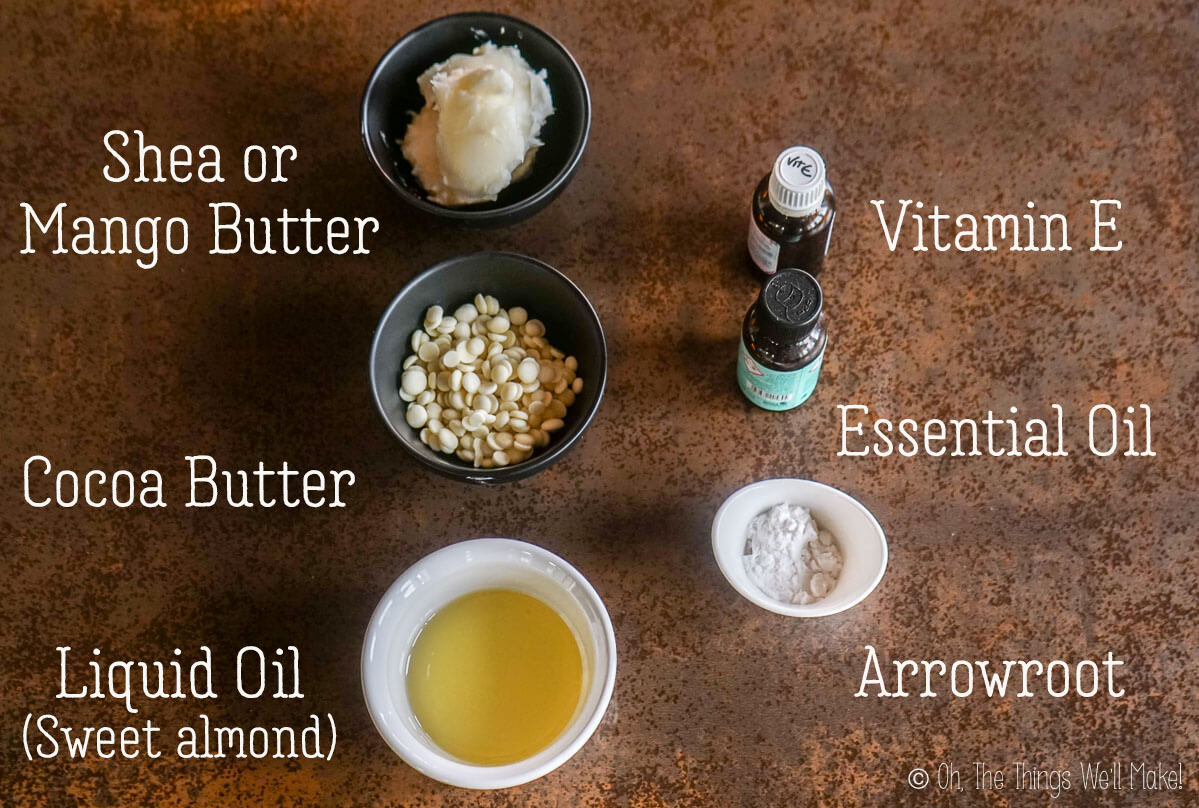
Mango or shea butter
In the recipe below, I chose mango butter as the main ingredient. Mango butter is derived from the seed of the mango fruit and is a medium-weight butter that has a nice feel when applied to the skin. It’s rich in vitamin A and E, both antioxidants that protect against free radical damage. Vitamin A promotes cell turnover while vitamin E protects cells from oxidative stress. Both vitamins promote healthy skin.
If you don’t want to use mango butter, shea butter is another great medium-weight body butter that can be used instead. Shea butter is extracted from the nut of the karite tree. Like mango butter, it contains high levels of vitamin A and E, along with other nutrients such as zinc and iron. It’s easy to find and it whips up really well.
Unrefined shea butter has a strong scent that many people find unpleasant or overwhelming. Choose unrefined if you are bothered by the scent of shea.
Cocoa butter
Cocoa butter comes from cocoa beans. It’s a hard butter that is rich in fatty acids and polyphenols, making it very emollient and protective for your skin. It helps keep your skin soft and supple while improving skin elasticity and reducing wrinkles.
Not only is it a harder butter than shea or mango butter, but it also has a higher melting point. That makes it a good addition for those who live in warmer climates.
Like unrefined shea butter, unrefined cocoa butter has a relatively strong scent that some people find overwhelming. Others love it because it smells like chocolate! If you are concerned, choose refined cocoa butter instead.
Cocoa butter can be substituted with either kokum butter or tucuma butter.
Sweet almond oil
Adding a liquid oil to the body butter helps balance out the hard butter, softening the finished product. You can choose any liquid oil that you happen to have on hand, including coconut oil. (Coconut oil has a soft butter consistency when stored in a cooler environment.)
In the recipe below, I chose sweet almond oil because it’s generally quite easy to find. Sweet almond oil is obtained from pressed almonds. It’s a light oil that is naturally anti-inflammatory and feels wonderful on the skin. It’s also rich in essential fatty acids including linoleic acid and oleic acid. These two fats help maintain moisture balance within our bodies and prevent dry skin.
To reduce the greasy feeling of a homemade body butter, try incorporating one of the so-called “dry oils”. Dry oils are oils like grapseed oil, or rosehip oil that are more rapidly absorbed into the skin.
Other ingredients
Apart from the butters, I added vitamin E, an antioxidant, to help extend the shelf life. I also added some arrowroot starch to reduce the greasy feeling. Essential oils can also be added to add fragrance.
The following cold-pressed oils can cause photosensitivity, meaning that they can make the skin more sensitive to sunlight or ultraviolet (UV) radiation. This increased sensitivity can lead to a greater risk of sunburn, skin irritation, or discoloration when the skin is exposed to sunlight or UV rays after applying or using the essential oil.: (Use distilled instead to avoid issues.)
- Bergamot
- Lemon
- Lime
- Bitter orange
- Grapefruit (Distilled may also cause photosensitivity.)
Apart from the citrus oils, some other oils, like petitgrain, marigold, lemongrass, and verbena, among others, may also cause photosensitivity.
Procedure
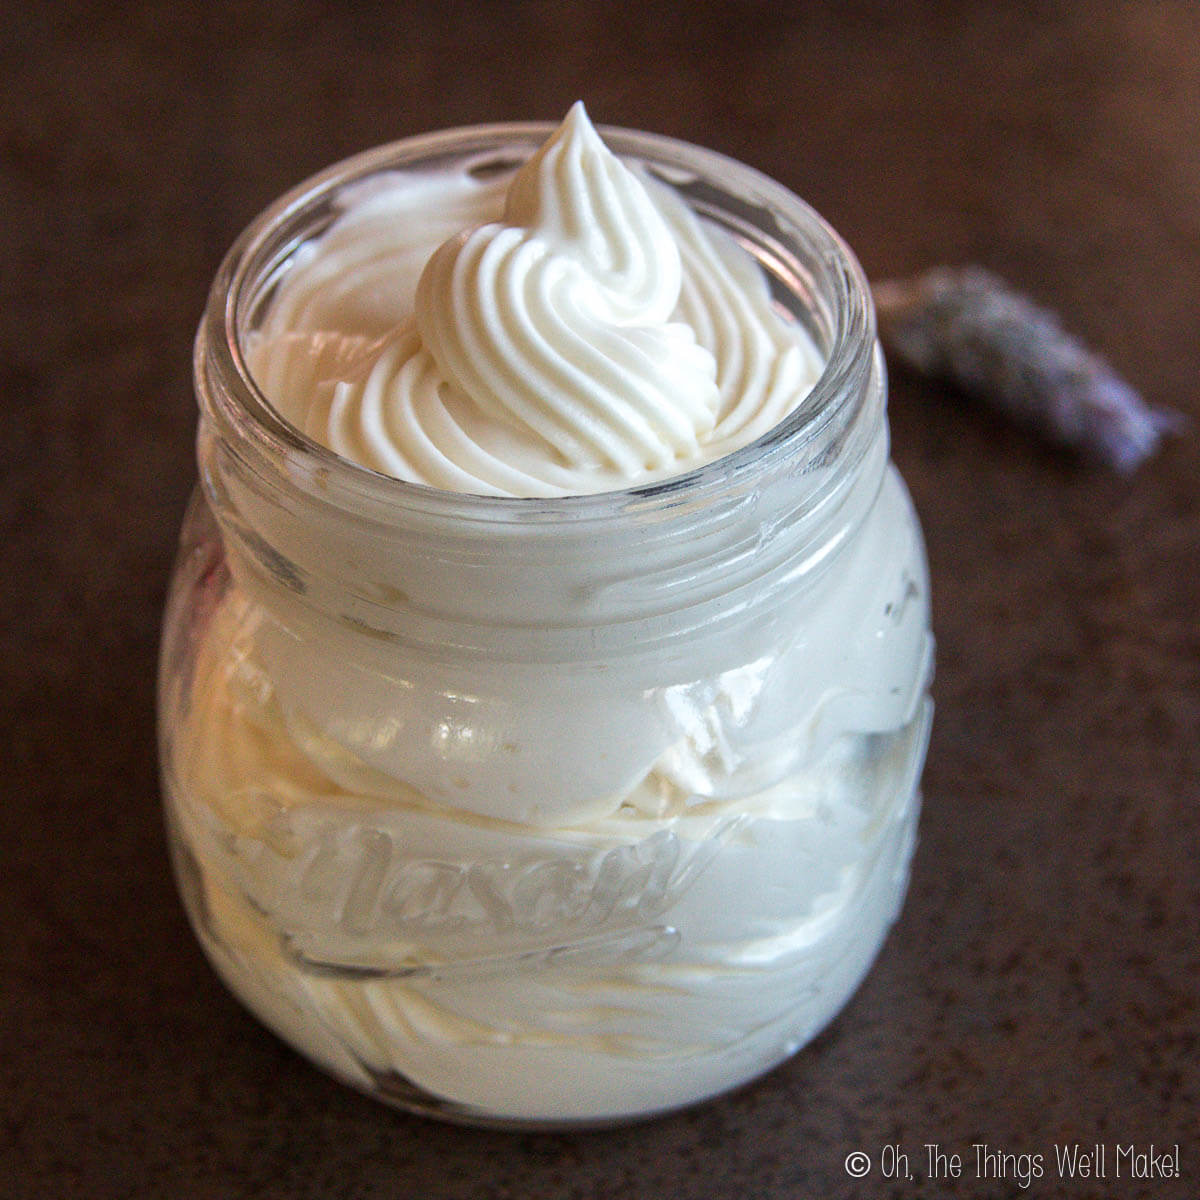
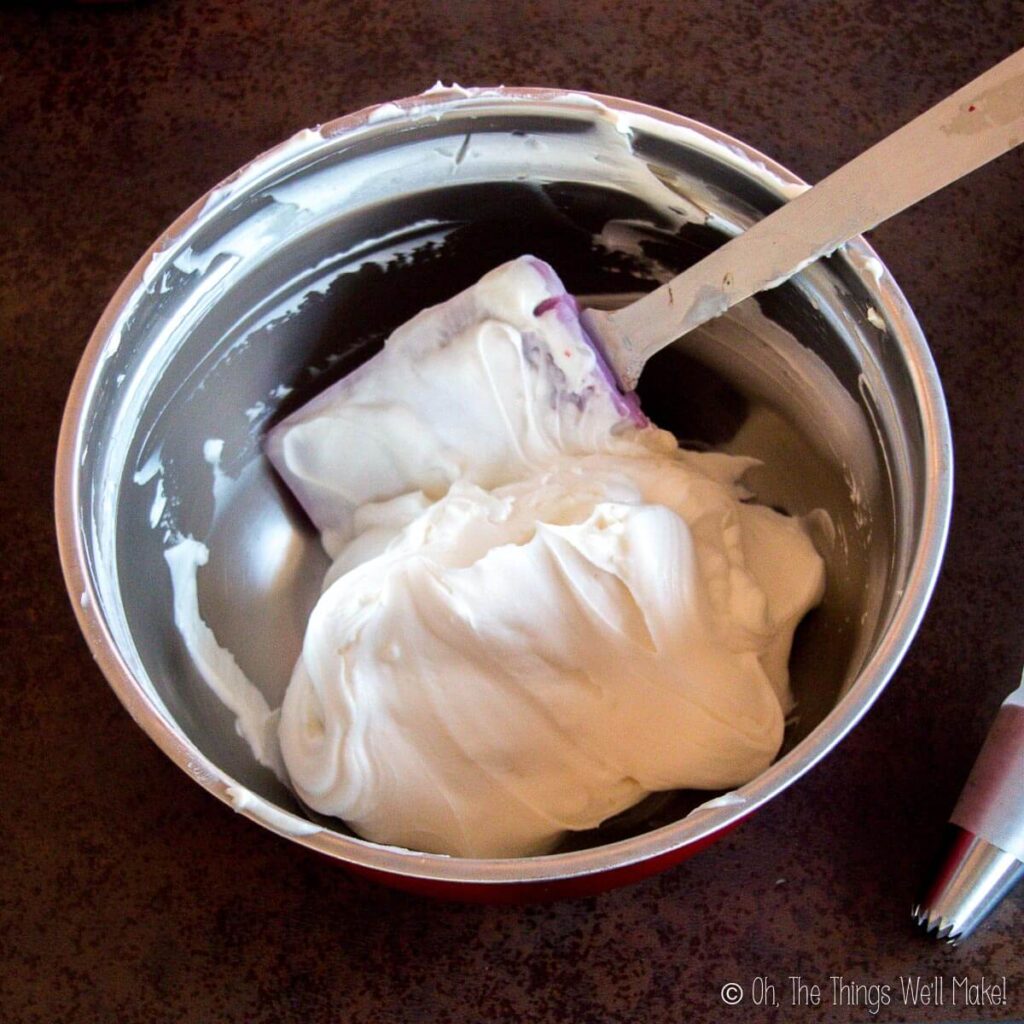
While making a body butter can be as simple as melting all of the butters and oils together and pouring them into a storage container, today I’m going to show you how to make a whipped body butter. By whipping the mixture as it cools, you incorporate air, resulting in a lighter, fluffier product that is easier to apply. Whipped body butters glide on much easier and have a lighter feel.
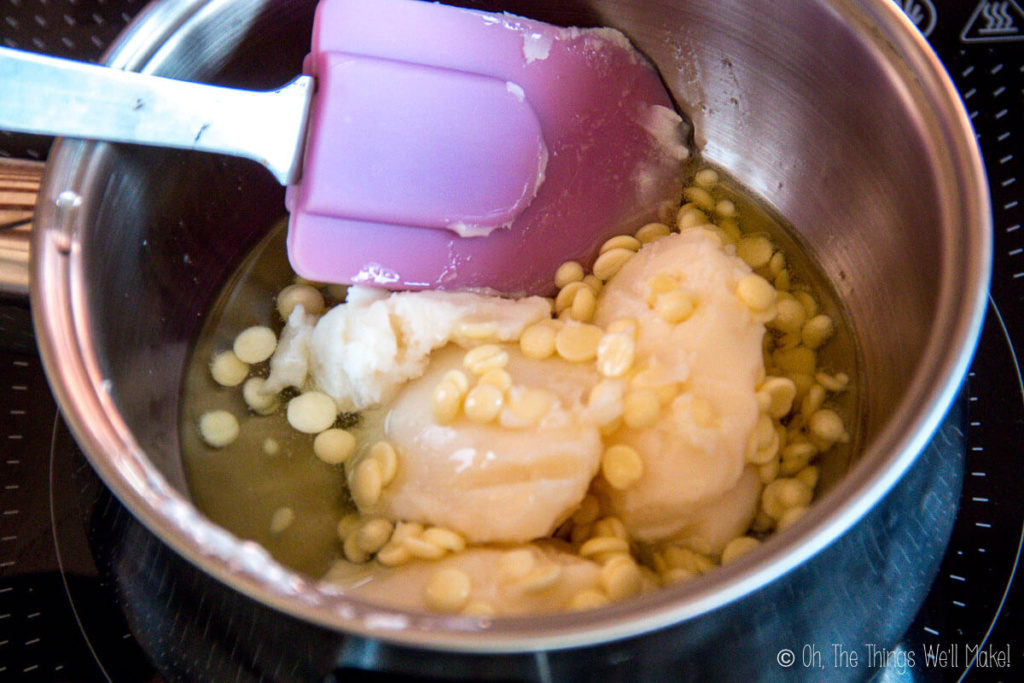
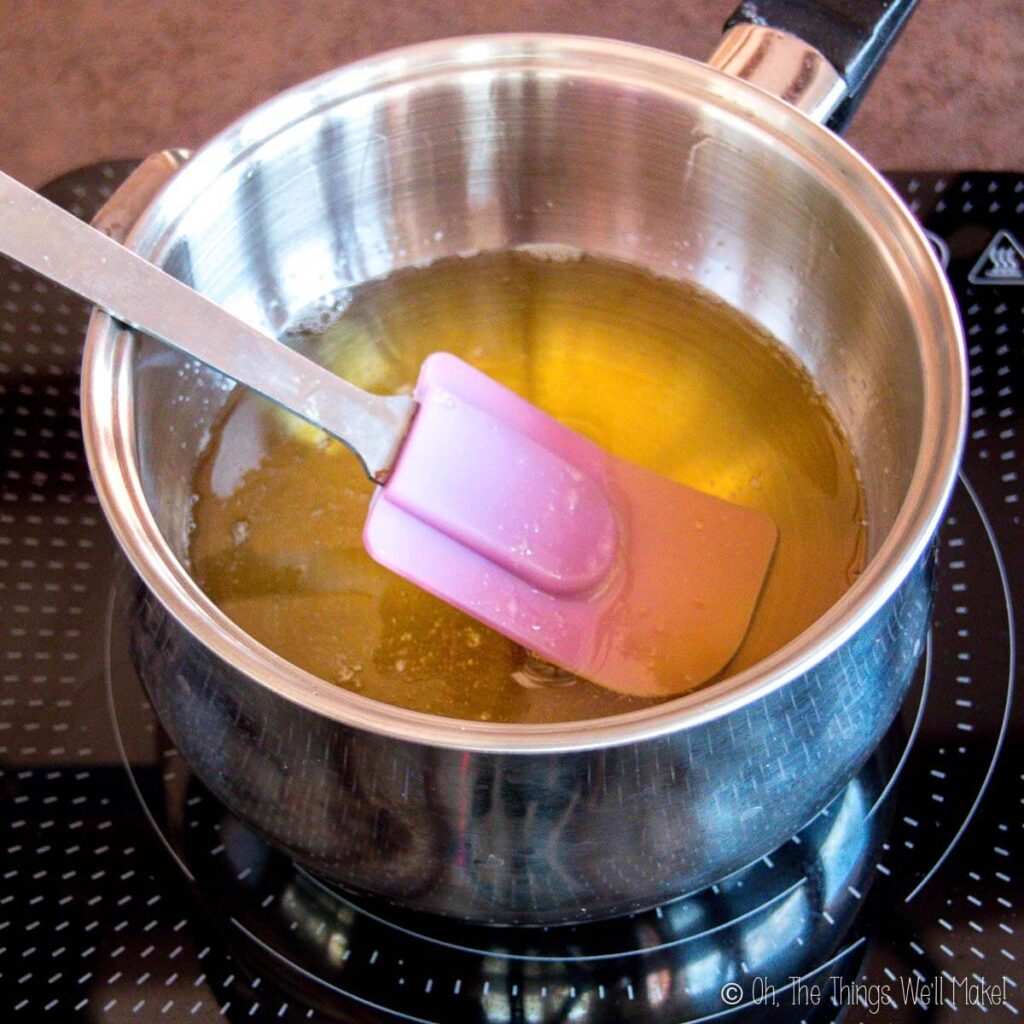
There are several ways to make it. First, the cocoa butter needs to be melted so that it can be combined with the other ingredients. Some people prefer to heat and melt all of the ingredients together. Others prefer melting the cocoa butter with the liquid oil and later incorporating the shea or mango butter during the whipping process.
Either way, gently melt the cocoa butter (or other hard butter) with the liquid oil(s), preferably in a double boiler. The mango or shea butter can be melted with the other fats or added during the whipping process.
Preventing graininess
Shea butter and mango butter can become grainy when heated above their melting temperature and allowed to cool slowly. To avoid this problem, either add them after the rest of the ingredients have mostly cooled or melt them with the other ingredients and then rapidly cool the mixture in the freezer or over an ice bath.
Whipping the body butter
Once cooled, you can add in heat-sensitive ingredients like vitamin E and essential oils (and mango or shea butter if you didn’t melt it with the other ingredients). You can also add some arrowroot starch (or another starch) to help reduce the sensation of greasiness. Whip the mixture with an electric beater to combine the ingredients well and begin to incorporate air.
Once well combined, return the mixture to the ice bath or freezer for a few minutes. Then, remove it and use a spatula to wipe the solidified areas off the sides of the pan. Beat the mixture for another minute or so before returning it to the ice bath or freezer.
Continue the cycle of freezing and whipping until the mixture has solidified enough to keep its shape. At that point, you can spoon or pipe your finished whipped body butter into its final storage container. (I like using glass jars with metal lids.)
Customizing and troubleshooting
There are many reasons that you may need to adjust the recipe slightly. It may be due to the climate you live in or just a matter of preference.
How to make it feel less greasy
Many people, especially those with oily skin or those who are used to using light lotions, feel that body butter is too greasy.
One way to help reduce that sensation is to add starch to the body butter when it’s in its melted state. In my body butter recipe below, I added arrowroot starch to help reduce the greasiness. If you don’t have arrowroot, you can experiment with other starches like tapioca starch, corn starch, or rice starch instead.
Another way to make a less greasy body butter is to avoid using oils that are slow absorbing like castor oil or avocado oil. Some of the faster absorbing oils, also called “dry oils,” are grapeseed oil or rosehip oil. You could experiment with using one of those, or a combination of those, for the liquid oil part of your recipe.
What to do if it’s grainy
Shea butter and mango butter can get grainy when they are melted and allowed to slowly cool.
If your body butter feels grainy, you’ll want to remelt it and speed up the cool-down process by rapidly cooling it in the freezer or over an ice bath as you whip it.
How to soften it if it’s too hard (or harden it if it’s too soft)
It’s impossible to share a recipe that everybody will like as we all have varying preferences in how soft or hard the final product should be. Plus, unlike lotions, this product will be softer when stored in warmer environments (and harder when stored in cooler environments). I’m sure you can see why it’s important to know how to adjust the recipe as needed.
To get the perfect texture, adjust the ratio of hard butters (like cocoa butter), medium-weight butters (like shea butter or mango butter), and liquid oil(s). For a softer butter, increase the amount of liquid oil and/or add less cocoa butter. For a harder one, decrease the amount of liquid oil and/or add more cocoa butter.
Keep in mind, when adjusting the ratio, that the hard butter adds to the occlusive barrier of the body butter and also helps raise the melting point slightly. Cocoa butter has a melting point of around 95-98ºF (35-37ºC), which is higher than that of mango or shea butter whose melting points are closer to 86-90ºF (30-32ºC). This is important for people who live in warm environments.
If you leave your whipped body butter in a hot area, it may melt and re-solidify into a flat, dense cream, losing the air that you incorporated during the whipping process (and potentially becoming grainy). Adding too much cocoa butter, though, results in a hard, waxy body butter that is difficult to apply.
The medium-weight butters help soften the mixture, but also have relatively low melting points. They don’t provide the same barrier to moisture loss as cocoa butter either.
Adding liquid oils will help soften the mixture and make it glide better. Too much oil, though, results in a product that won’t solidify enough to make a stable whipped butter.
Adjusting once finished
Luckily, if you aren’t happy with your mixture, it’s pretty easy to fix. If it’s only slightly on the hard side, you may be able to whip in some more liquid oil without re-melting your ingredients. On the other hand, if you need to harden it, you may be able to whip in some melted cocoa butter in the same way.
If you aren’t able to whip your body butter with the new ingredients as-is, you can remelt it and make your changes as needed. Then, go through the cooling and whipping process again until you get it the way you like it.
If you do remelt it, keep in mind that Vitamin E and some essential oils are more delicate and heat-sensitive. Try to re-melt your butter gently over a double boiler to keep them as intact as possible.
If you feel that your butter has lost its scent during the remelting process, try adding a few extra drops of your chosen essential oil without going overboard. Essential oils can cause sensitivity when used in large quantities. (That’s especially important with some of the more allergenic oils or those that are more prone to cause irritation to the skin). It’s best to keep the total amount to less than 2% of the recipe by weight.
How long will it keep?
Because this is an oil-based product and doesn’t include any water, it isn’t prone to microbial growth. That means that unless you contaminate it with water (by scooping it up with wet hands and/or storing it uncovered in a humid environment), you shouldn’t have to worry about bacteria or mold. If you will be careful when using it, there is no need to add a preservative.
The shelf life of your finished product, then, isn’t dependent on microbial growth. It’s dependent on the shelf life of the various ingredients used. To determine the “best used by” date, check the expiration dates on the packaging of your chosen butters and oils. Your butter will have a shelf life similar to that of the oil or butter used with the shortest shelf life. Following that logic, if you use fresh oils and butters, your finished body butter will keep much longer than if you use oils that are about to go rancid.
To help slightly extend the shelf-life of your butter, you can add an antioxidant like Vitamin E (at around 0.5% of the recipe by weight). It’s best to weigh out the vitamin E as accurately as possible since adding too much can actually have the opposite effect and contribute to it going rancid more quickly.
Video

Basic Whipped Body Butter
Materials
- 100 g mango butter (or shea butter)
- 40 g cocoa butter (or kokum butter)
- 60 g sweet almond oil (or another liquid oil)
- 2 tsp. arrowroot starch (Optional, to reduce greasiness)
- 0.75 g vitamin E (Optional, to extend shelf life)
- 2 g essential oils (Optional, for fragrance)
Instructions
Method 1
- Weigh out the mango butter, cocoa butter, and almond oil in a double boiler or double boiler insert.
- Heat over medium heat until the butters have melted.
- Add in the arrowroot starch, and mix together thoroughly until it is well incorporated into your mixture. Pour the mixture into a stainless steel bowl that will fit into your freezer.
- Place the mixture into the freezer or into an ice bath to cool the mixture as quickly as possible. This will help prevent a grainy texture in the final product.
- After a few minutes have passed, remove the mixture from the freezer and use a spatula to wipe the solidified butters off the sides of the pan. Beat everything together.
- If the mixture is relatively cool, add in heat-sensitive ingredients like vitamin E and essential oils. Whip them together with the rest of the ingredients, and place the mixture back in the freezer again for a few more minutes.
- Remove the mixture from the freezer again and, once again, use a spatula to remove the solidified butter from the sides of the bowl. Use the beater to whip everything together.
- Continue the cycle of freezing and whipping until the mixture has solidified enough to keep its shape.
Method 2
- Weigh out the cocoa butter and almond oil in a double boiler or double boiler insert.
- Heat over medium heat until the cocoa butter has melted. Then, remove from the heat source.
- When the mixture has mostly cooled, add the mango or shea butter, the arrowroot starch, the vitamin E, and the essential oils. Whip until fluffy.
- If it's too soft to hold its shape yet, place in the freezer or over an ice bath to quickly cool it. (Rapid cooling of melted mango or shea butters is important to prevent graininess.)
- Remove from the cold source and whip one last time.
Storage
- Spoon or pipe the finished body butter into a storage container. Store out of the heat so that it doesn't melt.
Notes
Choosing essential oils
Different essential oils can give a different fragrance and feel to your finished body butter. Lavender, for example, has more of a calming effect while citrus oils can be more invigorating. Keep in mind that many citrus oils (especially pressed oils) can cause photosensitivity, meaning that you may be more prone to burning if you wear them out in the sun. Avoid phototoxic oils if you plan on wearing your body butter outside during the day. (Most distilled oils are OK to use, but even distilled grapefruit oil may cause some photosensitivity.)This post was originally published on January 11, 2019. It was rewritten in September of 2021, adding video, new photos, and improved instructions.


Hi…how do you keep butters from getting hard?
It’s really all about adjusting the ratios of the butters and oils, depending on the climate you live in.
If you find it’s too hard for you, you can lower the amount of cocoa butter, for example, and/or increase the amount of liquid oils.
Making sure it’s whipped well also helps reduce the “hard” feeling.
I actually prefer to make lotions and am not a huge fan of body butters.
Thank you so much!!
Thanks so much for this!
If I were to do preservative with 1% the recommended amount, how do I calculate that for a 8oz batch?
Thank you!
Hi Destiny,
8 ounces is around 227 grams. I find it easier to work in grams with this sort of thing.
You’d be fine with just over 2 grams of preservative. ?
Hi Tracey, I see you use Vitamin E as an anti-oxidant which is not a preservative, so I’m wondering if you do use a real preservative and if so, what is it that you use?
Hi Margaret,
I didn’t add a preservative to this.
Body butters don’t need a preservative because they don’t have any ingredients with water in them. The vitamin E will help extend the life of the oils.
You could consider adding a preservative if you plan on using it with wet hands and think you’ll be contaminating it with water. (A lot of people use this right after the shower.)
I have more information about that in my beginner’s guide to natural preservatives (With some choices to use).
How many jars of body butter does this recipe make?
It makes around 200g of body butter. That ends up being one larger jar or 2-3 smaller jars. (The volume will depend on how much you whip it.)
I just tried this recipe and it was surprisingly simple and I love the way it feels on my skin! The only thing I am not happy with is the scent. I did add some essential oil, but I can smell the cocoa butter a little too strongly…Can I replace or eliminate the cocoa butter? Or do you have another suggestion that would keep this natural and organic? Thank you for your help!
Hi Angela,
There are both refined and unrefined cocoa butters available. The unrefined tend to have a strong scent. The more refined ones are usually much milder. You want a hard butter to help keep the whipped texture, but you can play with the ratios of the various butters as needed. Kokum butter is often used to replace cocoa butter, but I haven’t personally tried it. It’s something you could definitely consider, though.
Hello! I am thinking of making a body butter using Kokum butter. I’m wondering about the percentages of each ingredient. How do you measure 1% of something, for example?
Hi Jenny,
I normally make testing batches of 100g (total). That makes the calculation easy- 1g of an ingredient is 1% of the final recipe.
That said, with body butters, it can be difficult to make such small batches because it can be hard to whip tiny amounts.
If I were to make 200g as my finished batch, every 2g would be 1%.
Hi Jenny, The other day I made a batch of body butter and substituted the same amount of kokum butter as I would have used of cocoa butter. Before Christmas, I had run out of cocoa butter so I made up the difference in kokum butter.
Thanks for sharing the recipe. Pls what can I use in place of arrowroot starch.
Hello Uty,
Most fine starches should work fine. Something like tapioca starch or maybe even rice or corn starch could work to cut the oiliness.
Great post!! I’ve been making body butter also but find that the cocoa butter (chocolatey) smell is hard to scent over. I love the smell personally, but I have tried vanilla, grapefruit oil, and other essential oils (but don’t want to overdo using those due to the sensitivity issues for some) to create scented butters. Have you ever made a body butter that does not contain the cocoa butter?
Hi Mary,
To be honest, I don’t make body butter that often as I prefer lotions.
There are a few things you can try, though.
Cocoa butter generally comes in either refined or unrefined versions. The refined cocoa butter doesn’t have as much of a chocolatey scent.
You could also try subbing it out for another butter, as you mentioned.
Cocoa butter is quite hard, and most of the other butters are softer than cocoa. So, if you were to sub it for a softer butter, you could add in a small amount of wax to bring up the melting point and make the butter a bit more consistent. You could also lower the amount of liquid oil used instead.
Illipe butter is said to be a good substitute. I haven’t tried it in this recipe, though.
Thank you for your great information. I made a batch and shortly after it went hard, not rock hard but it’s no longer fluffy. I’m going to remelt it and add some oil, how much oil would you suggest I try? My batch was calculated at 4 oz.
Hi Laura,
I’m sorry to hear that. Yes, body butter recipes can change in texture a lot depending on the temperature of where it’s being stored.
That’s one of the reasons that I prefer lotions to body butters. If it gets stored in a place where it’s too hot, it will melt enough to lose the whipped texture, and then as it cools again, it will turn harder than it originally was.
4 oz. is about half of what I showed in my recipe- or slightly more. (Around 200g=just over 7 ounces)
I had about 60g… I don’t know. It’s hard to know for sure without seeing it. I wouldn’t add too much at once- but with a product like a body butter, it’s not easy to keep adding more little by little, you know?
Maybe around 5-10g?!?!
It may be that it just needs to be re-whipped and would be fine as is. It’s hard for me to accurately guess without seeing and feeling it. 😉
I really hope you’re able to get it how you like.
Worst case scenario- you could use the ingredients as the oil phase of a lotion. (I’ve done that before because I like them better. I admittedly ususally only use body butters to do a deep conditioning of my hands and feet at night. hahahahaha) 😉
Hi Laura, I had the same issue. Have you managed to solve yours? Did re-melting help? Thank you!
Hi Natalia,
Perhaps I should try formulating a batch for colder times of the year. It could be that in colder temperatures, the butter concentration is too high and makes the finished product too hard. Again, this is fixable by lowering the concentration of the solid ingredients or increasing the amount of liquid oil(s)- which is the more practical option if you want to salvage a batch that has already been made.
Hello,
Would you ever suggest combining the amount of Shea butter and Cocoa butter and using only one of those butters in the revised amount?
Hi Winetta,
You can definitely play with that concept, but keep in mind that cocoa butter is much harder than shea butter. If using cocoa butter only, you’d have to increase the liquid oils in the recipe or it may be very hard to apply. If working with shea, the butter may be too soft, and you may have to drastically reduce the liquid oils. It’s all about experimentation, though, and finding a texture you like.
Beautiful recipe! Could you tell me what the melting point is? I live in Kenya, and wouldn’t want all that work to go to waste. Also, is there a way to make the whipping process shorter?
Hi Emmy,
The melting point of mango butter is around 86ºF and that is the most delicate of the butters. What I’m not sure about, though, is if the final product will have a higher or lower melting point than that. The cocoa butter has a higher one, but then you have a liquid oil that may lower it. I’m not sure how you would calculate it. It’s probably somewhere around that temperature, though, maybe?
As for the whipping process- Yes, you could just allow it to cool and whip it, but the problem is that mango butter and shea butter (if you were to sub one for the other) have a tendency to get grainy if you don’t cool them super quickly. It’s also the best way to incorporate more air to get the butter lighter in texture. While it sounds time consuming, it’s really not that big of a deal. You can be cleaning up and doing other things while you wait for it to cool a bit each time.
Hi Tracy! I love your recipes…! I live in Sri Lanka and we have a lot of coconut oil. Can I use that? And also if I use virgin coconut oil, will it be better? Thank you!
Hi Dhilma,
Yes, of course!
You may have to play with the ratio of how much you add to get the consistency you like, but you could maybe switch it with the mango butter.
The reason I don’t like adding coconut oil to body butters is that it has such a low melting point. You’d have to store it someplace cool to keep it from melting (which may make it hard to use, unless you purposely make it on the light side by adding more of the softer oils). Once melted, you’d have to go through the whole whipping process again to get the texture back.
You could prevent that problem by using fractionated coconut oil in place of the liquid oil in the recipe.
Thanks for this! But do you have to sterilize everything? (The whisks, the piping sleeve, and so forth). Or do you need to be less particular about sterilizing when making body butter?
I always find sterilizing the most painful part about making lotions! Especially cleaning the reusable silicone airless containers that I like to use for lotions.
Hello Shabnam,
Well it’s always a good idea get things as clean as possible. There is really no need to sterilize ever- because there are microbes in the air, so you’ll never be able to completely sterilize. It’s always a good idea to sanitize by running alcohol over your containers.
In the case of body butters, you’ll have a lot less potential for problems because there isn’t any water in them.
It’s probably more important to make sure the container is really dry before adding your butter. You don’t want to contaminate with water!
As for the silicone containers. Yes, I love and use them. I usually just run them through the dishwasher. You can then rinse them with alcohol right before using.
I’m not sure they’re a good choice for body butter, though. Body butter is pretty solid, even when whipped. It may be difficult to dispense from a silicone tube.