

How to Make Boba, aka. Tapioca Pearls, From Scratch
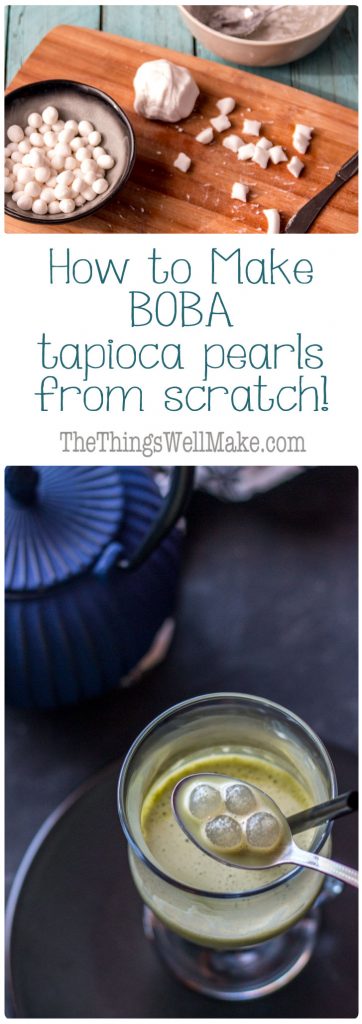
Store bought tapioca pearls can be tricky to cook. That’s why I’ll show you how to make boba from scratch at home for homemade bubble tea. It doesn’t take long to prepare them, and they’re so much better than dried tapioca pearls found in stores.
In the middle of the summer heat, you may have noticed that I haven’t been posting as often lately. In part it’s due to my new philosophy of blogging. In part it’s due to having my son home for the summer, and him wanting to play with me most of the day. (I can’t be complaining about having to play in the pool and cuddle up with a sweet, adorable little 5 year old, can I?)
Mostly, though, it’s due to me not being completely caught up from my trip to the US a few weeks back. Amidst the fiestas here in my town, lots of birthday parties and being a full time mommy, it’s taking me longer than I expected to get back into the swing of things.
The first week of our adventures in the US, we stayed at my dad’s house in Connecticut, not too far away from good old New York, New York.
Most of that week was pretty relaxed, but we did manage to throw in a fun day of exploring NYC which included a delicious meal in Chinatown. I had been to NYC as a kid, but don’t remember ever visiting Chinatown, so it was a new, fun adventure for me. I loved marveling at the Asian style architecture of normally American styled places like Starbucks, and if I hadn’t been trying to travel lightly while walking the city, I probably would have bought a few kilos of Asian fruits like lychees, mangosteen, dragon fruits… all of the fun fruits that I can rarely (if ever) find here in Spain.

Another delicacy that I wasn’t able to try was boba bubble tea.
After our meal, I eyed the bubble tea for sale at the shop across the street, and hinted at perhaps going over to get some dessert. Normally I don’t go for buying specialty teas and coffees outside the house because I know they’ll be sugar-laden and definitely not paleo. 😉 How often am I going to get the chance to try bubble tea made in Chinatown Manhattan, though, right?
Unfortunately, everybody else was full, except for my boring practical husband who had no interest in trying something as absurd as bubble tea, so in the interest of not drinking alone, I decided to pass and never got to try bubble tea before heading on towards Times Square and Central Park.
Fast forward a few weeks, and I was hanging out at the Asian store here in Spain, browsing all the fun, unusual treats the shop had to offer, and I saw tapioca pearls for sale. I couldn’t help but buy some to make boba at home so that I could try to make homemade bubble tea.
The problem with store bought tapioca pearls
Unfortunately, despite having watched numerous videos and reading numerous blogs about how to cook the darn things, I couldn’t get the store bought boba to cook right!
After some research, I’ve found that it’s probably because the people who have the most success with store bought boba use tapioca pearls that have been sealed in shrink wrap and that need to be stored in the fridge and used up within a week once opened. I’m guessing those are packaged without being completely dehydrated, making their reconstitution easier later on. I have only been able to find the fully dried tapioca pearls here, though.
I tried everything from…
pre-soaking the pearls… which ended in a tapioca starch water and powdery mess…
bringing the water to a boil with the boba tapioca pearls already in the pan… which ended up with a gluey mess and no pearls to be seen…
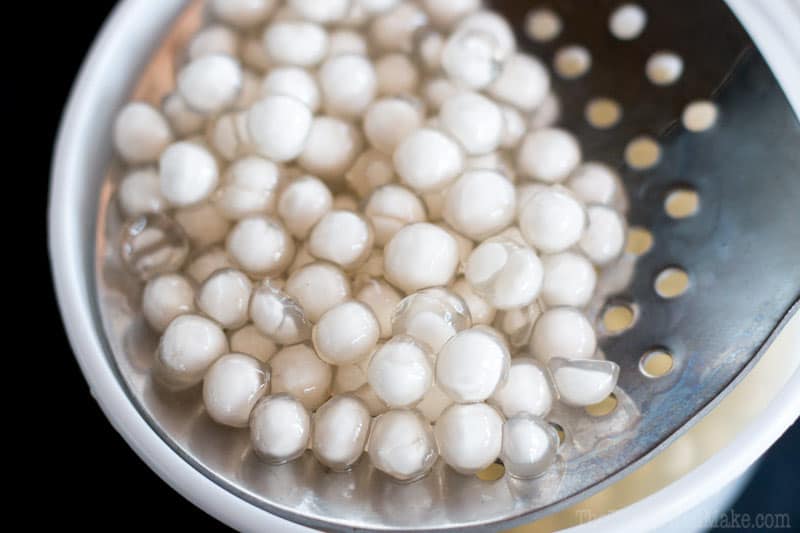
boiling the water and then adding the boba…which, despite boiling for over an hour ended up with rubbery, transparent balls with an opaque, raw, hard, tapioca flour center. Yuck!
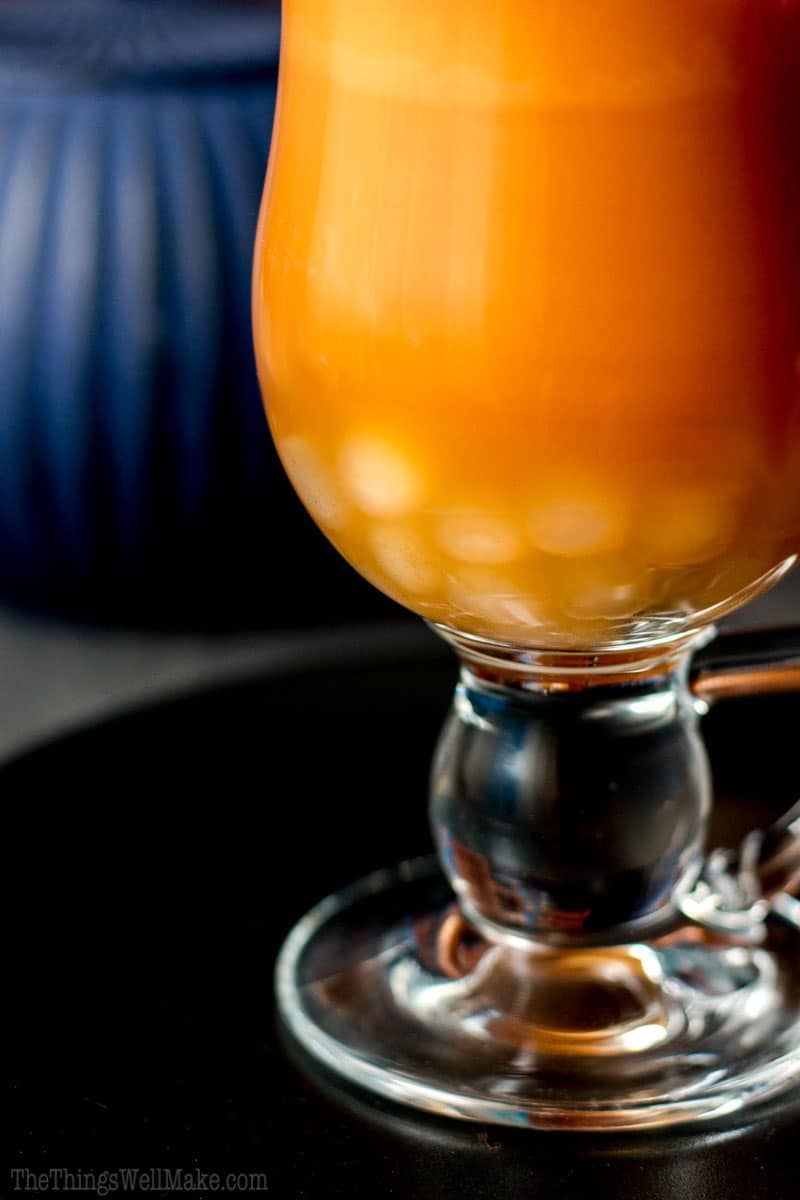
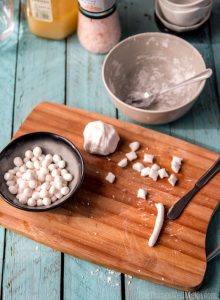
The only thing that sort of worked was to boil for very long periods, followed by very long periods of cooling, usually followed by boiling and cooling again at least once more. Even the boba that almost cooked all the way through (see the picture below) weren’t very appealing, and I decided to give up on making homemade bubble tea!
Or did I?
The tapioca pearls that I bought showed only 2 ingredients: tapioca starch and water.
Making tapioca pearls/boba from scratch
Making boba from scratch can’t be that difficult, right?
I thought about how I used to always make pasta from scratch. People used to think I was crazy when they heard that I always made my own pasta from scratch.
Doesn’t that take forever?
Well, actually, no!
Apart from the clean up, it took me about the same amount of time to make homemade pasta as it did for me to boil the store bought stuff. Plus, mine was just so much better and fully customizable!
Why is homemade pasta and boba so quick to make?
Faster cooking time
Because store bought pasta has been dehydrated so that it will keep for longer. Boiling it to cook it takes much longer than cooking the pasta that you have freshly made.
I no longer make homemade pasta very often; not because it takes too long, or because it’s not great, but because most of the time I have completely eliminated gluten from my diet. I have tried coming up with gluten free and grain free pasta recipes, but so far the closest I’ve come to a paleo pasta is the dough I used in my paleo dim sum recipe. (It actually tastes very similar to pasta, and has a similar texture once cooked, it’s just a lot more delicate to work with so it’s not as practical for making something like spaghetti.)
My logic, though, was that homemade boba tapioca pearls would cook similarly. Because they are fresh and haven’t been dehydrated, they would cook up almost immediately.
And I was right!
It took me less time to make boba tapioca pearls from scratch than it did for me to try to cook the store bought boba!
Seriously!
It’s super quick and easy to make, and it’s actually even kind of fun.
Plus it uses only 2 ingredients, tapioca starch and water, so it’s gluten free, grain free, and, thus, arguably paleo. 🙂
After me having thrown out some of his dried up, unusable playdough, my son was only too happy to help make little tapioca pearls too. Win-win!
(I may or may not have actually used his.) 😉
Wow, I’m chatty today…
Let’s get to it!
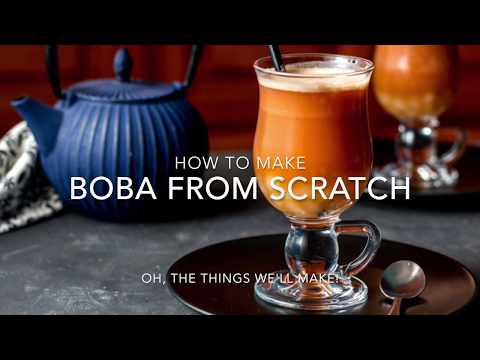
Video
Boba, aka. Tapioca Pearls, From Scratch
Instructions
- Boil the water.
- Add the tapioca starch to a bowl, followed by the boiling water. I work the water in little by little in case it isn’t all needed. Kneading with your hands is the best way to incorporate the water and make a non-sticky dough. Be careful not to burn yourself, though.
- Once you have a workable dough, the easiest way to make tapioca pearls is to roll the dough into long snakes of dough, cut them into small pieces and roll them into tiny balls.
- To cook your homemade boba, boil at least twice as much water as the volume of tapioca pearls that you are going to cook.
- Add your homemade boba to the boiling water. The boba should float to the top. When that happens, turn the heat down to medium
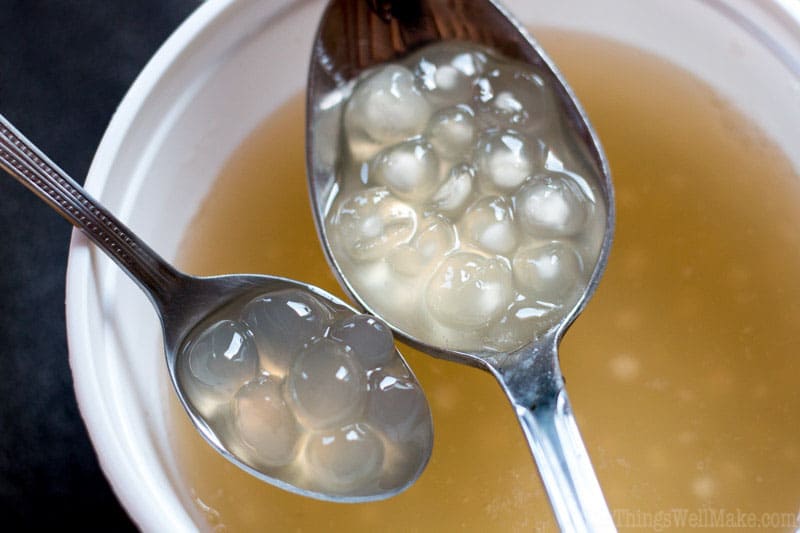
- You’ll notice that the boba begin to cook and get their chewy texture almost immediately. At any point after a couple of minutes, you can use the boba and they will be better than the dehydrated store bought pearls. I later found, though, that if you keep simmering until they fall back to the bottom of the pan, and then remove them, they will be more transparent once removed and allowed to steep in honey for a few minutes. (They will still be pretty opaque when you remove them from the water, but they start to become translucent once removed from the boiling water and stored in honey.)
- Remove the boba from hot water with a slotted spoon, and transfer them to a bowl with some honey. The honey will help preserve them until you are ready to use them, slightly sweeten them, and keep them from sticking to each other.
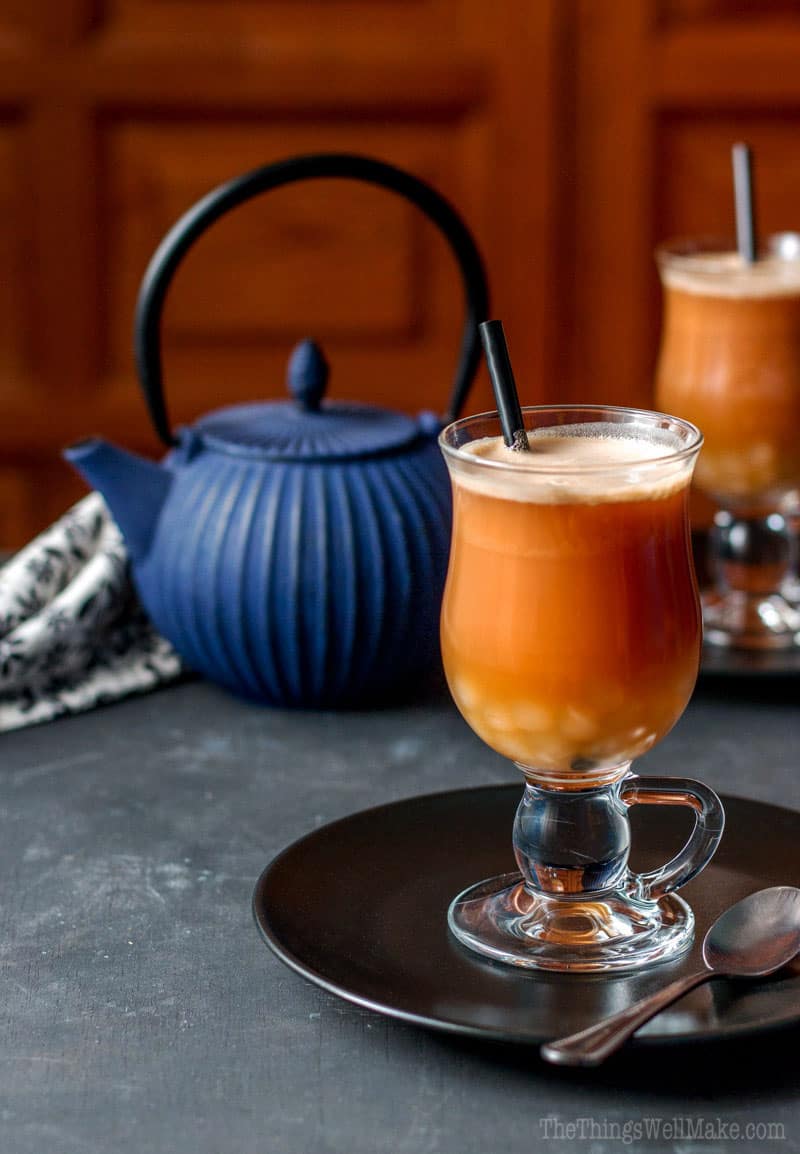
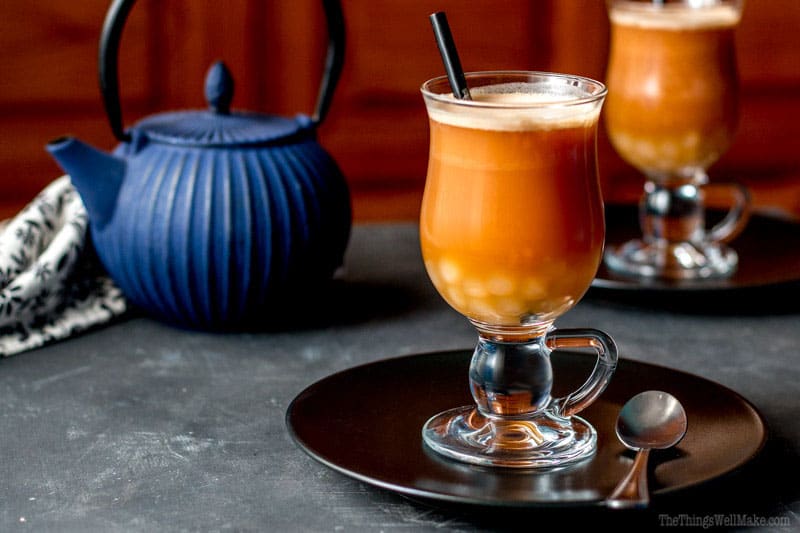
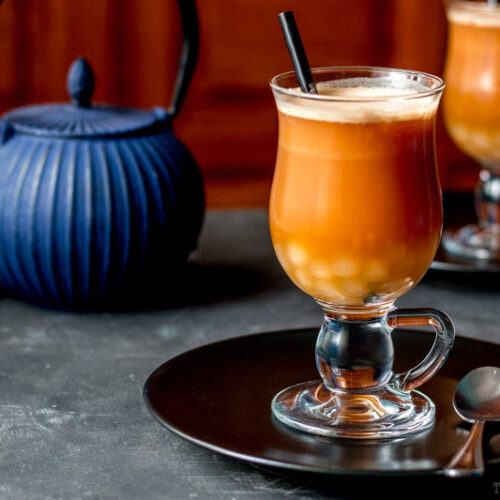
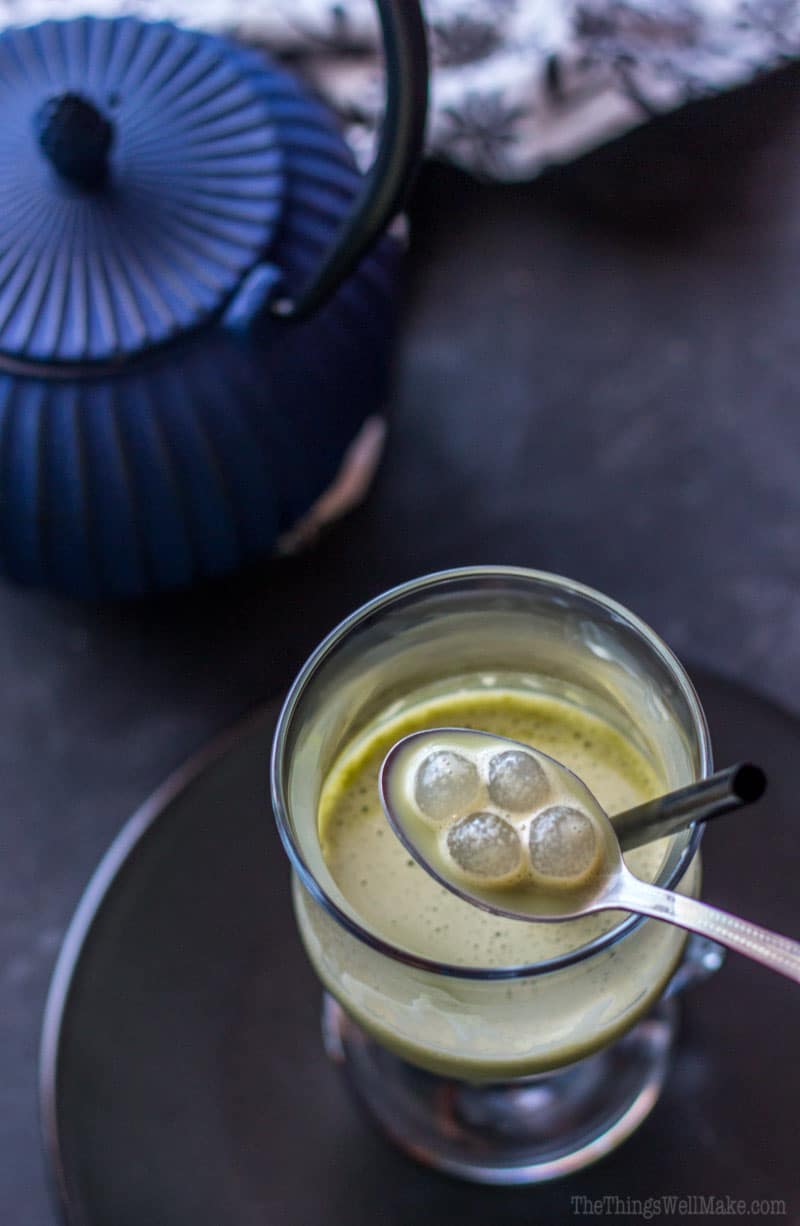
- Add them to your tea! I’ve found that they have the best texture when warm, so if you want cold bubble tea, it’s best to add them first to your glass while they are warm, and pour the cold tea over top, serving immediately!
- Enjoy!
Can you store homemade boba tapioca pearls for later?
I’ve been experimenting with different ways to store them.
Can you let them dry out and then use them later?
Yes, but you end up with the same sort of problem that can be had with store bought dehydrated tapioca pearls. It takes a lot longer to cook them, and you may end up with opaque, raw tapioca flour centers.
Can you freeze the cooked boba?
You can, but they will get opaque and hard. I found that out the hard way when I thought it was a good idea to make popsicles with boba! Some people swear that boba popsicles are great, but I can’t imagine how! I found the frozen boba to be unpalatable and hard. No more boba tea popsicles for me! (I did find one blog post that said that you had to use mini pearls in popsicles for them to stay chewy, but I found the frozen boba to be so gross that I probably won’t be giving it a try!)
If you boil them again, they will warm up and turn translucent again. The texture will come closer to the original chewy texture, but I didn’t find them to be as pleasant as the ones made from scratch and served immediately.
Can you freeze the tapioca pearl dough and form the boba later?
Freezing the dough works pretty well, but the dough can get a bit crumblier and harder to work with once it thaws than when it was freshly made. The cooked boba made from frozen dough seemed pretty much identical to the boba made fresh, so if you get sick of making boba in the middle of the process, freezing the excess dough is definitely an option. I wouldn’t personally make a big batch just to freeze it, though, as it is easy enough to make when needed, and the fresh dough is easier to work with.
Can you freeze the formed, uncooked tapioca pearls?
Yes, and I’ve found that to be the best way to make boba ahead of time and store them for later. They may not turn out exactly like the ones made from scratch, but they are pretty close.
I boil them right from frozen, and boil them a little bit longer than I normally do with freshly made tapioca pearls.
Can you color and flavor homemade boba?
So far, I’ve only tried adding in a pinch of salt and some honey to my homemade boba. They turned out well, and may have been slightly sweeter than the ones that are only soaked in honey, but I didn’t really notice much of a difference in the final outcome. The flavor didn’t really change too much.
A lot of people have asked me about how to make black boba.
So, I began to research the topic. At first, I was pretty sure that the black boba just added food coloring to the boba. That’s probably still the case with most inexpensive black boba for sale. (As you probably know by now, I’m not big about adding colorants to my homemade food, so I haven’t tried using food coloring yet.)
That said, other commenters have brought other theories…
Black sugar
Some people have told me that the difference is that the black boba use dark sugar. There is even a type of Asian sugar called “black sugar” that many have claimed is used in black boba. That said, I’m still of the belief that no matter how much dark sugar was added to the boba, it wouldn’t be enough to make them black!
They may use black sugar in the boba, but it it likely supplemented with some other colorant to make them the deep shade of black that you’re used to seeing in shops.
What does seem more plausible, is another theory offered by readers…
Activated Charcoal
It has been brought to my attention that sometimes activated charcoal is used. One reader saw a video on Facebook showing how activated charcoal was used to make black boba from scratch at a café.
Other colors…
I’ll probably try adding things like matcha or substituting the water with fruit juices in some of my next batches, and I’ll try to keep you updated on the outcome.
I’d love to hear what combinations you come up with!


Thank you for this info!! I’m wondering how you work the starch so that it doesn’t turn into a goeey-while-dormant and powdery-while-handled mess?! Did I not knead it enough? I eventually got a handful to form into ball-ish shapes and I added activated charcoal to mine— they’re so black! Excited to try it again. Hopefully they’ll be easier next time.
Hi Jade,
I usually mix it with the boiling water to get it to do it’s gooey/rubbery texture, and then I add a little more flour, if needed, to get it workable. It normally is only powdery if the water wasn’t hot enough to get it to that rubbery texture in the beginning.
It usually ends up working itself out if you can get that at the beginning, even if you need to add a bit more “uncooked” flour. 😉
As for the colorings…
Did you see that I later made them in all sorts of natural colors?
You can find that post here: Naturally Colored Homemade Boba (Black & Other Colors)
Mine were not edible. The “dough” was a nightmare to get right.. it wasn’t until the mix cooled a bit that it was workable (I did use boiling hot water). The end result was sticky, soft chewy balls that I did not want in my stomach. They also weren’t translucent at any point after boiling for 10 min and then soaking them in honey. Looked all bubbly inside. Maybe it depends on where you get the tapioca starch? Oh well..
Hi Vanna,
I’m sorry to hear that.
I’m thinking you needed to add more of the dry starch to get the dough workable.
I’m not sure why yours weren’t translucent, though. I’ve tried with several brands and never had a problem. So, yes, it may be an issue with the starch you used.
It doesn’t sound like you are too excited to give it another try, but if you do, I’d love to hear how that goes. I’d love to know what starch isn’t working well so that I can help warn other readers!
Its not supposed to be translucent
See the photos above.
You can also add natural colorants to make naturally colored boba. Those aren’t translucent and actually are very bright without the need for artificial colors.
Can you make it with cornflour? Not able to get any of the special flours suggested. But I really reakly wanna try it!!! Thanks
I’m afraid that it wouldn’t work. Tapioca starch gives a special type of texture that is needed for these. Cornstarch is different.
Hey Tracy, thanks for sharing your recipe, looking forward to trying it out.
One question: how do you manage to not scold your hands when working the dough?
Ha! I don’t know.
I guess it cools pretty immediately. As long as the flour gets mostly mixed in while the water is boiling, it should convert the starches enough to form a nice dough. Then, you don’t really have to rush to handle the dough while still burning.
Great write up and suggestions.
Save me a bunch of time. These are by far the best Boba balls. I will never use dried once again.
It would be nice if there were some type of press they could make them round without having to do it by hand.
My personal conclusion and favorite is 50-50 hot water and tapioca powder. This stove will definitely be sticky. Dust it generously in tapioca powder when rolling. This wetter consistency makes for super soft fluffy balls that don’t dry up when you store them.
I personally boil them and I have a syrup of almost 50-50 sugar water. I had a very solid pinch of salt. About 1 teaspoon per quart of sugar syrup I also added a full teaspoon of vanilla extract. Honey works great as well and gives a nice flavor. Are use this syrup to then sweeten the tea as well. My favorite was working with aged Pu-erh tea. The woody smoky flavor matches the sweet milk he consistently perfectly
So many options to play around with. Thank you again
Hi Mats,
Thanks for the ideas!
I also quite prefer the homemade ones. Did you see my newer post about making colored boba?
I made this today! I ended up adding more tapioca starch as it was too sticky, but eventually it came together. Made strawberry bubble tea for my son and I and it all came out great. Feeling super accomplished!
Hi Kat,
That’s great! I’m so happy it worked out.
Yes, I need to re-write that a bit. I’m finding that with certain tapioca starches, you really end up using less water. I found that out when I tried 3 different brands while working on my newer post for colorful boba. 😉
Have you seen that post? It’s a lot of fun to make naturally colorful boba.
Tracy,
I have experimented and iterated how to cook perals. Same experiences as you. But I figured out a trick for cooking the dry tapioca pearls.
It’s a very long 7-days lead time but only about 15 total of prepping and cooking.
1. Boil a good amount of water.
2. Throw the dry petals in the boiling water for 10s. Really just enough time to toss them in, a very very quick stir, then pour them out into a colander. Don’t be tempted to over cook.
3. Immediately put them into an ice and water bath. And stir gently. This prevents the pearls from sticking.
4. Now here the trick: soak them like this in a jar for a week inside the fridge. Note the pearls will absorb water an expand, so leave room in the jar for this. Also, stir or shake 2-3 times in the first 8 hours to prevent them from sticking as they expand with water absorption.
Steps 1-4 takes about 5 min of interaction time.
5. When you’re ready to cook them, boil water then throw the pearls in. They will fully cook through in about 5-20 min.
Why does this work?
The key is to get moisture throughout the pearl so that heat can be transferred to the center to cook it. Putting dry uncooked pearls into water causes them to fall apart.
Par boiling creates a thin layer of cooked tapioca starch just enough to hold the pearls together when they hydrate but the cooked layer is thin to allow the water to penetrate more easily into the center of the pearl.
I have experimented with the soak time and it needs a min of 3 days depending on the size of the pearl but I usually soak for 7 just to be sure.
Hi George,
Wow- That’s awesome!
I had considered trying to soak them for long periods, but I was afraid they would fall apart. I think I did experiment with soaking them before cooking, but that did make them fall apart. I guess by cooking them for a short period first, that helps hold them together when they are in the cold water.
I no longer have any of the tapioca pearls, but you’ve made me want to buy more to give your method a try.
I’ll have to update the post with your tips for getting the tapioca pearls to work once I do.
Thanks so much for your tips.
Some additional info:
When you go to cook the pearls in this way, if you cook them on high heat, they do cook quickly but might look like the center is white and uncooked. This is a visual anomaly. I have some theories of what might be happening, ie. the embedded air that in the pearl expands during high heat causing the appearance to be whitish. If you chew the pearl you’ll see it’s fully cooked. To mitigate this, I find letting the pearls heat soak and cool down in the hot water down to room temperature after cooking will alleviate this appearance. As for the color, I prefer not to add food coloring but after the pearls are cooked and cooled, I will drain the water then add a couple tablespoons of homemade carmelized syrup for flavor and a light brown color. The syrup also helps them not stick together, especially if later chilled for storage.
hi George, have you tried soaking for longer than 7 days? i’m thinking there would be no downside to just leaving some in the fridge, other than molding… thanks for sharing this method!
Thanks for the tips!
In my case- the ones I bought were definitely raw inside as they were hard. That may definitely help with the people who are having issues getting their homemade pearls transparent.
I have since showed my method for getting brightly (naturally) colored boba. 😉
I agree about the syrup. I’ve used everything from a simple sugar syrup to honey to coconut syrup.
Just fyi, George’s method totally works for completely cooked chewy balls! I’ve never had such good home made boba in my life! Though, to be fair, I haven’t had a chance to try your completely diy method yet, Tracy. As soon as I get some butterfly pea flower tea, though, I’m on it! (Though I’ll probably leave them as little square pillows instead of rolling them into balls. Lazy boba! 🙂
Hi Sam,
Hahaha! I’d love to see that. I hadn’t thought of that. I use the rolling process as sort of a stress relief. 😉
Maybe I’ll have to try his method someday. I’m not sure I want to buy more pearls though, as they’ve always been a nightmare and the taste/texture just wasn’t impressive to me. It could just be that the ones at my local Asian market aren’t of very good quality.
The colors definitely make them more fun! I love the bright blue boba. Have fun with it!
Is it necessary for the pearls to be soaked in honey? Or is that an optional choice?
Hi KayLee,
That’s an optional choice. You can soak them in maple syrup, a sugar syrup, or whatever you like. They will take up some of the flavor of what you soak them in, and I find that it keeps them from sticking to each other. I suppose you could put them directly in a tea, but they won’t soak up any flavor, then, and they don’t store as well in a liquid like tea as they do in a syrup.
Hi
This might be a bit late of asking, but could I book the balls in sugared water instead of soaking it in the end?
Sometimes as a desert I boil sweet potato in dark brown sugared water and it’s nice. I’m hoping the same could apply to the tapioca.
Thanks
Hi Will,
I haven’t tried that. My guess is that it would be fine too cook them in sugar water. That said, I’d probably still soak them in something like honey, maple syrup, or a sugar syrup in the end. I find that it really helps keep them from sticking together. They also really mellow out during the resting period.
Can I use cassava flour? Is it the same? I am using the same recipe but with cassava flour and as I’m boiling it, they turn into this huge blob of mess. HELP 🙁
Hi Yoan,
While they come from the same plant, the yuca plant, cassava flour is usually the full root that has been dried into a powder while the tapioca flour/starch is only the starch part it without the fiber.
So, that could be the problem.
Also, you really only need to add in the boiling water into the flour, as much as is needed to get a nice dough. You normally won’t need all of the water, but it can depend a lot on the brand you are using. It’s a good idea to have the full amount of boiling water ready, though.
Watching the video should help you.
I just made like 5 batches yesterday because I was experimenting with new natural colors. I’ll be sharing it as soon as I can with a new video. So, I have the process fresh in my mind right now. I will say that it didn’t go exactly the same every time I made them, and it did change a little bit when I ran out of one flour and switched to another. Both worked fine, but one needed a bit more water than the other. (I’m not sure why.)
Oh, and one more thing- you can keep adding in some more flour to help get it less sticky.
The reason you use boiling water in the first place is so that the flour does start to cook enough to make a pliable dough, but not so much that it is so rubbery that you can’t work with it. It will get a bit sticky until you work in the rest of the flour.
I ended up getting a bag of tapioca starch today and tried the recipe and it worked. Thanks. I have a question though since soaking them in sugar made them a bit too plain for my taste, if I mix the hot water with some sugar, before mixing it with the tapioca starch, will it ruin the dough or something? When I tried doing it, the dough got clumped into a huge mess.
Hi Yoan,
I’m sorry. I missed your comment before.
I’m not really sure as I haven’t tried making it with sugar water before. I find that they are sweet enough for me if I allow them to soak in honey or maple syrup for a while. The last time I made them, I used a coconut sugar syrup. It was quite sweet and was delicious with the boba. 😉
Hi! I’ve been making store bought boba since 2011! I recently saw a video on Facebook by Insider that shows how boba is made at the only self serve boba bar. They use activated charcoal to create black boba right in shop! I’m looking to recreate it using your recipe and some activated charcoal.
Hi Crissy,
Thanks for the tip!
That makes a lot of sense. I’d love to hear how it goes. Maybe I’ll have to try it out and add a new video. 😉
Is it possible to make a large batch (to eat in a day or two or across 3 days) and you store it in the fridge in honey? (After you cook the pearls)
Anyone tried it ?
Haven’t ever tried it, sorry for not being helpful but I heard eating too much boba can cause stomach problems and whenever I had a lot I would feel slightly uncomfortable so please be careful with how much you consume!